manuals.online logo
Brands
  1. Home
  2. •
  3. Brands
  4. •
  5. Magnavox
  6. •
  7. LCD TV
  8. •
  9. Magnavox 32MF301B User manual

Magnavox 32MF301B User manual

Other manuals for 32MF301B

4

This manual suits for next models

1

Other Magnavox LCD TV manuals

Magnavox 15MF Series User manual

Magnavox

Magnavox 15MF Series User manual

Magnavox 42MF531D-37B - Hook Up Guide User manual

Magnavox

Magnavox 42MF531D-37B - Hook Up Guide User manual

Magnavox 37MF301B User manual

Magnavox

Magnavox 37MF301B User manual

Magnavox 40MF401B User manual

Magnavox

Magnavox 40MF401B User manual

Magnavox 37MF337B - Hook Up Guide User manual

Magnavox

Magnavox 37MF337B - Hook Up Guide User manual

Magnavox 42MF437B - 42" Digital Lcd Hdtv User manual

Magnavox

Magnavox 42MF437B - 42" Digital Lcd Hdtv User manual

Magnavox 15MF500T - 15" Lcd Tv User manual

Magnavox

Magnavox 15MF500T - 15" Lcd Tv User manual

Magnavox 32MF301B Configuration guide

Magnavox

Magnavox 32MF301B Configuration guide

Magnavox 32MF231D - Hook Up Guide User manual

Magnavox

Magnavox 32MF231D - Hook Up Guide User manual

Magnavox 26MF605W - 26" Lcd Hd Flat Tv User manual

Magnavox

Magnavox 26MF605W - 26" Lcd Hd Flat Tv User manual

Magnavox 32MV402X User manual

Magnavox

Magnavox 32MV402X User manual

Magnavox 55MV314X User manual

Magnavox

Magnavox 55MV314X User manual

Magnavox 42MF521D - Hook Up Guide User manual

Magnavox

Magnavox 42MF521D - Hook Up Guide User manual

Magnavox 37MF321D - Hook Up Guide User manual

Magnavox

Magnavox 37MF321D - Hook Up Guide User manual

Magnavox 55ME345V User manual

Magnavox

Magnavox 55ME345V User manual

Magnavox 42MF438B/F7 Installation instructions

Magnavox

Magnavox 42MF438B/F7 Installation instructions

Magnavox 40ME313V/F7 User manual

Magnavox

Magnavox 40ME313V/F7 User manual

Magnavox 42MF531D - Hook Up Guide User manual

Magnavox

Magnavox 42MF531D - Hook Up Guide User manual

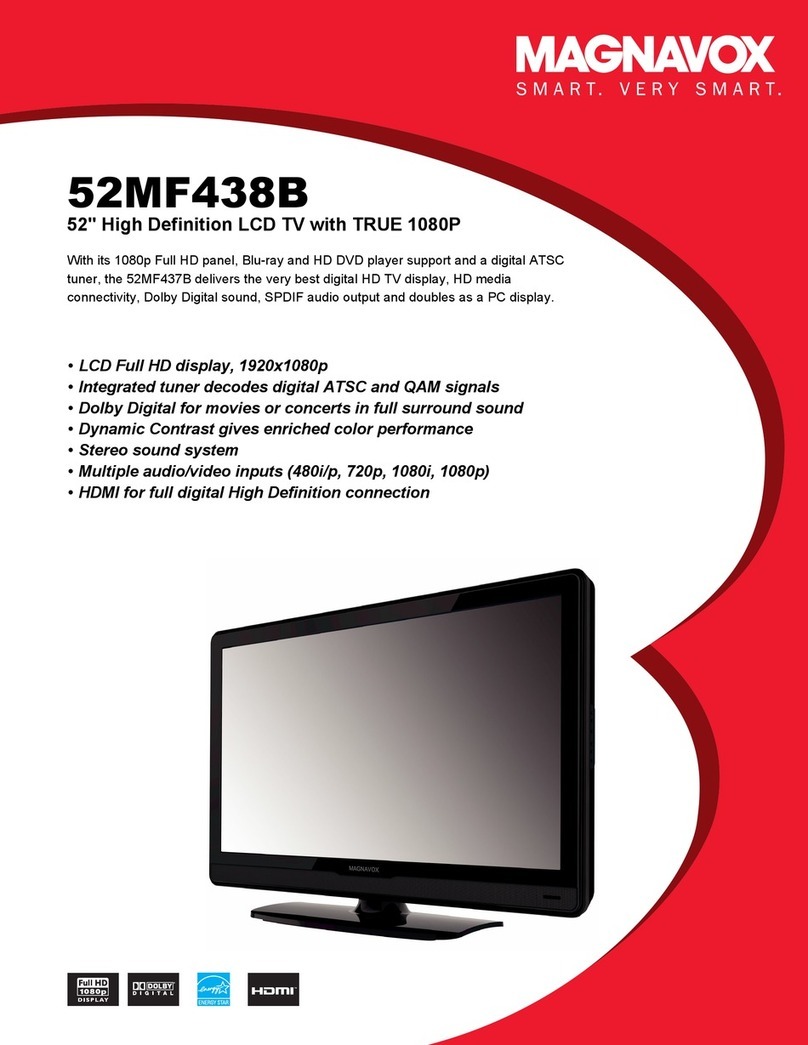
Magnavox 52MF438B/F7 User manual

Magnavox

Magnavox 52MF438B/F7 User manual

Magnavox 32MF231D - Hook Up Guide User manual

Magnavox

Magnavox 32MF231D - Hook Up Guide User manual

Magnavox 26MF321B User manual

Magnavox

Magnavox 26MF321B User manual

Magnavox 32MF338B - 32" LCD TV User manual

Magnavox

Magnavox 32MF338B - 32" LCD TV User manual

Magnavox 47MF439B/F7 Installation instructions

Magnavox

Magnavox 47MF439B/F7 Installation instructions

Magnavox 42MF531D - Hook Up Guide User manual

Magnavox

Magnavox 42MF531D - Hook Up Guide User manual

Popular LCD TV manuals by other brands

Samsung LA32E420 E-manual

Samsung

Samsung LA32E420 E-manual

ViewSonic VS12119-1M user guide

ViewSonic

ViewSonic VS12119-1M user guide

iLO CIWL3706 owner's manual

iLO

iLO CIWL3706 owner's manual

LG 32LT560C Quick reference guide

LG

LG 32LT560C Quick reference guide

Sony WEGA KLV-27HR3 operating instructions

Sony

Sony WEGA KLV-27HR3 operating instructions

Zenith Z32LC2D Specifications

Zenith

Zenith Z32LC2D Specifications

Sony KDL-32S3000R - 32" Class Bravia S-series Digital Lcd... Specifications

Sony

Sony KDL-32S3000R - 32" Class Bravia S-series Digital Lcd... Specifications

Medion MEDION LIFE X14330 quick start guide

Medion

Medion MEDION LIFE X14330 quick start guide

Vizio HDTV30A VW32L Service manual

Vizio

Vizio HDTV30A VW32L Service manual

Sharp LC-24DV250K Operation manual

Sharp

Sharp LC-24DV250K Operation manual

SOYO Dymond DYLT032A user manual

SOYO

SOYO Dymond DYLT032A user manual

Kalley K-LED40FHDST2 Service manual

Kalley

Kalley K-LED40FHDST2 Service manual

Dynex DX-L40-10A Guide de l'utilisateur

Dynex

Dynex DX-L40-10A Guide de l'utilisateur

Hisense M3300 user manual

Hisense

Hisense M3300 user manual

Toshiba 42XV600A owner's manual

Toshiba

Toshiba 42XV600A owner's manual

Panasonic TX-26LX1A operating instructions

Panasonic

Panasonic TX-26LX1A operating instructions

HP LT3200 Illustrated parts & service map

HP

HP LT3200 Illustrated parts & service map

Sharp LC-32GA8 Service manual

Sharp

Sharp LC-32GA8 Service manual

manuals.online logo
manuals.online logoBrands
  • About & Mission
  • Contact us
  • Privacy Policy
  • Terms and Conditions

Copyright 2025 Manuals.Online. All Rights Reserved.

32MF301B
19MF301B
/CD TV
Thank youfor choosing
Magnavox
Need help fast?
Read your Owner's Manual first for
quick tips that make using your
Magnavox product more enjoyable.
If you have read your instructions
and still need assistance,
you may access our online help at
www.magnavox.comlsupport
or call
1=866-341-3738
while with your product
(and Model ISerial number)
votreconfiance.
aide
rapide?
Manuel du Propri_talre regorgent
d'astuces destin6es _simphfier
l_utihsation de votre produit Magnavox.
Toutefois, si vous ne parvenez
pas _r_soudre votre probt_me,
vous pouvez acceder
notre aide en tigne i_ I'adresse
www.magnavox.com lsupport
ou formez le
1-866-341-3738
Veillez _avoir votre produit
pottle de main
(et model Iserial nombre)
Gradas pot escoger Magnavox.
Necesita ayuda
inmediata?
Lea primero el Manual del Propietario,
en donde encontrar6 consejos que
le ayudargn a disfrutar plenamente
de su producto Magnavox.
Si despu6s de leerlo a6n necesita ayuda,
consulte nuestro servtcio de
asistencia en linea en
www.magnavox.comlsupport
oIlame al tel_fono
1-866-341-3738
ytenga a mano el producto
(y n_mero de model / serial)
mDOLBY
DIGITAL I
NODEL NUNBER SERIAL NUNBER
2
Registeringyour model with MAGNAVOX makes you eligible for all of the valuable benefitslisted below,so don't miss out.Complete and
return your Product RegistrationCard at once, or register online at www.magnavox.comlsupport to ensure:
Know these
safety symbols
CAUTION:TOaEDUCETHE_SKOFELECTalCSHOC_DONOT
_NOVECOVEa(OaBACK)NOUSEa.SEaVlC_LEPAaTS
INSDEaEFEaSEaVlClNGTO®ALIFIEDSEaVlCE_a_NNEL
AThis "bolt of lightning" indicates uninsulated material
within your unit may cause an electrical shock. For the
safety of everyone in your household, please do not
remove product covering.
_IL The "exclamation point" calls attention to features for
which you should read the enclosed literature closely to
prevent operating and maintenance problems.
WARNING: To reduce the risk of fire or electric shock, this apparatus should not be exposed to rain or moisture and objects filled
with liquids, such as vases, should not be placed on this apparatus.
CAUTION: To prevent electric shock, match wide blade of plug to wide slot, fully insert.
ATTENTION: Pour 6viter les choc 61ectriques, introduire la lame la plus large de la fiche dans la borne correspondante de la prise et
pousser jusqu'au fond.
Wall Hount Bracket Kit
Recommended Wall Mount Bracket Kit:
Brand: SanusVuepo nt
Model #: 32MF301B FSS
19MF301B [10
<for 32 inches only>
Recommended Screw dimension when purchased:
32MF301 B F14 x 0.787" (20mm)
+ Washer 0.07g"(F2_mm)
19MF301B M4x0.472" (12mm)
The recommended Wall Mount Bracket K_ (sold separately)
allows the mounting oftheqV on the wall.
For detailed informat on on nstalling the wall mount, refer to
the Wall Mount Instruct on Book
Funal is not respons ble for any damage to the product or njury
to yourself or others if you elect to nstall theqVVVall Mount
Bracket or mount the IV onto the Bracket on your own.
TheWall Mount Bracket must be installed by experts.
Funai not liable for these types of accidents or
injury noted below.
Install theWall Mount Bracket on a sturdy vertical wall.
If installed onto a ceiling or slanted wall, the qV and Wall
Mount Bracket may fall which could result in a severe injur)4
Do not use screws that are longer or shorter than their
specified length. If screws too long are used this may cause
mechanical or electr ca[ damage nside the [V set. If screws
too short are used ths may cause the[V set to fail
Do not fasten the soews by excess ve foree;th s may damage
the product or cause the product to fall, leading to an injur_
For safety reasons use 2_people to mount theTV onto aVVall
Mount ng Bracket.
Do not mount theIV onto the VVall Mounting Bracket whle
your/V is plumed in or turned on. It may _esuft in an electrical
shock injur)4
When installing the unit on the wall, allow this much space.
Top: 11.8 inches (30cm)
Left and right side: 5.9 inches (15cm)
Bottom: 3,9 inches (10cm)
IMPORTANT SAFETY INSTRUCTIONS
1,
_. Keep these nstructions,
3, Heed al warnings,
4, Follow a nstructions,
S. Do not use this apparatus nea_-wate_
6. Clean only wth a dry coth.
F. Do not beck any of the vent at op opep n£s,
Instal n acco/dapce with the manufactulor's instruct ons,
& Do not nstsll near any heat sources such as radiators heat
regi£ers, stoves, or other appal-atus (inc ud ng amplifiers)
that produce heat,
9. Do not det_,at the safl,ty purpose of the polarized or
g_x_ur,ding type pug.A polarized pug/,as two blades wth
one wider than the othet_ A g_ound ng type pug hastwo
blades arid th/d ground ng prong, The wde blade or thtd
prong arc, prey ded for your satct}4When the prey ded
pug does not fit into your outlet, copsult an electric at, for
rels scerner,t of the obsolete out et,
I0, Protect the power cold from being walked on or pinched
particularly at plugs, convenience receptacles, and the point
where they exit from the ppa_atus,
11, Only use alSschments/accessodes specified by the
manu_actu reds
Read before operating equipment
Readtheseinstructions, I6. TilrJStability A t_,evisonsmustcomplywth recommended
tus.When a cart s used, use taut on when movn£ the
cart/@pa_ _tus combination to avoid inju_-y from tip ove_
13, Unp ug this appa/stus during ghtning storms or when un
used for long per ods of time,
14, Refl, r all serv cing to qualified serv ce personne. Serv cing is
requ red when the apparatus has been damaged n any way,
such as power supply cord or plug is damaged, qud has
been sped or objects have faen into apparatus, the appara
tus has been exposed to rain o_-moisture, does not operate
norma y, or has been dropped.
15, Damage Requiring Service The appliance shou d be
serv ted by qua ified service personnel when:
A. The power supply cord or the pug has been damaged;
B. Obiects hdve fden, or liquid has been spilled nto the
@p ante;
¢-, The app snce has been exposed to rain
D, lhe appli nce does not appear to operate normally or
exhibits marked change in perfo_-mance;
E, lhe appliance has been dropped, or the enclosure damaged,
international goba saf_,ty stand /ds for tt
and stabilty properties of its cabinet design,
• Do not comp_x_mise these design standards by applying
excessve pull force to the f'_ont, or top, of the cabinet
which could ultimately overtul-n the p_x_duct,
• Also, do not endanger yourself, or children, by placing
electronic equipment/toys on the top of the cabinet Such
terns could unsuspecting y fall f_-om the top of the set and
cause product damage and/or personal mjur)4
I7. Wall or Ceiling Mounting The appliance should be
mounted to a wall or ceiling only as recommended by the
manufdcture_
I8. Power Lines An outdoor antenna should be located
dW_y from power lines,
I9. Outdoor Antenna Grounding If an outside antenna
is connected to the recevec be sule the antenn system s
grounded so as to prey de some p_otection against votage
surges and built up state charges,
Section 810 of the Nat onal Electric Code, ANSI/NFP/\
No, 701984, provides informatiof wth respect to proper
ground ng of the mast and supporting structul e, ground
ing of the leadn wire to an antenna d scharge unit, sze of
ground ng connectors, Iocat on of antennad scharge unt,
cor, nection to grounding electrodes, and requ mments for
the ground n£ e ectrode, See Figure below,
20. Object and Liquid Entry Care shoud be taken so
that objects do not fJI ar, d quds am not sped into the
enc osure through open ngs,
21, Battery Usage CAUTION [o prevent battery
leakage that may result n body it,jury, p_sperty damage,
or dam48e to the unit:
• InsMI a batteries correctly, with + and - aligned as
marked on the unt,
• Do not mix batteries (old and new or cadson and
a ka ine, e,tc,).
• Remove batteries when the unit is not used for a long
time,
Note to the CATV system installer :This reminder s prey ded to call the C/_FV system nstaller's attent on to Art cie
83_040 of the NEC that provides _uidelines for proper _round n£ and, in particulac specifies that the cable 8round shall
be connected to the _roundin8 system of the building, as close to the pont of cable entry as pract cal.
4
FCC WARNING
This apparatus may generate or use radio frequency energy. Changes or modifications to this apparatus may cause harmful interference
unless the modifications are expressly approved in the manual. The user could lose the authority to operate this apparatus if an
unauthorized change or modification is made.
RADIO-TV INTERFERENCE
This apparatus has been tested and found to comply with the limits for a Class B digital device, pursuant to Part 15 of the FCC Rules.
These limits are designed to provide reasonable protection against harmful interference in a residential installation. This apparatus
generates, uses, and can radiate radio frequency energy and, if not installed and used in accordance with the instructions, may cause
harmful interference to radio communications. However, there is no guarantee that interference will not occur in a particular installation.
If this apparatus does cause harmful interference to radio or television reception, which can be determined by turning the apparatus off
and on, the user is encouraged to try to correct the interference by one or more of the following measures:
1) Reorient or relocate the receiving antenna.
2) Increase the separation between the apparatus and receiver.
3) Connect the apparatus into an outlet on a circuit different from that to which the receiver is connected.
4) Consult the dealer or an experienced radio/TV technician for help.
DECLARATION OF CONFORMITY
Trade Name: HAGNAVOX Responsible Party: FUNAI CORPORATION, Inc.
Model: 32MF301 B Address: 19900 Van Ness Avenue, Torrance, CA 90501 U.S.A.
19MF301 B Telephone Number: 1-866-341-3738
This Class B digital apparatus complies with Canadian ICES-003. Standard Television Receiving Apparatus, Canada BETS-7/NTNR-7
CAUTION: Danger of explosion if battery is incorrectly replaced. Replace only with the same or equivalent type.
WARNING : Batteries (battery pack or battery installed) shall not be exposed to excessive heat such as sunshine, fire or the like.
Disconnect the mains plug to shut off when find trouble or not in use.The mains plug shall remain readily operable.
This apparatus should not be placed in a built-in installation such as a bookcase or rack unless proper ventilation is provided.
Nake sure to leave a space of 4 inches (10cm) or more around this apparatus.
WARNING: To prevent injury, this apparatus must be securely attached to the wall in accordance with the instructions.
Do not place the unit on the furniture that is capable of being tilted by a child and an adult leaning, pulling, standing or
climbing on it. A falling unit can cause serious injury or even death.
X ike all LCD products, this set contains a lamp with Mercury, please dispose of according to all Local, State and
Federal laws. For the disposal or recycling information, contact:
www.mygreenelectronics.com or www.eiae.org
• The American Academy of Pediatrics discourages television
viewing for children younger than two years of age.
NOTE ABOUT RECYCLING
• Ths unit's pdck_Jging mater s arc, recyclable nd
can be reused, Please dispose of any materia s r,
accordance with your Iota recyc ng regu at ons,
Batter es shoud never be thrown away or inciperated
but disposed of n accordar, ce with your Iota
regu ations concern ng chemical wastes,
• For product mcyclir_g ir_forrnaton, pease vsit www, magr_avox,com
/- 7c-,,
WHEN CARRYINGTHIS UNIT _ >
• At east 2 peope are i-equ red wl,en _ /_ _
carry ng this unt, , I
• Hake sure to hold the upper dnd bottom ",
fi-ames of the unit firmy as ustrated,
TO AVOID THE HAZARDS OF \,
ELECTRICAL SHOCK AND FIRE "
• Do riot hndle the AC power cord wth wet har'ds.
• Do not pu} on the AC power cold when disconnect ng it flsm an
/_(. outlet, Grasp it by the pug,
• Do not put your fingers or obiects into the unit,
LOCATION AND HANDLING
• Do riot nstall the unit n direct sur,light or it, a pace subjr,ct to dust
or strorlg vibt _tiorl,
•/'wod a place wth drastic temperature changes.
• Install the unit n a horizontal and stable poston, Do not place
anything dilect y on top or bottom of the unit. Depending or, youl-
external devices, noise or disturbance of the picture nd/or sound
ms>,be generatr, d if the unit is placed too close to them. In this
case,pease ensure enough space between the external dev ces and
the unit,
• Depend ng on the environment, the tempe/ature of this un t may
increase s ght y,This is not a ma fur,or on.
• Be sure to unpug the AC power cord flsm the AC out r,t before
moving or carry ng the unit,
Trademark Information
I-iii ml °
HDFII, the HDFII Logo, and High Definit on Multimedia Inte_ffsce are
trademarks or i-eglstered trademad<s of HDMI Lcens ng LLC in the
United States and other countres,
I']"1DOLBY
DIGITAL ]
blanufactured under Ncense fi-om Dolby Lsborator es, Dolby and the
double_D symbol am trademad<s of Doby Laboratories,
Congratulations on your purchase! As you enjoy your new product, please
keep these safety tips in mind:
THE ISSUE
• [he t-ometi_ealerenle a nr<-entexperence s a growh'g rend and large
flat panel displays are popular purchases However, flal panel displays
are not always suppored on the proper stondsor inslalledaccord ng to the
manufacturer'srecommendalions
• Flatpaneldisplays thatare inappropriately stuatedon dressers,bookcases,
shelves,desks, speakers,chestsor carts may fall over and causeinjury
THIS MANUFACTURERCARES!
• Tt'e consumerelectroncs induslry iscommitted to r,,aking home enterta nn"ent
enjoyable and safe
TUNE INTO SAFETY
• One sze does NOT f all Follow the r_anufacturer'secommer_dations
for the safe rTstallotionar'd useof your flat panel display
• Carefully read ar,d ur,derstar,d all er,closed instructionsfor orooer useof
this product
• Don't allow children to clmb on or play with furnitJre and telev sion sets
• Don't place flat paneldisplays onturntare thatcan easily be usedas steps,
such as a chest of drawers
• Rememberthai children can become excited while watching a program,
especially on a "larger tha_"life" flal panel display Care should be iaken to
place or install_hedisplay wf'e_e it cannol be pushed, pulled over,
or knockeddowr"
• Care should be taken to routeall cords and cables cant'eared to theflat
panel display so thatthey cannot be pulled or grabbed by curiouschildren
WALL MOUNTING: IFYOUDECIDETOWALLMOUNT
YOURFLATPANELDISPLAY,ALWAYS:
•Use a mountthat has been recommended by he display _anufacturer
and/or Ised by an ndepe_'dent laboratory (suchas UI, CSA, Erl)
• Follovvall inslructionssupplied by thedisplay and wall mount manufacturers
• If you haveany doubtsabou your ability 1osately installyour flal panel
d splay, contact your retailer about professonal installaton
• Make sure thatthe wall where you are mountingthedisplay s appropriate
Some wall mountsare not designed to be mountedto walls with steel
studsor old cnder block construction If you are unsure,contact a
professional nstaller
• A '_qnimumof _o people are requi ed for ins_allaton Flal panel displays
can be heavy www.CE.org/safety
6
INTRODUCTION
Contents
Important Safety Instruct ons
h-ademark Information
Child Saf_,ty
INTRODUCTION
Featul es
Supplied Accessor es
Symbos Used n ths Mdnual
Attachin Sthe Base
Mounting the Unit on Your Fumture
Remote Control Function
Installing the Batter es
Contro Panel
lbrmina s
PREPARATION
Antenna Cor'nr'ction
Connectior, to Cable Receiwr or Sate te Box
Plug In the AC Power Cord
Initial Setup
WATCHING TV
Sleep limer
Switching Each Input Mode
Freeze Mode
Chdnnel Select or1
TV Screen Dispby Mode
Sound Functions
TV Screen Information
ECO
fun-Link Options
USING FUNCTIONS
Picturo
Sound
Setup
Featul es
Ldnguage
USB
CONNECTING DEVICES
External Device Connect on 25
USEFULTIPS
FAQ 28
5-oub eshoot n£ Guide 28
INFORMATION
Glossary 30
Maintenance 30
General Spec float orls 3I
Eectrica Specification 31
Other Specifications 3I
Limited Wan-arty 33
Features
DTV/TV/CATV
You carsuse your remote contro to seect channels whch are
broadcast in dgiM format and convent ona ar,aog format.Also,
cable subscribers can access ther cable IV channels,
3 Information Display (/XT SC only)
4 You can disp ay the tire, contents and other nbrmation of the
5 current DTV pl_gram on theTV screen,
Autoprogram
6 Ntis unit automat cal y scans and memorzes channels avaiabe it,
7 your area, e m nat ng d fficut setup pl_cedures,
7 Child Loci<
7 This Matul e allows you to block ch drorl's access to indppropr ate
7pl_grams,
8 Closed Caption Decoder
8 Built n cosed caption decoder disp ays text for closed rapt on
9supported programs,
9MTS /SAP Tuner
Audo carsbe selocted fl_m the remote contro,
Auto Standby
10 If there s no input sgnl and no operat on for I5 minutes, the
I0 unit will go into standby mode automaticall)4
I0 Sleep Timer
11 You can set the unt to go into standby mode after a specific
amount of time,
12 Choices for On-screen Language
12 Select your on s@een anguage:
12 Eng sh, Span sh or French,
12 Stereo Sound Function
13 PLL Frequency Synthesized Tuning
13 Prov des flee and easy channe se ection and r,ts you tune
14 di_ect y to any channel usng the number and dec real point","
buttons on the remote contro,
14
14 Various Adjustment for Picture and Sound
Customizes mage quaty suitable fur your- room and sets your
sound prefiw, nce,
16 fun-Link via HDMI Link
16 (HDMI Cable not Included)
17 fun L nk alows your other HDMI link dev ces to be contro ed by
18 the HDMI cable connected to yourTV,
23 HDMI Input
24 HDMI-DVI Input
If your vdeo devce hs DVI output jack, use an HDMI DVI
convers on cabe to connect the unt,
ComponentVideo Input
PC Input
AV Input
USB Terminal
lhe picture @PEG)and vdr, o (Mot or1jPEG) files storod on a
USB storage devce can be pdyed back on this unit,
Digital Audio Output
<1961F301 B only>
Headphone Audio Output
© 2011 Funa Electric Co., Ltd,
All rghts reserved, No part of this manua may be reproduced, copied, transm tted, disseminated, transcribed, downloaded or stored n an7 storage
medium, n anyform or for any purpose without the express prior wrrLt_,nconsent of Funa, Fulthermore, any unaufl,orizc, d commerc al distlibution of
ths manu or any revison he/eto s stricty pl_hibited.
Information in this document s subject to change without notice. Funai reserves the right to change the content heron w thout the obligat on to hotly
any person or o%ar, ization of such changes,
FUNAI with the t_ design s a legistered trademad< of Funs Eectr c Co., Ltd, and may not be used n any way wthout the express wr tten consent
o_ Funa. All other trademad<s used heron reman the exclusive property of ther respect ve owners, Noth ng contained n ths manua shoud be
construed s glint ng, by implication or otherw se, any license or rght to use any of the trademarks displayed herein. Msuse of any trademarks or
any other content in this manua is strict y prohibited, Funi shall aggressive y enforce ts ntr, ectua property rghts to the fullest extent o_the law,
MAGNAVOX is ai_gistered trddemdrk of Philips Electronics North America Corporation and isused by Funai Electric Co, Ltd, and Funai Corporation,
Inc under cense flom Philips Electronics North Am@-cd,
Supplied Accessories
Owner's Manual Quick Start Guide
Remote TV base and 3 screws
Control 32MF301B M4 x 14
(NF805UD) 19MF301B M4 x 12
Batteries
(AAA, 1.5V x 2)
Registration card
[4o _'
If you lose the scrows, please purchase the above merit oned
Phips head screws at your Iota stole,
If you r,eed to i ep ace these accessor es, please refer to the part
name or No, with the luss atior, s and call our toll flee customer
support ne found on the cover of this manual,
V_el s_£ a unverss _e_o e col ro o opIse rhs _s
Nake sure the component code or, your universa i emote control
s set to our brand, Re@r to the manua accompanyln£ your
romote contro for more dora s.
We do not £uarantee 100% nteroperabilty wth all universa
romote contro s,
Symbols Used in this Manual
The following s the ctescr ption for the symbols used n ths
manuak Description refers to:
:D gital]V operat on
:AnaJog/CableTV operation
If neither symbol appears, the operation s applicable to
both,
Attaching the Base
You must attach the base to the unt to have it as a table top
unit, Be sure the front and rear of the base match the proper
direction, At least 2_people are requ red for these steps,
1Check the text "FRONT" w_th "an ow" on the Base's
bolCom to ensure t is being installed n the correct
direct on, Spread a thck and soft cloth over a table as shown
at step 2, Place the man unit face down onto it, Make sure
not to damage the screen,
2 Insert 2 hooks under
the bottom of the main
unit nto base holes
(shown by arrow d;,),
then move the base in
the direct on as shown
by arrow ,'.2.'until it
stops and the screw
holes are aigned.
b'lal<e sure not to put the AC power cord between the
base and the unit.
3Drve Ph Ilips head
screws nto the 3
threaded holes at the
bottom of the base
until they are tght
Ion,hove b, basefo_ /s _r_
• Unscrew the Phillips head screws in step 3,
After the screws alO removed, pul the base up toward the rear of
the unit, Be ca1_'fu not to drop the base when you remove It,
i!i_ii!;
211
i!i"i_
Mounting the Unit on Your Furniture
Screw this unt on your furnture t ghtiy usng wood screw (not
supplied) in the hole at the back of the base as shown. [
• Recommended screw dimens on :3/16 x 3/4 inches (5,1 x 20 mm)
rear of this unit
hole
8
Remote Control Function
1
2
3
Installing the Batteries
Install the batteries (AAA, 1,5V x 2) matching the polar ty
indicated insde battery compartment of the remote control,
(_(power) ,,,_p.11
Press to turn the unit on and go into standby mode.
3o completely turn off the unit, you must unplug the AC
power cord,
2 SAP ,,i_ p.13
3 SOURCE ,,i_ p.12
4FREEZE film.p.12
Press to freeze screen image.
S OK llllI_p.11
6 A/V/_/I_(cursor) iiiii_p,11
7 BACK _ IIII1_ p.14
8 VOL +/- IIII_p.13
9PREVCH IIII_p,12
Press to return to previously wewed channel.
10 SLEEP llI@"p.12
11 FORMAT IlII_ p.13
Press to select aspect rs_o s_u ab e for the TV screen.
12 RED/GREEN/BLUE/YELLOW ,,,_p.23
I unctionally useful for fun Link,
13 MENU IIII_p.lS
14 INFO Jillp.14
15 REV ,_II!FWD _ ,D p.23
_ress to search backward or forvva _athrOUgh tne ]ls£
PLAYI_ ,,,,p.23
°_ess I0 begin tne aisc pla/OaC t
SKIP I_I_I/SKIP _ .i_ p.23
Dress to SKID OaCKWa "d or forM/a_ chaDtel-< titles or
16
17
18
tracks of the msc
PAUSE II J p.23
S_ess io pause The alsc olaYDaCK
STOP • ,,. p.23
_dSS I0 SZOD lne aisc DI_ 'DaCI
MUTE illi_ p.13
CH +/- illi_ p.12
ECO illi_ p.14
Pressto reduce power consumption,
19 Number buttons IIIII_p.12
•(dot)
Pressto shift the subchannel from the main channel,
20 "Fun'L,nHOPTIONS_ ,i,!. p.14, 23
Pressto call up various menu from your fun Link device
connected through an HDNI cable.
•Be sure to follow the correct polarity as nd cated in the battery
compal-tmept, Reversed batteries mdy cause damage to the
device,
• Do riot mx d fferer,t types of batteries together (e,£,A kaline arid
Carbon Zinc, or rechargeab e bstteries lib' r,i cad, nrrfls _,tc) or
o!d batteries with fresh ones,
• If the device is not to be used f_r a Ion£ period of time, remove
the batteries to prevent damase ol- njury from possible battery
leakage.
•Do not try to recharge batLer es; they can overheat and iupture,
Control Panel
1
Terminals
34 5
D
13
lO
14
15
to do the software update themse ves,
1 VOLUME +/- ,,_ p.13
Pressto adjust the volume up/down or move rigbt
(+)/left (-) through the main menu terns,
2 CHANNEL +/- ,,,,_ p.12
Pressto select channels or move up (+)/down (-)
through the main menu items,
3 MENU ,,,_ p.15
4 SOURCE ,,,,,_ p.12
5 (!) POWER ,,,,,_p.11
Pressto turn the unit on and go into standby mode.
[o completely turn off the unit, you must unplug the AC
power cord.
6 Infrared sensor window
Receives inflated rays transmtted from the remote
control.
Standby indicator
Lights up red when the unt is n standby mode and
flashes when the unit goes nto standby mode.
Side Panel
8 Component/CompositeVideo Input jacks
forVIDEO ,,,,_p.26
CompositeVideo input jack is shared jack wth
ComponentVideo input (Y)jack,
9 AnalogAudio (L/R)Input jacks
/:2i
!iq
&i
i!i!i
i i/
i
{%
!2!
(i;,
i{i!
(3'
ii;_i{
,,,,,_p.10, 25, 26, 27
Connect Analog Audio signals fi'om !i!i!i!!
ComponentVideo/Analog Audio (L/R)jacks signal or
HDMI DVI/Analog Audio (L/R) jacks signal or
CompositeVideo/Analog Audio (L/R) jacks signal or i!;'
PC Connection/Analog Audio (L/R) jacks signal with
stereo mini plug conversion cable jack on PC.
Analog Audio (L/R) input jacks are right below the _ _....
ComponentVideo Input jacks.When the Audio is
monaural, then only connect to the Audio L input jack,
10 Antenna Input jack n,,_ p.10
<32MF301 B only>
11 USBTerminal ....• p.27
Use this term nal only to play back the picture (}PEG) and
video (Notion jPEG) flies stored on a USB storage device.
12 HDMI 2 Input jack n,_ p.10, 25
<19MF301 B only>
13 HDMI (HDMI-DVl) Input jack ,,,,_ p.10, 25
14 Headphone Audio Output jack
Headphone connect on for personal listen ng.
Rear Panel
15 AC power cord ,,,_ p.10
16 Digital Audio Output jack ,,,_ p.26
17 PC (VGA)Input jack ,,_ p.27
<32MF301 B only>
18 HDMI 1 (HDMI-DVl) Input jack ,,,,_ p.10, 25
<19MF301 B only>
19 USBTerminal ,,,,_ p.27
Use this term nal only to play back the picture (}PEG) and
video (Notion jPEG) _les stored on a USB storage device.
10
PREPARATION
Before you connect:
Be sure your antenna or other device s connected properl/
Delore plu,_gng In the AC _ower cote1
Antenna Connection
Connect the Rt coa×lal cable o _our home outlet to the
_[/_enna IRDU_ ack of this unit
VHF/UHF
analogor
DTV antenna
®
®
®
®
®
e
®
_.Fcoaxial cable ®
cable TV signal
Once connect ons are completed.turn on the unt and begin
nitial setup. Channel scann ng s necessary for the unit to
memorize all available channels n your area. [Initial Setup]
,,_ p.11
No_,
If you have any quest on about the ©TV's antenna, vsit
www.antennsweb.o% for further nformation.
Depending on your antenna system, you ms>, need d fierent types
of comb nets (mixers) ol- separators (sp tters) for HDTV signa
the rain mum RF bandpass or, these devces is 2,000b1Hz ol- 2GHz.
For your safe,t>, nd to avod damage to this unt, please unpu£ the
RF coaxa cable flsm the antenna input jack before movng the
unit.
If you did use an antenna to rc.ceve ana ogTV, t should aso
wofl< for DTV mcept or,. Outdoor or stt}c antennas w be more
eff_,ct ve than a sot top or inside antenna.
lb switch your mcept on source easily br,tween antenna and cabe,
nstall an antenna selectoE
If you a_r, not receiv ng a sgna flsm your cable serv ca, contact the
Cabe prov dens
Connection to Cable Receiver or
Satellite Box
Use an HDbql or ComponentV deo cables to connect the
HDMI or the ComponentV deo input jacks of the unit to the
HDPll or the ComponentV deo output jacks of the cable
race ver/satellite box.
if/ou connect to the unit's ComponentVideo input jacks,
connect Analog Audio cables to the Analog Audo L/R input
jacks right below the ComponentVideo connector jacks.
satellite dish
cable TV signal
including PPV
RF coaxial cabl_.
_ompone ....
(red/blu6/green) and
audio cables ®®®®
cable receiver/satellite box
$ For 32NF301B, you can also use the HDNI jack on the Rear Panel.
You can also connect this unit to the cable receiver or satellite
box other than the HDMI or the ComponentVideo output jacks
or CompositeV deo output jack (n,_ p.26) because they might
have different output jacks.
Requ red cables and connecting methods of the cable receiver/
satellite box, or the ava lability channel for the dear QAbq may
dffer depend ng on the cable/satellite prov der or IocaF[V
broadcasler:
For more nformation, please contact your cable/satellite provider
or local IV broadcasten
Noe
• Use an HDPII cabe with the HDPll logo (a ca/tiffed HDbll cable),
Hgh Speed HDISl cable s recommended for the better compat bi i%
Plug In theAC Power Cord
Nake sure that the AC power cord must be plugged to an AC
outlet after all the necessary connections are made.
C_ut o/:
Do not connect the AC power colx) to a powor suppy outs de
the nd catr'd vo}tage ofths unit (AC 120V).
Connect ng the AC power cord to a power suppy outs de of this
range may re,sut in fire or eectr ca shocks.
Noe
Each timr, you pug n the AC power colx:], no operations will be
performed for a f_,w seconds.This is not a malfunct on.