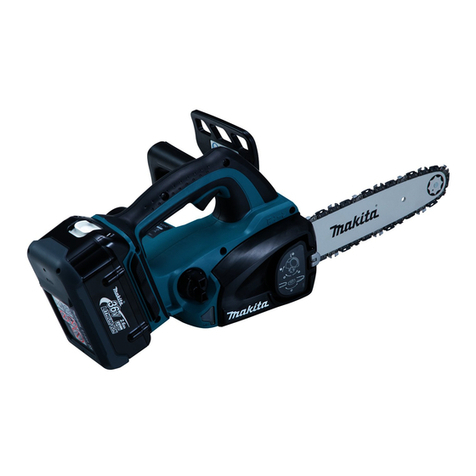
Makita DUC122 User manual

1
GB Cordless Chain Saw INSTRUCTION MANUAL
SI Brezžična verižna žaga NAVODILO ZA UPORABO
AL Sharrë me zinxhir me bateri MANUALI I PËRDORIMIT
BG Акумулаторен верижен трион
РЪКОВОДСТВО ЗА ЕКСПЛОАТАЦИЯ
HR Bežična motorna pila PRIRUČNIK S UPUTAMA
MK Безжична моторна пила
У
ПАТСТВО ЗА УПОТРЕБА
RO Ferăstrău cu lanţcu acumulator MANUAL DE INSTRUCŢIUNI
RS Бежична ланчана тестера
У
ПУТСТВО ЗА УПОТРЕБУ
RUS Цепная пила спитанием от
аккумуляторной батареи
РУКОВОДСТВО ПО ЭКСПЛУАТАЦИИ
UA Бездротова ланцюгова пила ІНСТРУКЦІЯ ЗЕКСПЛУАТАЦІЇ
DUC121
DUC122

2
1
23
1 012143
1
2 012128
12
3 008572
12
4 008566
1
2
3
5 008568
2
1
6 013715
12
7 013716
2
3
1
8 008569 9 008570

3
2
1
3
13 008571
1
14 008574
1
15 008575
1
2
16 008576 17 001742 18 008634
1
2
19 008573 20 008633 21 006927
12
10 008587 11 008570 12 014818

4
1
25 008580 26 008581
1
27 008582
1
28 008635
1
2
29 008584
1
2
3
30 008586
1
31 001145
12
32 008585
22 006929 23 008578
12
24 008579

5
ENGLISH (Original instructions)
Explanation of general view
1-1. Red indicator
1-2. Button
1-3. Battery cartridge
2-1. Star marking
3-1. Lock-off button
3-2. Switch trigger
4-1. Sprocket cover
4-2. Knob
5-1. Cutter
5-2. Guide bar
5-3. Arrow
6-1. Spring
6-2. Sprocket
7-1. Spring
7-2. Guide bar
8-1. Sprocket cover
8-2. Hook
8-3. Hole
13-1. Oil tank cap
13-2. Oil inspection window
13-3. Oil tank opening
14-1. Tip guide
15-1. Lower guide
19-1. Battery cartridge
19-2. Scabbard (chain cover)
24-1. Push nut
24-2. Slotted bit screwdriver
25-1. Filter
27-1. Filter
28-1. Push nut
29-1. Sprocket
29-2. Locking ring
30-1. Locking ring
30-2. Sprocket
30-3. Washer
31-1. Limit mark
32-1. Brush holder cap
32-2. Screwdriver
SPECIFICATIONS
Model DUC121 DUC122
Guidebar length 115 mm
Cutting length 11.5 cm
Standard guide bar
Type Carving bar
Type 25 AP
Pitch 6.35 mm (1/4")
Gauge 1.3 mm (0.05")
Standard saw chain
No. of drive links 42
Number of teeth 9
Sprocket Pitch 6.35 mm (1/4")
Overall length 422 mm
Net weight 2.5 kg 2.6 kg
Chain speed per minute (min-1) 4.8 m/s (290 m/min) 5.0 m/s (300 m/min)
Chain oil tank volume 80 cm3
Rated voltage D.C. 14.4 V D.C. 18 V
• Due to our continuing program of research and development, the specifications herein are subject to change without notice.
• Specifications and battery cartridge may differ from country to country.
• Weight, with battery cartridge, according to EPTA-Procedure 01/2003
WARNING: Use appropriate combination of the guide bar and saw chain. Otherwise personal injury may result.
END313-1
Symbols
The following show the symbols used for the equipment.
Be sure that you understand their meaning before use.
・Read instruction manual.
・Wear eye protection.
・Wear ear protection.
・Wear a helmet, goggles and ear
protection.
・Use appropriate protection for foot-leg
and hand-arm.
・This saw is to be used by properly
trained operators only.
・Do not expose to rain.
・Maximum permissible cut length
・Direction of chain travel
・Saw chain oil adjustment
・Only for EU countries
Do not dispose of electric equipment or
battery pack together with household
waste material!
In observance of the European
Directives, on Waste Electric and
Electronic Equipment and Batteries and
Accumulators and Waste Batteries and
Cd
Ni-MH
Li-ion

6
Accumulators and their implementation
in accordance with national laws,
electric equipment and batteries and
battery pack(s) that have reached the
end of their life must be collected
separately and returned to an
environmentally compatible recycling
facility.
ENE090-1
Intended use
The tool is intended for cutting branches / pruning trees.
It is also suitable for tree service.
ENG905-1
Noise
The typical A-weighted noise level determined
according to EN60745:
Model DUC122
Sound pressure level (LpA) : 84.6 dB (A)
Sound power level (LWA) : 92.7 dB (A)
Uncertainty (K) : 2 dB (A)
Wear ear protection
ENG900-1
Vibration
The vibration total value (tri-axial vector sum)
determined according to EN60745:
Model DUC122
Work mode : cutting wood
Vibration emission (ah) : 4.3 m/s2
Uncertainty (K) : 1.5 m/s2
ENG901-1
• The declared vibration emission value has been
measured in accordance with the standard test
method and may be used for comparing one tool
with another.
• The declared vibration emission value may also be
used in a preliminary assessment of exposure.
WARNING:
• The vibration emission during actual use of the
power tool can differ from the declared emission
value depending on the ways in which the tool is
used.
• Be sure to identify safety measures to protect the
operator that are based on an estimation of
exposure in the actual conditions of use (taking
account of all parts of the operating cycle such as
the times when the tool is switched off and when it
is running idle in addition to the trigger time).
ENH030-5
For European countries only
EC Declaration of Conformity
Makita declares that the following Machine(s):
Designation of Machine:
Cordless Chain Saw
Model No./ Type: DUC122
Specifications: see "SPECIFICATIONS" table.
Conforms to the following European Directives:
2000/14/EC, 2006/42/EC
They are manufactured in accordance with the following
standard or standardized documents:
EN ISO 11681-2
The EC-Type Examination Certificate
No.4814056.14009
The EC-Type Examination per 2006/42/EC was
performed by:
DEKRA Testing and Certification GmbH
Enderstraße 92b
01277 Dresden
Germany
Identification No. 2140
The technical file in accordance with 2006/42/EC is
available from:
Makita, Jan-Baptist Vinkstraat 2, 3070, Belgium
The conformity assessment procedure required by
Directive 2000/14/EC was in Accordance with annex V.
Measured Sound Power Level: 93 dB (A)
Guaranteed Sound Power Level: 95 dB (A)
23.9.2014
000331
Yasushi Fukaya
Director
Makita, Jan-Baptist Vinkstraat 2, 3070, Belgium
GEA010-1
General Power Tool Safety
Warnings
WARNING Read all safety warnings and all
instructions.
Failure to follow the warnings and instructions
may result in electric shock, fire and/or serious injury.
Save all warnings and instructions for
future reference.
GEB119-1
Cordless Chain saw safety
warnings:
1.
Keep all parts of the body away from the saw
chain when the chain saw is operating. Before
you start the chain saw, make sure the saw chain

7
is not contacting anything.
A moment of inattention
while operating chain saws may cause entanglement
of your clothing or body with the saw chain.
2. When holding with both hands, always hold
the chain saw with your right hand on the rear
handle and your left hand on the front handle.
Holding the chain saw with a reversed hand
configuration increases the risk of personal injury
and should never be done.
3. Hold the power tool by insulated gripping
surfaces only, because the saw chain may
contact hidden wiring. Saw chains contacting a
"live" wire may make exposed metal parts of the
power tool "live" and could give the operator an
electric shock.
4.
Wear safety glasses and hearing protection.
Further protective equipment for head, hands,
legs and feet is recommended.
Adequate protective
clothing will reduce personal injury by flying debris or
accidental contact with the saw chain.
5. Always keep proper footing. Slippery or
unstable surfaces may cause a loss of balance or
control of the chain saw.
6. When cutting a limb that is under tension be
alert for spring back. When the tension in the
wood fibers is released the spring loaded limb
may strike the operator and/or throw the chain
saw out of control.
7. Use extreme caution when cutting brush and
saplings. The slender material may catch the
saw chain and be whipped toward you or pull you
off balance.
8.
Carry the chain saw by the front handle with the
chain saw switched off and away from your
body. When transporting or storing the chain
saw always fit the guide bar cover.
Proper
handling of the chain saw will reduce the likelihood
of accidental contact with the moving saw chain.
9. Follow instructions for lubricating, chain
tensioning and changing accessories.
Improperly tensioned or lubricated chain may
either break or increase the chance for kickback.
10. Keep handles dry, clean, and free from oil and
grease. Greasy, oily handles are slippery causing
loss of control.
11. Cut wood only. Do not use chain saw for
purposes not intended. For example: do not
use chain saw for cutting plastic, masonry or
non-wood building materials. Use of the chain
saw for operations different than intended could
result in a hazardous situation.
12. Causes and Operator Prevention of Kickback:
Kickback may occur when the nose or tip of the
guide bar touches an object, or when the wood
closes in and pinches the saw chain in the cut.
Tip contact in some cases may cause a sudden
reverse reaction, kicking the guide bar up and
back towards the operator.
Pinching the saw chain along the top of the guide
bar may push the guide bar rapidly back towards
the operator.
Either of these reactions may cause you to lose
control of the saw which could result in serious
personal injury. Do not rely exclusively upon the
safety devices built into your saw. As a chain saw
user, you should take several steps to keep your
cutting jobs free from accident or injury.
Kickback is the result of tool misuse and/or
incorrect operating procedures or conditions and
can be avoided by taking proper precautions as
given below:
−
Maintain a firm grip, with thumbs and fingers
encircling the chain saw handles, with both
hands on the saw and position your body
and arm to allow you to resist kickback
forces.
Kickback forces can be controlled by the
operator, if proper precautions are taken. Do not
let go of the chain saw.
014673
−Do not overreach and do not cut above
shoulder height. This helps prevent
unintended tip contact and enables better
control of the chain saw in unexpected
situations.
−Only use replacement bars and chains
specified by the manufacturer. Incorrect
replacement bars and chains may cause
chain breakage and/or kickback.
−Follow the manufacturer’s sharpening
and maintenance instructions for the saw
chain. Decreasing the depth gauge height
can lead to increased kickback.
13. Before starting work, check that the chain saw is
in proper working order and that its condition
complies with the safety regulations. Check in
particular that:
• The run-down brake is working properly;
• The bar and the sprocket cover are fitted
correctly;
• The chain has been sharpened and tensioned
in accordance with the regulations;
14. Do not start the chain saw with the chain
cover being installed on it. Starting the chain
saw with the chain cover being installed on it may
cause the chain cover to thrown out forward
resulting in personal injury and damage to objects
around the operator.
8
Top handle chainsaw specific safety
warnings
1.
This chain saw is designed especially for tree care and
surgery. The chain saw is intended to be used by
properly trained persons only. Observe all instructions,
procedures and recommendations from the relevant
professional organization. Otherwise fatal accidents
may occur. It is recommend that always using a rising
platform (cherry picker, lift) for sawing in trees.
Rappelling techniques are extremely dangerous and
require special training. The operators must be trained
to become familiar with safety equipment usage and
climbing techniques. Always use the appropriate belts,
ropes and carabiners when working in trees. Always
use restraining equipment for both the operator and the
saw.
2. Perform cleaning and maintenance before
storage in accordance with the instruction manual.
3. Ensure safe positioning of the chain saw during
car transportation to avoid fuel or chain oil
leakage, damage to the tool and personal injury.
4. Do not fill the chain oil near fire. Never smoke
when you fill the chain oil.
5. National regulation may restrict the use of the
chain saw.
6. If the equipment gets heavy impact or fall, check
the condition before continuing work. Check the
controls and safety devices for malfunction. If
there is any damage or doubt, ask our authorized
service center for the inspection and repair.
7.
Hold the saw firmly in place to avoid skating (skid
movement) or bouncing of the saw when starting a cut.
8. At the end of the cut, be careful to keep your
balance due to the “drop”.
9. Take into account the direction and speed of the
wind. Avoid sawdust and chain oil mist.
Protective equipment
1. In order to avoid head, eye, hand or foot
injuries as well as to protect your hearing the
following protective equipment must be used
during operation of the chain saw:
−The kind of clothing should be appropriate, i. e. it
should be tight-fitting but not be a hindrance. Do
not wear jewelry or clothing which could become
entangled with bushes or shrubs. If you have
long hair, always wear a hairnet!
−It is necessary to wear a protective helmet
whenever working with the chain saw. The
protective helmet is to be checked in
regular intervals for damage and is to be
replaced after 5 years at the latest. Use only
approved protective helmets.
−The face shield of the protective helmet (or
the goggles) protects against sawdust and
wood chips. During operation of the chain
saw always wear a goggle or a face shield to
prevent eye injuries.
−Wear adequate noise protection
equipment (ear muffs, ear plugs, etc.).
−The protective jacket consists of 22 layers
of nylon and protects the operator against
cuts. It is always to be worn when working
from elevated platforms (cherry pickers, lifts),
from platforms mounted on ladders or when
climbing with ropes.
−The protective brace and bib overall is
made of a nylon fabric with 22 layers and
protects against cuts. We strongly
recommend its use.
−Protective gloves made of thick leather are
part of the prescribed equipment and must
always be worn during operation of the chain
saw.
−During operation of the chain saw safety
shoes or safety boots fitted with anti skid
sole, steel toe caps and protection for the leg
must always to be worn. Safety shoes
equipped with a protective layer provide
protection against cuts and ensure a secure
footing. For working in trees the safety boots
must be suitable for climbing techniques.
Vibration
1. Individuals with poor circulation who are exposed
to excessive vibration may experience injury to
blood vessels or the nervous system.
Vibration may cause the following symptoms to
occur in the fingers, hands or wrists: “Falling
asleep” (numbness), tingling, pain, stabbing
sensation, alteration of skin colour or of the skin.
If any of these symptoms occur, see a
physician!
To reduce the risk of “white finger disease”, keep
your hands warm during operation and well
maintain the equipment and accessories.
SAVE THESE INSTRUCTIONS.
WARNING:
DO NOT let comfort or familiarity with product
(gained from repeated use) replace strict adherence
to safety rules for the subject product. MISUSE or
failure to follow the safety rules stated in this
instruction manual may cause serious personal
injury.

9
ENC007-8
IMPORTANT SAFETY
INSTRUCTIONS
FOR BATTERY CARTRIDGE
1. Before using battery cartridge, read all
instructions and cautionary markings on (1)
battery charger, (2) battery, and (3) product
using battery.
2. Do not disassemble battery cartridge.
3. If operating time has become excessively
shorter, stop operating immediately. It may
result in a risk of overheating, possible burns
and even an explosion.
4. If electrolyte gets into your eyes, rinse them
out with clear water and seek medical
attention right away. It may result in loss of
your eyesight.
5. Do not short the battery cartridge:
(1) Do not touch the terminals with any
conductive material.
(2) Avoid storing battery cartridge in a
container with other metal objects such
as nails, coins, etc.
(3) Do not expose battery cartridge to water
or rain.
A battery short can cause a large current flow,
overheating, possible burns and even a
breakdown.
6. Do not store the tool and battery cartridge in
locations where the temperature may reach or
exceed 50 ゚C (122 ゚F).
7. Do not incinerate the battery cartridge even if
it is severely damaged or is completely worn
out. The battery cartridge can explode in a fire.
8. Be careful not to drop or strike battery.
9. Do not use a damaged battery.
10. Follow your local regulations relating to
disposal of battery.
SAVE THESE INSTRUCTIONS.
Tips for maintaining maximum battery life
1. Charge the battery cartridge before
completely discharged.
Always stop tool operation and charge the battery
cartridge when you notice less tool power.
2. Never recharge a fully charged battery
cartridge.
Overcharging shortens the battery service life.
3. Charge the battery cartridge with room
temperature at 10 ゚C - 40 ゚C (50 ゚F - 104 ゚F).
Let a hot battery cartridge cool down before
charging it.
4. Charge the battery cartridge once in every six
months if you do not use it for a long period
of time.

10
Parts supplied
1
2
3
4
56
7
8
9
10
11
12
13
008588
1
2
3
4
5
6
7
8
9
10
11
12
Top handle
Battery cartridge
Sprocket cover
Front hand guard
Guide bar
Tip guard
Saw chain
knob
Lock off button
Switch trigger
Front handle
Chain cover
13
Carabiner or rope
attachment point
008589

11
FUNCTIONAL DESCRIPTION
CAUTION:
• Always be sure that the tool is switched off and the
battery cartridge is removed before adjusting or
checking function on the tool.
Installing or removing battery cartridge
Fig.1
CAUTION:
• Always switch off the tool before installing or
removing of the battery cartridge.
•
Hold the tool and the battery cartridge firmly when
installing or removing battery cartridge.
Failure to
hold the tool and the battery cartridge firmly may cause
them to slip off your hands and result in damage to the
tool and battery cartridge and a personal injury.
To remove the battery cartridge, slide it from the tool
while sliding the button on the front of the cartridge.
To install the battery cartridge, align the tongue on the
battery cartridge with the groove in the housing and slip
it into place. Insert it all the way until it locks in place
with a little click. If you can see the red indicator on the
upper side of the button, it is not locked completely.
CAUTION:
• Always install the battery cartridge fully until the
red indicator cannot be seen. If not, it may
accidentally fall out of the tool, causing injury to
you or someone around you.
• Do not install the battery cartridge forcibly. If the
cartridge does not slide in easily, it is not being
inserted correctly.
Battery protection system
(Lithium-ion battery with star marking)
Fig.2
Lithium-ion batteries with a star marking are equipped
with a protection system. This system automatically cuts
off power to the tool to extend battery life.
The tool will automatically stop during operation if the
tool and/or battery are placed under one of the following
conditions:
• Overloaded:
The tool is operated in a manner that causes
it to draw an abnormally high current.
In this situation, release the trigger switch on
the tool and stop the application that caused
the tool to become overloaded. Then pull the
trigger switch again to restart.
If the tool does not start, the battery is
overheated. In this situation, let the battery
cool before pulling the trigger switch again.
• Low battery voltage:
The remaining battery capacity is too low
and the tool will not operate. In this situation,
remove and recharge the battery.
Switch action
CAUTION:
• Before inserting the battery cartridge into the tool,
always check to see that the switch trigger
actuates properly and returns to the "OFF"
position when released.
Fig.3
To prevent the switch trigger from being accidentally
pulled, a lock-off button is provided.
To start the tool, depress the lock-off button and pull the
switch trigger. Release the switch trigger to stop.
ASSEMBLY
CAUTION:
• Always be sure that the tool is switched off and the
battery cartridge is removed before carrying out
any work on the tool.
Installing or removing saw chain
CAUTION:
• Always be sure that the tool is switched off and the
battery cartridge is removed before installing or
removing the saw chain.
• Always wear gloves when installing or removing
the saw chain.
• Use only saw chain and guide bar with bar tip
designed for this chain saw (see the Extract from
the spare parts list).
• In order to prevent kickback, do not remove the
bar tip or replace the guide bar with one without a
bar tip.
Fig.4
Loosen the screw by turning counterclockwise the knob
until the sprocket cover comes off.
Remove the sprocket cover.
Remove saw chain and guide bar from the tool.
Fig.5
Fit in one end of the saw chain on the top of guide bar.
At this time, fit the saw chain as shown in the figure
because it rotates in the direction of arrow.
Fig.6
Place the saw chain so that the spring is positioned
inside it and fit in the other end of saw chain around the
sprocket as shown in the figure.
Fig.7
While turning the guide bar counterclockwise, install it
so that the end of guide bar contacts the spring.
Fig.8
Insert the hook of sprocket cover into the hole in the tool
and then place the sprocket cover on the tool.
Fig.9
Turn the knob clockwise to tighten the screw firmly.

12
Adjusting saw chain tension
Fig.10
Just a slight loosening of the screw allows the saw
chain tension to be adjusted. After adjusting, retighten
the screw firmly.
Fig.11
CAUTION:
• For a while after a new saw chain is installed, it
tends to become loosened. From time to time
check the saw chain tension before use.
• Low tension of saw chain may cause coming out
of place.
• Installing or removing saw chain should be carried
out in a clean place free from sawdust and the like.
Spike bumper (optional accessory)
Fig.12
To install spike bumper, perform the following steps:
1. Remove the sprocket cover, saw chain and guide
bar as described in this instruction manual.
2. Fit the holes of spike bumper along with the holes
on the chainsaw.
3. Tighten them firmly with screws.
OPERATION
Lubrication
Fig.13
Saw chain is automatically lubricated when the tool is in
operation.
Check the amount of remaining oil in the oil tank
through the oil inspection window.
To refill the tank, remove the cap from the oil tank
opening.
After refilling the tank, always screw the provided oil
tank cap on the chain saw.
CAUTION:
• When filling the chain saw with chain oil for the
first time, or refilling the tank after it has been
completely emptied, add oil up to the bottom edge
of the filler neck. The oil delivery may otherwise be
impaired.
• As a saw chain oil, use oil exclusively for Makita
chain saws or oil available in market.
• Never use oil including dust and particles or
volatile oil.
• When pruning trees, use botanical oil. Mineral oil
may harm trees.
• Never force the chain saw when pruning trees.
• Before cutting out, make sure that the provided oil
tank cap is screwed in place.
Hold the chain saw away from the tree. Start it and wait
until lubrication on saw chain is adequate.
Bring the tip guide/lower guide into contact with the
branch to be cut before switching on. Cutting without
bringing the tip guide/lower guide into contact with the
branch may cause the guide bar to wobble, resulting in
injury to operator.
Saw the wood to be cut by just moving it down.
Pruning trees
Fig.14
Fig.15
CAUTION:
• Keep all parts of the body away from the saw
chain when the motor is operating.
• Hold the chain saw firmly with both hands when
the motor is running.
• Do not overreach. Keep proper footing and
balance at all times.
Bring the tip guide/lower guide into contact with the
branch to be cut before switching on. Cutting without
bringing the tip guide/lower guide into contact with the
branch may cause the guide bar to wobble, resulting in
injury to operator.
When cutting thick branches, first make a shallow
undercut and then make the finish cut from the top.
Fig.16
If you try to cut off thick branches from the bottom, the
branch may close in and pinch the saw chain in the cut.
If you try to cut off thick branches from the top without a
shallow undercut, the branch may splinter.
Fig.17
If you cannot cut the timber right through with a single
stroke:
Apply light pressure to the handle and continue sawing
and draw the chain saw back a little; then apply the
spike a little lower and finish the cut by raising the
handle.
Fig.18
Carrying tool
Fig.19
Always remove the battery cartridge from the tool and
overlap the guide bar with the scabbard before carrying
the tool. Also cover the battery cartridge with the battery
cover.
MAINTENANCE
CAUTION:
• Always be sure that the tool is switched off and the
battery cartridge is removed before attempting to
perform inspection or maintenance.
• Always wear gloves when performing any
inspection or maintenance.
• Never use gasoline, benzine, thinner, alcohol or
the like. Discoloration, deformation or cracks may
result.

13
Sharpening the saw chain
CAUTION:
•
Always remove the battery cartridge and wear safety
gloves when performing work on the saw chain.
Fig.20
Sharpen the saw chain when:
−Mealy sawdust is produced when damp wood is
cut;
−The chain penetrates the wood with difficulty, even
when heavy pressure is applied;
−The cutting edge is obviously damaged;
−The saw pulls to the left or right in the wood. The
reason for this behaviour is uneven sharpening of
the saw chain, or damage to one side only.
Sharpen the saw chain frequently, but remove only
a little material each time.
Two or three strokes with a file are usually sufficient for
routine resharpening. When the saw chain has been
resharpened several times, have it sharpened in a
MAKITA specialist repair shop.
File and file guiding
−Use a special round file (optional accessory) for
saw chains, with a diameter of 4 mm, to sharpen
the chain. Normal round files are not suitable.
Fig.21
−The file should only engage the material on the
forward stroke. Lift the file off the material on the
return stroke.
−Sharpen the shortest cutter first. The length of this
cutter is then the gauge dimension for all other
cutters on the saw chain.
−Guide the file as shown in the figure.
−The file can be guided more easily if a file holder
(accessory) is employed. The file holder has
markings for the correct sharpening angle of 30 °
(align the markings parallel to the saw chain) and
limits the depth of penetration (to 4/5 of the file
diameter).
Guide the file as shown in the figure.
−After sharpening the chain, check the height of the
depth gauge using the chain gauge tool (optional
accessory).
Fig.22
−Remove any projecting material, however small,
with a special flat file (optional accessory).
−Round off the front of the depth gauge again.
−Wash away dust and particles from saw chain
after adjusting the height of depth gauge.
Cleaning guide bar
Fig.23
Chips and sawdust will build up in the guide bar groove,
clogging it and impairing oil flow. Always clean out the
chips and sawdust when sharpening or replacing the
saw chain.
Cleaning the oil filter at the oil discharge hole
Small dust or particles may be built up in the oil filter at
the oil discharge hole during operation.
Small dust or particles built up in the oil filter may impair
the oil discharge flow and cause an insufficient
lubrication on the whole saw chain.
When a poor chain oil delivery occurs at the top of
guide bar, clean the filter as follows.
Remove the battery cartridge from the tool.
Remove the sprocket cover and saw chain from the tool.
(Refer to the section titled " Installing or removing saw
chain ".)
Fig.24
Remove the push nut using a slotted bit screwdriver
with a slender shaft or the like.
Fig.25
Take the filter out of the chain saw and remove small
dust or particles from it. When the filter is too dirty,
replace it with a new one.
Insert the battery cartridge into the tool.
Fig.26
Pull the switch trigger to flow built-up dust or particles
off the oil discharge hole by discharging chain oil.
Remove the battery cartridge from the tool.
Fig.27
Insert the cleaned oil filter into the oil discharge hole.
When the filter is too dirty, replace it with a new one.
Fig.28
Insert the push nut with its correct side facing up as
shown in the figure into the oil discharge hole to secure
the filter. When the filter cannot be secured with a
disfigured push nut, replace the push nut with a new
one.
Reinstall the sprocket cover and saw chain on the tool.
Replacing the sprocket
Before fitting a new saw chain, check the condition of
the sprocket.
Fig.29
CAUTION:
• A worn sprocket will damage a new saw chain.
Have the sprocket replaced in this case. The
sprocket need to be installed so that it always
faces as shown in the figure.
Fig.30
Always fit a new locking ring when replacing the
sprocket.
Replacing carbon brushes
Fig.31
Remove and check the carbon brushes regularly.
Replace when they wear down to the limit mark. Keep
the carbon brushes clean and free to slip in the holders.
Both carbon brushes should be replaced at the same
time. Use only identical carbon brushes.

14
Use a screwdriver to remove the brush holder caps.
Take out the worn carbon brushes, insert the new ones
and secure the brush holder caps.
Fig.32
Storing tool
Clean the tool before storing. Remove any chips and
sawdust from the tool after removing the sprocket cover.
After cleaning the tool, run it under no load to lubricate
the saw chain and guide bar.
Cover the guide bar with the scabbard.
Remove oil from the oil tank to empty it and place the
chain saw with the tank cap facing upward.
To maintain product SAFETY and RELIABILITY, repairs,
any other maintenance or adjustment should be
performed by Makita Authorized Service Centers,
always using Makita replacement parts.
Instructions for periodic maintenance
To ensure long life, prevent damage and ensure the full
functioning of the safety features the following
maintenance must be performed regularly.
Warranty claims can be recognized only if this work is
performed regularly and properly. Failure to perform the
prescribed maintenance work can lead to accidents!
The user of the chain saw must not perform
maintenance work which is not described in the
instruction manual. All such work must be carried out by
authorized service centre.
Remove from the chain
saw.
Guide bar
Chainlubrication
Switch trigger
Lock-off button
Oil tank cap
Chaincatcher
Screws and nuts
Chainsaw
Saw chain
Before
storage
Annually
Every 3
month
Every
week
Everyday
Before
operation
Item
Operating
time
Inspection.
Cleaning.
Check at authorized service
center.
Inspection.
Inspection.
Inspection.
Inspection.
Inspection.
Inspection.
Sharpening ifnecessary.
Check the oil feed rate.
Check tightness.
014813

15
TROUBLE SHOOTING
Before asking for repairs, conduct your own inspection
first. If you find a problem that is not explained in the
manual, do not attempt to dismantle the tool. Instead,
ask Makita Authorized Service Centers, always using
Makita replacement parts for repairs.
Adjustthe guide bar and saw chain
tension.
Askyour local authorized service
center for repair.
Malfunction status Cause Action
Chainsaw does not start.
Motor stops running after alittleuse.
Nooil on the chain.
Itdoes not reach maximum RPM.
Chaindoes not stop:
Stop the machine immediately!
Abnormal vibration:
Stop the machine immediately!
Battery problem (under voltage).
Battery's charge level is low.
Oil tank is empty.
Oil guide groove is dirty.
Malfunction of oil pump.
Battery cartridge is installed improperly.
The drive system does not work
correctly.
Malfunction of switch.
Looseguide bar or saw chain.
Tool malfunction.
Recharge the battery cartridge. If
recharging is not effective, replace
battery cartridge.
Recharge the battery cartridge. If
recharging is not effective, replace
battery cartridge.
Fill the oil tank.
Clean the groove.
Install the battery cartridge as
described inthis manual.
Recharge the battery cartridge. If
recharging is not effective, replace
battery cartridge.
Askyour local authorized service
center for repair.
Askyour local authorized service
center for repair.
Askyour local authorized service
center for repair.
Battery cartridge is not installed.
Battery's charge level is low.
Install the charged battery cartridge.
014814
OPTIONAL ACCESSORIES
CAUTION:
• These accessories or attachments are
recommended for use with your Makita tool
specified in this manual. The use of any other
accessories or attachments might present a risk of
injury to persons. Only use accessory or
attachment for its stated purpose.
If you need any assistance for more details regarding
these accessories, ask your local Makita Service Center.
• Various type of Makita genuine batteries and
chargers
• Saw chain
• Scabbard
• Guide bar complete
• File
NOTE:
• Some items in the list may be included in the tool
package as standard accessories. They may differ
from country to country.

16
SLOVENŠČINA (izvirna navodila)
Razlaga splošnega pogleda
1-1. Rdeči indikator
1-2. Gumb
1-3. Baterijski vložek
2-1. Oznaka z zvezdico
3-1. Sprostilni gumb
3-2. Sprožilno stikalo
4-1. Pokrov zobca kolesa
4-2. Ročica
5-1. Rezalnik
5-2. Meč
5-3. Puščica
6-1. Vzmet
6-2. Vskočnik
7-1. Vzmet
7-2. Meč
8-1. Pokrov zobca kolesa
8-2. Kljuka
8-3. Odprtina
13-1. Pokrovček rezervoarja za olje
13-2. Kontrolno okence za olje
13-3. Odprtina rezervoarja za olje
14-1. Konica meča
15-1. Spodnje vodilo
19-1. Baterijski vložek
19-2. Nožnica (pokrov verige)
24-1. Potisna matica
24-2. Ploščati izvijač
25-1. Filter
27-1. Filter
28-1. Potisna matica
29-1. Vskočnik
29-2. Vskočnik
30-1. Vskočnik
30-2. Vskočnik
30-3. Podložka
31-1. Meja obrabljenosti
32-1. Pokrov krtačke
32-2. Izvijač
TEHNIČNI PODATKI
Model DUC121 DUC122
Dolžina meča 115 mm
Dolžina reza 11,5 cm
Standardni meč
Tip Mečza izrezovanje
Tip 25 AP
Naklon 6,35 mm (1/4")
Merilnik 1,3 mm (0,05")
Standardna veriga žage
Št. pogonskih povezav 42
Število zobcev 9
Vskočnik Naklon 6,35 mm (1/4")
Celotna dolžina 422 mm
Neto teža 2,5 kg 2,6 kg
Hitrost verige na minuto (min-1) 4,8 m/s (290 m/min) 5,0 m/s (300 m/min)
Prostornina rezervoarja za verižno olje 80 cm3
Nazivna napetost D.C. 14,4 V D.C. 18 V
• Zaradi našega nenehnega programa raziskav in razvoja si pridržujemo pravico do spremembe tehničnih podatkov brez obvestila.
• Tehnični podatki in baterijski vložki se lahko razlikujejo od države do države.
• Teža z baterijskim vložkom je v skladu z EPTA-postopkom 01/2003
OPOZORILO: Uporabljajte ustrezno kombinacijo meča in verige žage. Sicer lahko pride do telesnih poškodb.
END313-1
Simboli
Naslednji simboli se uporabljajo v povezavi s strojem.
Pred uporabo proizvoda se obvezno seznanite z
njihovim pomenom.
・Preberite navodila za uporabo.
・Uporabljajte zaščito za oči.
・Uporabljajte zaščito za sluh.
・Nosite čelado, očala in zaščito za sluh.
・Uporabljajte ustrezno zaščito za
stopala in noge ter dlani in roke.
・To žago smejo uporabljati le ustrezno
usposobljeni upravljavci.
・Ne izpostavljajte dežju.
・Maksimalna dovoljena dolžina rezanja
・Smer premika verige
・Prilagoditev verižnega olja za žago
・Le za države EU
Električnega orodja ali akumulatorja ne
odlagajte skupaj z gospodinjskimi
odpadki!
Cd
Ni-MH
Li-ion

17
V skladu z Evropsko direktivo o
odpadni električni in elektronski opremi
in o baterijah in akumulatorjih ter
odpadnih baterijah in akumulatorjih in z
njunim izvajanjem v skladu z državno
zakonodajo se morajo električna
oprema, baterije in akumulatorji, ki so
prišli do konca svojega življenjskega
cikla, zbirati ločeno in se vrniti v
okoljsko združljivo ustanovo za
recikliranje.
ENE090-1
Namen uporabe
Orodje je namenjeno za rezanje vej/obrezovanje dreves.
Prav tako je primerno za podiranje dreves.
ENG905-1
Hrup
Tipični, z A ocenjeni vrednosti hrupa glede na EN60745:
Model DUC122
Raven zvočnega tlaka (LpA): 84,6 dB (A)
Raven zvočne moči (LWA): 92,7 dB (A)
Odstopanje (K): 2 dB (A)
Uporabljajte zaščito za sluh
ENG900-1
Vibracije
Skupne vrednosti vibracij (vektorska vsota treh osi) po
EN60745:
Model DUC122
Delovni način: rezanje lesa
Oddajanje tresljajev (ah): 4,3 m/s2
Odstopanje (K): 1,5 m/s2
ENG901-1
• Navedena vrednost oddajanja vibracij je bila
izmerjena v skladu s standardnimi metodami
testiranja in se lahko uporablja za primerjavo
orodij.
• Navedena vrednost oddajanja vibracij se lahko
uporablja tudi pri predhodni oceni izpostavljenosti.
OPOZORILO:
• Oddajanje vibracij med dejansko uporabo
električnega orodja se lahko razlikuje od navedene
vrednosti oddajanja, odvisno od načina uporabe
orodja.
• Upravljavec mora za lastno zaščito poznati
varnostne ukrepe, ki temeljijo na oceni
izpostavljenosti v dejanskih pogojih uporabe
(upoštevajočceloten delovni proces v trenutkih, ko
je orodje izključeno in ko deluje v prostem teku z
dodatkom časa sprožitve).
ENH030-5
Samo za evropske države
ES Izjava o skladnosti
Družba Makita izjavlja, da je/so naslednji stroj/-i:
Oznaka stroja:
Brezžična verižna žaga
Št. modela / tip: DUC122
Specifikacije: glejte tabelo "SPECIFIKACIJE".
Je skladen z naslednjimi evropskimi direktivami:
2000/14/ES, 2006/42/ES
Izdelan v skladu z naslednjim standardom ali
standardiziranimi dokumenti:
EN ISO 11681-2
Potrdilo o pregledu tipa ES št.4814056.14009
Pregled tipa ES v skladu z 2006/42/ES je izvedel:
DEKRA Testing and Certification GmbH
Enderstraße 92b
01277 Dresden
Nemčija
Identifikacijska št. 2140
Tehnična dokumentacija v skladu z direktivo
2006/42/ES je na voljo na:
Makita, Jan-Baptist Vinkstraat 2, 3070, Belgija
Postopek za ugotavljanje skladnosti, ki ga predpisuje
direktiva 2000/14/ES, je v skladu s prilogo V.
Izmerjena stopnja jakosti zvoka: 93 dB (A)
Zajamčena stopnja jakosti zvoka: 95 dB (A)
23.9.2014
000331
Yasushi Fukaya
Direktor
Makita, Jan-Baptist Vinkstraat 2, 3070, Belgija
GEA010-1
Splošna varnostna opozorila za
električno orodje
OPOZORILO Preberite vsa varnostna opozorila in
navodila.
Neupoštevanje opozoril in navodil lahko vodi do
električnega udara, požara, in/ali hudih telesnih poškodb.
Shranite vsa opozorila in navodila za
kasnejšo uporabo.
GEB119-1
Varnostna opozorila za uporabo
brezžične verižne žage:
1.
Med delovanjem verižne žage ne približujte delov
telesa verigi. Preden zaženete verižno žago se
prepričajte, da se veriga ničesar ne dotika.
Trenutek
nepazljivosti pri delu z verižnimi žagami lahko povzroči
zapletanje vaših oblačil ali telesa v verigo žage.

18
2. Verižno žago vedno držite z obema rokama, in
sicer z desno roko za zadnji ročaj in z levo za
sprednji ročaj. Obratno držanje verižne žage
poveča tveganje za osebne poškodbe in ga nikoli
ne smete izvesti.
3. Držite električno orodje na izoliranih držalnih
površinah, saj lahko veriga žage prereže
skrito električno napeljavo. Če verige žage
prerežejo vodnike pod napetostjo, dobijo napetost
vsi neizolirani kovinski deli električnega orodja,
zaradi česar lahko uporabnik utrpi električni udar.
4. Uporabljajte zaščitna očala in zaščito za sluh.
Priporočena je dodatna zaščita za glavo, roke,
noge in stopala. Zadostna zaščitna obleka bo
zmanjšala telesne poškodbe zaradi letečih
ostankov ali nenamernega stika z verigo žage.
5. Vedno uporabljajte ustrezno obutev. Drseča ali
nestabilna površina lahko povzroči izgubo
ravnotežja ali nadzora nad verižno žago.
6. Kadar režete napeto vejo, bodite pozorni, ko
odskoči nazaj. Ko se napetost lesnih vlaken
sprosti, lahko veja udari upravljavca in/ali
povzroči nenadzorovano premikanje verižne žage.
7. Bodite izjemno previdni pri rezanju mladik in
sadik. Vitek material lahko ujame verigo žage in
jo vrže proti vam ali povzroči izgubo ravnotežja.
8.
Verižno žago nosite tako, da jo izklopljeno držite
za sprednji ročaj in obrnjeno stran od telesa.
Kadar nosite ali shranjujete verižno žago, vedno
namestite pokrivalo meča.
Ustrezno ravnanje z
verižno žago bo zmanjšalo verjetnost nenamernega
stika s premikajočo se verigo.
9. Upoštevajte navodila glede mazanja,
napetosti verige in menjave pripomočkov.
Nepravilno napeta ali namazana veriga se lahko
strga ali poveča možnost povratnega udarca.
10. Ročaji morajo biti suhi, čisti in brez olja ter
masti. Mastni, naoljeni ročaji so drseči in
povzročijo izgubo nadzora.
11. Režite samo les. Verižne žage ne uporabljajte
v nepredvidene namene. Na primer: verižne
žage ne uporabljajte za rezanje plastike, zidov
ali nelesenih gradbenih elementov. Uporaba
verižne žage, ki ni v skladu z namensko uporabo,
lahko povzroči nevarno situacijo.
12. Vzroki in preprečevanje povratnega udarca s
strani upravljavca:
Povratni udarec se lahko pojavi, če se konica
meča dotakne kakšnega predmeta ali ko se les
zapre in uklešči verigo v reži.
Stik konice lahko v nekaterih primerih povzroči
nenadno obratno reakcijo, ki vrže mečnavzgor in
nazaj proti upravljavcu.
Zagozditev verige žage na vrhu meča lahko hitro
potisne mečnazaj proti upravljavcu.
Katera koli izmed teh reakcij lahko povzroči izgubo
nadzora nad žago, kar lahko povzroči hude telesne
poškodbe. Ne zanašajte se izključno na zaščitne
naprave, vgrajene v vašo žago. Kot uporabnik verižne
žage morate izvesti nekaj korakov, da preprečite
nesreče ali poškodbe med delom.
Povratni udarec je posledica nestrokovnega ravnanja
z orodjem in/ali neugodnih okoliščin. Preprečite ga
lahko z upoštevanjem spodaj navedenih opozoril.
−Trdno držite žago, tako da s sklenjenimi
prsti držite ročaja, imate obe roki na žagi
in namestite telo ter roki tako, da boste
lahko prestregli sile povratnega udarca.
Sile povratnega udarca lahko upravljavec
nadzoruje, če izvede pravilne previdnostne
ukrepe. Ne izpustite verižne žage.
014673
−
Ne segajte previsoko in ne režite nad višino
ramen.
S tem boste preprečili nenameren stik
konice in omogočili boljši nadzor nad verižno
žago v nepredvidenih situacijah.
−
Uporabljajte samo nadomestne meče in
verige, ki jih je določil proizvajalec.
Nepravi
nadomestni meči in verige lahko povzročijo
strganje verige in/ali povratni udarec.
−
Upoštevajte navodila proizvajalca za
brušenje in vzdrževanje verige žage.
Zmanjšanje višine merilnika globine lahko
povzroči povečano možnost povratnega udarca.
13. Pred začetkom dela preverite, ali verižna žaga
pravilno deluje in ali se njeno stanje sklada s
predpisi za varnost. Še posebej preverite:
• ali zavora izteka pravilno deluje,
• ali sta mečin pokrov zobca kolesa pravilno
nameščena,
•
ali je veriga naostrena in napeta v skladu s pravili,
14. Ne zaženite verižne žage z nameščenim
zaščitnim pokrovom verige. Zagon verižne
žage z nameščenim zaščitnim pokrovom verige
lahko povzroči, da bo zaščitni pokrov verige
izvrglo naprej, posledica pa je telesna poškodba
in poškodbe predmetov v bližini upravljavca.
Posebna varnostna opozorila na zgornjem
ročaju verižne žage
1. Ta verižna žaga je zasnovana posebej za nego in
zdravljenje dreves. Verižno žago smejo
uporabljati le ustrezno usposobljene osebe.
Upoštevajte vsa navodila, postopke in priporočila
ustreznih poklicnih organizacij. Sicer lahko pride
do nesrečs smrtnim izidom. Vedno je
priporočljivo, da za žaganje v drevesih

19
uporabljate dvižno ploščad (konzolni žerjav,
dvigalo). Tehnike spuščanje so izjemno nevarne
in zahtevajo posebno usposabljanje. Upravljavci
morajo biti usposobljeni in se seznaniti z
varnostno opremo in tehnikami plezanja. Kadar
delate v drevesih, vedno uporabljajte ustrezne
pasove, vrvi in sponke. Vedno uporabljajte
zadrževalno opremo za upravljavca in žago.
2. Čiščenje in vzdrževanje pred hrambo izvajajte v
skladu z navodili za uporabo.
3. Pri transportu v motornih vozilih verižno žago
ustrezno namestite, tako da gorivo ali verižno olje
ne more iztekati in da ne pride do poškodb orodja
ali telesnih poškodb.
4. Ne dolivajte verižnega olja v bližini ognja. Med
dolivanjem verižnega olja ne kadite.
5. Varnostna opozorila za uporabo brezžične
verižne žage:
6. Če oprema utrpi močan udarec ali pade, pred
nadaljnjo uporabo preverite stanje. Preverite, ali
upravljalni elementi in varnostne naprave pravilno
delujejo. Če opazite poškodbe ali če ste v dvomih,
se posvetujte s pooblaščenim servisom glede
pregleda in popravila.
7. Ko začnete rezati, žago držite trdno, da
preprečite drsenje ali odskakovanje žage.
8. Ob koncu reza bodite previdni, da ohranite
ravnotežje zaradi „padca“.
9. Upoštevajte smer in hitrost vetra. Izogibajte se
žagovini in meglicam verižnega olja.
Zaščitna oprema
1. Pri delu z verižno žago morate nositi
navedeno zaščitno opremo, saj boste le tako
zmanjšali možnost poškodbe glave, oči, rok in
nog:
−Obleka mora biti delu primerna. To pomeni,
da se dobro prilega, vendar ne sme biti ovira
pri delu. Ne nosite nakita ali kosov oblačila, ki
bi se lahko zataknilo v grmovje in podrast. Če
imate dolge lase, je obvezna mreža za lase!
−Pri delu z verižno žago je obvezna nošnja
zaščitne čelade. V rednih intervalih je treba
preveriti zaščitno čelado, ali je
poškodovana, in jo zamenjati najkasneje po
5 letih uporabe. Uporabljajte samo atestirane
zaščitne čelade.
−Ščitnik za obraz je nameščen na čelado (ali
očala) in ščiti pred žagovino in odrezki. Pri
delu z verižno žago vedno nosite očala ali
ščitnik za obraz, da preprečite poškodbe oči.
−Nosite zadostno zaščito za sluh (naušniki,
ušesni čepi itd.).
−Zaščitni suknjičje sestavljen iz 22 slojev
najlona in ščiti upravljavca pred urezi. Pri
delu na dvignjeni ploščadi (konzolni žerjavi,
dvigala), iz ploščadi, nameščeni na lestev ali
kadar plezate z vrvmi, ga je vedno treba
nositi.
−Zaščitni kombinezon z naramnicami in
naprsnikom je narejen iz najlona z 22 sloji
in ščiti pred urezi. Zelo priporočamo njegovo
uporabo.
−Zaščitne rokavice iz debelega usnja so del
predpisane opreme in jih morate pri delu z
verižno žago vedno nositi.
−Med delom z verižno žago morate vedno
nositi zaščitne čevlje ali škornje z
nedrsečim podplatom, jeklenim ščitnikom za
nožne prste in zaščito nog. Zaščitni čevlji so
opremljeni z zaščitnim slojem, ki zagotavljajo
zaščito pred urezi in omogočajo trdno
stojišče. Za delo v drevesih morajo biti
zaščitni škornji primerni za tehnike plezanja.
Vibracije
1. Pri posameznikih s slabo prekrvavitvijo, ki so
izpostavljeni čezmernim vibracijam, lahko pride
do poškodb krvnih žil ali živčnega sistema.
Vibracije lahko povzročijo naslednje simptome, ki
se pojavijo v prstih, dlaneh ali zapestjih:
„Spanje“ (odrevenelost), mravljinci, bolečina, občutek
zbadanja, spremembe barve kože ali kože same.
Če opazite kateri koli izmed teh pojavov,
poiščite zdravniško pomoč!
Za zmanjšanje tveganja za „sindrom belih
prstov“ ohranite vaše roke med uporabo tople in
dobro vzdržujte opremo in pripomočke.
SHRANITE TA NAVODILA.
OPOZORILO:
NE dopustite si, da bi zaradi udobnejšega dela ali
poznavanja izdelka (pridobljenega z večkratno
uporabo) opustili striktno upoštevanje varnostnih
pravil pri uporabi stroja. ZLORABA ali
neupoštevanje varnostnih pravil v teh navodilih za
uporabo lahko povzroči hude telesne poškodbe.
ENC007-8
POMEMBNA VARNOSTNA
NAVODILA
ZA BATERIJSKE VLOŽKE
1. Pred uporabo baterijskega vložka preberite
vsa navodila in opozorilne oznake na (1)
polnilniku akumulatorja, (2) akumulatorju in
(3) izdelku, ki uporablja akumulator.
2. Ne razstavljajte baterijskega vložka.
3. Če se je čas delovanja občutno skrajšal, takoj
prekinite z uporabo. V nasprotnem primeru je
lahko rezultat pregretje, morebitne opekline in
celo eksplozija.
4. Če pride elektrolit v oči, jih sperite s čisto
vodo in takoj poiščite zdravniško pomoč.
Posledica je lahko izguba vida.

20
5. Ne povzročite kratkega stika baterijskega
vložka:
(1) Ne dotikajte se priključkov s kakršnim
koli prevodnim materialom.
(2) Izogibajte se shranjevanju baterijskega
vložka v posodo z drugimi kovinskimi
predmeti kot so žeblji, kovanci itn.
(3) Ne izpostavljajte baterijskega vložka vodi
ali dežju.
Kratek stik akumulatorja lahko povzroči velik
tok, pregretje, morebitne opekline in celo
eksplozijo.
6. Ne shranjujte orodja in baterijskega vložka na
lokacijah, kjer lahko temperatura doseže ali
preseže 50 ゚C (122 ゚F).
7. Ne sežigajte baterijskega vložka, tudi če je
hudo poškodovan ali v celoti izpraznjen.
Baterijski vložek lahko v ognju eksplodira.
8. Bodite previdni, da vam akumulator ne pade
in ga ne udarjajte.
9. Ne uporabljajte poškodovanih akumulatorjev.
10. Upoštevajte lokalne uredbe glede odlaganja
akumulatorja.
SHRANITE TA NAVODILA.
Nasveti za maksimalno življenjsko dobo
akumulatorja
1. Napolnite baterijski vložek preden se v celoti
izprazni.
Ko opazite, da ima orodje manjšo moč, vedno
ustavite delovanje orodja in napolnite
baterijski vložek.
2. Nikoli znova ne polnite popolnoma
napolnjenega baterijskega vložka.
Prenapolnjenje skrajša življenjsko dobo
akumulatorja.
3. Napolnite baterijski vložek pri sobni
temperaturi med 10 ゚C in 40 ゚C (50 ゚F - 104 ゚
F). Počakajte, da se vročbaterijski vložek
pred polnjenjem ohladi.
4. Napolnite baterijski vložek enkrat vsakih šest
mesecev, če ga ne uporabljate dlje časa.
Other manuals for DUC122
2
This manual suits for next models
1
Table of contents
Languages:
Other Makita Chainsaw manuals

Makita
Makita DUC121 User manual

Makita
Makita XCU01 User manual

Makita
Makita EA3600F User manual

Makita
Makita DUC305 User manual

Makita
Makita DUC307 User manual

Makita
Makita EA3200S User manual

Makita
Makita UC3041A User manual

Makita
Makita BUC250 User manual

Makita
Makita DCS3410 User manual

Makita
Makita DUC405 User manual

Makita
Makita UC3030A Guide

Makita
Makita UC250D User manual

Makita
Makita DUC305Z User manual

Makita
Makita UC3041A User manual

Makita
Makita EA3500S User guide

Makita
Makita XCU03PT User manual

Makita
Makita EA3200S Manual

Makita
Makita DUC305 User manual

Makita
Makita UC002G User manual

Makita
Makita DUC254RTE User manual