manuals.online logo
Brands
  1. Home
  2. •
  3. Brands
  4. •
  5. Makita
  6. •
  7. Drill
  8. •
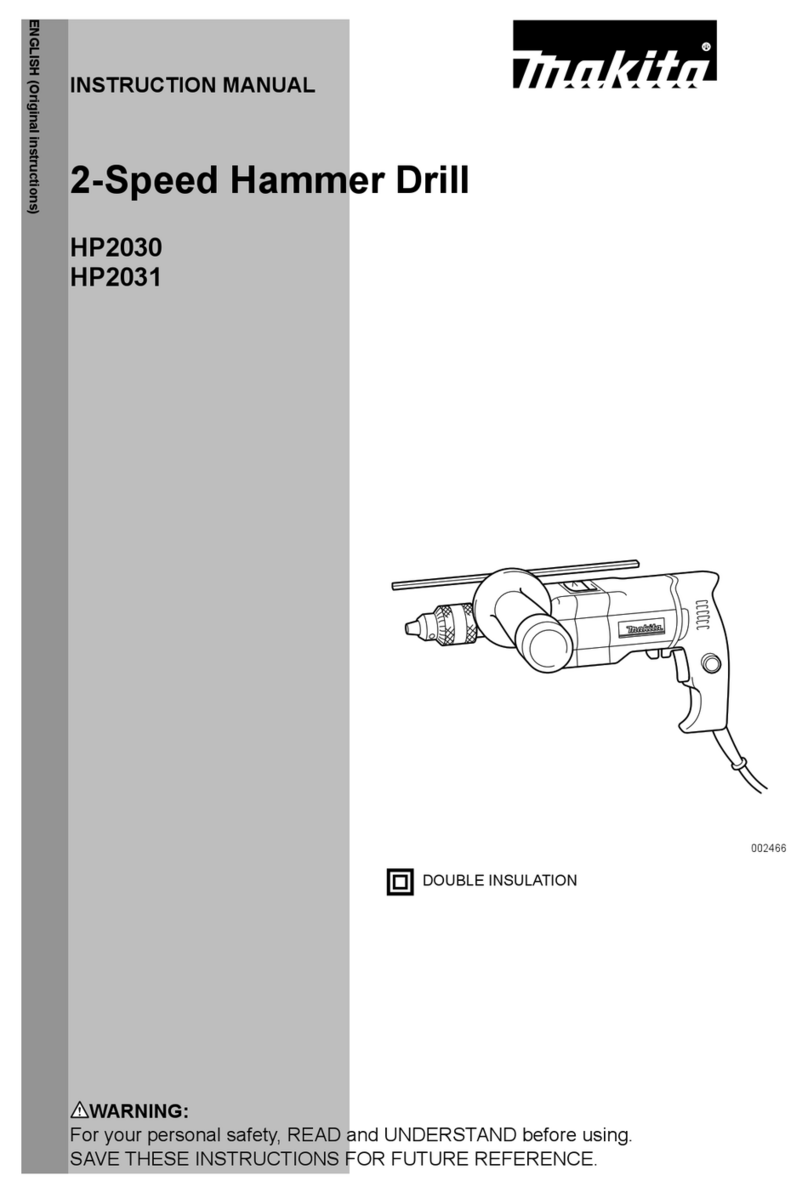
  9. Makita HP2030 User manual

Makita HP2030 User manual

Other manuals for HP2030

2

This manual suits for next models

1

Other Makita Drill manuals

Makita FD10 User manual

Makita

Makita FD10 User manual

Makita M8301D003 User manual

Makita

Makita M8301D003 User manual

Makita DA4030 User manual

Makita

Makita DA4030 User manual

Makita 8414D User manual

Makita

Makita 8414D User manual

Makita DDF453SYE User manual

Makita

Makita DDF453SYE User manual

Makita FD09 User manual

Makita

Makita FD09 User manual

Makita M8103 User manual

Makita

Makita M8103 User manual

Makita 6096D User manual

Makita

Makita 6096D User manual

Makita HP2051HJ User manual

Makita

Makita HP2051HJ User manual

Makita 6226D User manual

Makita

Makita 6226D User manual

Makita DA4000LR User manual

Makita

Makita DA4000LR User manual

Makita DP2010 User manual

Makita

Makita DP2010 User manual

Makita DP3002 User manual

Makita

Makita DP3002 User manual

Makita BDF456 User manual

Makita

Makita BDF456 User manual

Makita DA001G User manual

Makita

Makita DA001G User manual

Makita BHP343 User manual

Makita

Makita BHP343 User manual

Makita DTS131 User manual

Makita

Makita DTS131 User manual

Makita 8406 User manual

Makita

Makita 8406 User manual

Makita DDF470 User manual

Makita

Makita DDF470 User manual

Makita BDF450 User manual

Makita

Makita BDF450 User manual

Makita 6200D User manual

Makita

Makita 6200D User manual

Makita BDF343 User manual

Makita

Makita BDF343 User manual

Makita BHP343 User manual

Makita

Makita BHP343 User manual

Makita BDF441 User manual

Makita

Makita BDF441 User manual

Popular Drill manuals by other brands

Stanley FatMax FME140 Original instructions

Stanley

Stanley FatMax FME140 Original instructions

Black & Decker MATRIX BDCDMT120C instruction manual

Black & Decker

Black & Decker MATRIX BDCDMT120C instruction manual

DeWalt D25134 manual

DeWalt

DeWalt D25134 manual

Skil 2431 Original instructions

Skil

Skil 2431 Original instructions

Bort 93728410 user manual

Bort

Bort 93728410 user manual

GreenWorks DDG407 Operator's manual

GreenWorks

GreenWorks DDG407 Operator's manual

Panasonic EY7460 - DRILL DRIVER 21.6V operating instructions

Panasonic

Panasonic EY7460 - DRILL DRIVER 21.6V operating instructions

Mueller E-5 operating instructions

Mueller

Mueller E-5 operating instructions

Bosch GSB Professional 18-2 RE Original instructions

Bosch

Bosch GSB Professional 18-2 RE Original instructions

Clarke CON18LI Operation & maintenance instructions

Clarke

Clarke CON18LI Operation & maintenance instructions

Stanley SCH20 user manual

Stanley

Stanley SCH20 user manual

Black & Decker LDX220 instruction manual

Black & Decker

Black & Decker LDX220 instruction manual

GMC HD1400K instruction manual

GMC

GMC HD1400K instruction manual

POWERBOR PB1000E owner's manual

POWERBOR

POWERBOR PB1000E owner's manual

Festool T18+3 instructions

Festool

Festool T18+3 instructions

Draper 56407 manual

Draper

Draper 56407 manual

Bosch PSB 530 RA operating instructions

Bosch

Bosch PSB 530 RA operating instructions

Maximum 054-1359-4 instruction manual

Maximum

Maximum 054-1359-4 instruction manual

manuals.online logo
manuals.online logoBrands
  • About & Mission
  • Contact us
  • Privacy Policy
  • Terms and Conditions

Copyright 2025 Manuals.Online. All Rights Reserved.

P-Speed Hammer Drill
MODEL
HP2030
Variable speed
I
Reversing
MODEL
HP2031
Variable speed / Reversing
INSTRUCTION MANUAL
SPECIFICATIONS
No
load speed
Blows
IRPM)
per mimte
Speed
0
~
9,400
Manufacturer reserves the right to change specifications without notice.
Specifications may differ from country to country.
WARNING: For your personal safety, READ and UNDERSTAND before using.
SAVE THESE INSTRUCTIONS FOR FUTURE REFERENCE.
DOUBLE
INSULATION
Overall
372
mm
2.3
kg
(15-518") (5.1
Ibs)
GENERAL SAFETY RULES
(For
All
Tools)
WARNING! Read
and
understand
all
instructions.
Failure
tofollow all instructions listed below, may result
in
electric
shock,
fire and/or serious personal injury.
SAVE
THESE INSTRUCTIONS
READ ALL INSTRUCTIONS.
1.
2.
3.
4.
5.
6.
7.
8.
9.
IO.
2
Keepyour work area cleanand well
lit.
Cluttered benches and dark areas invite
accidents.
Do
notoperate power tools
in
explosiveatmospheres, such as
in
the presence
of flammable liquids, gases, or dust. Power tools create sparks which may
ignite the dust or fumes.
Keep bystanders, children, and visitors away while operating a power tool.
Distractions can cause you to loose control.
Double Insulatedtools are equipped witha polarized plug(oneblade iswider
than the other.] This plug will
fit
in
a
polarized outlet only one way.
If
the
plug does not
fit
fully
in
the outlet, reverse the plug.
If
it
still does not
fit,
contact a qualified electrician to install a polarized outlet. Do not change
the plug
in
any way. Double insulation
IE
eliminates the need for the three
wire grounded power cord and grounded power supply system.
Avoid bodycontactwith grounded surfaces such as pipes, radiators, ranges
and refrigerators. There is an increased risk of electric shock if your body is
grounded.
Don't expose power tools torain or wet conditions. Water entering a power
tool
will
increase the risk of electric shock.
Donotabuse the cord. Never usethe cord tocarry the tools or pullthe plug
from an outlet. Keepcord away from heat, oil, sharp edges or movingparts.
Replace damaged cords immediately. Damaged cords increase the risk of
electric shock.
When operating a power tool outside, use anoutdoor extension cord marked
"W-A" or "W." These cords are rated for outdoor use and reduce the risk
of electric shock.
Stay
alert, watch
what
you are doingand use common sense
when
operating
a power tool.
Do
not use tool while tired or under the influence
of
drugs,
alcohol, or medication.
A
moment
of
unattentionwhile operating power tools
may
result
in
serious personal injury.
Dressproperly. Donotwear loose clothing orjewelry. Contain longhair. Keep
your hair, clothing, andglovesaway from moving parts.
Loose
clothes, jewelry
or long hair can be caught
in
moving parts.
11. Avoid accidental starting. Be sure switch is off before plugging
in.
Carrying
tools
with
your finger onthe switch or plugging in
tools
that have the switch
on invites accidents.
12. Remove adjusting keys or switches before turning the tool on. A wrench or
a key that is left attached to a rotating part of the tool may result
in
personal
i
n
j
ury.
13. Donotoverreach.Keep properfooting and balanceat alltimes. Proper footing
and
balance
enables
better
control
of
the
tool
in
unexpected situations.
14.
Use safety equipment. Always wear eye protection. Dust mask, non-skid
safety shoes, hard hat, or hearing protection must be used for appropriate
conditions.
15.
Use clamps
or
another practical way to secure and support the workpiece
to a stable platform. Holding the work
by
hand or against your body is
unstable and maylead
to
loss
ofcontrol.
16.
Do
notforce the tool. Use the correct tool for your application. The correct
tool
will
dothejob better andsafer atthe ratefor which
it
isdesigned.
17. Do not use tool if switch does not turn
it
on or off. Any tool that cannot
be controlled with the switch is dangerous and must be repaired.
18. Disconnect the plugfrom the power source before making any adjustments,
changing accessories, or storing the tool. Such preventive safety measures
reduce the risk of starting the tool accidentally.
19. Store idle tools out of reach of children and other untrained persons.
Tools
are dangerous in the hands of untrained users.
20. Maintain tools with care. Keep cutting tools sharp and clean. Properly
maintainedtools, with sharp cuttingedges are less likelytobind and are easier
to control.
21.
Check
for misalignment or
binding
of
moving parts,
breakage
of
parts, and
any other condition that may affect the tools operation.
If
damaged, have
the tool serviced before using. Many accidents are caused
by
poorly
maintainedtools.
22. Use only accessories that are recommended
by
the manufacturer for your
model. Accessories that may be suitable for one tool, may become hazardous
when used on another tool.
23.
Tool
service must be performed only by qualified repair personnel. Service
or maintenance performed by unqualified personnel could result in a risk of
injury.
24.
When servicing a tool, use only identical replacement parts. Followinstruc-
tions
in
the Maintenance section
of
this manual. Use of unauthorized parts
or failure
to
follow Maintenance Instructions may create a risk of electric
shock or injury.
3
Specific Safety Rules
1.
Wear a hard hat (safety helmet), safety glasses and/or face shield.
It
isalso
highly recommended that you wear a dust mask, ear protectors and thickly
padded gloves.
2.
Undernormaloperation, thetool isdesignedtoproduce vibration. Thescrews
can come looseeasily, causing a breakdown or accident. Check tightness of
screws carefully before operation.
3.
Always be sure you have a firm footing.
Be sure no one is below when using the tool
in
high locations.
4.
Hold the tool firmly with both hands. Always use the side grip.
5.
Keep hands away from rotating parts.
6.
Do
not leave the tool running. Operate the tool only when hand-held.
7.
When drilling intowalls, floors or wherever "live" electrical wires may be en-
countered,
DO
NOTTOUCH ANY METAL PARTS
OF
THE TOOL! Holdthe tool
by the insulated grasping surfaces to prevent electric shock if you driU into
a "live" wire.
8.
Do
not touch the
bit
or the workpiece immediately after operation; they may
be extremely hot and could burn your skin.
.
~
SAVE THESE INSTRUCTIONS.
4
The following show the symbols used for tool.
v
.................................
volts
A
.................................
amperes
Hz
.................................
hertz
kg
.................................
ki
lograms
h
.................................
hours
min
.................................
minutes
S
.................................
seconds
Q
.................................
alternating current
-
____
.................................
direct current
fi
.................................
no load speed
.................................
alternating or direct current
.................................
Class
II
Construction
A
.................................
splash-proof construction
bb
.................................
watertight construction
...
/min
................................
revolutions or reciprocation per minute
@
.................................
number of blow
5
CAUTION:
Always be sure that the tool
is
switched off and unpluggedbefore installingor removing
the side grip, bitor other accessories.
.
Side grip (auxiliary handle)
Always use the side grip to ensure operat-
ing safety. Install the side grip
so
that the
teeth on the grip fit inbetweenthe protru-
sions (A) on the tool barrel. Then tighten
the grip by turning clockwise
at
the desired
position.
It
may
be swung 360'
so
as
tobe
secured
at
any position. To remove the side
grip, loosen
it
by turning counterclockwise.
Then push the grip base away from the
tool barrel to disengage
it
from the protru-
sions
(B)
Installingor removingthe drill bit
For Model HP2030
To
install the bit, place
it
in the chuck
as
far
as
it
will go. Tighten the chuck by
hand. Place the chuck key in each of the
three holes and tighten clockwise. Be sure
to tighten
all
three chuck holesevenly.
To
remove the bit, turn the chuck key
counterclockwise in just one hole, then
loosen the chuck by hand.
After using the chuck key, be sure to re-
turn
it
to the originalposition.
For Model HP2031
Hold the ring and turn the
sleeve
counter-
clockwise to open the chuck jaws.
Place
the bit in the chuck
as
far
as
it
will go.
Hold the ring firmly and turn the
sleeve
clockwiseto tighten the chuck.
To remove the bit, hold the ring and turn
the
sleeve
counterclockwise.
Grip
base
-
Side
grip
-
Loosen
r-
Protrusions
Teeth
(A)
6
Depthgauge
The depth gauge
is
convenient for drilling
holes of uniform depth.
Loosen
the side
grip and insert the depth gauge into the
hole in the side grip. Adjust the depth
gauge to the desired depth and tighten the
side grip.
NOTE
:
The depth gauge cannot be used
at
the position where the depthgauge strikes against the
gear housing.
Switch
action
CAUTION
:
Before plugging in the tool, always check to
see
that the switchtirgger actuates properly
and returnsto the "OFF" position when released.
To
start the tool, simply pull the trigger.
Tool
speed
is
increased by increasing pres-
sure on the trigger.
Release
the trigger to
stop.
For continous operation, pull the trigger
and then push inthe lock button. To stop
the tool from the locked position, pull the
trigger fully, then release
it.
Reversing switch lever
-
7
Reversing switch action
CAUTION:
Always check the direction of rotation before operation.
.Use the reversing switch only after the tool comes to
a
complete stop. Changing the
This tool has
a
reversing switch to change the direction of rotation. Move the reversing
switch lever to the
0
position for clockwise rotation or the
0
position for counter-
clockwise rotation.
direction of rotation beforethe tool stops may damage the tool.
Speed change
CAUTION
:
Use the speed change lever only after the tool comes to
a
complete stop. Using the speed
change lever beforethe tool stops may damage the tool.
Two rpm ranges can be preselected with the speed change lever. Turn the lever to the
position
1
for low speed or the position
2
for high speed. If the lever
is
not turned
smoothly, turn the chuck slightly ineither direction and then turnthe lever again.
Action
mode
change
lever
-\
Position
1
Position
2
8
Selecting the action mode
For
rotation
only,
turn
the
action mode
change lever tothe position of
OIIP
symbol.
For rotation with hammering, turn the
action mode change lever
to
the position
of
+
symbol.
For rotation
only
For rotation
with
hammering
CAUTION
:
Always turn the lever fully to your desired mode position. If you operate the
tool
with
the lever positioned half-waybetween the mode symbols, the tool may be damaged.
Operation
1)
Hammer drilling operation
When drilling in concrete, granite,
tile,
etc.,
turn the action mode change lever tothe
position of
+
symbol. Be sure
to
use
a
tungsten-carbide tipped bit.
Do
not apply
more pressure when the hole becomes clogged with chips or particles. Instead, run the
tool
at
an idle, then remove the bit partially from the hole.
By
repeating this several
times, the holewill be cleaned out.
After drilling the hole, use the blow-out
bulbtocleanthe dust out of the hole.
9
2)
Drillil
When
the p1
Dril
Whe
guid
piec
e
Dril
TO
cenl
inde
Use
shot
CAU'
Pres
pres
and
The
thrc
the
.A
s1
in
o
it
fii
Alw
MAIN1
CAUTIC
Always
I
inspect
ic
To main
replacem
Authoriz
10
operation
rilling inwood, metalor plastic materials, turn the actionmode change lever to
tion of
0-m
symbol.
g
inwood
drilling in wood, best results are obtained with wood drills equipped with
a
screw. The guide screw makes drilling easier by pulling the bit into the work-
g
in
metal
avent the bit from slipping when starting
a
hole, make an indentation with
a
punch and hammer
at
the point to be drilled.
Place
the point of the bit in the
ation and
start
drilling.
cutting lubricantwhen drilling metals. The exceptions are iron and brass which
I
be drilleddry.
3N
:
ig
excessively on the tool will not speed up the drilling. Infact, this excessive
re will only serve to damage the tip of your bit, decrease the tool performance
orten the service lifeof the tool.
is
a
tremendous twisting force exerted onthe tool/bit
at
the time of holebreak-
Ih. Hold the tool firmly and exert care when the bit begins to breakthrough
wkpiece.
:k bit can be removedsimply by settingthe reversingswitch to reverse rotation
er to back out. However, the tool may back out abruptly if you do not hold
s
secure small workpieces in
a
vise
or similar hold-downdevice.
lY.
NANCE
sure that the tool
is
switched off and unplugged beforeattemptingto perform
or maintenance.
n product SAFETY and RELIABILITY, repairs, carbon brush inspectionand
it,
any other maintenance or adjustment should be performed by Makita
I
or FactoryService Centers, always using Makita replacementparts.