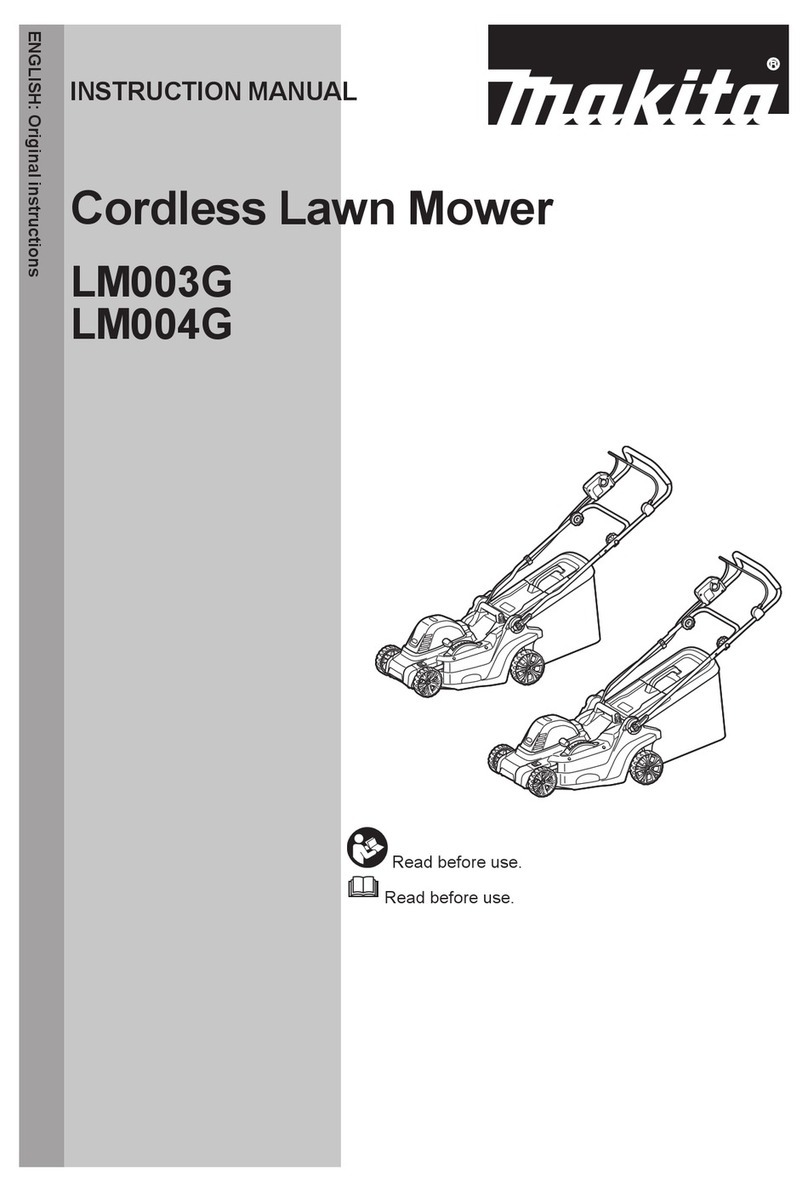
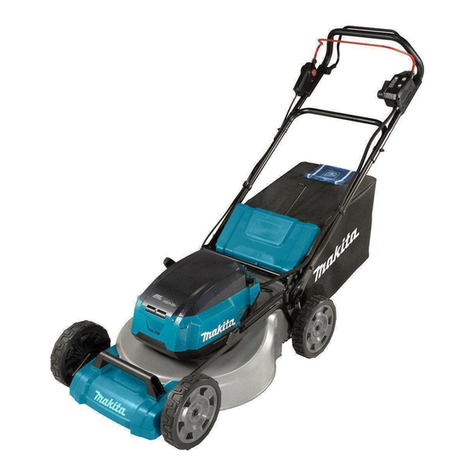
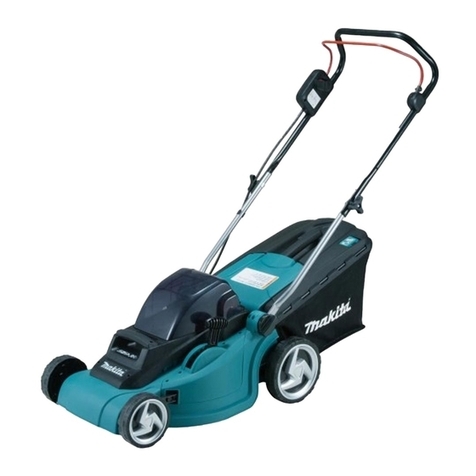
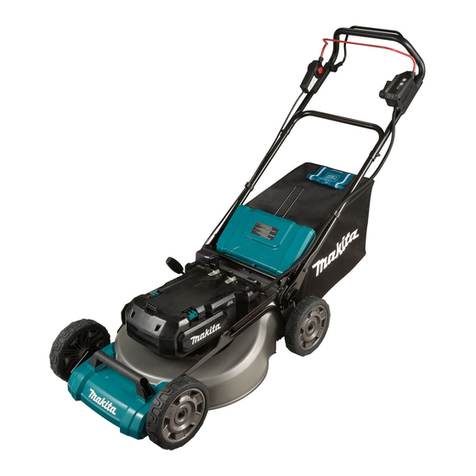
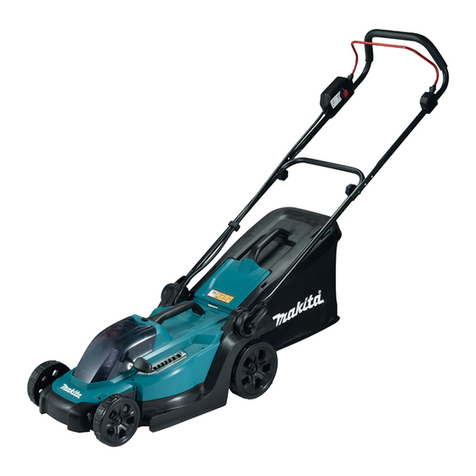
Makita DLM462 User manual

INSTRUCTION MANUAL
MANUEL D'INSTRUCTION
MANUAL DE INSTRUCCIONES
Cordless Lawn Mower
Tondeuse Sans Fil
Cortadora de Cesped
DLM462
DLM530
DLM532
IMPORTANT: Read Before Using.
IMPORTANT : Lire avant usage.
IMPORTANTE: Lea antes de usar.

2ENGLISH
ENGLISH (Original instructions)
SPECIFICATIONS
Model: DLM462 DLM530 DLM532
Mowing width (blade diameter) 460 mm (18-1/8″) 534 mm (21″)
No load speed 2,500 /min 2,300 /min
Maximum speed 3,300 /min 2,800 /min
Part number of replacement mower blade 191D51-9 191D52-7
Dimensions
(L x W x H)
L: 1,610 mm to 1,690 mm
(63-1/2″ to 66-1/2″)
W: 535 mm (21″)
H: 980 mm to 1,095 mm
(38-1/2″ to 43″)
L: 1,630 mm to 1,715 mm (64″ to 67-1/2″)
W: 590 mm (23-1/4″)
H: 990 mm to 1,095 mm (39″ to 43″)
Traveling speed 2.5 - 5.0 km/h
(1.6 - 3.1 mile/h)
–2.5 - 5.0 km/h
(1.6 - 3.1 mile/h)
Rated voltage D.C. 36 V
Net weight
36 - 39 kg (79 - 86 lbs) 36 - 40 kg (79 - 88 lbs) 40 - 43 kg (88 - 95 lbs)
Protection degree IPX4
•
Due to our continuing program of research and development, the specications herein are subject to change without notice.
• Specications may dier from country to country.
• The weight may dier depending on the attachment(s), including the battery cartridge. The lightest and heavi-
est combination, according to EPTA-Procedure 01/2014, are shown in the table.
Applicable battery cartridge and charger
Battery cartridge
BL1815N / BL1820B / BL1830 / BL1830B / BL1840B / BL1850B / BL1860B
Charger DC18RC / DC18RD / DC18RE / DC18SD / DC18SE / DC18SF
•
Some of the battery cartridges and chargers listed above may not be available depending on your region of residence.
WARNING: Only use the battery cartridges and chargers listed above. Use of any other battery cartridges
and chargers may cause injury and/or re.
SAFETY WARNINGS
IMPORTANT SAFETY INSTRUCTIONS
WARNING: When using electric lawn mow-
ers, basic safety precautions should always be
followed to reduce the risk of re, electric shock,
and personal injury; including the following.
Read All Instructions
Read, understand, and follow all instructions on the
mower and in the instruction manuals. Be thoroughly
familiar with the controls and the proper use of the
mower before starting.
WARNING!
Training
1. This mower is capable of amputating hands
and feet and throwing objects. Failure to
observe the following safety instructions
could result in serious injury or death.
2. Only allow responsible adults, who are familiar
with the instruction, to operate the mower.
Preparation
1. Keep Children Away - All visitors should be kept
a safe distance from work area. Be alert and turn
mower o if a child enters the area. Use extra care
when approaching blind corners, shrubs, trees, or
other objects that may block your view of a child.
2. Dress Properly - Do not wear loose clothing
or jewelry. They can be caught in moving parts.
Use of rubber gloves and substantial footwear is
recommended when working outdoors. Do not
operate the mower when barefoot or wearing open
sandals.
3. Use Safety Glasses- Always use face or dust
mask if operation is dusty.
4. Objects struck by the lawn mower blade can
cause severe injuries to persons. The lawn
should always be carefully examined and
cleared of all objects prior to each mowing.
Stay behind the handle when the engine
(motor) is running.
5. Be sure the area is clear of other people before
mowing. Stop mower if anyone enters the area.
6. Do not insert the lock key into mower until it is
ready to be used.

3ENGLISH
7. Watch for holes, ruts, bumps, rocks, or other
hidden objects. Uneven terrain could cause a slip
and fall accident. Tall grass can hide obstacles.
8. Check the blades or blade bolts carefully for
cracks or damage before operation. Replace
cracked or damaged blades or blade bolts
immediately.
9. Do not insert or remove the lock key in the
rain.
Operation
1. Avoid Dangerous Environment - Never operate
the mower in damp or wet locations. Always be
sure of your footing: keep a rm hold on the han-
dle and walk; never run.
2. Don't Use In Rain.
3. Use Right Appliance - Do not use lawn mower for
any job except that for which it is intended.
4. Don't Force Lawn Mower - It will do the job better
and safer at the rate for which it was designed.
5. Don't Overreach - Keep proper footing and
balance at all times. Do not mow near drop os,
ditches, or embankments. You could lose your
footing or balance.
6. Stay Alert - Watch what you are doing. Use com-
mon sense. Do not operate lawn mower when you
are tired. Do not operate machine while under the
inuence of alcohol or drugs. A moment of inat-
tention while operating the mower may result in
serious personal injury.
7. Remove Battery From Lawn Mower - Remove
the battery when not in use, before servicing,
cleaning, removing material from the lawn mower,
or changing accessories such as mower blades,
and the like.
8. Keep hands and feet away from cutting area.
Keep clear of the discharge opening at all
times.
9. If the mower strikes a foreign object, follow
these steps:
• Stop the mower. Release the switch. Wait
until the blade comes to a complete stop.
• Remove the lock key and the battery
cartridge.
• Inspect the mower for any damage.
• Repair any damage before restarting and
operating the mower. Replace the blade if it
is damaged in any way.
10. Never direct discharged material toward
anyone. Avoid discharging material against a
wall or obstruction. Material may ricochet back
toward the operator. Stop the blade when crossing
gravel surfaces.
11. Do not pull the mower backwards unless
absolutely necessary. When you are compelled
to back the mower from a fence or other similar
obstruction, look down and behind before and
while moving backwards.
12. Release switch lever and wait for blade rota-
tion to stop before crossing driveways, walks,
roads and any gravel-covered areas. Also
remove the lock key if you leave it, reach to pick
up or remove something out of your way, or for
any other reason that may distract you from what
you are doing.
13. Do not operate machine without the entire
grass catcher, discharge guard, rear guard, or
other safety protective devices in place and
working.
14. Stop the motor and remove the lock key when-
ever you leave the equipment, before cleaning
the mower or unclogging the chute and mak-
ing any repairs or inspections.
15. Shut the motor o and wait until the blade
comes to a complete stop before removing the
grass catcher. Beware that the blades coast after
turn o.
16. Mow only in daylight or good articial light.
17. If the mower starts to vibrate abnormally
(check immediately)
- inspect for damage,
- replace or repair any damaged parts,
- check for and tighten any loose parts.
18. Don't grasp the exposed cutting blades or
cutting edges when picking up or holding the
appliance.
19. Never attempt to make cutting height adjust-
ments while mower is running if the mower
has cutting height adjustment feature.
20. Mow across the face of slopes, never up and
down. Exercise extreme caution when chang-
ing direction on slopes. Do not mow exces-
sively steep slopes. Poor footing could cause a
slip and fall accident.
21. Avoid operating the mower in wet grass.
22. Stop operation immediately if you notice
anything unusual. Switch o the mower and
remove the lock key. Then inspect the mower.
23. Do not start the mower when standing in front
of the discharge opening.
24. Avoid using the mower in bad weather con-
ditions especially when there is a risk of
lightning.
25. When you use the machine on muddy ground,
wet slope, or slippery place, pay attention to
your footing.
26. Avoid working in poor environment where
increased user fatigue is expected.
27. Do not use the machine in bad weather where
visibility is limited. Failure to do so may cause
fall or incorrect operation due to low visibility.
28. Do not submerge the machine into a puddle.
29. When wet leaves or dirt adhere to the suc-
tion mouth (ventilation window) due to rain,
remove them.
30. Do not use the machine in the snow.
31. If the cut-o grass is wet, it is likely to be
clogged inside of the machine. Check the con-
dition of the machine regularly, and remove the
adhered grass as necessary.
32. When operating the machine, pay attention to
piping and wiring.
33. Do not use a corded power supply such as bat-
tery adapter or portable power pack with this
machine. The cable of such power supply may
hinder the operation and result in personal injury.

4ENGLISH
Maintenance and storage
1. Store Idle Lawn Mower Indoors - When not in
use, lawn mower should be stored in an indoor dry
and locked-up place - out of reach of children.
2. Maintain Lawn Mower With Care - Keep cutting
edges sharp and clean for best and safest per-
formance. Follow instructions for lubricating and
changing accessories. Inspect lawn mower cord
periodically and if damaged, have it repaired by
an authorized service facility. Keep handles dry,
clean, and free from oil and grease.
3. Keep machine free of grass, leaves, or other
debris build up. Keep guards in place and in
working order.
4. Keep blades sharp.
5. Use identical replacement blades only.
6. Check the grass basket frequently for wear or
deterioration. For storage, always make sure
the grass basket is empty. Replace a worn grass
basket with a new factory replacement one for
safety.
7. Check grass basket components and the
discharge guard frequently and replace with
manufacturer’s recommended parts, when
necessary.
8. Check the blade mounting bolt at frequent
intervals for proper tightness.
9. Keep all nuts, bolts, and screws tight to
be sure the equipment is in safe working
condition.
10. Never remove or tamper with safety devices.
Check their proper operation regularly. Never
do anything to interfere with the intended
function of a safety device or to reduce the
protection provided by a safety device.
11. Be careful during adjustment of the mower
to prevent entrapment of the ngers between
moving blades and xed parts of the mower.
12. Always allow the mower to cool down before
storing.
13. When servicing the blades be aware that, even
though the power source is switched o, the
blades can still be moved.
14. Maintain or replace safety and instruction
labels, as necessary.
15. Do not leave the machine unattended outdoors
in the rain.
16. Do not wash the machine with high pressure
water.
17. When washing the machine, be sure to remove
the battery and lock key and close the battery
cover, and pour water toward the bottom of the
machine to which the blade is attached.
18. When storing the machine, avoid direct sun-
light and rain, and store it in a place where it
does not get hot or humid.
19. Perform inspection or maintenance in a place
where rain can be avoided.
20. After using the machine, remove the adhered
dirt and dry the machine completely before
storing. Depending on the season or the area,
there is a risk of malfunction due to freezing.
Battery tool use and care
1. Prevent unintentional starting. Ensure the
switch is in the o-position before connecting
to battery pack, picking up or carrying the
machine. Carrying the machine with your nger
on the switch or energizing machine that have the
switch on invites accidents.
2. Disconnect the battery pack from the machine
before making any adjustments, changing
accessories, or storing machine. Such preven-
tive safety measures reduce the risk of starting the
machine accidentally.
3. Recharge only with the charger specied by
the manufacturer. A charger that is suitable for
one type of battery pack may create a risk of re
when used with another battery pack.
4. Use machines only with specically desig-
nated battery packs. Use of any other battery
packs may create a risk of injury and re.
5. When battery pack is not in use, keep it away
from other metal objects, like paper clips,
coins, keys, nails, screws or other small metal
objects, that can make a connection from one
terminal to another. Shorting the battery termi-
nals together may cause burns or a re.
6. Under abusive conditions, liquid may be
ejected from the battery; avoid contact. If con-
tact accidentally occurs, ush with water. If
liquid contacts eyes, seek medical help. Liquid
ejected from the battery may cause irritation or
burns.
7. Do not use a battery pack or machine that is
damaged or modied. Damaged or modied
batteries may exhibit unpredictable behaviour
resulting in re, explosion or risk of injury.
8. Do not expose a battery pack or machine to
re or excessive temperature. Exposure to re
or temperature above 130°C (265°F) may cause
explosion.
9. Follow all charging instructions and do not
charge the battery pack or machine outside of
the temperature range specied in the instruc-
tions. Charging improperly or at temperatures
outside of the specied range may damage the
battery and increase the risk of re.
10. Have servicing performed by a qualied repair
person using only identical replacement parts.
This will ensure that the safety of the product is
maintained.
11. Do not modify or attempt to repair the machine
or the battery pack except as indicated in the
instructions for use and care.
Electrical and battery safety
1. Do not dispose of the battery(ies) in a re.
The cell may explode. Check with local codes for
possible special disposal instructions.
2. Do not open or mutilate the battery(ies).
Released electrolyte is corrosive and may cause
damage to the eyes or skin. It may be toxic if
swallowed.
3. Do not charge battery in rain, or in wet
locations.
4. Do not charge the battery outdoors.
5ENGLISH
5. Do not handle charger, including charger plug,
and charger terminals with wet hands.
6. Do not charge lawn mower in rain, or in wet
locations.
7. When replacing batteries, all batteries should
be replaced at the same time. Mixing fresh and
discharged batteries could increase internal cell
pressure and rupture the discharged battery.
8. Exercise care in handling batteries in order not
to short the battery with conducting materials
such as rings, bracelets, and keys. The battery
or conductor may overheat and cause burns.
9. Do not replace the battery in the rain.
10. Do not wet the terminal of battery with liquid
such as water, or submerge the battery. Do not
leave the battery in the rain, nor charge, use,
or store the battery in a damp or wet place. If
the terminal gets wet or liquid enters inside of bat-
tery, the battery may be short circuited and there is
a risk of overheat, re, or explosion.
11. After removing the battery from the machine or
charger, be sure to attach the battery cover to
the battery and store it in a dry place.
12. Do not replace the battery with wet hands.
Service
1. Have your power tool serviced by a qualied
repair person using only identical replacement
parts. This will ensure that the safety of the power
tool is maintained.
2. Never service damaged battery packs. Service
of battery packs should only be performed by the
manufacturer or authorized service providers.
SAVE THESE INSTRUCTIONS.
WARNING: Use of this product can create
dust containing chemicals which may cause
respiratory or other illnesses. Some examples of
these chemicals are compounds found in pesti-
cides, insecticides, fertilizers and herbicides.
Your risk from these exposures varies, depend-
ing on how often you do this type of work. To
reduce your exposure to these chemicals: work
in a well ventilated area, and work with approved
safety equipment, such as those dust masks that
are specially designed to lter out microscopic
particles.
Symbols
The followings show the symbols used for tool.
volts
direct current
no load speed
revolutions or reciprocation per minute
Important safety instructions for
battery cartridge
1.
Before using battery cartridge, read all instruc-
tions and cautionary markings on (1) battery char-
ger, (2) battery, and (3) product using battery.
2. Do not disassemble battery cartridge.
3. If operating time has become excessively
shorter, stop operating immediately. It may
result in a risk of overheating, possible burns
and even an explosion.
4. If electrolyte gets into your eyes, rinse them
out with clear water and seek medical atten-
tion right away. It may result in loss of your
eyesight.
5. Do not short the battery cartridge:
(1) Do not touch the terminals with any con-
ductive material.
(2) Avoid storing battery cartridge in a con-
tainer with other metal objects such as
nails, coins, etc.
(3) Do not expose battery cartridge to water
or rain.
A battery short can cause a large current ow, over-
heating, possible burns and even a breakdown.
6. Do not store the tool and battery cartridge in
locations where the temperature may reach or
exceed 50 °C (122 °F).
7. Do not incinerate the battery cartridge even if
it is severely damaged or is completely worn
out. The battery cartridge can explode in a re.
8. Be careful not to drop or strike battery.
9. Do not use a damaged battery.
10.
The contained lithium-ion batteries are subject to
the Dangerous Goods Legislation requirements.
For commercial transports e.g. by third parties,
forwarding agents, special requirement on pack-
aging and labeling must be observed.
For preparation of the item being shipped, consult-
ing an expert for hazardous material is required.
Please also observe possibly more detailed
national regulations.
Tape or mask o open contacts and pack up the
battery in such a manner that it cannot move
around in the packaging.
11. When disposing the battery cartridge, remove
it from the tool and dispose of it in a safe
place. Follow your local regulations relating to
disposal of battery.
12. Use the batteries only with the products
specied by Makita. Installing the batteries to
non-compliant products may result in a re, exces-
sive heat, explosion, or leak of electrolyte.
13. If the tool is not used for a long period of time,
the battery must be removed from the tool.
SAVE THESE INSTRUCTIONS.
CAUTION: Only use genuine Makita batteries.
Use of non-genuine Makita batteries, or batteries that
have been altered, may result in the battery bursting
causing res, personal injury and damage. It will
also void the Makita warranty for the Makita tool and
charger.

6ENGLISH
Tips for maintaining maximum
battery life
1.
Charge the battery cartridge before completely dis-
charged. Always stop tool operation and charge the
battery cartridge when you notice less tool power.
2.
Never recharge a fully charged battery cartridge.
Overcharging shortens the battery service life.
3.
Charge the battery cartridge with room tempera-
ture at 10 °C - 40 °C (50 °F - 104 °F). Let a hot
battery cartridge cool down before charging it.
4. Charge the battery cartridge if you do not use
it for a long period (more than six months).
ASSEMBLY
WARNING: Always be sure that the lock key
and battery cartridge are removed before carrying
out any work on the mower. Failure to remove the
lock key and the battery cartridge may result in seri-
ous personal injury from accidental start-up.
WARNING: Never start the mower unless it is
completely assembled. Operation of the machine
in a partially assembled state may result in serious
personal injury from accidental start-up.
Installing the handle
NOTICE: When installing handles, position the
cords so that they are not caught by anything
between the handles. If the cord is damaged, the
mower switch may not work.
1. Align the holes in the lower handle with the holes
in the mower body, and then tighten 4 bolts temporarily.
2
1
► 1. Lower handle 2. Bolt
2. Firmly tighten 4 bolts which were temporarily
tightened in step 1 using box wrench 13.
3. Align the hole in the lower handle with the hole in
the upper handle, then insert the bolt from inside, and
then tighten the nut from outside with box wrench 13.
Perform the same procedure on the other side.
3
4
5
2
1
► 1. Bolt 2. Lower handle 3. Nut 4. Hole 5. Upper
handle
CAUTION: Hold the upper handle rmly so
that it does not drop o your hand. Otherwise, the
handle may fall and cause an injury.
4. Attach the holders to the handle.
Align the protrusions on the holder with the holes on the
handle so that the protrusions t in the holes. Position
the cords as shown in the gure.
12
► 1. Cord 2. Holder

7ENGLISH
Removing the mulching plug
1. Open the rear cover.
1
► 1. Rear cover
2. Remove the mulching plug while holding down the
lever.
1
2
► 1. Lever 2. Mulching plug
Installing or removing the grass
basket
To install the grass basket, follow the steps below.
1. Open the rear cover.
1
► 1. Rear cover
2. Hold the handle of the grass basket, and then
hook the grass basket on the rod of the mower body as
shown in the gure.
1
2
3
► 1. Rod 2. Handle 3. Grass basket
To remove the grass basket, open the rear cover, and
then remove the grass basket by holding the handle.
Attaching the mulching plug
1. Open the rear cover, and then remove the grass
basket.
1
2
► 1. Rear cover 2. Grass basket
2. Attach the mulching plug while holding down the
lever, and then release the lever to lock the mulching
plug.
1
2
► 1. Lever 2. Mulching plug

8ENGLISH
Attaching the discharge attachment
For DLM530/DLM532
1.
Open the rear cover, and then remove the grass basket.
1
2
► 1. Rear cover 2. Grass basket
2. Attach the mulching plug while holding down the
lever, and then release the lever to lock the mulching
plug.
1
2
► 1. Lever 2. Mulching plug
3. Open the right side cover, and then attach the
discharge attachment.
Insert the hooks of the discharge attachment under the
rod of the right side cover.
1
2
► 1. Right side cover 2. Discharge attachment
FUNCTIONAL DESCRIPTION
Installing or removing battery cartridge
CAUTION:
Always switch o the machine before
installing or removing of the battery cartridge.
CAUTION:
Hold the machine and the battery car-
tridge rmly when installing or removing battery cartridge.
Failure to hold the machine and the battery cartridge rmly may
cause them to slip o your hands and result in damage to the
machine and battery cartridge and a personal injury.
CAUTION: Make sure that you lock the battery
cover before use. Otherwise, mud, dirt, or water may
cause damage to the product or the battery cartridge.
CAUTION: Always install the battery cartridge
fully until the red indicator cannot be seen. If not,
it may accidentally fall out of the machine, causing
injury to you or someone around you.
CAUTION: Do not install the battery cartridge
forcibly. If the cartridge does not slide in easily, it is
not being inserted correctly.
NOTE: The machine does not work with only one
battery cartridge.
To install the battery cartridge;
1.
Pull up the locking lever, and then open the battery cover.
1
2
► 1. Battery cover 2. Locking lever
2. Align the tongue on the battery cartridge with the
slot on the machine, and then slide the cartridge until it
locks in place with a little click.
1
2
3
►
(1) Battery port 1 (2) Battery port 2 (3) Battery cartridge

9ENGLISH
NOTE: Install at least 2 battery cartridges to battery
port 1 or battery port 2.
3. Insert the lock key in the place shown in the gure
as far as it will go.
1
► 1. Lock key
4. Close the battery cover and push it until it is
latched with the locking lever.
To remove the battery cartridge;
1.
Pull up the locking lever and open the battery cover.
2. Pull out the battery cartridge from the machine
while sliding the button on the front of the cartridge.
3. Pull out the lock key.
4. Close the battery cover.
Switching the battery cartridges
1
► 1. Battery selection switch
The machine uses 2 battery cartridges for operation at a time.
Up to 4 battery cartridges can be installed to the machine.
Before operating the machine, select the battery port 1 or
battery port 2 by turning the battery selection switch.
NOTE: If only 2 battery cartridges are installed to the
machine, be sure to select the battery port to which
the battery cartridges are installed using the battery
selection switch.
Machine / battery protection system
The machine is equipped with a machine/battery protec-
tion system. This system automatically cuts o power to
the motor to extend machine and battery life. The machine
will automatically stop during operation if the machine or
battery is placed under one of the following conditions:
Overload protection
When the battery is operated in a manner that causes
it to draw an abnormally high current, the machine
automatically stops and the main power lamp blinks in
green. In this situation, turn the machine o and stop
the application that caused the machine to become
overloaded. Then turn the machine on to restart.
Overheat protection
When the machine or battery is overheated, the
machine stops automatically and the main power lamp
lights up in red. In this case, let the machine and battery
cool before turning the machine on again.
Overdischarge protection
When the battery capacity is not enough, the machine
stops automatically and the main power lamp blinks in
red. In this case, remove the battery from the machine
and charge the battery cartridges or change the battery
cartridges to fully charged ones.
Indicating the remaining battery capacity
Only for battery cartridges with the indicator
1
2
► 1. Indicator lamps 2. Check button
Press the check button on the battery cartridge to indi-
cate the remaining battery capacity. The indicator lamps
light up for a few seconds.
Indicator lamps Remaining
capacity
Lighted O Blinking
75% to 100%
50% to 75%
25% to 50%
0% to 25%
Charge the
battery.
The battery
may have
malfunctioned.

10 ENGLISH
NOTE: Depending on the conditions of use and the
ambient temperature, the indication may dier slightly
from the actual capacity.
Control panel
The control panel has the main power switch, the mode switch-
ing button, and the indicator of remaining battery capacity.
13
4
56
2
► 1. Battery indicator 2. Mode switching lamp 3. Main
power lamp 4. Check button 5. Mode switching
button 6. Main power switch
Main power switch
WARNING: Always turn o the main power
switch when not in use.
To turn on the machine, press the main power switch.
The main power lamp lights up in green. To turn o the
machine, press the main power switch again.
NOTE: If the main power lamp lights up in red or
blinks in red or green, refer to the instructions for
machine/battery protection system.
NOTE:
This machine employs the auto power-o func-
tion. To avoid unintentional start up, the main power
switch will automatically shut down when the switch
lever and drive lever (if equipped) are not pulled for a
certain period after the main power switch is turned on.
Mode switching button
You can switch the operating mode by pressing the mode
switching button. When the machine is turned on, the
machine starts up in the normal mode. When you press
the mode switching button, the machine shifts to the noise
reduction mode and the mode switching lamp lights up
in green. In the noise reduction mode, you can decrease
the noise at mowing. When you press the mode switching
button again, the machine returns to the normal mode.
Indicating the remaining battery
capacity
Press the check button to indicate the remaining battery
capacities. The battery indicators correspond to each
battery.
Battery indicator status
Remaining battery
capacity
On O
50% - 100%
20% - 50%
0% - 20%
NOTE: The indicator lamps for remaining battery
capacity is just for a reference. The actual bat-
tery capacity may dier depending on the usage
conditions.
NOTE: Before you press the check button to indicate
the remaining battery capacities, stop the machine.
Switch action
WARNING: Before installing the battery car-
tridge, always check to see that the switch lever
actuates properly and returns to the original posi-
tion when released. Operating the machine with a
switch that does not actuate properly can lead to loss
of control and serious personal injury.
NOTE: The mower does not start without pressing the
switch button even the switch lever is pulled.
NOTE: Mower may not start due to the overload
when you try to mow long or dense grass at a time.
Increase the mowing height in this case.
This mower is equipped with the lock key and handle
switch. If you notice anything unusual with either of the
lock key or switch, stop the operation immediately and
have them checked by your nearest Makita Authorized
Service Center.
For DLM462/DLM532
1. Install the battery cartridges. Insert the lock key,
and then close the battery cover.
2. Select the battery cartridges used for operation by
turning the battery selection switch.
3. Press the main power switch.

11 ENGLISH
4. Pull the switch lever toward you while holding
down the switch button. Release the switch button as
soon as the motor starts running.
1 2
► 1. Switch button 2. Switch lever
NOTE: If the lock key is not inserted, the power lamp
blinks in green when you pull the switch lever.
5. While holding the switch lever, push the drive lever
forward and hold it to drive the rear wheels.
1
► 1. Drive lever
NOTE: You can drive the rear wheels by pushing
the drive lever forward and hold it without pulling the
switch lever.
6. Release the drive lever and the switch lever to
stop the machine.
For DLM530
1. Install the battery cartridges. Insert the lock key,
and then close the battery cover.
2. Select the battery cartridges used for operation by
turning the battery selection switch.
3. Press the main power switch.
4. Pull the switch lever toward you while holding
down the switch button. Release the switch button as
soon as the motor starts running.
1 2
► 1. Switch button 2. Switch lever
NOTE: If the lock key is not inserted, the power lamp
blinks in green when you pull the switch lever.
5. Release the switch lever to stop the motor.
Adjusting the mowing height
WARNING: Never put your hand or leg under
the mower body when adjusting the mowing
height.
WARNING: Always make sure that the lever
ts in the groove properly before operation.
The mowing height can be adjusted in the range of
between 20 mm (13/16″) and 100 mm (3-15/16″).
Remove the lock key, and then pull the mowing height
adjusting lever outward of the mower body and move it
to your desired mowing height.
1
► 1. Mowing height adjusting lever
The table below shows the relationship between the
number on the mower body and the approximate mow-
ing height.

12 ENGLISH
Number Mowing height
120 mm (13/16″)
226 mm (1″)
332 mm (1-1/4″)
439 mm (1-9/16″)
547 mm (1-7/8″)
655 mm (2-3/16″)
763 mm (2-1/2″)
874 mm (2-15/16″)
986 mm (3-3/8″)
10 100 mm (3-15/16″)
Hold the front grip or the lower handle with one hand,
and then move the mowing height adjusting lever with
the other hand.
1
2
3
► 1. Mowing height adjusting lever 2. Lower handle
3. Front grip
NOTE: The mowing height gures should be used
just as a guideline. Depending on the conditions of
the lawn or the ground, the actual lawn height may
become slightly dierent from the set height.
NOTE: Try a test mowing of grass in a less conspicu-
ous place to get your desired height.
Grass level indicator
Grass level indicator shows the volume of mowed
grass. When the grass basket is not full, the indicator
oats while the blades are running.
1
► 1. Grass level indicator
When the grass basket is almost full, the indicator does
not oat while the blades are running. In this case, stop
the operation immediately and empty the basket.
1
► 1. Grass level indicator
NOTE: This indicator is a rough guide. Depending on
the conditions of inside of the basket, this indicator
may not work properly.
Adjusting the handle height
CAUTION: Before removing the bolts, hold
the upper handle rmly. Otherwise, the handle may
fall and cause an injury.
The handle height can be adjusted in two levels.
1. Remove the upper bolts of the lower handle using
box wrench 13, and then loosen the lower bolts.
1
2
► 1. Upper bolt 2. Lower bolt
2. Adjust the handle height, and then tighten the
upper and lower bolts rmly.

13 ENGLISH
Adjusting the traveling speed
For DLM462/DLM532
1
► 1. Speed lever
The traveling speed can be adjusted with the speed
lever. To decrease the speed, pull the lever toward you,
and to increase the speed, turn the lever forward.
Using mulching plug
The mulching plug allows you to return the cut grass to
the ground without gathering the cut grass in the grass
basket. When you operate the machine with the mulch-
ing plug, be sure to remove the grass basket.
NOTICE: When using the machine with the
mulching plug, make sure that the total length of
grass is 30 mm (1-3/16″) or more, or the cut length
is 15 mm (9/16″) or less.
1
2
► (1) 30 mm (1-3/16″) or more (2) 15 mm (9/16″) or
less
Using discharge attachment
For DLM530/DLM532
The discharge attachment allows you to discharge
the cut grass to the ground from the right side of the
machine without gathering the cut grass in the grass
basket. When you operate the machine with the dis-
charge attachment, be sure to install the mulching plug
and remove the grass basket.
Electronic function
The machine is equipped with the electronic functions
for easy operation.
• Constant speed control of blade rotation
Electronic speed control for obtaining constant
speed. Possible to get ne nish, because the
rotating speed is kept constant even under load
condition.
• Soft start at driving
The soft-start function minimizes start-up shock,
and makes the machine start smoothly.
• Electric brake
This machine is equipped with an electric brake.
If the machine consistently fails to quickly stop
the mower blades after releasing the switch lever,
have the machine serviced at Makita Authorized
Service Center.
OPERATION
Mowing
WARNING: Before mowing, clear away sticks
and stones from mowing area. Furthermore, clear
away any weeds from mowing area in advance.
WARNING: Always wear the safety goggles or
safety glasses with side shields when operating
the mower.
CAUTION: If the cut grass or foreign object
blocks up inside of the mower body, be sure to
remove the lock key and battery cartridge and
wear gloves before removing the grass or foreign
object.
NOTICE: Use this machine for mowing lawn only.
Do not mow weeds with this machine.
Firmly hold the handle with both hands when mowing.
The mowing speed guideline is approximately 7 to 14
meters (23 - 46 ft.) per 10 seconds.

14 ENGLISH
The center lines of the front wheels are guidelines to
mowing width. Using the center lines as guidelines,
mow in strips. Overlap by one half to one third the previ-
ous strip to mow the lawn evenly.
12 3
► 1. Mowing width 2. Overlapping area 3. Center line
Change the mowing direction each time to prevent the
grass grain pattern from forming in just one direction.
Periodically check the grass basket for mowed grass.
Empty the grass before it becomes full. Before every
periodical check, be sure to stop the mower then
remove the lock key and the battery cartridge.
NOTICE: Using the mower with the grass basket
full prevents smooth blade rotation and places
an extra load on the motor, which may cause
breakdown.
Mowing a long-grass lawn
Do not try to cut long grass all at once. Instead, mow
the lawn in steps. Leave a day or two between mowings
until the lawn becomes evenly short.
NOTE: Mowing long grass to a short length all at
once may cause the grass to die. The cut grass may
also block up inside of the mower body.
Emptying the grass basket
WARNING: To reduce a risk of accident, reg-
ularly check the grass basket for any damage or
weakened strength. Replace the grass basket if
necessary.
1. Release the switch lever and drive lever (for
DLM462/DLM532), or release the switch lever (for
DLM530).
2. Remove the lock key.
3. Open the rear cover and take out the grass basket
by holding the handle.
1
23
► 1. Rear cover 2. Handle 3. Grass basket
4. Empty the grass basket.

15 ENGLISH
MAINTENANCE
WARNING: Always be sure that the lock
key and battery cartridge are removed from the
mower before storing or carrying the mower or
attempting to perform inspection or maintenance.
WARNING: Always remove the lock key when
the mower is not in use. Store the lock key in a
safe place out of reach of children.
WARNING: Wear gloves when performing
inspection or maintenance.
WARNING: Always wear the safety goggles or
safety glasses with side shields when performing
inspection or maintenance.
NOTICE: Never use gasoline, benzine, thinner,
alcohol or the like. Discoloration, deformation or
cracks may result.
To maintain product SAFETY and RELIABILITY,
repairs, any other maintenance or adjustment should
be performed by Makita Authorized or Factory Service
Centers, always using Makita replacement parts.
Maintenance
1. Remove the lock key and battery cartridges, and
then close the battery cover.
2.
Put the mower on its side so that the mowing height
adjusting lever comes to the upper side. Clean grass
clippings accumulated on the underside of mower deck.
3. Pour water toward the bottom of the machine to
which the blade is attached.
NOTICE: Do not wash the machine with high
pressure water.
4. Check all nuts, bolts, screws, etc. for tightness.
5.
Inspect moving parts for damage, breakage, and wear.
Damaged or missing parts should be repaired or replaced.
6. Store the mower in a safe place out of the reach of
children.
For DLM462/DLM532
NOTICE: Do not pour water to the area shown in
the gure. Pouring water to the motor unit may cause
a malfunction of the machine.
1
► 1. Area where water should not be poured
Carrying the mower
When carrying the mower, hold the front grip and rear
grip with two people as shown in the gure.
12
► 1. Front grip 2. Rear grip
Storing
Store mower indoors in a cool, dry and locked place.
Don't store the mower and charger in locations where
the temperature may reach or exceed 40 °C (104 °F).
Removing or installing the mower
blade
WARNING: The blade coasts for a few sec-
onds after releasing the switch. Do not start any
operation until the blade comes to a complete
stop.
WARNING: Always remove the lock key and
battery cartridge when removing or installing the
blade. Failure to remove the lock key and battery
cartridge may cause a serious injury.
WARNING: Always wear gloves when han-
dling the blade.
Removing the mower blade
1. Put the mower on its side so that the mowing
height adjusting lever comes to the upper side.
2. To lock the blade, insert the pin into a hole on the
mower body.

16 ENGLISH
3.
Turn the bolt counterclockwise with box wrench 17.
2
1
3
► 1. Mower blade 2. Pin 3. Box wrench
4. Remove the bolt, and then mower blade.
3
2
4
1
► 1. Blade support 2. Mower blade 3. Bolt
4. Protrusion
NOTICE: When installing the mower blade, make
sure that the protrusions on the blade support t
in the holes in the mower blade.
Installing the mower blade
WARNING: Install the mower blade carefully.
It has a top/bottom facing.
WARNING: Tighten the bolt clockwise rmly
to secure the blade.
WARNING: Make sure that the mower blade
and all the xing parts are installed correctly and
tightened securely.
WARNING: When you replace the blades,
always follow the instructions provided in this
manual.
NOTICE: After installing the mower blades,
remove the pin from the mower body.
To install the mower blades, perform the removal proce-
dure in reverse.

17 ENGLISH
TROUBLESHOOTING
Before asking for repairs, conduct your own inspection rst. If you nd a problem that is not explained in the manual,
do not attempt to disassemble the machine. Instead, ask Makita Authorized Service Centers, always using Makita
replacement parts for repairs.
State of abnormality Probable cause (malfunction) Remedy
Mower does not start. Two battery cartridges are not installed. Install two charged battery cartridges.
Battery problem (under voltage) Recharge the battery cartridge. If recharging is not
eective, replace battery cartridge.
The lock key is not inserted. Insert the lock key.
Battery selection switch is not in the
correct position.
Select the battery port to which the battery car-
tridges are installed using the battery selection
switch.
Motor stops running after a little use. Battery's charge level is low. Recharge the battery cartridge. If recharging is not
eective, replace battery cartridge.
Cutting height is too low. Increase the cutting height.
Cut grass is clogged in the mower. Remove the clogged grass from the mower.
Motor does not reach maximum
RPM.
Battery cartridge is installed improperly. Install the battery cartridge as described in this
manual.
Battery power is dropping. Recharge the battery cartridge. If recharging is not
eective, replace battery cartridge.
The drive system does not work
correctly.
Ask your local authorized service center for repair.
Mower blade does not rotate:
stop the mower immediately!
Foreign object such as a branch is
jammed near the blade.
Remove the foreign object.
The drive system does not work
correctly.
Ask your local authorized service center for repair.
Abnormal vibration:
stop the mower immediately!
Blade is imbalanced, excessively or
unevenly worn.
Replace the blade.
OPTIONAL ACCESSORIES
CAUTION: These accessories or attachments
are recommended for use with your Makita
machine specied in this manual. The use of any
other accessories or attachments might present a risk
of injury to persons. Only use accessory or attach-
ment for its stated purpose.
If you need any assistance for more details regard-
ing these accessories, ask your local Makita Service
Center.
• Mower blade
• Makita genuine battery and charger
NOTE: Some items in the list may be included in the
product package as standard accessories. They may
dier from country to country.
MAKITA LIMITED WARRANTY
Please refer to the annexed warranty sheet for the
most current warranty terms applicable to this product.
If annexed warranty sheet is not available, refer to the
warranty details set forth at below website for your
respective country.
United States of America: www.makitatools.com
Canada: www.makita.ca
Other countries: www.makita.com

18 FRANÇAIS
FRANÇAIS (Mode d’emploi original)
SPÉCIFICATIONS
Modèle : DLM462 DLM530 DLM532
Largeur de tonte (diamètre de lame) 460 mm (18-1/8″) 534 mm (21″)
Vitesse à vide 2 500 /min 2 300 /min
Vitesse maximale 3 300 /min 2 800 /min
Numéro de pièce de la lame de tondeuse de rechange 191D51-9 191D52-7
Dimensions
(L x P x H)
L : 1 610 mm à 1 690 mm
(63-1/2″ à 66-1/2″)
P : 535 mm (21″)
H : 980 mm à 1 095 mm
(38-1/2″ à 43″)
L : 1 630 mm à 1 715 mm (64″ à 67-1/2″)
P : 590 mm (23-1/4″)
H : 990 mm à 1 095 mm (39″ à 43″)
Vitesse de déplacement 2,5 - 5,0 km/h
(1,6 - 3,1 mile/h)
-2,5 - 5,0 km/h
(1,6 - 3,1 mile/h)
Tension nominale C.C. 36 V
Poids net
36 - 39 kg (79 - 86 lbs) 36 - 40 kg (79 - 88 lbs) 40 - 43 kg (88 - 95 lbs)
Degré de protection IPX4
• Étant donné l’évolution constante de notre programme de recherche et développement, les spécications
contenues dans ce manuel sont sujettes à modication sans préavis.
• Les spécications peuvent varier suivant les pays.
• Le poids peut varier selon les accessoires, y compris la batterie. La plus légère et la plus lourde combinaisons,
selon la procédure EPTA 01/2014, sont indiquées dans le tableau.
Batteries et chargeurs applicables
Batterie
BL1815N / BL1820B / BL1830 / BL1830B / BL1840B / BL1850B / BL1860B
Chargeur DC18RC / DC18RD / DC18RE / DC18SD / DC18SE / DC18SF
• Suivant la région où vous habitez, il se peut que certaines des batteries et certains des chargeurs énumérés
ci-dessus ne soient pas disponibles.
MISE EN GARDE : Utilisez exclusivement les batteries et chargeurs énumérés ci-dessus. L’utilisation
de toute autre batterie ou tout autre chargeur peut entraîner une blessure et/ou un incendie.
CONSIGNES DE
SÉCURITÉ
IMPORTANTES CONSIGNES DE
SÉCURITÉ
MISE EN GARDE : Pour réduire les risques
d’incendie, de décharge électrique et de blessure
lors de l’utilisation des tondeuses électriques,
il importe de toujours prendre des mesures de
sécurité élémentaires, dont les suivantes.
Lisez toutes les instructions.
Vous devez lire, comprendre et respecter toutes les ins-
tructions inscrites sur la tondeuse et dans les manuels
d’instructions. Avant de commencer, familiarisez-vous
bien avec les commandes et l’utilisation adéquate de la
tondeuse.
MISE EN GARDE !
Initiation
1. Cette tondeuse peut amputer des mains et des
pieds et éjecter des objets. Le non-respect des
consignes de sécurité suivantes peut entraîner
de graves blessures ou la mort.
2.
N’autorisez que des adultes responsables, qui
connaissent les instructions, à utiliser la tondeuse.
Préparatifs
1.
Tenez les enfants à distance - Tous les visiteurs
doivent être maintenus à une distance raisonnable
de la zone de travail. Soyez attentif et éteignez la
tondeuse si un enfant s’approche de la zone de travail.
Soyez particulièrement vigilant aux abords d’angles
sans visibilité, de buissons, d’arbres ou d’autres obs-
tacles qui pourraient vous empêcher de voir un enfant.
2.
Portez des vêtements adéquats - Ne portez ni vête-
ments amples ni bijoux. Ils pourraient être happés par
les pièces mobiles. Le port de gants de caoutchouc et de
chaussures robustes est recommandé pour les travaux
extérieurs. Ne faites pas fonctionner la tondeuse si vous
êtes pieds nus ou si vous portez des sandales ouvertes.

19 FRANÇAIS
3. Portez des lunettes de sécurité - Si le travail
génère de la poussière, portez toujours un écran
facial ou un masque antipoussières.
4. Des objets heurtés par la lame de tondeuse
peuvent causer de graves blessures aux per-
sonnes se trouvant à proximité. La pelouse
doit toujours être examinée attentivement
et débarrassée de tout objet avant la tonte.
Restez derrière le guidon pendant que le
moteur tourne.
5. Avant de tondre, assurez-vous qu’il n’y a per-
sonne d’autre que vous dans la zone. Arrêtez
la tondeuse si quelqu’un pénètre dans la zone.
6. N’insérez pas la clé de sécurité dans la
tondeuse si celle-ci n’est pas prête pour
l’utilisation.
7. Faites attention aux trous, ornières, bosses,
cailloux ou autres obstacles cachés. Un terrain
irrégulier présente des risques de glissades et de
chutes. Des obstacles peuvent être cachés dans
les herbes hautes.
8. Avant l’utilisation, vériez toujours soigneu-
sement l’absence de ssures ou de dom-
mages sur les lames ou les boulons de lame.
Remplacez immédiatement la lame ou le bou-
lon de lame ssuré ou endommagé.
9. N’insérez pas ou ne retirez pas la clé de sécu-
rité sous la pluie.
Utilisation
1. Évitez les environnements dangereux -
N’utilisez jamais la tondeuse dans les empla-
cements humides ou mouillés. Assurez-vous
toujours d’être en position stable; saisissez ferme-
ment le guidon et marchez; ne courez jamais.
2. Évitez l’utilisation sous la pluie.
3. Utilisez le bon appareil - N’utilisez pas la ton-
deuse pour eectuer un travail pour lequel elle n’a
pas été conçue.
4. Ne forcez pas la tondeuse - Elle eectuera un
travail de meilleure qualité et plus sécuritaire si
elle est utilisée au régime pour lequel elle a été
conçue.
5. Ne vous étirez pas trop - Assurez-vous d’une
bonne prise au sol et d’une bonne position d’équi-
libre en tout temps. Ne tondez pas près des des-
centes abruptes, fossés et talus. Vous risqueriez
de perdre pied ou de perdre l’équilibre.
6. Restez vigilant - Soyez attentif à vos gestes.
Faites preuve de bon sens. N’utilisez pas la ton-
deuse lorsque vous êtes fatigué. N’utilisez pas la
machine si vous avez consommé de l’alcool ou
une drogue. Un moment d’inattention pendant
l’utilisation de la tondeuse peut entraîner une
grave blessure.
7. Retirez la batterie de la tondeuse à gazon -
Retirez la batterie après l’utilisation, avant de
réparer la tondeuse, de la nettoyer ou d’en retirer
un matériau, ou avant de remplacer des acces-
soires tels que les lames de tondeuse.
8. N’approchez pas les mains et les pieds de la
zone de coupe. Tenez-vous éloigné de l’ouver-
ture de décharge en tout temps.
9. Si la tondeuse heurte un corps étranger, sui-
vez ces étapes :
• Arrêtez la tondeuse. Relâchez l’interrupteur.
Attendez l’arrêt complet de la lame.
• Retirez la clé de sécurité et la batterie.
• Vériez l’absence de dommages sur la
tondeuse.
• Réparez tout dommage sur la tondeuse
avant de la redémarrer et de l’utiliser.
Remplacez la lame si elle est endommagée.
10. Assurez-vous que les matériaux projetés ne le
soient jamais en direction de qui que ce soit.
Évitez de projeter les matériaux contre un mur
ou un obstacle. Ces matériaux pourraient rico-
cher vers l’utilisateur. Arrêtez la lame lorsque vous
traversez une surface de gravier.
11. Ne tirez pas la tondeuse vers l’arrière, à moins
que cela ne soit absolument nécessaire. Si
vous devez tirer la tondeuse vers l’arrière pour
éviter une clôture ou autre obstacle similaire,
regardez en bas et derrière avant et pendant la
marche arrière.
12. Relâchez le levier d’interrupteur et attendez
que la lame cesse de tourner avant de traver-
ser une voie d’accès pour autos, une allée,
une route ou toute surface couverte de gravier.
Retirez également la clé de sécurité si vous vous
en éloignez, si vous vous étirez pour ramasser ou
enlever quelque chose de votre passage, ou pour
toute autre raison qui pourrait détourner votre
attention.
13. N’utilisez pas la machine sans que le bac de
ramassage, la protection d’évacuation, la pro-
tection arrière et les autres dispositifs de sécu-
rité ne soient installés et en fonctionnement.
14. Arrêtez le moteur et retirez la clé de sécurité
chaque fois que vous vous éloignez de l’équi-
pement, avant de nettoyer la tondeuse ou de
déboucher le déecteur et de faire des répara-
tions ou inspections.
15. Éteignez le moteur et attendez l’arrêt com-
plet de la lame avant de retirer le bac de
ramassage. Soyez conscient du fait que la lame
continue de tourner en roue libre après l’arrêt du
moteur.
16. Ne tondez qu’à la lumière du jour ou avec une
bonne lumière articielle.
17. Si la tondeuse se met à vibrer anormalement
(vériez immédiatement)
- vériez l’absence de dommages,
- remplacez ou réparez toute pièce
endommagée,
- s’il y a des pièces mal serrées, resserrez-les.
18. Lorsque vous prenez ou tenez l’appareil, ne le
faites pas par les lames nues ou par les bords
tranchants.
19. Si la tondeuse est dotée d’une fonction de
réglage de la hauteur de coupe, n’essayez
jamais d’ajuster la hauteur de coupe pendant
que la tondeuse tourne.
20. Tondez les pentes dans le sens transversal,
jamais en montant ou en descendant. Soyez
particulièrement prudent lors des change-
ments de direction sur les terrains en pente.
Ne tondez pas sur des pentes excessivement
raides. Une position instable présente des risques
de glissades et de chutes.

20 FRANÇAIS
21.
Évitez d’utiliser la tondeuse sur de l’herbe mouillée.
22. Arrêtez immédiatement votre outil dès que
vous observez quelque chose d’inhabituel.
Éteignez la tondeuse et retirez la clé de sécu-
rité. Inspectez ensuite la tondeuse.
23. Ne vous placez pas devant l’ouverture de
décharge pour faire démarrer la tondeuse.
24. Évitez d’utiliser la tondeuse sous de mau-
vaises conditions météo, et tout spécialement
lorsqu’il y a risque de foudre.
25. Lorsque vous utilisez la machine sur un sol
boueux, une pente mouillée ou un endroit
glissant, faites attention à votre position.
26. Évitez de travailler dans un environnement
médiocre qui risque fortement d’entraîner une
fatigue accrue de l’utilisateur.
27. N’utilisez pas la machine par mauvais temps,
la visibilité étant réduite. Autrement vous ris-
quez de provoquer une chute ou une utilisation
incorrecte en raison d’une mauvaise visibilité.
28.
Ne submergez pas la machine dans une aque d’eau.
29. Lorsque des feuilles mouillées ou des saletés
adhèrent à la bouche d’aspiration (fenêtre de
ventilation) à cause de la pluie, retirez-les.
30. N’utilisez pas la machine dans la neige.
31. Si l’herbe coupée est mouillée, l’intérieur de
la machine risque d’être obstrué par celle-ci.
Vériez régulièrement l’état de la machine et
retirez l’herbe collée au boîtier si nécessaire.
32. Pendant l’utilisation de la machine, prenez
garde aux tuyaux et câbles.
33. N’utilisez pas une source d’alimentation
laire comme un adaptateur de batterie ou un
support d’alimentation portable avec cette
machine. Le câble de la source d’alimentation
peut aecter le fonctionnement et entraîner une
blessure.
Entretien et remisage
1. Après l’utilisation, remisez la tondeuse à l’in-
térieur - Lorsqu’elle n’est pas utilisée, la tondeuse
doit être remisée à l’intérieur dans un emplace-
ment sec et verrouillé, hors d’atteinte des enfants.
2. Entretenez la tondeuse avec soin - Pour un
rendement supérieur et un fonctionnement plus
sécuritaire, gardez les tranchants aiguisés et
propres. Suivez les instructions de lubrication
et de changement des accessoires. Inspectez
régulièrement le cordon de la tondeuse; s’il est
endommagé, faites-le réparer dans un centre de
service après-vente agréé. Maintenez les guidons
secs, propres et exempts d’huile ou de graisse.
3. Gardez la machine exempte d’herbes, de
feuilles et autres accumulations de débris.
Maintenez les protecteurs en place et en bon
état de fonctionnement.
4. Gardez les lames aûtées.
5. Utilisez uniquement des lames de rechange
identiques.
6. Vériez régulièrement l’usure ou la détériora-
tion du collecteur d’herbe. Assurez-vous tou-
jours que le collecteur d’herbe est vide avant
le remisage. Si le collecteur d’herbe est usé,
faites-le remplacer en usine par un collecteur neuf
pour plus de sécurité.
7. Vériez régulièrement les composants du col-
lecteur d’herbe et la protection de décharge, et
remplacez-les au besoin en utilisant les pièces
recommandées par le fabricant.
8. Vériez à intervalles réguliers si le boulon de
xation de la lame est bien serré.
9. Assurez-vous que tous les écrous, boulons et
vis sont bien serrés pour garantir un fonction-
nement sécuritaire de l’équipement.
10. Ne retirez pas et ne modiez pas les disposi-
tifs de sécurité. Vériez régulièrement leur bon
fonctionnement. N’entravez jamais le fonction-
nement prévu des dispositifs de sécurité et ne
limitez jamais la protection qu’ils orent.
11.
Lorsque vous réglez la tondeuse, évitez soi-
gneusement de vous coincer les doigts entre les
lames mobiles et les pièces xes de la tondeuse.
12. Laissez toujours refroidir la tondeuse avant de
la remiser.
13. Lors de l’entretien des lames, gardez à l’esprit
qu’elles peuvent bouger même si la source
d’alimentation est coupée.
14.
Les étiquettes de sécurité et d’instructions doivent
être entretenues ou remplacées si nécessaire.
15. N’abandonnez pas la machine à l’extérieur
sous la pluie.
16. Ne lavez pas la machine avec de l’eau à haute
pression.
17. Lorsque vous lavez la machine, assurez-vous
de retirer la batterie et la clé de sécurité et
fermez le couvercle de batterie, puis versez
de l’eau vers le bas de la machine à laquelle la
lame est xée.
18. Lorsque vous rangez la machine, évitez la
lumière directe du soleil et la pluie et rangez-la
dans un endroit où elle ne soit pas trop chaude
ou trop humide.
19. Eectuez l’inspection ou l’entretien dans un
endroit à l’abri de la pluie.
20. Après avoir utilisé la machine, retirez la saleté
collée et séchez complètement la machine
avant de la ranger. Selon la saison ou la zone, il
existe un risque de dysfonctionnement dû au gel.
Utilisation et entretien de l’outil à batterie
1. Prévenez le démarrage accidentel. Assurez-
vous que l’interrupteur est en position d’arrêt
avant de connecter la machine à la batterie,
de la saisir ou de la transporter. Transporter
la machine avec le doigt sur l’interrupteur ou la
mettre sous tension alors que son interrupteur
est en position de marche ouvre la porte aux
accidents.
2. Retirez la batterie de la machine avant de pro-
céder à des réglages, au remplacement d’ac-
cessoires ou au rangement de la machine. De
telles mesures de sécurité préventives réduisent
le risque de démarrage accidentel de la machine.
3. Ne la rechargez qu’avec le chargeur spécié
par le fabricant. Un chargeur conçu pour un
certain type de batterie risque de déclencher un
incendie s’il est utilisé avec une autre batterie.
4. N’utilisez les machines qu’avec leurs batteries
spéciques. Les autres batteries risqueraient de
vous blesser ou de provoquer un incendie.
Other manuals for DLM462
9
This manual suits for next models
2
Table of contents
Languages:
Other Makita Lawn Mower manuals

Makita
Makita LM003J User manual

Makita
Makita PLM4622N2 User guide

Makita
Makita UM401D Manual

Makita
Makita DLM380 User manual

Makita
Makita DLM533 User manual

Makita
Makita PLM4120N User guide

Makita
Makita EM2651LH User manual

Makita
Makita XML02 User manual

Makita
Makita PLM5600N2 User guide

Makita
Makita LM001G User manual

Makita
Makita PLM4616 User manual

Makita
Makita ELM4610 User guide

Makita
Makita DLM462 User manual

Makita
Makita XML10 User manual

Makita
Makita ELM3311 User guide

Makita
Makita LM001G User manual

Makita
Makita PLM4631N2 User guide

Makita
Makita DLM460 User manual

Makita
Makita LM001C User manual

Makita
Makita PLM4110 User guide