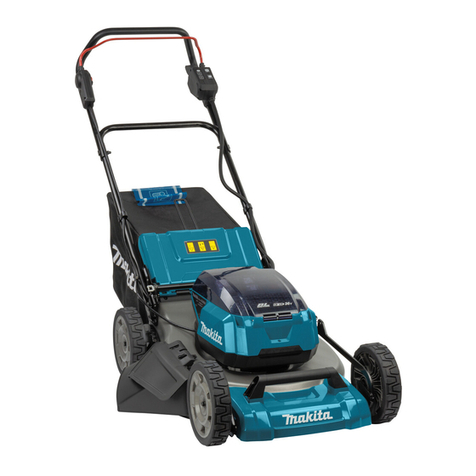
Makita LM003G User manual

LM003G
LM004G
EN Cordless Lawn Mower INSTRUCTION MANUAL 7
PL Akumulatorowa kosiarka do
trawy INSTRUKCJA OBSŁUGI 18
HU Vezeték nélküli fűnyíró HASZNÁLATI KÉZIKÖNYV 31
SK Akumulátorová kosačka NÁVOD NA OBSLUHU 43
CS Akumulátorová sekačka na
trávu NÁVOD K OBSLUZE 55
UK Бездротова газонокосарка ІНСТРУКЦІЯ З
ЕКСПЛУАТАЦІЇ 66
RO Maşină de tuns iarba fără
cablu MANUAL DE INSTRUCŢIUNI 79
DE Akku Rasenmäher BETRIEBSANLEITUNG 92

2
1
23
Fig.1
Fig.2
1
Fig.3
1
2
Fig.4
1
Fig.5
Fig.6

3
1
2
Fig.7
1
Fig.8
1
2
Fig.9
1
Fig.10
1
2
3
Fig.11
1
2
Fig.12
1
2
Fig.13
1
2
Fig.14

4
1
Fig.15
1
Fig.16
1
2
Fig.17
12
Fig.18
1
Fig.19
1
Fig.20
1
Fig.21

5
1
2
Fig.22
Fig.23
Fig.24
1 2 3
Fig.25
Fig.26
1
2
Fig.27
1
Fig.28

6
1
2
Fig.29
1
Fig.30
1
2
Fig.31
1
34
2
Fig.32
3
2
1
Fig.33

7ENGLISH
ENGLISH (Original instructions)
SPECIFICATIONS
Model: LM003G LM004G
Mowing width (blade diameter) 380 mm 430 mm
No load speed 3,800 min-1
Part number of replacement
mower blade
Straight mower blade 1913G8-3 1913H4-8
Mulching blade 1913H0-6 1913H6-4
Dimensions
(L x W x H)
during operation L: 1,370 mm to 1,420 mm
W: 450 mm
H: 990 mm to 1,020 mm
L: 1,390 mm to 1,440 mm
W: 460 mm
H: 990 mm to 1,020 mm
when stored
(without grass basket)
520 mm x 450 mm x 880 mm 520 mm x 460 mm x 885 mm
Rated voltage D.C. 36 V - 40 V max
Net weight 14.9 - 17.3 kg 15.6 - 18.2 kg
Protection degree IPX4
• Duetoourcontinuingprogramofresearchanddevelopment,thespecicationshereinaresubjecttochange
without notice.
• Specicationsmaydierfromcountrytocountry.
• Theweightmaydierdependingontheattachment(s),includingthebatterycartridge.Thelightestandheavi-
est combinations, according to EPTA-Procedure 01/2014, are shown in the table.
Applicable battery cartridge and charger
Batterycartridge BL4020 / BL4025 / BL4040 / BL4040F / BL4050F / BL4080F
Charger DC40RA / DC40RB / DC40RC / DC40WA
• Someofthebatterycartridgesandchargerslistedabovemaynotbeavailabledependingonyourregionof
residence.
WARNING: Only use the battery cartridges and chargers listed above.Useofanyotherbatterycartridges
andchargersmaycauseinjuryand/orre.
WARNING: Do not use a corded power supply such as battery adapter or portable power pack with
this machine.Thecableofsuchpowersupplymayhindertheoperationandresultinpersonalinjury.
Symbols
Thefollowingsshowthesymbolswhichmaybeused
fortheequipment.Besurethatyouunderstandtheir
meaning before use.
Take particular care and attention.
Read instruction manual.
Danger;beawareofthrownobjects.
The distance between the machine and
bystandersmustbeatleast15m.
Neverputyourhandsandfeetnearthe
mower blade under the mower. Mower
blades continue to rotate after the motor is
switchedo.
Warning;Disconnectbatterybefore
maintenance.
Ni-MH
Li-ion
OnlyforEUcountries
Due to the presence of hazardous com-
ponents in the equipment, waste electrical
and electronic equipment, accumulators
andbatteriesmayhaveanegativeimpact
on the environment and human health.
Do not dispose of electrical and electronic
appliances or batteries with household
waste!
In accordance with the European Directive
on waste electrical and electronic equip-
ment and on accumulators and batteries
and waste accumulators and batteries,
as well as their adaptation to national law,
waste electrical equipment, batteries and
accumulatorsshouldbestoredseparately
and delivered to a separate collection point
for municipal waste, operating in accor-
dance with the regulations on environmen-
tal protection.
Thisisindicatedbythesymbolofthe
crossed-out wheeled bin placed on the
equipment.
Guaranteed sound power level according
to EU Outdoor Noise Directive.

8ENGLISH
Sound power level according to Australia
NSW Noise Control Regulation.
Intended use
The machine is intended for lawn mowing.
Noise
ThetypicalA-weightednoiseleveldeterminedaccord-
ing to EN62841-4-3:
Model LM003G
Measured sound power level (LWA) : 90 dB (A)
Guaranteed sound power level (LWA) : 93 dB (A)
Sound pressure level (LpA) : 83 dB (A)
Uncertaintyforsoundpressurelevel(K):3dB(A)
Model LM004G
Measured sound power level (LWA) : 90 dB (A)
Guaranteed sound power level (LWA) : 93 dB (A)
Sound pressure level (LpA) : 81 dB(A)
Uncertaintyforsoundpressurelevel(K):3dB(A)
NOTE: The declared noise emission value(s) has
been measured in accordance with a standard test
methodandmaybeusedforcomparingonetoolwith
another.
NOTE: The declared noise emission value(s)
mayalsobeusedinapreliminaryassessmentof
exposure.
WARNING: Wear ear protection.
WARNING: The noise emission during actual
use of the power tool can dier from the declared
value(s) depending on the ways in which the
tool is used especially what kind of workpiece is
processed.
WARNING: Be sure to identify safety mea-
sures to protect the operator that are based on an
estimation of exposure in the actual conditions of
use (taking account of all parts of the operating
cycle such as the times when the tool is switched
o and when it is running idle in addition to the
trigger time).
Vibration
The vibration total value (tri-axial vector sum) deter-
mined according to EN62841-4-3:
Model LM003G
Vibration emission (ah) : 2.5 m/s2or less
Uncertainty(K):1.5m/s2
Model LM004G
Vibration emission (ah) : 2.5 m/s2or less
Uncertainty(K):1.5m/s2
NOTE: The declared vibration total value(s) has been
measured in accordance with a standard test method
andmaybeusedforcomparingonetoolwithanother.
NOTE:Thedeclaredvibrationtotalvalue(s)mayalso
beusedinapreliminaryassessmentofexposure.
WARNING: The vibration emission during
actual use of the power tool can dier from the
declared value(s) depending on the ways in which
the tool is used especially what kind of workpiece
is processed.
WARNING: Be sure to identify safety mea-
sures to protect the operator that are based on an
estimation of exposure in the actual conditions of
use (taking account of all parts of the operating
cycle such as the times when the tool is switched
o and when it is running idle in addition to the
trigger time).
Declarations of Conformity
For European countries only
TheDeclarationsofconformityareincludedinAnnexA
to this instruction manual.
SAFETY WARNINGS
General power tool safety warnings
WARNING Read all safety warnings, instructions,
illustrations and specications provided with this
power tool. Failure to follow all instructions listed below
mayresultinelectricshock,reand/orseriousinjury.
Save all warnings and instruc-
tions for future reference.
Theterm"powertool"inthewarningsreferstoyour
mains-operated(corded)powertoolorbattery-operated
(cordless) power tool.
Cordless Lawn Mower Safety
Warnings
1.
Do not use the lawnmower in bad weather condi-
tions, especially when there is a risk of lightning.
Thisdecreasestheriskofbeingstruckbylightning.
2. Thoroughly inspect the area for wildlife where
the lawnmower is to be used.Wildlifemaybe
injuredbythelawnmowerduringoperation.
3. Thoroughly inspect the area where the lawn-
mower is to be used and remove all stones,
sticks, wires, bones, and other foreign objects.
Thrownobjectscancausepersonalinjury.
4. Before using the lawnmower, always visually
inspect to see that the blade and the blade
assembly are not worn or damaged. Worn or
damagedpartsincreasetheriskofinjury.
5. Check the grass catcher frequently for wear or
deterioration. A worn or damaged grass catcher
mayincreasetheriskofpersonalinjury.
6. Keep guards in place. Guards must be in work-
ing order and be properly mounted. A guard
that is loose, damaged, or is not functioning cor-
rectlymayresultinpersonalinjury.
7. Keep all cooling air inlets clear of debris.
Blockedairinletsanddebrismayresultinover-
heatingorriskofre.

9ENGLISH
8. While operating the lawnmower, always wear
non-slip and protective footwear. Do not oper-
ate the lawnmower when barefoot or wearing
open sandals.Thisreducesthechanceofinjury
to the feet from contact with the moving blade.
9. While operating the lawnmower, always wear
long trousers. Exposed skin increases the likeli-
hoodofinjuryfromthrownobjects.
10. Do not operate the lawnmower in wet grass.
Walk, never run. This reduces the risk of slipping
andfallingwhichmayresultinpersonalinjury.
11. Do not operate the lawnmower on excessively
steep slopes. This reduces the risk of loss of
control,slippingandfallingwhichmayresultin
personalinjury.
12. When working on slopes, always be sure of
your footing, always work across the face
of slopes, never up or down and exercise
extreme caution when changing direction. This
reduces the risk of loss of control, slipping and
fallingwhichmayresultinpersonalinjury.
13. Use extreme caution when reversing or pulling
the lawnmower towards you. Always be aware
of your surroundings. This reduces the risk of
tripping during operation.
14. Do not touch blades and other hazardous
moving parts while they are still in motion. This
reducestheriskofinjuryfrommovingparts.
15. When clearing jammed material or cleaning
the lawnmower, make sure all power switches
are o and the battery pack is disconnected.
Unexpectedoperationofthelawnmowermay
resultinseriouspersonalinjury.
SAVE THESE INSTRUCTIONS.
WARNING: DO NOT let comfort or familiarity
with product (gained from repeated use) replace
strict adherence to safety rules for the subject
product.
MISUSE or failure to follow the safety rules stated
in this instruction manual may cause serious
personal injury.
IMPORTANT SAFETY
INSTRUCTIONS
WARNING: Read all safety warnings and
all instructions. Failure to follow the warnings and
instructionsmayresultinelectricshock,reand/or
seriousinjury.
Save all warnings and instruc-
tions for future reference.
Training
1. Read the instructions carefully. Be familiar
with the controls and the proper use of the
mower.
2. Never allow children or people unfamiliar with
these instructions to use the mower. Local
regulations can restrict the age of the operator.
3. Never operate the mower while people, espe-
cially children, or pets are nearby.
4. Keep in mind that the operator or user is
responsible for accidents or hazards occurring
to other people or their property.
5. Children should be supervised to ensure that
they do not play with the mower.
6. Physical condition - Do not operate mower
while under the inuence of drugs, alcohol, or
any medication.
Preparation
1.
While operating the mower, always wear sub-
stantial footwear and long trousers. Do not
operate the mower when barefoot or wearing
open sandals. Avoid wearing clothing or jewelry
that is loose tting or that has hanging cords or
ties. They can be caught in moving parts.
2. Before use, always visually inspect the mower
for damaged, missing or misplaced guards or
shields.
3. Be sure the area is clear of other people before
mowing. Stop mower if anyone enters the area.
4. Always wear protective goggles to protect
your eyes from injury when using power tools.
The goggles must comply with ANSI Z87.1 in
the USA, EN 166 in Europe, or AS/NZS 1336
in Australia/New Zealand. In Australia/New
Zealand, it is legally required to wear a face
shield to protect your face, too.
It is an employer's responsibility to enforce
the use of appropriate safety protective equip-
ments by the tool operators and by other per-
sons in the immediate working area.
5.
Check the blades or blade bolts carefully for cracks
or damage before operation. Replace cracked or
damaged blades or blade bolts immediately.
6. Remove foreign matters such as rocks, wire,
bottles, bones and large sticks from the work
area before mowing to prevent personal injury
or damage to the mower.
7. Objects struck by the mower blade can cause
severe injuries to persons. The lawn should
always be carefully examined and cleared of
all objects prior to each mowing.
8. Watch for holes, ruts, bumps, rocks, or other
hidden objects. Uneven terrain could cause a slip
and fall accident. Tall grass can hide obstacles.
9. Use personal protective equipment. Always
wear eye protection. Protective equipment such
asadustmask,non-skidsafetyshoes,hardhator
hearing protection used for appropriate conditions
willreducepersonalinjuries.


10 ENGLISH
Operation
1. Do not overreach. Keep the balance at all
times. Always be sure of the footing on slopes.
Walk, never run.
2. Stop the mower and turn o the machine, and
make sure that all moving parts have come to
a complete stop:
- whenever you leave the mower,
- before clearing blockages or unclogging
chute,
- before checking, cleaning or working on the
mower,
- after striking a foreign object. Inspect the
mower for damage and make repairs before
restarting and operating the mower,
- whenever the mower starts vibrating
abnormally.
3. Never operate the mower with defective
guards or shields, or without safety devices,
for example deectors and/or grass basket, in
place.
4. Avoid using the mower in bad weather con-
ditions especially when there is a risk of
lightning.
5. Wear eye protection and stout shoes at all
times while operating the mower.
6. Operate the mower only in daylight or in good
articial light.
7. Switch on the mower carefully according to
instructions and with feet well away from the
blade(s).
8. Take care against injury to feet and hands from
the mower blades.
9. Always ensure that the ventilation openings
are kept clear of debris.
10. Mow across the face of slopes, never up and
down. Exercise extreme caution when chang-
ing direction on slopes. Do not mow exces-
sively steep slopes.
11. Use extreme caution when reversing or pulling
the mower towards you.
12. Stop the blade(s) if the mower has to be tilted
for transportation when crossing surfaces
other than grass, and when transporting the
mower to and from the area to be used.
13. Do not tilt the mower when switching on the
motor, except if the mower has to be tilted
for starting. In this case, do not tilt it more
than absolutely necessary and lift only the
part, which is away from the operator. Always
ensure that both hands are in the operating
position before returning the mower to the
ground.
14. Do not put hands or feet near or under rotating
parts. Keep clear of the discharge opening at
all times.
15. Do not transport the mower while the mower is
turned on.
16. Avoid operating the mower in wet grass.
17. Always keep a rm hold on the handle.
18. Don't grasp the exposed cutting blades or
cutting edges when picking up or holding the
mower.
19. Keep hands and feet away from rotating
blades. Caution - Blades coast after the mower
is switched o.
20. Stop operation immediately if you notice
anything unusual. Switch o the mower. Then
inspect the mower.
21. Never attempt to make cutting height adjust-
ments while mower is running if the mower
has cutting height adjustment feature.
22. Release switch lever and wait for blade rota-
tion to stop before crossing driveways, walks,
roads, and any gravel-covered areas. Also turn
o the machine if you leave the mower, reach
to pick up or remove something out of your
way, or for any other reason that may distract
you from what you are doing.
23. If the mower strikes a foreign object, follow
these steps:
- Stop the mower, release the switch lever and
wait until the blade comes to a complete stop.
- Remove the battery cartridge.
- Thoroughly inspect the mower for any
damage.
- Replace the blade if it is damaged in any way.
Repair any damage before restarting and con-
tinuing to operate the mower.
24. Do not start the mower when standing in front
of the discharge opening.
25. If the mower starts to vibrate abnormally
(check immediately)
- inspect for damage,
- replace or repair any damaged parts,
- check for and tighten any loose parts.
26. Never direct discharged material toward
anyone. Avoid discharging material against a
wall or obstruction.Materialmayricochetback
toward the operator. Stop the blade when crossing
gravel surfaces.
27. Do not pull the mower backwards unless
absolutely necessary.Whenyouarecompelled
to back the mower from a fence or other similar
obstruction, look down and behind before and
while moving backwards.
28. Shut the motor o and wait until the blade
comes to a complete stop before removing the
grass catcher. Beware that the blades coast after
turno.
29. When you use the machine on muddy ground,
wet slope, or slippery place, pay attention to
your footing.
30. Do not submerge the machine into a puddle.
31. When operating the machine, pay attention to
piping and wiring.
Maintenance and storage
1. Replace worn or damaged parts for safety.
Use only genuine replacement parts and
accessories.
2. Inspect and maintain the mower regularly.
3. When not in use, store the mower out of the
reach of children.
4. Keep all nuts, bolts, and screws tight to
be sure the equipment is in safe working
condition.

11 ENGLISH
5. Check the grass basket frequently for wear or
deterioration. For storage, always make sure
the grass basket is empty. Replace a worn
grass basket with a new factory replacement
for safety.
6. Use only the manufacturer genuine blades
specied in this manual.
7. Be careful during adjustment of the mower
to prevent entrapment of the ngers between
moving blades and xed parts of the mower.
8. Check the blade mounting bolt at frequent
intervals for proper tightness.
9. Always allow the mower to cool down before
storing.
10. When servicing the blades be aware that, even
though the power source is switched o, the
blades can still be moved.
11. Never remove or tamper with safety devices.
Check their proper operation regularly. Never
do anything to interfere with the intended
function of a safety device or to reduce the
protection provided by a safety device.
12. Do not leave the machine unattended outdoors
in the rain.
13. When storing the machine, avoid direct sun-
light and rain, and store it in a place where it
does not get hot or humid.
Battery tool use and care
1. Recharge only with the charger specied by
the manufacturer. A charger that is suitable for
onetypeofbatterypackmaycreateariskofre
whenusedwithanotherbatterypack.
2. Use power tools only with specically desig-
nated battery packs.Useofanyotherbattery
packsmaycreateariskofinjuryandre.
3. When battery pack is not in use, keep it away
from other metal objects, like paper clips,
coins, keys, nails, screws or other small metal
objects, that can make a connection from one
terminal to another.Shortingthebatterytermi-
nalstogethermaycauseburnsorare.
4. Under abusive conditions, liquid may be
ejected from the battery; avoid contact. If con-
tact accidentally occurs, ush with water. If
liquid contacts eyes, additionally seek medical
help.Liquidejectedfromthebatterymaycause
irritation or burns.
5. Do not use a battery pack or tool that is dam-
aged or modied.Damagedormodiedbatteries
mayexhibitunpredictablebehaviourresultingin
re,explosionorriskofinjury.
6. Do not expose a battery pack or tool to re or
excessive temperature.Exposuretoreortem-
peratureabove130°Cmaycauseexplosion.
7. Follow all charging instructions and do not
charge the battery pack or tool outside the
temperature range specied in the instruc-
tions.Chargingimproperlyorattemperatures
outsidethespeciedrangemaydamagethe
batteryandincreasetheriskofre.
Electrical and battery safety
1. Do not dispose of the battery(ies) in a re.
Thecellmayexplode.Checkwithlocalcodesfor
possible special disposal instructions.
2. Do not open or mutilate the battery(ies).
Releasedelectrolyteiscorrosiveandmaycause
damagetotheeyesorskin.Itmaybetoxicif
swallowed.
3.
Do not charge battery in rain, or in wet locations.
4. Do not charge the battery outdoors.
5. Do not handle charger, including charger plug,
and charger terminals with wet hands.
6. Do not replace the battery in the rain.
7. Do not wet the terminal of battery with liquid
such as water, or submerge the battery. Do not
leave the battery in the rain, nor charge, use,
or store the battery in a damp or wet place. If
the terminal gets wet or liquid enters inside of bat-
tery,thebatterymaybeshortcircuitedandthereis
ariskofoverheat,re,orexplosion.
8. After removing the battery from the machine or
charger, be sure to attach the battery cover to
the battery and store it in a dry place.
9. Do not replace the battery with wet hands.
10. Avoid dangerous environment. Don't use the
machine in damp or wet locations or expose it
to rain. Water entering the machine will increase
the risk of electric shock.
11. If the battery cartridge gets wet, drain the
water inside and then wipe it with a dry cloth.
Dry the battery cartridge completely in a dry
place before use.
Service
1. Have your power tool serviced by a qualied
repair person using only identical replacement
parts.Thiswillensurethatthesafetyofthepower
tool is maintained.
2. Never service damaged battery packs. Service
ofbatterypacksshouldonlybeperformedbythe
manufacturer or authorized service providers.
SAVE THESE INSTRUCTIONS.
WARNING: DO NOT let comfort or familiarity
with product (gained from repeated use) replace
strict adherence to safety rules for the subject
product.
MISUSE or failure to follow the safety rules stated
in this instruction manual may cause serious
personal injury.
Important safety instructions for
battery cartridge
1.
Before using battery cartridge, read all instruc-
tions and cautionary markings on (1) battery char-
ger, (2) battery, and (3) product using battery.
2. Do not disassemble or tamper with the battery
cartridge.Itmayresultinare,excessiveheat,
or explosion.
3. If operating time has become excessively
shorter, stop operating immediately. It may
result in a risk of overheating, possible burns
and even an explosion.
4. If electrolyte gets into your eyes, rinse them
out with clear water and seek medical atten-
tion right away. It may result in loss of your
eyesight.

12 ENGLISH
5. Do not short the battery cartridge:
(1) Do not touch the terminals with any con-
ductive material.
(2) Avoid storing battery cartridge in a con-
tainer with other metal objects such as
nails, coins, etc.
(3) Do not expose battery cartridge to water
or rain.
A battery short can cause a large current
ow, overheating, possible burns and even a
breakdown.
6. Do not store and use the tool and battery car-
tridge in locations where the temperature may
reach or exceed 50 °C (122 °F).
7. Do not incinerate the battery cartridge even if
it is severely damaged or is completely worn
out. The battery cartridge can explode in a re.
8. Do not nail, cut, crush, throw, drop the battery
cartridge, or hit against a hard object to the
battery cartridge.Suchconductmayresultina
re,excessiveheat,orexplosion.
9. Do not use a damaged battery.
10. The contained lithium-ion batteries are subject
to the Dangerous Goods Legislation require-
ments.
Forcommercialtransportse.g.bythirdparties,
forwarding agents, special requirement on pack-
aging and labeling must be observed.
For preparation of the item being shipped, consult-
ing an expert for hazardous material is required.
Pleasealsoobservepossiblymoredetailed
national regulations.
Tapeormaskoopencontactsandpackupthe
batteryinsuchamannerthatitcannotmove
around in the packaging.
11. When disposing the battery cartridge, remove
it from the tool and dispose of it in a safe
place. Follow your local regulations relating to
disposal of battery.
12. Use the batteries only with the products
specied by Makita. Installing the batteries to
non-compliantproductsmayresultinare,exces-
siveheat,explosion,orleakofelectrolyte.
13. If the tool is not used for a long period of time,
the battery must be removed from the tool.
14. During and after use, the battery cartridge may
take on heat which can cause burns or low
temperature burns. Pay attention to the han-
dling of hot battery cartridges.
15. Do not touch the terminal of the tool imme-
diately after use as it may get hot enough to
cause burns.
16. Do not allow chips, dust, or soil stuck into the
terminals, holes, and grooves of the battery
cartridge.Itmaycauseheating,catchingre,
burstandmalfunctionofthetoolorbatterycar-
tridge,resultinginburnsorpersonalinjury.
17. Unless the tool supports the use near
high-voltage electrical power lines, do not use
the battery cartridge near high-voltage electri-
cal power lines.Itmayresultinamalfunctionor
breakdownofthetoolorbatterycartridge.
18. Keep the battery away from children.
SAVE THESE INSTRUCTIONS.
CAUTION: Only use genuine Makita batteries.
Use of non-genuine Makita batteries, or batteries that
havebeenaltered,mayresultinthebatterybursting
causingres,personalinjuryanddamage.Itwill
alsovoidtheMakitawarrantyfortheMakitatooland
charger.
Tips for maintaining maximum
battery life
1. Charge the battery cartridge before completely
discharged. Always stop tool operation and
charge the battery cartridge when you notice
less tool power.
2. Never recharge a fully charged battery car-
tridge. Overcharging shortens the battery
service life.
3. Charge the battery cartridge with room tem-
perature at 10 °C - 40 °C (50 °F - 104 °F). Let
a hot battery cartridge cool down before
charging it.
4. When not using the battery cartridge, remove
it from the tool or the charger.
5. Charge the battery cartridge if you do not use
it for a long period (more than six months).
ASSEMBLY
WARNING: Always be sure that the battery
cartridge is removed before carrying out any
work on the machine.Failuretoremovethebattery
cartridgemayresultinseriouspersonalinjuryfrom
accidental start-up.
WARNING: Never start the mower unless it is
completely assembled. Operation of the machine
inapartiallyassembledstatemayresultinserious
personalinjuryfromaccidentalstart-up.
Installing the battery cover
WARNING: Do not insert the battery cartridge
before installing the battery cover. Failure to do so
maycauseaseriousinjury.
Installthebatterycovercompletelybeforetheopera-
tion.Thebatterycoverprotectsthemowerandbattery
cartridge from mud, dirt, and water.
1. Placethebatterycoverwiththeprotrusionsonthe
moweralignedwiththeholesonthebatterycover.
►Fig.1: 1. Protrusion 2. Hole 3.Batterycover
2. Placeyourhandsinthemiddleofthebattery
cover and push it.
►Fig.2
3. Makesurethatthebatterycoverisattached
securely,andthebatterycoverislockedsecurelywith
the locking lever.
►Fig.3: 1. Locking lever

13 ENGLISH
Installing the handle
CAUTION: Install the handles securely.
NOTICE: When installing handles, position the
cord so that it is not caught by anything between
the handles. If the cord is damaged, the mower
switchmaynotwork.
1. Place the both ends of lower handle into the
groovesofthemowerbody,thentightentheclamping
levers, and then fold the clamping levers.
►Fig.4: 1. Clamping lever 2. Lower handle
When tightening the clamping levers, tighten them until
theringsontheleversjustcannotbeseen.
►Fig.5: 1. Ring
NOTE: Make sure that there is no gap between the
lowerhandleandthemowerbodyaftertheclamping
levers are folded.
►Fig.6
2. Align the hole in the upper handle with the hole
in the lower handle, then insert the bolt from outside,
and then tighten the thumb nut from inside. Perform the
same procedure on the other side.
►Fig.7: 1. Thumb nut 2. Bolt
NOTE:Holdtheupperhandlermlysothatitdoes
notdropoyourhand.
Removing the mulching plug
1. Open the rear cover.
►Fig.8: 1. Rear cover
2. Holdthemulchingplugbythehandle,andthen
pullitoutfromthemowerbodyasshowninthegure.
►Fig.9: 1. Handle 2. Mulching plug
Installing or removing the grass
basket
To install the grass basket, follow the steps below.
1. Open the rear cover.
►Fig.10: 1. Rear cover
2. Hold the handle of the grass basket, and then
hookthegrassbasketontherodofthemowerbodyas
showninthegure.
►Fig.11: 1. Rod 2. Handle 3. Grass basket
To remove the grass basket, open the rear cover, and
thenremovethegrassbasketbyholdingthehandle.
Attaching the mulching plug
1. Open the rear cover, and then remove the grass
basket.
►Fig.12: 1. Rear cover 2. Grass basket
2. Holdthemulchingplugbythehandle,andthen
attachittothemowerbodybypushingitasfarasitwill
goasshowninthegure.
►Fig.13: 1. Handle 2. Mulching plug
FUNCTIONAL
DESCRIPTION
CAUTION: Always be sure that the machine is
switched o and the battery cartridge is removed
before adjusting or checking function on the
machine.
Installing or removing battery
cartridge
CAUTION: Always switch o the machine
before installing or removing of the battery
cartridge.
CAUTION: Hold the machine and the battery
cartridge rmly when installing or removing bat-
tery cartridge. Failure to hold the machine and the
batterycartridgermlymaycausethemtoslipo
yourhandsandresultindamagetothemachineand
batterycartridgeandapersonalinjury.
CAUTION: Make sure that you lock the battery
cover before use. Otherwise,mud,dirt,orwatermay
causedamagetotheproductorthebatterycartridge.
CAUTION: Always install the battery cartridge
fully until the red indicator cannot be seen. If not,
itmayaccidentallyfalloutofthemachine,causing
injurytoyouorsomeonearoundyou.
CAUTION: Do not install the battery cartridge
forcibly.Ifthecartridgedoesnotslideineasily,itis
notbeinginsertedcorrectly.
CAUTION: Hold the battery cover rmly when
installing or removing the battery cartridge.
To install the battery cartridge;
1. Pullupthelockinglever,andthenopenthebattery
cover.
►Fig.14: 1.Batterycover2. Locking lever
2. Alignthetongueonthebatterycartridgewiththe
slot on the mower then slide the cartridge until it locks in
place with a little click.
►Fig.15: 1.Batterycartridge
3. Closethebatterycoverrmly.
To remove the battery cartridge from the mower;
1. Pullupthelockingleverandopenthebattery
cover.
2. Pulloutthebatterycartridgefromthemowerwhile
sliding the button on the front of the cartridge.
3. Closethebatterycover.

14 ENGLISH
Machine / battery protection system
Themachineisequippedwithamachine/battery
protectionsystem.Thissystemautomaticallycutso
powertothemotortoextendmachineandbatterylife.
Themachinewillautomaticallystopduringoperationif
themachineorbatteryisplacedunderoneofthefol-
lowing conditions.
Overload protection
Whenthemachine/batteryisoperatedinamanner
thatcausesittodrawanabnormallyhighcurrent,the
machineautomaticallystopsandtheindicatorlamp
lightsupinred.Inthissituation,turnthemachineo
and stop the application that caused the machine to
become overloaded. Then turn the machine on to
restart.
Overheat protection
When the machine is overheated, the machine stops
automaticallyandtheindicatorlamplightsupinred.
Let the machine cool down before turning the machine
on again.
Overdischarge protection
Whenthebatterycapacitybecomeslow,themachine
stopsautomaticallyandtheindicatorlamplightsupin
red. If the machine does not operate even when the
switchesareoperated,removethebatteryfromthe
machineandchargethebattery.
Protections against other causes
Protectionsystemisalsodesignedforothercausesthat
could damage the machine and allows the machine to
stopautomatically.Takeallthefollowingstepstoclear
the causes, when the machine has been brought to a
temporaryhaltorstopinoperation.
1. Turnthemachineo,andthenturnitonagainto
restart.
2. Chargethebattery(ies)orreplaceit/themwith
rechargedbattery(ies).
3. Letthemachineandbattery(ies)cooldown.
Ifnoimprovementcanbefoundbyrestoringprotection
system,thencontactyourlocalMakitaServiceCenter.
NOTICE: If the machine stops due to a cause
not described above, refer to the section for
troubleshooting.
NOTE: The timing, at which the lamp lights up,
depends on the temperature at work place and the
batterycartridgeconditions.
Indicating the remaining battery
capacity
►Fig.16: 1. Indicator lamp
Whentheremainingbatterycapacitygetslow,the
indicatorlampblinksinred.Byfurtheruse,themachine
stops and the indicator lamp lights up in red. In this
situation,chargethebatterycartridge.
Indicating the remaining battery
capacity
Pressthecheckbuttononthebatterycartridgetoindi-
catetheremainingbatterycapacity.Theindicatorlamps
light up for a few seconds.
►Fig.17: 1. Indicator lamps 2. Check button
Indicator lamps Remaining
capacity
Lighted O Blinking
75% to 100%
50% to 75%
25% to 50%
0% to 25%
Charge the
battery.
Thebattery
mayhave
malfunctioned.
NOTE: Depending on the conditions of use and the
ambienttemperature,theindicationmaydierslightly
fromtheactualcapacity.
NOTE:Therst(farleft)indicatorlampwillblinkwhen
thebatteryprotectionsystemworks.
Switch action
WARNING: Before installing the battery car-
tridge, always check to see that the switch lever
actuates properly and returns to the original
position when released. Operating a machine with a
switchthatdoesnotactuateproperlycanleadtoloss
ofcontrolandseriouspersonalinjury.
NOTE: The mower does not start without pressing the
switch button even the switch lever is pulled.
NOTE:Mowermaynotstartduetotheoverload
whenyoutrytomowlongordensegrassatatime.
Increase the mowing height in this case.
Thismachineisequippedwiththeswitchbutton.Ifyou
noticeanythingunusualwiththeswitchbutton,stop
theoperationimmediatelyandhaveitcheckedbyyour
nearest Makita Authorized Service Center.
1. Installthebatterycartridge,andthenclosethe
batterycoverrmly.
2. Pulltheswitchlevertowardyouwhileholding
down the switch button. Release the switch button when
the motor starts running.
►Fig.18: 1. Switch button 2. Switch lever
3. Release the switch lever to stop the motor.

15 ENGLISH
Adjusting the mowing height
WARNING:
Never put your hand or leg under
the mower body when adjusting the mowing height.
WARNING: Always make sure that the lever
ts in the groove properly before operation.
Themowingheightcanbeadjustedintherangeof
between 20 mm and 75 mm.
Turnothemachine,andthenpullthemowingheight
adjustingleveroutwardofthemowerbodyandmoveit
toyourdesiredmowingheight.
►Fig.19: 1.Mowingheightadjustinglever
The table below shows the relationship between the number
onthemowerbodyandtheapproximatemowingheight.
Number Mowing height
120 mm
229 mm
336 mm
444 mm
553 mm
661 mm
769 mm
875 mm
NOTE:Themowingheightguresshouldbeused
justasaguideline.Dependingontheconditionsof
thelawnortheground,theactuallawnheightmay
becomeslightlydierentfromthesetheight.
NOTE:Tryatestmowingofgrassinalessconspicu-
ousplacetogetyourdesiredheight.
Grass level indicator
►Fig.20: 1. Grass level indicator
Grass level indicator shows the volume of mowed grass.
• When the grass basket is not full, the indicator
oatsduringmowing.
•
When the grass basket is full, the indicator does not
oatduringmowing.Inthiscase,stopmowingimme-
diatelyandemptythebasket.Afteremptyingthe
basket, clean it so that its meshwork vents the air.
NOTE:
This indicator is a rough guide. Depending on the condi-
tionsofinsideofthebasket,thisindicatormaynotworkproperly.
Adjusting the handle height
CAUTION: Before removing the bolts, hold
the upper handle rmly.Otherwise,thehandlemay
fallandcauseaninjury.
Thehandleheightcanbeadjustedintwolevels.
1. Loosen the thumb nuts of the handle, and then
remove the bolts and thumb nuts.
►Fig.21: 1. Thumb nut
2. Adjustthehandleheight.
3. Insert the bolts from outside, and then tighten the
thumb nuts from inside.
Using mulching plug
Themulchingplugallowsyoutoreturnthecutgrassto
the ground without gathering the cut grass in the grass
basket.Whenyouoperatethemachinewiththemulch-
ing plug, be sure to remove the grass basket.
NOTICE: When using the machine with the
mulching plug, make sure that the total length of
grass after cutting is 30 mm or more, and the cut
length is 15 mm or less.
►Fig.22: (1) 30 mm or more (2) 15 mm or less
OPERATION
Mowing
WARNING: Before mowing, clear away sticks
and stones from mowing area. Furthermore, clear
away any weeds from mowing area in advance.
WARNING: Always wear the safety goggles or
safety glasses with side shields when operating
the mower.
CAUTION: If the cut grass or foreign object
blocks up inside of the mower body, be sure to
remove the battery cartridges and wear gloves
before removing the grass or foreign object.
NOTICE: Use this machine for mowing lawn only.
Do not mow weeds with this machine.
►Fig.23
Firmlyholdthehandlewithbothhandswhenmowing.
Themowingspeedguidelineisapproximately2to4
seconds per 1 meter.
►Fig.24
NOTE: When cutting long lawn or dense lawn, if the
unevennessinthelengthoflawnorpoornishis
found after mowing, or decrease of the motor speed
is found during mowing, decrease the mowing speed
lower than recommended in this manual, or raise the
mowing height.
The center lines of the front wheels are guidelines to mowing
width. Using the center lines as guidelines, mow in strips. Overlap
byonehalftoonethirdthepreviousstriptomowthelawnevenly.
►Fig.25: 1. Mowing width 2. Overlapping area
3. Center line
Change the mowing direction each time to prevent the
grassgrainpatternfromforminginjustonedirection.
►Fig.26
Periodicallycheckthegrassbasketformowedgrass.
Emptythegrassbeforeitbecomesfull.Beforeeveryperi-
odicalcheck,besuretostopandturnothemachine.
NOTICE: Using the mower with the grass basket
full prevents smooth blade rotation and places
an extra load on the motor, which may cause
breakdown.

16 ENGLISH
Mowing a long-grass lawn
Donottrytocutlonggrassallinonego.Instead,mow
thelawninsomesteps.Leaveadayortwobetween
mowsuntilthelawnbecomesevenlyshort.
NOTE: Mowing long grass to a short length all in one
gomaycausethegrasstodie.Thecutgrassmay
alsoblockupinsideofthemowerbody.
Emptying the grass basket
WARNING: To reduce a risk of accident, reg-
ularly check the grass basket for any damage or
weakened strength. Replace the grass basket if
necessary.
1. Release the switch lever.
2. Removethebatterycartridge.
3. Open the rear cover and take out the grass basket
byholdingthehandle.
►Fig.27: 1. Rear cover 2. Handle
4. Emptythegrassbasket.
MAINTENANCE
WARNING: Always be sure that the battery
cartridge is removed from the machine before
storing or carrying the machine or attempting to
perform inspection or maintenance.
WARNING: Wear gloves when performing
inspection or maintenance.
WARNING: Always wear the safety goggles or
safety glasses with side shields when performing
inspection or maintenance.
NOTICE: Never use gasoline, benzine, thinner,
alcohol or the like. Discoloration, deformation or
cracks may result.
To maintain product SAFETY and RELIABILITY,
repairs,anyothermaintenanceoradjustmentshould
beperformedbyMakitaAuthorizedorFactoryService
Centers,alwaysusingMakitareplacementparts.
Maintenance
1. Removethebatterycartridge,andthenclosethe
batterycover.
2. Put the mower on its side. Clean grass clippings
accumulated on the underside of mower deck.
3. Pour water toward the bottom of the machine to
which the blade is attached.
NOTICE: Do not wash the machine with high
pressure water.
4. Check all nuts, bolts, screws, etc. for tightness.
5.
Inspect moving parts for damage, breakage, and wear.
Damaged or missing parts should be repaired or replaced.
6.
Store the mower in a safe place out of the reach of children.
Storage
CAUTION: When putting the machine in the
upright position, place the machine on a at and
stable surface. If the machine is placed on an unsta-
blesurface,themachinemayfalloverandcausean
injury.
Storemowerindoorsinacool,dryandlockedplace.
Don't store the mower and charger in locations where
thetemperaturemayreachorexceed40°C.
1. Removethebatterycartridge.
2. Remove the grass basket.
3. Unfold the clamping levers, then fold the handle,
and then fold the clamping levers.
►Fig.28: 1. Clamping lever
4. Loosen the thumb nuts of the handle, and then
fold the upper handle.
►Fig.29: 1. Thumb nut 2. Upper handle
5. Place the machine in the upright position.
NOTE: When putting the mower in the upright posi-
tion,donotholdthehandleonly,butholdthemower
bodyandhandle.
6. Store the grass basket between the handle and
themowerbody.
►Fig.30: 1. Grass basket
Carrying the mower
CAUTION: Before carrying the mower, make
sure that the battery cartridge is removed.
Whencarryingthemower,holdthereargripandthe
lower holding part at the front of the machine as shown
inthegure.
►Fig.31: 1. Lower holding part 2. Rear grip
Removing or installing the mower blade
WARNING:
Always remove the battery cartridge
when removing or installing the blade. Failure to remove
the battery cartridge may cause a serious injury.
WARNING:
The blade coasts for a few seconds
after releasing the switch. Do not start any operation
until the blade comes to a complete stop.
WARNING: Always wear gloves when han-
dling the blade.
NOTICE: When removing or installing the
mower blade, use the box wrench included in the
machine package.

17 ENGLISH
Removing the mower blade
1. Put the mower on its side so that the mowing
heightadjustinglevercomestotheupperside.
2. To lock the blade rotation, insert a pin or tool such
asscrewdriverintoaholeonthemowerbody.
3. Turn the bolt counterclockwise with the wrench.
►Fig.32: 1. Mower blade 2. Wrench 3. Screwdriver
4. Hole
4. Remove the bolt and blade in order.
►Fig.33: 1. Blade support 2. Mower blade 3. Bolt
Installing the mower blade
To install the mower blade, take the removal procedure in reverse.
WARNING: Install the mower blade carefully.
It has a top/bottom facing.
WARNING: Tighten the bolt clockwise rmly
to secure the blade.
WARNING:
Make sure that the mower blade and all
the xing parts are installed correctly and tightened securely.
WARNING:
When you replace the blades, always
follow the instructions provided in this manual.
NOTICE: When tightening the bolt to install the
mower blade, apply 19 - 29 N•m as tightening
torque (the values are just for a reference).
TROUBLESHOOTING
Beforeaskingforrepairs,conductyourowninspectionrst.Ifyoundaproblemthatisnotexplainedinthemanual,
donotattempttodisassemblethemachine.Instead,askMakitaAuthorizedServiceCenters,alwaysusingMakita
replacement parts for repairs.
State of abnormality Probable cause (malfunction) Remedy
Mower does not start. Batterycartridgeisnotinstalled. Installchargedbatterycartridge.
Batteryproblem(undervoltage) Rechargethebatterycartridge.Ifrechargingisnot
eective,replacebatterycartridge.
Motor stops running after a little use. Battery'schargelevelislow. Rechargethebatterycartridge.Ifrechargingisnot
eective,replacebatterycartridge.
Cutting height is too low. Increase the cutting height.
Motor does not reach maximum
RPM. Batterycartridgeisinstalledimproperly.
Installthebatterycartridgeasdescribedinthismanual.
Batterypowerisdropping. Rechargethebatterycartridge.Ifrechargingisnot
eective,replacebatterycartridge.
Thedrivesystemdoesnotworkcorrectly.
Askyourlocalauthorizedservicecenterforrepair.
Mower blade does not rotate:
stopthemowerimmediately!
Foreignobjectsuchasabranchis
jammedneartheblade. Removetheforeignobject.
Thedrivesystemdoesnotworkcorrectly.
Askyourlocalauthorizedservicecenterforrepair.
Abnormal vibration:
stopthemowerimmediately!
Bladeisimbalanced,excessivelyor
unevenlyworn.
Replace the blade.
OPTIONAL ACCESSORIES
CAUTION: These accessories or attachments
are recommended for use with your Makita
machine specied in this manual.Theuseofany
other accessories or attachments might present a risk
ofinjurytopersons.Onlyuseaccessoryorattach-
ment for its stated purpose.
Ifyouneedanyassistanceformoredetailsregard-
ingtheseaccessories,askyourlocalMakitaService
Center.
• Mower blade
• Makitagenuinebatteryandcharger
NOTE:Someitemsinthelistmaybeincludedinthe
productpackageasstandardaccessories.Theymay
dierfromcountrytocountry.

18 POLSKI
POLSKI (Instrukcja oryginalna)
DANE TECHNICZNE
Model: LM003G LM004G
Szerokośćkoszenia(średnicanoża) 380 mm 430 mm
Prędkośćbezobciążenia 3 800 min-1
Numerczęścizamiennego
nożakosiarki Prostynóżkosiarki 1913G8-3 1913H4-8
Nóżdomulczowania 1913H0-6 1913H6-4
Wymiary
(dług.xszer.xwys.) podczaspracy D: 1 370 mm do 1 420 mm
Sz: 450 mm
W: 990 mm do 1 020 mm
D: 1 390 mm do 1 440 mm
Sz: 460 mm
W: 990 mm do 1 020 mm
podczasprzechowywania
(bezkoszanatrawę)
520 mm x 450 mm x 880 mm 520 mm x 460 mm x 885 mm
Napięcieznamionowe Prądstały36V–40Vmaks.
Masa netto 14,9–17,3kg 15,6–18,2kg
Stopieńochrony IPX4
• Wzwiązkuzestaleprowadzonymprzeznasząrmęprogramembadawczo-rozwojowymniniejszedanemogą
uleczmianombezwcześniejszegopowiadomienia.
• Danetechnicznemogąróżnićsięwzależnościodkraju.
• Masamożebyćróżnawzależnościodosprzętu,wtymakumulatora.Wtabeliprzedstawionajestnajlżejszai
najcięższakonguracja,zgodniezprocedurąEPTA01/2014.
Kompatybilne akumulatory i ładowarki
Akumulator BL4020 / BL4025 / BL4040 / BL4040F / BL4050F / BL4080F
Ładowarka DC40RA / DC40RB / DC40RC / DC40WA
• Pewnezwymienionychpowyżejakumulatorówiładowarekmogąbyćniedostępnewregioniezamieszkania
użytkownika.
OSTRZEŻENIE: Należy używać wyłącznie akumulatorów i ładowarek wymienionych powyżej.
Używanieinnychakumulatorówiładowarekmożestwarzaćryzykowystąpieniaobrażeńciałalubpożaru.
OSTRZEŻENIE: Nie używać z tą maszyną przewodowych źródeł zasilania, takich jak adapter akumu-
latora lub przenośna jednostka zasilająca.Przewódtakiegoźródłazasilaniamożeutrudniaćpracę,awkonse-
kwencjimożedojśćdoobrażeńciała.
Symbole
Poniżejpokazanosymbole,jakiemogąbyćzastoso-
wanenaurządzeniu.Przedrozpoczęciemużytkowania
należyzapoznaćsięzichznaczeniem.
Zachowaćszczególnąostrożność.
Przeczytaćinstrukcjęobsługi.
Niebezpieczeństwo;uważaćnawyrzucane
przedmioty.
Odległośćmiędzymaszynąaosobami
postronnymimusiwynosićconajmniej15m.
Nigdyniewkładaćrąkanistóppodkosiarkę,
wpobliżenożakosiarki.Nożekosiarkiobra-
cająsięnawetpowyłączeniusilnika.
Ostrzeżenie:Przedrozpoczęciemkonser-
wacjinależyodłączyćakumulator.
Ni-MH
Li-ion
DotyczytylkopaństwUE
Zuwaginaobecnośćwsprzęcienie-
bezpiecznychskładników,zużytysprzęt
elektryczny,elektroniczny,akumulatory
orazbateriemogąpowodowaćnegatywny
wpływnaśrodowiskoizdrowieludzi.
Niewyrzucajurządzeńelektrycznych,
elektronicznychlubakumulatorówwrazz
odpadami z gospodarstwa domowego!
ZgodniezEuropejskąDyrektywąw
sprawiezużytegosprzętuelektrycznegoi
elektronicznegoorazdotyczącąakumula-
torówibateriiorazzużytychakumulatorów
ibaterii,atakżedostosowaniemichdo
prawakrajowego,zużyteurządzenia
elektryczne,elektroniczne,bateriei
akumulatory,należyskładowaćosobnoi
przekazywaćdopunktuselektywnejzbiórki
odpadówkomunalnych,działającego
zgodniezprzepisamidotyczącymiochrony
środowiska.
Informujeotymsymbolprzekreślonego
kołowegokonteneranaodpadyumiesz-
czonynasprzęcie.

19 POLSKI
Gwarantowanypoziommocyakustycznej
zgodniezdyrektywąUEwsprawiehałasu
nazewnątrz.
Poziommocyakustycznejzgodniez
australijskimiprzepisamidot.redukcji
hałasudlaNowejPołudniowejWalii
Przeznaczenie
Maszynatajestprzeznaczonadokoszeniatrawników.
Hałas
TypowyrównoważnypoziomdźwiękuAokreślonyw
oparciuonormęEN62841-4-3:
Model LM003G
Zmierzonypoziommocyakustycznej(LWA): 90 dB (A)
Gwarantowanypoziommocyakustycznej(LWA): 93 dB (A)
Poziomciśnieniaakustycznego(LpA): 83 dB(A)
Niepewnośćdlapoziomuciśnieniaakustycznego(K):3dB(A)
Model LM004G
Zmierzonypoziommocyakustycznej(LWA): 90 dB (A)
Gwarantowanypoziommocyakustycznej(LWA): 93 dB (A)
Poziomciśnieniaakustycznego(LpA): 81 dB(A)
Niepewnośćdlapoziomuciśnieniaakustycznego(K):3dB(A)
WSKAZÓWKA:Deklarowanawartośćemisjihałasu
zostałazmierzonazgodniezestandardowąmetodą
testowąimożnająwykorzystaćdoporównywania
narzędzi.
WSKAZÓWKA:Deklarowanąwartośćemisjihałasu
możnatakżewykorzystaćwewstępnejocenie
narażenia.
OSTRZEŻENIE: Nosić ochronniki słuchu.
OSTRZEŻENIE: Poziom hałasu wytwa-
rzanego podczas rzeczywistego użytkowania
elektronarzędzia może się różnić od wartości
deklarowanej w zależności od sposobu użytko-
wania narzędzia, a w szczególności od rodzaju
obrabianego elementu.
OSTRZEŻENIE: W oparciu o szacowane
narażenie w rzeczywistych warunkach użytkowa-
nia należy określić środki bezpieczeństwa w celu
zapewnienia ochrony operatora (uwzględniając
wszystkie elementy cyklu działania, tj. czas, kiedy
narzędzie jest wyłączone i kiedy pracuje na biegu
jałowym, a także czas, kiedy jest włączone).
Drgania
Całkowitawartośćpoziomudrgań(sumawektoróww3
osiach)określonazgodnieznormąEN62841-4-3:
Model LM003G
Emisjadrgań(ah): 2,5 m/s2lubmniej
Niepewność(K):1,5m/s2
Model LM004G
Emisjadrgań(ah): 2,5 m/s2lubmniej
Niepewność(K):1,5m/s2
WSKAZÓWKA:Deklarowanawartośćpoziomu
drgańzostałazmierzonazgodniezestandardową
metodątestowąimożnająwykorzystaćdoporówny-
wanianarzędzi.
WSKAZÓWKA:Deklarowanąwartośćpoziomu
drgańmożnatakżewykorzystaćwewstępnejocenie
narażenia.
OSTRZEŻENIE: Drgania wytwarzane pod-
czas rzeczywistego użytkowania elektronarzędzia
mogą się różnić od wartości deklarowanej w
zależności od sposobu użytkowania narzędzia,
a w szczególności od rodzaju obrabianego
elementu.
OSTRZEŻENIE: W oparciu o szacowane
narażenie w rzeczywistych warunkach użytkowa-
nia należy określić środki bezpieczeństwa w celu
zapewnienia ochrony operatora (uwzględniając
wszystkie elementy cyklu działania, tj. czas, kiedy
narzędzie jest wyłączone i kiedy pracuje na biegu
jałowym, a także czas, kiedy jest włączone).
Deklaracje zgodności
Dotyczy tylko krajów europejskich
DeklaracjezgodnościsądołączonejakozałącznikAdo
niniejszejinstrukcjiobsługi.
OSTRZEŻENIA
DOTYCZĄCE
BEZPIECZEŃSTWA
Ogólne zasady bezpiecznej
eksploatacji elektronarzędzi
OSTRZEŻENIE Należy zapoznać się z wszyst-
kimi ostrzeżeniami dotyczącymi bezpieczeństwa,
instrukcjami, ilustracjami i danymi technicz-
nymi dołączonymi do tego elektronarzędzia.
Niezastosowaniesiędowszystkichpodanychponiżej
instrukcjimożeprowadzićdoporażeniaprądemelek-
trycznym,pożarui/lubpoważnychobrażeńciała.
Wszystkie ostrzeżenia i instruk-
cje należy zachować do wykorzy-
stania w przyszłości.
Pojęcie„elektronarzędzie”,występującewwymienio-
nychtuostrzeżeniach,odnosisiędoelektronarzędzia
zasilanegozsiecielektrycznej(zprzewodemzasilają-
cym)lubdoelektronarzędziaakumulatorowego(bez
przewoduzasilającego).

20 POLSKI
Ostrzeżenia dotyczące
bezpieczeństwa dla akumulatorowej
kosiarki do trawy
1. Nie należy używać kosiarki do trawy przy
złej pogodzie, w szczególności, jeśli istnieje
ryzyko wyładowań atmosferycznych.Dzięki
temuzmniejszysięryzykoporażeniapiorunem.
2.
Należy dokładnie sprawdzić, czy w obszarze, w
którym ma być używana kosiarka do trawy, nie ma
dzikich zwierząt.Podczaspracyzużyciemkosiarki
dotrawymożedojśćdoobrażeńudzikichzwierząt.
3. Należy dokładnie sprawdzić obszar, w którym
ma być używana kosiarka do trawy i usunąć
wszystkie kamienie, patyki, druty, kości i inne
przedmioty.Wyrzucaneprzedmiotymogąspowo-
dowaćobrażeniaciała.
4. Przed użyciem kosiarki zawsze należy wzro-
kowo sprawdzić, czy ostrze i zespół ostrzy nie
są zużyte lub uszkodzone.Zużytelubuszko-
dzoneczęścizwiększająryzykoobrażeń.
5. Regularnie sprawdzać chwytak trawy pod
kątem zużycia lub uszkodzeń.Zużytylubuszko-
dzonychwytaktrawymożezwiększyćryzyko
obrażeńciała.
6. Osłony powinny być założone. Osłony muszą
być sprawne i muszą być prawidłowo zamon-
towane.Jeśliosłonajestluźna,zostałauszko-
dzonalubniedziałaprawidłowo,możespowodo-
waćobrażeniaciała.
7. Dbać o to, by we wlotach powietrza chłodzą-
cego nie gromadziły się odpadki. Zablokowane
wlotypowietrzaizanieczyszczeniamogąspowo-
dowaćprzegrzanielubryzykopożaru.
8. Podczas użytkowania kosiarki do trawy należy
zawsze nosić antypoślizgowe i ochronne
obuwie. Nie wolno używać kosiarki do trawy
bez założonego obuwia lub nosząc sandały.
Zmniejszatoryzykoobrażeństópnaskutekkon-
taktuzruchomymostrzem.
9. Podczas użytkowania kosiarki do trawy
zawsze należy nosić długie spodnie.Odsłonięta
skórazwiększaprawdopodobieństwoobrażeń
spowodowanychprzezwyrzucaneprzedmioty.
10. Unikać koszenia mokrej trawy. Podczas użyt-
kowania urządzenia należy chodzić, a nie
biegać.Pozwalatozmniejszyćryzykopoślizgui
upadku,comożespowodowaćobrażeniaciała.
11. Nie należy używać kosiarki do trawy na
znacząco stromych zboczach. Pozwala to
zmniejszyćryzykoutratykontroli,ślizganiasięlub
upadku,comożespowodowaćobrażeniaciała.
12. W przypadku pracy na zboczach należy sta-
wiać stabilne kroki i poruszać się zawsze w
poprzek zbocza, a nie w górę ani w dół, a pod-
czas zmiany kierunku zachować szczególną
ostrożność.Pozwalatozmniejszyćryzykoutraty
kontroli,ślizganiasięlubupadku,comożespowo-
dowaćobrażeniaciała.
13. Zachować szczególną ostrożność w przy-
padku cofania lub ciągnięcia kosiarki do trawy
w swoim kierunku. Zawsze należy zwracać
uwagę na otoczenie.Pozwalatozredukować
ryzykowywróceniapodczaspracy.
14. Nie dotykać ostrzy ani innych niebezpiecznych
ruchomych części, jeśli nadal się poruszają.
Zmniejszatoryzykoobrażeńspowodowanych
przezruchomeczęści.
15. Podczas usuwania zakleszczonego materiału
lub czyszczenia kosiarki do trawy należy się
upewnić, czy wszystkie przełączniki zasilania
są wyłączone i czy akumulator został odłą-
czony. Nieoczekiwane uruchomienie kosiarki do
trawymożespowodowaćpoważneobrażenia
ciała.
ZACHOWAĆ NINIEJSZE
INSTRUKCJE.
OSTRZEŻENIE: NIE WOLNO pozwolić, aby
wygoda lub rutyna (nabyta w wyniku wielokrot-
nego używania urządzenia) zastąpiły ścisłe prze-
strzeganie zasad bezpieczeństwa obsługi.
NIEWŁAŚCIWE UŻYTKOWANIE narzędzia lub
niestosowanie się do zasad bezpieczeństwa
podanych w niniejszej instrukcji obsługi może
prowadzić do poważnych obrażeń ciała.
WAŻNE ZASADY
BEZPIECZEŃSTWA
OSTRZEŻENIE: Przeczytać wszystkie ostrze-
żenia bezpieczeństwa i wszystkie instrukcje.
Niezastosowaniesiędowspomnianychostrzeżeńi
instrukcjimożedoprowadzićdoporażeniaprądem
elektrycznym,pożarui/lubpoważnychobrażeńciała.
Wszystkie ostrzeżenia i instruk-
cje należy zachować do wykorzy-
stania w przyszłości.
Informacje podstawowe
1.
Należy uważnie przeczytać niniejszą instrukcję.
Należy zapoznać się z elementami sterowania i
zasadami poprawnego użytkowania kosiarki.
2. Nie dopuszczać, aby kosiarka była używana
przez dzieci lub osoby, które nie zapoznały się
z niniejszą instrukcją. Lokalne przepisy mogą
ograniczać wiek użytkownika.
3. Nie wolno użytkować kosiarki, gdy w pobliżu
znajdują się inne osoby, zwłaszcza dzieci, oraz
zwierzęta.
4. Należy pamiętać, że operator lub użytkownik
odpowiada za wypadki lub niebezpieczeństwa
zagrażające innym osobom lub ich mieniu.
5. Należy zwracać uwagę, aby dzieci nie bawiły
się kosiarką.
6. Kondycja zyczna – nie używać kosiarki pod
wpływem narkotyków, alkoholu lub leków.
Przygotowanie
1. Podczas użytkowania kosiarki zawsze należy
nosić odpowiednio mocne obuwie i długie
spodnie. Nie wolno używać kosiarki, nie mając
na stopach obuwia lub nosząc otwarte san-
dały. Unikać noszenia luźnej odzieży lub biżu-
terii, a także wiszących ozdób lub krawatów.
Mogą się one zahaczyć o ruchome części.
Other manuals for LM003G
2
This manual suits for next models
1
Table of contents
Languages:
Other Makita Lawn Mower manuals

Makita
Makita DLM380 User manual

Makita
Makita DLM462 User manual

Makita
Makita PLM4616 User manual

Makita
Makita LM001G User manual

Makita
Makita PLM5102 User guide

Makita
Makita DLM464 User manual

Makita
Makita DLM462 User manual

Makita
Makita PLM4627N User manual

Makita
Makita LM001C User manual

Makita
Makita DLM463 User manual

Makita
Makita XML02 User manual

Makita
Makita DLM533 User manual

Makita
Makita PLM4626 User manual

Makita
Makita LM001J User manual

Makita
Makita DLM462 User manual

Makita
Makita PLM4810 User manual

Makita
Makita DLM533 User manual

Makita
Makita UM40LDW User manual

Makita
Makita LM001CX3 User manual

Makita
Makita BLM430 Manual