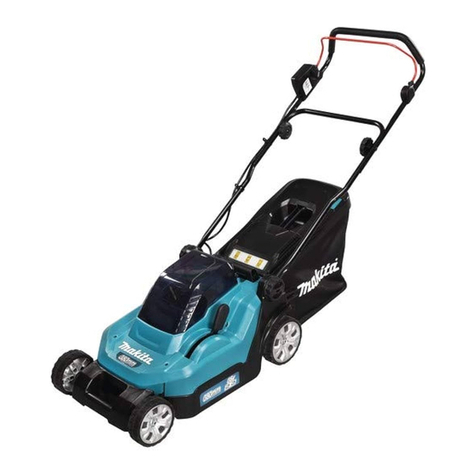
Makita ELM3320 User manual

ELM3320
ELM3720
ELM4120
EN Electric Lawn Mower INSTRUCTION MANUAL 9
ES Cortadora Eléctrica de
Césped
MANUAL DE
INSTRUCCIONES 16
ID Mesin Pemotong Rumput
Elektrik PETUNJUK PENGGUNAAN 24
VI
Máy Cắt Cỏ Đẩy Cầm Tay
Hoạt Động Bằng Động Cơ
Điện
TÀI LIỆU HƯỚNG DẪN 32
TH 39

1
Fig.1
1
Fig.2
1
Fig.3
321
Fig.4
1
Fig.5
1
1
2
Fig.6
1
Fig.7
2

1
1
2
Fig.8
1
Fig.9
Fig.10
1
2
Fig.11
1
Fig.12
1
Fig.13
3

1
Fig.14
1
2
Fig.15
1
Fig.16
1
Fig.17
321
Fig.18
Fig.19
Fig.20
Fig.21
4

1
2
Fig.22
Fig.23
Fig.24
12
33
Fig.25
Fig.26
Fig.27
Fig.28
1
Fig.29
5

2
1
Fig.30
1
2
3
4
Fig.31
1
Fig.32
1
2
Fig.33
1
Fig.34
1
Fig.35
6

Fig.36
1
Fig.37
2
1
Fig.38
1
Fig.39
1
Fig.40
1
2
3
4
Fig.41
1
Fig.42
Fig.43
7

1
Fig.44
1
Fig.45
1
2
3
Fig.46
1
2
3
4
Fig.47
5
4
2
3
1
Fig.48
1
2
3
Fig.49
8

9ENGLISH
ENGLISH (Original instructions)
SPECIFICATIONS
Model: ELM3320 ELM3720 ELM4120
No load speed 3,400 min-1
Cutting height 20 mm - 55 mm 20 mm - 75 mm
Cutting width 330 mm 370 mm 410 mm
Part number of replacement mower blade YA00000731 YA00000732 YA00000733
Dimensions
(L x W x H)
During operation (with
grass basket)
L: 1,040 mm to 1,230 mm
W: 380 mm
H: 870 mm to 1,110 mm
L: 1,140 mm to 1,330 mm
W: 415 mm
H: 890 mm to 1,120 mm
L: 1,255 mm to 1,470 mm
W: 460 mm
H: 955 mm to 1,230 mm
When stored (without grass
basket)
350 mm x 380 mm x
1,090 mm
335 mm x 415 mm x
1,090 mm
395 mm x 460 mm x
1,220 mm
Net weight 10.2 kg 11.6 kg 14.5 kg
Safety class /II
• Duetoourcontinuingprogramofresearchanddevelopment,thespecicationshereinaresubjecttochange
without notice.
• Specicationsmaydifferfromcountrytocountry.
• The weight may differ depending on the attachment(s). The lightest and heaviest combination, according to
EPTA-Procedure 01/2014, are shown in the table.
Symbols
The followings show the symbols used for the equip-
ment. Be sure that you understand their meaning before
use.
Take particular care and attention.
Read the instruction manual.
DOUBLE INSULATION
Danger;beawareofthrownobjects.
The distance between the tool and
bystanders must be at least 15 m.
Wait until all machine components have
completely stopped before touching them.
Keepthesupplyexiblecordawayfrom
the cutting blades.
Beware of sharp blades. Blades continue
to rotate after the motor is switched off.
Remove the plug from the machine before
maintenance or if cord is damaged.
The noise of the machine is not more than
96 dB.
Keep hands and feet away. Do not operate
mower unless the guards and attachments
are in proper place.
Only for EU countries
Do not dispose of electric equipment
together with household waste material! In
observance of the European Directive, on
Waste Electric and Electronic Equipment
and its implementation in accordance with
national law, electric equipment that have
reached the end of their life must be col-
lected separately and returned to an envi-
ronmentally compatible recycling facility.
Intended use
The machine is intended for lawn mowing. Do not use
the machine for other purposes. Use of the machine for
operations other than the intended use could result in a
hazardous situation.
Power supply
The tool should be connected only to a power supply of
the same voltage as indicated on the nameplate, and
can only be operated on single-phase AC supply. They
are double-insulated and can, therefore, also be used
from sockets without earth wire.
If the supply cord is damaged, it must be replaced by
the manufacturer or its service agent in order to avoid
a hazard.

10 ENGLISH
SAFETY WARNINGS
IMPORTANT SAFETY
INSTRUCTIONS
WARNING: Read all safety warnings and
all instructions. Failure to follow the warnings and
instructionsmayresultinelectricshock,reand/or
seriousinjury.
Save all warnings and instruc-
tions for future reference.
1. Children should be supervised to ensure that
they do not play with the mower.
2. Never allow children or people unfamiliar with
these instructions to use the mower. Local
regulations can restrict the age of the operator.
3. Never operate the mower while people, espe-
cially children, or pets are nearby.
4. Keep in mind that the operator or user is
responsible for accidents or hazards occurring
to other people or their property.
5. While operating the mower, always wear sub-
stantial footwear and long trousers. Do not
operate the mower when barefoot or wearing
open sandals. Avoid wearing clothing or jew-
elry that is loose tting or that has hanging
cords or ties. They can be caught in moving
parts.
6. Always wear protective goggles to protect
your eyes from injury when using power tools.
The goggles must comply with ANSI Z87.1 in
the USA, EN 166 in Europe, or AS/NZS 1336
in Australia/New Zealand. In Australia/New
Zealand, it is legally required to wear a face
shield to protect your face, too.
It is an employer's responsibility to enforce
the use of appropriate safety protective equip-
ments by the tool operators and by other per-
sons in the immediate working area.
7. Before use, check the supply and power
cord for signs of damage or aging. If the cord
becomes damaged during use, disconnect
the cord from the supply immediately. Do not
touch the cord before disconnecting the sup-
ply. Do not use the mower if the cord is dam-
aged or worn.
8. Operate the mower only in daylight or in good
articial light.
9. Avoid operating the mower in wet grass.
10. Never operate the mower in the rain.
11. Always keep a rm hold on the handle.
12. Always be sure of your footing on slopes.
13. Walk, never run.
14. Don't grasp the exposed cutting blades or
cutting edges when picking up or holding the
mower.
15. Physical condition - Do not operate mower
while under the inuence of drugs, alcohol, or
any medication.
16. Keep hands and feet away from rotating
blades. Caution - Blades coast after the mower
is switched off.
17. Use only the manufacturer genuine blades
specied in this manual.
18. Check the blades carefully for cracks or dam-
age before operation. Replace cracked or
damaged blades immediately.
19. Be sure the area is clear of other people before
mowing. Stop mower if anyone enters the area.
20. Remove foreign matters such as rocks, wire,
bottles, bones and large sticks from the work
area before mowing to prevent personal injury
or damage to the mower.
21. Stop operation immediately if you notice
anything unusual. Switch off the mower and
unplug the power cord from the power supply.
Then inspect the mower.
22. Never attempt to make wheel height adjust-
ments while mower is running.
23. Release switch lever and wait for blade rota-
tion to stop before crossing driveways, walks,
roads, and any gravel-covered areas. Also
unplug the power cord from the power supply
if you leave the mower, reach to pick up or
remove something out of your way, or for any
other reason that may distract you from what
you are doing.
24. Objects struck by the mower blade can cause
severe injuries to persons. The lawn should
always be carefully examined and cleared of
all objects prior to each mowing.
25. If the mower strikes a foreign object, follow
these steps:
- Stop the mower, release the switch lever and
wait until the blade comes to a complete stop.
- Unplug the power cord from the power
supply.
- Thoroughly inspect the mower for any
damage.
- Replace the blade if it is damaged in any way.
Repair any damage before restarting and con-
tinuing to operate the mower.
26. Check the grass basket frequently for wear or
deterioration. For storage, always make sure
the grass basket is empty. Replace a worn
grass basket with a new factory replacement
for safety.
27. Use extreme caution when reversing or pulling
the mower towards you.
11 ENGLISH
28. Stop the blade(s) if the mower has to be tilted
for transportation when crossing surfaces
other than grass, and when transporting the
mower to and from the area to be used.
29. Never operate the mower with defective
guards or shields, or without safety devices,
for example deectors and/or grass basket, in
place.
30. Switch on the mower carefully according to
instructions and with feet well away from the
blade(s).
31. Do not tilt the mower when switching on the
motor, except if the mower has to be tilted
for starting. In this case, do not tilt it more
than absolutely necessary and lift only the
part, which is away from the operator. Always
ensure that both hands are in the operating
position before returning the appliance to the
ground.
32. Do not start the mower when standing in front
of the discharge opening.
33. Do not put hands or feet near or under rotating
parts. Keep clear of the discharge opening at
all times.
34. Do not transport the mower while the mower is
turned on.
35. Stop the mower, and remove plug from the
socket. Make sure that all moving parts have
come to a complete stop
- whenever you leave the mower,
- before clearing blockages or unclogging
chute,
- before checking, cleaning or working on the
mower,
- after striking a foreign object. Inspect the
mower for damage and make repairs before
restarting and operating the mower.
36. If the mower starts to vibrate abnormally
(check immediately)
- inspect for damage,
- replace or repair any damaged parts,
- check for and tighten any loose parts.
37. Be careful during adjustment of the mower
to prevent entrapment of the ngers between
moving blades and xed parts of the mower.
38. Mow across the face of slopes, never up and
down. Exercise extreme caution when chang-
ing direction on slopes. Do not mow exces-
sively steep slopes.
39. Do not wash with a hose; avoid getting water
in motor and electrical connections.
40. Check the blade mounting bolt at frequent
intervals for proper tightness.
41. Keep all nuts, bolts, and screws tight to
be sure the equipment is in safe working
condition.
42. Take care as rotating one blade can cause
other blades to rotate.
43. Always allow the mower to cool down before
storing.
44. When servicing the blades be aware that, even
though the power source is switched off, the
blades can still be moved.
45. Replace worn or damaged parts for safety.
Use only genuine replacement parts and
accessories.
46. Have your power tool serviced by a qualied
repair person using only identical replacement
parts. This will ensure that the safety of the power
tool is maintained.
47. Follow instruction for lubricating and chang-
ing accessories.
48. Keep handles dry, clean and free from oil and
grease.
49. Check to make sure that the voltage and fre-
quency of the power supply correspond to the
specications given on the identication plate.
We recommend the use of a residual-current-op-
erated circuit breaker (ground-fault circuit inter-
rupter) with a tripping current of 30 mA or less, or
an earth leakage current protector.
50. This machine can be used by children aged
from 8 years and above and persons with
reduced physical, sensory or mental capabil-
ities or lack of experience and knowledge if
they have been given supervision or instruc-
tion concerning use of the machine in a safe
way and understand the hazards involved.
Cleaning and user maintenance shall not be
made by children without supervision.
Residual risks
Even if you are operating this product in accordance
withallthesafetyrequirements,potentialrisksofinjury
and damage remain. The following dangers can arise in
connection with the structure and design of this product.
1. Health defects resulting from vibration emission
if the product is being used over long periods of
time or not adequately managed and properly
maintained.
2. Injuriesanddamagetopropertyduetobroken
application tools or the sudden impact of hidden
objectsduringuse.
3. Dangerofinjuryandpropertydamagecausedby
yingobjects.
WARNING: This product produces an elec-
tromagnetic eld during operation. This eld may
under some circumstances interfere with active
or passive medical implants. To reduce the risk
of serious or fatal injury, we recommend persons
with medical implants to consult their doctor and
the medical implant manufacturer before operat-
ing this product.
SAVE THESE INSTRUCTIONS.
WARNING: DO NOT let comfort or familiarity
with product (gained from repeated use) replace
strict adherence to safety rules for the subject
product.
MISUSE or failure to follow the safety rules stated
in this instruction manual may cause serious
personal injury.

12 ENGLISH
ASSEMBLY
CAUTION: Always be sure that the tool is
switched off and unplugged before carrying out
any work on the tool.
Assembling the handle
1. Unload the upper handle from the main unit of the
machine.
►Fig.1: 1. Upper handle
2. Loosen the thumb nuts.
►Fig.2: 1. Thumb nut
3. Widen the handle outside a little, and then raise
the handle.
►Fig.3: 1. Handle
4. Adjustthehandleheightbyaligningthearrowwith
the mark.
►Fig.4: 1. Thumb nut 2. Mark 3. Arrow
5. Tighten the thumb nuts.
►Fig.5: 1. Thumb nut
6. Attach the upper handle by inserting the levers
from the outside of the handle, and then tighten the nuts
with the wrench to secure the handle.
►Fig.6: 1. Lever 2. Nut
7. Secure the cords with the clamps as shown in the
gure.
►Fig.7: 1. Clamp
Installing the grass basket
1. Attach the pipes of the grass basket to the frame.
►Fig.8: 1. Pipe 2. Frame
2. Open the rear cover.
►Fig.9: 1. Rear cover
3. Hook the grass basket onto the rear side of the
machine.
►Fig.10
To remove the grass basket, perform the installation
procedure in reverse.
Connecting extension cord
WARNING: When connecting the extension
cord to the power plug of the machine, make sure
that the switch lever is released and the cord is
unplugged from the power supply.
WARNING: Do not connect or disconnect the
extension cord with wet hands.
NOTICE: When connecting the extension cord to
the power plug of the machine, be sure to insert it
fully into the socket.
When connecting the extension cord, hook it over the
hookonthehandleasshownintheguretoprevent
inadvertent unplugging by excessive strain on the plug.
►Fig.11: 1. Hook 2. Extension cord
FUNCTIONAL
DESCRIPTION
Adjusting the mowing height
WARNING: Before adjusting the mowing
height, unplug the extension cord from the power
supply, and check that the blades have come to a
complete halt.
WARNING: Never put your hand or leg under
the mower body when adjusting the mowing
height.
Youcanadjustthemowingheightintherangeof20mm
to 55 mm (for ELM3320/ELM3720) or 20 mm to 75 mm
(forELM4120).Themowingheightcanbeadjusted
in 3 levels (for ELM3320/ELM3720) or 7 levels (for
ELM4120).
For ELM3320/ELM3720
►Fig.12: 1.Adjustinglever
For ELM4120
►Fig.13: 1.Adjustinglever
Hold the handle with one hand, and then move the
adjustingleverwiththeotherhand.
►Fig.14: 1.Adjustinglever
NOTE: Try a test mowing of grass in a less conspicu-
ous place to get your desired height.
Switch action
WARNING: Before plugging in the tool,
always check that the switch lever actuates
properly and returns to the “OFF” position when
released.
WARNING: For your safety, this machine is
equipped with the lock-off button which prevents
the tool from unintended starting. Never use the
machine if it starts when you pull the switch lever
without pressing the lock-off button. Ask your
local Makita Service Center for repairs.
WARNING: Never disable the lock function or
tape down the lock-off button.
NOTICE: Do not pull the switch lever forcibly
without pressing the lock-off button. The switch
may break.
To start the machine, press the lock-off button, and
then squeeze in the switch lever. To stop the machine,
release the switch lever.
►Fig.15: 1. Switch lever 2. Lock-off button

13 ENGLISH
Level indicator of grass basket
The level indicator of the grass basket opens during
mowing if the grass basket is not full. If the grass basket
is full, the level indicator closes during mowing. If it's
full, empty the grass basket before starting mowing.
►Fig.16: 1. Level indicator
►Fig.17: 1. Level indicator
Adjusting the handle height
Thehandleheightcanbeadjustedinthreelevels.
Loosen the thumb nuts while holding the handle, then
adjustthehandleheightbyaligningthearrowwithone
of the marks, and then tighten the thumb nuts.
►Fig.18: 1. Thumb nut 2. Mark 3. Arrow
Motor protection system (Over
current relay)
WARNING: If the machine suddenly stops
while operating it, release the switch lever
and unplug the extension cord. Otherwise, the
machine may suddenly restart and cause an
injury.
CAUTION: Before removing an object that is
jamming the blade, be sure to wear gloves and
unplug the extension cord from the power socket.
Ifthecutoffgrassordirtisjamminginsideofthemain
body, the machine stops automatically to protect the
motor (over current relay). In this case, unplug the
extension cord from the power socket, then remove the
materialcausingthejam,andthenletthemachinecool
down for a few minutes before turning on the machine.
NOTE: The over current relay may be activated when
wet or long grass gets caught up inside of the main
body.
OPERATION
Mowing
WARNING: Before mowing, clear away sticks
and stones from the mowing area. Furthermore,
clear away any weeds from the mowing area in
advance.
►Fig.19
WARNING: Always wear the safety goggles or
safety glasses with side shields when operating
the mower.
CAUTION: If the cut grass or foreign object
blocks up inside of the mower body, be sure to
turn the power off, and then unplug the extension
cord from the power socket. Before removing the
grass or foreign object, be sure to wear gloves.
CAUTION: Be sure to install the grass basket
when operating the machine.
NOTICE: Use this machine for mowing lawn only.
Do not mow weeds with this machine.
Firmly hold the handle with both hands when mowing.
►Fig.20
The mowing speed guideline is approximately one
meter per four seconds.
►Fig.21
Start mowing near the power socket to ensure that the
extension cord does not become an obstacle.
►Fig.22: 1. Power socket 2. Extension cord
Do not allow the extension cord to pass under or
become entangled beneath the machine.
►Fig.23
►Fig.24
The lines on both sides of the main body are guidelines
to mowing width. Using the lines as guidelines, mow in
strips. Overlap by one half to one third the previous strip
to mow the lawn evenly.
►Fig.25: 1. Mowing width 2. Overlapping area 3. Line
Change the mowing direction each time to prevent the
grassgrainpatternfromforminginjustonedirection.
►Fig.26
Periodically check the grass basket for mowed grass.
Empty the basket before it becomes full. Before every
periodic check, be sure to stop the machine.
NOTE: Using the mower with the grass basket full
prevents smooth blade rotation and places an extra
load on the motor, which may cause a breakdown.
Mowing a long-grass lawn
Do not try to cut long grass all at once. Instead, mow
the lawn in steps. Leave a day or two between mowings
until the lawn becomes evenly short.
►Fig.27
NOTE: Mowing long grass to a short length all at
once may cause the grass to die. The cut grass may
also block up inside of the mower body.
Edge mowing
When mowing at the edge, be sure to move the
machine along the edge.
►Fig.28

14 ENGLISH
MAINTENANCE
WARNING: Before performing the mainte-
nance, unplug the extension cord from the power
supply, and conrm that the blades have come to
a complete halt.
CAUTION: When performing the mainte-
nance, always wear gloves.
To maintain product SAFETY and RELIABILITY,
repairs,anyothermaintenanceoradjustmentshould
be performed by Makita Authorized or Factory Service
Centers, always using Makita replacement parts.
Maintenance after mowing
After mowing, wipe the machine with a dry cloth or a
cloth dipped in soapy water. Also, use a soft brush to
brush off grass cuttings and dirt from blades.
NOTICE: Never use gasoline, benzine, thinner,
alcohol or the like. Discoloration, deformation or
cracks may result.
Storing
1. Disconnect the extension cord.
►Fig.29: 1. Extension cord
2. Open the rear cover, and then remove the grass
basket.
►Fig.30: 1. Rear cover 2. Grass basket
3. Loosen the thumb nuts while holding the handle,
then widen the handle outside a little, and then fold the
handle.
►Fig.31: 1. Thumb nut 2. Handle 3. Mark 4. Arrow
CAUTION: When folding the handle, be care-
ful not to pinch your hand or ngers.
NOTE: Make sure that the arrow indicates the mark
at the most front position.
4. Tighten the thumb nuts.
►Fig.32: 1. Thumb nut
5. Open the levers, and then place the cord over the
lever.
►Fig.33: 1. Lever 2. Cord
6. Return the levers to the halfway position as shown
inthegure.
►Fig.34: 1. Lever
7. Fold the handle.
►Fig.35: 1. Handle
8. Placethemachineasshowninthegure.
►Fig.36
CAUTION: Be sure to store this machine
indoors and place it on a at surface. Otherwise,
themachinemayfallandcauseaninjury.
You can also store the machine as follows.
1. Disconnect the extension cord.
►Fig.37: 1. Extension cord
2. Open the rear cover, and then remove the grass
basket.
►Fig.38: 1. Rear cover 2. Grass basket
3. Setthemowingheightwiththeadjustinglever.
For ELM3320/ELM3720:
Set the mowing height to “1”.
►Fig.39: 1.Adjustinglever
For ELM4120:
Set the mowing height to “2”.
►Fig.40: 1.Adjustinglever
4. Loosen the thumb nuts while holding the handle,
then widen the handle outside a little, and then fold the
handle.
►Fig.41: 1. Thumb nut 2. Handle 3. Mark 4. Arrow
CAUTION: When folding the handle, be care-
ful not to pinch your hand or ngers.
NOTE: Make sure that the arrow indicates the mark
at the most front position.
5. Tighten the thumb nuts.
►Fig.42: 1. Thumb nut
6. Placethemachineasshowninthegure.
►Fig.43
CAUTION: Be sure to store this machine
indoors and place it on a at surface. Otherwise,
themachinemayfallandcauseaninjury.
You can also store the machine by folding the handle.
CAUTION: Before opening the levers, hold
the upper handle rmly. Otherwise, the handle
may fall and cause an injury.
1. Open the levers while holding the upper handle.
►Fig.44: 1. Lever
2. Fold the upper handle.
►Fig.45: 1. Upper handle
Replacing the mower blade
CAUTION: Do not use any wrench other than
the standard hex wrench when replacing the
mower blade. Using a different wrench may lead to
over-tighteningorlooseness,whichmaycauseinjury.
1. Unplug the extension cord and stand up the
machine. (Refer to the instructions for storing.)
2. Insert the pin into the hole, and then hold the han-
dle with one hand and loosen the bolt with the wrench
counterclockwise.
►Fig.46: 1. Blade 2. Wrench 3. Pin

15 ENGLISH
3. Remove the mower blade.
For ELM3320
Remove the bolt, washer, mower blade, and bracket in
order.
►Fig.47: 1. Bracket 2. Mower blade 3. Washer 4. Bolt
For ELM3720/ELM4120
Remove the bolt, washer, mower blade, bracket, and
spacer in order.
►Fig.48: 1. Spacer 2. Bracket 3. Mower blade
4. Washer 5. Bolt
4. Attach a new mower blade, then insert the pin into
the hole, and then hold the handle with one hand and
tightentheboltwiththewrenchclockwisermly.
►Fig.49: 1. Mower blade 2. Wrench 3. Pin
Extension cord
You should only use extension cords for outdoor use,
PVC or rubber cord ordinary duty with a cross sectional
area not less than 1.5 mm2.
Before and during use, check the supply and extension
cords for damage. Do not use the appliance if the cord
is damaged or worn. Keep extension cord away from
cutting elements. If the cord is damaged during use,
disconnect the cord from the supply immediately. Do not
touch the cord before disconnecting the supply.
OPTIONAL
ACCESSORIES
CAUTION: These accessories or attachments
are recommended for use with your Makita tool
specied in this manual. The use of any other
accessories or attachments might present a risk of
injurytopersons.Onlyuseaccessoryorattachment
for its stated purpose.
If you need any assistance for more details regard-
ing these accessories, ask your local Makita Service
Center.
• Mower blade
NOTE: Some items in the list may be included in the
tool package as standard accessories. They may
differ from country to country.

16 ESPAÑOL
ESPAÑOL (Instrucciones originales)
ESPECIFICACIONES
Modelo: ELM3320 ELM3720 ELM4120
Velocidad en vacío 3.400 min-1
Altura de corte 20 mm - 55 mm 20 mm - 75 mm
Anchura de corte 330 mm 370 mm 410 mm
Número de pieza de cuchilla de cortacésped
de recambio
YA00000731 YA00000732 YA00000733
Dimensiones
(La x An x Al)
Durante la operación (con
cesta para hierba)
La: 1.040 mm a 1.230 mm
An: 380 mm
Al: 870 mm a 1.110 mm
La: 1.140 mm a 1.330 mm
An: 415 mm
Al: 890 mm a 1.120 mm
La: 1.255 mm a 1.470 mm
An: 460 mm
Al: 955 mm a 1.230 mm
Cuando está almacenada
(sin cesta para hierba)
350 mm x 380 mm x
1.090 mm
335 mm x 415 mm x
1.090 mm
395 mm x 460 mm x
1.220 mm
Peso neto 10,2 kg 11,6 kg 14,5 kg
Clase de seguridad /II
• Debidoanuestrocontinuadoprogramadeinvestigaciónydesarrollo,lasespecicacionesaquídadasestán
sujetasacambiossinprevioaviso.
• Lasespecicacionespuedenserdiferentesdepaísapaís.
• El peso puede variar dependiendo del accesorio(s). La combinación menos pesada y la más pesada, de
acuerdo con el procedimiento EPTA 01/2014, se muestran en la tabla.
Símbolos
A continuación se muestran los símbolos utilizados con
esteequipo.Asegúresedequeentiendesusignicado
antes de usarlo.
Preste cuidado y atención especiales.
Lea el manual de instrucciones.
DOBLE AISLAMIENTO
Peligro; sea consciente de que salen
objetoslanzados.
La distancia entre la herramienta y los tran-
seúntes deberá ser de 15 m por lo menos.
Espere hasta que todos los componentes
de la máquina se hayan detenido comple-
tamente antes de tocarlos.
Mantengaelcableexibledesuministro
dealimentaciónalejadodelascuchillas
de corte.
Tengacuidadodelascuchillasaladas.
Las cuchillas siguen girando después de
apagar el motor. Retire el enchufe de la
máquina antes de hacer el mantenimiento
o si el cable se daña.
El ruido de la máquina no es más de 96 dB.
Mantengaalejadoslasmanosylospies.
No utilice el cortacésped a menos que los
protectores y accesorios estén montados
debidamente en su sitio.
Solamente para países de la UE
¡Nodesechelosaparatoseléctricosjunto
con los residuos domésticos! De confor-
midad con la Directiva Europea, sobre
residuos de aparatos eléctricos y electró-
nicos y su aplicación de acuerdo con la
legislación nacional, los aparatos eléctricos
cuyavidaútilhayallegadoasundeberán
ser recogidos por separado y trasladados a
unaplantadereciclajequecumplaconlas
exigencias ecológicas.
Uso previsto
La máquina ha sido prevista para segar césped. No
utilicelamáquinaparaotrosnes.Lautilizaciónde
la máquina para operaciones distintas al uso previsto
podrá resultar en una situación peligrosa.
Alimentación
La herramienta deberá ser conectada solamente a
una fuente de alimentación de la misma tensión que
la indicada en la placa de características, y solamente
puede ser utilizada con alimentación de CA monofá-
sica. La herramienta tiene doble aislamiento y puede,
por lo tanto, utilizarse también en tomas de corriente sin
conductor de tierra.
Si el cable de suministro de alimentación se daña,
deberá ser reemplazado por el fabricante o su agente
de servicio para evitar un peligro.

17 ESPAÑOL
ADVERTENCIAS DE
SEGURIDAD
INSTRUCCIONES DE SEGURIDAD
IMPORTANTES
ADVERTENCIA: Lea todas las advertencias
de seguridad y todas las instrucciones. Si no
sigue las advertencias e instrucciones podrá resultar
en una descarga eléctrica, un incendio y/o heridas
graves.
Guarde todas las advertencias
e instrucciones para futuras
referencias.
1. Los niños pequeños deberán ser supervisa-
dos para asegurarse de que no juegan con el
cortacésped.
2. No permita nunca que niños o gente no fami-
liarizada con estas instrucciones utilicen el
cortacésped. Los reglamentos locales pueden
restringir la edad del operario.
3. No utilice nunca el cortacésped cuando haya
gente, especialmente niños o animales domés-
ticos cerca.
4. Tenga en cuenta que el operario o usuario es
el responsable de los accidentes o riesgos
ocasionados a otras personas o propiedades
de las mismas.
5. Mientras utiliza el cortacésped póngase siem-
pre calzado robusto y pantalones largos. No
utilice el cortacésped cuando esté descalzo o
lleve puestas sandalias abiertas. Evite ponerse
ropa o joyas que queden holgadas o que ten-
gan cordones colgando o corbatas. Pueden
engancharse en las piezas que se mueven.
6. Póngase siempre gafas de protección para
proteger sus ojos de heridas cuando utilice
herramientas eléctricas. Las gafas de protec-
ción deben cumplir con las normas ANSI Z87.1
en los Estados Unidos de América, EN 166 en
Europa, o AS/NZS 1336 en Australia/Nueva
Zelanda. En Australia/Nueva Zelanda, se
requiere, también, legalmente ponerse pantalla
facial para proteger la cara.
Es una responsabilidad del empresario impo-
ner a los operarios de la herramienta y a otras
personas en las inmediaciones del área de
trabajo el uso de equipos de protección de
seguridad apropiados.
7. Antes de la utilización, compruebe el cable
de alimentación por si hay indicios de daños
o envejecimiento. Si el cable se daña durante
la utilización, desconéctelo del suministro
de alimentación inmediatamente. No toque el
cable antes de desconectar el suministro de
alimentación. No utilice el cortacésped si el
cable está dañado o desgastado.
8. Utilice el cortacésped solamente en luz diurna
o con buena luz articial.
9. Evite utilizar el cortacésped en hierba mojada.
10. No utilice nunca el cortacésped en la lluvia.
11. Sujete siempre rmemente el asidero.
12. Asegúrese siempre de que en pendientes
apoya bien los pies.
13. Camine, nunca corra.
14. No agarre las cuchillas de corte o bordes de
corte expuestos cuando recoja o sujete el
cortacésped.
15. Condición física - No utilice el cortacésped
bajo la inuencia de drogas, alcohol, o cual-
quier medicación.
16. Mantenga las manos y los pies alejados de las
cuchillas giratorias. Precaución - Las cuchillas
siguen girando por inercia después de apagar
el cortacésped.
17. Utilice solamente las cuchillas genuinas del
fabricante especicadas en este manual.
18. Compruebe las cuchillas cuidadosamente por
si tienen grietas o daños antes de comenzar la
operación. Reemplace las cuchillas agrietadas
o dañadas inmediatamente.
19. Asegúrese de que el área está despejada de
gente antes de segar. Detenga el cortacésped
si entra alguien en el área.
20. Retire los objetos extraños tales como rocas,
alambres, botellas, huesos y palos largos
del área de trabajo antes de segar para evitar
heridas personales o daños al cortacésped.
21. Detenga la operación inmediatamente si nota
algo inusual. Apague el cortacésped y desen-
chufe el cable de alimentación del suministro
de alimentación. Después inspeccione el
cortacésped.
22. No intente nunca realizar el ajuste de altura
de las ruedas mientras el cortacésped está en
marcha.
23. Suelte la palanca interruptor y espere a que la
cuchilla deje de girar antes de cruzar caminos
de acceso, paseos, carreteras, o cualquier
área cubierta con gravilla. También desen-
chufe el cable de alimentación del suministro
de alimentación si deja el cortacésped, si
quiere recoger o retirar algo que está en su
camino, o por cualquier otra razón que pueda
distraerle de lo que está haciendo.

18 ESPAÑOL
24. Los objetos golpeados por la cuchilla de cor-
tacésped pueden ocasionar graves heridas
personales. El césped deberá ser siempre
examinado atentamente y despejado de todos
los objetos antes de cada siega.
25. Si el cortacésped golpea un objeto extraño,
siga estos pasos:
- Detenga el cortacésped, suelte la palanca
interruptor y espere hasta que la cuchilla se
haya detenido completamente.
- Desenchufe el cable de alimentación del
suministro de alimentación.
- Inspeccione detenidamente el cortacésped
por si tiene algún daño.
- Reemplace la cuchilla si tiene cualquier tipo
de daño. Repare cualquier daño antes de vol-
ver a poner en marcha y continuar utilizando el
cortacésped.
26. Compruebe la cesta para hierba con frecuen-
cia por si está desgastada o deteriorada. Al
almacenar, asegúrese siempre de que la cesta
para hierba está vacía. Reemplace la cesta
para hierba si está gastada con una de recam-
bio nueva de fábrica por seguridad.
27. Utilice mucha precaución cuando retroceda o
tire del cortacésped hacia usted.
28. Detenga la(s) cuchilla(s) si el cortacésped
tiene que ser inclinado para transportarlo
cuando atraviese supercies que no sean de
hierba, y cuando transporte el cortacésped
hasta o desde el área donde lo utiliza.
29. No utilice nunca el cortacésped con protecto-
res o escudos defectuosos, o sin los dispositi-
vos de seguridad, por ejemplo, deectores y/o
la cesta para hierba, en su sitio.
30. Encienda el cortacésped con cuidado de
acuerdo con las instrucciones y con los pies
bien alejados de la(s) cuchilla(s).
31. No incline el cortacésped cuando vaya a
encender el motor, excepto si el cortacésped
tiene que ser inclinado para arrancarlo. En
este caso, no lo incline más de lo absoluta-
mente necesario y levante solamente la parte
que está alejada del operario. Asegúrese siem-
pre de que ambas manos están en la posición
de operación antes de volver a poner el apa-
rato en el suelo.
32. No ponga en marcha el cortacésped cuando se
encuentre enfrente de la abertura de descarga.
33. No ponga las manos ni los pies cerca o debajo
de las piezas giratorias. Manténgase alejado
de la abertura de descarga en todo momento.
34. No transporte el cortacésped mientras el cor-
tacésped está encendido.
35. Detenga el cortacésped, y retire la clavija del
receptáculo de alimentación. Asegúrese de
que todas las piezas que se mueven se hayan
parado completamente
- siempre que vaya a dejar el cortacésped,
- antes de retirar obstrucciones o desatascar
la tolva,
- antes de comprobar, limpiar o trabajar en el
cortacésped,
- después de haber golpeado un objeto
extraño. Inspeccione el cortacésped por si
está dañado y haga las reparaciones antes
de volver a poner en marcha y utilizar el
cortacésped.
36. Si el cortacésped comienza a vibrar anormal-
mente (compruebe inmediatamente)
- inspeccione por si hay daños,
- reemplace o repare cualquier pieza dañada,
- compruebe si hay alguna pieza oja y
apriétela.
37. Tenga cuidado durante el ajuste del cortacés-
ped para evitar pillarse los dedos entre las
cuchillas que se mueven y las piezas jas del
cortacésped.
38. Siegue a través de la cara de la pendiente,
nunca de arriba a abajo. Extreme las pre-
cauciones cuando cambie de dirección en
pendientes. No siegue en cuestas empinadas
excesivamente.
39. No lave la herramienta con una manguera;
evite mojar el motor y las conexiones
eléctricas.
40. Compruebe el perno de montaje de la cuchilla
a intervalos frecuentes para ver que está bien
apretado.
41. Mantenga todas las tuercas, pernos y tornillos
apretados para asegurarse de que el equipo
está en condiciones de trabajo seguras.
42. Tenga cuidado porque al girar una cuchilla
puede ocasionar el giro de otras cuchillas.
43. Deje siempre que el cortacésped se enfríe
antes de almacenarlo.
44. Cuando haga el mantenimiento a las cuchillas,
sea consciente de que, aunque la fuente de
alimentación esté apagada, las cuchillas toda-
vía se pueden mover.
45. Reemplace las piezas desgastadas o dañadas
por motivos de seguridad. Utilice solamente
piezas de repuesto y accesorios genuinos.
46. Haga que su herramienta eléctrica sea servida
por un reparador técnico cualicado utilizando
solamente piezas de repuesto idénticas. Esto
garantizará que se mantendrá la seguridad de la
herramienta eléctrica.
47. Siga la instrucción para lubricar y cambiar los
accesorios.
48. Mantenga los asideros secos, limpios y libres
de aceite y grasa.
49. Compruebe para asegurarse de que la tensión
y la frecuencia del suministro de alimenta-
ción corresponden con las especicaciones
ofrecidas en la placa de identicación. Se
recomienda utilizar un disyuntor de cortocircuito
de funcionamiento por corriente residual (interrup-
tor diferencial) con una corriente de desconexión
de 30 mA o menos, o un protector de fuga de
corriente a tierra.

19 ESPAÑOL
50. Esta máquina puede ser utilizada por niños
de 8 o más años de edad y personas con
capacidades físicas, sensoriales o mentales
mermadas, o sin experiencia y conocimiento,
si han recibido supervisión o instrucción
para el uso de la máquina de forma segura y
son conscientes del peligro que implica. La
limpieza y mantenimiento que debe hacer el
usuario no deben ser realizados por niños sin
supervisión.
Riesgos residuales
Aunque utilice este producto de acuerdo con todos los
requisitos de seguridad, todavía hay riesgos potencia-
les de heridas y daños. Los peligros siguientes pueden
surgir con respecto a la estructura y el diseño de este
producto.
1. Defectos de salud como resultado de la emisión
de vibración si el producto se utiliza durante perio-
dosdetiempolargosonosemanejadebidamente
y se realiza el mantenimiento correctamente.
2. Heridas y daños a la propiedad debidos al uso de
implementosrotosoalimpactosúbitodeobjetos
ocultos durante la utilización.
3. Peligro de heridas y daños a la propiedad ocasio-
nadosporobjetosquesalendespedidos.
ADVERTENCIA: Este producto produce una
campo electromagnético durante la operación.
Este campo puede, en algunas circunstancias,
interferir con implantes médicos activos o pasi-
vos. Para reducir el riesgo de heridas graves
o fatales, se recomienda que las personas con
implantes médicos consulten con su médico y el
fabricante del implemento médico antes de utili-
zar este producto.
GUARDE ESTAS
INSTRUCCIONES.
ADVERTENCIA: NO deje que la comodidad o
familiaridad con el producto (a base de utilizarlo
repetidamente) sustituya la estricta observancia
de las normas de seguridad para el producto en
cuestión.
El MAL USO o el no seguir las normas de seguri-
dad establecidas en este manual de instrucciones
podrá ocasionar graves heridas personales.
MONTAJE
PRECAUCIÓN: Asegúrese siempre de que la
herramienta está apagada y desenchufada antes
de realizar cualquier trabajo en la herramienta.
Montaje del asidero
1. Descargue el asidero superior de la unidad princi-
pal de la máquina.
►Fig.1: 1. Asidero superior
2. Aojelastuercasmanuales.
►Fig.2: 1. Tuerca manual
3. Extienda el asidero hacia afuera un poco, y des-
pués suba el asidero.
►Fig.3: 1. Asidero
4. Ajustelaalturadelasideroalineandolaechacon
la marca.
►Fig.4: 1. Tuerca manual 2. Marca 3. Flecha
5. Apriete las tuercas manuales.
►Fig.5: 1. Tuerca manual
6. Coloque el asidero superior insertando las palan-
cas desde la parte exterior del asidero, y después
aprietelastuercasconlallaveparasujetarelasidero.
►Fig.6: 1. Palanca 2. Tuerca
7. Sujeteloscablesconlasabrazaderascomose
muestraenlagura.
►Fig.7: 1. Abrazadera
Instalación de la cesta para hierba
1. Coloque los tubos de la cesta para hierba en el
bastidor.
►Fig.8: 1. Tubo 2. Bastidor
2. Abra la cubierta posterior.
►Fig.9: 1. Cubierta posterior
3. Enganche la cesta para hierba en la parte poste-
rior de la máquina.
►Fig.10
Para retirar la cesta para hierba, realice el procedi-
miento de instalación a la inversa.
Conexión del cable de extensión
ADVERTENCIA: Cuando conecte el cable de
extensión al enchufe eléctrico de la máquina, ase-
gúrese de que la palanca interruptor está liberada
y que el cable está desenchufado del suministro
de alimentación.
ADVERTENCIA: No conecte o desconecte el
cable de extensión con las manos mojadas.
AVISO: Cuando conecte el cable de extensión
al enchufe eléctrico de la máquina, asegúrese de
insertarlo completamente en el receptáculo de
alimentación.
Cuando conecte el cable de extensión, engánchelo
enelganchodelasiderocomosemuestraenlagura
para evitar que se desenchufe inadvertidamente por
una tirantez excesiva en el enchufe.
►Fig.11: 1. Gancho 2. Cable de extensión

20 ESPAÑOL
DESCRIPCIÓN DEL
FUNCIONAMIENTO
Ajuste de la altura de siega
ADVERTENCIA: Antes de ajustar la altura
de siega, desenchufe el cable de extensión del
suministro de alimentación, y compruebe que las
cuchillas se han detenido completamente.
ADVERTENCIA: No ponga nunca su mano o
pierna debajo del cuerpo del cortacésped cuando
ajuste la altura de siega.
Puedeajustarlaalturadesiegaenelrangode20mm
a 55 mm (para ELM3320/ELM3720) o 20 mm a 75 mm
(paraELM4120).Laalturadesiegasepuedeajustaren
3 niveles (para ELM3320/ELM3720) o 7 niveles (para
ELM4120).
Para ELM3320/ELM3720
►Fig.12: 1.Palancadeajuste
Para ELM4120
►Fig.13: 1.Palancadeajuste
Sujeteelasideroconunamano,ydespuésmuevala
palancadeajusteconlaotramano.
►Fig.14: 1.Palancadeajuste
NOTA: Realice una prueba segando hierba en un
lugar menos notorio para obtener la altura deseada.
Accionamiento del interruptor
ADVERTENCIA: Antes de enchufar la herra-
mienta, compruebe siempre que la palanca inte-
rruptor se acciona debidamente y que vuelve a la
posición “apagada” cuando la suelta.
ADVERTENCIA: Por su propia seguridad,
esta máquina está equipada con el botón de des-
bloqueo que evita que la herramienta sea puesta
en marcha involuntariamente. No utilice nunca
la máquina si se pone en marcha cuando usted
aprieta la palanca interruptor sin presionar el
botón de desbloqueo. Pida a su centro de servicio
Makita local que le hagan las reparaciones.
ADVERTENCIA: No inhabilite nunca la
función de bloqueo o sujete, apretado con cinta
adhesiva, el botón de desbloqueo.
AVISO: No apriete con fuerza la palanca inte-
rruptor sin presionar el botón de desbloqueo. El
interruptor podrá romperse.
Para poner en marcha la máquina, presione el botón de
desbloqueo, y después oprima la palanca interruptor.
Para detener la máquina, suelte la palanca interruptor.
►Fig.15: 1. Palanca interruptor 2. Botón de
desbloqueo
Indicador de nivel de la cesta para
hierba
El indicador de nivel de la cesta para hierba se abre
durante la siega si la cesta para hierba no está llena. Si
la cesta para hierba está llena, el indicador de nivel se
cierra durante la siega. Si está llena, vacíe la cesta para
hierba antes de comenzar a segar.
►Fig.16: 1. Indicador de nivel
►Fig.17: 1. Indicador de nivel
Ajuste de la altura del asidero
Laalturadelasiderosepuedeajustarentresniveles.
Aojelastuercasmanualesmientrassujetaelasidero,
despuésajustelaalturadelasideroalineandolaecha
con una de las marcas, y después apriete las tuercas
manuales.
►Fig.18: 1. Tuerca manual 2. Marca 3. Flecha
Sistema de protección del motor
(Relé de sobrecorriente)
ADVERTENCIA: Si la máquina se detiene
repentinamente mientras la está utilizando, libere
la palanca interruptor y desenchufe el cable de
extensión. De lo contrario, la máquina podrá
volver a ponerse en marcha repentinamente y
ocasionar heridas.
PRECAUCIÓN: Antes de retirar un objeto que
está atascando la cuchilla, asegúrese de ponerse
guantes y desenchufar el cable de extensión del
receptáculo de alimentación.
Si la hierba cortada o la suciedad atasca el interior del
cuerpo principal, la máquina se para automáticamente
para proteger el motor (relé de sobrecorriente). En este
caso, desenchufe el cable de extensión del receptá-
culo de alimentación, después retire el material que
ocasionaelatasco,ydespuésdejequelamáquinase
enfríe durante unos pocos minutos antes de volver a
encenderla.
NOTA: El relé de sobrecorriente se puede activar
cuandoseenganchahierbamojadaolargadentro
del cuerpo principal.
OPERACIÓN
Siega
ADVERTENCIA: Antes de segar, retire los
palos y piedras del área de la siega. Además,
retire cualquier maleza del área de la siega de
antemano.
►Fig.19
Other manuals for ELM3320
3
This manual suits for next models
2
Table of contents
Languages:
Other Makita Lawn Mower manuals

Makita
Makita LM003J User manual

Makita
Makita DLM480 User manual

Makita
Makita DLM534 User manual

Makita
Makita DLM380 User manual

Makita
Makita DLM480 User manual

Makita
Makita XML02 User manual

Makita
Makita LM001J User manual

Makita
Makita PLM4630N User manual

Makita
Makita PLM5113N2 User guide

Makita
Makita DLM432 User manual

Makita
Makita LM001G User manual

Makita
Makita DLM330 User manual

Makita
Makita DLM533 User manual

Makita
Makita PM5600S3R User guide

Makita
Makita DLM537 User manual

Makita
Makita XML13 User manual

Makita
Makita XML03CM1 User manual

Makita
Makita DLM460 User manual

Makita
Makita BLM381 User manual

Makita
Makita PLM5121 User manual