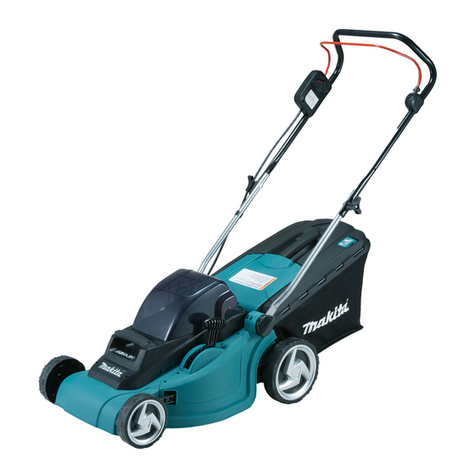
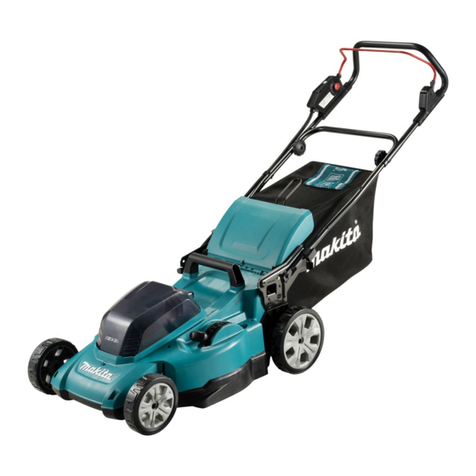
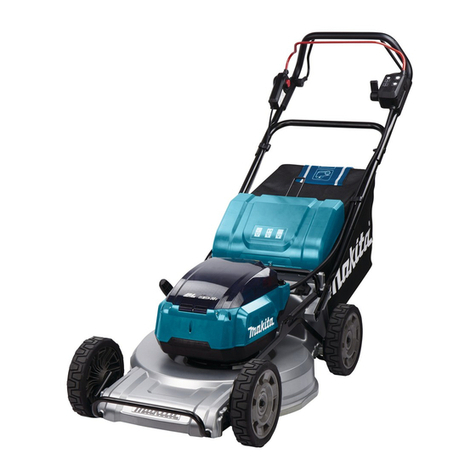
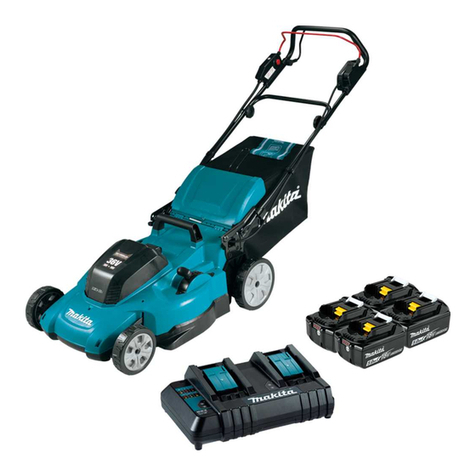
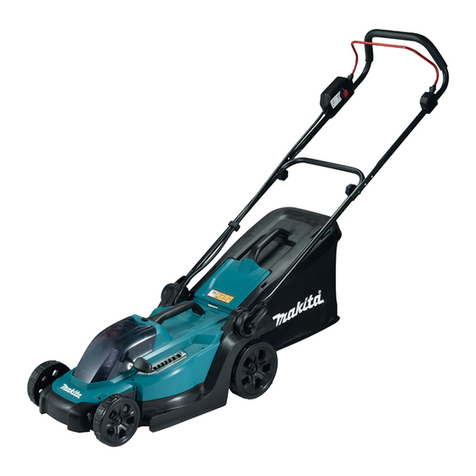
Makita DLM382PM2 User manual

DLM382
DLM432
EN Cordless Lawn Mower INSTRUCTION MANUAL 7
FR Tondeuse Sans Fil MANUEL D’INSTRUCTIONS 16
DE Akku Rasenmäher BETRIEBSANLEITUNG 26
IT Tosaerba a batteria ISTRUZIONI PER L’USO 37
NL Accugrasmaaier GEBRUIKSAANWIJZING 47
ES Cortadora de Cesped MANUAL DE
INSTRUCCIONES 57
PT Cortadora de Grama a Bateria MANUAL DE INSTRUÇÕES 67
DA Akku-plæneklipper BRUGSANVISNING 77
EL Μηχανή γκαζόν με μπαταρία ΕΓΧΕΙΡΙΔΙΟ ΟΔΗΓΙΩΝ 87
TR Akülü Çim Biçme Makinesi KULLANMA KILAVUZU 98

3
1
2
Fig.1
Fig.2
1
2
Fig.3
1
2
Fig.4
2
2
1
Fig.5
1
Fig.6
1
Fig.7
1
2
Fig.8
2

1
Fig.9
1
2
3
Fig.10
1
2
Fig.11
1
2
Fig.12
1
2
Fig.13
1
Fig.14
1
Fig.15
1
Fig.16
3

1
2
Fig.17
21
Fig.18
12
Fig.19
1
Fig.20
1
Fig.21
1
2
Fig.22
Fig.23
Fig.24
4

12
33
Fig.25
Fig.26
1
2
Fig.27
12
Fig.28
1
2
Fig.29
1
2
Fig.30
1
Fig.31
1
23
Fig.32
5

3
1
2
Fig.33
1
23
Fig.34
1
2
3
4
Fig.35
6

7ENGLISH
ENGLISH (Original instructions)
SPECIFICATIONS
Model: DLM382 DLM432
Mowing width (blade diameter) 380 mm 430 mm
No load speed 3,700 min-1 3,600 min-1
Part number of replacement mower blade 191D41-2 191D43-8
Dimensions
(L x W x H)
during operation L: 1,380 mm to 1,410 mm
W: 450 mm
H: 985 mm to 1,005 mm
L: 1,435 mm to 1,490 mm
W: 460 mm
H: 1,005 mm to 1,045 mm
when stored
(without grass basket)
860 mm x 450 mm x 475 mm 865 mm x 460 mm x 475 mm
Rated voltage D.C. 36 V
Net weight 16.2 - 16.9 kg 16.8 - 17.5 kg
•
Due to our continuing program of research and development, the specications herein are subject to change without notice.
• Specications may differ from country to country.
• The weight may differ depending on the attachment(s), including the battery cartridge. The lightest and heavi-
est combination, according to EPTA-Procedure 01/2014, are shown in the table.
Applicable battery cartridge
BL1815N / BL1820 / BL1820B / BL1830 / BL1830B / BL1840 / BL1840B / BL1850 / BL1850B / BL1860B
• Some of the battery cartridges listed above may not be available depending on your region of residence.
WARNING:
Only use the battery cartridges listed above. Use of any other battery cartridges may cause injury and/or re.
Symbols
The followings show the symbols used for the equip-
ment. Be sure that you understand their meaning before
use.
Take particular care and attention.
Read instruction manual.
Danger; be aware of thrown objects.
The distance between the tool and
bystanders must be at least 15 m.
Never put your hands and feet near the
blade under the mower. Blades continue to
rotate after the motor is switched off.
Remove the lock key before inspecting,
adjusting, cleaning, servicing, leaving and
storing the mower.
Ni-MH
Li-ion
Only for EU countries
Do not dispose of electric equipment or
battery pack together with household waste
material!
In observance of the European Directives,
on Waste Electric and Electronic
Equipment and Batteries and Accumulators
and Waste Batteries and Accumulators
and their implementation in accordance
with national laws, electric equipment and
batteries and battery pack(s) that have
reached the end of their life must be col-
lected separately and returned to an envi-
ronmentally compatible recycling facility.
Intended use
The machine is intended for lawn mowing.
Noise
The typical A-weighted noise level determined accord-
ing to EN60335-2-77:
Model DLM382
Sound pressure level (LpA) : 81 dB(A)
Sound power level (LWA) : 91 dB (A)
Uncertainty (K) : 3 dB(A)
Model DLM432
Sound pressure level (LpA) : 81 dB(A)
Sound power level (LWA) : 92 dB (A)
Uncertainty (K) : 3 dB(A)
NOTE:
The declared noise emission value(s) has been
measured in accordance with a standard test method
and may be used for comparing one tool with another.
NOTE:
The declared noise emission value(s) may
also be used in a preliminary assessment of exposure.
WARNING: Wear ear protection.
WARNING:
The noise emission during actual
use of the power tool can differ from the declared val-
ue(s) depending on the ways in which the tool is used
especially what kind of workpiece is processed.
WARNING:
Be sure to identify safety measures
to protect the operator that are based on an estima-
tion of exposure in the actual conditions of use (tak-
ing account of all parts of the operating cycle such
as the times when the tool is switched off and when
it is running idle in addition to the trigger time).

8ENGLISH
Vibration
The vibration total value (tri-axial vector sum) deter-
mined according to EN60335-2-77:
Model DLM382
Vibration emission (ah) : 2.5 m/s2or less
Uncertainty (K) : 2.0 m/s2
Model DLM432
Vibration emission (ah) : 2.5 m/s2or less
Uncertainty (K) : 1.5 m/s2
NOTE: The declared vibration total value(s) has been
measured in accordance with a standard test method
and may be used for comparing one tool with another.
NOTE: The declared vibration total value(s) may also
be used in a preliminary assessment of exposure.
WARNING: The vibration emission during
actual use of the power tool can differ from the
declared value(s) depending on the ways in which
the tool is used especially what kind of workpiece
is processed.
WARNING: Be sure to identify safety mea-
sures to protect the operator that are based on an
estimation of exposure in the actual conditions of
use (taking account of all parts of the operating
cycle such as the times when the tool is switched
off and when it is running idle in addition to the
trigger time).
EC Declaration of Conformity
For European countries only
The EC declaration of conformity is included as Annex A
to this instruction manual.
SAFETY WARNINGS
IMPORTANT SAFETY
INSTRUCTIONS
WARNING: Read all safety warnings and
all instructions. Failure to follow the warnings and
instructions may result in electric shock, re and/or
serious injury.
Save all warnings and instruc-
tions for future reference.
Training
1.
Read the instructions carefully. Be familiar with
the controls and the proper use of the mower.
2. Never allow children or people unfamiliar with
these instructions to use the mower. Local
regulations can restrict the age of the operator.
3. Never operate the mower while people, espe-
cially children, or pets are nearby.
4. Keep in mind that the operator or user is
responsible for accidents or hazards occurring
to other people or their property.
5. Children should be supervised to ensure that
they do not play with the mower.
6. Physical condition - Do not operate mower
while under the inuence of drugs, alcohol, or
any medication.
Preparation
1. While operating the mower, always wear sub-
stantial footwear and long trousers. Do not
operate the mower when barefoot or wearing
open sandals. Avoid wearing clothing or jew-
elry that is loose tting or that has hanging
cords or ties. They can be caught in moving
parts.
2. Before use, always visually inspect the mower
for damaged, missing or misplaced guards or
shields.
3. Be sure the area is clear of other people before
mowing. Stop mower if anyone enters the area.
4. Do not insert the lock key into mower until it is
ready to be used.
5. Always wear protective goggles to protect
your eyes from injury when using power tools.
The goggles must comply with ANSI Z87.1 in
the USA, EN 166 in Europe, or AS/NZS 1336
in Australia/New Zealand. In Australia/New
Zealand, it is legally required to wear a face
shield to protect your face, too.
It is an employer's responsibility to enforce
the use of appropriate safety protective equip-
ments by the tool operators and by other per-
sons in the immediate working area.
6. Check the blades or blade bolts carefully for
cracks or damage before operation. Replace
cracked or damaged blades or blade bolts
immediately.
7. Remove foreign matters such as rocks, wire,
bottles, bones and large sticks from the work
area before mowing to prevent personal injury
or damage to the mower.
8. Objects struck by the mower blade can cause
severe injuries to persons. The lawn should
always be carefully examined and cleared of
all objects prior to each mowing.
9. Watch for holes, ruts, bumps, rocks, or other
hidden objects. Uneven terrain could cause a slip
and fall accident. Tall grass can hide obstacles.
Operation
1. Do not overreach. Keep the balance at all
times. Always be sure of the footing on slopes.
Walk, never run.

9ENGLISH
2. Stop the mower and remove the lock key, and
make sure that all moving parts have come to
a complete stop:
- whenever you leave the mower,
- before clearing blockages or unclogging chute,
- before checking, cleaning or working on the
mower,
- after striking a foreign object. Inspect the
mower for damage and make repairs before
restarting and operating the mower,
- whenever the mower starts vibrating abnormally.
3. Never operate the mower with defective
guards or shields, or without safety devices,
for example deectors and/or grass basket, in
place.
4. Avoid using the mower in bad weather con-
ditions especially when there is a risk of
lightning.
5. Wear eye protection and stout shoes at all
times while operating the mower.
6. Operate the mower only in daylight or in good
articial light.
7. Switch on the mower carefully according to
instructions and with feet well away from the
blade(s).
8. Take care against injury to feet and hands from
the mower blades.
9. Always ensure that the ventilation openings
are kept clear of debris.
10. Mow across the face of slopes, never up and
down. Exercise extreme caution when chang-
ing direction on slopes. Do not mow exces-
sively steep slopes.
11. Use extreme caution when reversing or pulling
the mower towards you.
12. Stop the blade(s) if the mower has to be tilted
for transportation when crossing surfaces
other than grass, and when transporting the
mower to and from the area to be used.
13. Do not tilt the mower when switching on the
motor, except if the mower has to be tilted
for starting. In this case, do not tilt it more
than absolutely necessary and lift only the
part, which is away from the operator. Always
ensure that both hands are in the operating
position before returning the mower to the
ground.
14. Do not put hands or feet near or under rotating
parts. Keep clear of the discharge opening at
all times.
15. Do not transport the mower while the mower is
turned on.
16. Avoid operating the mower in wet grass.
17. Never operate the mower in the rain.
18. Always keep a rm hold on the handle.
19. Don't grasp the exposed cutting blades or
cutting edges when picking up or holding the
mower.
20. Keep hands and feet away from rotating
blades. Caution - Blades coast after the mower
is switched off.
21. Stop operation immediately if you notice
anything unusual. Switch off the mower and
remove the lock key. Then inspect the mower.
22. Never attempt to make cutting height adjust-
ments while mower is running if the mower
has cutting height adjustment feature.
23. Release switch lever and wait for blade rota-
tion to stop before crossing driveways, walks,
roads, and any gravel-covered areas. Also
remove the lock key if you leave the mower,
reach to pick up or remove something out of
your way, or for any other reason that may
distract you from what you are doing.
24. If the mower strikes a foreign object, follow
these steps:
- Stop the mower, release the switch lever and
wait until the blade comes to a complete stop.
- Remove the lock key and the battery
cartridge.
- Thoroughly inspect the mower for any
damage.
- Replace the blade if it is damaged in any way.
Repair any damage before restarting and con-
tinuing to operate the mower.
25. Do not start the mower when standing in front
of the discharge opening.
26. If the mower starts to vibrate abnormally
(check immediately)
- inspect for damage,
- replace or repair any damaged parts,
- check for and tighten any loose parts.
27. Never direct discharged material toward
anyone. Avoid discharging material against a
wall or obstruction. Material may ricochet back
toward the operator. Stop the blade when crossing
gravel surfaces.
28. Do not pull the mower backwards unless
absolutely necessary. When you are compelled
to back the mower from a fence or other similar
obstruction, look down and behind before and
while moving backwards.
29. Shut the motor off and wait until the blade
comes to a complete stop before removing the
grass catcher. Beware that the blades coast after
turn off.
Maintenance and storage
1. Replace worn or damaged parts for safety.
Use only genuine replacement parts and
accessories.
2. Inspect and maintain the mower regularly.
3. When not in use, store the mower out of the
reach of children.
4. Keep all nuts, bolts, and screws tight to
be sure the equipment is in safe working
condition.
5. Check the grass basket frequently for wear or
deterioration. For storage, always make sure
the grass basket is empty. Replace a worn
grass basket with a new factory replacement
for safety.
6. Use only the manufacturer genuine blades
specied in this manual.
7. Be careful during adjustment of the mower
to prevent entrapment of the ngers between
moving blades and xed parts of the mower.
8. Do not wash with a hose; avoid getting water
in motor and electrical connections.

10 ENGLISH
9. Check the blade mounting bolt at frequent
intervals for proper tightness.
10. Always allow the mower to cool down before
storing.
11. When servicing the blades be aware that, even
though the power source is switched off, the
blades can still be moved.
12. Never remove or tamper with safety devices.
Check their proper operation regularly. Never
do anything to interfere with the intended
function of a safety device or to reduce the
protection provided by a safety device.
Battery tool use and care
1. Recharge only with the charger specied by
the manufacturer. A charger that is suitable for
one type of battery pack may create a risk of re
when used with another battery pack.
2. Use power tools only with specically desig-
nated battery packs. Use of any other battery
packs may create a risk of injury and re.
3. When battery pack is not in use, keep it away
from other metal objects, like paper clips,
coins, keys, nails, screws or other small metal
objects, that can make a connection from one
terminal to another. Shorting the battery termi-
nals together may cause burns or a re.
4. Under abusive conditions, liquid may be
ejected from the battery; avoid contact. If con-
tact accidentally occurs, ush with water. If
liquid contacts eyes, additionally seek medical
help. Liquid ejected from the battery may cause
irritation or burns.
5. Do not use a battery pack or tool that is dam-
aged or modied. Damaged or modied batteries
may exhibit unpredictable behaviour resulting in
re, explosion or risk of injury.
6. Do not expose a battery pack or tool to re or
excessive temperature. Exposure to re or tem-
perature above 130 °C may cause explosion.
7. Follow all charging instructions and do not
charge the battery pack or tool outside the
temperature range specied in the instruc-
tions. Charging improperly or at temperatures
outside the specied range may damage the
battery and increase the risk of re.
Electrical and battery safety
1. Do not dispose of the battery(ies) in a re.
The cell may explode. Check with local codes for
possible special disposal instructions.
2. Do not open or mutilate the battery(ies).
Released electrolyte is corrosive and may cause
damage to the eyes or skin. It may be toxic if
swallowed.
3. Do not charge battery in rain, or in wet
locations.
4. Do not charge the battery outdoors.
5. Do not handle charger, including charger plug,
and charger terminals with wet hands.
Service
1. Have your power tool serviced by a qualied
repair person using only identical replacement
parts. This will ensure that the safety of the power
tool is maintained.
2. Never service damaged battery packs. Service
of battery packs should only be performed by the
manufacturer or authorized service providers.
SAVE THESE INSTRUCTIONS.
WARNING: DO NOT let comfort or familiarity
with product (gained from repeated use) replace
strict adherence to safety rules for the subject
product.
MISUSE or failure to follow the safety rules stated
in this instruction manual may cause serious
personal injury.
Important safety instructions for
battery cartridge
1.
Before using battery cartridge, read all instruc-
tions and cautionary markings on (1) battery char-
ger, (2) battery, and (3) product using battery.
2. Do not disassemble battery cartridge.
3. If operating time has become excessively
shorter, stop operating immediately. It may
result in a risk of overheating, possible burns
and even an explosion.
4.
If electrolyte gets into your eyes, rinse them out
with clear water and seek medical attention right
away. It may result in loss of your eyesight.
5. Do not short the battery cartridge:
(1) Do not touch the terminals with any con-
ductive material.
(2) Avoid storing battery cartridge in a con-
tainer with other metal objects such as
nails, coins, etc.
(3) Do not expose battery cartridge to water
or rain.
A battery short can cause a large current
ow, overheating, possible burns and even a
breakdown.
6. Do not store the tool and battery cartridge in
locations where the temperature may reach or
exceed 50 °C (122 °F).
7. Do not incinerate the battery cartridge even if
it is severely damaged or is completely worn
out. The battery cartridge can explode in a re.
8. Be careful not to drop or strike battery.
9. Do not use a damaged battery.
10. The contained lithium-ion batteries are subject
to the Dangerous Goods Legislation require-
ments.
For commercial transports e.g. by third parties,
forwarding agents, special requirement on pack-
aging and labeling must be observed.
For preparation of the item being shipped, consult-
ing an expert for hazardous material is required.
Please also observe possibly more detailed
national regulations.
Tape or mask off open contacts and pack up the
battery in such a manner that it cannot move
around in the packaging.
11. When disposing the battery cartridge, remove
it from the tool and dispose of it in a safe
place. Follow your local regulations relating to
disposal of battery.
11 ENGLISH
12. Use the batteries only with the products
specied by Makita. Installing the batteries to
non-compliant products may result in a re, exces-
sive heat, explosion, or leak of electrolyte.
13. If the tool is not used for a long period of time,
the battery must be removed from the tool.
SAVE THESE INSTRUCTIONS.
CAUTION:
Only use genuine Makita batteries.
Use of non-genuine Makita batteries, or batteries that
have been altered, may result in the battery bursting
causing res, personal injury and damage. It will also
void the Makita warranty for the Makita tool and charger.
Tips for maintaining maximum
battery life
1.
Charge the battery cartridge before completely dis-
charged. Always stop tool operation and charge the
battery cartridge when you notice less tool power.
2.
Never recharge a fully charged battery cartridge.
Overcharging shortens the battery service life.
3.
Charge the battery cartridge with room tempera-
ture at 10 °C - 40 °C (50 °F - 104 °F). Let a hot
battery cartridge cool down before charging it.
4. Charge the battery cartridge if you do not use
it for a long period (more than six months).
ASSEMBLY
WARNING: Always be sure that the lock key
and battery cartridge are removed before carrying
out any work on the mower. Failure to remove the
lock key and the battery cartridge may result in seri-
ous personal injury from accidental start-up.
WARNING: Never start the mower unless it is
completely assembled. Operation of the machine
in a partially assembled state may result in serious
personal injury from accidental start-up.
Installing the battery cover
WARNING: Do not insert the lock key and bat-
tery cartridge before installing the battery cover.
Failure to do so may cause a serious injury.
Install the battery cover completely before the opera-
tion. The battery cover protects the mower and battery
cartridge from mud, dirt, and water.
1. Place the battery cover with the protrusions on the
mower aligned with the holes on the battery cover.
► Fig.1: 1. Protrusion 2. Hole 3. Battery cover
2. Place your hands in the middle of the battery
cover and push it.
► Fig.2
3. Before the rst operation, check that the pivot
point of the battery cover is attached properly. If the
battery cover is installed correctly, it will not open until
the battery cover locking lever is pulled.
► Fig.3: 1. Pivot point 2. Battery cover locking lever
Installing the handle
NOTICE: When installing handles, position the
cords so that they are not caught by anything
between the handles. If the cord is damaged, the
mower switch may not work.
1. Slide the both ends of lower handle into the
grooves of the mower then fully tighten the clamping
screws.
► Fig.4: 1. Clamping screw 2. Lower handle
2. Align the screw holes of upper handle and lower
handle. Secure them with the clamping screws and
nuts.
► Fig.5: 1. Clamping nut 2. Clamping screw
NOTE: Hold the upper handle rmly so that it does
not drop off your hand.
3. Attach the holders to the handle. Position the
power supply cord as shown in the gure.
► Fig.6: 1. Holder
Removing the mulching plug
Optional accessory
1. Open the rear cover.
► Fig.7: 1. Rear cover
2. Hold the mulching plug by the handle, and then
pull it out from the mower body as shown in the gure.
► Fig.8: 1. Mulching plug 2. Handle
Installing the grass basket
1. Open the rear cover.
► Fig.9: 1. Rear cover
2. Hook the grass basket on the rod of the mower
body as shown in the gure.
► Fig.10: 1. Hook 2. Rod 3. Grass basket
Attaching the mulching plug
Optional accessory
1. Open the rear cover, and then remove the grass
basket.
► Fig.11: 1. Rear cover 2. Grass basket
2. Hold the mulching plug by the handle, and then
attach it to the mower body as shown in the gure.
► Fig.12: 1. Mulching plug 2. Handle

12 ENGLISH
FUNCTIONAL DESCRIPTION
Installing or removing battery cartridge
CAUTION: Always switch off the machine
before installing or removing of the battery
cartridge.
CAUTION: Make sure that you lock the battery
cover before use. Otherwise, mud, dirt, or water may
cause damage to the product or the battery cartridge.
CAUTION: Always install the battery cartridge
fully until the red indicator cannot be seen. If not,
it may accidentally fall out of the machine, causing
injury to you or someone around you.
CAUTION: Do not install the battery cartridge
forcibly. If the cartridge does not slide in easily, it is
not being inserted correctly.
NOTE: The machine does not work with only one
battery cartridge.
To install the battery cartridge;
1. Slide the battery cover locking lever and open the
battery cover.
► Fig.13: 1. Battery cover 2. Battery cover locking
lever
2. Align the tongue on the battery cartridge with the
slot on the mower then slide the cartridge until it locks in
place with a little click.
► Fig.14: 1. Battery cartridge
3. Insert the lock key in the place shown in the gure
as far as it will go.
► Fig.15: 1. Lock key
4. Close the battery cover and push it until it is
latched with the locking lever.
To remove the battery cartridge from the mower;
1. Slide the battery cover locking lever and open the
battery cover.
2. Pull out the battery cartridge from the mower while
sliding the button on the front of the cartridge.
3. Pull out the lock key.
4. Close the battery cover.
Machine / battery protection system
The machine is equipped with a machine/battery
protection system. This system automatically cuts off
power to the motor to extend tool and battery life. The
machine will automatically stop during operation if the
machine or battery is placed under one of the following
conditions.
Overload protection
When the machine is operated in a manner that causes
it to draw an abnormally high current, the machine
automatically stops without any indication. In this situ-
ation, turn the machine off and stop the application that
caused the machine to become overloaded. Then turn
the machine on to restart.
Overheat protection
When the machine is overheated, the machine stops
automatically. Let the machine cool down before turning
the machine on again.
Overdischarge protection
When the battery capacity becomes low, the machine
stops automatically. If the product does not operate
even when the switches are operated, remove the bat-
teries from the machine and charge the batteries.
Indicating the remaining battery
capacity
► Fig.16: 1. Battery indicator
When the remaining battery capacity gets low, the bat-
tery indicator blinks on the applicable battery side. By
further use, the machine stops and the battery indicator
lights up about 10 seconds. In this situation, charge the
battery cartridge.
Indicating the remaining battery
capacity
Only for battery cartridges with the indicator
► Fig.17: 1. Indicator lamps 2. Check button
Press the check button on the battery cartridge to indi-
cate the remaining battery capacity. The indicator lamps
light up for a few seconds.
Indicator lamps Remaining
capacity
Lighted Off Blinking
75% to 100%
50% to 75%
25% to 50%
0% to 25%
Charge the
battery.
The battery
may have
malfunctioned.
NOTE: Depending on the conditions of use and the
ambient temperature, the indication may differ slightly
from the actual capacity.
Switch action
WARNING: Before installing the battery car-
tridge, always check to see that the switch lever
actuates properly and returns to the original
position when released. Operating a machine with a
switch that does not actuate properly can lead to loss
of control and serious personal injury.

13 ENGLISH
NOTE: The mower does not start without pressing the
switch button even the switch lever is pulled.
NOTE: Mower may not start due to the overload
when you try to mow long or dense grass at a time.
Increase the mowing height in this case.
This mower is equipped with the interlock switch and
handle switch. If you notice anything unusual with either
of these switches, stop operation immediately and
have them checked by your nearest Makita Authorized
Service Center.
1. Install the battery cartridges. Insert the lock key
into the interlock switch and then close the battery
cover.
► Fig.18: 1. Battery cartridge 2. Lock key
2. Press the switch button and hold it.
3. Grab the upper handle and pull the switch lever.
► Fig.19: 1. Switch button 2. Switch lever
4. Release the switch button as soon as the motor
starts running. The mower will continue to run until you
release the switch lever.
5. Release the switch lever to stop the motor.
Adjusting the mowing height
WARNING: Never put your hand or leg under
the mower body when adjusting the mowing
height.
WARNING: Always make sure that the lever
ts in the groove properly before operation.
The mowing height can be adjusted in the range of
between 20 mm and 75 mm.
1. Remove the lock key.
2. Pull the mowing height adjusting lever to the
outward of the mower body and move it to your desired
mowing height.
► Fig.20: 1. Mowing height adjusting lever
NOTE: The mowing height gures should be used
just as a guideline. Depending on the conditions of
the lawn or the ground, the actual lawn height may
become slightly different from the set height.
NOTE: Try a test mowing of grass in a less conspicu-
ous place to get your desired height.
Grass level indicator
► Fig.21: 1. Grass level indicator
Grass level indicator shows the volume of mowed
grass.
• When the grass basket is not full, the indicator
oats during mowing.
• When the grass basket is full, the indicator does
not oat during mowing. In this case, stop mowing
immediately and empty the basket. After emptying
the basket, clean it so that its meshwork vents the
air.
NOTE: This indicator is a rough guide. Depending on
the conditions of inside of the basket, this indicator
may not work properly.
Using mulching plug
Optional accessory
The mulching plug allows you to return the cut grass to
the ground without gathering the cut grass in the grass
basket. When you operate the machine with the mulch-
ing plug, be sure to remove the grass basket.
NOTICE: When using the machine with the
mulching plug, make sure that the total length of
grass is 30 mm or more, or the cut length is 15
mm or less.
► Fig.22: (1) 30 mm or more (2) 15 mm or less
OPERATION
Mowing
WARNING: Before mowing, clear away sticks
and stones from mowing area. Furthermore, clear
away any weeds from mowing area in advance.
WARNING: Always wear the safety goggles or
safety glasses with side shields when operating
the mower.
CAUTION: If the cut grass or foreign object
blocks up inside of the mower body, be sure to
remove the lock key and battery cartridge and
wear gloves before removing the grass or foreign
object.
NOTICE: Use this machine for mowing lawn only.
Do not mow weeds with this machine.
► Fig.23
Firmly hold the handle with both hands when mowing.
The mowing speed guideline is approximately 1 meter
per 4 seconds.
► Fig.24
The outside edges of the front wheels are guidelines
to mowing width. Using the outside edges of the front
wheels as guidelines, mow in strips. Overlap by one half
to one third the previous strip to mow the lawn evenly.
► Fig.25: 1. Mowing width 2. Overlapping area
3. Outside edge
Change the mowing direction each time to prevent the
grass grain pattern from forming in just one direction.
► Fig.26
Periodically check the grass basket for mowed grass.
Empty the grass before it becomes full. Before every
periodical check, be sure to stop the mower then
remove the lock key and the battery cartridge.
NOTICE: Using the mower with the grass basket
full prevents smooth blade rotation and places
an extra load on the motor, which may cause
breakdown.

14 ENGLISH
Mowing a long-grass lawn
Do not try to cut long grass all in one go. Instead, mow
the lawn in some steps. Leave a day or two between
mows until the lawn becomes evenly short.
NOTE: Mowing long grass to a short length all in one
go may cause the grass to die. The cut grass may
also block up inside of the mower body.
Emptying the grass basket
WARNING:
To reduce a risk of accident, regu-
larly check the grass basket for any damage or weak-
ened strength. Replace the grass basket if necessary.
1. Release the switch lever.
2. Remove the lock key.
3. Open the rear cover and take out the grass basket
by holding the handle.
► Fig.27: 1. Rear cover 2. Handle
4. Empty the grass basket.
MAINTENANCE
WARNING: Always be sure that the lock
key and battery cartridge are removed from the
mower before storing or carrying the mower or
attempting to perform inspection or maintenance.
WARNING: Always remove the lock key when
the mower is not in use. Store the lock key in a
safe place out of reach of children.
WARNING: Wear gloves when performing
inspection or maintenance.
WARNING: Always wear the safety goggles or
safety glasses with side shields when performing
inspection or maintenance.
NOTICE: Never use gasoline, benzine, thinner,
alcohol or the like. Discoloration, deformation or
cracks may result.
To maintain product SAFETY and RELIABILITY,
repairs, any other maintenance or adjustment should
be performed by Makita Authorized or Factory Service
Centers, always using Makita replacement parts.
Maintenance
1. Remove the lock key. Store it in a safe place out of
the reach of children.
2. Clean the mower using only a wet cloth. Do not
spray or pour water on the mower when cleaning.
3. Put the mower on its side and clean grass clip-
pings accumulated on the underside of mower deck.
4. Check all nuts, bolts, knobs, screws, fasteners etc.
for tightness.
5. Inspect moving parts for damage, breakage, and
wear. Damaged or missing parts should be repaired or
replaced.
Storage
WARNING: When carrying or storing the
mower, do not hold the folded handles but the
front grip of the mower. Holding the folded handles
may cause a serious injury or damage to the mower.
Before storing the mower, remove the battery cartridge
and lock key.
Store mower indoors in a cool, dry and locked place.
Don't store the mower and charger in locations where
the temperature may reach or exceed 40 °C.
► Fig.28: 1. Front grip 2. Rear grip
1. Loosen the clamping screws and expand the
lower handle to both sides. Move down the handle for-
ward. At this time, keep a rm grip on the lower handle
so that the handle does not fall down to the far side from
the mower body.
► Fig.29: 1. Clamping screw 2. Lower handle
2. Loosen the clamping nuts and pivot the upper
handle back while expanding the both sides.
► Fig.30: 1. Clamping nut 2. Upper handle
3. Store the grass basket between the handle and
the mower body.
► Fig.31: 1. Grass basket
NOTE: When putting the mower in the upright posi-
tion, do not hold the handle but use the front grip of
the mower.
Removing or installing the mower
blade
WARNING: Always remove the lock key and
battery cartridge when removing or installing the
blade. Failure to remove the lock key and battery
cartridge may cause a serious injury.
WARNING: The blade coasts for a few sec-
onds after releasing the switch. Do not start any
operation until the blade comes to a complete
stop.
WARNING: Always wear gloves when han-
dling the blade.
Removing the mower blade
For DLM382
1. Put the mower on its side so that the mowing
height adjusting lever comes to the upper side.
2. To lock the blade rotation, insert a screwdriver or a
similar tool into a hole on the mower body.
3. Turn the bolt counterclockwise with the wrench.
► Fig.32: 1. Mower blade 2. Screwdriver 3. Wrench
4. Remove the bolt and blade in order.
► Fig.33: 1. Blade support 2. Mower blade 3. Bolt

15 ENGLISH
For DLM432
1. Put the mower on its side so that the mowing
height adjusting lever comes to the upper side.
2. To lock the blade rotation, insert a screwdriver or a
similar tool into a hole on the mower body.
3. Turn the bolt counterclockwise with the wrench.
► Fig.34: 1. Mower blade 2. Screwdriver 3. Wrench
4. Remove the bolt, outer ange, mower blade, and
inner ange in order.
► Fig.35: 1. Inner ange 2. Mower blade 3. Outer
ange 4. Bolt
Installing the mower blade
To install the mower blade, take the removal procedure
in reverse.
WARNING: Install the mower blade carefully.
It has a top/bottom facing. Place the blade so that
the rotational direction arrow faces outward.
WARNING: Tighten the bolt clockwise rmly
to secure the blade.
WARNING: Make sure that the mower blade
and all the xing parts are installed correctly and
tightened securely.
WARNING: When you replace the blades,
always follow the instructions provided in this
manual.
TROUBLESHOOTING
Before asking for repairs, conduct your own inspection rst. If you nd a problem that is not explained in the manual,
do not attempt to dismantle the tool. Instead, ask Makita Authorized Service Centers, always using Makita replace-
ment parts for repairs.
State of abnormality Probable cause (malfunction) Remedy
Mower does not start. Two battery cartridges are not installed. Install the charged battery cartridges.
Battery problem (under voltage) Recharge the battery cartridge. If recharging is not
effective, replace battery cartridge.
The lock key is not inserted. Insert the lock key.
Motor stops running after a little use. Battery's charge level is low. Recharge the battery cartridge. If recharging is not
effective, replace battery cartridge.
Cutting height is too low. Increase the cutting height.
Motor does not reach maximum
RPM.
Battery cartridge is installed improperly. Install the battery cartridge as described in this
manual.
Battery power is dropping. Recharge the battery cartridge. If recharging is not
effective, replace battery cartridge.
The drive system does not work
correctly.
Ask your local authorized service center for repair.
Mower blade does not rotate:
stop the mower immediately!
Foreign object such as a branch is
jammed near the blade.
Remove the foreign object.
The drive system does not work
correctly.
Ask your local authorized service center for repair.
Abnormal vibration:
stop the mower immediately!
Blade is imbalanced, excessively or
unevenly worn.
Replace the blade.
OPTIONAL
ACCESSORIES
CAUTION: These accessories or attachments
are recommended for use with your Makita tool
specied in this manual. The use of any other
accessories or attachments might present a risk of
injury to persons. Only use accessory or attachment
for its stated purpose.
If you need any assistance for more details regard-
ing these accessories, ask your local Makita Service
Center.
• Mower blade
• Mulching plug
• Makita genuine battery and charger
NOTE: Some items in the list may be included in the
tool package as standard accessories. They may
differ from country to country.

16 FRANÇAIS
FRANÇAIS (Instructions originales)
SPÉCIFICATIONS
Modèle : DLM382 DLM432
Largeur de tonte (diamètre de la lame) 380 mm 430 mm
Vitesse à vide 3 700 min-1 3 600 min-1
Numéro de référence de la lame de tondeuse de remplacement 191D41-2 191D43-8
Dimensions
(L x l x H)
pendant l’utilisation L : 1 380 mm à 1 410 mm
l : 450 mm
H : 985 mm à 1 005 mm
L : 1 435 mm à 1 490 mm
l : 460 mm
H : 1 005 mm à 1 045 mm
pendant le rangement
(sans le bac à herbe)
860 mm x 450 mm x 475 mm 865 mm x 460 mm x 475 mm
Tension nominale 36 VCC
Poids net 16,2 - 16,9 kg 16,8 - 17,5 kg
• Étant donné l’évolution constante de notre programme de recherche et de développement, les spécications
contenues dans ce manuel sont sujettes à modication sans préavis.
• Les spécications peuvent varier suivant les pays.
• Le poids peut être différent selon les accessoires, notamment la batterie. Les associations la plus légère et la
plus lourde, conformément à la procédure EPTA 01/2014, sont indiquées dans le tableau.
Batterie applicable
BL1815N / BL1820 / BL1820B / BL1830 / BL1830B / BL1840 / BL1840B / BL1850 / BL1850B / BL1860B
• Certaines batteries répertoriées ci-dessus peuvent ne pas être disponibles selon la région où vous résidez.
AVERTISSEMENT : N’utilisez que les batteries répertoriées ci-dessus. L’utilisation de n’importe quelle
autre batterie peut provoquer des blessures et/ou un incendie.
Symboles
Vous trouverez ci-dessous les symboles utilisés pour l’appareil.
Veillez à comprendre leur signication avant toute utilisation.
Veuillez être prudent et rester attentif.
Lire le mode d’emploi.
Danger ; prendre garde aux projections
d’objets.
La distance entre l’outil et les personnes
présentes doit être d’au moins 15 m.
Ne mettez jamais les mains ou les pieds
près de la lame sous la tondeuse. Les
lames continuent de tourner une fois le
moteur coupé.
Retirez la clé de sécurité avant d’inspecter,
de régler, de nettoyer, de réparer, de laisser
sans surveillance ou de ranger la tondeuse.
Ni-MH
Li-ion
Pour les pays de l’Union européenne
uniquement
Ne jetez pas les appareils électriques ou
les batteries avec vos ordures ménagères !
Conformément aux directives européennes rela-
tives aux déchets d’équipements électriques et
électroniques et aux piles et accumulateurs ainsi
qu’aux déchets de piles et d’accumulateurs et leur
mise en œuvre conformément aux lois nationales,
les équipements électriques, les piles et les batte-
ries en n de vie doivent faire l’objet d’une collecte
sélective et être conés à une usine de recyclage
respectueuse de l’environnement.
Utilisations
La machine est conçue pour tondre la pelouse.
Bruit
Niveau de bruit pondéré A typique, déterminé selon
EN60335-2-77 :
Modèle DLM382
Niveau de pression sonore (LpA) : 81 dB (A)
Niveau de puissance sonore (LWA ) : 91 dB (A)
Incertitude (K) : 3 dB (A)
Modèle DLM432
Niveau de pression sonore (LpA) : 81 dB (A)
Niveau de puissance sonore (LWA ) : 92 dB (A)
Incertitude (K) : 3 dB (A)
NOTE : La ou les valeurs d’émission de bruit décla-
rées ont été mesurées conformément à la méthode
de test standard et peuvent être utilisées pour com-
parer les outils entre eux.
NOTE : La ou les valeurs d’émission de bruit décla-
rées peuvent aussi être utilisées pour l’évaluation
préliminaire de l’exposition.

17 FRANÇAIS
AVERTISSEMENT : Portez un serre-tête
antibruit.
AVERTISSEMENT : L’émission de bruit
lors de l’usage réel de l’outil électrique peut être
différente de la ou des valeurs déclarées, suivant
la façon dont l’outil est utilisé, particulièrement
selon le type de pièce usinée.
AVERTISSEMENT : Les mesures de sécurité
à prendre pour protéger l’utilisateur doivent être
basées sur une estimation de l’exposition dans
des conditions réelles d’utilisation (en tenant
compte de toutes les composantes du cycle
d’utilisation, comme par exemple le moment de
sa mise hors tension, lorsqu’il tourne à vide et le
moment de son déclenchement).
Vibrations
Valeur totale de vibrations (somme de vecteur triaxial)
déterminée selon EN60335-2-77 :
Modèle DLM382
Émission de vibrations (ah) : 2,5 m/s2ou moins
Incertitude (K) : 2,0 m/s2
Modèle DLM432
Émission de vibrations (ah) : 2,5 m/s2ou moins
Incertitude (K) : 1,5 m/s2
NOTE : La ou les valeurs de vibration totales décla-
rées ont été mesurées conformément à la méthode
de test standard et peuvent être utilisées pour com-
parer les outils entre eux.
NOTE : La ou les valeurs de vibration totales décla-
rées peuvent aussi être utilisées pour l’évaluation
préliminaire de l’exposition.
AVERTISSEMENT : L’émission de vibrations
lors de l’usage réel de l’outil électrique peut être
différente de la ou des valeurs déclarées, suivant
la façon dont l’outil est utilisé, particulièrement
selon le type de pièce usinée.
AVERTISSEMENT : Les mesures de sécurité
à prendre pour protéger l’utilisateur doivent être
basées sur une estimation de l’exposition dans
des conditions réelles d’utilisation (en tenant
compte de toutes les composantes du cycle
d’utilisation, comme par exemple le moment de
sa mise hors tension, lorsqu’il tourne à vide et le
moment de son déclenchement).
Déclaration de conformité CE
Pour les pays européens uniquement
La déclaration de conformité CE est fournie en Annexe
A à ce mode d’emploi.
CONSIGNES DE SÉCURITÉ
IMPORTANTES
AVERTISSEMENT :
Lisez toutes les consignes
de sécurité et toutes les instructions. Il y a risque
d’électrocution, d’incendie et/ou de graves blessures si les
mises en garde et les instructions ne sont pas respectées.
Conservez toutes les mises en
garde et instructions pour réfé-
rence ultérieure.
Formation
1. Lisez attentivement les instructions.
Familiarisez-vous avec les commandes et la
bonne utilisation de la tondeuse.
2.
Ne laissez jamais les enfants ou les personnes qui
ne sont pas familiarisées avec ces instructions
utiliser la tondeuse. Les réglementations locales
peuvent spécier un âge minimum pour l’utilisation.
3. N’utilisez jamais la tondeuse alors que des
personnes — et tout particulièrement des
enfants — ou des animaux domestiques se
trouvent à proximité.
4. Gardez à l’esprit que l’opérateur ou l’utilisa-
teur est responsable des accidents ou risques
encourus par les personnes ou leur propriété.
5. Les enfants doivent être sous la surveillance
d’un adulte an de s’assurer qu’ils ne jouent
pas avec la tondeuse.
6. Condition physique - N’utilisez pas la ton-
deuse après avoir consommé une drogue, de
l’alcool ou un médicament.
Préparatifs
1. Pendant l’utilisation de la tondeuse, portez
toujours des chaussures résistantes et un
pantalon long. N’utilisez pas la tondeuse
pieds nus ou avec des sandales qui laissent
les pieds partiellement découverts. Évitez
de porter des vêtements et bijoux amples ou
dotés de cordons ou attaches qui pendent. Les
pièces mobiles risqueraient de les happer.
2. Avant utilisation, inspectez toujours visuelle-
ment la tondeuse pour vérier que les carters
ou écrans de protection ne sont pas endom-
magés, manquants ou égarés.
3. Assurez-vous qu’il n’y a personne à proximité
avant de commencer à tondre. Arrêtez la ton-
deuse si quelqu’un s’approche.
4. N’insérez la clé de sécurité dans la tondeuse
qu’une fois celle-ci prête pour l’utilisation.
5. Pour protéger vos yeux des blessures lorsque
vous utilisez un outil électrique, portez tou-
jours des lunettes de protection, lesquelles
doivent être conformes à ANSI Z87.1 aux
États-Unis, EN 166 en Europe ou AS/NZS 1336
en Australie/Nouvelle-Zélande. En Australie/
Nouvelle-Zélande, la loi exige également le
port d’un écran facial pour se protéger le
visage.

18 FRANÇAIS
L’employeur est responsable d’imposer le port
d’équipements de sécurité appropriés par les
utilisateurs de l’outil et par les autres personnes
se trouvant à proximité de la zone de travail.
6. Vériez soigneusement l’absence de ssures
ou de dommages sur les lames ou les boulons
des lames avant l’utilisation. Remplacez immé-
diatement les lames ou les boulons des lames
ssurés ou abîmés.
7. Pour éviter de vous blesser ou d’abîmer la
tondeuse, enlevez les corps étrangers tels que
pierres, câbles, bouteilles, os et gros bouts de
bois dans la zone de travail avant de commen-
cer à tondre.
8.
Les objets heurtés par la lame de tondeuse
peuvent provoquer de graves blessures. Pensez
toujours à inspecter soigneusement le gazon et
à retirer tous les objets avant de tondre.
9. Prenez garde aux trous, ornières, bosses,
pierres ou autres objets cachés. Un terrain
irrégulier est propice aux glissades et aux chutes.
L’herbe haute peut masquer les obstacles.
Fonctionnement
1. Ne vous penchez pas trop loin. Maintenez tou-
jours votre équilibre. Assurez-vous toujours
d’être en position stable dans les pentes. Ne
courez jamais ; marchez.
2. Arrêtez la tondeuse, retirez la clé de sécurité
et assurez-vous que toutes les pièces mobiles
sont parfaitement arrêtées :
- chaque fois que vous laissez la tondeuse
sans surveillance,
- avant de retirer un objet bloqué ou de débou-
cher la goulotte,
- avant d’effectuer la vérication, le nettoyage
ou l’entretien de la tondeuse,
- après avoir heurté un corps étranger. Avant
de redémarrer et d’utiliser la tondeuse, vériez
l’absence de dommages et effectuez les répa-
rations nécessaires,
- chaque fois que la tondeuse se met à vibrer
de manière inhabituelle.
3.
N’utilisez jamais la tondeuse si ses carters ou
écrans de protection ne fonctionnent pas, ou si
ses dispositifs de sécurité (tels que les déec-
teurs et/ou le bac à herbe) ne sont pas posés.
4. Évitez d’utiliser la tondeuse par mauvais
temps, particulièrement en cas d’orage.
5. Portez toujours une protection oculaire et des
chaussures solides pendant que vous utilisez
la tondeuse.
6. N’utilisez la tondeuse qu’à la lumière du jour
ou sous un bon éclairage articiel.
7. Démarrez la tondeuse prudemment, en suivant
les instructions et en gardant les pieds bien à
l’écart de la ou des lames.
8. Prenez garde de ne pas vous blesser les pieds
et les mains avec les lames de la tondeuse.
9. Assurez-vous toujours que les bouches d’aé-
ration ne sont pas obstruées par des débris.
10. Tondez toujours les pentes latéralement,
jamais de haut en bas ou vice-versa. Soyez
très prudent lorsque vous changez de direc-
tion dans les pentes. Ne tondez pas dans les
pentes trop abruptes.
11. Soyez très prudent lorsque vous faites reculer
la tondeuse ou la tirez vers vous.
12. Immobilisez la ou les lames si vous devez
incliner la tondeuse pour la transporter en
traversant une surface autre que du gazon, et
lorsque vous transportez la tondeuse vers ou
hors de la zone d’utilisation.
13. N’inclinez pas la tondeuse en allumant le
moteur, sauf si la tondeuse doit être inclinée
pour le démarrage. Le cas échéant, ne l’in-
clinez pas plus que nécessaire et ne soule-
vez que la partie opposée à vous. Avant de
ramener la tondeuse au sol, veillez à ce que
vos deux mains soient toujours en position
d’utilisation.
14. Ne mettez pas les mains ou les pieds près des
pièces en rotation, ou sous celles-ci. Restez
en tout temps à l’écart de l’ouverture de
décharge.
15. Ne transportez pas la tondeuse pendant
qu’elle tourne.
16. Évitez d’utiliser la tondeuse sur de l’herbe
mouillée.
17. N’utilisez jamais la tondeuse sous la pluie.
18. Tenez toujours la poignée fermement.
19. Ne saisissez pas les lames de coupe exposées
ou les bords tranchants pour soulever ou tenir
la tondeuse.
20. Gardez mains et pieds à l’écart des lames en
rotation. Attention - Les lames continuent de
tourner une fois la tondeuse éteinte.
21. Cessez immédiatement l’utilisation si vous
remarquez quoi que ce soit d’inhabituel.
Coupez le contact de la tondeuse et retirez la
clé de sécurité. Inspectez ensuite la tondeuse.
22. N’essayez jamais de régler la hauteur de coupe
pendant que la tondeuse tourne si celle-ci est
pourvue d’une fonction de réglage de la hau-
teur de coupe.
23. Libérez le levier d’interrupteur et attendez que
la lame ait cessé de tourner avant de traverser
une allée, un trottoir, une route ou une zone
recouverte de gravier. Pensez également à
retirer la clé de sécurité si vous laissez la ton-
deuse sans surveillance, si vous vous penchez
pour ramasser ou enlever un objet qui fait
obstacle, ou pour toute autre raison pouvant
vous distraire de votre travail.

19 FRANÇAIS
24. Si la tondeuse heurte un corps étranger, pro-
cédez comme suit :
- Arrêtez la tondeuse, libérez le levier d’inter-
rupteur et attendez que la lame ait complète-
ment cessé de tourner.
- Retirez la clé de sécurité et la batterie.
- Inspectez minutieusement la tondeuse pour
vous assurer qu’elle n’a subi aucun dommage.
- Si la lame est abîmée, remplacez-la. Réparez
tout dégât avant de redémarrer et de continuer
à utiliser la tondeuse.
25. Ne vous tenez pas devant l’ouverture de
décharge pour démarrer la tondeuse.
26. Si la tondeuse se met à vibrer anormalement
(vériez immédiatement)
- inspectez les dommages,
- remplacez ou réparez les pièces
endommagées,
- vériez et resserrez les pièces mal serrées.
27. Ne dirigez jamais le matériau déversé en direc-
tion d’une personne. Évitez de déverser le
matériau contre un mur ou une obstruction. Le
matériau peut ricocher en arrière en direction de
l’utilisateur. Arrêtez la lame lorsque vous traversez
des surfaces couvertes de gravier.
28. Ne tirez pas la tondeuse en arrière sauf en cas
de nécessité absolue. Lorsque vous êtes obligé
de retirer la tondeuse d’une clôture ou d’autres
obstacles semblables, regardez vers le bas et
l’arrière avant et pendant que vous reculez.
29. Coupez le moteur et patientez jusqu’à ce que
la lame soit complètement arrêtée avant de
retirer le collecteur d’herbe. Soyez conscient
que la lame continue de tourner même après la
mise hors tension.
Entretien et rangement
1. Pour votre propre sécurité, remplacez les
pièces usées ou endommagées. Utilisez exclu-
sivement des pièces de rechange et acces-
soires authentiques.
2. Procédez régulièrement à l’inspection et à
l’entretien de la tondeuse.
3. Lorsque vous ne l’utilisez pas, rangez la ton-
deuse hors de portée des enfants.
4. Gardez tous les écrous, boulons et vis bien
serrés pour garantir le fonctionnement sûr de
l’équipement.
5. Inspectez régulièrement le bac à herbe pour
vérier l’absence d’usure ou de détérioration.
Avant le rangement, assurez-vous toujours
que le bac à herbe est vide. Si le bac à herbe
est usé, remplacez-le par un bac de rechange
neuf pour votre sécurité.
6.
Utilisez exclusivement les lames authentiques
du fabricant spéciées dans ce mode d’emploi.
7. Lorsque vous réglez la tondeuse, évitez de
vous coincer les doigts entre les lames en
mouvement et les pièces xes de la tondeuse.
8. Ne nettoyez pas la tondeuse avec un tuyau
d’arrosage ; évitez de mouiller le moteur et les
connexions électriques.
9. Vériez régulièrement le boulon de montage
de la lame pour vous assurer qu’il est bien
serré.
10. Laissez toujours refroidir la tondeuse avant de
la ranger.
11. Lors de l’entretien des lames, gardez à l’esprit
qu’elles peuvent tourner même si la source
d’alimentation est coupée.
12. Ne retirez ni ne modiez jamais les dispositifs
de sécurité. Vériez régulièrement leur bon
fonctionnement. Ne faites jamais quoi que ce
soit susceptible d’entraver la fonction prévue
d’un dispositif de sécurité ou de réduire la pro-
tection assurée par un dispositif de sécurité.
Utilisation et entretien des outils fonctionnant sur
batterie
1. Rechargez la batterie uniquement avec le char-
geur spécié par le fabricant. Un chargeur qui
est adapté à un type spécique de batterie peut
présenter un risque d’incendie s’il est utilisé avec
un autre type de batterie.
2. Utilisez un outil électrique uniquement avec la
batterie spéciquement indiquée. L’utilisation
de toute autre batterie peut présenter un risque de
blessure et d’incendie.
3.
Lorsque vous n’utilisez pas la batterie, tenez-la
à l’écart des objets métalliques, comme des
trombones, pièces de monnaie, clés, clous, vis
ou autres petits objets métalliques, susceptibles
de créer une connexion entre deux bornes.
Court-circuiter les bornes d’une batterie entre elles
peut provoquer des brûlures ou un incendie.
4. Dans des conditions d’utilisation inadéquate,
il peut y avoir une fuite de l’électrolyte de la
batterie. Le cas échéant, évitez tout contact
avec ce liquide. En cas de contact accidentel,
rincez à l’eau. Si le liquide pénètre dans les
yeux, consultez par ailleurs un médecin. Le
liquide s’échappant de la batterie peut provoquer
une irritation ou des brûlures.
5. N’utilisez pas une batterie ou un outil s’ils sont
endommagés ou modiés. Une batterie endom-
magée ou modiée peut avoir un comportement
imprévisible susceptible d’entraîner un incendie,
une explosion ou des blessures.
6. N’exposez pas la batterie ou l’outil au feu ou à
une température excessive. L’exposition au feu
ou à une température supérieure à 130 °C peut
provoquer une explosion.
7. Respectez toutes les instructions de charge et
ne chargez pas la batterie ou l’outil en dehors
de la plage de température indiquée dans les
instructions. Une charge incorrecte ou à une
température en dehors de la plage indiquée peut
endommager la batterie et augmenter le risque
d’incendie.
Sécurité électrique et sécurité des batteries
1. Ne jetez pas la ou les batteries au feu.
L’élément de la pile pourrait exploser. Consultez
les codes locaux pour de possibles instructions de
mise au rebut spéciales.
2. N’ouvrez ni ne manipulez la ou les batteries.
L’électrolyte qui s’échappe de la batterie est cor-
rosif et peut irriter la peau ou les yeux. Il peut être
toxique en cas d’ingestion.
3. Ne chargez pas la batterie sous la pluie ou
dans un endroit mouillé.

20 FRANÇAIS
4. Ne pas charger la batterie à l’extérieur.
5. Ne manipulez pas le chargeur, y compris la
che du chargeur et les bornes du chargeur
avec les mains mouillées.
Dépannage
1. Conez la réparation de votre outil électrique à
un réparateur qualié qui utilise des pièces de
rechange identiques. La sécurité de l’outil élec-
trique sera ainsi préservée.
2. Ne dépannez jamais les batteries endomma-
gées. Le dépannage des batteries doit être effec-
tué uniquement par le fabricant ou un dépanneur
agréé.
CONSERVEZ CES
INSTRUCTIONS.
AVERTISSEMENT : NE vous laissez PAS
tromper (au l d’une utilisation répétée) par un
sentiment d’aisance et de familiarité avec le
produit, en négligeant le respect rigoureux des
consignes de sécurité qui accompagnent le pro-
duit en question.
La MAUVAISE UTILISATION de l’outil ou l’igno-
rance des consignes de sécurité indiquées
dans ce mode d’emploi peut entraîner de graves
blessures.
Consignes de sécurité importantes
pour la batterie
1. Avant d’utiliser la batterie, lisez toutes les
instructions et précautions relatives (1) au
chargeur de batterie, (2) à la batterie, et (3) au
produit utilisant la batterie.
2. Ne démontez pas la batterie.
3. Cessez immédiatement l’utilisation si le temps
de fonctionnement devient excessivement
court. Il y a risque de surchauffe, de brûlures,
voire d’explosion.
4. Si l’électrolyte pénètre dans vos yeux, rin-
cez-les à l’eau claire et consultez immédiate-
ment un médecin. Il y a risque de perte de la
vue.
5. Ne court-circuitez pas la batterie :
(1) Ne touchez les bornes avec aucun maté-
riau conducteur.
(2) Évitez de ranger la batterie dans un
conteneur avec d’autres objets métal-
liques, par exemple des clous, des pièces
de monnaie, etc.
(3) N’exposez pas la batterie à l’eau ou à la
pluie.
Un court-circuit de la batterie peut provoquer
une intensité de courant élevée, une sur-
chauffe, parfois des brûlures et même une
panne.
6. Ne rangez pas l’outil et la batterie dans un
endroit où la température risque d’atteindre ou
de dépasser 50 °C.
7. Ne jetez pas la batterie au feu même si elle est
sérieusement endommagée ou complètement
épuisée. La batterie peut exploser au contact
du feu.
8. Évitez de laisser tomber ou de cogner la
batterie.
9. N’utilisez pas la batterie si elle est
endommagée.
10. Les batteries au lithium-ion contenues sont
soumises aux exigences de la législation sur
les marchandises dangereuses.
Lors du transport commercial par des tierces
parties ou des transitaires par exemple, des exi-
gences spéciques en matière d’étiquetage et
d’emballage doivent être respectées.
Pour la préparation de l’article expédié, il est
nécessaire de consulter un expert en matériau
dangereux. Veuillez également respecter les
réglementations nationales susceptibles d’être
plus détaillées.
Recouvrez les contacts exposés avec du ruban
adhésif ou du ruban de masquage et emballez la
batterie de telle sorte qu’elle ne puisse pas bouger
dans l’emballage.
11. Lors de la mise au rebut de la batterie, reti-
rez-la de l’outil et jetez-la en lieu sûr. Suivez les
réglementations locales en matière de mise au
rebut des batteries.
12. Utilisez les batteries uniquement avec les
produits spéciés par Makita. L’insertion de
batteries dans des produits non conformes peut
provoquer un incendie, une chaleur excessive,
une explosion ou une fuite de l’électrolyte.
13. Lorsque vous n’utilisez pas l’outil pendant une
période prolongée, la batterie doit être retirée
de l’outil.
CONSERVEZ CES
INSTRUCTIONS.
ATTENTION : N’utilisez que des batteries
Makita d’origine. L’utilisation de batteries de marque
autre que Makita ou de batteries modiées peut pro-
voquer l’explosion des batteries, ce qui présente un
risque d’incendie, de dommages matériels et corpo-
rels. Cela annulera également la garantie Makita pour
l’outil et le chargeur Makita.
Conseils pour assurer la durée
de vie optimale de la batterie
1. Chargez la batterie avant qu’elle ne soit com-
plètement déchargée. Arrêtez toujours l’outil
et rechargez la batterie quand vous remarquez
que la puissance de l’outil diminue.
2. Ne rechargez jamais une batterie complète-
ment chargée. La surcharge réduit la durée de
service de la batterie.
3. Chargez la batterie à une température
ambiante comprise entre 10 °C et 40 °C. Avant
de charger une batterie chaude, laissez-la
refroidir.
4. Rechargez la batterie si elle est restée inutili-
sée pendant une période prolongée (plus de
six mois).
This manual suits for next models
2
Table of contents
Languages:
Other Makita Lawn Mower manuals

Makita
Makita BLM430 User manual

Makita
Makita HML01 User manual

Makita
Makita LM004G User manual

Makita
Makita XML03 User manual

Makita
Makita BLM430 User manual

Makita
Makita DLM431 User manual

Makita
Makita DLM431 User manual

Makita
Makita LM001CX3 User manual

Makita
Makita ELM4121 User manual

Makita
Makita UM40LDW User manual

Makita
Makita PLM5121 User manual

Makita
Makita LM001C User manual

Makita
Makita LM001C User manual

Makita
Makita DLM382 User manual

Makita
Makita DLM431 User manual

Makita
Makita DLM380 User manual

Makita
Makita DLM536PT2 User manual

Makita
Makita DLM380Z User manual

Makita
Makita DLM382 User manual

Makita
Makita XML02 User manual