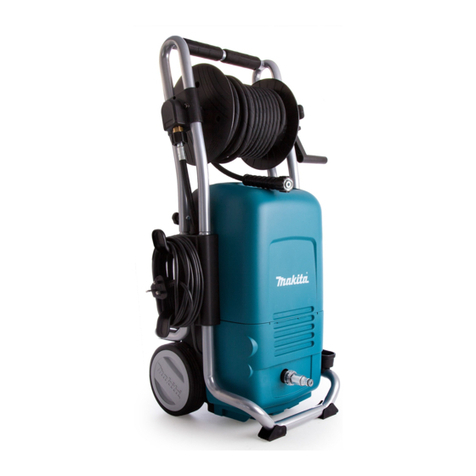
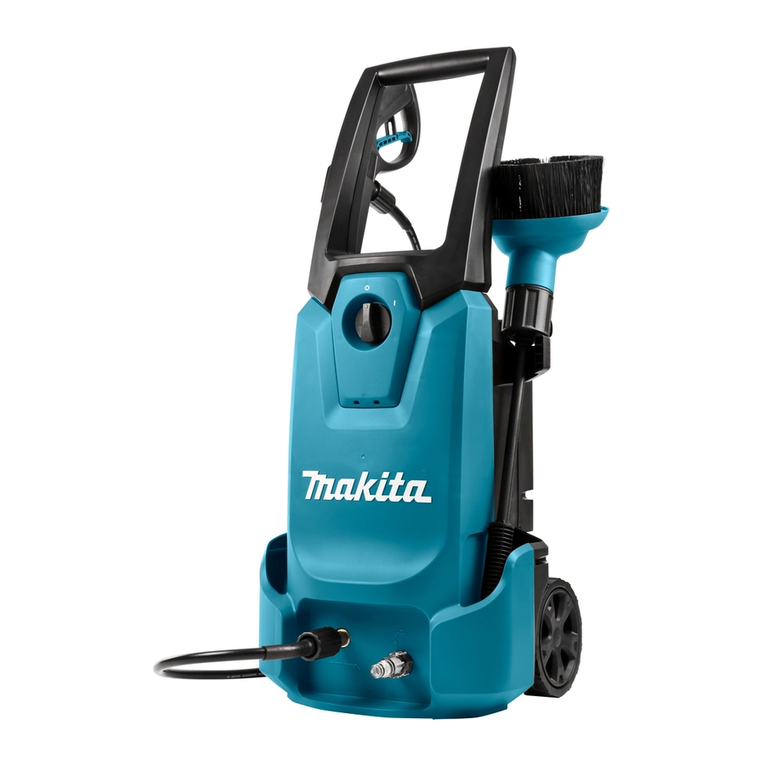
Makita HW 112 User manual

Instore "130"you
canfind and buy almostall necessarygoodsforyourauto
in
Kyiv and othercities,deliveryby ground andpostal services. Ourexperienced
consultantswill provide youwithexhaustive informationand helpyoutochose
the very particular thing.We arewaiting foryou at the address
http://130.com.ua
PHONES
(044) 338-0-130
(050) 332-0-130
(063) 577-0-130
(067) 353-0-130
Internet storeof
autogoods
CARRECEIVERS —Receivers •Mediareceiversandstations•Nativereceivers •CD/DVD changers •FM-modulators/USBadapters•Flashmemory•Faciaplates and adapters •Antennas •Accessories |
CARAUDIO —Car audiospeakers •Amplifiers•Subwoofers •Processors•Crossovers •Headphones•Accessories|TRIPCOMPUTERS —Universalcomputers •Modelcomputers •Accessories|
GPSNAVIGATORS —PortableGPS•Built-in GPS•GPSmodules •GPStrackers •Antennas forGPSnavigators•Accessories|VIDEO —DVR •TVsetsand monitors•Car TVtuners•Cameras •Videomodules
•Transcoders •Car TVantennas•Accessories|SECURITYSYSTEMS —Car alarms •Bikealarms •Mechanicalblockers •Immobilizers •Sensors •Accessories |OPTICANDLIGHT —Xenon•Bixenon •Lamps
•LED •Stroboscopes •OpticandHeadlights •Washers •Light,rainsensors •Accessories |PARKTRONICS ANDMIRRORS —Rear parktronics•Frontparktronics •Combined parktronics •Rear-viewmirrors
•Accessories |HEATINGANDCOOLING —Seat heaters •Mirrorsheaters •Screen-wipers heaters •Engineheaters •Auto-refrigerators •Airconditioningunits •Accessories |TUNING —Vibro-isolation
•Noise-isolation •Tintfilms •Accessories |ACCESSORIES —Radar-detectors•Handsfree,Bluetooth•Windowlifters•Compressors •Beeps,loudspeakers •Measuring instruments •Cleaners •Carsits
•Miscellaneous|MOUNTING —Installationkits •Upholstery•Grilles•Tubes•Cableand wire •Tools•Miscellaneous|POWER —Batteries •Converters •Start-chargingequipment•Capacitors
•Accessories |MARINE AUDIOANDELECTRONICS —Marinereceivers•Marineaudiospeakers •Marinesubwoofers •Marineamplifiers•Accessories |CARCARE PRODUCTS —Additives •Washer fluid •
Care accessories •Car polish •Flavors •Adhesives andsealants |LIQUIDANDOIL —Motoroil•Transmissionoil •Brakefluid •Antifreeze•Technicallubricant
SKYPE
km-130

TP
FR
EN
DE
IT
ES
PT
EL
NL
DA
NO
FI
SV
CS
PL
SL
SK
LT
BG
RU
HU
RO
TR
HR
LV
ET
cod. 91713 - BU
UK
HW 112
Autogoods “130”
130.com.ua

2
FR Lire ce manuel avant l’installation/utilisation du nettoyeur en faisant très attention aux INSTRUCTIONS POUR LA SÉCURITÉ
EN Read this manual through carefully before installing/using the cleaner, paying special attention to the SAFETY
INSTRUCTIONS
DE Lesen Sie dieses Handbuch vor der Installation und dem Gebrauch des Hochdruckreinigers aufmerksam durch und achten
Sie besonders auf die SICHERHEITSANWEISUNGEN
IT Leggere questo manuale prima dell’installazione/uso dell’idropulitrice, prestando particolare attenzione alle ISTRUZIONI
PER LA SICUREZZA
ES Leer este manual antes de la instalación/uso de la hidrolimpiadora, prestando particular atención a las INSTRUCCIONES
SOBRE SEGURIDAD
PT Leia este manual antes de instalar/usar a lavadora a alta pressão, prestando muita atenção nas INSTRUÇÕES PARA A
SEGURANÇA
EL ∆ιαβάστε το παρόν εγχειρίδιο πριν από την εγκατάσταση/χρηση του μηχανήματος πλύσης, με ιδιαίτερη προσοχή στις
Ο∆ΗΓΙΕΣ ΓΙΑ ΤΗΝ ΑΣΦΑΛΕΙΑ
NL Lees vóór de installatie/het gebruik van de hogedrukreiniger deze handleiding goed door en in het bijzonder de
VEILIGHEIDSVOORSCHRIFTEN
DA Læs denne vejledning inden installation og brug af højtryksrenseren og vær særligt opmærksom på SIKKERHEDSREGLERNE
NO Les denne håndboken før installasjon og bruk av høytrykksspyleren og vær spesielt oppmerksom på SIKKERHETSREGLENE
FI Lue tämä käyttöopas ennen painepesurin asennusta/käyttöä. Kiinnitä erityistä huomiota TURVAOHJEISIIN
SV Läs igenom bruksanvisningen före installation och användning av högtryckstvätten. Lägg speciellt märke till
SÄKERHETSBESTÄMMELSERNA
CS Před instalací nebo používáním tohoto čističe si pečlivě přečtěte tuto příručku. Zvýšenou pozornost věnujte části
BEZPEČNOSTNÍ POKYNY
PL Przed przystąpieniem do instalacji bądź użycia myjki należy dokładnie przeczytać niniejszy podręcznik, zwracając
szczególną uwagę na treść części dotyczącej INSTRUKCJI BEZPIECZEŃSTWA
SL Pozorno preberite ta navodila pred namestitvijo/uporabo čistilnika, pri čemer posebno pozornost namenite VARNOSTNIM
NAVODILOM
SK Pred inštaláciou/používaním čističa si pozorne prečítajte tento návod a buďte obzvlášť opatrní pri čítaní BEZPEČNOSTNÝCH
POKYNOV
LT Prieš sumontuodami ir naudodami įrenginį atidžiai perskaitykite šią naudojimo instrukciją, ypatingą dėmesį atkreipdami
į SAUGOS INSTRUKCIJAS
BG Прочетете това ръководство внимателно, преди да инсталирате/използвате машината за почистване,
като обърнете особено внимание на ИНСТРУКЦИИТЕ ЗА БЕЗОПАСНОСТ
RU Прочитайте данное руководство перед установкой моечной машины, обращая особенное внимание на
ИНСТРУКЦИИ ПО БЕЗОПАСНОСТИ
HU A tisztítóberendezés üzembehelyezése/használata előtt olvassa át gondosan ezt a leírást, különös figyelmet szentelve a
BIZTONSÁGI ELŐÍRÁSOK című résznek
RO Citiţi acest manual în întregime cu atenţie înainte de a instala/utiliza aparatul de curăţat, acordând o atenţie mărită
INSTRUCŢIUNILOR DE SIGURANŢĂ
TR Hidro temizleyiciyi kurmadan/kullanmadan önce, EMNİYET BİLGİLERİ’NE özellikle dikkat göstererek, işbu kılavuzu
okuyunuz
HR Prije montiranja/korištenja čistača pažljivo pročitajte ovaj priručnik i posebnu pozornost posvetite SIGURNOSNIM
MJERAMA
LV Pirms tīrīšanas ierīces uzstādīšanas/izmantošanas izlasiet šo rokasgrāmatu, īpaši vērīgi lasiet DROŠĪBAS NOTEIKUMUS
ET Lugege see kasutusjuhend enne survepesuri töökorda seadmist/kasutamist hoolega läbi, pöörates erilist tähelepanu
OHUTUSNÕUETELE
UK Перед тим, як встановлювати/використовувати пристрій для миття, уважно прочитайте цей посібник,
звертаючи особливу увагу на ІНСТРУКЦІЇ З БЕЗПЕКИ
Autogoods “130”
130.com.ua

3
1
E3 E1
A1-A2-A3-A4
C1
D
C2
B1
B6
B2
B3
B4
C4
Autogoods “130”
130.com.ua

4
2
1 2
6 7
3 4
8
5
Ø13
Autogoods “130”
130.com.ua

5
3
4
D
1
2
HH
H
E
I
Autogoods “130”
130.com.ua

6
5
I
Volt
230 2 x 1,5 mm 2 x 2,5 mm
1 ÷ 25 m 25 ÷ 50 m
L
4
1
5
S
n
M
1~
b
a
C
N
L1 r
2T
Autogoods “130”
130.com.ua

12 English
1
SAFETY INSTRUCTIONS
1.1 The appliance you have purchased is a technologically advanced
product designed by one of the leading European manufacturers
of high pressure pumps. To obtain the best performance from your
unit, read this booklet carefully and follow the instructions each
time you use it. We congratulate you on your choice and wish you
successful operation.
2
SAFETY RULES/RESIDUAL RISKS
2.1 SAFETY “MUST NOTS”
2.1.1 DO NOT use the appliance with
inflammable or toxic liquids, or
any products which are not compatible with the correct operation
of the appliance. EXPLOSION OR POISONING HAZARD
2.1.2 DO NOT direct the water jet towards people or
animals. INJURY HAZARD
2.1.3 DO NOT direct the water jet towards the unit
itself, electrical parts or towards other electrical
equipment. ELECTRIC SHOCK HAZARD
2.1.4 DO NOT use the appliance outdoors in case of rain. SHORT
CIRCUIT HAZARD
2.1.5 DO NOT allow children or incompetent persons to use the
appliance. INJURY HAZARD
2.1.6
DO NOT touch the plug and/or socket with wet
hands. ELECTRIC SHOCK HAZARD
2.1.7
DO NOT use the appliance if the electrical cable is
damaged. ELECTRIC SHOCK AND SHORT CIRCUIT HAZARD
2.1.8 DO NOT use the appliance if the high pressure
hose is damaged. EXPLOSION HAZARD
2.1.9 DO NOT jam the trigger in the operating position. ACCIDENT
HAZARD
2.1.10 Check that the data plates are affixed to the appliance, if
not, inform your dealer. Units without plates must NOT
be used as they are unidentifiable and potentially dangerous.
ACCIDENT HAZARD
2.1.11 DO NOT tamper with or adjust the setting of the
safety valve or the safety devices. EXPLOSION HAZARD
2.1.12 DO NOT alter the original diameter of the spray head
nozzle. HAZARDOUS ALTERATION OF OPERATING PERFORMANCE
2.1.13 DO NOT leave the appliance unattended. ACCIDENT HAZARD
2.1.14 DO NOT move the appliance by pulling on the
ELECTRICAL CABLE. SHORT CIRCUIT HAZARD
2.1.15 Make sure that cars do not drive over the high pressure hose.
2.1.16 DO NOT move the appliance by pulling on the high pressure hose.
EXPLOSION HAZARD
2.1.17 When directed towards tyres, tyre valves or other pressurised
components, the high pressure jet is potentially dangerous. Do not
use the rotating nozzle kit, and always keep the jet at a distance of
at least 30 cm during cleaning. EXPLOSION HAZARD
2.2 SAFETY “MUSTS”
2.2.1 All electrical conductors MUST BE PROTECTED against the
water jet. SHORT CIRCUIT HAZARD
2.2.2 The appliance MUST ONLY BE CONNECTED to an
adequate power supply in compliance with all
applicable regulations (IEC 60364-1). ELECTRIC SHOCK HAZARD
The appliance may cause network noise DURING startup.
• Use of a safety residual current circuit-breaker (R.C.C.B.) will
provide additional protection for the operator (30 mA).
Models supplied without plug must be installed by qualified staff.
Use only authorized electrical extension leads with suitable
conductor gauge.
2.2.3
High pressure may cause parts to rebound: wear all the protective
clothing and equipment needed to ensure the operator’s safety.
INJURY HAZARD
2.2.4 Before doing work on the appliance, REMOVE the plug.
ACCIDENTAL START-UP HAZARD
2.2.5 Before pressing the trigger, GRIP the gun firmly to
counteract the recoil. INJURY HAZARD
2.2.6 COMPLY WITH the requirements of the local water
supply company. According to EN 12729 (BA), the
appliance may only be connected to the mains drinking water
supply if a backflow preventer valve with drain facility is installed in
the supply hose. CONTAMINATION HAZARD
2.2.7 Maintenance and/or repair of electrical components
MUST be carried out by qualified staff. ACCIDENT HAZARD
2.2.8 DISCHARGE residual pressure before disconnecting the
unit hose. INJURY HAZARD
2.2.9 Before using the appliance, CHECK every time that the
screws are fully tightened and that there are no broken or
worn parts. ACCIDENT HAZARD
2.2.10 ONLY USE detergents which will
not corrode the coating materials
of the high pressure hose/electrical cable. EXPLOSION AND ELECTRIC
SHOCK HAZARD
2.2.11 ENSURE that all people or animals keep a
minimum distance of 16 yd. (15m) away. INJURY
HAZARD
Autogoods “130”
130.com.ua

13English
EN
3
GENERAL INFORMATION FIG.1
3.1 Use of the manual
This manual forms an integral part of the appliance and should be
kept for future reference. Please read it carefully before installing/
using the unit. If the appliance is sold, the Seller must pass on this
manual to the new owner along with the appliance.
3.2 Delivery
The appliance is delivered partially assembled in a cardboard box.
The supply package is illustrated in fig.1.
3.2.1 Documentation supplied with the appliance
A1 Use and maintenance manual
A2 Safety instructions
A3 Declaration of conformity
A4 Warranty regulations
3.3 Disposing of packaging
The packaging materials are not environmental pollutants but must
still be recycled or disposed of in compliance with the relevant
legislation in the country of use.
3.4 Safety signs
Comply with the instructions provided by the safety signs fitted to
the appliance.
Check that they are present and legible; otherwise, fit replacements
in the original positions.
E1 sign – Indicates that the appliance must not be disposed of as
municipal waste; it may be handed in to the dealer on purchase of a
new appliance. The appliance's electrical and electronic parts must
not be reused for improper uses since they contain substances
which constitute health hazards.
3.4.1 Symbols
E2 symbol – Indicates that the appliance is intend-
ed for professional use, i.e. for experienced people
informed about the relative technical, regulatory
and legislative aspects and capable of performing the
operations necessary for the use and maintenance of the
appliance.
E3 symbol – Indicates that the appliance is
intended for non-professional (domestic) use.
4
TECHNICAL INFORMATION FIG.1
4.1 Envisaged use
This appliance has been designed for individual use for the cleaning
of vehicles, machines, boats, masonry, etc, to remove stubborn dirt
using clean water and biodegradable chemical detergents.
Vehicle engines may be washed only if the dirty water is disposed of
as per regulations in force.
- Intake water temperature: see data plate on the appliance.
- Intake water pressure: min. 0,1MPa-max 1MPa.
- Operating ambient temperature: above 0°C.
The appliance is compliant with the EN 60335-2-79/A1 standard.
4.2 Operator
The symbol on the front cover identifies the appliance’s intended
operator (professional or non-professional).
4.3 Improper use
Use by unskilled persons or those who have not read and under-
stood the instructions in the manual is forbidden.
The introduction of inflammable, explosive and toxic liquids into the
appliance is prohibited.
Use of the appliance in a potentially inflammable or explosive
atmosphere is forbidden.
The use of non-original spare parts and any other spare parts not
specifically intended for the model in question is prohibited.
All modifications to the appliance are prohibited. Any modifications
made to the appliance shall render the Declaration of Conformity
null and void and relieve the manufacturer of all liability under civil
and criminal law.
4.4 Main components (see fig.1)
B1 Adjustable spray nozzle
B2 Lance
B3 Gun with safety catch
B4 Power supply cable with plug
B5 High pressure hose
B6 Detergent tank
4.4.1 Accessories
C1 Nozzle cleaning tool
C2 Rotating nozzle kit
C3 Handle
C4 Brush (on models with this feature)
C5 Hose reel (on models with this feature)
4.5 Safety devices
Caution - Danger!
Do not tamper with or adjust the safety valve setting.
- Safety valve and/or pressure limiting valve.
The safety valve is also a pressure limiting valve.
When the gun trigger is released, the valve opens and the water
recirculates through the pump inlet.
- Safety catch (D): prevents accidental spraying of water.
5
INSTALLATION FIG.2
5.1 Assembly
Caution - Danger!
All installation and assembly operations must be
performed with the appliance disconnected from the mains
power supply.
The assembly sequence is illustrated in fig.2.
5.2 Assembling the rotating nozzle
(For models with this feature)
The rotating nozzle kit delivers greater washing power.
Use of the rotating nozzle may cause of reduction in pressure of
25% compared to the pressure obtained with the adjustable nozzle.
However, the rotating nozzle kit delivers greater washing power due
to the rotation of the water jet.
5.3 Electrical connection
Caution - Danger!
Check that the electrical supply voltage and frequen-
cy (V-Hz) correspond to those specified on the appliance
data plate (fig.2). The appliance should only be connected
to a mains power supply equipped with an adequate earth
connection and a differential security breaker (30 mA) to cut
off the electricity supply in the instance of a short circuit.
5.3.1 Use of extension cables
Use cables and plugs featuring“IPX5”protection level.
The cross-section of the extension cable should be pro-
portionate to its length; the longer it is, the greater its
cross-section should be. See table I.
5.4 Water supply connection
Caution - Danger!
Only clean or filtered water should be used for intake.
The delivery of the water intake tap should be equal to that
of pump capacity.
Place the appliance as close to the water supply system as possible.
5.4.1 Connection points
●
Water outlet (OUTLET)
■
Water inlet with filter (INLET)
5.4.2 Connection to the mains water supply
The appliance can be connected directly to the mains
drinking water supply only if the supply hose is fitted with
a backflow preventer valve as per current regulations in
force. Make sure that the hose is at least Ø 13 mm and
that it is reinforced.
Autogoods “130”
130.com.ua

14 English
EN
6
ADJUSTMENT INFORMATION FIG.3
6.1 Adjusting the spray nozzle (for models with this feature)
Water flow is adjusted by regulating the nozzle (E).
6.2 Adjusting the detergent (on models with this feature)
Detergent flow is adjusted using the regulator (F).
6.3 Adjusting the detergent pressure
Set the adjustable nozzle (E) on " " to deliver detergent at the
correct pressure (on models with this feature).
6.4 Adjusting the pressure (on models with this feature)
The regulator (G) is used to adjust the working pressure. The pres-
sure is shown on the pressure gauge (where fitted).
7
INFORMATION ON USE OF THE APPLIANCE FIG.4
7.1 Controls
- Starter device (H).
Set the starter switch on (ON/1) to set the motor ready to start.
Set the starter device switch on (OFF/0) to shut down the appliance.
- Water jet control lever (I).
Caution - Danger!
During operation the appliance must be positioned
as shown in fig. 4 on a sturdy, stable surface.
7.2 Start-up
1) Turn on the water supply tap fully.
2) Release the safety catch (D).
3) Depress the gun trigger for a few seconds and start up the appli-
ance using the starter device (ON/1).
Caution - Danger!
Before starting up the appliance check that the water
supply hose is connected properly; use of the appliance
without water will damage it; do not cover the ventilation
grilles when the appliance is in use.
TSS models - In TSS models with automatic delivery flow cut-off system:
- when the gun trigger is released the dynamic pressure automati-
cally cuts out the motor (see fig.4);
- when the gun trigger is depressed the automatic drop in pres-
sure starts the motor and the pressure is restored after a very
slight delay;
- if the TSS is to function correctly all gun releasing and depressing
operations must be performed at intervals of less than 4-5 seconds.
To prevent damage to the appliance, do not allow it to
operate dry.
7.3 Stopping the appliance
1) Set the starter device switch on (OFF/0).
2) Depress the gun trigger and discharge the residual pressure
inside the hoses.
3) Engage the gun safety catch (D).
7.4 Restarting
1) Release the safety catch (D).
2) Depress the gun trigger and discharge the residual air inside
the hoses.
3) Set the starter device on (ON/1).
7.5 Storage
1) Switch the appliance off (OFF/0).
2) Remove the plug from the socket.
3) Turn off the water supply tap.
4) Discharge the residual pressure from the gun until all the water
has come out of the nozzle.
5) Drain and wash out the detergent tank at the end of the work-
ing session. To wash out the tank, use clean water instead of
the detergent.
6) Engage the gun safety catch (D).
7.6 Refilling and using detergent
When using detergent, the adjustable nozzle must be set on
" " (on models with this feature).
Use of a high pressure hose longer than the one originally supplied
with the cleaner, or the use of an additional hose extension, may
reduce or completely halt the intake of detergent.
Fill the tank with highly degradable detergent.
7.7 Recommended cleaning procedure
Dissolve dirt by applying the detergent mixed with water to the
surface while still dry.
When dealing with vertical surfaces work from the bottom upwards.
Leave the detergent to act for 1-2 minutes but do not allow the
surface to dry. Starting from the bottom, use the high pressure jet
at a minimum distance of 30 cm. Do not allow the rinse water to run
onto unwashed surfaces.
In some cases, scrubbing with brushes is needed to remove dirt.
High pressure is not always the best solution for good washing
results, since it may damage some surfaces. The finest adjustable
nozzle jet setting or the rotating nozzle should not be used on
delicate or painted parts, or on pressurised components (e.g tyres,
inflation valves, etc.).
Effective washing depends on both the pressure and volume of the
water used, to the same degree.
8
MAINTENANCE FIG.5
Any maintenance operations not covered by this chapter should be
carried out by an Authorized Sales and Service Centre.
Caution - Danger!
Always disconnect the plug from the power socket
before carrying out any work on the appliance.
8.1 Cleaning the nozzle
1) Disconnect the lance from the nozzle.
2)
Remove any dirt deposits from the nozzle hole using the tool (C1).
8.2 Cleaning the filter
Inspect the intake filter (L) and detergent filter (if fitted) before each
use, and clean in accordance with the instructions if necessary.
8.3 Unjamming the motor (on models with this feature)
In case of lengthy stoppages, limescale sediments may cause the
motor to seize. To unjam the motor, turn the drive shaft with a
tool (M).
8.4 End-of-season storage
Treat the appliance with non-corrosive, non-toxic antifreeze before
storing it away for winter.
Put the appliance in a dry place, protected from frost.
Autogoods “130”
130.com.ua

15English
EN
9
TROUBLESHOOTING
Problem Possible causes Remedy
Pump does not reach working
pressure
Nozzle worn Replace nozzle
Water filter fouled Clean filter (fig.5)
Water supply pressure low Turn on water supply tap fully
Air being sucked into system Check tightness of hose fittings
Air in pump
Switch off the appliance and keep depressing and releas-
ing the gun trigger until the water comes out in a steady
flow. Switch the appliance back on again.
Adjustable nozzle not positioned correctly Turn the adjustable nozzle (E) (+) (fig.3)
Thermostatic valve tripped Wait for correct water temperature to be restored
Pressure drops during use
Water intake from external tank Connect appliance to the mains water supply
Intake water too hot Reduce temperature
Nozzle clogged Clean nozzle (fig.5)
Intake filter (L) dirty Clean filter (L) (fig.5)
Motor “sounds”but fails to start
Insufficient power supply Check that the voltage of the mains power supply line is
the same as that on the plate (fig.2)
Voltage loss due to use of extension cable Check characteristics of extension cable
Appliance not used for a long period of time Contact your nearest Authorized Service Centre
Problems with TSS device Contact your nearest Authorized Service Centre
Motor fails to start
No electrical power Check that the plug is firmly in the socket and that the
mains voltage supply is present (*)
Problems with TSS device Contact your nearest Authorized Service Centre
Appliance not used for a long period of time Using the tool (M) unjam the motor from the hole at the
rear of the appliance (in models with this feature) (fig.5)
Water leakage Seals worn Have the seals replaced at your nearest Authorized
Service Centre
Safety valve tripped and discharging Contact an Authorized Service Centre
Appliance noisy Water too hot Reduce temperature (see technical data
Oil leakage Seals worn Contact your nearest Authorized Service Centre
TSS versions only: motor starts
even with gun trigger is released
High pressure system or pump hydraulic circuit not
watertight Contact your nearest Authorized Service Centre
TSS versions only: no water deliv-
ery when gun trigger is depressed
(with supply hose connected)
Nozzle clogged Clean nozzle (fig.5)
No detergent taken in
Adjustable nozzle on high pressure setting Set nozzle on " " setting (fig.5)
Detergent too dense Dilute with water
High pressure hose extension being used Fit original hose
Deposits or restriction in detergent circuit Flush with clean water and eliminate any restrictions. If the
problem persists, contact an Authorized Service Centre
(*) If the motor starts and does not restart during operation, wait 2-3 minutes before repeating the start-up procedure (overload cutout has been tripped).
If the problem recurs more than once, contact your nearest Authorized Service Centre.
Autogoods “130”
130.com.ua

Makita Corporation - Japan
MODEL SERIAL NUMBER
EN EC Declaration of conformity
We Makita Corporation, Anjo, Aichi, Japan declare that the following Makita Machine(s):
Designation of Machine High Pressure Washer
Model No / Type HW112
Input power 1,6 kW
Conforms to the following European Directives:
2006/42/EC, 2006/95/EC, 2002/95/EC, 2002/96/EC, 2004/108/EC, 2000/14/EC
And are manufactured in accordance to the following standards or standardised
documents: EN 60335-1; EN 60335-2-79; EN 55014-1; EN 55014-2; EN 61000-3-2; EN 61000-
3-3; EN 61000-3-11; EN 60704-1
TheTechnical Documentation is kept by our authorised Representative in Europe who is:
Makita International Europe Ltd,
Michigan, Drive, Tongwell,
Milton Keynes, MK15 8JD, England
The conformity assessment procedure required by Directive 2000/14/EC was in
accordance with annex V
Measured Sound Power Level LPA: 85 dB (A); (K=3 dB(A))
Guaranteed Sound Power Level LWA: 86 dB (A); (K=3 dB(A))
06th December 2010
Kato Tomoyasu
Director
Makita Corporation, 3-11-8 Sumiyoshi-Cho, Anjo, Aichi, 446-8502, Japan
Technical Data (EN) Unit
HW112
Output
L/min
6,2
Pressure
MPa
10
Maximum pressure
MPa
12
Power
kW
1,6
T° input
°C
50
Maximum input pressure
MPa
1
Repulsive force of the gun to the maximum pressure
N
13,6
Motor Insulation
-
Class F
Motor Protection
-
IPX5
Voltage
V/Hz
230/50
Maximum allowed net impedance
Ω 0,436
Sound level
K = 3 dB(A) :
LPA (EN 60704-1)
dB (A) 78,4
LWA (EN 60704-1)
dB (A) 86
Unit vibrations
K = 1,5
m/s2
:
m/s2
3,41
Weight
kg
16,2
Autogoods “130”
130.com.ua

139
Autogoods “130”
130.com.ua

2
1
Autogoods “130”
130.com.ua
Table of contents
Other Makita Pressure Washer manuals

Makita
Makita HW1300 User manual

Makita
Makita HW1200 User manual

Makita
Makita HW 131 User manual

Makita
Makita HW1200 User manual

Makita
Makita EHW120 Quick start guide

Makita
Makita Dolmar HP-6000 User manual

Makita
Makita HW001GZ User manual

Makita
Makita HW120 User manual

Makita
Makita HW001G User manual

Makita
Makita HW 131 User manual

Makita
Makita HW1200 User manual

Makita
Makita DHW080 User manual

Makita
Makita HW1200 User manual

Makita
Makita HW120 User manual

Makita
Makita HW 121 User manual

Makita
Makita DOLMAR HP-135 User guide

Makita
Makita HW1200 User manual

Makita
Makita HW 140 User manual

Makita
Makita DHW080 User manual

Makita
Makita DHW080 User manual