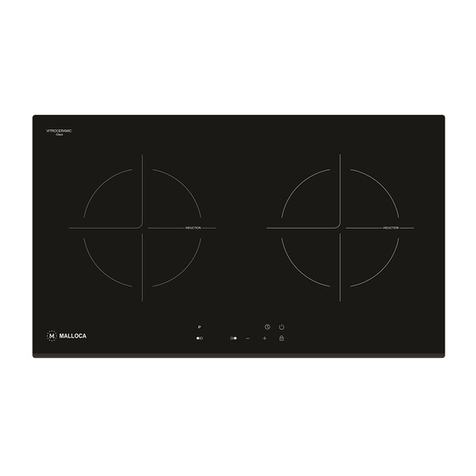
Operation Guide for Induction Hob
Connect the app liance to the power supply. Touch the ON/OFF button (button1) for about 0.8
Turning on the Heating Area
Press the button for about 0.3 seconds when the appliance is turned on. The heating area is available
Turning off the Heating Area:
Press th e butto n for about 0.8 seconds, the heating area will be turned off.
Residual Heat Indication:
Considering the safety of the user, there will be residual heat indication, when the surfac e
The residual heat will be display ed at th e fourth LED of th e displaying area of heating area and it will
display ”H”. The left heating area is correspondent with LED14, right heating area is correspo ndent with LED15.
Shutting off Automatically (At Maximum Time Limit)
Each heating power level has a maxim um work time limit , please refer to the power table in the
appe ndix (For exam ple, the max imum work time limit for 6 power level is 90 seconds).If one power
leve l has worked longer t han the t able showed maximum tim e limit, the relati ve heating area will turn-off
automatical ly. If reg ulating the power wit hin working maximum limit time, it will come to a new maximum
working time limit. But if the heati ng are a had been set time with timer in adva nce , the heating area will not
turn-off automatically.
th
Child Lock Function:
Activate the child loc
Unlock the child lock
Timer
Timer Option
Timer option button (0.3 seconds)
Timer kinds: Left heating area timer, Righ t heating area timer, EGG timer.
Each heating area has a corresponding timer.
When the heating area is wo rking, pres s the timer option button ,it is ava ilable to choose from
When the hob is turn-off, press timer buttonGG timer ,it is available to ch oose EGG timer.
When it comes to preset cookin g time, there will be an alarm , and the heating area will turn -off
The buzzer will bu zzing. The timer indicator and LED showin g area will twin kle, it is advisable to
It is set to press any button for 0.3 sec onds, but if the ON/OFF button is pressed over 0.3 seconds,
Turn-off Timer/Change Timer setting
Misoperation
Press a button for a long time
Multiple Button Operation at the Same Time
When pressing several buttons at the same time, it will not react. But when pressing over 10
Multiple Button Operation Successively
When press several buttons successively, it will only trigger the function of first butto n in t he normal
Display of Error Code in the Heating Area
There are two kind s of Error: general error and heating area error.
The general error will turn off the whole control board and dis pla y alternatively” Er” and two bits error code.
second . The columns will show in succession from left to right. It is advisable to input power
level, otherwise the hob will turn off automatically.
for operation.
ON/OFF of Heating Area
temperature is higher than 65℃.
Preset Time with Timer
After chosen timer, the corresponding indicator will twinkle a s men tion ed ab ove. By pressing the
bu tton (0.3 sec onds), it will se t time. When press buttons at the same time, it is available to set the timer to zero.
The timer will work automatical ly in 10 second s after the time is set. Decimal point in the firs t LED
will dis play the timer whether it is working or editing. When the decim al point is twinkling, the t imer is working .
While the decimal point is on for long time , the timer could be edited.
- -3- -4
When tw o timers are turne d on at the same time, three LED will show the editing tim er in front of
others. When two timers are working at the same time, three LED will show the timer which has less
rema ining time. The ind icator light will twi nkle for the one which is show ing, and for the one that
does not be showed, the timer in dicator will be on.
Preset the Cooking Time
If press”+”and”-”bu ttontog ether, the timer
The timer will work 10 seconds after it is set. The first LED will show whether the timer is working or editing .
If the de cimal point is twinkling, it indicates that the timer is working .If the decimal point is on, it
If the tw o timers are turne d on at the same time, three LED will preferen tially sh ow the one wh ich is
in editing state. When the two timers are working at the sa me time , th e three LEDs will preferentially
LEDs will p re ferentially show th e one wh ich have less time. For the timer which is shown,its indicator
its indicator will twinkle, and ano ther on e will on.
Timer Alarm & Confirmation:
indicates that it is in editing state.
au tomatically.
press any button to confirm, oth erwise, the alarm will disappear in 2 minutes.
an d keep longer than 0.8 seconds, the hob will turn-off automatically.
to set to “00”. In 10 seconds, it will automatically turn off. Moreover, it is available to turn o ff by
pressing the ON/OFF button .
Wh en any button is pressed over 10 seconds, there will show Error icon on the LED
(No error icon under child lock function)
second s, there will show error icon.
condition. And the function of the other butto ns will not be triggered. Te n seconds later, it will show Error icon.
General Fault Code
Showing Description Possible Reason Shooting
Er22 Button fault Touching controller fault Change touch
control board
Other Inner fault of
control board
Inner fault in control board Professional
maintenance
Heating Area Error Code
When the hob is standby or heating, touch the child lock button for about tw o seconds, the child lock
indicator will on, th e controller is still in old w orking state, bu t it will not respond to other buttons
except the child lock button itself and ON/OFF button .
Turn on child lock button when th e hob is working, press ON/ OFF button of any heating area for about
0.8 seco nds , the hob will turn-off automatica lly.
Press the child lo ck button aga in for about 2 seconds when the hob is in standby or working state. It
will unlock the touc h controller, the child loc k indicator will turn-off, and all th e touch key can be
used normally again.
The child lock function h as memory. Even if it is in turn-off state, the child lock function will still
exist. When the hob is in tu rn-off state, touching any bu tton (excep t the ON/OFF button ) will cause
bee ring fro m the buzze r, and the ch ild lock indica tor will on for 1 second.
left to right which heating area timer to preset.
Press the timer button, the relative LED light will twinkle as mentione d above. Then press the
button or (about 3 seconds) to set time for coo king.
Turn-off timer by pr essing the button until it displayd“00”, or, by pressing butt ons at the sa me time
will be set to be zero.
Th e heating area error will turn off the heating area which has fault, and the relative heating area
will alternatively display ”E” and one bit error code.
