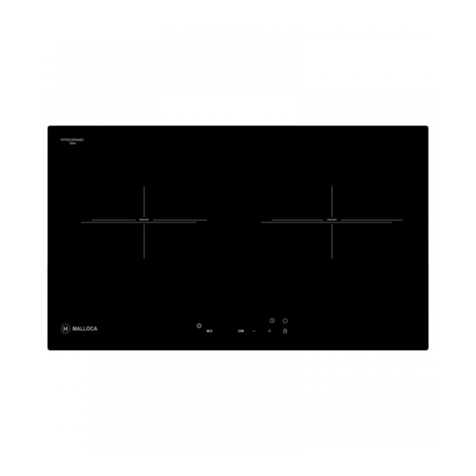
Malloca DZ - 7372 Instruction Manual

USER'S HANDBOOK
MALLOCA VITROCERAMIC HOB
MOD EL:DZ - 7372
Distributor in Viet Nam:
BACH HOP KITCHEN APPLIANCE COMPANY LIMITED
Tel
Fax:(08) 3 9970 135 - (08) 38444 125
279 Nguyen Van Troi Street, Ph u Nhuan Dist
Ho Chi Minh City, Viet Nam
: (08) 3 9975893 - (08) 3 9975894

CONTENT
Demonstration of the hob……………………………………………………………….2
Technical data……………………………………………………………………………2
Operation guide………………………………………………………………………….3
Notice……………………………………………………………………………………4
Installation and Debugging..……………………………………………………………6
Cleaning and Maintenance………………..……………………………………………6
Trouble shooting ………………………………………………………… …6…………
- 6 -
-1-
◆
Cleaning and Maintenance
Please disconnect the hob from the main power supply when you wish to clean it.
Please wait for the ceramic top to cold-off before doing any cleaning on the hob.
Wipe-off the stain or dirt with damp cloth or use a mild, not-abrasive cleaning detergent.
Trouble shooting
Installation and Debugging
◆
◆
This product is build-in ceramic hob. Plea se refer t o the hole size in the “TECH NICAL DATA”
co lumn of the second page in this hand book. And it must be assembled by the profession al persons.
Please refer to the methods and steps in the page three to five of this handbook for debugging of
this product.
Dear Valued Customers:
We thank you for choosing MALLOCA Ceramic Hob series. Please be
reminded to read this handbook carefully before assembling or using the product.
This User's Handbook contains important information, including safety and
installation guidelines. Please keep this handbook for future reference.
铁 制 炒煎
平 底 锅 不 锈 钢锅 铁制平底锅 不 锈 钢 壳 铁 盆 铁 壳 仿 瓷 炊具
适合的锅具
Choice of the Utensils
Iron Marmi
te or Pan
Stainl
ess-steel
Pan
Stainl
ess-steel
Ket tle
Iron Pan Iron Pan Iron kettle Enamel Coo ker
The Proper Cooker
错误 错误 正确
图 示
DE MONS TRATIO N
WRONG WRO NG RIG H T
Malfunction Cause Solution
Cable loosen Connect the power supply plugNo indication light when
power “ON” Broken circuit of fuse Call the after-sale service
The hob does not work
constantly
The hob is self protected when
the temperature overheat the
maximum
Normal phenomenon. Once
the temperature cool down, it
can work normally
It can be used as usual if with a
small crack
Continue to useInsulating layer cracked or
broken
If have fragment or incomplete Disconnect the unit from the
main power supply and stop
using it and call the after-sale
service.
The indicator is brokenResidual heat indicator does
not light-up while the ceramic
surface has high temperature
Inner connecting lead fall off
Call the after-sale service
centre
Big concavity of the cooking
utensil
Heating time extending
Pan area is too large
Change new cooking utensil

- 5 -
◆This product operates under 220V/50Hz A.C. It should be supplied with 25-50A
circuit that able to load the maximum power of this product.
There are few possibilities in the event the hob stop operating, it is because the
temperature has exceeded the customary temperature. At this moment, the power
supply will automatically disconnected. When the temperature cools down, it will
work again.
In order for the hob to function properly, it is advisable to use good quality flat
bottom pans and pots. For best results, we recommend pans or pots to be placed on t
op of circle on the surface of the hob.
It is not advisable to operate the hob without placing any utensil on top of it.
It is must to have a 3mm all extremely disconnect device.
Children are prohibited to access or near te hob especially when the hob is operating
which generates high temperature.
It is advisable to disconnect the power supply once finish cooking.
In case of breakage, even if it is only slightly cracked, disconnect the unit fro m the
main power supply and stop using it.
Please do not put metallic kitchenware such as the knife, fork, spoon, and cover ,
and the like on the top of hob, cause they maybe get hot.
Out of consideration for safety and super power of ceramic hob and induction hob,
it is not advisable to use two or more burners at the same time.
Please disconnect the hob from the main power supply when you wish to clean it.
Please wait for the ceramic top to cold-off before doing any cleaning on the hob.
Wipe-off the stain or dirt with damp cloth or use a mild, not-abrasive cleaning detergent.
The manufacturer cannot be held liable for damage to persons to property caused
by improper installation or by improper usage.
Children are strongly prohibited to use the hob or its control panel.
If the power wire is breakdown, it is necessary to have manufacturer or the
professionals to change it.
◆
◆
◆
◆
◆
◆
◆
◆
◆
◆
◆
◆
◆
Demonstration of the Product
- 2 -
微晶面板
2200W炉盘
1600W/650W炉盘
触摸控制板
MA LL OC A
1600W/650W burner
Touch control board
Glass ceramic panel
2200W burner
Technical Data
ITEM NAME
ITEM NO.
RATED POWER
MAXIMUM
OU TPUT POWER
PRODUCT DIMENSION mm( )
HOLE SIZE mm( )
TOUCH CONTROL HOUSEHOLD CERAMIC HOB
DZ-7372
220V
3800W
752X442X57(length*width*depth)
708X405X80(length*width* )depth
Control Board for Ceramic Hob
2 3 4
5
6
7
8
9
10
11
2 3 4
5
6
7
8
10
11
1
12 13 14 15 16 17 18 19 20 21
1.
2.
O N / O F F bu t t o n fo r l e f t h ea t i n g a re a
Power decreasing button”-”of left heating area
12.Power level showing area of left heating area
13.Double ring indicator of left heating area
14.Timer option indicator for left heating area
3.Power increasing button”+”
.Timer option bu tton
of left heating area
4. Multiple ring o ption button,left double ring option
5
6.Timer decreasing button”-”
7.Timer increasing button”+”
8.Child lock option button
9 . O N / O F F b u t t o n f o r r i g h t h e a t i n g a re a
10.Power decreasing button”-”of right heating area
11.Power increasing button”+”of right heating area
15.Timer indicator for hour
16.Timer indicator for decimal minute
17.Timer indicator for single digit second
18.Timer indicator for right heating area
19.Child lock indicator
20.Power level indicator for right heating area
21.Double ring indicator for right heating area
General Fault Code
Showing Description PossibleReason Shooting
Er22 Buttonfault Touching controllerfault Change touch
control board
Other Inner fault of
control board
Innerfault incontrol board Professional
maintenance
alternatively” Er” and two-bit error code.
◆The general error will turn off the whole control board and display
◆There are two kinds of Error: general error and heating area error.
Display of Error Code in the Heating Area
the other buttons will not be triggered. Ten seconds later, it will show Error icon.
NOTICE

-3 - - 4-
Operation Guide for Ceramic Hob
How to Operate the Vitroceramic Hob?
Shutting Off the Heating Area
Shutting off automatically (At Maximum Time Limit)
Setting Power
Connect the appliance to the power supply. Touch the ON/OFF button for abou t 0.8 seconds, ◆
Turn on the Heating Area (the single ring) by touching ON/OFF button ,and set y our desired temperature using ◆
Touching the button for about 0.8 seconds, all the heating area will turn-off at once.◆ON/OFF
Please choose the power level within ten seconds, otherwise, the appliance will ◆
then the indicator light columnar will on at regular interval.( )
turn-off automatically.
“ ” button (about 0.3 seconds). For example, when touc hing” ”,the indicator light will
display three columns, and the power at this moment is 3 level (There are total of 1-6 levels,
one column in dicate one level). When touching ” ”button ,button, it will directly indicate six
colum ns, that the pow er is 6 level.
th
◆Each heating pow er level has a maximum work tim e limit, please refer to the power table
in the appendix (For example, the maximum work time limit for 6 power lev el is 90 seconds).
If one power level has worked longer than the table showed maximum time limit, the relative
heating area will turn-off automatically. If regulating the power within workin g ma ximum
limit time, it will come to a new maximum working time limit. But if the heating ar ea had
been set time with timer in advance, the heating area will not turn-off automatically.
th
Multiple Ring Option
◆Multiple ring function could be turned on by touching the multiple ring option button .
Residual Heat Indication
◆Considering the safety of the us er, when the surface temperature is to o high, there wil l be residual he at indication.
◆The residu al heat will be d ispl ayed at the f ourth LED of the h eati ng area o f display,and there
will display ”H”. The left heating area is correspondent with LED15, right heating area is co rrespondent with LED17.
Child Lock Function
Activate the child lock
◆Wh en the hob is standby or heating, touch the child lock button for about two
seconds, the child lock indicator will on, the controller is still in old working state,
◆urn on child lock button when the ho b is working, press ON/OFF button of any heating area,
but it will no t respo nd to other buttons except the child lock button its elf and ON/OFF button .
◆Press the child lock button again for about 2 second s when the hob is in standby or
the hob will tu rn-off automatically.
◆The child lock function has memory, even if it is in turn-off state, th e child lock
function still exist. When the hob is in turn-off state, touching any button (exce pt th e
ON/OFF button ) will cause bee ring from the buzze r, and the child lock indic ator will on for 1 second.
Unlock the child lock
Timer
working state. It will unlock the touch controller, the child lock indicator will turn-off,
and all the touch key can be used normally again.
Timer Option
◆Timer option button (0.3 seconds)
◆Timer kind s: Left heating area timer, Right heating area tim er, Egg timer
◆Each heatin g area has a corresponding timer.
◆Wh en the heating area is working, press the timer option button ,it is available to choose
from le ft to right which heating area timer to prese t.
◆When the hob is turn-off, press timer button ,it is available to choose Egg timer.
Preset Time with Timer
◆After chosen timer, the corresponding indicator will twinkle as mentioned above.
By pressing the button “ ”(0.3 secon ds), i t
will set time When press buttons
.
◆The timer will work automatically in 10 seconds after the time is set. Decimal point
“ ”at the sam e time, it is available to set the timer to zero.
in the first LED will display whether the timer is working or editing. When the decimal point
is twinkling, the timer is working. While the decimal point is on for long time, the timer could be edited.
◆When two timers are turned on at the same time, three LED will
show th e editing timer in front of othe rs. When tw o timers are working
a t th e s a m e t i me , t h re e L E D wi l l s h ow the t im er w hic h has l e s s
re m ai n in g tim e . Th e in d ic a to r li ght w i ll t win k le f or t he one w hic h
is showing, and for the one that doe s not be showed, th e timer indicator will be on.
Timer Alarm & Confirmation
◆When it co mes to pr eset cooking time, there will be an alarm, and the
heating area wil l
turn-off automatically.
◆The buzzer will buzzing. The timer indicator and LED show ing area will twinkle, it
is advisable to press any button to confirm, otherwise,
the alarm will disappear in 2 minutes.
◆It is set to press any button for 0.3 seconds, but if the ON/OFF button is pressed
over 0.3 seconds, and keep longer than 0.8 seconds, the hob will turn-off
automatically.
Turn-off Timer/Change Timer setting
◆Turn-off timer by pressing the button” ”until it display“00”, Meanwhile,
it is also available by pressing” ” buttons at the same time to set to “00”. In 10
seconds, it will automatically turn off. Moreover, it is available to turn off by
pressing the ON/OFF button .
Misoperation
◆Press a button for a long time
◆When any button is pressed over 10 seconds, there will show Error icon
on the LED (No error icon under child lock function)
Multiple Button Operation at the Same Time
◆When pressing several buttons at the same time, it will not react.
But when pressing over 10 seconds, there will show error icon
Multiple Button Operation Successively
◆When press several buttons successively, it will only trigger the
function of first button in the normal condition. And the function of
Other Malloca Hob manuals

Malloca
Malloca MI-784 ITG User manual

Malloca
Malloca DZ-5803 Instruction Manual

Malloca
Malloca MR 593 User manual

Malloca
Malloca MIR 593 User manual

Malloca
Malloca MH-20I User manual

Malloca
Malloca MR-03 User manual

Malloca
Malloca AS 9502B User manual

Malloca
Malloca MI 593W User manual

Malloca
Malloca MH-02IS User manual

Malloca
Malloca DZ/C-9304 Instruction Manual

Malloca
Malloca MH-03I N User manual

Malloca
Malloca MI 732 SL User manual

Malloca
Malloca MH-5903 I User manual

Malloca
Malloca MH-732 ER User manual

Malloca
Malloca MH-02IS User manual

Malloca
Malloca DC-7372 Instruction Manual

Malloca
Malloca MH-03IR User manual

Malloca
Malloca MDH-02I User manual

Malloca
Malloca MI 594 LINEAR User manual

Malloca
Malloca MH-02I N User manual