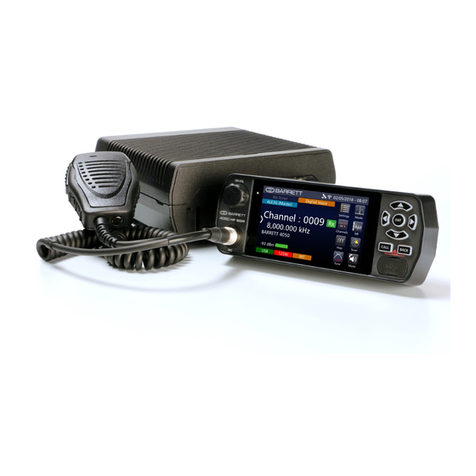
Mammut PULSE Barryvox User manual

The PULSE Barryvox®is designed for snow
and mountain sports outside of controlled,
groomed slopes within ski area boundaries as
well as controlled, mantained trails. All snow
and winter sport activities are inherently dan-
gerous.
nowledge and experience are essential to
reduce the risk of injury or even death. Do not
enter avalanche terrain without an experienced
guide or equivalent training. Apply common
sense at all times. Never pursue these activi-
ties alone.
IMPORTANT:
Version 4.0 2013
Reference Manual
P LSE Barryvox®
ENGLISH

REGISTRATION AND SERVICE
Service Centers Information and prices for maintenance and repair are available at:
www.mammut.ch/barryvox (-> Service)
Switzerland Mammut Sports Group AG, Birren 5, CH-5703 Seon
Phone: +41 (0)62 769 83 88
email: [email protected]
Europe and Mammut Sports Group GmbH, Mammut-Basecamp 1, DE-87787 Wolfertschwenden
countries not Phone: +49 (0) 8334 3620 300
listed email: [email protected]
SA and Canada Mammut Sports Group Inc., 458 Hurricane Lane, Suite 111, US-Williston, VT 05495
Phone: +1 800 451 5127
email: [email protected]
Register your P LSE Barryvox®today!
By registering your device, you will gain exclusive access to the Barryvox Community. We will remind you when
to have your device serviced and provide you with technical tips, the latest insights on avalanche theory, as well
as information about the availability of software updates. If you register now, several services will be free of
charge!
www.mammut.ch/barryvox
Register your PULSE Barryvox®at:
[ Photo: Patrice Schreyer ]
© Copyright by Mammut Sports Group AG
Illustrations and Avalanche Rescue Expertise copyright and provided by Genswein.
All rights reserved. Text, text excerpts, images and diagrams are all subject to copyright. No part may
be reproduced or copied without written permission from the publisher. For further use and publica-
tions for educational purposes, please contact Mammut Sports Group AG.
Mammut and Barryvox are registered trademarks of the Mammut Sports Group AG. All rights reserved.

AVALANCHE RISK MANAGEMENT
Avalanche Training Centers
Within the “Avalanche Training Centers”, provided
by Mammut in several regions, you have the
opportunity to practice realistic search and exca-
vation situations for free. In addition to compre-
hensive information on the assessment of ava-
lanche danger, permanently installed, snow-cov-
ered transmitters can be activated randomly and
searched for.
For years, Mammut has been heavily involved in
«Avalanche Risk Management» [a.r.m.] with the
objective to increase the safety of all winter sports
enthusiasts by providing better equipment, know-
how transfer, and focused training.
Rescue Equipment
With the PULSE Barryvox, probes, shovels and the
airbag systems, Mammut offers a comprehensive
choice of avalanche rescue and survival
devices.
Additional information on [a.r.m.] or Mammut
products can be found at: www.mammut.ch
Mammut and Snowpulse Airbag Systems:
The additional use of a Mammut or Snowpulse
Airbag increases the chance to stay on the sur-
face and therefore considerably reduces the risk
of a complete burial.
FRONT VIEW
Earphone jackWrist loop
-Key -Key
Display
SEND-Control LED Main switch
Speaker

WELCOME
7
Congratulations on the purchase of your new
P LSE Barryvox®.
This user manual explains the functionality and use of
the PULSE Barryvox®. The PULSE Barryvox®is a revo-
lutionary avalanche transceiver, which you will under-
stand quickly and which is very easy to use.
A transceiver does not protect you against
avalanches!
As a winter outdoor enthusiast, you must consider
all possible avalanche prevention measures and
plan your trips carefully. Companion rescue – the
worst case – must be practiced frequently. Under
the stress of an accident, this is the only way you
will be able to locate and dig out a companion
quickly and efficiently. Despite practice and all the
technological advancements, by far not all of the
completely buried avalanche victims are rescued!
An avalanche burial is always life threatening.
Important information on these topics can be found
in the chapters on companion rescue and avalanche
theory.
PULSE Barryvox®– Made in Switzerland
Our heritage is compelling. Mammut and Barryvox
follow the time-honored tradition of world-class
precision products made in Switzerland. From its
design to its engineering and production, this
device is completely Swiss-made.
This device is compatible with all avalanche trans-
ceivers that comply with the EN 300718 standard
and operate on a frequency of 457 kHz.
The following documents for the Barryvox transcei-
vers are available at
www.mammut.ch/BarryvoxManual:
Barryvox Legal and Regulatory Guide
Contains information concerning the normative and
legal use of the device, warranty and repair, as well
as the region and country specific differences in the
application of the W-Link data transmission.
Barryvox Emergency Plan
Stick the emergency plan on the back of the battery
compartment lid. It shows the elementary steps for
a successful companion rescue.
Barryvox ser manual
The user manual, a practical companion in the field,
describes the functions of the device in its «basic»
profile.
Barryvox Reference Manual
The reference manual is a comprehensive resource
of information for your Barryvox. It includes all
information on the Advanced Mode for advanced
and professional users, the complete system over-
view, information on maintenance and troubleshoo-
ting, but as well on rescue organization, excavation
and avalanche prevention.
Barryvox Application Safety Guide
In addition to the reference handbook the Applica-
tion Safety Guide contains comprehensive instruc-
tions on the safe use and maintenance of your
transceiver as well as possible sources of interfer-
ence. Special considerations are included for effi-
cient fleet management.
(www.mammut.ch/BarryvoxManual)
[ Photo: Rainer Eder ]

98
TABLE OF CONTENTS
Front view
Welcome
1. A lication conce t and overview of functions.......................................................... 10
2. Initial Setu .......................................................................................................... 16
3. Start Menu and Settings.......................................................................................... 18
4. Setu .................................................................................................................... 26
5. Send Mode (SEND) .................................................................................................. 32
6. Search Mode (SEARCH) ............................................................................................ 34
Search Phases.......................................................................................................... 34
Standard Mode ........................................................................................................ 40
Search for Multiple Buried Subjects ............................................................................................44
Analog Search Tone ....................................................................................................................46
Analog Mode............................................................................................................ 49
7. Advanced Features ................................................................................................ 54
8. Additional Information .......................................................................................... 56
9. Com anion Rescue ................................................................................................ 62
10. Introduction to Avalanche Theory ............................................................................ 70
Index ................................................................................................................................................74

10
OPERATIONOperation
11
1. A lication conce t and overview of functions
1.1 Main Switch OFF / SEND / SEARCH
The main switch is located on the top side of the device. It can be moved by pressing down on the button. By
applying lateral pressure to the switch, it can be set to SEND at any time. In the left switch position, the transceiv-
er is OFF, in the center position, it is in SEND mode, and in the right position, the SEARCH mode is activated.
To get into the OFF position, an additional safety button must be pressed down, as well.
Always make sure that the switch locks into position mechanically to avoid an undesired change of mode.
OFF
OFFSEND SEARCH
OFFSEND SEARCH
OFF -> SEND SEND -> OFF
OFFSEND SEARCH
SEARCH
OFFSEND SEARCH
SEND -> SEARCH SEARCH -> SEND
Examples:
One Function .
Two Functions .
Special Functions .
1.2 se of Keys
The PULSE Barryvox®clearly excels through its ease
of use. The device is operated using the two lateral
keys. The current function of the keys is always
shown at the bottom of the display. On the left, the
function of the left -key is shown; on the right,
you will see the function of the right -key. If the
text is centered, either key can be pressed to acti-
vate the function.
Right -key:
3Mark
Left -key:
Move the selection
Both keys simultaneously:
Back
Left or right key:
Group check

COCK IT GROU CHECK / SEND AND RESCUE-SEND
1312
COCK IT INITIAL SETU
1 2 3 4
4
1 2 3 4
4
INITIAL SETU
GROU CHECK
SEND MODE
RESCUE-SEND
MODE
Chapter
«Auto-Revert to Send»
Chapter «Group Test»
Chapter
«Rescue-Send Mode»
Chapter
«Rescue-Send Mode»
Chapter «Send mode» Chapter «Group Test» Chapter «Group Test»
SEARCH
OFFSEND SEARCH
SEARCH -> SEND
Chapter «Group Test»
Chapter «Send mode» Chapter
«Burial and Vital Duration»
Chapter «Battery Level
Indicator» und «Turning
the device on»
Chapter
«Rescue-Send Mode»
1 2 3 4 5
5 6 7 8 9
9
1
0
Future change of language:
Chapter «Language»
Chapter
«Calibrate Device»
Chapter «Battery Level
Indicator»
Chapter «Search Mode»
Future change of profile:
Chapter «Profile»
1
OFF
OFFSEND SEARCH
OFF -> SEND
Chapter «Main Switch»

COCK IT SEARCH IN THE ADVANCED ROFILE
1514
COCK IT SEARCH IN THE BASIC ROFILE
1 2 3
1 2 3
1 2 3
1 2 3
COURSE SEARCH
FINE SEARCH
REVERT
TO SEND
Chapter «List of Buried
Subjects» and «Multiple
Rescuers»
Chapter «Deep Burials»
Chapter «Limitations»
and «Analog Search Tone»
Chapter «Search for a
Single Buried Subject
Using the Standard Mode»
Chapter «Analog Mode»
Chapter «Earphones»
Chapter
«Manual Volume Control
in Analog Mode»
Chapter «SEND Mode» Chapter «Search for a
Single Buried Subject
Using the Standard Mode»
Chapter «Search for a
Single Buried Subject
Using the Standard Mode»
Chapter «Limitations»
and «Analog Search Tone»
Chapter «Triage»and
«Vital Data Detection»
Chapter «Analog Mode» Chapter «Analog Mode»
Chapter «Fine Search»
«User Guidance in the
Assisted Fine Search»
«Probe Indication»
Chapter «Fine Search» Chapter «Fine Search»
Chapter «Signal Search»
Chapter «Search for
Multiple Buried Subjects»
and «Limitations»
Chapter «Limitations»
SEARCH
OFFSENDSEARCH
SEARCH -> SEND
SIGNAL SEARCH
STANDARD SEARCH
MODE IN THE
ADVANCED ROFILE
ANALOG MODE
ANALOG MODE
WITH MANUAL
VOLUME CONTROL
O ERATION WITH
EAR HONES
Press keys for 3 sec!
Press keys for 3 sec!

16
INITIAL SETU
17
2. Initial Setup
2.1 Emergency lan
Before you use the device for the first time, remove
the protective foil on the front side and stick the
emergency plan on the back of the battery com-
partment lid.
2.2 Insert / Replace Batteries
Only use alkaline (LR03/AAA) or lithium
(LR92/AAA)
batteries of the same type. Always insert 3 new bat-
teries of the same type. In case these batteries need
to be removed, the same 3 batteries or 3 new bat-
teries need to be reinserted. Never use recharge-
able batteries and always replace all the batteries
at the same time.
Make sure the lid is properly closed and that the
device and the batteries stay dry. Periodically
inspect the battery compartment. Clean or dry it, if
needed, since moisture can cause corrosion. Avoid
touching the contacts with your hands.
A reliable power supply is crucial for the safe oper-
ation.
2.2.1 Important oints When
Using Alkaline Batteries
Type LR03/AAA
When storing or not using the transceiver for an
extended period of time (i.e. in the summer),
remove the batteries and leave the battery com-
partment open. The warranty becomes void if bat-
teries have leaked! When reinserting the batteries,
use the same 3 batteries or 3 new batteries.
2.2.2 Important oints When
Using Lithium Batteries
Type LR92/AAA
Lithium batteries are extraordinary long-lasting ,
cold-proof and do not leak. The usable energy in
low temperatures is higher compared to alkaline
batteries. This battery technology is the best choice
for the application in a avalanche rescue transceiv-
er.
1
2
VIDEO
VIDEO
VIDEO
VIDEO
VIDEO
VIDEO
2.3 Device Setup
When turning the device on for the first time and
switching to SEND, the user language and profile
must be selected.
Afterwards, the user will be prompted to calibrate
the device.
All settings may be modified later at any time.
ress the -key to change the current selection
and confirm by pressing the -key.
In the «Cockpit Initial Setup» you find a step-by-
step setup guide.
2.3.1 Language
This setting allows you to select the language of
your transceiver’s user interface
2.3.2 rofile
The profiles allow to adapt your PULSE Barryvox
quickly and easily to your user profile. The selected
profile is shown during the start-up of the device.
Determine the most suited profile of the device:
Which one of the statements below fits you
best?
The Basic Profile is my choice if:
- I am novice or I did not much familiarize myself
with this topic up to now. I start with the basic
search mode which uses only one-button and
does not have any additional functions. After
some exercise, I may switch to the more sophis-
ticated «Advanced Profile».
- I use this device only for my rudimentary trained
participants/guests
The Advanced Profile is my choice if:
A: I am familiar with the «Basic Profile» and would
like to achieve a better performance in ava-
lanche rescue.
B: I know how to interpret analog sound and for
demanding search scenarios I would like to be
able to take advant
age of the comprehensive search modes of the
«Advanced Profile».
C: I use the device for my profession, I am group
leader or in another way in an accountable posi-
tion. My avalanche rescue transceiver needs to
be able to provide a 100% solution to all search
scenarios.
Settings in the Advanced Profile:
The Advanced Profile gives you access to a compre-
hensive choice of settings.
Group A, B and C: Adapt the settings to your
requirements and capabilities.
Group B and C: It is strongly recommended to
choose the following settings:
Analog Mode = manual, Audio support <3m = off
(see chapter «Settings»)

Setup
19
2.3.3 Calibrate device
Your PULSE Barryvox® contains an electronic com-
pass which provides a rapid adjustment of the
direction indicator and extends the display range to
360 degrees.
To function properly, the compass must be calibrat-
ed after each battery replacement or after you have
traveled for a long distance. The need to calibrate
the compass is automatically detected when the
batteries are replaced. This is, however, not the
case if you travel a long distance.
Hold the device horizontally and press any key to
start the calibration procedure. Rotate the horizon-
tally held transceiver slowly and with constant speed
clockwise until the message «Device calibrated!»
appears.
Verify W-Link Region Setting
Verify that your PULSE Barryvox®is set to the appro-
priate W-Link region for your country (wireless radio
link). Please pay attention to the information in the
«Barryvox Legal and Regulatory Guide» and the chap-
ter «W-Link». For countries without W-Link approval,
transmission and reception of vital data is not possi-
ble. (Chapter «Triage Criteria and Vital Data»).
Carrying system
Adjust the carrying system to fit your body.
(Chapter «Carrying positions»).
3. Start Menu and Settings
To access the „Start Menu”, switch the device from
FF to SEND and press any button within the first 5
seconds. The confirmation „activated” appears at
the bottom of the screen. The start menu opens and
the first entry „Group Check” appears. Immediately
press the -key, to get to access the different
functions. Confirm your selection by pressing the -
key.
3.1 Content of the start menu
in the basic profile
3.1.1 Group Check
Before a party takes off, the transceivers of all party
members must be checked. You find the detailed
instructions in the chapter «Group Check».
3.1.2 Language
This setting allows you to select the language of
your transceiver’s user interface
18
INITIAL SETU START MENU AND SETTINGS
3.1.3 rofile
The profiles allow to adapt your PULSE Barryvox
quickly and easily to your user profile.
3.1.4 Adjusting the Screen Contrast
The contrast of the screen may be adjusted in the
start menu. ptimize the contrast of the screen by
pressing of the -key. Confirm the best setting by
pressing the -key.
3.1.5 Owner
The PULSE Barryvox®allows you to enter your
name, address, and other information, such as your
phone number or e-mail address. This information
is displayed every
time the transceiver
is turned on, so that
the owner can be
identified immedi-
ately anytime. We
recommend that
you enter this infor-
mation.
Due to restrictions in the number characters per
line and overall space, the data entered must be
limited to information necessary to identify the
device and return it to its owner.
By pressing the -key briefly, the cursor on the
bottom line moves to the right. By pressing the
-key longer, the cursor moves to the left. Press-
ing the -key confirms your selection.
Beware of the meaning of the following icons:
New line
Move cursor to the left
Move cursor to the right
Backspace
Save and exit
3.1.6 Maintenance
In the maintenance tab in the start menu, the date
of the next check as well as the software (SW) and
hardware (HW) version can be displayed.

3.3 Overview Start Menu in the Advanced rofile
Group c eck
Language
German
Englis
Frenc
Italian
Spanis
Swedis
Norwegian
Japanese
Profile
Basic
Advanced
Contrast
Owner
Maintenance
Next c eck
SW
HW
Settings
Analog mode
Auto
Manual
Audio support < 3m
On
Off
Pinpoint view < 3 m
Assisted
Cross
Airport
Direction
Auto-revert to SEND
8 min
4 min
Off
Group C eck Distance
Touring
Sledding
Vital data
On
Off
Vital sensor test
W-Link
Available regions
Off
Calibrate device
Reset device
Exit
Exit
START MENU AND SETTINGS ADVANCED ROFILE
2120
START MENU AND SETTINGS BASIC ROFILE
3.2 Overview Start Menu in the Basic rofile Bold print = default factory settings
Group c eck
Language
German
Englis
Frenc
Italian
Spanis
Swedis
Norwegian
Japanese
Profile
Basic
Advanced
Contrast
Owner
Maintenance
Next c eck
SW
HW
Exit
Hidden, unchangeable settings of the
Basic rofile
Analog mode = No Analog
Selection of burials = Off
Analog tone = Off
Audio support < 3m = On
Pinpoint view < 3 m = Assisted
Auto-revert to SEND = 4 min
Group C eck Distance = Touring
Vital data = Send only
The Basic Profile presents itself with an unchangeable
range of functions and information which are specifi-
cally optimized for rudimentary trained users.
In the Basic profile, the user only hears artificial beep
sounds, it never plays the analog sound, therefore the
tone information is always focusing on one buried
subject only, the one which is currently being sear-
ched for. During search, no vital data information is
shown. The automatic selection of the closest buried
subject replaces the possibility to manually choose in
the list of buried subjects. The user does not have
access to analog mode, therefore the buttons during
the search are only used for marking (one-button user
interface).

23
3.4 Content of the start menu
and settings in the advanced profile
The default settings of the device are configured
optimally for normal use. The start menu includes
the same function as outlined in the chapter
“content of the start menu in the basic profile”.
n addition, the “settings” allow advanced and pro-
fessional users to activate additional functions and
to adapt the setting to meet their specific require-
ments and preferences.
ost settings increase the level of detail shown
on to the user as well as the amount of functi-
ons available. You should only change the
default settings if you have a specific reason to
do so.
3.4.1 Analog ode
The analog mode allows the rescuer to solve even
the most complex multiple burial situations and
makes the PULSE Barryvox®a full-fledged ava-
lanche transceiver. f the analog mode is set to
«Manual», the experienced rescuer can adjust the
volume manually, which can be very advantageous
in certain situations. The setting “manual” is as well
required to take advantage of an increased search
strip width as described in the chapter “Extended
Search Strip Width in Analog Mode”.
3.4.2 Audio Support Fine Search
(< 3 Meters)
During fine search, the search for beginners is sup-
ported with an acoustic tone, which leads you in the
right direction. For rescuers who can interpret the
analog sound, it is highly recommended to disable
this digital audio support as the more meaningful
analog sound will then be available instead.
3.4.3 Fine Search View (< 3 Meters)
n fine search range, the Barryvox supports the res-
cuer with the “assisted fine search” function, which
allows a user-friendly and precise fine search.
n case you do not like this assistance, you may
choose the setting “cross”, which gives you a dyna-
mic cross view during fine search. Alternatively, the
setting “direction”, leading you with the standard
directional arrow during fine search, may be used
by rescuers who are very familiar with the particu-
lar distribution of the field lines in close proximity to
a buried subject.
3.4.4 Auto-Revert to SEND
Auto-revert to SEND switches the transceiver from
SEARCH mode to SEND mode if there is no user
interaction or major motion for a specific amount of
time. The default setting of 4 minutes is appropriate
for most users. Only change this setting if you have
an important reason to do so. The setting is critical
for your personal safety! f you disable this setting,
you will always see the warning symbol in
SEARCH mode.
3.4.5 Group Check Distance
The group check distance defines the test distance
during the group check. Choose «Sledding» (5m) for
the motorized application and «Touring» (1m) for all
other cases.
3.4.6 Vital Data
Your PULSE Barryvox®detects your vital data (see
chapter „Vital Data Detection”) while you are buried
and transmits these via the W-Link radio connection
to the rescuers (default setting). n SEARCH mode, the
Barryvox displays the vital status, provided the sender
has enabled the W-Link and the ability to transmit
vital data.
f you do not wish to have these data transmitted, you
can disable this feature. Only change this setting if
you have an important reason to do so. This setting
can affect your chances of survival in a complete bur-
ial situation as well as those of buried subjects you
are searching for.
22
START ENU AND SETTINGS

25
3.4.9 Calibrate device
Your PULSE Barryvox® contains an electronic com-
pass which provides a rapid adjustment of the
direction indicator and extends the display range to
360 degrees.
To function properly, the compass must be calibrat-
ed after each battery replacement or after you have
traveled for a long distance. The need to calibrate
the compass is automatically detected when the
batteries are replaced. This is, however, not the
case if you travel a long distance.
Hold the device horizontally and press any key to
start the calibration procedure. Rotate the horizon-
tally held transceiver slowly and with constant speed
clockwise until the message «Device calibrated!»
appears.
3.4.10 Reset Device
The function «Reset device» allows you to restore
all default factory settings. All modified settings are
lost.
24
START ENU AND SETTINGS
3.4.7 Vital Sensor Test
The PULSE Barryvox®uses a highly sensitive
motion sensor to detect vital data in buried sub-
jects.
To test the vital sensor p
osition the transceiver the
way you will be carrying it in the outdoors. ( t is
imperative to use the same clothing!) Lay yourself
on the floor so that your body presses the Barryvox
downwards and avoid any intentional movements.
Interpretation of the Test Results:
No tone:
The transceiver cannot detect any vital data.
Slow series of tones:
Vital data are being detected.
Rapid series of tones:
The sensor is detecting extensive motion, as experi-
enced in ascent or descent. Avoid any movement to
test the vital data detection reliably!
3.4.8 W-Link
The PULSE Barryvox®uses a W-Link radio transmis-
sion. Different countries have varying frequency regu-
lations. The following world map shows the frequen-
cies used in the individual countries. Note that specif-
ic frequencies may not be used in certain coun-
tries. The frequency is factory set depending on the
country of sale. The manufacturer declines all lia-
bility in the case of after-sale frequency modifica-
tions. Please consult as well the Barryvox Legal and
Regulatory Guide.
Frequency setting:
Region A / W-Link Frequency 868 Hz [= light grey]
EU- and EFTA-Member countries
Region B / W-Link Frequency 915 Hz [= dark grey]
USA, Canada and New Zealand
W-Link not allowed [= black]
Japan, Russia, ndia, China
unknown [= white]

2726
SETUP
4. Setup
4.1 Handling the Barryvox
As all transceivers, the Barryvox contains shock-
sensitive ferrite antennas. Therefore, you should
handle it with utmost care!
Store the device and the carrying system in a dry
spot that is protected from extreme cold or heat
and direct sunshine.
t is recommended that you have the functionality
tested at regular intervals (see chapter «Periodic
Checks»).
4.2 Interferences
As a matter of principle, avoid having other elec-
tronic devices (e.g. mobile phones, radios, head-
lamps), metal objects (pocket knives, magnetic but-
tons), or other transceivers close to (20 cm in
SEND; 50 cm in SEARCH) your running avalanche
transceiver. The PULSE Barryvox®contains a mag-
netic compass. You should not wear clothing with
magnetic buttons! Users of pacemakers are
advised to carry the device in a secure pant
pocket (no vital data detection). Consult the man-
ufacturer’s instructions with regard to the impact on
pacemakers.
When searching, hold the device at a minimum of
50cm away from these objects and turn off any
electronic devices, if possible. t is highly recom-
mended to turn off mobile phones!
4.3 Carrying Positions
Regardless of the carrying position, the display
should always face your body!
The detection of vital data is only possible if you
carry the device in the carrying system.
(Chapter «Triage Criteria and Vital Data»)
Before you use the device for the first time in the
outdoors, or when you decide to carry the trans-
ceiver in a different manner, we recommend that
you test the vital data sensor (Chapter «Vital Sensor
Test»).
VIDEO
VIDEO
4.3.1 Carrying System
(Recommended Carrying Position)
The carrying system has to be put on your inner-
most layer of clothing prior to beginning the trip
(see illustration) and has to be worn on your body
for the duration of the trip. The transceiver shall
always remain covered by one layer of clothing.
The device itself is inserted into the carrying sys-
tem according to the illustration. t should always
remain anchored to the base plate of the carrying
system using the red hook on the wrist loop.
4.3.2 Carrying the
Transceiver in a Pocket
(without vital data detection)
f you carry the Barryvox
in a pant pocket, the zip-
per must remain closed
for the duration of the
trip. Always use a secured
pocket (see illustration). f
possible, attach the wrist
loop to your pants or
secure it around your belt.
4.4 Turning the Device On
When the main switch is moved from the OFF to the
SEND or SEARCH positions, the transceiver is turned
on. To slide the main switch from OFF to SEND or
SEARCH, unlock the main switch by pressing down the
button at the top.
While starting, the device conducts a self-test.
The microprocessor, the antennas, the sensors, and
the display are checked. f the battery level is low,
the self-test will not run.
f the self-test is completed successfully, the dis-
play will show «OK».
The remaining battery level is displayed as a percent-
age.
f the self-test fails, an error message is displayed
for 20 seconds along with an acoustic warning.
The meanings of the different error messages are
described in the chapter «Troubleshooting».

29
Change between Alkaline and Lithium Batteries
As soon as one battery is removed and a reinserted or
replaced, the device tries to recognize the battery type
(alkaline or lithium).
The following user interactions may be shown:
Only confirm this questions if you really inserted 3 new
lithium batteries, which have never been used before
in any other device.
Only confirm this question, if you have removed one or
multiple batteries and reinsert now the same, in the
meantime never for any other purpose used batteries
(i.e. batteries you have removed over the summer).
Only confirm this question if you exclusively inserted
alkaline batteries.
f you mix alkaline and lithium batteries, or try to use
lithium batteries which have already been used in
other devices, it is impossible to determine the battery
capacity.
28
SETUP
4.5 Battery Level Indicator
The following table gives you average values for the
battery levels.
The remaining battery level can only be displayed
correctly if batteries are used according to the
chapter « nsert / Replace Batteries» Low tempera-
tures, age, and brand can have a negative impact
on the battery life and the accuracy of the battery
level indication.
100%: Normative Requirement
(=minimum requirement)
min 200hrs SEND at 10°C
followed by 1hr SEARCH at -10°C
Typical values for the PULSE
Barryvox® with alkaline batteries:
250hrs SEND at 10°C
Measured with Duracell ULTRA
(initial set of batteries)
Typical values for the PULSE
Barryvox®with lithium batteries:
310hrs SEND at 10°C
Measured with Energizer ULTRA
and ADVANCED
less than The batteries must be
20% replaced as soon as
or 0% possible!
Emergency reserve at 20%:
Max. 20 hrs in SEND mode
and max. 1hr in SEARCH
mode left.
Battery capacity The battery capacity cannot
unknown be reliably determined.
The batteries must be
replaced as soon as
possible!
The transceiver sounds a warning if the battery
level is below 20% or unknown at startup.

31
Double Group Check
We recommend to perform a double group check
ones a week and in general when a new group gets
together.
The double group check individually tests the SEND
and SEARCH function of all devices.
The members of the party activate the group check
on their transceivers or set them to a low receive
volume. The leader switches his or her transceiver
to the SEND mode and ensures that all party mem-
bers can receive. Subsequently, the party members
switch their transceivers to SEND, and the leader
activates the group check or sets the transceiver to
a low receive volume. The SEND mode of all trans-
ceivers is checked, and ultimately the leader
switches his or her transceiver to SEND.
VIDEO
VIDEO
30
SETUP
4.6 Group Check
Single Group Check
Before a party takes off, the transceivers of all party
members must be checked. To conduct this test,
the function group check is activated on a single
transceiver within the party. Activate the group
check by switching the device from OFF to SEND
and pressing either of the keys within the first 5
seconds. After a few seconds, the device will auto-
matically activate the group check. Make sure all
the other transceivers of the party are in SEND
mode.
The test is successful if you can clearly hear beep
sounds from each participant's transceiver within
the range indicated on the display. The members of
the party must be spread out appropriately to avoid
mutual interference. The indicated test distance
must not be shortened, as otherwise the group
check becomes very unreliable.
If no tone is heard within
the indicated range, the
device may not be used.
How to solve the problem:
1.Check if the device is switched to SEND.
2.Replace the batteries.
3.Have the device checked by the manufacturer.
(chapter «Maintenance and Repair»)
After 5 minutes in group check, the transceiver
automatically switches to the SEND mode. The user
is warned ahead of time by an acoustic alarm. This
automatic switching can be prevented by pressing
any button within 20 seconds. After the group
check, the transceiver must be switched to the
SEND mode by pressing any button.
f your PULSE Barryvox®detects that the transmit
frequency of the tested device is not within the nor-
mative regulations, a warning message will be
shown. n this case, repeat the test with 5m dis-
tance between the participants to identify the
defective transmitter. Such devices must be
checked/repaired by the manufacturer.
VIDEO
VIDEO
Group check SEND
SEND Group check
E BERSLEADERE BERSLEADER
Group check SEND VIDEO
VIDEO

5.1 Rescue-Send Mode (Rescue-SEND)
The rescue send mode is used by all rescuers who
are involved in the rescue operation, but do not per-
form a transceiver search themselves (shovelers,
probe line, surface search, search with other search
devices etc.). The rescue send mode monitors the
motions of the rescuer and only activates the trans-
mitter, when the activity level of the rescuer is
during 4 minutes on such a low level that it has be
to be assumed that this is an involuntary state of
inactivity caused by a secondary avalanche.
Prior to reverting, the device will sound an audible
alarm. Reverting can be avoided if either of the
keys is pressed within 30 seconds of the alarm.
To activate the rescue send mode, switch the devi-
ce to SEARCH and revert to SEND. Wait until the 5
sec. count-down has completed, “Rescue-SEND” is
now shown at the bottom of the screen. As soon as
you hear 3 ascending beep-sounds, immediately
press any key. The activation of the rescue send
mode is confirmed by 3 descending beep sounds
and the double flashing of the red SEND-Control
LED. f you switch between SEND and SEARCH
during the further rescue operation, the device
always used the rescue send mode when the main
switch is in the SEND position. Turn the device off
and on to return back to the normal send mode.
n the «Cockpit Rescue-SEND» you find a step-by-
step setup guide.
32
SEND ODE
33
5. SEND Mode
The SEND mode is the normal operating mode out-
doors or in all other situations in which there is a
risk of avalanches.
Each time the SEND mode has been activated, this
is confirmed by a triple beep sound.
Each individual signal pulse is tested. f the test is
successful, this is confirmed by a blink of the red
SEND-Control LED.
The LCD display is automatically deactivated in the
SEND mode, but can be activated any time by pres-
sing either of the keys.
n case of a burial (or whenever the transceiver
stops moving), the device records the burial dura-
tion and detects vital data. These are displayed on
the buried device and transmitted via W-Link to all
other transceivers capable of receiving vital data.
See chapter «Burial and Vital Duration».

3534
SEARCH ODE
Signal search:
Search area to the point
where the first clearly audible
signal can be detected.
Coarse search:
Search area starting from
the reception of the first
signal until the immediate
vicinity of the buried sub-
ject. In this phase the signal
search pattern is abandoned
in order to follow the sig-
nals leading to the buried
subject.
Fine search:
Search area in the immedi-
ate vicinity of the buried
subject.
Pinpointing:
First use of the probe until
probe hit.
6. SEARCH Mode
Although the avalanche transceiver is easy to
use, its effective use requires proper training.
We recommend that you practice transceiver
searches regularly.
Electronic devices and metal objects can inter-
fere with the search or make it impossible.
See chapter « nterferences».
Be aware that electronic devices used by other res-
cuers may disturb the search. This is equally valid
for mobile phones, therefore it is highly recommen-
ded to switch off phones with are not absolutely
required.
At the beginning and during the search, pay close
attention that the rescuer’s transceivers are not
transmitting and do not switch to SEND unintentio-
nally.
t does not make sense to remove the backpack and
mount the shovel and probe already at the boarder
of the avalanche. Keep the backpack with all the
equipment on you! The assembled shovel and probe
is only a hindrance during signal and course
search. Only remove your pack to assemble probe
and shovel ones you have successfully concluded
the fine search.
6.1 Search Phases
n an avalanche search, the following phases are
distinguished:
l Signal search
l Coarse search
l Fine search
l Pinpointing
using transceiver
using probe

3
10
Signal Search Fine Search Pinpointing
Marking &
Multiple Search
Coarse Search
«Large distance to the target»:
Fast search speed, low search precision
«Landing»:
Transceiver on the snow surface, move slowly,
high search precision.
«Airport visible»:
Slow down considerably
The transceiver search is comparable to the landing of an airplane!
Mark
SEARCH SPEED
SEARCH PRECISION
3736
SEARCH ODE
«Signal» «Fine Search» «Probe Hit»
RESCUE ORGANIZATION: EVENT DRIVEN, LOUD AND CLEAR CO UNICATION

39
6.1.2 Extended Search Strip
Width in Analog ode
The search strip width can be extended from 50m
to 80m by experienced users. For this, the setting
"Analog Mode" must be set to "Manual" (see chap-
ter "Settings"). For the signal search with extended
search strip width, switch to Analog Mode by press-
ing both lateral keys simultaneously until the search
mode has switched to "Analog". Press the (KRE S)-
key multiple times until the screen is blank - the
search strip width is now 80m. Search the ava-
lanche systematically. When you receive the first
signal, follow it based on the analog sound in the
direction of the strongest signal (tangent search).
When the signal clearly rises, the screen switches
back on automatically. Switch now back to the
standard search mode by pressing both lateral keys
simultaneously and conclude the search by follow-
ing the distance and direction indications.
6.2 Auto-Revert to SEND
Auto-revert to SEND automatically switches the
transceiver from the SEARCH mode to the SEND
mode if no user interaction or movement occurs
during a certain amount of time (default 4 minutes).
Prior to reverting, the device will sound an audible
alarm. Reverting can be avoided if either of the
keys is pressed within 30 seconds of the alarm.
n case rescuers are buried in a second avalanche,
this function allows them to be located using trans-
ceivers.
Elementar understanding of transceiver search
The 457kHz transmitter of the transceiver has a spa-
cial, kidney shaped transmit distribution, which is
visualized with field lines in the illustration below.
The searching transceiver leads the rescuer along
the field lines and therefore usually not in a straight
line to the buried subject.
38
SEARCH ODE
6.1.1 Signal Search
From the start of the search until you clearly hear
the first tone, you are in signal search.
The avalanche surface is searched systematically
until you pick up a signal. During the acoustic sig-
nal search, the rescuer has the visual focus on the
surface of the debris in order to be able to see body
parts or objects protruding the snow surface.
The PULSE Barryvox®uses the symbol as a
generic instruction to apply one of the following
search patterns for new signals!
Optimization of Range
To optimize the range, rotate the transceiver slowly
around all axes. Hold the device with the loudspeaker
facing your ear sidewise of your head.
Once a signal is received, maintain the device ori-
entation and continue walking until the signal can
be heard clearly. The signal search is concluded.
f your Barryvox®detects that the signal search
strip width needs to be reduced due to a device
transmitting far apart from the normative regula-
tion, the reduced search strip width will be indicat-
ed.
Regardless of the operating mode, the following
search strategies apply:
Search strategy if the last seen point is unknown.
Search strategy if the last seen point is known. The
signal search strip extends downhill from the last
seen point in the direction of the slide.
LAST SEEN POINT
UNKNOWN
LAST SEEN POINT
LAST SEEN POINT
UNKNOWN
ULTIPLE RESCUERS
SINGLE RESCUER
Tangent Search System Search Along the Field Line: Flux line search
Other manuals for PULSE Barryvox
4
This manual suits for next models
3
Table of contents
Other Mammut Transceiver manuals
