Maplin A70QB User manual

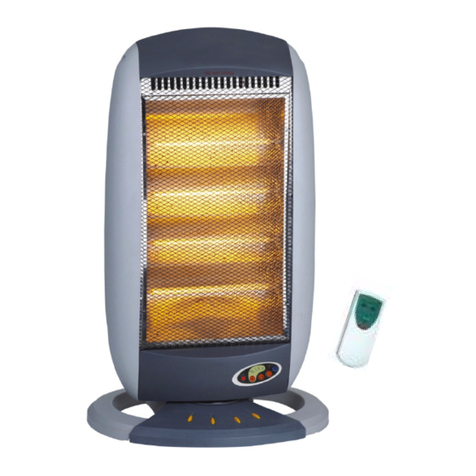
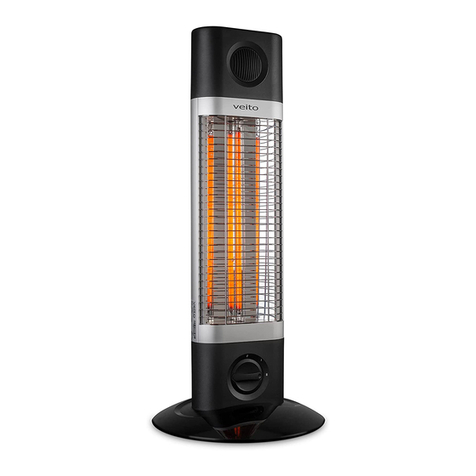
2500W Blade Heater
A70QB
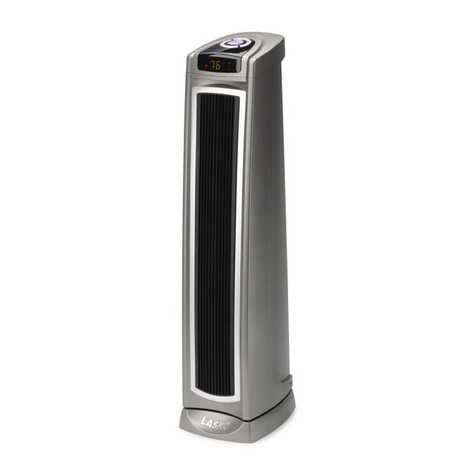
The modern, stylish and compact design of this 2500W blade heater makes it ideal for
both the home and office. The control panel and handy remote allow you to set your
desired temperature and duration of operation. In addition, the oscillation function and
two power settings have the capability to heat a wider area than a conventional fan
heater.
Features:
• LED display shows time and temperature
• Oscillates for greater coverage
• Handy remote control included
• Timer can be set from 1 to 12 hours
• Temperature can be set from 15°C to 28°C
• Two Fan power settings, high and low

Contents:
•1 x Blade heater
•1 x Base
•1 x Remote control
•4 x Screws
•1 x Instruction manual
Technical specification:
Model NO. DF-HT5A01P
Voltage 220-240V AC
Frequency 50Hz
Wind speed ≥1.6m/s
Power Low 1600W/High 2500W
Noise level. ≤50 dB
Dimension 320 x 1130 mm
Warning:
•Not suitable for use by children, keep out of reach unless under continuous
supervision
•Do not place heavy objects on the power cord. Do not operate this appliance
with a damaged cord or plug. If the power supply cord is damaged, it must be
replaced by a qualified electrician
•Do not immerse the cord, plug or any part of this appliance in water or any
other liquid. Do not handle with wet hands
•It is not recommended to use an extension cord with this product
•Do not let the mains lead hang over the edge of the table or work surface,
touch hot surfaces or rest against the front of the heater
•Do not misuse the cord or pull the cable to disconnect from the power outlet
•In order to avoid overheating, do not cover the heater or place anything on top
of it. Do not allow it to touch flammable material, including curtains, bedding etc
•The heater must not be located immediately below a socket-outlet
•Do not use this heater in dusty environments or where flammable or explosive
vapours are present (e.g. in a workshop or garage), do not use in the immediate
surroundings of a bath, shower or swimming pool
•Do not place this heater on or near to any other source of heat
•Do not hang wet clothes above the heater
•Ensure there is nothing obstructing the air inlet or outlet
•Some parts of this product can become very hot and cause burns. To avoid
burns, do not touch the hot surface with bare skin. Particular attention has to
be given where children, animals and vulnerable people are present
•This heater is not equipped with a device to control the room temperature

•Ensure this unit is switched off when the room is unoccupied. Disconnect from
the mains when not in use or cleaning. If unused for extended periods of time,
store in a dry and ventilated location
•For household use only, do not use outdoors or in direct sunshine
•Do not attempt to repair, disassemble or modify this appliance. There are no
user-serviceable parts inside
•Do not allow any foreign objects to enter the ventilation or exhaust openings as
this may cause an electric shock, fire or damage to the appliance
•Do not use this heater with a programmer, timer or any other device that
switches the heater on automatically
•When the heater is switched on for the first time, it may release a slight
harmless odor. This is normal and should not occur again. If there is an unusual
smell or sound from the device after this time, stop operating and unplug
•Do not use pesticides or other flammable spray around the product, as this will
damage the device
Assembly Instructions:
1. Remove all components from their packaging including the main unit, the base,
the remote control and the screws
2. Lay the main unit on its’ side
3. Connect the base to the main unit and secure with the four screws included
4. Stand the machine up and place on an even and stable surface

Operation Instructions:
Operation Panels
Ensure the power supply, socket and voltage are in accordance the requirements
(220V-240V, 50Hz)
1) Connect to the power supply
2) Press power switch which is in the back of the device, the device is switched on
but all functions and displays are still off
3) Press the key and the device will begin to work. Press again and the device
will enter into standby mode
4) Temperature: The LED shows the current room temperature. The default
temperature setting is 25°C
5) Press to shift between low and high heating power
When operating at low heating power, the low heating power indicator will
alight
When operating at high heating power, the high heating power indicator will
alight
6) Press key to make the device oscillate (swing)
Press oscillate, the device will oscillate, and the indicator will alight
Room temperature
& Timer indicator
Timer
Indicator
ON/OFF
Indicator
Oscillation
Indicator
Temperature
Indicator

Press oscillate again, the oscillate function turns off, and the indicator will turn off
7) Press key to set the time
-The time indicator will be on, the LED light will flicker every 0.5
seconds. At this time, press the UP+and DOWN-keys to set the timer
(within a range of 1-12 hours), the time will be plus or minus 1 hour on every
press
- If the timer has been set before, it cannot be changed. You can reset the time,
only by pressing the UP+and DOWN-keys. Press the key to
quit the timer setting. The time that you have set will begin at once
- The LED indicator will decrease by 1 hour at a time, if the timer turns to 0, then
the device will turn off at once, and enter into standby mode.
- Press the key when the timer setting is finished, this will now show the
current room temperature
9) Press key twice, the temperature indicator will alight
- After entering into the temperature setting, the temperature light will be on,
the LED light will flicker every 0.5 seconds. You can change the temperature
by pressing the UP+and DOWN-keys. The range of the temperature
is from 15°C to 28 °C, the temperature will be plus or minus 1°C on every
press
- After entering into the temperature setting, the temperature that has been set
cannot be changed. You can only reset the temperature by pressing the UP
+and DOWN-keys. Press the key to quit the temperature setting,
and the temperature that you have set will begin at once
- If no key has been pressed for 5 seconds or any key other than UP+and
DOWN-) is pressed, then the LED indicator will show the room temperature.
If the temperature is ≤-10°C, then it will show “LO”. If the temperature is over
40°C, then it will show “HI"
10) After the device has been switched on for 10 seconds, if the ambient temperature
is equal to or above the temperature that has been set, the heating function will
switch off. The low/high heating power light will switch off, and the fan will turn off
after 10 seconds. If you have pressed oscillate, this function will switch off as well.
11) If the ambient temperature decreases to 2°C below the set temperature, the
heating function will switch on again, as well as the fan & the oscillate function (if
you have pressed oscillate previously).
12) If the ambient temperature reaches above the automatically set temperature of
25°C, then the device will only work if a higher temperature has been set
13) When setting the time & temperature at the same time, a circle will alight. The time
and temperature will show intermittently every 30 minutes.
f

Remote Control Operation:
•Remove the battery cover from the reverse of remote control (see picture 1)
•Pay attention to the battery polarity, and insert the battery CR2032 (see
picture 2)
•Push the battery cover back onto the remote control
Picture 1:
Picture 2:
Cleaning:
Ensure the device is switched off before cleaning
•Clean the surface of the unit with a clean damp cloth, do not use corrosive
detergent or solvents
•Do not wash directly with water
(Oscillate)

WEEE Directive & Product Disposal:
At the end of its serviceable life, this product should not be treated as
household or general waste. It should be handed over to the applicable
collection point for the recycling of electrical and electronic equipment, or
returned to the supplier for disposal.
Internal/Supplied Batteries
This symbol on the battery indicates that the battery is to be collected
separately. This battery is designed for separate collection at an
appropriate collection point.
Table of contents
