MARANA Forni ROTOFORNO CLASSICO Series User manual

Certificate Number: 255416-2516776 Project Number: 2516776 Page Number:74
INSTALLATION AND OPERATION MANUAL
MARANA FORNI srl unipersonale
via Turbina 98 37139 Chievo-Verona-Italia
tel. +39 045 6704503 - fax +39 045 7156118
www.maranaforni.it - info@maranaforni.it
Skype: maranaforni
VER
2.1
© Riproduzione vietata
PAG
1 / 27
Ovens Series: ROTOFORNO CLASSICO® - ROTOFORNO SU&GIU®
Ovens Mod: MF110(DX,SX)(C,T,CT) –MF130(DX,SX) )(C,T,CT) –MF150(DX,SX) )(C,T,CT)
MANUAL CONTENTS
OVEN INSTALLATION ………………………………………………………………………………………….
3
INSTALLATION CLEARANCES ……………………………………………………………………………….
4
OVEN FLUE VENTING MEASURES …………………………………………………………………………
5
GAS SPECIFICATIONS………………………………………………………………………………………….
6
ELECTRICAL SPECIFICATIONS………………………………………………………………………………
9
OVEN COVERING SPECIFICATIONS……………………………………………………….........................
10
OPERATING INSTRUCTIONS…………………………………………………………………………………
11
CONTROLLER CONSOLE –SERIE ROTOFORNO SU&GIU® ………………………………………
13
CONTROLLER CONSOLE –SERIE ROTOFORNO CLASSICO® ……………………………………
17
CONTROLLER CONSOLE - GAS BURNER ……………………………………………………………….
20
OVEN DRYING OPERATION…………………………………………………………………………………
24
OVEN DAILY OPERATION……………………………………………………………………………………
25
OVEN CLEANING OPERATIONS…………………………………………………………………………...…
26
MAINTENANCE AND REPAIRS………………………………………………………………………………..
27
WARRENTY ……………………………………………………………………………………………………..
27

Certificate Number: 255416-2516776 Project Number: 2516776 Page Number:74
INSTALLATION AND OPERATION MANUAL
MARANA FORNI srl unipersonale
via Turbina 98 37139 Chievo-Verona-Italia
tel. +39 045 6704503 - fax +39 045 7156118
www.maranaforni.it - info@maranaforni.it
Skype: maranaforni
VER
2.1
© Riproduzione vietata
PAG
2 / 27
ATTENTION TO PURCHASER:
INSTRUCTIONS TO BE FOLLOWED IN THE EVENT THE USER SMELLS GAS:
-DON’T TRY TO LIGHT ANY APPLIANCE
-DON’T TOUCH ANY ELECTRICAL SWITCH – DON’T USE ANY PHONE IN YOUR BUILDING
-IMMEDIATELY CONTACT LOCAL GAS SUPPLIER IF YOU CANNOT REACH YOUR GAS
SUPPLIER, CONTACT FIRE DEPARTMENT.
FOR YOUR SAFETY: Do not store or use gasoline or other flammable vapours or liquids in the
vicinity of this or any other appliance. Also, always keep the area under and around this appliance
free and clear of any all combustible materials.
WARNING: Improper installation, adjustment, alteration, service or maintenance can cause
property damage, injury or death. Read the installation, operating and maintenance instructions
thoroughly before installing or servicing this equipment. Contact your local building or fire officials
about restrictions and installation inspection in your area.
IT IS RECOMMENDED THAT THIS OVEN BE INSTALLED, MAINTAINED AND SERVICED
BY AUTHORIZED PROFESSIONALS.
DON’T THROW THIS MANUAL AWAY - RETAIN IT FOR FUTURE REFERENCE
For additional copies of this manual and responses to service/maintenance questions
please contact:
CONTACT YOUR LOCAL BUILDING OR FIRE OFFICIALS FOR CLARIFICATION ON
ANY RESTRICTIONS ON INSTALLATION OF THIS OVEN IN YOUR AREA, OR NEED
FOR INSPECTION OF THE OVEN INSTALLATION.

Certificate Number: 255416-2516776 Project Number: 2516776 Page Number:74
INSTALLATION AND OPERATION MANUAL
MARANA FORNI srl unipersonale
via Turbina 98 37139 Chievo-Verona-Italia
tel. +39 045 6704503 - fax +39 045 7156118
www.maranaforni.it - info@maranaforni.it
Skype: maranaforni
VER
2.1
© Riproduzione vietata
PAG
3 / 27
OVEN INSTALLATION
MARANAFORNI OVENS MUST ONLY BE INSTALLED ON FIELD BY AUTHORIZED PROFESSIONALS
TO BE NOTED BEFORE OVEN INSTALLATION:
OVEN MUST NOT TO BE USED WITHOUT ANY INSULATION AND COVERING
SERIE ROTOFORNO SU&GIU: POUR MECHANICAL OIL INTO OVEN HYDRAULIC PUMP (example OSO
046)
DO NOT OIL MOTOR PARTS: ALL PARTS ARE AUTO-GREASED.
Before installation, be sure of floor stability and if it could carry oven’s weight.
Oven Model
Weight L.b.s.
Weight Kg
MF110*
3747.86
1700.00
MF130*
4188.78
1900.00
MF150*
4850.17
2200.00
* all models, series
Installation oven must be only on a non-combustible floor, which extends at least 36” (914mm) in front and
30” (762mm) to either side of the door.

Certificate Number: 255416-2516776 Project Number: 2516776 Page Number:74
INSTALLATION AND OPERATION MANUAL
MARANA FORNI srl unipersonale
via Turbina 98 37139 Chievo-Verona-Italia
tel. +39 045 6704503 - fax +39 045 7156118
www.maranaforni.it - info@maranaforni.it
Skype: maranaforni
VER
2.1
© Riproduzione vietata
PAG
4 / 27
INSTALLATION CLEARANCES
WARNING: Improper installation, adjustment, alteration, service or maintenance can cause property
damage, injury or death. Read the installation, operating and maintenance instructions thoroughly before
installing or servicing this equipment. Contact your local building or fire officials about restrictions and
installation inspection in your area.
IT IS ABSOLUTELY IMPORTANT TO MAINTAIN CLEARANCE SPACE BETWEEN THE OVEN AND ANY
COMBUSTIBLE MATERIAL (WALLS AND/OR CEILINGS), TO AVOID RESULT IN FIRE.
DO NOT PACK REQUIRED CLEARANCE (AIR SPACE) WITH INSULATION OR OTHER MATERIALS.
WHEN NON-COMBUSTIBLE BUILDING MATERIALS CONTACT OVEN COVERING THE CLEARANCES
TO COMBUSTIBLES ARE TRANSFERRED TO THOSE NON-COMBUSTIBLES.
TO REDUCE RISK OF FIRE, FOLLOW THESE INSTALLATION INSTRUCTIONS.
OVEN MUST BE INSULATED AND COVERED WITH NON-COMBUSTIBLE MATERIALS OR WITH A
NON-COMBUSTIBLE FACADE
Consider your insulation material (standard dry-wall or sheet rock) as a combustible.
Servicing of this products could expose you to non-safety dust:
ALWAYS WEAR RESPIRATORY AND EYE PROTECTION
Tiled materials must conform local codes or in the absence of local codes, with the National Fuel Gas Code,
ANSI Z223.1/NFPA 54, or the Natural Gas and Propane Installation Code, CSA B149.1, as applicable.

Certificate Number: 255416-2516776 Project Number: 2516776 Page Number:74
INSTALLATION AND OPERATION MANUAL
MARANA FORNI srl unipersonale
via Turbina 98 37139 Chievo-Verona-Italia
tel. +39 045 6704503 - fax +39 045 7156118
www.maranaforni.it - info@maranaforni.it
Skype: maranaforni
VER
2.1
© Riproduzione vietata
PAG
5 / 27
Oven insulation material must be 1.2” (30mm –3cm) to combustible material from all sides, and 14” (356mm –
35,6 cm) clearance to combustibles from the top of oven insulation material. Area above the oven doorway
and 6” (152mm) to each side of the doorway must be covered with non-combustible material.
Oven insulation material
KEEP THE APPLIANCE AREA FREE AND CLEAR FROM COMBUSTIBLES
OVEN FLUE VENTING MEASURES
Oven Model
Flue collar diam
inch measure
Flue collar diam
millimeter measure
MF110*
8”
200 mm
MF130*
8”
200 mm
MF150*
8”
200 mm
*All models, series
COMBUSTIBLE MATERIAL
14”(356 mm - 35 cm) top clearance
from oven insulation material to
combustible building
1,2”(30mm - 3 cm) sides clearance
from oven insulation material to
combustible building

Certificate Number: 255416-2516776 Project Number: 2516776 Page Number:74
INSTALLATION AND OPERATION MANUAL
MARANA FORNI srl unipersonale
via Turbina 98 37139 Chievo-Verona-Italia
tel. +39 045 6704503 - fax +39 045 7156118
www.maranaforni.it - info@maranaforni.it
Skype: maranaforni
VER
2.1
© Riproduzione vietata
PAG
6 / 27
GAS SPECIFICATIONS
Installation must conform with local codes, or in the absence of local codes, with the National Fuel Gas Code,
ANSI Z223.1/NFPA 54, or the Natural Gas and Propane Installation Code, CSA B149.1, as applicable,
including:
1.The appliance and its individual shutoff valve must be disconnected from the gas supply piping system
during any pressure testing of that system at test pressures in excess of ½ psi (3.5 kPa).
2.The appliance must be isolated from the gas supply piping system by closing its individual manual shutoff
valve during any pressure testing of the gas supply piping system at test pressures equal or less than ½ psi
(3.5 kPa).
The appliance, when installed, must be electrically grounded in accordance whit local codes, or in absence of
local codes, with the National Electrical Code, ANSI/NFPA 70, or the Canadian Electrical Code, CSA C22.2,
as applicable.
The supply line must be equipped with a manual shutoff valve. This valve should be located in the same room
but external to the range. It should be in a location that allows ease of opening and closing.
DO NOT BLOCK ACCESS TO SHUTOFF VALVE.
The vent line from the gas appliance pressure regulator shall be installed to the outdoors in accordance with
local codes or, in the absence of local codes, with the National Fuel Gas Code, ANSI Z223.1/NFPA 54, or the
Natural Gas and Propane Installation Code, CSA B149.1, as applicable.
DO NOT OBSTRUCT THE FLOW OF COMBUSTION AND VENTILATION AIR
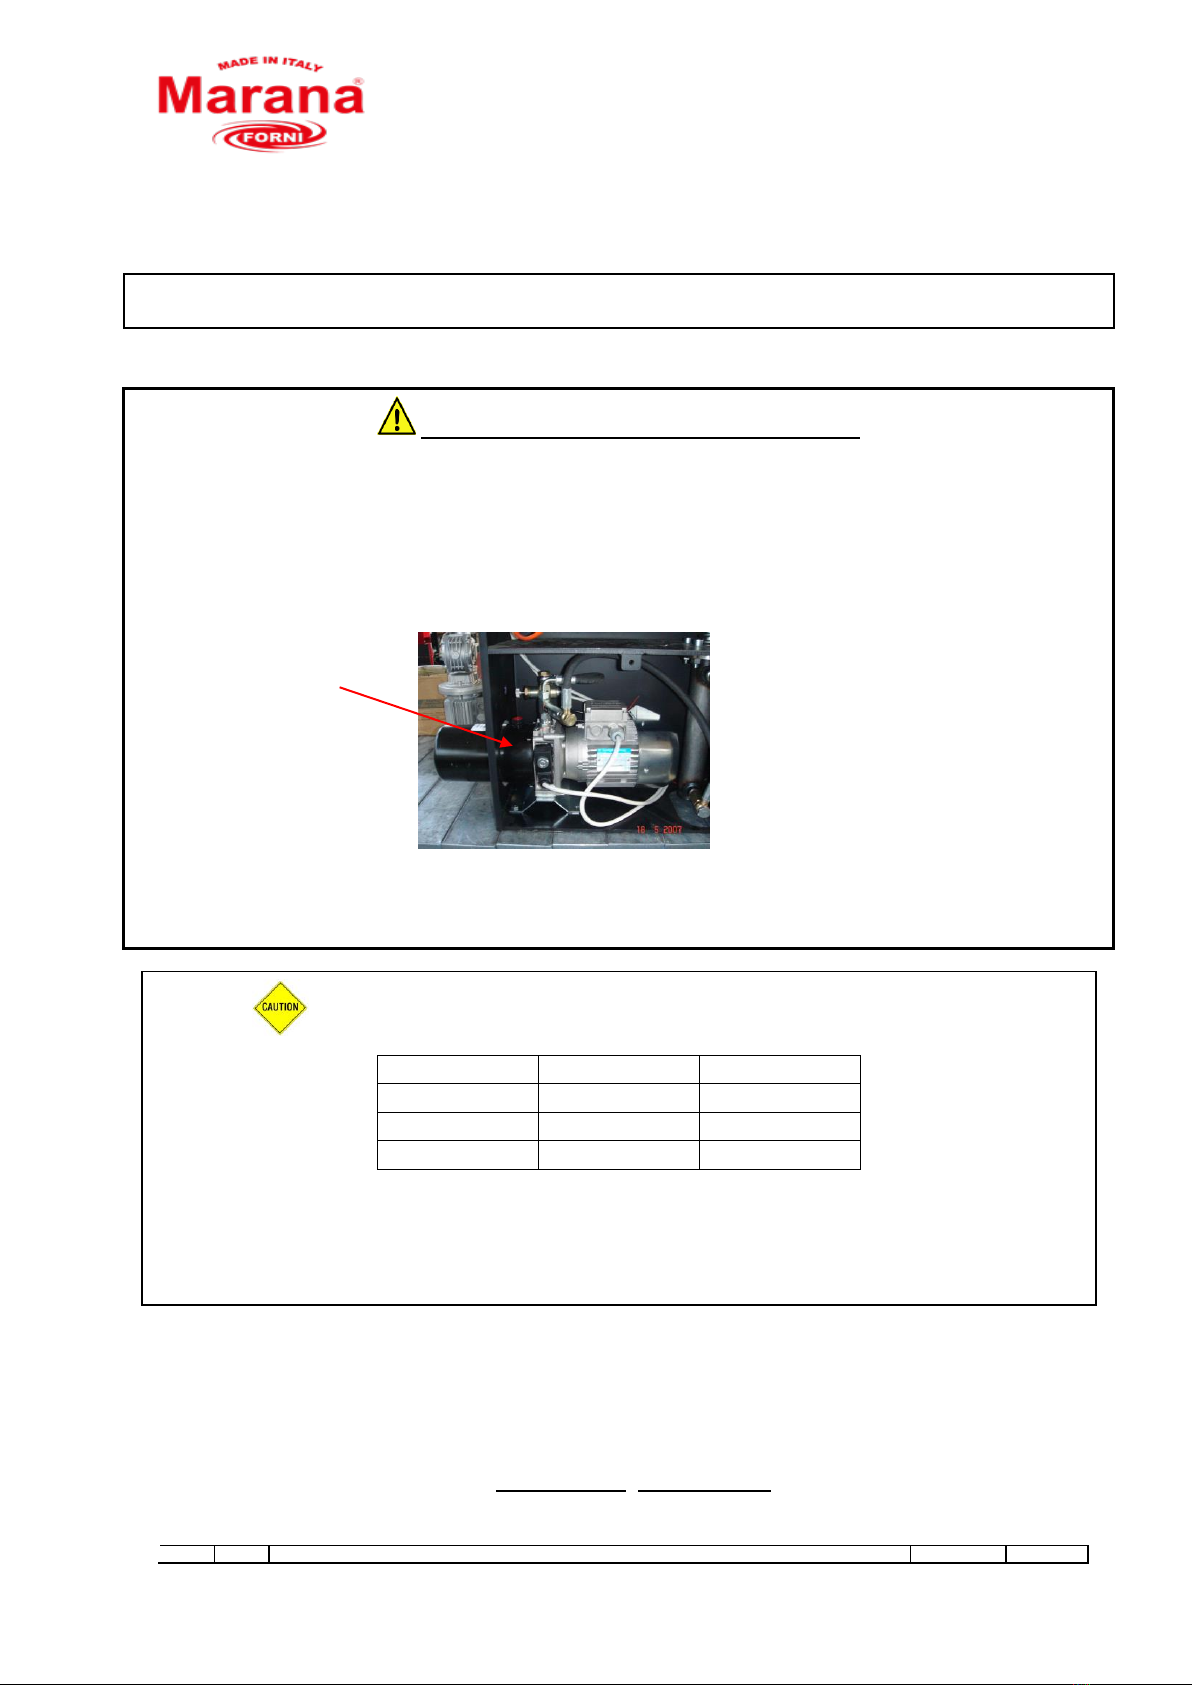
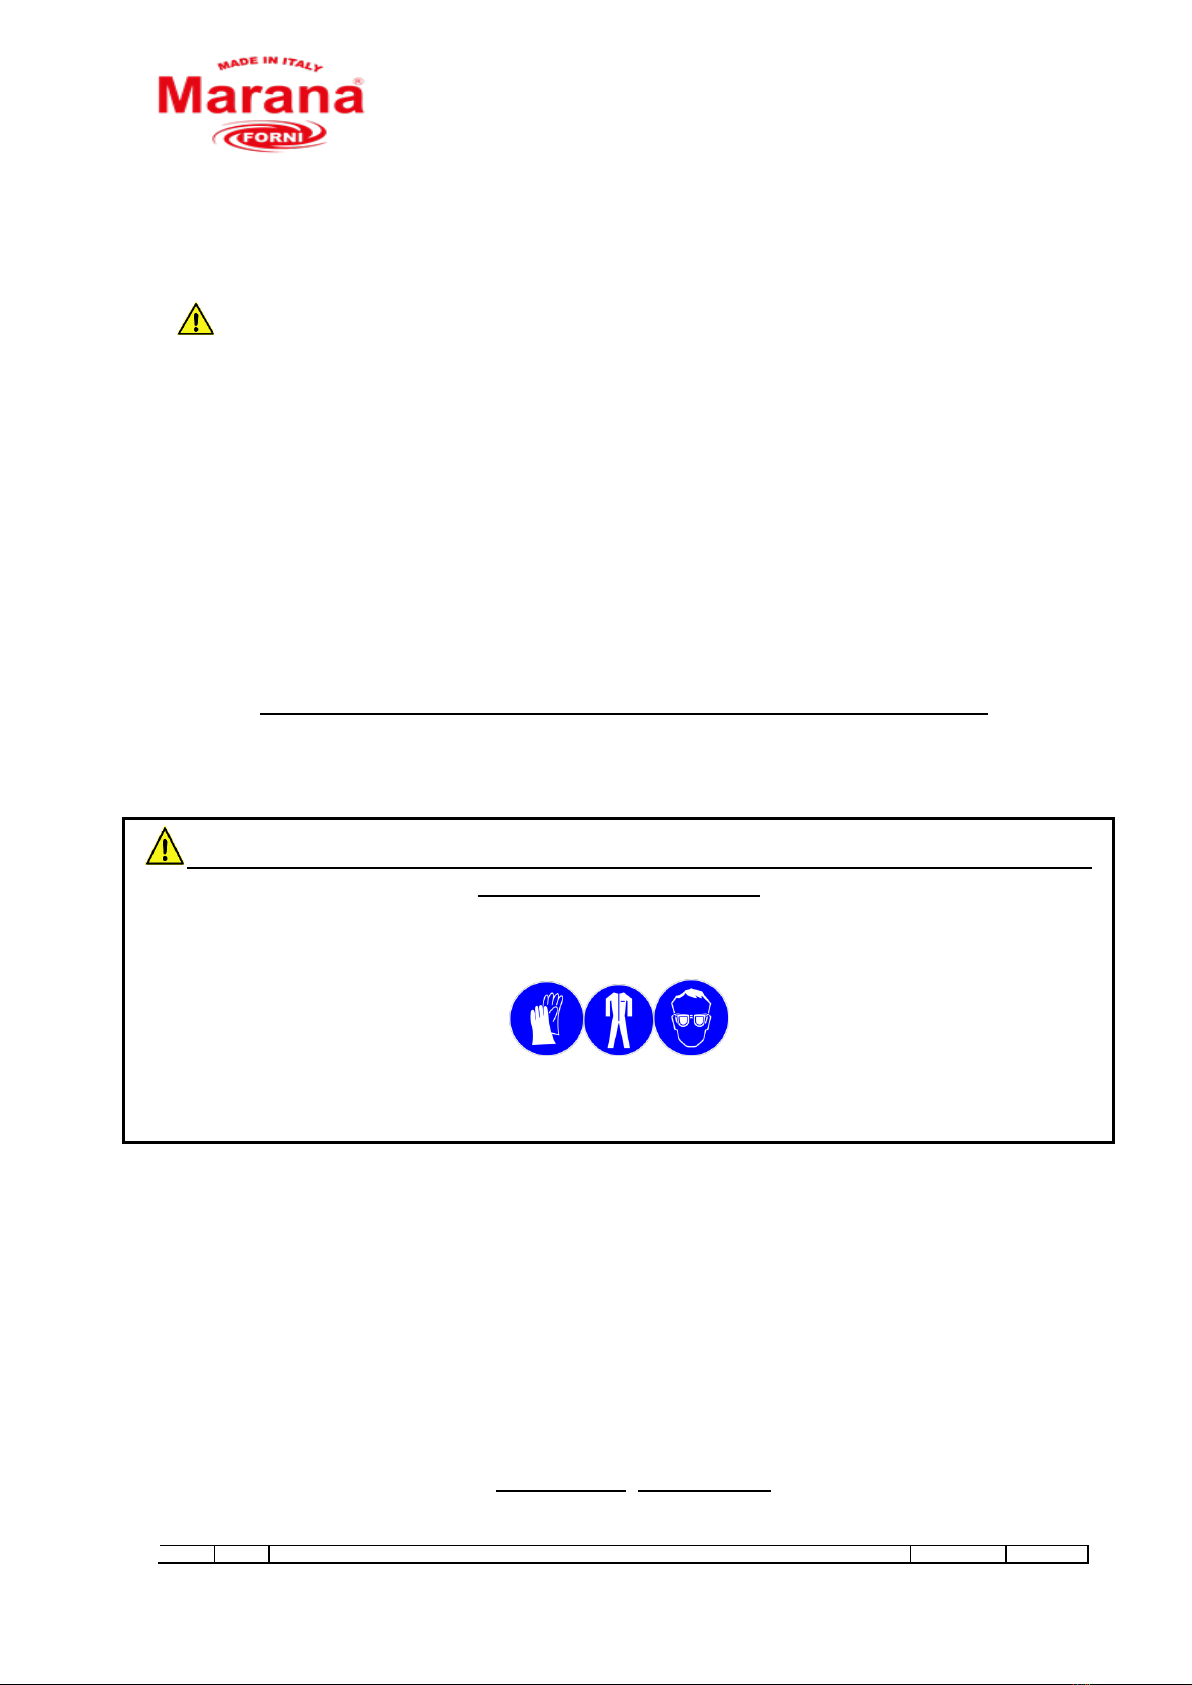
Maranaforni Gas Ovens are equipped with gas connection. Have a licensed gas installer provide to
hook-up and test all fittings and pipe connections for leaks. Use approved gas leak detectors (soap
solutions or equivalent) over and around the fittings and pipe connections.
DO NOT USE FLAME TO TEST FOR LEAKS!
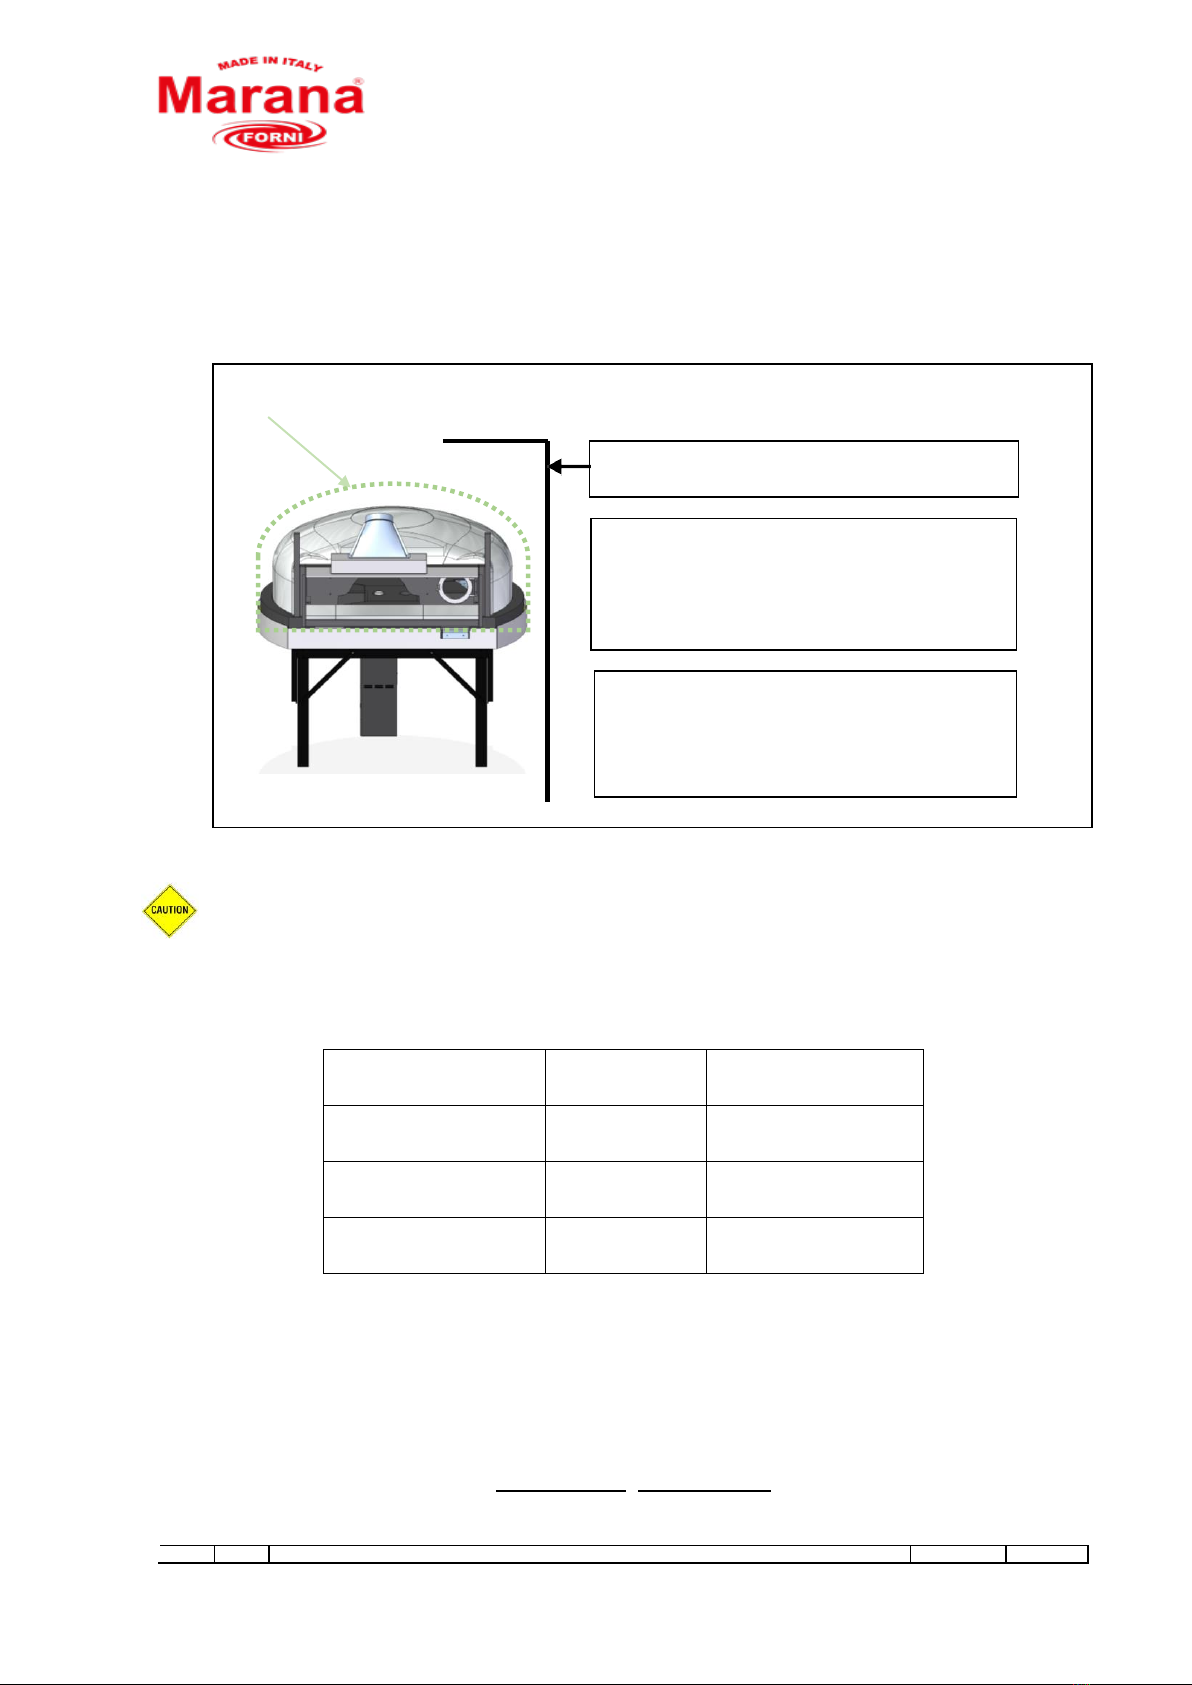
Exhaust hood must be installed by a qualified mechanical engineer in accordance with the hood
manufacturer’s instructions and all relevant Local and Natural Codes. Maranaforni recommends to submit your
venting plants to local code authorities before proceeding with installation.
Marana Forni recommends direct venting.

Certificate Number: 255416-2516776 Project Number: 2516776 Page Number:74
INSTALLATION AND OPERATION MANUAL
MARANA FORNI srl unipersonale
via Turbina 98 37139 Chievo-Verona-Italia
tel. +39 045 6704503 - fax +39 045 7156118
www.maranaforni.it - info@maranaforni.it
Skype: maranaforni
VER
2.1
© Riproduzione vietata
PAG
7 / 27
Burners
Serie ROTOFORNO SU&GIU®
Serie ROTOFORNO CLASSICO®
Baking
burner
MF110SX
MF110DX
C
Baking
burner
MF130SX
MF130DX
C
Baking
burner
MF150SX
MF150DX
C
Turbo burner
MF110SX –MF110DX
MF130SX –MF130DX
MF150SX –MF150DX
T
Natural gas (A)
Inlet pressure
iwc
7
7
7
7
Manifold pressure
iwc
4
4
4
4
Nominal rate
Btu/h
70000
80000
90000
27000
Pressure downstream gas valve
iwc
1,7
2,2
2,8
2,8
Reduced rate
Btu/h
44500
44500
44500
---
Pressure downstream gas valve
iwc
0,8
0,8
0,8
---
Orifices
1/100
mm
510
510
510
260
By-pass(*):
n°
---
---
---
---
Air adjustment
mm
Open
Open
Open
---
LP gas (D)
(Butane)
Inlet pressure
iwc
11
11
11
11
Manifold pressure
iwc
10
10
10
10
Nominal rate
Btu/h
70000
80000
90000
27000
Pressure downstream gas valve
iwc
4,6
6,0
7,6
9,6
Reduced rate
Btu/h
44500
44500
44500
---
Pressure downstream gas valve
iwc
2,0
2,0
2,0
---
Orifices
1/100
mm
310
310
310
150
By-pass:
n°
---
---
---
---
Air adjustment
mm
Open
Open
Open
---

Certificate Number: 255416-2516776 Project Number: 2516776 Page Number:74
INSTALLATION AND OPERATION MANUAL
MARANA FORNI srl unipersonale
via Turbina 98 37139 Chievo-Verona-Italia
tel. +39 045 6704503 - fax +39 045 7156118
www.maranaforni.it - info@maranaforni.it
Skype: maranaforni
VER
2.1
© Riproduzione vietata
PAG
8 / 27
For CT version, please add BTU/h ref. C and BTU/h ref. T
Burners
Serie ROTOFORNO SU&GIU®
Serie ROTOFORNO CLASSICO®
Baking
burner
MF110SX
MF110DX
C
Baking
burner
MF130SX
MF130DX
C
Baking
burner
MF150SX
MF150DX
C
Turbo burner
MF110SX –MF110DX
MF130SX –MF130DX
MF150SX –MF150DX
T
LP gas (E)
(Propane)
Inlet pressure
iwc
11
11
11
11
Manifold pressure
iwc
10
10
10
10
Nominal rate
Btu/h
70000
80000
90000
27000
Pressure downstream gas valve
iwc
5,8
7,6
9,6
9,6
Reduced rate
Btu/h
44500
44500
44500
---
Pressure downstream gas valve
iwc
2,5
2,5
2,5
---
Orifices
1/100
mm
310
310
310
160
By-pass:
n°
---
---
---
---
Air adjustment
mm
Open
Open
Open
---
For CT version, please add BTU/h ref. C and BTU/h ref. T
Oven model:
MF110
MF130
MF150
Evacuation smoke M3 per hour
150 M3/h
235 M3/h
263 M3/h
Flow mass of the combustion product
45,2 gr/sec
58,36 gr/sec
86,2 gr/sec
Average temperature of the
combustion products
MAX 206°C
Media 152K
MAX 214° C
Media 157K
MAX 205° C
Media 134K

Certificate Number: 255416-2516776 Project Number: 2516776 Page Number:74
INSTALLATION AND OPERATION MANUAL
MARANA FORNI srl unipersonale
via Turbina 98 37139 Chievo-Verona-Italia
tel. +39 045 6704503 - fax +39 045 7156118
www.maranaforni.it - info@maranaforni.it
Skype: maranaforni
VER
2.1
© Riproduzione vietata
PAG
9 / 27
NOZZLES SUBSTITUTION
Nozzle Baking Burner
Mod.MF110(DX,SX)(C,CT) –MF130(DX,SX) )(C,CT) –MF150(DX,SX) )(C,CT)
Unscrew nut C- unscrew nozzle D –position new nozzle into air regulator E –screw nozzle D –screw nut C
Nozzle Turbo Burner
Mod.MF110(DX,SX)(T,CT) –MF130(DX,SX) )(T,CT) –MF150(DX,SX) )(T,CT)
Unscrew nozzle B blocking nut A –change nozzle screwing.

Certificate Number: 255416-2516776 Project Number: 2516776 Page Number:74
INSTALLATION AND OPERATION MANUAL
MARANA FORNI srl unipersonale
via Turbina 98 37139 Chievo-Verona-Italia
tel. +39 045 6704503 - fax +39 045 7156118
www.maranaforni.it - info@maranaforni.it
Skype: maranaforni
VER
2.1
© Riproduzione vietata
PAG
10 / 27
ELECTRICAL SPECIFICATIONS
Voltage 240V
Frequency 60 Hz
Amp 2.5
Maranaforni Ovens is configured for connection to a 240v circuit. Always refer to the equipement data plate
beneath the oven to verify the proper voltage.
Electrical diagrams are located behind control panel and inside motor box, under the oven.
SERIE ROTOFORNO SU&GIU SERIE ROTOFORNO CLASSICO
OVEN COVERING SPECIFICATIONS
DO NOT CONNECT THIS OVEN RATED 240v TO A DIFFERENT VOLTAGE CIRCUIT.
Consult a licensed electrician to connect the oven to your appropriate circuit.
WARNING –ELECTRICAL GROUNDING INSTRUCTIONS
This appliance must be electrically grounded in accordance with local codes, or in the absence of
local codes, with the National Electrical code, ANSI/NFPA 70 or the Canadian Electrical code, CSA
C22.1 as applicable.
DO NOT OPEN OVEN CONSOLE OR GAS CONSOLE.
IN CASE IT IS NOT OPERATING PROPERLY CALL FOR SERVICE
OVEN MUST BE INSULATED AND COVERED WITH NON-COMBUSTIBLE MATERIALS OR WITH A
NON-COMBUSTIBLE FACADE
Consider your insulation material (standard dry-wall or sheet rock) as a combustible.
Servicing of this products could expose you to non-safety dust:
ALWAYS WEAR RESPIRATORY AND EYE PROTECTION

Certificate Number: 255416-2516776 Project Number: 2516776 Page Number:74
INSTALLATION AND OPERATION MANUAL
MARANA FORNI srl unipersonale
via Turbina 98 37139 Chievo-Verona-Italia
tel. +39 045 6704503 - fax +39 045 7156118
www.maranaforni.it - info@maranaforni.it
Skype: maranaforni
VER
2.1
© Riproduzione vietata
PAG
11 / 27
BEFORE COVERING, PLEASE MAKE SURE TO HAVE A PROPER ACCESS FOR REMOVAL OF
THE EXHAUST HOOD FILTERS.
Covering materials must conform local codes or in the absence of local codes, with the National Fuel Gas
Code, ANSI Z223.1/NFPA 54, or the Natural Gas and Propane Installation Code, CSA B149.1, as applicable.
Oven covering or oven facade must be stay minimum 1.2” (30mm) from insulation material: this is for have
better insulation and more air circulation.
DON’T MAKE AN AIRTIGHT COVERING.
A FREE ACCESS OR A REMOVABLE PANEL WITH AIR GRATING 39,5”square (1000mm²) MUST BE
PROVIDED AT THE UNDER PART OF THE OVEN: IT ALLOWS ACCESS FOR SERVICE OF MOTORS,
ELECTRICAL COMPONENTS AND GAS BURNER AND AS AIR INTAKE.
Covering top part: if you want to close your covering making a top, do it after oven drying operation.
Provide an air grating 39,5”square (1000mm²) positioned on top.
Covering sides and front: provide an opening space 39,5”square (1000mm²) in front at the lower part of the
oven and an opening space 4”X4” (100mmX100mm) for thermal feeler inspection to be closed by the
removable Maranaforni table.
WARNING:
KEEP THE AREA AROUND AND BENETH THE OVEN CLEAR OF GRASS, LEAVES AND OTHER
COMBUSTIBLE MATERIALS.
DO NOT USE SPACE BETWEEN THE OVEN LEGS AS MATERIAL STORAGE.
THIS IS TO AVOID FIRE DAMAGES.
OPERATING INSTRUCTIONS
Operation area must be a brightly area. If not, provide for light appliances. Light must not be dazzling.
Operation area must be aired, ventilated. If not, provide for additional ventilation appliances.
WARNING!
DO NOT OPERATE WITHOUT REMOVABLE MOTOR BOX PANEL.
NEVER OPEN MOTOR BOX.

Certificate Number: 255416-2516776 Project Number: 2516776 Page Number:74
INSTALLATION AND OPERATION MANUAL
MARANA FORNI srl unipersonale
via Turbina 98 37139 Chievo-Verona-Italia
tel. +39 045 6704503 - fax +39 045 7156118
www.maranaforni.it - info@maranaforni.it
Skype: maranaforni
VER
2.1
© Riproduzione vietata
PAG
12 / 27
ONLY PIZZA AND BREAD PRODUCTS MAY BE COOKED DIRECTELY ON OVEN COOKING PLATE.
OTHER KIND OF FOOD MAY BE COOKED ON OR IN PANS OR OTHER SUITABLE CONTAINERS TO
PREVENT SPILLAGE ONTO THE OVEN DECK.
OVEN IS NOT FOR USE WITH SOLID FUEL COMBUSTIBLE
MOVEMENT OVEN TECHNICAL DETAILS
Motor rotating power
KW 0,18
Motor cooking plate lifting power –only for ROTOFORNO
SU&GIU® serie
KW 0,33
BEWARE OF VERY HIGH TEMPERATURE IN THE OVEN.
USE LONG OVEN GLOVES AND MITTS TO HANDLE POTS AND TOOLS.
DO NOT PUT UNPROTECTED HANDS OR ARMS INSIDE WHILE OVEN IS LIGHTED.
USE ONLY SHOVELS TO MOVE FOOD INSIDE COOKING ROOM.
WARNING! HOT WHILE IN OPERATION.
KEEP CHILDREN, PETS CLOTHING AND FURNITURE AWAY.
CONTACT MAY CAUSE SKIN BURNS.
DO NOT BURN GARBAGE OR FLAMMABLE FLUIDS

Certificate Number: 255416-2516776 Project Number: 2516776 Page Number:74
INSTALLATION AND OPERATION MANUAL
MARANA FORNI srl unipersonale
via Turbina 98 37139 Chievo-Verona-Italia
tel. +39 045 6704503 - fax +39 045 7156118
www.maranaforni.it - info@maranaforni.it
Skype: maranaforni
VER
2.1
© Riproduzione vietata
PAG
13 / 27
CONTROLLER CONSOLE –SERIE ROTOFORNO SU&GIU®

Certificate Number: 255416-2516776 Project Number: 2516776 Page Number:74
INSTALLATION AND OPERATION MANUAL
MARANA FORNI srl unipersonale
via Turbina 98 37139 Chievo-Verona-Italia
tel. +39 045 6704503 - fax +39 045 7156118
www.maranaforni.it - info@maranaforni.it
Skype: maranaforni
VER
2.1
© Riproduzione vietata
PAG
14 / 27
1. TO SWITCH ON / OFF
With the green light indicating that the electricity supply is connected (lightning), press the
ON/OFF button for a moment; the display will light up indicating, after about ten seconds, the
temperature reading inside the oven (red light above the thermometer will be on); the rotation
speed of the plate will be that of “oven standby”.
To switch off the console, press the ON/OFF button for a few seconds until it switches off.
Use the “EMERGENCY” button only in case of necessity.
2. BASE LEVEL COOKING
Move the joystick down for a moment (towards the lit dot above the “clock” symbol); the
rotation speed of the plate will change to the optimal speed for cooking; the display will show
the cooking time remaining, with time being counted down; ten seconds before cooking is
finished, there will be a short warning sound indicating “cooking almost finished” and at the end
there will be three short sounds.
3. COOKING WITH THE PLATE AT THE 1ST LEVEL
Move the joystick lever to the left for a moment; the plate will rise to the first level and cooking
will take place as for the “BASE LEVEL COOKING”. When cooking is finished, the plate will
descend to the base level. For safety, the command will be refused if the temperature
registered inside the oven is less than 150°C.
4. COOKING WITH THE PLATE AT THE 2ND LEVEL
Move the joystick lever to the right for a moment. Everything will function as for cooking at the
1st level, but obviously at a higher level. When cooking is finished, the plate will descend to the
base level. For safety, the command will be refused if the temperature registered inside the
oven is less than 150°C.
5. TO PRE-HEAT THE PLATE
Move the joystick lever upwards for a moment; the plate will rise to the maximum height, and
rotation speed will be that during cooking, and for a pre-set time, at the end of which the plate
will descent to the base level.
For safety, the command will be refused in the temperature registered inside the oven is less
than 150°C.
6. TO IMMEDIATELY HALT COOKING IN PROGRESS
For all cooking methods or pre-heating the plate, keep the joystick pressed downwards for a
couple of seconds. Cooking or pre-heating will stop immediately, and the plate will descend to
the base (function RESET).
7. TO STOP ROTATION OF THE PLATE
Press the ON/OFF button for a moment; the plate will slow down and then stop. Pressing the
button again in the same way will cause the rotation to return to the normal speed again.

Certificate Number: 255416-2516776 Project Number: 2516776 Page Number:74
INSTALLATION AND OPERATION MANUAL
MARANA FORNI srl unipersonale
via Turbina 98 37139 Chievo-Verona-Italia
tel. +39 045 6704503 - fax +39 045 7156118
www.maranaforni.it - info@maranaforni.it
Skype: maranaforni
VER
2.1
© Riproduzione vietata
PAG
15 / 27
8. TO VARY THE COOKING TIME
During the “standby” phase, press the “SET” button for a moment; the green light near the clock
symbol will flash; duration of the cooking time will be shown on the display. The time can be
increased or decreased as desired by pushing the joystick (to the right or left); keep the SET
button pressed to confirm or wait for the automatic “exit”.
9. TO VARY THE ROTATION SPEED OF THE PLATE DURING COOKING
Briefly press the SET button twice (the green led with the entering hare will flash). With the joystick
towards + or –increase or decrease the revolutions per minute as desired. Exit from the
regulation mode by keeping the “SET” button pressed for a few seconds or wait for the
automatic exit.
10. TO VARY THE ROTATION SPEED OF THE PLATE DURING “EXTRACTION”
At the end of the cooking time, the extraction time begins. The rotation speed can be set by
pressing the “SET” button three times (the green led with the exiting hare will flash); use the
joystick to increase or decrease the revolutions/minute as desired.
Exit from the regulation mode by keeping the “SET” button pressed for a few seconds or wait
for the automatic exit.
11. TO CHANGE ROTATION DIRECTION OF THE PLATE
Switch off the control panel with the ON/OFF button, keeping the joystick lever pushed
towards the desired rotation direction (left or right). Switch on the control panel again with the
same button, releasing the lever after hearing a short sound.
12. TO CHANGE THE SOUND OF THE ACOUSTIC SIGNALS
Keeping the “SET” button pressed even after obtaining the desired sound, move the joystick
lever (towards the left or right) to modify the sound as desired; when the joystick is released,
the sound will be permanently memorised.
13. TO POSITION THE PLATE FOR MAINTENANCE
Switch off the control panel with the ON/OFF button, wait a few seconds, then switch on
again, keeping the joystick lever pushed upwards until all the horizontal lines appear on the
display.
At this point, rotation is blocked and with the joystick (pushed upwards), the plate can be
raised or lowered as desired, even if the temperature is below 150°C.
14. CONTROL VERSION OF PROGRAMME
For the first 5 seconds after switching on (with the ON/OFF button), the display shows which
release of the function programme version is being used: “r.07” = release 7.

Certificate Number: 255416-2516776 Project Number: 2516776 Page Number:74
INSTALLATION AND OPERATION MANUAL
MARANA FORNI srl unipersonale
via Turbina 98 37139 Chievo-Verona-Italia
tel. +39 045 6704503 - fax +39 045 7156118
www.maranaforni.it - info@maranaforni.it
Skype: maranaforni
VER
2.1
© Riproduzione vietata
PAG
16 / 27
In case cooking plate would block in the summit of cooking room and controller console doesn’t respond
to let down command, press hydraulic pump button “BY-PASS VALVE” as followed by
BOX MOTOR
RING IN BRASS
REDUCTION SHAFT
AXIAL BEARING 51205
DUST DISC PROTECION
OLEODINAMIC CILINDER
VALVE PARACHUTE
SUPPORTING HOTPLATE SHAFT
SUPPORT BEARING
REDUCTION ENGINE SUPPORT
PIVOT Ø14x44
ELECTRIC MATERIAL BOX
PUMP ENGINE
REDUCTION ENGINE
BEARING LEAD SHAFT
COMPRESSION SPRING
11
14
15
13
12
8
10
9
5
6
7
COMPONENT
2
3
4
N°
1
STEAL SPHERE Ø12
16
8
14
16
15
13
12
10
11
9
10
9
4
1
7
3
6
2
5

Certificate Number: 255416-2516776 Project Number: 2516776 Page Number:74
INSTALLATION AND OPERATION MANUAL
MARANA FORNI srl unipersonale
via Turbina 98 37139 Chievo-Verona-Italia
tel. +39 045 6704503 - fax +39 045 7156118
www.maranaforni.it - info@maranaforni.it
Skype: maranaforni
VER
2.1
© Riproduzione vietata
PAG
17 / 27
CONTROLLER CONSOLE –SERIE ROTOFORNO ®

Certificate Number: 255416-2516776 Project Number: 2516776 Page Number:74
INSTALLATION AND OPERATION MANUAL
MARANA FORNI srl unipersonale
via Turbina 98 37139 Chievo-Verona-Italia
tel. +39 045 6704503 - fax +39 045 7156118
www.maranaforni.it - info@maranaforni.it
Skype: maranaforni
VER
2.1
© Riproduzione vietata
PAG
18 / 27
1. TO SWITCH ON / OFF
With the green light indicating that the electricity supply is connected (lightning), press the
ON/OFF button for a moment; the display will light up indicating, after about ten seconds, the
temperature reading inside the oven (red light above the thermometer will be on); the rotation
speed of the plate will be that of “oven standby”.
To switch off the console, press the ON/OFF button for a few seconds until it switches off.
Use the “EMERGENCY” button only in case of necessity.
2. BASE LEVEL COOKING
Move the joystick down for a moment (towards the lit dot above the “clock” symbol); the
rotation speed of the plate will change to the optimal speed for cooking; the display will show
the cooking time remaining, with time being counted down; ten seconds before cooking is
finished, there will be a short warning sound indicating “cooking almost finished” and at the end
there will be three short sounds.
3. TO IMMEDIATELY HALT COOKING IN PROGRESS
For all cooking methods or pre-heating the plate, keep the joystick pressed downwards for a
couple of seconds. Cooking or pre-heating will stop immediately, and the plate will descend to
the base (function RESET).
4. TO STOP ROTATION OF THE PLATE
Press the ON/OFF button for a moment; the plate will slow down and then stop. Pressing the
button again in the same way will cause the rotation to return to the normal speed again.
5. TO VARY THE COOKING TIME
During the “standby” phase, press the “SET” button for a moment; the green light near the clock
symbol will flash; duration of the cooking time will be shown on the display. The time can be
increased or decreased as desired by pushing the joystick (to the right or left); keep the SET
button pressed to confirm or wait for the automatic “exit”.
6. TO VARY THE ROTATION SPEED OF THE PLATE DURING COOKING
Briefly press the SET button twice (the green led with the entering hare will flash). With the
joystick towards + or –increase or decrease the revolutions per minute as desired. Exit from the
regulation mode by keeping the “SET” button pressed for a few seconds or wait for the
automatic exit.
7. TO VARY THE ROTATION SPEED OF THE PLATE DURING “EXTRACTION”
At the end of the cooking time, the extraction time begins. The rotation speed can be set by
pressing the “SET” button three times (the green led with the exiting hare will flash); use the
joystick to increase or decrease the revolutions/minute as desired.
Exit from the regulation mode by keeping the “SET” button pressed for a few seconds or wait
for the automatic exit.

Certificate Number: 255416-2516776 Project Number: 2516776 Page Number:74
INSTALLATION AND OPERATION MANUAL
MARANA FORNI srl unipersonale
via Turbina 98 37139 Chievo-Verona-Italia
tel. +39 045 6704503 - fax +39 045 7156118
www.maranaforni.it - info@maranaforni.it
Skype: maranaforni
VER
2.1
© Riproduzione vietata
PAG
19 / 27
8. TO CHANGE ROTATION DIRECTION OF THE PLATE
Switch off the control panel with the ON/OFF button, keeping the joystick lever pushed
towards the desired rotation direction (left or right). Switch on the control panel again with the
same button, releasing the lever after hearing a short sound.
9. TO CHANGE THE SOUND OF THE ACOUSTIC SIGNALS
Keeping the “SET” button pressed even after obtaining the desired sound, move the joystick
lever (towards the left or right) to modify the sound as desired; when the joystick is released,
the sound will be permanently memorised.
10. CONTROL VERSION OF PROGRAMME
For the first 5 seconds after switching on (with the ON/OFF button), the display shows which
release of the function programme version is being used: “r.07” = release 7.

Certificate Number: 255416-2516776 Project Number: 2516776 Page Number:74
INSTALLATION AND OPERATION MANUAL
MARANA FORNI srl unipersonale
via Turbina 98 37139 Chievo-Verona-Italia
tel. +39 045 6704503 - fax +39 045 7156118
www.maranaforni.it - info@maranaforni.it
Skype: maranaforni
VER
2.1
© Riproduzione vietata
PAG
20 / 27
CONTROLLER CONSOLE –GAS BURNER
1. Power indicator LED.
2. Baking Burner LED.
3. Power switch to start/increase the baking burner.
4. Power switch to turn off/down the baking burner.
5. Turbo burner function LED.
LED off: Burner turned off.
LED on: burner in manual mode.
LED with flashing light: Burner in automatic mode.
6. LED on: Turbo burner locked. LED off: Normal mode.
7. LED for oven light on.
8. Programme button/light turned on (if there is a bulb).
9. Turbo burner on/off or in manual/automatic mode.
10. Flashing LED light: Master ignition switched off.
11. Master ignition to indicate if burners are on/off.
12. LED on: Start burners.
13. LED on: turbo burner locked. LED off: neutral.
This manual suits for next models
36
Table of contents
Other MARANA Forni Oven manuals
Popular Oven manuals by other brands

Welbilt
Welbilt 32Z9000 Service guide

H.Koenig
H.Koenig fo42 instruction manual

KICK ASS
KICK ASS KATRAVEL012 user guide

Range Master
Range Master KITCHENER U109720 - 01 Installation and user guide

EUROPRO
EUROPRO TO1612 owner's manual

StoneAge
StoneAge Vecchio Pizza Oven SA VPO-34 Installation and operation instructions