IMPORTANT SAFETY INSTRUCTIONS
READ BEFORE OPERATING EQUIPMENT
This product was designed and manufactured to meet strict
quality and safety standards. There are, however, some
installation and operation precautions which you should be
particularly aware of.
• Do not allow the power cable to become caught between the
panels and the component, as doing so can cause fire or
electric shock.
• Do not install the panels to a component other than those
indicated, as doing so can cause malfunction or fire.
• Be sure to unplug the power cable of the component before
installing the panels. Failure to do so can cause fire or electric
shock.
• Do not use this product for any other purpose.
• Do not install the side panel in a location that is exposed to
direct sunlight or is unusually hot (near a heater, etc.). Doing so
may cause the side panel to become discolored or deformed.
• Be careful not to damage the rack etc, when installing the side
panel.
• Be sufficiently careful not to trap your hand or another object
when installing the side panel.
•
If dirt or the like gets on the side panel, wipe it off immediately.
• To remove stubborn dirt, wipe it off using a cloth dampened
with mild detergent diluted with water and then wipe the side
panel using a dry cloth.
• Do not use benzine or thinners. Doing so may damage the
exterior surface.
• If a sticker or tape is stuck on the side panel, the paint may be
pealed off the surface when the sticker or tape is removed.
ENGLISH
Thank you for choosing the Marantz product.
These are wood panels that are to be installed onto the sides of
your Marantz component.
Installing this product will give your component a higher quality
look.
Read this user guide before installation to install the product
correctly.
This product can only be installed onto the
following models.
• WS0901
• Integrated Amplifier: PM5003
• CD Player: CD5003
• Super Audio CD Player: SA7003, SA8003
• Tuner: ST6003
• WS1101
• Integrated Amplifier: PM7003, PM8003
7Accessories check
Before use, check the below accessories were included in the
package.
• Left side panel .........................................................................1
• Right side panel ......................................................................1
• Aluminum bushings ................................................................6
• User guide ...............................................................................1
7INSTALLATION PROCEDURE
Use the procedure below to install the side panels onto your component.
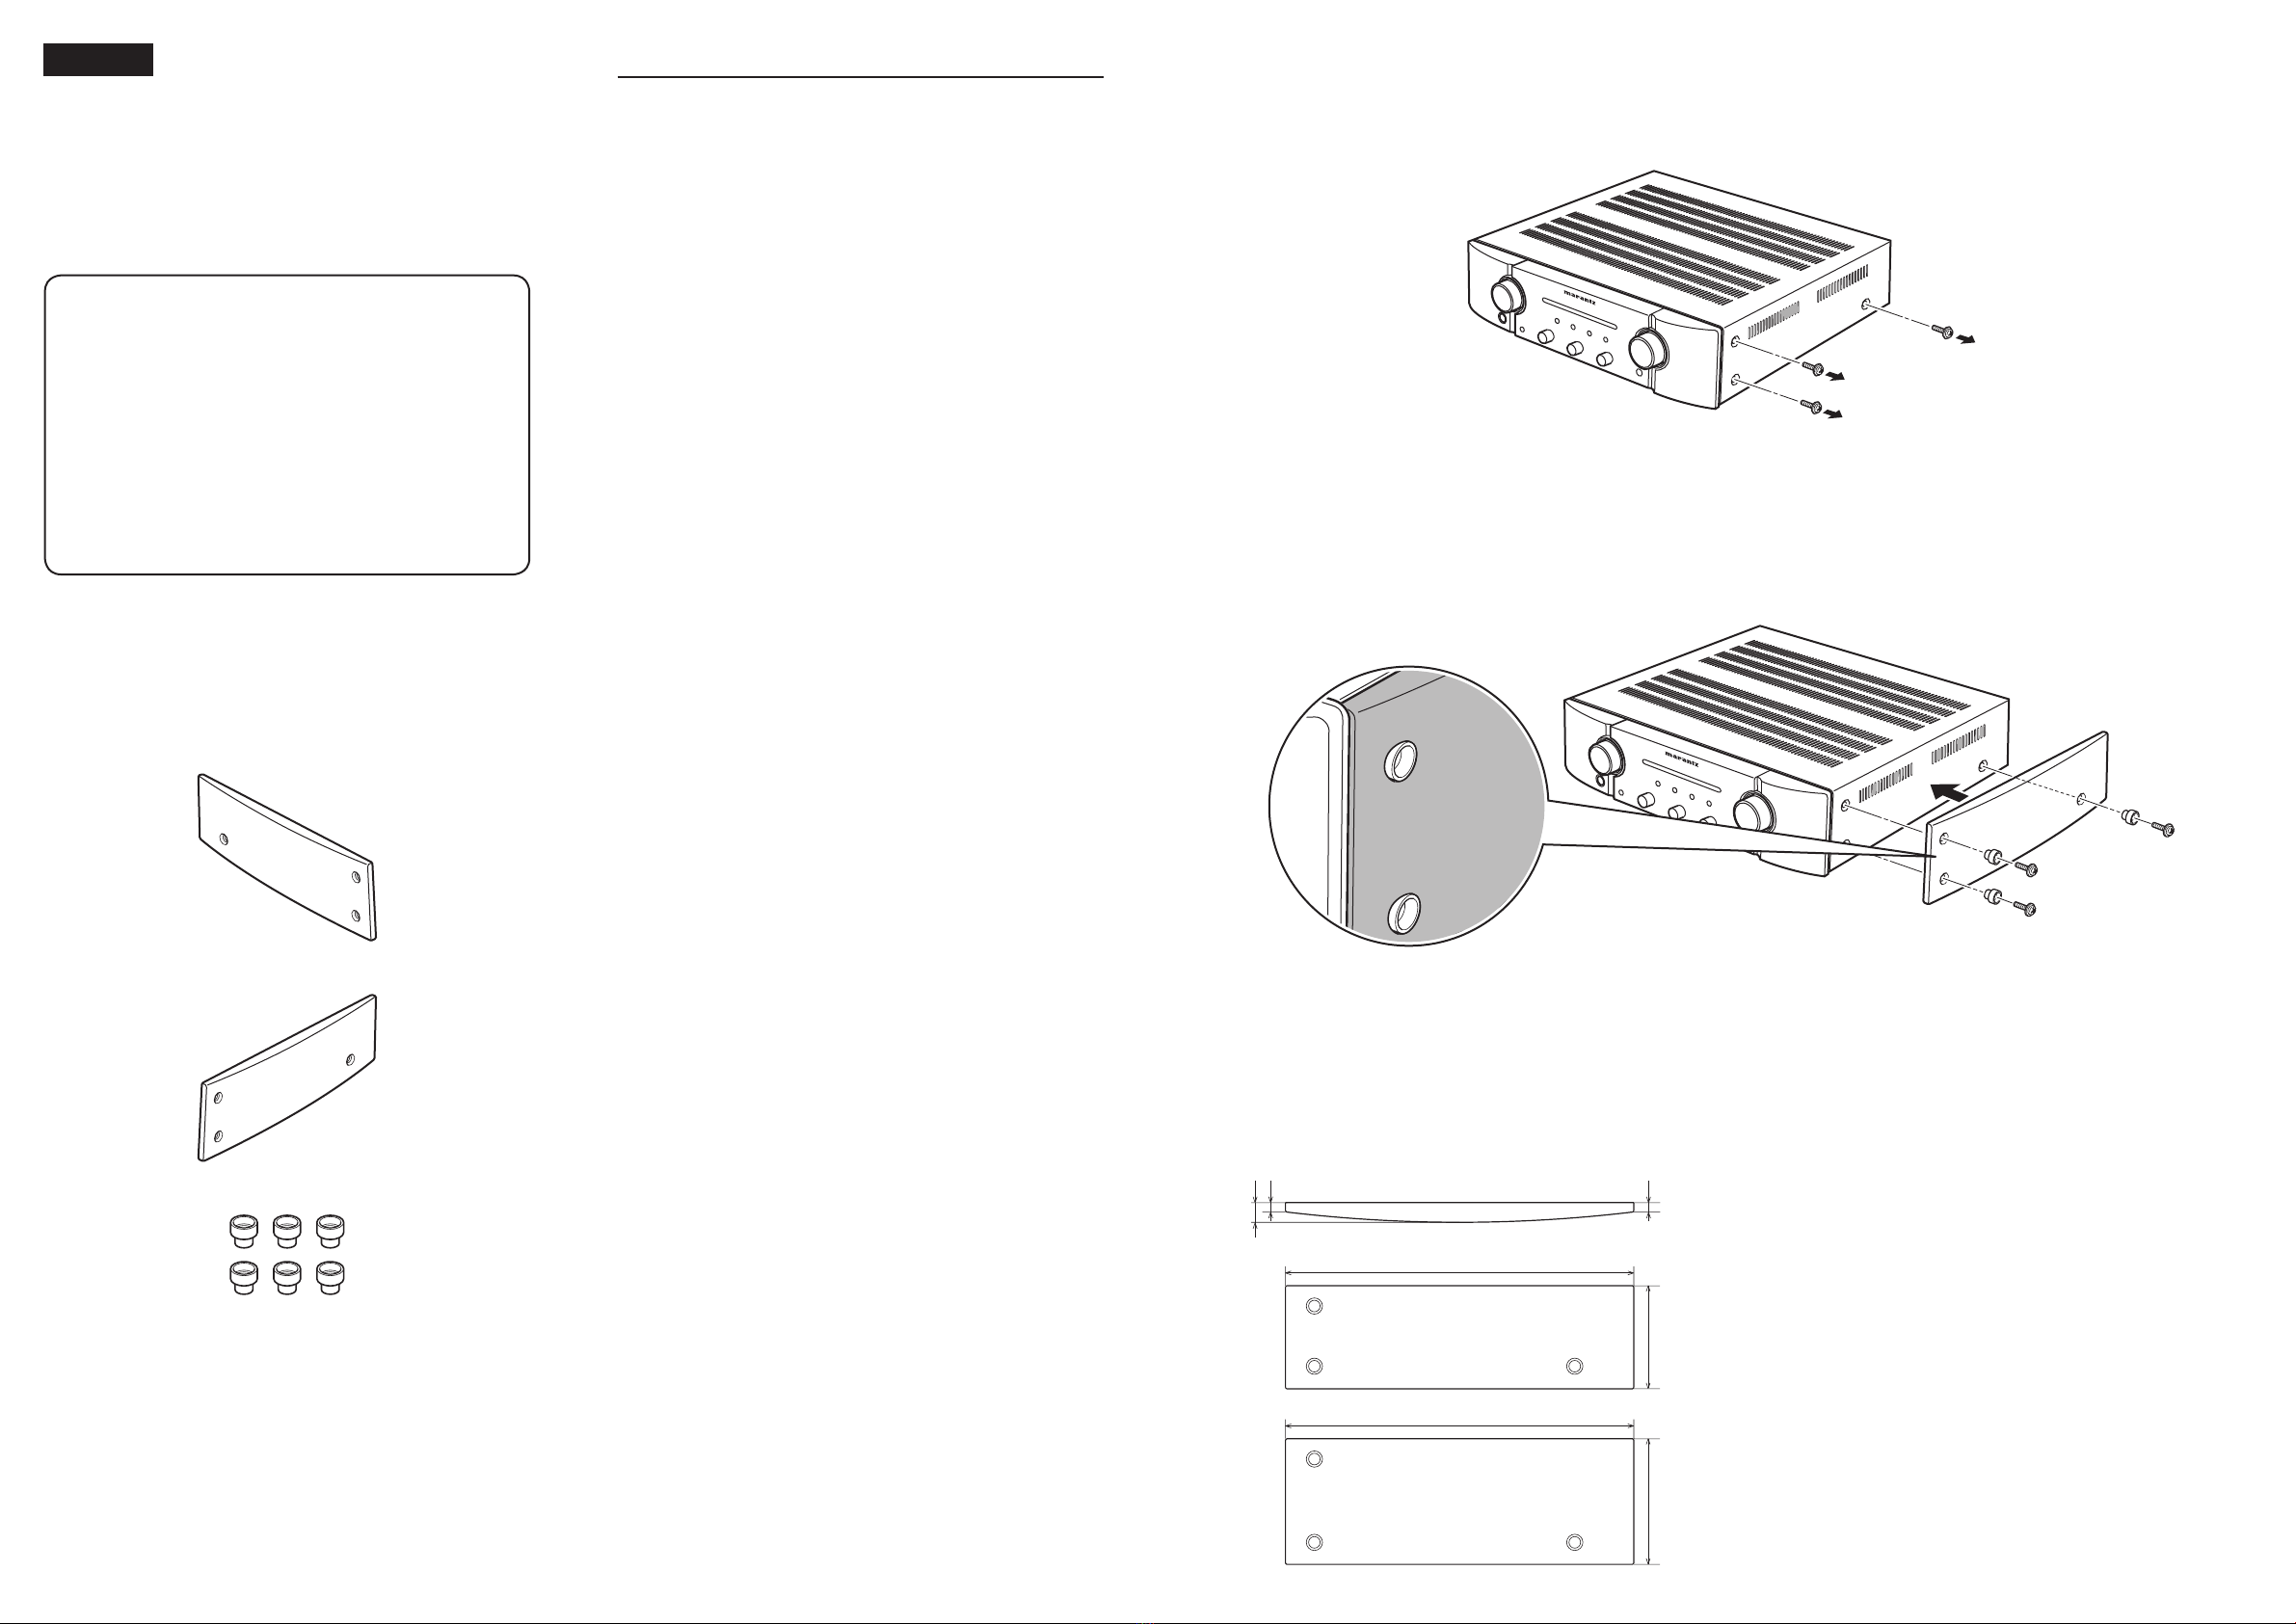
1. Unplug the power cable of the component from the electrical outlet.
2. Remove the 3 screws from right side of the component.
CAUTION:
• Never remove the screws on the rear of the component, as the top cover can come off, possibly resulting in fire or electric shock.
• Never remove the screws on the left side of the component while the right side of the component is removed, as the top cover can come off, possibly
resulting in fire or electric shock.
3. Install 3 of the supplied aluminum bushings to the right panel.
Next, use the screws removed in Step 2 and install the right panel onto the right side of the component.
The aluminum bushings will protrude
a bit from the panel.
CAUTION:
• Be careful not to lose any of the screws. If a screw becomes lost, contact your Marantz retailer. Use of incorrect screws can cause fire or electric shock.
• When installing the panels, be sure to use the screws removed from the component.
4. The right panel is installed.
Repeat these steps to install the left panel onto the left side of the component.
7DIMENSIONAL DIAGRAM (mm)
301
301
17
8
108.5 89 8
WS901
WS1101
WS0901-WS1101FE.indd2WS0901-WS1101FE.indd2 09.3.271:03:46PM09.3.271:03:46PM


