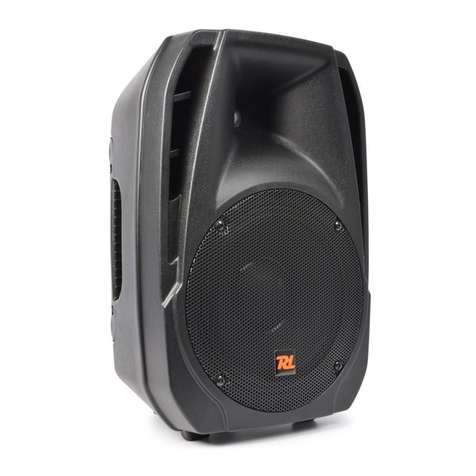
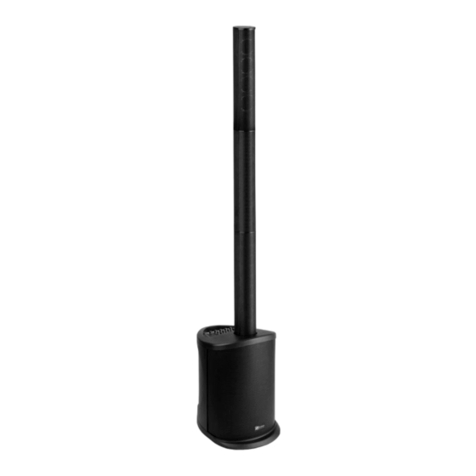
Mark MB 10 PRO A DSP MKII User manual

MB 10 PRO A DSP MKII
MB 12 PRO A DSP MKII
MB 15 PRO A DSP MKII
User Manual – Version 1.0

1
SAFETY INSTRUCTIONS
1. Read the instructions of this manual.
2. Keep these instructions in a safety place.
3. Heed and follow all warnings and instructions.
4. Please, respect your country safety regulations.
5. Don’t use this device close to the water or high humidity places. Clean only with dry cloth.
6. Don’t install near any heat sources such as radiators, heat registers, stoves, or other apparatus that
produce heat. Make certain that the equipment is always installed so that is cooled and can’t overheat.
7. Don’t block any ventilation openings. Install in accordance with the manufacturer’s instructions.
8. Protect the power cord from being walked on or pinched, particularly at plugs, convenience
receptacles, and the point where they exit from the apparatus.
9. Only use attachments/accessories specified by MARK.
10. Unplug this device during lightning storms or when unused for long periods of time.
11. The technical service is required when the device has been damaged in any way, such as power
supply cord or plug is damaged, liquid has been spilled or objects have fallen into the device, doesn’t
operate normally or has been dropped.
12. To completely disconnect this apparatus from the AC mains, disconnect the power supply cord
plug from the AC receptacle.
13. The mains plug of the power supply cord shall remain readily operable.
14. WARNING – to reduce the risk of fire or electric shock, don’t expose this device to rain or humidity.
15. Don’t expose this equipment to dripping or splashing and ensure that no objects filled with liquids,
such as vases, are placed on the equipment.

2
OVERVIEW
This new self-powered loudspeaker series incorporates a DSP with 4 preset equalizations depending on the use and place
where they are going to be used.
In addition, it incorporates one more selectable mode depending on the placement of the loudspeaker: in normal position
or acting as a monitor.
Regardless of preset equalizations, all parameters are configurable thanks to the built-in encoder and the LCD screen that
shows all these functions and their values (only MB 12 & MB 15). In this way we can modify the values of 3 equalizer tones,
the subwoofer cutoff frequency (if we wish it to act as such), the delay value and the activation of the Bluetooth mode.
We can also control the brightness and contrast of the LCD screen or turn it off completely (only MB 12 & MB 15).
It has 2 selectable MIC/LINE inputs with its own volume control and an additional one for connection of external devices
such as MP3 players.
The loudspeakers are made of high resistance plastic and metal grille. It has a handle with great firmness on the side, top
and bottom, making transportation comfortable.
Technical Data:
MB 10 PRO A DSP MKII
MB 12 PRO A DSP MKII
MB 15 PRO A DSP MKII
Woofer Diameter
10”
12”
15”
Coil diameter
2”
3”
3”
Tweeter
34 mm
34 mm
44 mm
Amplifier type
Class D
Class D
Class D
Handling power
300W
350W + 70W
450W + 70W
Frequency response
58 Hz – 20 kHz
50 Hz – 20 kHz
38 Hz – 20 kHz
Sensitivity
94 dB
97 dB
98 dB
Max. SPL
118 dB
123 dB
125 dB
Functions
4 DSP presets, Bluetooth & TWS
Dimensions
500 x 303 x 310 mm
590 x 360 x 340 mm
690 x 395 x 390 mm
Weight
11,6 kg
17,2 kg
21,5 kg
Features:
- Self-powered loudspeakers with DSP, Bluetooth & TWS.
- 4 equalization presets.
- Configuration of values through encoder and large LCD screen (only MB 12 & MB 15).
- Setting of 3 tone controls and Delay (only MB 12 & MB 15).
- Cutoff frequency setting when operating as a subwoofer (only MB 12 & MB 15).
- Brightness, contrast, and LCD dimmer settings (only MB 12 & MB 15).
- 2 selectable MIC / LINE inputs + 1 additional LINE (only MB 12 & MB 15) / 1 selectable MIC / LINE inputs + 1 additional
LINE (only MB 10).
- Handles of great resistance in lateral and upper and lower sides.
- Switch power supply.

3
CONTROLS & FUNCTIONS
MB 10
MB 12 / MB 15
1. MIC 1 / LINE 1 (Combo connector for MB 12 & 15) (Jack ¼” & XLR3 for MB 10)
When LINE / MIC switch work at mic status, this input is used to plug in microphone cable to get signal
from dynamic microphone; When line / Mic switch work at line status, this input is used to plug in audio
cable to get signal from CD player or other devices.
2. MIC/ LINE switch
Press this switch down to make the combo connector works at mic input status.
Press this switch up to make the combo connector works at line input status.

4
3. CH1 - LINE/MIC VOL
This knob is used to adjust the volume of channel 1.
4. MIC 2 / LINE 2 (Combo connector for MB 12 & 15) (RCA & XLR3 for MB 10)
When LINE / MIC switch works at mic status, this input is used to plug in microphone cable to get signal
from dynamic microphone; When line / Mic switch works at line status, this input is used to plug in
audio cable to get signal from CD player or other devices.
5. MIC / LINE switch (Only for MB 12 & MB 15)
Press this switch down to make the combo connector works at mic input status.
Press this switch up to make the combo connector works at line input status.
6. CH2 – LINE VOL
This knob is used to adjust the volume of channel 2.
7. CD/MP3 IN (Only for MB 12 & MB 15)
This is a 3.5mm jack input, which is used to get signal from mobile phone or other devices.
8. Line out
This input is used to send the master signal to another active loudspeaker.
9. Function (Only for MB 12 & MB 15)
This is DSP process controller, with this function encoder, you can choose the DSP modes and several
functions configuration.
In MB 10, press the button marked as DSP to select the four different equalization presets. The green
LED together the name will light.
10. DSP display (Only for MB 12 & MB 15)
This is the display for DSP processor.
11. BT indicator
This is indicator for Bluetooth function, when the Bluetooth is available, it will be illuminated.
Bluetooth name: ATWS-BT
12. TWS indicator
When the bluetooth between two active loudspeakers is linked together, it will be illuminated.
Therefore, two active loudspeakers can be linked by bluetooth, for example, the signal from one MB
to another MB is sent by Bluetooth, not by link cables.

5
13. Power switch
Turn on / off the device
14. AC Socket
Plug in power cable to get AC power supply from 100V to 240V
DSP & FUNCTIONS SETUP OPERATION (Only for MB 12 & MB 15)
Turn the encoder (9) to navigate between menu and press it to select. Once selected, turn the encoder
again to select the desired value and press again to confirm.
MASTER
General Master
-60dB to +10 dB
MODE
DSP presets
MUSIC
FLAT
SPEECH
LOCATION
Loudspeaker position
NORMAL
MONITOR
TREBLE
Treble
-12dB to +12 dB
MIDDLE
Middle
-12dB to +12 dB
BASS
Bass
-12dB to +12 dB
SUB
Subwoofer use
ON/OFF
DELAY
Delay value
OFF/ 0.1 mS to 16 mS
BLUETOOTH
Bluetooth function
OFF/TWS/ON
LCD DIM
LCD turn on or off
ON/OFF
BRIGHT
LCD bright
0-10
CONTRAST
LCD contrast
0-10
RESET
General reset
INFO
Firmware information
EXIT
Press to exit of setup
BLUETOOTH operation
Select the BLUETOOTH function to ON and check in the smartphone the device name (ATWS-BT) and
link both devices.

6
TROUBLESHOOTING
This short guide is meant to help and try to solve simple problems. If they continue and the device
cannot operate, please, don’t try to repair it by yourself, return the device to your MARK dealer.
If a problem occurs, carry out the following steps in sequence until find the problem solved.
1- If the device does not operate properly, unplug the device.
2- Check the fuse, power from the wall, all cable, etc.
3- If all the above appears to be OK, plug the unit in again.
4- If you are unable to determine the cause of the problem, do not open the device, as this may
damage the unit and the warranty will become void.
5- Return the device to your MARK dealer.

7
INDICACIONES DE SEGURIDAD
1. Lea detenidamente las siguientes instrucciones y preste atención a éstas.
2. Guarde en un lugar seco y seguro este manual.
3. Siga una a una todas las instrucciones.
4. Respete las instrucciones de seguridad de su país cuando instale este dispositivo.
5. No use este dispositivo cerca del agua o zonas altamente húmedas. A la hora de limpiarlo, utilice un
paño seco.
6. No instale el dispositivo cerca de ninguna fuente de calor o fuego tales como calefactores, estufas o
incluso amplificadores que produzcan calor. Asegúrese de que una vez instalado el dispositivo, esté
en un lugar fresco y seco.
7. No obstruya ninguna de las salidas. Cuando instale el dispositivo hágalo tal y como lo indican estas
instrucciones.
8. Proteja el cable de alimentación para no ser pisado o manipulado, particularmente en los conectores
(mural y de entrada a la unidad).
9. Utilice únicamente accesorios especificados por MARK.
10. Desconecte el dispositivo si no va a ser utilizado durante largos periodos de tiempo.
11. El dispositivo será reparado por el servicio técnico oficial cuando esté dañado, el cable esté
deteriorado o el conector estropeado, así como si el dispositivo ha entrado en contacto con líquidos o
no opera correctamente.
12. Para desconectar totalmente la unidad de la red eléctrica principal, desconecte el cable de la toma
mural. eléctrica.
13. El conector principal debe poder conectarse y desconectarse de la red eléctrica de manera fácil.
14. ATENCIÓN. Para reducir el riesgo de fuego o shock eléctrico, no exponga este dispositivo bajo la
lluvia o la humedad.
15. No exponga este equipo a líquidos, ni salpicaduras, así como su ubicación cerca de recipientes o
posibles fuentes con líquidos.

8
DESCRIPCIÓN GENERAL
Esta nueva serie de cajas acústicas autoamplificadas incorpora un DSP con 4 ecualizaciones prestablecidas dependiendo
del uso y recinto donde vayan a ser utilizadas.
Además, incorpora un modo más dependiendo de la colocación de la caja acústica: en posición normal o actuando como
monitor.
Independiente de las ecualizaciones preestablecidas, todos los parámetros son configurables gracias al encoder
incorporado y la pantalla LCD muestra todas estas funciones y sus valores (sólo MB 12 y MB 15). De esta forma podemos
modificar los valores de 3 tonos de ecualización, la frecuencia de corte de subwoofer (si deseamos que actúe como tal), el
valor de delay y la activación del modo Bluetooth.
Asimismo, podemos controlar el brillo y contraste de la pantalla LCD o apagarla completamente (sólo MB 12 y MB 15).
Dispone de 2 entradas MIC/LINE seleccionables con su propio control de volumen y otra adicional para el conexionado de
dispositivos externos como reproductores MP3.
Ambas cajas acústicas están fabricadas en plástico de alta resistencia y rejilla metálica. Dispone de asa de gran firmeza en
el lateral y en las parte superior e inferior, haciendo que el transporte sea cómodo.
Datos Técnicos:
MB 10 PRO A DSP MKII
MB 12 PRO A DSP MKII
MB 15 PRO A DSP MKII
Diámetro del altavoz
10”
12”
15”
Diámetro de la bobina
2”
3”
3”
Tweeter
34 mm
34 mm
44 mm
Tipo de amplificador
Clase D
Clase D
Clase D
Potencia soportada
300W
350W + 70W
450W + 70W
Respuesta en frecuencia
58 Hz – 20 kHz
50 Hz – 20 kHz
38 Hz – 20 kHz
Sensibilidad
94 dB
97 dB
98 dB
Max. SPL
118 dB
123 dB
125 dB
Funciones
4 presets DSP, Bluetooth y TWS
Dimensiones
500 x 303 x 310 mm
590 x 360 x 340 mm
690 x 395 x 390 mm
Peso
11,6 kg
17,2 kg
21,5 kg
Características:
- Sistema de cajas acústicas autoamplificadas con DSP.
- 4 presets de ecualización.
- Configuración de valores mediante encoder y pantalla LCD de grandes dimensiones (sólo MB 12 y MB 15).
- Ajuste de 3 controles de tono y Delay (sólo MB 12 y MB 15).
- Configuración de frecuencia de corte al funcionar como subwoofer (sólo MB 12 y MB 15).
- Ajustes de brillo, contraste y dimmer de la pantalla (sólo MB 12 y MB 15).
- 2 entradas MIC/LINE seleccionables + 1 LINE adicional (sólo MB 12 y MB 15). 1 MIC/LINE seleccionable + 1 LINE
(sólo MB 10).
- Asas de gran resistencia en lateral y partes superior e inferior.
- Fuente de alimentación conmutada.

9
CONTROLES Y FUNCIONES
MB 10
MB 12 / MB 15
1. MIC 1 / LINE 1 (conector Combo para MCB 12 y MB 15), (Jack ¼” y XLR3 para MB 10)
Cuando el interruptor LINE / MIC funciona en la posición MIC, esta entrada se usa para conectar el cable
del micrófono para obtener la señal del micrófono dinámico; En la posición LINE, esta entrada se usa
para conectar el cable de audio para obtener la señal del reproductor de CD u otros dispositivos
2. Interruptor MIC / LINE
Presione este interruptor para que el conector combo funcione en el estado de entrada del micrófono.
Libere este interruptor para que el conector combo funcione en el estado de entrada de línea.

10
3. CH1 VOL
Este mando se utiliza para ajustar el volumen del canal 1
4. MIC 2 / LINE 2 (conector Combo para MCB 12 y MB 15), (RCA y XLR3 para MB 10)
Cuando el interruptor LINE / MIC funciona en la posición MIC, esta entrada se usa para conectar el cable
del micrófono para obtener la señal del micrófono dinámico; En la posición LINE, esta entrada se usa
para conectar el cable de audio para obtener la señal del reproductor de CD u otros dispositivos
5. Interruptor MIC / LINE (Sólo para MB 12 y MB 15)
Presione este interruptor hacia abajo para que el conector combo funcione en el estado de entrada del
micrófono
Presione este interruptor hacia arriba para que el conector combo funcione en el estado de entrada de
línea
6. CH2 VOL
Este mando se utiliza para ajustar el volumen del canal 2
7. CD / MP3 IN (Sólo para MB 12 y MB 15)
Esta es una entrada de jack de 3,5 mm, que se utiliza para conectar la señal de un smartphone o
dispositivo similar.
En MB 10, presione el botón marcado como DSP para seleccionar los 4 presets diferentes de
ecualización. El LED verde junto a cada nombre se encenderá.
8. Line out
Esta entrada se utiliza para enviar la señal master a otro altavoz activo.
9. Function (Sólo para MB 12 y MB 15)
Este es el controlador de procesador DSP, con este encoder puede elegir los modos DSP y la
configuración de varias funciones.
10. Pantalla DSP
Esta es la pantalla para el procesador DSP.
11. indicador de BT
Este es el indicador de la función Bluetooth, cuando el Bluetooth está disponible, se iluminará.
Nombre de Bluetooth: ATWS-BT
12. indicador TWS
Cuando el bluetooth entre dos altavoces activos esté conectado, se iluminará. Por lo tanto, dos
altavoces activos pueden vincularse por bluetooth, por ejemplo, la señal de un MBP 12 A PRO a otro
MBP 12 A PRO o un MB15 A PRO se envía por bluetooth, no por cables de enlace.

11
13. Interruptor
Enciende/ apaga el dispositivo
14. Toma AC
Conecte el cable a una toma adecuada de alimentación de 100V a 240V
DSP y CONFIGURACIÓN DE FUNCIONES (Sólo para MB 12 y MB 15)
Gire el encoder (9) para navegar entre los menús y púlselo para seleccionar. Una vez seleccionado, gire
el codificador nuevamente para seleccionar el valor deseado y presione nuevamente para confirmar.
MASTER
Master general
-60dB a +10 dB
MODE
Presets DSP
MUSIC
FLAT
SPEECH
LOCATION
Posición del altavoz
NORMAL
MONITOR
TREBLE
Agudos
-12dB a +12 dB
MIDDLE
Medios
-12dB a +12 dB
BASS
Bajos
-12dB a +12 dB
SUB
Uso como subwoofer
ON/OFF
DELAY
Valor Delay
OFF/ 0.1 mS a 16 mS
BLUETOOTH
Función Bluetooth
OFF/TWS/ON
LCD DIM
Pantalla LCD on/off
ON/OFF
BRIGHT
Brillo pantalla
0-10
CONTRAST
Contraste pantalla
0-10
RESET
Reset general
INFO
Info. Firmware
EXIT
Presionar para salir
Funcionamiento BLUETOOTH
Seleccione la función BLUETOOTH en ON, verifique en el smartphone el nombre del dispositivo (ATWS-
BT) y vincule ambos dispositivos.

12
POSIBLES PROBLEMAS Y SOLUCIÓN
Esta guía pretende ayudar a resolver problemas simples y comunes que pueden aparecer en el uso del
dispositivo. Si los problemas persisten, no intente abrir y reparar la unidad por sí solo, contacte con su
distribuidor más cercano y devuélvalo para su reparación.
Si el dispositivo tiene un problema, siga los siguientes puntos hasta que lo encuentre y pueda
solucionarlo.
1- Si el dispositivo presenta un mal funcionamiento, apáguelo y desenchúfelo de la red eléctrica.
2- Verifique que el fusible no esté fundido y que el resto de los cables de alimentación no estén
deteriorados o presenten un mal uso.
3- Si todo parece estar correcto, vuelva a enchufarla.
4- Si no puede determinar la causa del malfuncionamiento del aparato, no intente desmontar la
unidad y arreglarla ya que puede agravar el problema además de eliminar la garantía.
5- Devuelva el dispositivo a su distribuidor MARK más cercano.

13
This manual suits for next models
2
Table of contents
Languages:
Other Mark Speakers manuals
Mark
Mark MBD 415 A USB User manual
Mark
Mark MBS 85A USB User manual
Mark
Mark MBS 82A USB User manual
Mark
Mark Descom MBS COMBO 500 User manual
Mark
Mark MBS Series User manual

Mark
Mark MAM 100 TROLLEY User manual
Mark
Mark MP 12- AM User manual
Mark
Mark MBS 6215 User manual
Mark
Mark ER 415 BT User manual
Mark
Mark COMBO 700 User manual

