Marport Seine User manual

Seine Sensors
Service Manual


Contents | ii
Contents
Legal.................................................................................................4
History...........................................................................................................................................................................4
Copyright......................................................................................................................................................................6
Disclaimer....................................................................................................................................................................6
Introduction and Presentation..........................................................7
Introduction................................................................................................................................................................ 7
Applications.................................................................................................................................................................8
Safety Guidelines.................................................................................................................................................... 10
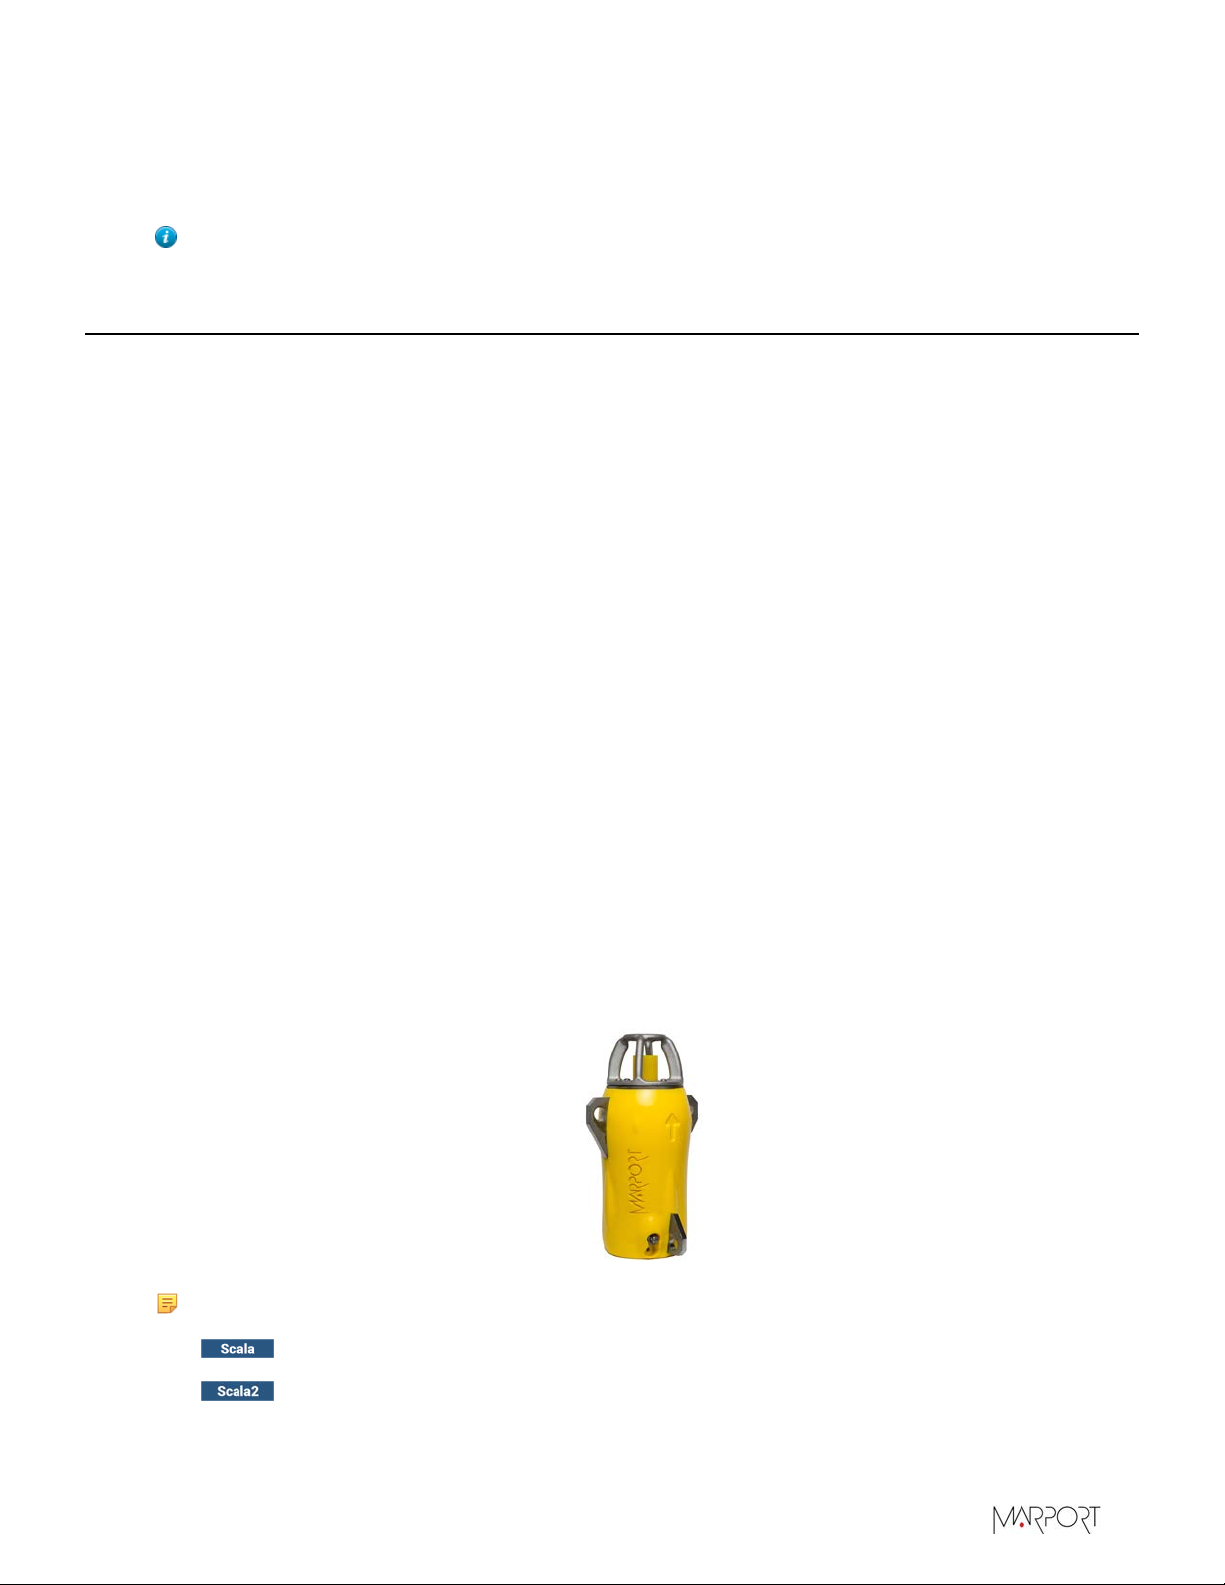
Description................................................................................................................................................................. 11
Firmware.........................................................................................................................................................11
Technical Specifications........................................................................................................................... 11
Main Parts.....................................................................................................................................................14
Installation Steps....................................................................................................................................................15
Sensor Configuration...................................................................... 16
Installing Mosa2..................................................................................................................................................... 16
Connecting the Sensor to Mosa2......................................................................................................................17
Seine Explorer Specific Settings.......................................................................................................................19
Sounding Modes..........................................................................................................................................19
Configuring the Uplink, Up (Side) and Down Settings...............................................................20
Uplink................................................................................................................................................. 20
Up/Down Soundings......................................................................................................................21
Target Strength...............................................................................................................................23
About Time Variable Gain...................................................................................................................... 24
Configuring the Noise Floor..................................................................................................................25
Calibrating the Sensor for Target Strength Value........................................................................ 26
Setting Up the Installation........................................................................................................26
Calibrating the Sensor in Mosa2............................................................................................. 27
Canceling the Ringing..............................................................................................................................30
Configuring Seine Sensor Telegrams..............................................................................................................33
Depth...............................................................................................................................................................33
Height............................................................................................................................................................. 34
Temperature.................................................................................................................................................34
Down Sounding...........................................................................................................................................35
Configuring the Uplink Power..........................................................................................................................36
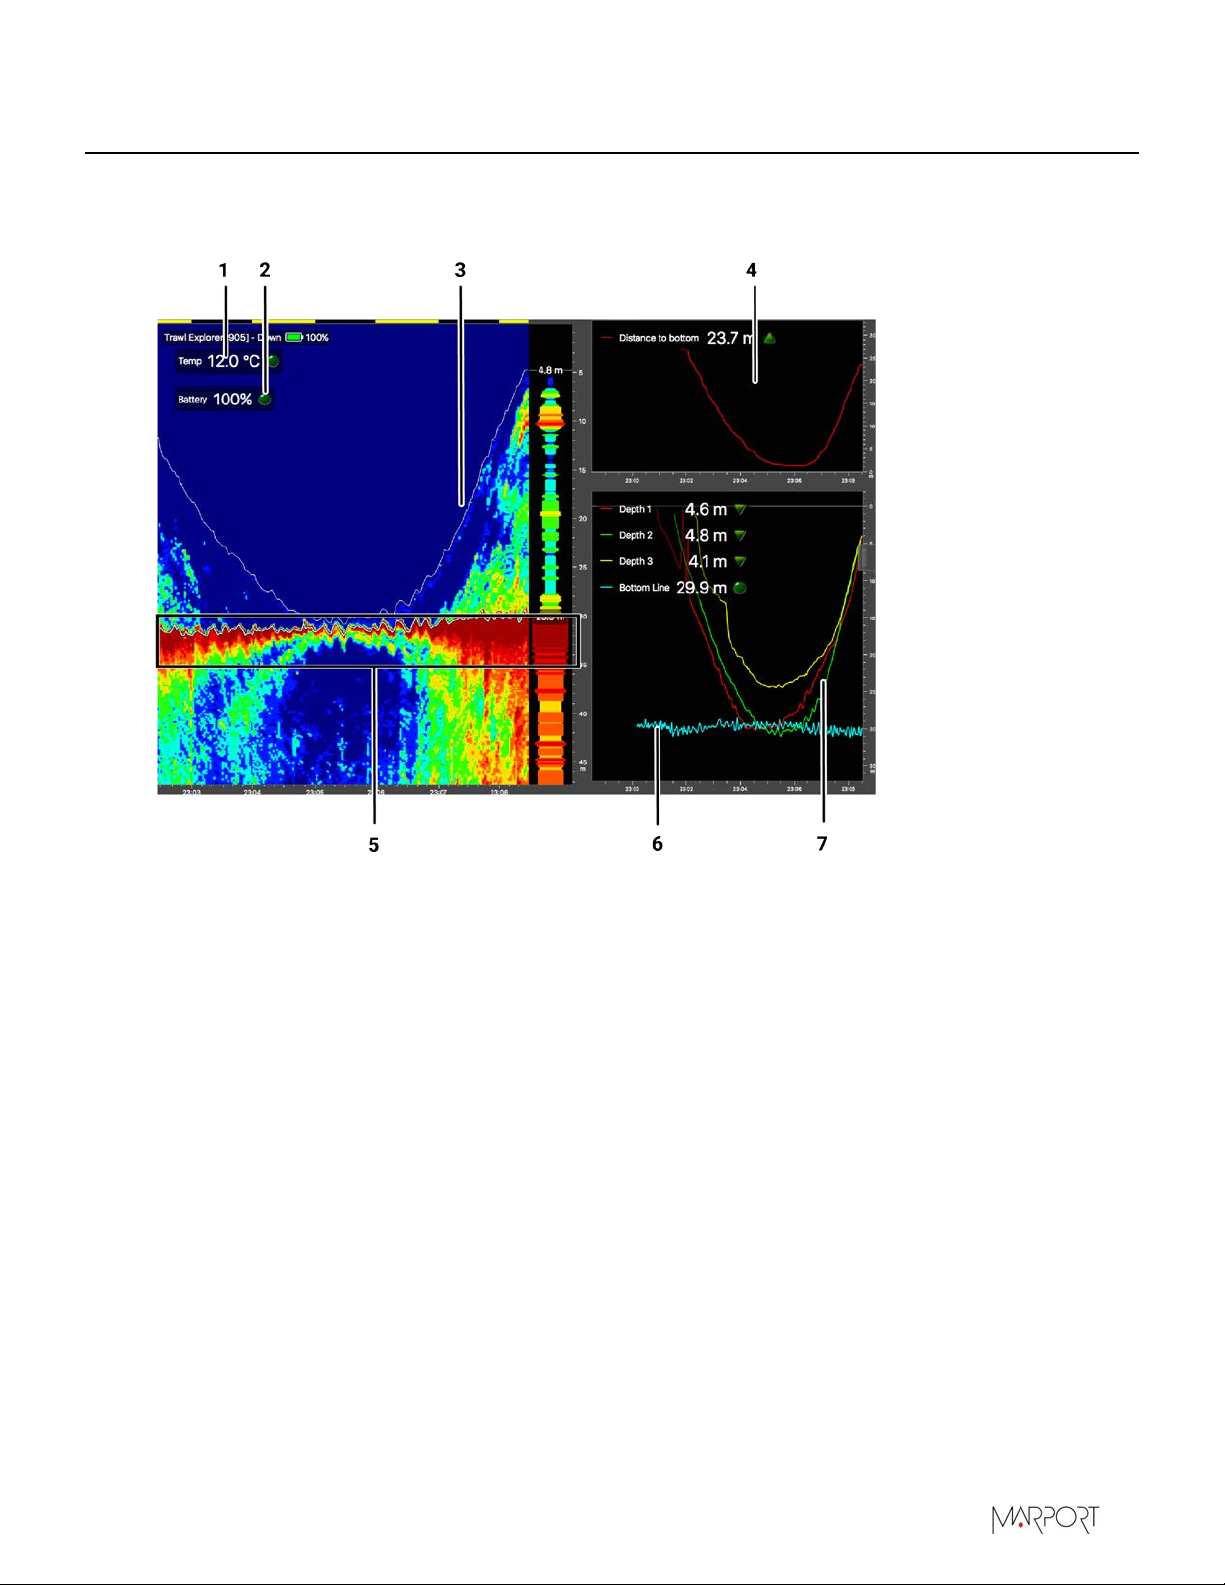
Testing Measures....................................................................................................................................................37
Updating the Sensor............................................................................................................................................. 38
Downloading the Firmware................................................................................................................... 38
Updating the Sensor.................................................................................................................................39
Exporting Sensor Configuration Settings for Record Keeping.............................................................40
Exporting Sensor Configuration Settings for the Receiver.................................................................... 41

Contents | iii
System Configuration and Display..................................................43
Adding the Sensor to the Receiver..................................................................................................................43
Defining the Trawl Gear Type..............................................................................................................43
Adding the Sensor with a Configuration File.................................................................................44
Adding the Sensor Manually.................................................................................................................46
Adding the Sensor to the Receiver.........................................................................................46
Configuring the Sensor Settings..............................................................................................47
Configuring Data Display on Scala/Scala2...................................................................................................50
Installation..................................................................................... 57
Installing the Seine Sensor on a Purse Seine............................................................................................. 57
Maintenance and Troubleshooting................................................. 60
Interference Check................................................................................................................................................ 60
Spectrum Analyzer Display................................................................................................... 60
Checking Noise Interference..................................................................................................61
Checking Noise Interference.................................................................................................62
Charging the Sensor............................................................................................................................................. 65
Cleaning the Sensor..............................................................................................................................................66
Maintenance Checklist.........................................................................................................................................67
Troubleshooting......................................................................................................................................................68
Firmware downloaded on DealerWeb cannot be read by Mosa2............................................ 68
Mosa2 does not open due to error message...................................................................................68
Adding a Sensor to M2 Receiver......................................................................................................... 68
Sensor cannot connect in wireless connection..............................................................................69
Sensor does not connect correctly with Mosa2 when using the Configuration
Cable..........................................................................................................................................................69
Echogram is fixed and blue...................................................................................................................70
Data in Scala/Scala2 is wrong...............................................................................................................71
Support Contact...................................................................................................................................................... 72
Appendix......................................................................................... 73
Frequency Plan........................................................................................................................................................73
Index.................................................................................................................78

Seine Sensors | V7 | Legal
Legal
History
V1 03/09/18 First release
V2 07/06/18
• New troubleshooting topic: Sensor cannot connect in
wireless connection on page 69
•Interference Check on page 60: more detailed
information about Spectrum page.
V3 11/30/18
•Frequency Plan on page 73: drawings have been
changed, frequencies are now allocated between 34 kHz
and 36 kHz and frequency ranges of narrowband and
wideband hydrophones are indicated.
V4 07/16/20 Now documents Mosa2 version 02.03, Scala version
01.06.34 and Scala2 version 02.02.
V5 10/01/20
Technical Specifications on page 11: the typical battery
life is now specified separately for SE50 (depth) and SE100
(height).
V6 03/08/21
• Now documents Mosa2 version 02.07.
•Connecting the Sensor to Mosa2 on page 17: added
guidance on how to connect sensor to Mosa2 using the
Configuration Cable product.
• Added troubleshooting topic: Sensor does not connect
correctly with Mosa2 when using the Configuration
Cable on page 69
•Added details on the Down 1 + Down 2 sounding mode
in Configuring the Uplink, Up (Side) and Down Settings
on page 20.
• Added contact details for the sales offices in South
Africa and Norway in Support Contact on page 72.
| 4

Seine Sensors | V7 | Legal
V7 07/05/21
• Now documents Scala2 version 02.04 and Mosa2
version 02.07.
• In Technical Specifications on page 11, corrected
the battery lifetime of the Seine Explorer.
• Replaced term Configuration Plug by Configuration
Cable.
•Connecting the Sensor to Mosa2 on page 17:
Updated distance between other electrical devices and
the computer: 1 m instead of 50 cm.
•Service manuals: removed Replacing Parts chapter.
Maintenance procedures are now documented in
Maintenance Manuals, that are specific to each model
of bottle used to protect the internal components.
| 5

Seine Sensors | V7 | Legal
Copyright
© 2021 Marport. All Rights reserved.
No part of this document may be reproduced, stored in a retrieval system or transmitted in any
form by any means; electronic, mechanical, photocopying or otherwise, without the express
written permission from Marport. “Marport”, the Marport logo and Software Defined Sonar are
registered trademarks of Marport. All other brands, products and company names mentioned
are the trademark and property of its respective owners only. Marport is a division of Airmar
Technology Corporation.
Disclaimer
Marport endeavors to ensure that all information in this document is correct and fairly stated, but
does not accept liability for any errors or omissions.
The present user guide is applicable for the following versions:
• Scala: 01.06.06-01.06.34 / Scala2: 02.04
• Mosa2: 02.07
Patents apply to products. U.S. Patents 9,772,416; 9,772,417
| 6

Seine Sensors | V7 | Introduction and Presentation
Introduction and Presentation
Read this section to get a basic knowledge of your Seine sensor.
Tip: Click Marport logo at the bottom of pages to come back to the table of contents.
Introduction
The Seine sensor is mounted on the lead line of a purse seine in a robust protective steel framed
housing. It relays data back to the wheelhouse from the moment the purse seine is shot away and
during the fishing operation. It has an omnidirectional uplink signal, which ensures that there is no
loss of signal during the fishing operation.
There are different Seine sensors:
• Seine sensor with depth.
• Seine sensor with depth and temperature
• Seine sensor with depth, height and temperature.
• Seine Explorer with temperature, depth, height, battery and echogram.
During the shot, depending on your type of Seine sensor, you can see the depth of water above the
lead line, the distance from the lead line to the seabed (height) and an echogram of the area below
the lead line. On most recent models, there is also an echogram of the contents of the purse seine
during its descent. Measuring the depth at rapid time intervals provides the user with an accurate
descent rate of the lead line.
When purse seining in shallow water, Marport's Seine sensors are an essential tool to ensure the
gear is kept at a safe distance from the seabed. This way, you can avoid damage to the gear.
Seine sensors with depth only or with depth, height and temperature can send depth and
temperature data to a Scanmar system. There is also a version of Seine sensors with depth and
temperature that is compatible with Simrad PI systems.
Note:
These labels tag topics or actions that are specific to Scala and/or Scala2.
Depending on the version you have, you may follow either one of these labels.
| 7

Seine Sensors | V7 | Introduction and Presentation
Applications
Here are some examples of data received from Seine sensors displayed in Scala/Scala2.
Seine Explorer and Seine sensors with depth and height
1. Temperature
2. Battery level
3. Leadline
4. Distance from the sensor to the
seabed
5. Seabed
6. Seabed (echosounder)
7. Depth of seine sensors
| 8

Seine Sensors | V7 | Introduction and Presentation
Safety Guidelines
Important: To ensure proper and safe use of this equipment, carefully read and follow the
instructions in this manual.
Basic good practices
When using the product, be careful: impacts can cause damage to the electronic components inside.
Never place the product in a hazardous and/or flammable atmosphere.
Product installation and use
Install and use this product in accordance with this user manual. Incorrect use of the product may
cause damage to the components or void the warranty.
Only qualified Marport dealers can do maintenance and repairs on internal components of the
sensors.
Precautions
Warning: In case of water ingress in the product, do not charge it: battery may vent or
rupture, causing product or physical damage.
| 10

Seine Sensors | V7 | Introduction and Presentation
Description
Firmware
There are four different Seine sensors. Each sensor has a different firmware and different features.
• Seine sensor with depth: Depth FIRM010
• Seine sensor with depth and temperature: Depth with Temp FIRM011
• Seine sensor with depth, height and temperature: Height FIRM020
• Seine Explorer with temperature, depth, height and echogram:
Name of firmware NBTE V2 NBTE V3
Number of firmware FIRM126 FIRM128
Autorange feature yes yes
Target strength on echograms n/a yes
Technical Specifications
Seine sensors with depth / temperature and Seine sensors with height / depth / temperature
Uplink frequency 30 to 60 kHz
Range to vessel up to 2500 m*
Sounder broadband frequency (height option) Configurable between 120-210 kHz
Data update rate Depth: 1-8 sec. - Temp: 3-16 sec. - Height: 1-14
sec.
Depth range up to 1800 m
Depth resolution 0.1m with 0.1% accuracy
Temp measurement range -5° C to +25° C
Temp accuracy ±0.1° C
Typical battery life • SE50 (depth): up to 744 hours, depending on
options †
• SE100 (height): up to 72 hours, depending on
options †
Standard: 8-12 hours ‡
Charging time Fast Charge: 4 hours
Battery type Lithium-Ion
Heavy-duty model's weight in air (with
housing)
10 kg
| 11

Seine Sensors | V7 | Introduction and Presentation
Heavy-duty model's weight In water (with
housing)
5.8 kg
Light model's weight in air (with housing) 7.2 kg
Light model's weight In water (with housing) 3.3 kg
Warranty 2 years (Sensor & Battery)**
Seine Explorer
Important: Sensors with product number 46-134-1-01 have only a down looking transducer.
Sensors with product number 46-137-1-01 have down and side looking transducers.
Uplink frequency 30 to 60 kHz
Range to vessel up to 2500 m*
Down sounder broadband frequency Configurable between 120-210 kHz
Up sounder broadband frequency Configurable between 360-400 kHz
Sounder range V2: 5 to 80 m - V3: 5 to 160 m
Data update rate Depth: 1-8 sec.
Temp/Battery/Height: every 6 sec.
Echogram update rate Up to 3 images per second
Temp measurement range -5° C to +25° C
Temp accuracy ±0.1° C
Depth resolution 0.1m with 0.1% accuracy
Typical battery life 12-24 hours †
Standard: 8-12 hours ‡
Charging time Fast Charge: 4 hours
Battery type Lithium-Ion
Heavy-duty model's weight in air (with
housing)
10 kg
Heavy-duty model's weight In water (with
housing)
5.8 kg
Light model's weight in air (with housing) 7.2 kg
Light model's weight In water (with housing) 3.3 kg
Warranty 2 years (Sensor & Battery)**
*Reference only. Depends on functions enabled. / † Depends on sensor uplink power and options / ‡
Based on average charging time. / **Marport Standard Marine Limited Warranty
| 12

Seine Sensors | V7 | Introduction and Presentation
Main Parts
External View
1. Pressure sensor
2. Temperature sensor
3. Water switch
4. Positive charge
5. Negative charge
6. Shoulder bolts
7. Down transducer
CAUTION:
• Do not put foreign objects into pressure sensor opening or try to open it.
• Do not remove the shoulder bolts from the outside of the sensor.
It may damage the components.
Exploded View
1. A1 PCBA
2. End cap
3. Down
transducer
4. Temperature
sensor
5. Transducer
6. Battery
7. Shoulder bolts
8. Pressure sensor
PCBA
1. Battery
2. Down (A)
3. Water switch
4. Pressure and
temperature
connector
5. Uplink (LED)
6. Uplink (C)
| 14

Seine Sensors | V7 | Sensor Configuration
Sensor Configuration
Learn how to configure Seine sensor settings.
Note: This guide refers to the following versions of Mosa2: 02.07. If you use another
version, the visual interface and options may vary.
Installing Mosa2
About this task
Note: We now recommend to use Mosa2 application instead of Marport Tools. Moreover,
Marport Tools is not compatible with computers using macOS Catalina.
Important: If the computer is under OS X Mavericks, Yosemite or El Capitan, use Mosa2
version 02.03.
Procedure
1. Double-click the installation zip file.
2. Click the *.dmg file.
3. From the installation window that appears, drag Mosa2 icon to the Applications icon.
Mosa2 is added to the Launchpad .
4. From the Launchpad , click and drag Mosa2 icon to the Dock at the bottom of the screen.
You can now open Mosa2 by clicking its icon on the Dock.
5. Systems with a Mac Pro under OS X Mavericks (Mosa2 version 02.03 only): you need to
launch a script that is in the installation package. This operation has to be done only once:
a) Click the magnifying glass from the top right corner of your screen and type Terminal.
b) Select Terminal from the results.
c) In the terminal, enter sh /Volumes/Marport-Mosa2/MosaPatchForMavericks.sh
d) When prompted, enter the administrator password.
| 16

Seine Sensors | V7 | Sensor Configuration
e) Close the terminal.
f) Open Mosa2 and check if the script has worked. If Mosa2 does not open, it means the script
has not worked. Repeat the procedure and make sure you enter the correct command line.
Connecting the Sensor to Mosa2
To configure the sensor, you need to connect it to Mosa2 using a wireless communication or using
the Configuration Cable.
About this task
Note: Use Mosa2 02.05 and above for compatibility with the Configuration Cable product.
For more details about the Configuration Cable, refer to its Quick Reference Guide.
Procedure
1. To connect the sensor using a wireless communication:
a) Connect the water-switch. The LED flashes red.
b) Disconnect the water-switch. After a few seconds, the LED flashes green.
c) Open Mosa2, then wait a few seconds for the sensor to be recognized. When it appears on the
discovery page, click .
2. To connect the sensor using the Configuration Cable:
a) Move other electrical devices minimum 1 m away from the computer.
b) Connect the USB connector directly to the computer. Mosa2 opens automatically and the
startup wizard is displayed. The LED on the plug is solid blue.
c) Connect the three-pin plug to the sensor. The LED on the plug blinks alternatively blue and
green.
d) Wait a few seconds. The configuration page of the sensor is displayed on Mosa2. The LED on
the plug is solid green.
| 17

Seine Sensors | V7 | Sensor Configuration
Results
The sensor configuration page is displayed.
Note: You can keep the Configuration Cable continuously connected by USB, and virtually
eject or connect it when Mosa2 is in discovery mode. Click Menu > Eject Config Plug or
Connect Config Plug. If ejected, the cable stays disconnected until you virtually connect to it
or manually disconnect then connect it.
Troubleshooting: If the sensor is not detected by Mosa2, the issue might come from the
short-range wireless connection of the computer.
1. Close Mosa2.
2. Click the short-range wireless symbol in the top-right corner of the menu bar while
holding the Shift (#) + ALT (#) keys on your Mac's keyboard.
3. Click Debug > Remove all devices.
4. Open Mosa2.
What to do next
You can now configure the sensor settings.
If you want to disconnect the sensor, click Menu > Disconnect.
| 18

Seine Sensors | V7 | Sensor Configuration
Seine Explorer Specific Settings
You need to set these settings for a Seine Explorer sensor.
Sounding Modes
The sensor can send pings according to three different sounding modes.
Down 1
Sensor sends pings towards down direction (1) only.
You can control the distance with the seabed.
Pings are sent quicker than with the other modes, so more
data is received, which enables a better horizontal resolution.
This mode is recommended for better quality echogram
images.
Down 1 + Up
Sensor sends pings towards down (1) and side (2) directions.
With the down sounding, you can control the distance with
the seabed. If applicable, with the side-looking (2) sounding
(called up sounding in Mosa2), you can see schools of fish
inside the net when the purse seine is deployed and going
down.
Fewer pings are sent because they are distributed between the
2 directions. As a result, data arrives slower to the receiver
and echograms are of lesser quality.
Down 1 + Down 2
Sensor sends 2 consecutive pings towards down direction (1
and 2).
This mode is useful if you need to send two different pings
towards the down direction. For example, sending one short
and one long ping, or sending one low frequency and one
higher frequency ping.
Like down + up mode, fewer pings are sent because they are
distributed between the two different down soundings. As a
result, data arrives slower to the receiver and echograms are
of lesser quality.
| 19
Table of contents
Other Marport Accessories manuals
Popular Accessories manuals by other brands

Vocal Performer
Vocal Performer VE-20 owner's manual

Sparehand Systems
Sparehand Systems Glacik G-505 quick guide

Balluff
Balluff BOD 26K Series Mounting and operating instructions

Sigfox
Sigfox Sens’it 3 series user manual

Victron energy
Victron energy Smart Battery Sense manual

SICK
SICK UM18-2 Pro operating instructions