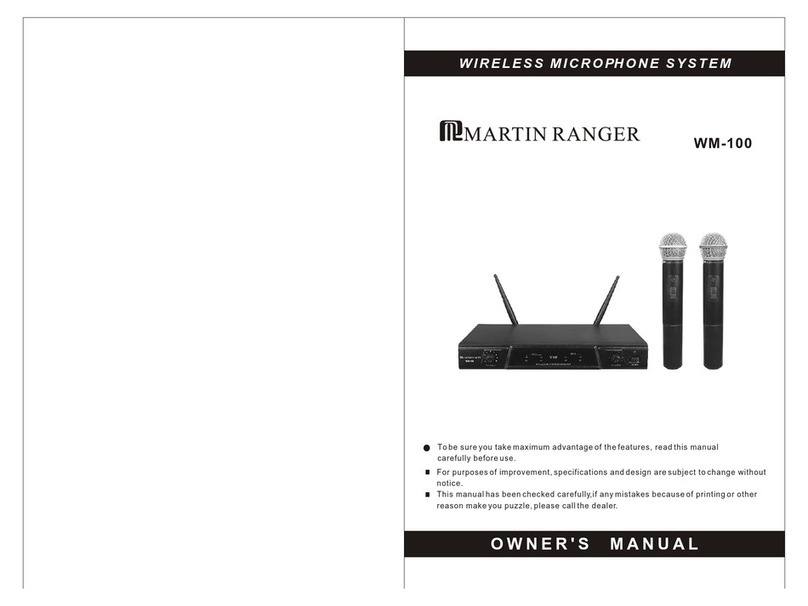
Martin Ranger UHF 700 User manual

Receiver
Receive mode
frequence stability
sensitivity
signal to noise ratio
audio output
power
crystal frequence lock
15PPM
3uV 30dB S/N
60dB
0~0.5V/4.7K
AC120( 10%)
frequence stability
modulate mode
modulate degree
emission power
harmonic suppression
battery
Transmitter
15PPM
FM
>30KHz
30mV MAX
40dB
1.5V AAbattery
7
SPECIFICATION
frequence stability
modulate mode
frequence response
signal to noise ratio
maximum sound pressure
distortion factor
effective field (in the open air)
operation temperature
System specification
0.005%
FM
50-16000Hz
>60dB
120dB
1%
50M
~
10 +50
CC
OWNER'S MANUAL
WIRELESS MICROPHONE SYSTEM
Tobe sure you take maximum advantageof the features, read this manual
carefully before use.
For purposes of improvement, specifications and design are subject to change without
notice.
This manual has been checked carefully,if any mistakes because of printing or other
reason make you puzzle, please call the dealer.
UHF 700

57 86
12 43
PREFACE
1
Cleaning:
Thank you for buying our excellent wireless microphone series products. Before you
use our products, please read this Owners Manual, so that you can enjoy it. Keep this
manuaI in a safety place for your future references.
This series professional wireIess microphone system introduces a number of
advanced technology and components, incIuding the efficient low-consumptionRF
transmission technology,elimination of switching impact technology, slow changed
output controI technology,superb sensitive VHF narrowband receiverand etc..
EDA, online simulation accessoriaI design and strict quality controIare applied to
ensure each system with excellent electronic function.
Desktop receiver and enhanced muting, high signal / noise ratio.
Almost zero noise output when standby.
Broad frequency response range, super low distortion.
No impact on switching receiver, ensure safety of rear stage amplifier system and
speaker.
Perfect operative status signals, fluorescence display, with digital microphone.
Long practical distance. Over 30 m in ideaI circumstances; practical 20 m radius in
complex circumstances.
Dual frequency design. Be able to use two microphones at the same time without
mutuaI interference.
Applicable for medium& small stages, karaoke halls, and home entertainment etc.
Features:
1. Be sure to check whether thelocal voltage accord with operative voltage of the
microphone before using, make correct selection.(Wrong selection may lead to
burnout of the whole machine.)
2. Please don t open or dismantle the machine on your own. For internaI repair, please
contact the locaI distributor or accepted service center.
3. When the machine will not be used for along time, please pull the power plug out of
AC power socket.
Matters Needing Attention:
1. Please make sure to cut off the powerbefore repairing or cleaning this machine.
2. The machine can be cleaned by soft cloth.To clean off stiff dirt, please use drycloth
dipping with neutral wash; clean the machine with dry cloth then.
3. Please don t use volatile gasoline, diluents or other chemicals for the machine body,
or the surface wilI be corrupted.
RECEIVER
2
MIN
MIN
MAX
MAX
MIN
MIN
MAX
MAX
910
1211 14 13
1. Power on/off switch
2. ChanneI A volume controI knob
3. Display
4. ChanneI B volumecontroI knob
5. ChanneI B antenna
6. Audio output jack
7. Power input
8. ChanneI A antenna
9. Channel A operatingindicator
10. Channel B operating indicator
11. ChanneIA volume control indicator
12. ChanneI A audioindicator
13. ChanneI B audio indicator
14. Channel B volume control indicator
SCREEN DISPLAY SKETCH
RECEIVER FRONT PANEL SKETCH
RECEIVER REAR PANEL SKETCH

3
TRANSMITTER
1. Open the battery cover 5,1.5V AAbatteries for microphone. Pay attention to the
positive and negative pole signsof the batteries.
2. Position the power switch to ON, indicator Iight 3 will be on, and indicator 10 or
15 on the receiver display will beon, showing ( ), corresponding operating
frequency point 12 or 13 will also be onsynchronously, indicating the receiveris
receiving effective signals from the microphone.
3. Position the audio switch to ON, make voices toward the microphone and
adjust receiver volume control knobs 2 and 4, volumecontrol display 9 and 15
will be on, indicating the volume you are adjusting,at the same time AFLEVEL
display 9 or 15 willdance with themusic.
4. When the power indicator darkens, it indicates lack of power. Please change
with new batteries in time.
5 To make your singing more perfect, please keepthe distance between
microphone and sound source as3-5cm.
Fully pull out antennas 5 and 8; adjust the antennas to be perpendicular tothe
floor Antenna installation will directly affectthe receiving effect.
1. Better keep distances between the receiver and walI floor to ensure good
receiving signals.
2. Don t put the receiver beside digital control equipments.
3. Connect the receiver and tuner or corresponding amplifier inlet with audio
transmission cables, adjust the corresponding signal channeI volume knob to
get suitable audio output.
4. Switch the power to your local operating voltage; insert the power plug into the
power socket.
5. Switch on the power, display 3 willlight up. Adjust volume knobs 2.4 to the least.
ANTENNA
INSTALLATlON AND USE
HAND-HOLD MICROPHONE
1. Cartridge module
2. Mic body
3. Operating indicator
4. Power switch
5. Battery cover
INSTALLATION AND USE
TRANSMITTER
LAVALIER BODYPACK TRANSMITTER
Battery Cover
Wireless Transmitter
Decrease the system volume.
Keep the transmitter away from the speakers.
Tune down cartridge sensitivity of the transmitter.
1. Open the batter cover , put in 9V overlapped batteries. Pay attention to thepositive
and negativepole signs ofthe batteries.
2. Insert the transmitter cable and cartridge module to the cartridge socket.
3. Position the power switch to ON, indicator light wilI be on, and indicator 9 or
16 on the receiver display will beon, showing( ), corresponding operating
frequency point 10 or 15 will also be on synchronously, indicatingthe receiver is
receiving effective signals fromthe microphone.
4. Make voices toward the microphone, adjust receiver volume controI knobs 2 and 4,
volume control display 11 and 14 will be on, indicating the volume you are adjusting,
at the same time AF LEVEL display 12 or 13will dance with the music.
5. When the power indicator darkens, it indicates lack of power. Pleasechange with
new batteriesin time.
1. The transmitter must be switched off before changing batteries.
2. If the transmitter will not be used for a long time, please take outbatteries to avoid
the parts of transmitter being destroyed by rotten batteries.
CHANGING BETTERIES
PREPARATlON BEFORE SOUND TESTlNG
1. Make sure the frequencies of transmitter and receiver conform to each other.
2. Keep the distance between antenna and transmitter over 1 meter.
3. Avoid whistling, especially when using the omnidirectional microphone.
OUR SUGGESTlONS:
4
5
4
3
2
1

Receiver
Problem
No receive
Possible cause
Poor connecting of the
receiver power or the power
isn t correct
Fail to operate
The transmitter is out
of the effective range
The frequence of the
transmitter and the receiver
isn t same
The antenna hasn t be pull
out
The volume of microphone
is too Ioud
Check the operation power
correct or not and plug it
securely
Operating it in the effective
range
Set the frequence to same
reduce the volume of the
microphone
Pull out the antenna
Distorted sound
solution
Transmitter
Problem
No carrier signal
Possible cause
The battery voltage
isn t enough
The battery install isn t
correct polarity
The transmitter is working
out of effective field
Fail to operate
Noise and distorted sound
Disturb by other electric wave
The operation frequence of two
transmitter is same.
The batteries voltage of
the transmitter isn t enough.
The frequence of the
transmitter and the
receiver isnt same
TROUBLESHOOTING
5
Shorten the operation distance of
the transmitter and the receiver
Move the receiverfar away
interference.
Replace the batteries.
The same operation frequence of
two transmitter should be avoid.
solution
Replace the batteries
Install the batteries correctly
Operating it in effective field
Set the frequence to same
ATTENTION
For the rechargeable system, which uses AA recycle rechargeable batteries. It
has recharge equipment. The recharge instructions are as below:
1. When the handheld microphone is out of power during using, please recharge it
in time.
2. Plug in the receiver, screw out antenna of the microphone. and connect the
microphone into the recharge socket on top of the receiver. the recharge signal
When the batteries are recharged.
3. In recharge status, the receiver will automatically close its display and audio
output.
Application:
1. Applicable batteries: AA1.5V rechargeable batteries.
2. Rated recharge power:100mA+/-10%
3. Rated recharge time: 4hrs.
Hold The Transmitter With Care:
Please dont le tan y objects (dust, raindrop, grit) fall intoth e machine to cause any
damage to it.
Please avoid the machine falling onto the ground. Keep itaway from serious strike or
shake.
The machine is not waterproof. Please avoid raindrop, tea etc.splattering onto the
machine.
In most countries of the world, regulations for wireless systemare generally stipulated by
the governments. To get legal usage permission is a must. Thelocal distributors may give
you regulations for wireless system in your district.
Should this machine does not work as usual, please stop using, takeout the batteries or
cut off the AC powerimmediately. Please contact the local distributor or accepted service
center to ensure your effective rights and interests.
Ensuring:
Permission:
Special Warning:
This charger is applicable for AA recycle rechargeable batteries only. Non-rechargeable
batteries are forbidden to be used to avoid any danger.
6
Other Martin Ranger Microphone System manuals
Popular Microphone System manuals by other brands

PCB Piezotronics
PCB Piezotronics 426 Series Installation and operating manual

Sony
Sony UWP-C1 operating instructions

Schlage
Schlage NDE80 Installation instructions and user guide

Aidcall
Aidcall Touchsafe Pro user guide

AKG
AKG WMS 40 PRO FLEXX User instructions

Sennheiser
Sennheiser MobileConnect User documentation