manuals.online logo
Brands
  1. Home
  2. •
  3. Brands
  4. •
  5. martinelli luce
  6. •
  7. Home Lighting
  8. •
  9. martinelli luce MINIPIPISTRELLO 620/J/DIM/T/CL User manual

martinelli luce MINIPIPISTRELLO 620/J/DIM/T/CL User manual

620/J/DIM/T/CL MINIPIPISTRELLO Design : Gae Aulenti - 1965/2013
martinelli Luce , Via T.Bandettini 55100 Lucca – Italia - tel. +39 0583 41.83.15 Web address :
www.martinelliluce.it l info@martinelliluce.it Rev.0 23/05/2018
Apparecchio mobile da tavolo a LED con Touch Control Ricaricabile
ISTRUZIONI PER LA CORRETTA INSTALLAZIONE, USO E MANUTENZIONE
AVVERTENZE
Le seguenti istruzioni devono essere seguite per una corretta installazione del prodotto, e servono
a garantire la vostra sicurezza. É necessario conservarle per una successiva consultazione. Questo
foglio deve essere a disposizione anche di chi ne avrà la manutenzione.
ATTENZIONE
Processo di AUTO-TARATURA: Alla prima alimentazione alla rete l’apparecchio deve
eseguire un processo di auto-taratura e non deve essere toccato fino allo spegnimento dei led (5/6
sec.). Da quel momento l’apparecchio è pronto all’utilizzo.
L’accensione e lo spegnimento avviene toccando la parte (T) dell’apparecchio.
Per la dimmerazione tenere premuto la parte (T); al massimo della potenza la sorgente led emette
un flash luminoso.
Ogni volta che andrà a mancare la corrente o verrà scollegato l’alimentatore dalla presa
l’apparecchio rieseguirà il processo di auto-taratura.
Nel caso in cui si riscontrassero anomalie nel funzionamento dell’apparecchio:
1. Scollegare l’alimentatore e il jack di collegamento.
2. Aspettare 20 sec. prima di ricollegarlo alla rete.
3. Far rieseguire il processo di AUTO-TARATURA.
INSTALLAZIONE
Montaggio del diffusore:
Svitare il pomello (1) dal corpo lampada.
Inserire il diffusore in metacrilato (2) nel perno centrale filettato (4), facendo attenzione di
posizionare il secondo foro (3) presente sul diffusore, nella vite di fermo, e avvitare il pomello (1) sul
perno (4).
La lampada viene fornita scarica con le batterie già inserite all’interno della base; seguire i passi
successivi per il corretto caricamento (da eseguire ogni volta che la lampada è scarica).
Collegare lo spinotto USB-A, presente sul cavo, al plug presente sul corpo lampada.
Collegare l’altro capo del cavo all’alimentatore a spina.
Collegare l’alimentatore elettronico a spina (5) alla rete.
In questo modo le batterie inizieranno a caricarsi, in prossimità del cavo sarà visibile una spia
lampeggiante di colore blu. Il tempo di ricarica varia tra le 6 e le 7 ore.
Terminata la carica la spia passerà da lampeggiate a fissa, sempre nel colore blu. A questo punto
sarà possibile rimuovere lo spinotto USB-A (la spia si spengerà) e utilizzare la lampada.
La spia in prossimità del plug rimarrà spenta fino a che la carica delle batterie sarà sopra il 50%.
Con lo stato delle batterie tra il 50% e il 25 % la spia sul plug sarà di colore rosso e fisso. Al di
sotto del 25% inizierà a lampeggiare e sarà necessaria una nuova ricarica.
CAUTELE DA ADOTTARE DURANTE L’USO DELL'APPARECCHIO
Caricare l’apparecchio prima che le batterie si esauriscano completamente.
Non coprire l'apparecchio (ad esempio con panni, foulard, ecc.)
Usare l'apparecchio nella posizione prevista: non coricare né ribaltare.
Per la pulizia utilizzare solamente un panno morbido e asciutto (microfibra).
Durante la fase di ricarica si consiglia di tenere spento l’apparecchio, per diminuirne i tempi.
NOTE SUPPLEMENTARI
Per la vostra sicurezza non modificare l’apparecchio.
Nel caso di rottura dell’alimentatore (5) scollegarlo dalla rete e separare l’alimentatore dal cavo
tramite il jack (6) e sostituirlo con uno identico.
Nel caso di rottura del cavo rivolgersi al fabbricante-venditore per far eseguire la sostituzione.
La Martinelli Luce Spa non si assume alcuna responsabilità per prodotti modificati senza
preventiva autorizzazione.
L’APPARECCHIO IN QUALUNQUE CONDIZIONE DI UTILIZZO E’ ESENTE
DAL RISCHIO DI SICUREZZA FOTOBIOLOGICA. (NORMA EN62471)
:L’apparecchio é adatto al montaggio su superfici normalmente infiammabili.
: Apparecchio adatto solo all’uso in interni.
: Simbolo che indica la Classe II (doppio isolamento).
:L’apparecchio è conforme alle direttive e alle normative vigenti.
: Simbolo per lo smaltimento dell’apparecchio (VEDERE SMALTIMENTO RIFIUTI RAEE)
A
ppareil mobile tableau LED avec Touch rechargeable Contrôle
INSTRUCTIONS DE MONTAGE, EXPLOITATON ET ENTREITIEN
NOTICE D’UTILISATION
Pour une installation optimale du produit les instructions suivantes doivent être suiviées. Elles
garantiront votre sécurité. Conservez-les afin de pouvoir les consulter en cas de nécessité. Ce
document doit être mis à la disposition du technicien d’entretien du produit.
PRUDENCE
AUTO-CALIBRAGE Process:À la première alimentation de réseau l'appareil doit effectuer un
processus d'auto-calibration et ne devrait pas être touché jusqu'à ce que l'appareil a été éteint
(5/6 sec.). Depuis ce temps, la lampe est prête à l'emploi.
L'allumer et éteindre en appuyant sur la (T).
Pour gradation tenir baisse la saillie (T); à la puissance maximale de la source LED émet un flash
lumineux.
Chaque fois que je vais à une panne de courant ou la tension d'alimentation est débranché de
l'alimentation du dispositif relancer le processus d'auto-calibrage.
Dans le cas où le dispositif devait avoir des anomalies dans le fonctionnement:
1. Déconnectez l’alimentation et les connecteur de raccordement.
2. Attendre 20 secondes avant de se reconnecter au réseau.
3. Avoir le processus d’ AUTO-CALIBRATION.
INSTALLATION
Montage du diffuseur :
Dévisser la poignée sphérique (1) du corps de la lampe, mettre le diffuseur en méthacrylate (2)
dans le pivot central fileté (4), en positionnant avec attention le deuxième trou (3) dans la vis de
maintien. Visser la poignée sphérique (1).
La lampe à décharge est alimenté avec des piles déjà insérées à l'intérieur de la base; suivre les
étapes suivantes pour le chargement correct (à effectuer à chaque fois que la lampe est
déchargée).
Connecter le plug USB-A, présente sur le câble, la présente du bouchon sur le corps de la lampe.
Connecter l'autre extrémité du cordon d'alimentation à brancher.
Connecter le ballast électronique enfichable (5) au réseau.
Cela commencera à charger les batteries, à proximité du câble d'un feu bleu clignotant sera
visible. Le temps de charge varie entre 6 et 7 heures.
Après la charge de l'indicateur passera de lampeggiate fixe, toujours en couleur bleue. A ce stade,
il sera possible de retirer la clé USB-A plug (la lumière s'éteint) et utiliser la lampe.
La lumière dans le voisinage de la bougie reste éteint jusqu'à ce que la charge des batteries sera
supérieure à 50%. Avec l'état de la batterie entre 50% et 25% sur la fiche allumera la couleur
rouge et fixe. En dessous de 25% clignote et il faudra une recharge.
PRECAUTIONS D’UTILISATION DE L’APPAREIL
Chargez la machine avant que les piles complètement.
Ne pas couvrir l’appareil (par exemple avec un chiffon, un foulard, etc.)
Utiliser l’appareil dans la position prévue: ne pas coucher et ne pas renverser l’appareil.
Pour le nettoyage utiliser un chiffon meuble et sec (microfibre).
REMARQUES SUPPLEMENTAIRES
Pour votre sécurité, ne pas apporter de modifications à l’appareil;
Dans le cas où il serait nécessaire de remplacer le bloc d’alimentation débranchez le câble
d'alimentation (5) de le connecteur (6) et le remplacer par un produit identique
Dans le cas où il serait nécessaire de remplacer le fil d’alimentation (si par exemple il est
endommagé) s’adresser au fabriquant/vendeur pour la réparation.
Martinelli Luce Spa n’assume aucune responsabilité pour les produits modifiés, sans autorisation
préalable.
L'APPAREIL DANS CHAQUES CONDITIONS D'UTILISATION EST EXEMPTE
CHEZ RISQUE DE LA SECURITE’ PHOTOBIOLOGIQUE. (NORME EN62471)
: L’appareil est designè pour etre installè sur les surfaces normalment inflammables.
: Appareil faisant partie de la classe I CE
:Symbole indiquant la Classe II (double isolation).
: L’appareil est conforme aux directives et aux normes en vigueur.
:Symbole pour l'élimination de l'appareil (voir ÉLIMINATION DES DÉCHETS DEEE)
Sorgente di luce : 1x 4,5W LED Integrata nel corpo lampada
ALIMENTAZIONE: 230V – 5V Source lumineuse: 1x 4,5W LED Intégrée dans l'appareil
ALIMENTATION: 230V – 5V
1
4
3
2
5T
6
1
620/J/DIM/T/CL MINIPIPISTRELLO Design : Gae Aulenti - 1965/2013
martinelli Luce , Via T.Bandettini 55100 Lucca – Italia - tel. +39 0583 41.83.15 Web address :
www.martinelliluce.it l info@martinelliluce.it Rev.0 28/06/2017
CARICA/SCARICA/AVVERTENZE
•L’apparecchio contiene delle batterie LI-ION (ioni di litio).
•Per la ricarica utilizzare esclusivamente il caricatore fornito in dotazione.
•Le batterie agli ioni di litio possono essere caricate anche quando non sono scariche: non
hanno l’effetto memoria delle vecchie batterie Nickel-Cadmio.
•Le batterie agli ioni di litio si rovinano se tenute scariche, quindi se scaricate eseguire
prima possibile una ricarica, anche parziale.
•Per evitare il danneggiamento della batteria non immagazzinare il prodotto con la batteria
scarica: fare una ricarica anche parziale.
•Le alte temperature rovinano le batterie: ricaricare la batteria a temperatura ambiente. Non
lasciare l’apparecchio al sole o in luoghi surriscaldati (>35°C) per lunghi periodi. Le basse
temperature (fino a 0°C) non sono un problema.
•Non forare mai le batterie, nemmeno se si dovessero gonfiare. Mai cortocircuitare le
batterie: l’eccessiva corrente può sviluppare un incendio. Le batterie messe nel fuoco
possono esplodere.
ACCORGIMENTI DI BASE SULLA GESTIONE DELLE BATTERIE
•Se la cella viene mantenuta per un lungo periodo di tempo (3 mesi o più), è consigliabile
che la cella batterai sia conservata a secco e a bassa temperatura.
•In caso di cavo scollegato x più di 5 mesi si consiglia di effettuare un ciclo di ricarica.
•Non tenere la lampada vicino a campi magnetici.
•Non tenere la lampada a temperature elevate vicino a fonti di calore o al sole.
•Le Celle batteria hanno una prestazione ottimale per la durata di 500 cicli completi di
scarica e carica;
•Dopo 500 cicli di scarica e carica completi, in condizioni ambiente normali, la capacità
delle batterie è comunque superiore all’80%.
CHARGE / DISCHARGE / WARNINGS
•The device contains LI-ION (Lithium Ion) batteries.
•For charging use only the charger supplied. Lithium-ion batteries can be charged even
when they are not exhausted: no Have the memory effect of the old Nickel-Cadmium
batteries.
•Lithium-ion batteries ruin if they are held down, so if you download them do it as soon as
possible a recharge, even partial.
•To avoid damaging the battery do not store the product with the battery discharge: make a
partial charge also.
•High temperatures ruin the batteries: charge the battery at room temperature.
•Not leave the appliance in the sun or in overheated places (> 35 ° C) for long periods. Low
temperatures (up to 0 ° C) are not a problem.
•Never drill the batteries, not even if they swell. Never short-circuit the batteries: excessive
current can develop a fire. Batteries in the fire may explode.
BASIC MEASURES ON BATTERY MANAGEMENT
•If the battery is kept for a long period of time (3 months or more), it is recommended that
the battery is kept dry and at low temperature.
•If a cable is disconnected for more than 5 months, it is recommended to carry out a
recharge cycle.
•Do not hold the lamp near magnetic fields.
•Do not hold the lamp at high temperatures near heat sources or in the sun.
•Battery cells have optimal performance for up to 500 full discharge and charge cycles;
•After 500 full discharge and full charge cycles, in normal ambient conditions, the capacity
of the batteries is above 80%.
620/J/DIM/T/CL MINIPIPISTRELLO Design : Gae Aulenti - 1965/2013
martinelli Luce , Via T.Bandettini 55100 Lucca – Italia - tel. +39 0583 41.83.15 Web address :
www.martinelliluce.it l info@martinelliluce.it Rev.0 23/05/2018
Mobile LED table device with Touch Control Rechargeable
INSTRUCTIONS FOR INSTALLATION, USE, AND MAINTENANCE.
WARNINGS
The following instructions must be observed for correct product installation and are aimed to ensure
the user’s safety. Keep them for future reference. These sheet must be provided to the maintenance
operator as well. ATTENTION
Process of SELF-CALIBRATION:At the first power supply to network the device must perform
a process of self-calibration and should not be touched until the unit was turned off (5/6 sec.). Since
that time the lamp is ready for use.
The turning on and off by touching the (T).
For the dimming press and hold the part (T); at maximum power the LED source emits a bright flash.
Every time I go to a power failure or the power supply is disconnected from the power the device re-
run the process of self-calibration.
In the case in which the device were to have anomalies in the functioning:
1. Disconnect the power supply and connection jack.
2. Wait 20 sec. before you reconnect to the network.
3. Rerun the process of SELF-CALIBRATION.
ASSEMBLY INSTRUCTIONS
Diffuser mounting:
Unscrew the knob (1) from the lamp housing.
Insert the metacrilate diffuser (2) into the threaded central pin (4), carefully placing the second hole
(3) on the diffuser in the retainer screw and screw the knob (1) onto the pin (4).
The lamp is supplied with the batteries already inserted inside the base; Follow the next steps for
proper loading (to be performed every time the lamp is discharged).
Connect the plug-in USB-A on the cable to the plug on the lamp housing.
Connect the other end of the cable to the power adapter.
Connect the plug-in power supply (5) to the mains.
This will cause the batteries to start charging, near a cable a blue blinking light will be visible.
Charging time varies between 6 and 7 hours.
Once the charge is complete, the light will flash from standstill, always in blue. At this point, you can
remove the USB-A plug (the light will turn off) and use the lamp.
The indicator near the plug will remain off until the battery charge is above 50%. With the battery
status between 50% and 25% the spy on the plug will be red and fixed. Below 25% will start
blinking and a new charge will be required.
PRECAUTIONS TO ADOPT IN USING THE APPLIANCE
Charge the device before the batteries run out completely.
Do not cover the appliance (such as with cloths, foulard, etc.)
Use the appliance in the envisaged position: do not tilt or upturn it.
Use only a soft and dry cloth for cleaning (microfibre).
ADDITIONAL NOTES
Do not make changes to the appliance.
In case of failure of the power supply (5) disconnected from the mains and disconnect the mains
cable from the jack (6) through and replace it with an identical.
If the power supply cable requires replacement (if it gets damaged), contact the
manufacturer/retailer to have it replaced.
Martinelli Luce spa declines all responsibilities for products modified without prior authorisation.
THE APPLIANCE IN ANY CONDITION OF USE IS EXEMPT FROM THE RISK
OF PHOTOBIOLOGICAL SAFETY. (NORM EN62471)
: The appliance is designed to be installed on normally flammable surfaces.
: Class I IP20 CE appliance
: Class II symbol (double isolation)
:The appliance complies with the current directives and regulations.
:Symbol for appliance disposal (please, see WEEE APPLIANCE DISPOSAL)
Verfahrbare LEDTabelle mit Touch Control Wiederaufladbare
ANWEISUNGEN FÜR DIE KORREKTE INSTALLIERUNG, DEN GEBRAUCH UND DIE WARTUNG
HINWEISE
Folgende Anweisungen sind für eine korrekte Installierung des Produkts zu befolgen und dienen zur
Gewährleistung Ihrer Sicherheit. Bitte heben Sie die Anweisungen für ein späteres Nachschlagen
auf. Dieses Anweisungsblatt muss auch dem Wartungspersonal zu Verfügung stehen.
AUFMERKSAMKEIT
Prozess SELBST-KALIBRIERUNG: Bei der ersten Stromversorgung Netzwerk muss das Gerät
führen einen Prozess der Selbst-Kalibrierung und sollten nicht berührt, bis das Gerät wurde ausgeschaltet
werden (5/6 sek.). Seit dieser Zeit ist die Lampe einsatzbereit.
Das Ein-und Ausschalten durch Berühren des (T).
Für das Dimmen des Teils (T) halten; bei maximaler Leistung emittiert die LED-Lichtquelle einen hellen Blitz.
Jedes Mal, wenn ich zu einem Stromausfall, oder das Netzteil aus der Steckdose das Gerät getrennt re-run
der Prozess der Selbst-Kalibrierung.
Wenn das Gerät Störungen haben:
1. Trennen Sie das Netzteil und Anschlussbuchsen.
2. Warten Sie 20 Sekunden, bevor Sie mit dem Netz werk.
3. Führen Sie den Prozess der SELBST-KALIBRIERUNG.
MONTAGEANLEITUNGEN
Montage Lautsprecher:
Lösen Sie den Knopf (1) von dem Lampenkörper.
Setzen Sie den Methacrylat Diffusor (2) in den mit Gewinden versehenen zentralen Zapfen (4), wobei darauf
das zweite Loch zu platzieren (3), die auf dem Diffusor in der Madenschraube und zieht den Drehknopf (1) auf
dem Stift (4).
Die Entladungslampe ist mit Batterien versorgt bereits in der Basis eingeführt ist; folgen die nächsten Schritte
für die korrekte Beladung (jedes Mal durchgeführt werden, dass die Lampe abgegeben wird).
Anschließen des USB-A Stecker, die auf dem Kabel, dem Stecker, die auf dem Lampenkörper.
Das andere Ende des Stromkabels zu stopfen.
Schließen Sie das Plug-in-elektronische Vorschaltgerät (5) an das Netzwerk.
Dies wird damit beginnen, die Batterien, in der Nähe des Kabels ein blaues Blinklicht sichtbar ist aufzuladen.
Die Ladedauer wird zwischen 6 und 7 Stunden variieren.
Nachdem die Ladeanzeige wird von l blinken fixiert, immer in der blauen Farbe ändern. An dieser Stelle ist
es möglich, das USB-A zu entfernen (das Licht wird ausgeschaltet) und die Lampe verwenden.
Das Licht in der Nähe des Stopfens bleibt ausgeschaltet, bis die Ladung der Batterien über 50% sein wird.
Mit dem Zustand der Batterien zwischen 50% und 25% auf dem Stecker wird rot und feste Farbe leuchten.
Unterhalb von 25% blinkt, und es wird wieder aufgeladen werden müssen.
BEIM GEBRAUCH ANZUWENDENDE VORSICHT
Chargez la machine avant que les piles complètement.Legen Sie das Gerät, bevor der Akku
vollständig auslaufen.
Das Gerät nicht abdecken (zum Beispiel mit Tücher, Foulards usw.) .
Für die Reinigung ist nur ein weich und trockenes Tuc (Mikrofaser).
ZUSATZBEMERKUNGEN
Für Ihre Sicherheit dürfen am Gerät keine Änderungen durchgeführt werden;
Bei Bruch der Stromversorgung (5) vom Netz zu trennen und das Kabel mit dem Stecker (6) Feeder,
ersetzen Sie es mit einem identischen.
Sollte es nötig sein das Stromkabel zu ersetzen (sollte es zum Beispiel versehendlich beschädigt
worden sein) ist der Hersteller/Vertreiber mit dem Austausch zu beauftragen.
Martinelli Luce Spa übernimmt keinerlei Verantwortung für Produkte, die ohne vorherige
Genehmigung verändert wurden.
DAS GERAT IN ALLE ANWEDUNGSPEDINGUNGEN BEFREIT IST VON
PHOTOBIOLOGISCHEN RISIKO SISCHERHEIT. (NORM EN62471)
: Das Gerät ist für die Montage auf normal entflammbaren Oberflächen geeignet.
: Gerät der Klasse I CE
: Dieses Symbol zeigt Klasse II (Doppelisolierung).
: Das Gerät entspricht den geltenden Richtlinien und Normen.
:Entsorgungssymbol des Geräts (siehe ENTSORGUNG DES GERÄTS RAEE)
Light Source: 1x 4,5W LED Integrated in the device
POWER SUPPLY: 230V – 5V Lichtquelle: 1x 4,5W LED Integriert in das Gerät
STROMVERSORGUNG: 230V – 5V
1
4
3
2
5T
6
1
This manual suits for next models

1

Other martinelli luce Home Lighting manuals

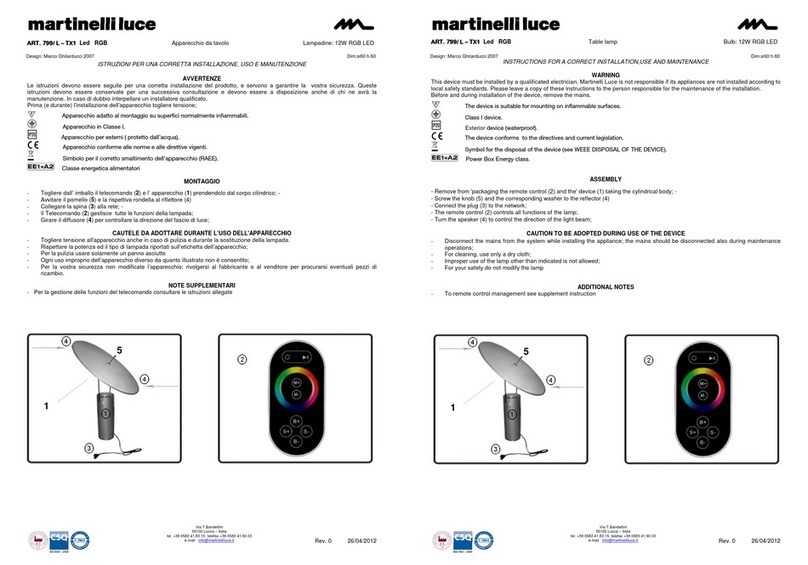
martinelli luce 799/L-TX1 Specification sheet

martinelli luce

martinelli luce 799/L-TX1 Specification sheet

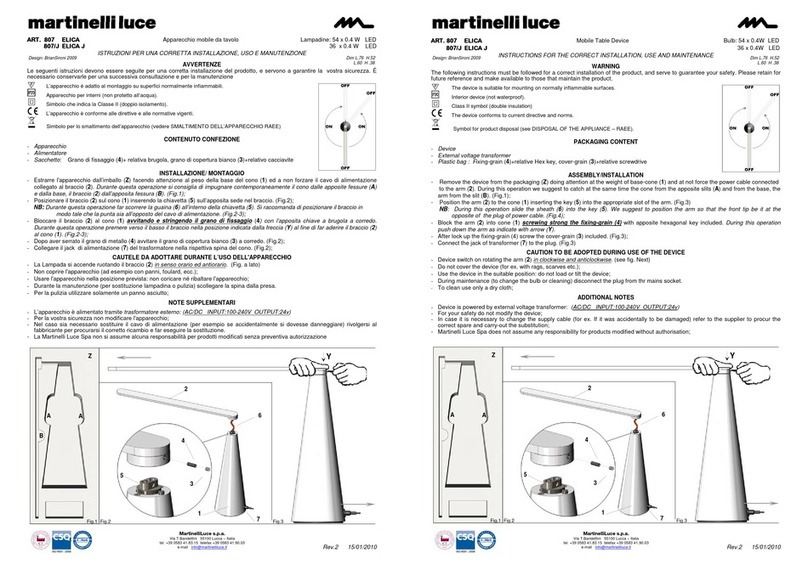
martinelli luce ELICA Parts list manual

martinelli luce

martinelli luce ELICA Parts list manual

Popular Home Lighting manuals by other brands

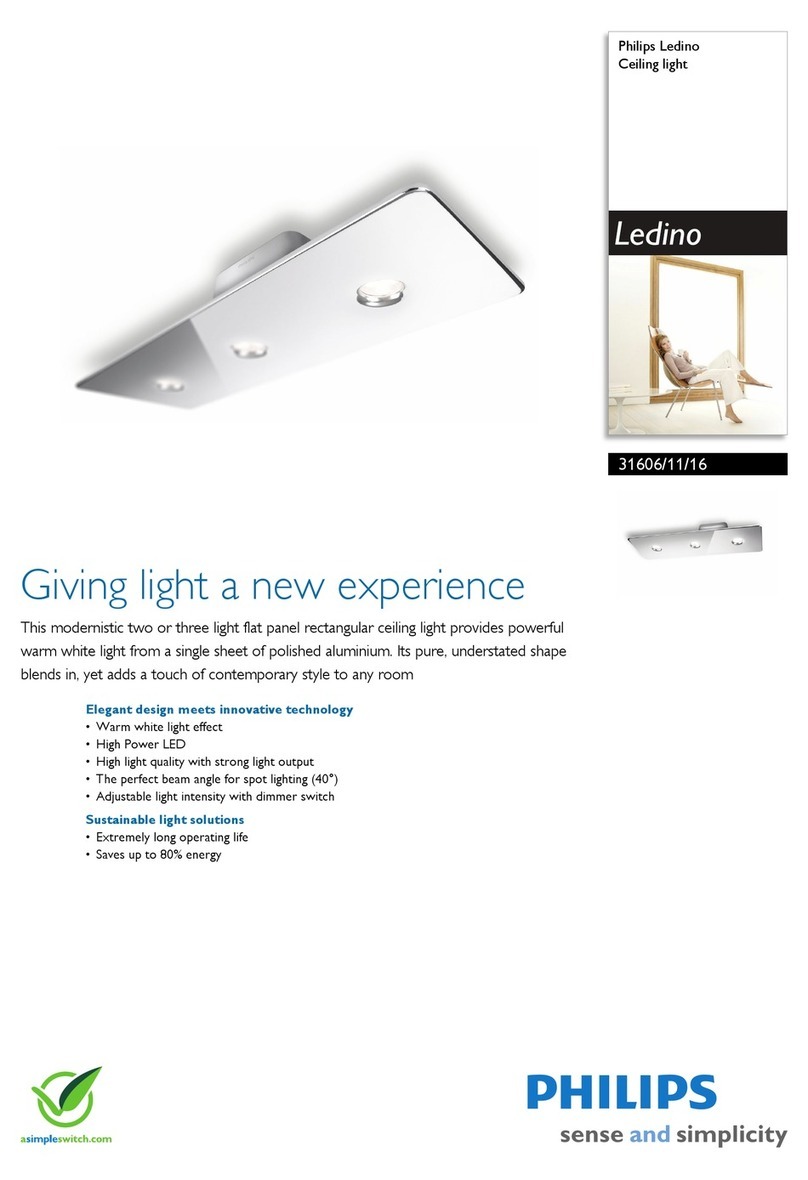
Philips Ledino 31606/11/16 Specifications

Philips

Philips Ledino 31606/11/16 Specifications

RL R45721102 manual

RL

RL R45721102 manual

SLV 231360 instruction manual

SLV

SLV 231360 instruction manual

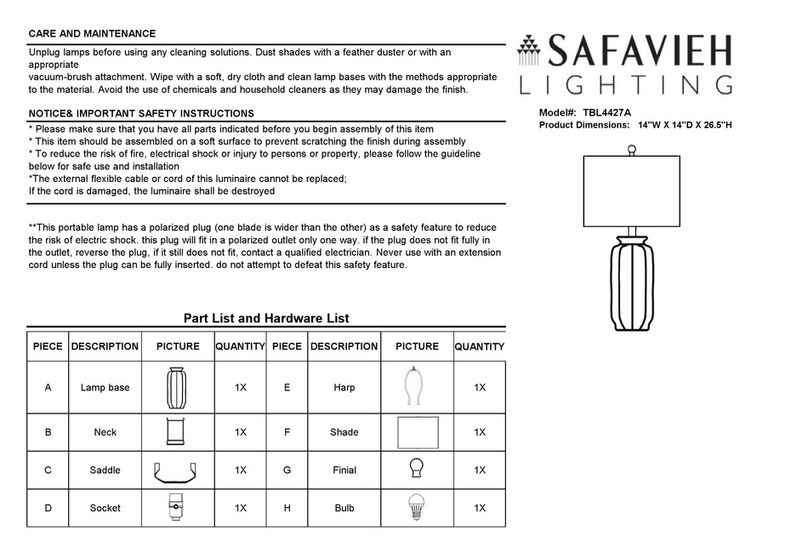
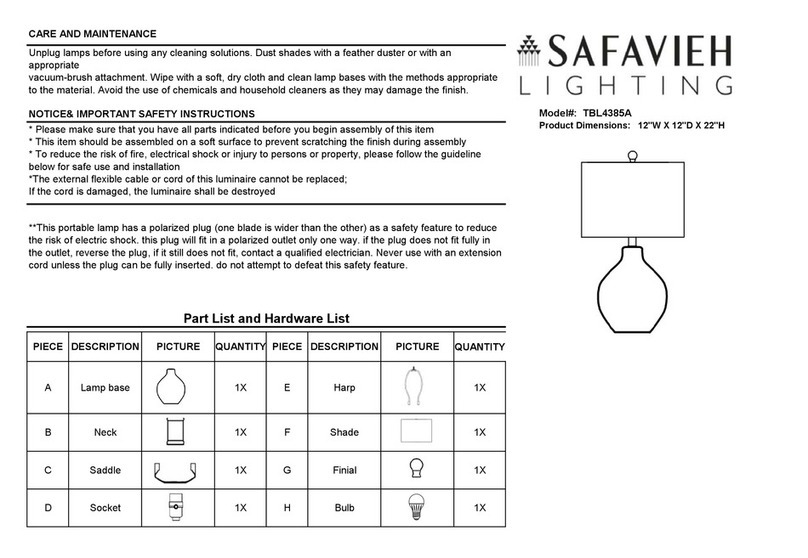
Safavieh Lighting RIGLAN TBL4090 manual

Safavieh Lighting

Safavieh Lighting RIGLAN TBL4090 manual

Hyundai HYUSTR001R installation instructions

Hyundai

Hyundai HYUSTR001R installation instructions

MIRABELLA Genio JETSON quick start guide

MIRABELLA

MIRABELLA Genio JETSON quick start guide

Philips LivingAmbiance 6916160PH brochure

Philips

Philips LivingAmbiance 6916160PH brochure

Safavieh Lighting TBL4158 quick start guide

Safavieh Lighting

Safavieh Lighting TBL4158 quick start guide

Philips Ledino 69066/30/16 brochure

Philips

Philips Ledino 69066/30/16 brochure

Philips Ledino 33603/87/16 user manual

Philips

Philips Ledino 33603/87/16 user manual

Dale Tiffany TT12061 Assembly instructions

Dale Tiffany

Dale Tiffany TT12061 Assembly instructions

HAMPTON BAY HD7411A Use and care guide

HAMPTON BAY

HAMPTON BAY HD7411A Use and care guide

Profoto ProTungsten Air user guide

Profoto

Profoto ProTungsten Air user guide

Philips ecoMOODS 34613/48/16 manual

Philips

Philips ecoMOODS 34613/48/16 manual

FOSCARINI Twiggy Grid Assembly instructions

FOSCARINI

FOSCARINI Twiggy Grid Assembly instructions

Orion LA 4-1205/1 Mounting and safety instructions

Orion

Orion LA 4-1205/1 Mounting and safety instructions

Silverwood CPLT1875 Assembly instructions

Silverwood

Silverwood CPLT1875 Assembly instructions

Conrad 77 62 71 operating instructions

Conrad

Conrad 77 62 71 operating instructions

manuals.online logo
manuals.online logoBrands
  • About & Mission
  • Contact us
  • Privacy Policy
  • Terms and Conditions

Copyright 2025 Manuals.Online. All Rights Reserved.