Master Forge 32938 User manual

Serial Number Purchase Date
ATTACH YOUR RECEIPT HERE
Lowes.com/masterforge
# AB12286
Español p. 25
Français p. 13
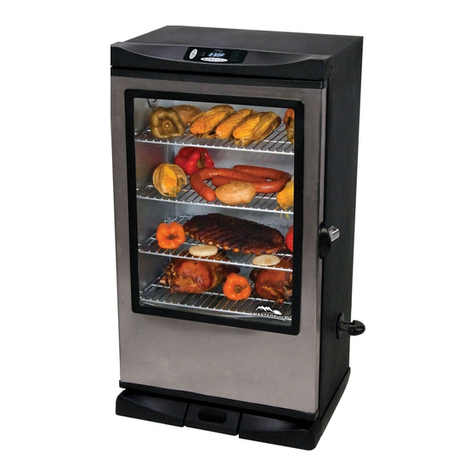
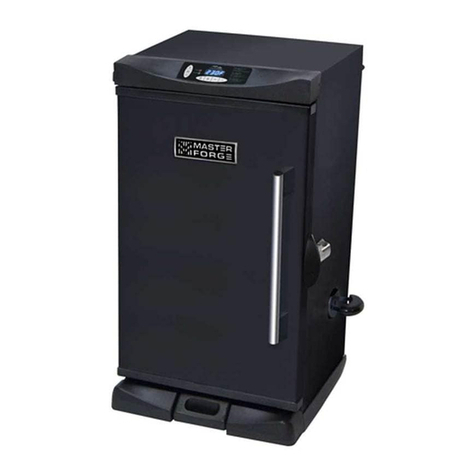
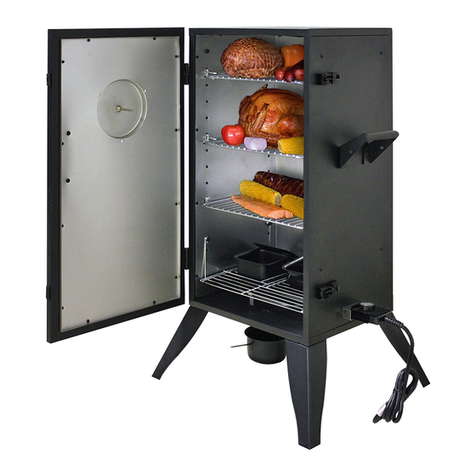
ELECTRIC SMOKER
ITEM #0416469
MODEL #32938
Master Forge & M Design® are registered
trademarks of LF, LLC. All rights reserved.
Questions, problems, missing parts? Before returning to your retailer, call our customer
service department at 1-800-963-0211, 8 a.m. – 6 p.m., EST, Monday – Thursday,
8 a.m. – 5:00 p.m., EST, Friday.
1

2
Lowes.com/masterforge
TABLE OF CONTENTS
Package Contents ................................................................................................................3
Hardware Contents...............................................................................................................3
Safety Information ................................................................................................................4
Preparation...........................................................................................................................6
Assembly Instructions...........................................................................................................6
Initial Use Instructions ..........................................................................................................8
Operating Instructions ..........................................................................................................9
Cooking Instructions.............................................................................................................9
Care and Maintenance ...................................................................................................... 10
Troubleshooting..................................................................................................................11
Warranty .............................................................................................................................11
Replacement Parts List ..................................................................................................... 12

3
Lowes.com/masterforge
3
A
C
B
D
E
F
G
H
PART DESCRIPTION QUANTITY
A Smoking Rack 3
BWater Pan & Wood Chip Box Tray 1
C Wood Chip Box Lid 1
D Cabinet 1
E Door Handle 1
F Foot 4
G Side Handle 2
H Temperature Controller 1
PACKAGE CONTENTS
HARDWARE CONTENTS
M5x16 Bolt
Qty. 8
5 mm Spring
Washer
Qty. 8
5 mm Flat
Washer
Qty. 16
M5 Nut
Qty. 8
AA BB CC DD
Step Bolt
Qty. 2
EE

4
Lowes.com/masterforge
Please read and understand this entire manual before attempting to assemble, operate or install the
product. Read all instructions.
• DO NOT use appliance for other than intended use. It is NOT intended for commercial use.
• This item is NOT intended to be installed or used in or on a recreational vehicle and/or boats.
• The smoker is NOT to be used as a heater.
• Use only on properly grounded outlet. Unplug from outlet when not in use and before cleaning. To
disconnect, turn the control to OFF, then remove plug from wall outlet. Allow to cool before putting
on or taking off parts.
• Make sure the smoker is completely assembled and ready for operation before plugging into
electrical outlet. DO NOT operate any appliance with a damaged cord or plug or after the appliance
malfunctions or has been damaged in any manner.
• To protect against electrical shock, DO NOT immerse cord, plugs or electrical parts in water or other
liquids. Smoker should NOT be exposed to water at any time.
• DO NOT operate smoker during rain or storms. If possible, disconnect from electrical source and
move smoker to dry and protected location.
• Protect electrical cord from damage, hot surfaces, and/or moisture. DO NOT let cord hang over
edge of table or counter or touch hot surfaces.
• The use of alcohol, prescription or non-prescription drugs may impair the user’s ability to properly
assemble and safely operate this smoker.
• This smoker is for OUTDOOR use only, in a well-ventilated area. DO NOT operate the smoker
indoors, in a garage, or in any other enclosed area or under overhead construction.
• Use caution when assembling and operating the smoker to avoid cuts and scrapes from rough or
sharp edges.
• Use caution when lifting and/or moving the smoker to avoid strains or back injury. Two (2) people
are recommended to lift the smoker. DO NOT move the smoker while it is in use. Allow the smoker
to cool completely before moving or storing. Extreme caution must be used when moving an
appliance containing hot oil or other hot liquids.
• DO NOT operate the smoker near or under ammable or combustible materials such as decks,
porches or carports. The minimum clearance shall be at least 24 inches from any structure or
combustible material.
• Operate the smoker only on stable, level, non-ammable surfaces such as asphalt, concrete, or
solid ground. DO NOT operate the smoker on ammable surfaces such as carpet or wood decks.
• DO NOT place or operate on tables or counters.
• DO NOT store the smoker near gasoline or other combustible liquids or where combustible vapors
may be present.
• Store smoker indoors when not in use – out of reach of children. DO NOT store or operate the
smoker in an area accessible to children or pets. Store the smoker in a dry, protected location.
• DO NOT leave the smoker unattended while it is in use. Close supervision is necessary when any
appliance is used by or near children.
• DO NOT allow anyone to conduct activities around the smoker during or following its use until it has
completely cooled. It is hot during operation and remains hot for a period of time.
• DO NOT leave hot ashes unattended until the smoker cools completely.
• DO NOT touch hot surfaces. Use handles or knobs. If you must handle the smoker when it is hot,
ALWAYS use protective mitts or heat-resistant gloves.
• DO NOT cover smoking racks with any type of metal foil as this may cause serious damage to the smoker.
• The water pan/wood chip box tray should not be moved while the smoker is operating or until the
SAFETY INFORMATION

5
Lowes.com/masterforge
smoker has cooled sufciently. It will contain hot liquid, hot ashes and hot grease that may cause
serious injury. If you must move these components, ALWAYS use protective oven mitts or heat-
resistant gloves.
• Dispose of cold ashes by wrapping them in heavy aluminum foil and putting them in a non-combustible
container. Be sure there are no other combustible materials in or near the container. If you must
dispose of ashes in less time than it takes for them to completely cool, remove the ashes from
the smoker, keeping them in heavy aluminum foil and soaking them completely with water before
disposing of them in a non-combustible container.
• DO NOT obstruct the ow of combustion air and/or ventilation air for the smoker.
• Use CAUTION when operating. Tie back long hair while operating the smoker. ALWAYS wear
fully-covering shoes while operating the smoker.
• NEVER use glassware, plastic or ceramic cookware on or in the smoker.
• NEVER operate the smoker without water in the water pan. NEVER allow the water to completely
evaporate. DO NOT clean this product with a water spray or similar cleaner.
• Check the water level at least every two hours. A sizzling sound may indicate a low water level or
billowing smoke may indicate no water in the water pan (grease from the meat will be falling on a
hot, dry water pan). Use caution and follow the instructions in this manual for adding water while
smoker is operating, as hot water may splash up and cause serious injury.
• When using avoring wood, add a sufcient amount prior to operation to avoid having to add wood
while smoker is operating.
• The use of accessory attachments is not recommended by the manufacturer and may cause injuries.
• While the smoker is not in use, the electrical cord should be unplugged and stored in a safe, dry location.
• A short power-supply cord (or detachable power-supply cord) should be used to reduce the risk
resulting from becoming entangled in or tripping over a longer cord. Longer detachable power
supply cords or extension cords are available and may be used if care is exercised in their use. If a
longer detachable power-supply cord or extension cord is used:
1. The marked electrical rating of the cord set or extension cord should be at least as great as the
electrical rating of the appliance.
2. The cord should be arranged so that it will not drape over the countertop or tabletop where it can
be pulled on by children or tripped over unintentionally. Connection to an extension cord should
be kept dry and off the ground.
• Outdoor extension cords should be used with outdoor use products and are surface marked with the
sufx letter “W” and with a tag stating “Suitable for use with outdoor appliances”.
• DO NOT use the smoker if the heating element fails to heat up. Under such conditions, the smoker
should be turned to the OFF position and the electrical cord should be disconnected. Refer to
"Troubleshooting" guide in this manual.
• DO NOT use the smoker if the power indicator light in the electrical controller fails to function. Refer
to "Troubleshooting" guide in this manual.
• Alternative fuels such as charcoal and wood pellets should NOT be used with this smoker or any of
its accessories.
• Fuel, such as charcoal briquettes, is not to be used with appliance.
• DO NOT place on or near a hot gas or electric burner or in a heated oven.
• DO NOT place smoker cover on the smoker if it is still hot from use.
• All installations are to conform to local, state and federal re codes.
• KEEP re extinguisher accessible at all times.
• Burning wood gives off carbon monoxide which can cause death.
• DO NOT burn wood chips inside homes, vehicles, tents, garages or any enclosed areas.
SAVE THESE INSTRUCTIONS
SAFETY INFORMATION

6
Lowes.com/masterforge
PREPARATION
ASSEMBLY INSTRUCTIONS
Before beginning assembly of product, make sure all parts are present. Compare parts with package
contents list and hardware contents list. If any part is missing or damaged, do not attempt to
assemble the product.
Estimated Assembly Time: 15 – 20 minutes
Tools Required for Assembly (not included): Phillips screwdriver, adjustable wrench.
Helpful Tools (not included): Level
2. Carefully stand the cabinet (D) upright. Level the
cabinet (D) by placing a level (not included) on
the side of the cabinet (D) and adjusting feet (F)
until level.
1. Carefully place the cabinet (D) on its left side.
Insert four feet (F) into the holes of the bottom of
cabinet (D).
1
22
D
F
2
1
1
1
1
2
D
F
1

7
ASSEMBLY INSTRUCTIONS
Lowes.com/masterforge
4. Attach door handle (E) with two step bolts (EE).
5. Place water pan & wood chip box tray (B)
and wood chip box lid (C) into the lowest rack
position in the cabinet (D).
3. Attach side handle (G) with four 5 mm spring
washers (BB), four 5 mm at washers (CC), and
four M5x16 bolts (AA). Secure from inside with
four 5 mm at washers (CC) and four M5 nuts
(DD). Repeat for remaining side handle (G).
D
B
C
5
1
2
EE
E
4
1
2
G
D
DD
AA CC
BB
3
CC
Hardware Used
Hardware Used
M5x16 Bolt
Step Bolt
5 mm Spring Washer
5 mm Flat Washer
M5 Nut
x 8
x 2
x 8
x 16
x 8
AA
EE
BB
CC
DD
M5x16 Bolt
Qty. 8
5 mm Spring
Washer
Qty. 8
5 mm Flat
Washer
Qty. 16
M5 Nut
Qty. 8
AA BB CC DD
Step Bolt
Qty. 2
EE
M5x16 Bolt
Qty. 8
5 mm Spring
Washer
Qty. 8
5 mm Flat
Washer
Qty. 16
M5 Nut
Qty. 8
AA BB CC DD
Step Bolt
Qty. 2
EE
M5x16 Bolt
Qty. 8
5 mm Spring
Washer
Qty. 8
5 mm Flat
Washer
Qty. 16
M5 Nut
Qty. 8
AA BB CC DD
Step Bolt
Qty. 2
EE
M5x16 Bolt
Qty. 8
5 mm Spring
Washer
Qty. 8
5 mm Flat
Washer
Qty. 16
M5 Nut
Qty. 8
AA BB CC DD
Step Bolt
Qty. 2
EE
M5x16 Bolt
Qty. 8
5 mm Spring
Washer
Qty. 8
5 mm Flat
Washer
Qty. 16
M5 Nut
Qty. 8
AA BB CC DD
Step Bolt
Qty. 2
EE

8
ASSEMBLY INSTRUCTIONS
Lowes.com/masterforge
INITIAL USE INSTRUCTIONS
D
H
7
A
D
6
6. Insert each smoking rack (A) into the associated
rack positions in the cabinet (D).
NOTE: It is recommended to keep these racks
inside the smoker when NOT in use.
For use, only use the number of racks required
to hold the meat.
7. Insert temperature controller (H) into the controller plug
on the right side of the cabinet (D).
NOTE: The rubber translucent white wrap on the
temperature controller (H) is designed to protect the
temperature controller in the event of rain during
operation.
NOTE: This wrap is only water-resistant and is not
meant to be waterproof.
NOTE: DO NOT operate this smoker during rain or
storms. If possible, disconnect from electrical source and
move smoker to dry and protected location.
Before you cook food in the smoker, it is important to prepare the smoker. The below procedure is
designed to clean and prepare the smoker for its initial smoking.
1. Set the temperature of the smoker to MED and the time to run to two hours.
2. For rst hour, remove water/wood chip box tray. DO NOT place any food in the smoker during this
procedure.
3. For second hour, place water/wood chip box tray in its position and only add wood to the wood chip
box. Allow the wood to burn for the remaining hour.
4. When this procedure is completed, allow the smoker to cool and remove the wood ashes and
residue from a cool or cold wood chip box. Also make sure the adjacent water pan is also cool or
cold when performing this clean out.

9
Lowes.com/masterforge
Adding water and wood to the smoker
1. Add wood to wood chip box prior to placing water pan/wood chip box tray in the smoker. Make sure
not to overll the box with wood and that the wood chip box lid properly ts.
NOTE: The amount and type of wood used is entirely up to you. It is recommended to start with
small amounts of wood initially.
2. Place the water pan/wood chip box tray in the smoker and then add water to water pan. Fill up to
1 in. below the rim. Close the door.
3. Then set the temperature controller to your desired setting (LOW/MED/HIGH) and adjust
accordingly until the temperature on the temperature gauge reaches the desired temperature.
Checking water and wood during operation
• To check the water while the smoker is in operation and HOT, SLOWLY open the door to allow the
built up heat and smoke to escape. Replenish water as need – BE CAREFUL NOT to touch any
part of the interior of the cabinet or door. Then SLOWLY and CAREFULLY close the smoker door.
• To check the wood while the smoker is in operation and HOT, SLOWLY open the door to allow the
built up heat and smoke to escape. Using an oven mitt or other heat-protection glove, CAREFULLY
remove the wood chip box lid. Once the lid is open, using a long-handled utensil, stir the remaining
wood ashes at and carefully add wood. BE CAREFUL NOT to touch any part of the interior of the
cabinet or door. Again using an oven mitt or other heat-protection glove, CAREFULLY reposition the
wood chip box lid to its correct position. Then SLOWLY and CAREFULLY close the smoker door.
IMPORTANT: Before use, clean and inspect the entire smoker.
• Place and ll the wood chip box with avoring wood chips and place the water pan/wood chip box
tray in the appropriate location of the smoker as instructed in the assembly section of this instruction
manual. The amount and type of wood(s) you use is entirely up to you. Checking and adding wood
to the wood chip box is covered on page 9 of this manual.
• Place the water pan/wood chip box tray in the appropriate location of the smoker as instructed in the
assembly instructions then carefully ll the water pan with water (or similar liquid like beer or apple
juice) up to 1 in. below the water pan rim. DO NOT overll or allow water to overow from the water
pan. Checking and adding water to the water pan is covered on page 9 of this manual.
• Insert or adjust the smoking racks to the desired positions. For better access to the food with tongs
or spatulas:
1. Use only the smoking racks needed for your smoking.
2. Be sure the grids of the smoking racks run front-to-back as shown in the assembly section.
Smoking tip: Coating the smoking rack(s) with cooking oil or spray before placing meat will help
in after-use clean up.
• Place the food on the smoking racks in a single layer with space between each piece. This will allow
smoke and hot moisture to circulate evenly around the food pieces.
OPERATING INSTRUCTIONS
COOKING INSTRUCTIONS

10
Lowes.com/masterforge
COOKING INSTRUCTIONS
CARE AND MAINTENANCE
• Depending on the meat and size, smoking for two to three hours at the ideal constant cooking
temperature of 225º to 250º F will get the best results. For more tender and heavily smoked meat, a
temperature of 220º to 240º F and smoking four to six hours (or longer) may be preferred. If time is
critical, a higher temperature range is recommended. One common time measurement used is to allow
45 – 60 minutes smoking time per pound of meat. NOTE: This will vary for bone-in and boneless meats.
• Flavoring wood tips:
• Small wood chips work best inside the wood chip box.
• Use dry hardwoods such as hickory, pecan, apple, cherry or mesquite.
• DO NOT use resinous woods such as pine. These usually produce an unpleasant avoring.
• Let your taste be your guide. Experiment with different types and quantities of wood chunks, chips
or sticks. You may also mix different woods together.
• To produce longer smoking and prevent faster burning, pre-soak the wood in water for at least
30 minutes (Refer to wood chip manufacturer’s instructions).
• Most smoking avor occurs within the rst few hours of smoking. Adding wood chips after this is
typically not necessary unless extra-heavy smoking avor is desired.
CAUTION: All care and maintenance procedures are to be performed only while the smoker is turned
off, completely cooled and unplugged from the electrical source.
• To clean, remove the water pan/wood chip box tray and cooking racks from the smoker. Clean with
hot, soapy water and rinse and dry thoroughly. To make cleaning easier, you may prefer to coat the
cooking racks lightly with a cooking oil or cooking spray before each use.
• To clean the inside and outside of the smoker cabinet, simply use a damp cloth. Spray washing with
a water hose is not recommended. All moisture should be wiped away and not allowed to stay inside
or on top of the smoker.
• After the ashes are completely cool, remove the water pan/wood chip box tray with lid and
thoroughly clean out all wood ashes and unburned wood, and wipe the box clean of any residue.
• Frequently inspect and clean the smoker for insects and insect nests.
• Inspect the electrical temperature controller cord before each use to make sure it is in good
condition.
• If there are signs of cuts or damage, DO NOT use electrical temperature controller.
• To protect your smoker from weather and other elements, it is recommended to keep your smoker
covered when not in use and stored in a dry area.
• It is recommended that this electric smoker is NOT be stored outside or in an area where outside
elements may have a detrimental effect on the smoker and its operation.
• Weather-resistant covers for this smoker are available for purchase.

11
Lowes.com/masterforge
This electric smoker is warranted to be free from defects in material and workmanship when properly
assembled, used and cared for as directed in these instructions for one (1) year from the date of original
retail purchase. Painted surfaces are guaranteed to be free of defects for 90 days from the date of
original retail purchase (except for rust, which may appear from repeated use). This warranty does not
cover damage or issues related to neglect, abuse, accident, transportation damages, commercial use or
ANY modications made to this product. Repair labor is not covered. This warranty is the only warranty
offered and is in lieu of all other warranties, whether expressed or implied, which includes implied
warranty, merchandising or use for a particular purpose.
WARRANTY
TROUBLESHOOTING
PROBLEM POSSIBLE CAUSE CORRECTIVE ACTION
Temperature
controller light
arrow does not
illuminate.
1. Electrical cord not plugged into outlet.
2. Main house fuse has been tripped.
3. Temperature controller has
malfunctioned.
1. Check outlet connection.
2. Check house fuses. DO NOT
operate other appliances on same
electrical circuit.
3. DO NOT use the smoker and
contact the manufacturer.
Longer than normal
heating time. 1. Door not closed completely.
2. Temperature controller has
malfunctioned.
3. Use of extension cord.
1. Close door securely.
2. DO NOT use the smoker and
contact the manufacturer.
3. Discontinue use of extension cord.
No smoke. 1. No wood in wood chip box.
2. Heating element is not functioning. 1. Add wood to wood chip box.
2. DO NOT use the smoker and
contact the manufacturer.
Temperature
controller light
arrow is on but
the smoker is not
heating.
1. Temperature controller has
malfunctioned.
2. Heating element is not functioning.
1. DO NOT use the smoker and
contact the manufacturer.
2. DO NOT use the smoker and
contact the manufacturer.
Temperature
controller does not
adjust heat.
1. Temperature controller has
malfunctioned. 1. DO NOT use the smoker and
contact the manufacturer.
Temperature
decreases sharply
or shuts down
prematurely.
1. Temperature controller has
malfunctioned. 1. DO NOT use the smoker and
contact the manufacturer.

12
Lowes.com/masterforge
For replacement parts, call our customer service department at 1-800-963-0211, 8 a.m. – 6 p.m., EST,
Monday – Thursday, 8 a.m. – 5 p.m., EST, Friday.
NOTE: Refer to the "Hardware Contents" section
for illustrations of hardware available for order.
PART DESCRIPTION PART #
1Door handle ES0150
2Temperature gauge ES0168
3Door ES0169
4Door hinge ES0153
5Smoking rack ES0155
6Grease shield plate ES0156
7Left support frame ES0157
8Right support frame ES0158
9Door magnet ES0159
10 Side handle ES0160
11 Cabinet ES0161
12 Rear vent tube ES0162
PART DESCRIPTION PART #
13 Temperature controller ES0163
14 Foot ES0164
15 Heating element ES0165
16 Wood chip box lid ES0166
17 Water pan/wood chip box
tray
ES0167
AA M5x16 mm bolt ES0175
BB 5 mm at washer ES0176
CC 5 mm spring washer ES0177
DD M5 nut ES0178
EE Step bolt ES0154
1
2
3
4
4
5
6
7
8
12
13
14
15
16
17
10
11
Printed in China
Master Forge & M Design® are registered
trademarks of LF, LLC. All rights reserved.
REPLACEMENT PARTS LIST
9

Lowes.com/masterforge
FUMOIR ÉLECTRIQUE
ARTICLE #0416469
MODÈLE #32938
Master Forge et le motif M Design® sont
des marques de commerce déposées de
LF, LLC. Tous droits réservés.
Des questions, des problèmes, des pièces manquantes? Avant de retourner l’article au
détaillant, appelez notre service à la clientèle au 1 800 963-0211, entre 8 h et 18 h (HNE),
du lundi au jeudi, ou entre 8 h et 17 h (HNE) le vendredi.
13
Date d’achat
Numéro de série
JOIGNEZ VOTRE REÇU ICI

14
Lowes.com/masterforge
TABLE DES MATIÈRES
Contenu de l’emballage..................................................................................................... 15
Quincaillerie incluse........................................................................................................... 15
Mesures de sécurité importantes ...................................................................................... 16
Préparation........................................................................................................................ 18
Instructions pour l’assemblage ou l’installation ................................................................. 18
Instructions pour la première utilisation............................................................................. 20
Mode d’emploi ................................................................................................................... 21
Instructions pour la cuisson............................................................................................... 21
Entretien ............................................................................................................................ 22
Dépannage........................................................................................................................ 23
Garantie............................................................................................................................. 23
Liste des pièces de rechange............................................................................................ 24

15
Lowes.com/masterforge
15
A
C
B
D
E
F
G
H
PIÈCE DESCRIPTION QUANTITÉ
A Grille de fumaison 3
BPlateau avec cuve à eau et contenant à copeaux de bois 1
CCouvercle de contenant à copeaux de bois 1
D Carrosserie 1
E Poignée de porte 1
F Pied 4
G Poignée latérale 2
H Dispositif de réglage de la température 1
CONTENU DE L’EMBALLAGE
QUINCAILLERIE INCLUSE (grandeur réelle)
Boulon M5 de
16 mm
Qté : 8
Rondelle à
ressort de 5 mm
Qté : 8
Rondelle
plate de 5 mm
Qté : 16
Écrou M5
Qté : 8
AA BB CC DD
Boulon de
structure
Qté : 2
EE

16
Lowes.com/masterforge
Prenez soin de lire et de comprendre l’intégralité de ce manuel avant de tenter d’assembler, d’installer ou
d’utiliser le produit. Lisez toutes les instructions.
• N’utilisez PAS l’appareil pour un usage autre que celui auquel il est destiné. Il n’est PAS destiné à un usage
commercial.
• Il n’est PAS destiné à l’installation ou à l’usage à bord d’un véhicule récréatif ou d’un bateau.
• Ce fumoir ne doit PAS être utilisé comme appareil de chauffage.
• Branchez-le toujours sur une prise mise à la terre. Débranchez l’appareil de la prise lorsque vous ne l’utilisez
pas ou lorsque vous le nettoyez. Pour débrancher l'appareil, réglez le bouton de commande à la position
d’arrêt, puis retirez la che de la prise murale. Laissez-le refroidir avant d’ajouter ou de retirer des pièces.
• Assurez-vous que le fumoir est complètement assemblé et est prêt à l’utilisation avant de le brancher sur une
prise de courant. N’utilisez AUCUN appareil muni d’un cordon ou d’une che endommagé, qui a subi une
défaillance, qui est tombé ou qui a été endommagé de quelque façon que ce soit.
• An d’éviter tout choc électrique, n’immergez pas le cordon d’alimentation, les ches, ni les pièces électriques
dans l’eau ou dans d’autres liquides. Le fumoir ne doit EN AUCUN CAS être exposé à l’eau.
• Ne faites PAS fonctionner le fumoir lorsqu’il pleut ou pendant un orage. Si possible, débranchez l’appareil de
la prise de courant et mettez-le à l’abri dans un endroit sec.
• Protégez le cordon d’alimentation de tout dommage, des surfaces chaudes et de l’humidité. Ne laissez PAS
le cordon d’alimentation pendre sur le rebord d'une table ou d'un comptoir ni entrer en contact avec une
surface chaude.
• L’usage d’alcool, de médicaments ou de drogue peut altérer l’habileté de l’utilisateur à assembler le fumoir
correctement et à le faire fonctionner de façon sécuritaire.
• Ce fumoir ne doit être utilisé qu’À L’EXTÉRIEUR seulement, dans un endroit bien aéré. N’utilisez PAS
le fumoir à l’intérieur, dans un garage ou toute autre pièce fermée ni à l’abri d’une quelconque structure
comportant un toit.
• Faites preuve de prudence lorsque vous assemblez et utilisez le fumoir an d’éviter les coupures et les
égratignures que peuvent causer les rebords rugueux ou les arêtes vives.
• Faites preuve de prudence lorsque vous soulevez ou déplacez le fumoir an d’éviter les blessures
provoquées par l’effort, notamment les blessures au dos. Nous recommandons que le fumoir, s’il doit être
soulevé, soit soulevé par deux (2) personnes. Ne déplacez PAS le fumoir pendant qu’il est en marche. Vous
devez faire preuve d'une extrême prudence lorsque vous déplacez un appareil qui contient de l'huile chaude
ou tout autre liquide chaud.
• N’utilisez PAS le fumoir à proximité d’une structure faite de matériaux inammables ou combustibles (par
exemple, terrasse en bois, véranda ou abri d’auto) ni sous une telle structure. Un dégagement minimal de
60,1 cm (24 po) doit être maintenu entre le fumoir et toute structure ou tout matériau combustible.
• Utilisez le fumoir uniquement sur une surface stable, DE NIVEAU et ininammable, par exemple une surface
revêtue d’asphalte ou de ciment ou un terrain ferme. N’utilisez PAS le fumoir sur une surface inammable,
par exemple un sol recouvert de tapis ou une terrasse en bois.
• Le fumoir ne doit PAS être placé ni utilisé sur une table ou un comptoir.
• Ne rangez PAS le fumoir dans un endroit près duquel se trouve de l’essence ou tout autre liquide
inammable ou dans un endroit où des vapeurs inammables sont susceptibles d’être présentes.
• Lorsque vous n’utilisez pas le fumoir, rangez-le à l’intérieur, hors de la portée des enfants. Le fumoir ne doit
PAS être rangé ni utilisé dans un endroit accessible aux enfants ou aux animaux domestiques. Entreposez le
fumoir dans un endroit sec et protégé.
• Ne laissez PAS le fumoir sans surveillance pendant qu’il est en marche. Supervisez attentivement l’utilisation
du fumoir. Une surveillance étroite est de rigueur lorsque l’appareil est utilisé par des enfants ou à proximité
de ces derniers.
• Ne permettez AUCUNE activité à proximité du fumoir pendant ou après son utilisation jusqu’à ce qu’il se soit
complètement refroidi. Le fumoir est chaud lorsqu’il est en marche et demeure chaud pendant un certain
temps suivant son utilisation.
• Ne laissez PAS les cendres chaudes sans surveillance jusqu’à ce que le fumoir se soit complètement refroidi.
• Ne touchez PAS aux surfaces quand elles sont chaudes. Utilisez plutôt les poignées. Si vous devez
MESURES DE SÉCURITÉ IMPORTANTES

17
Lowes.com/masterforge
manipuler le fumoir pendant qu’il est chaud, portez TOUJOURS des gants de cuisine isolants.
• La cuve à eau, le contenant à copeaux de bois et le bac ramasse-graisse ne doivent pas être déplacés
pendant que le fumoir est en marche ni tant que le fumoir ne s’est pas sufsamment refroidi. Si vous devez
déplacer ces composants, portez TOUJOURS des gants de cuisine isolants.
• Jetez les cendres froides en les emballant dans du papier d’aluminium résistant et en les plaçant dans un
contenant incombustible. Assurez-vous qu’aucune matière combustible ne se trouve dans le contenant ou
près de celui-ci.
• Ne recouvrez PAS les grilles du fumoir de quelque type de papier métallique que ce soit, car vous risquez
d’endommager gravement le fumoir.
• Ne bloquez PAS le ux d’air de combustion ou de ventilation du fumoir.
• Faites preuve de PRUDENCE si vous ouvrez la porte pendant que le fumoir est en marche. Portez
TOUJOURS des chaussures fermées lorsque vous utilisez le fumoir.
• N’utilisez JAMAIS de vaisselle en verre, en plastique ou en céramique dans le fumoir ou sur celui-ci.
• N’utilisez JAMAIS le fumoir sans eau dans la cuve à eau. Ne permettez JAMAIS à l’eau de s’évaporer
complètement. Ne le nettoyez PAS à l’aide d’un jet d’eau ou d’un dispositif semblable.
• Si des grésillements se font entendre ou si des tourbillons de fumée s’échappent du fumoir, c’est peut-être
que la cuve à eau est vide (la graisse de la viande tombe alors dans une cuve à eau sèche et chaude). Faites
preuve de prudence lorsque vous ajoutez de l’eau pour éviter que de l’eau brûlante vous éclabousse et vous
blesse gravement.
• Lorsque vous utilisez du bois aromatisant, mettez-en une quantité sufsante dans le contenant avant
l’utilisation pour éviter d’avoir à rajouter du bois en cours de route.
• L’utilisation d’autres accessoires n’est pas recommandée par le fabricant, car elle pourrait causer des
blessures.
• Lorsque vous n’utilisez pas le fumoir, retirez le cordon d’alimentation électrique et rangez-le dans un endroit
sûr, au sec.
• Utilisez un cordon d'alimentation court (ou une rallonge électrique détachable) pour éviter de vous empêtrer
les pieds dans un long cordon ou de trébucher. Des cordons d’alimentation ou des rallonges électriques
détachables plus longs peuvent être utilisés, mais en faisant preuve de prudence. Si vous utilisez un long
cordon d’alimentation ou une longue rallonge détachable : (1) les caractéristiques électriques de la rallonge
ou du cordon d'alimentation utilisés doivent être au moins égales à celles de l’appareil, et (2) le cordon
d’alimentation doit être disposé de façon à ne pas pendre d’un comptoir ou d’une table pour éviter qu’un
enfant le tire ou trébuche. Les connexions de la rallonge électrique doivent être à l'abri de l'eau et ne pas
toucher le sol.
• Les rallonges conçues pour l'extérieur sont marquées d'un W et sont dotées d'une étiquette sur laquelle il est
écrit « Suitable for Use with Outdoor Applicances » (convient aux appareils pour l'extérieur).
• N’utilisez PAS le fumoir si l’élément chauffant ne chauffe pas. Si cela se produit, mettez le fumoir en position
« OFF » (arrêt) et débranchez le cordon d’alimentation électrique. Consultez le guide de dépannage du
présent manuel.
• N’utilisez PAS le fumoir si le voyant d’alimentation ou l’afcheur à DEL ne fonctionne pas. Consultez le guide
de dépannage du présent manuel.
• N’utilisez AUCUN autre combustible, par exemple, charbon de bois ou pastilles de bois, avec ce fumoir.
• Ne placez PAS de charbon de bois ou de pastilles de bois dans le contenant à copeaux de bois.
• N’alimentez pas cet appareil avec du carburant, comme des briquettes de charbon.
• Ne placez PAS l’appareil à proximité d’un brûleur à gaz ou électrique chaud, ni à l’intérieur d’un four chaud.
• Toutes les installations doivent être conformes aux exigences municipales, provinciales et fédérales en
matière de prévention des incendies.
• ASSUREZ-VOUS qu’un extincteur d’incendie se trouve à portée de la main en tout temps.
• La combustion du bois génère du monoxyde de carbone, qui peut causer la mort.
• Ne faites PAS brûler des copeaux de bois à l'intérieur d'une maison, d'un véhicule, d'une tente, d'un
garage ou de tout autre espace clos.
CONSERVEZ CES INSTRUCTIONS
MESURES DE SÉCURITÉ IMPORTANTES

18
Lowes.com/masterforge
PRÉPARATION
INSTRUCTIONS POUR L’ASSEMBLAGE
Avant de commencer l’assemblage du produit, assurez-vous d’avoir toutes les pièces. Comparez les
pièces avec la liste du contenu de l’emballage et de la quincaillerie ci-dessus. S’il y a des pièces
manquantes ou endommagées, ne tentez pas d’assembler le produit. Communiquez avec le service
à la clientèle pour obtenir des pièces de rechange.
Temps d’assemblage approximatif : de 15 à 20 minutes.
Outils nécessaires pour l’assemblage (non inclus) : tournevis cruciforme, clé à molette.
Outils utiles (non inclus) : niveau.
2. Avec précaution, remettez le fumoir (D) debout.
Mettez le fumoir (D) de niveau en plaçant un
niveau (non inclus) sur le côté du fumoir (D) et
en ajustant les pieds (F) jusqu’à ce qu’il soit de
niveau.
1. Placez soigneusement le fumoir (D) sur son côté
gauche. Insérez quatre pieds (F) dans les trous
situés en dessous du fumoir (D).
1
22
D
F
2
1
1
1
1
2
D
F
1

19
Lowes.com/masterforge
INSTRUCTIONS POUR L’ASSEMBLAGE
4. Fixez la poignée de la porte (E) à l’aide de deux
boulons de structure (EE).
5. Mettez le plateau avec la cuve à eau et le
contenant à copeaux de bois (B) ainsi que le
couvercle de contenant à copeaux de bois (C)
dans l’emplacement le plus bas à l’intérieur du
fumoir (D).
3. Fixez la poignée latérale (G) à l’aide de quatre
rondelles à ressort de 5 mm (BB), de quatre ron-
delles plates de 5 mm (CC) et de quatre boulons
M5 de 16 mm (AA). Fixez à partir de l’intérieur à
l’aide de quatre rondelles plates de 5 mm (CC)
et de quatre écrous M5 (DD). Répétez cette
étape pour l’autre poignée latérale (G).
D
B
C
5
1
2
EE
E
4
1
2
G
D
DD
AA CC
BB
3
CC
Quincaillerie utilisée
Boulon M5 de 16 mm
Boulon de
structure
Rondelle à
ressort de 5 mm
Rondelle plate
de 5 mm
Écrou M5
x 8
x 2
x 8
x 16
x 8
AA
EE
BB
CC
DD
M5x16 Bolt
Qty. 8
5 mm Spring
Washer
Qty. 8
5 mm Flat
Washer
Qty. 16
M5 Nut
Qty. 8
AA BB CC DD
Step Bolt
Qty. 2
EE
M5x16 Bolt
Qty. 8
5 mm Spring
Washer
Qty. 8
5 mm Flat
Washer
Qty. 16
M5 Nut
Qty. 8
AA BB CC DD
Step Bolt
Qty. 2
EE
M5x16 Bolt
Qty. 8
5 mm Spring
Washer
Qty. 8
5 mm Flat
Washer
Qty. 16
M5 Nut
Qty. 8
AA BB CC DD
Step Bolt
Qty. 2
EE
M5x16 Bolt
Qty. 8
5 mm Spring
Washer
Qty. 8
5 mm Flat
Washer
Qty. 16
M5 Nut
Qty. 8
AA BB CC DD
Step Bolt
Qty. 2
EE
M5x16 Bolt
Qty. 8
5 mm Spring
Washer
Qty. 8
5 mm Flat
Washer
Qty. 16
M5 Nut
Qty. 8
AA BB CC DD
Step Bolt
Qty. 2
EE

20
Lowes.com/masterforge
INSTRUCTIONS POUR L’ASSEMBLAGE
INSTRUCTIONS POUR LA PREMIÈRE UTILISATION
D
H
7
A
D
6
6. Insérez chaque grille de fumaison (A) dans
l’emplacement correspondant à l’intérieur du
fumoir (D).
REMARQUE : Il est préférable de laisser les
grilles à l’intérieur du fumoir lorsque celui-ci n’est
PAS utilisé.
Lorsque vous utilisez le fumoir, utilisez seulement
le nombre de grilles nécessaire pour y déposer la
viande.
7. Insérez le dispositif de réglage de la température (H)
dans la prise du dispositif située sur le côté droit du
fumoir (D).
REMARQUE : L’enveloppe blanche translucide en
caoutchouc du dispositif de réglage de la température
(H) est conçue pour le protéger en cas de pluie.
REMARQUE : Cette enveloppe est résistante à l’eau,
mais elle n’est pas étanche.
REMARQUE : N’utilisez PAS ce fumoir lorsqu’il pleut ni
pendant un orage. Si possible, débranchez le fumoir de
la prise de courant et mettez-le à l’abri dans un endroit
sec et protégé.
Avant de cuire des aliments dans votre fumoir, vous devez préparer celui-ci. La marche à suivre
ci-dessous permet de nettoyer et de préparer votre fumoir pour la fumaison initiale.
1. Réglez la température du fumoir à MED (moyen) et la durée de fumaison à deux heures.
2. Durant la première heure, retirez le plateau avec la cuve à eau et le contenant à copeaux de bois.
Ne placez AUCUN aliment dans le fumoir pendant cette opération.
3. Durant la deuxième heure, mettez le plateau avec la cuve à eau et le contenant à copeaux de bois
dans son emplacement et ajoutez uniquement du bois dans le contenant à copeaux de bois. Laissez
le bois brûler pendant l’heure restante.
4. Une fois cette opération terminée, laissez le fumoir se refroidir, puis retirez les cendres et les
résidus du contenant à copeaux refroidi. Assurez-vous également que la cuve à eau adjacente s’est
refroidie lorsque vous effectuez ce nettoyage.
This manual suits for next models
1
Table of contents
Languages:
Other Master Forge Smoker manuals