Pressure brake
bleeding
Parkvehicle on level surface, setparking
brake, and turn off engine.
Locate brake orclutch mastercylinder
and remove cap.
NOTE
Do not add fluid to dispenser reservoir
until dispensing hose connections have
been made and system has been
checked for leaks.
NOTE
Consultservice manual to determine
recommended bleed pressure and
properbleeding sequence for vehicle.
WARNING
Do not remove lid from reservoir or
adapter from master cylinder with
system pressurized.
Failure to comply could result in death
or serious injury.CAUTION
Do not allow fluids to contact skin or
painted surfaces. Fluids are hazardous
and corrosive to skin and painted
surfaces.
Failure to comply could result in injury
or damage to equipment.
NOTE
Verify all coupler sleeves snap to lock
connection.
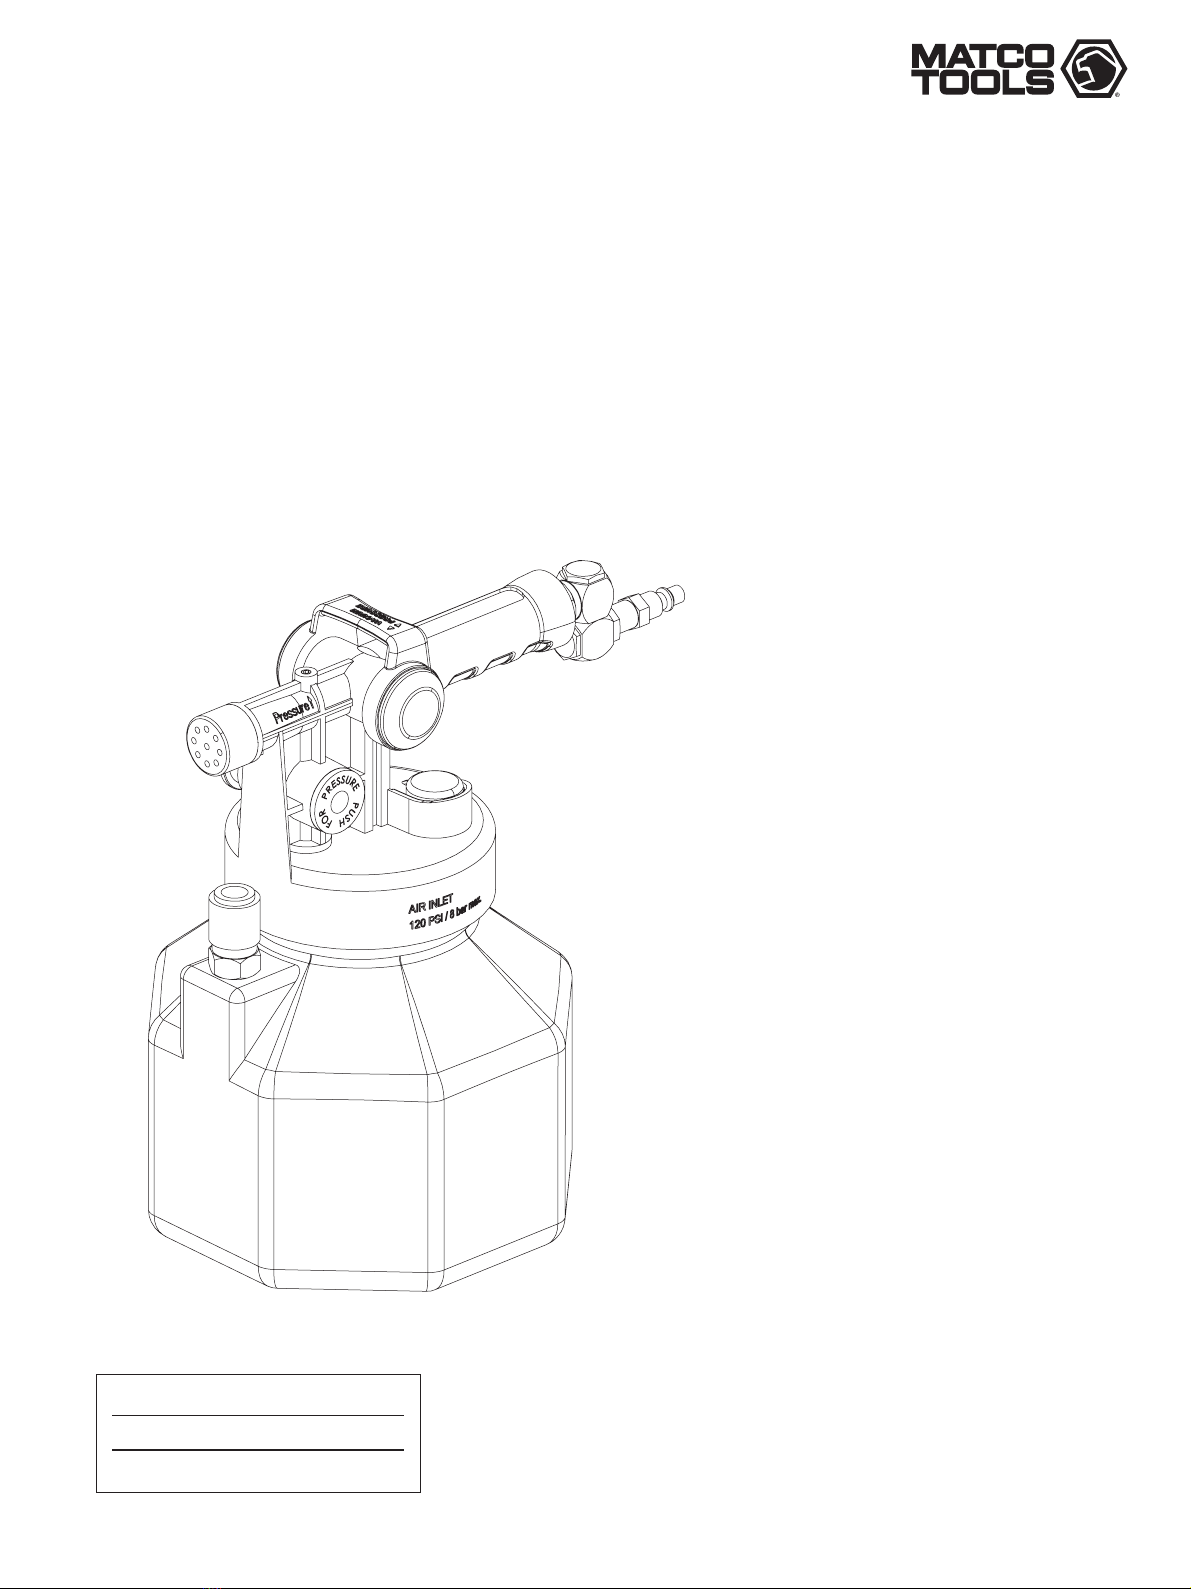
Ensure shut-off valve on fluid dispensing
hose () is closed.
Connectair supply to swivel coupler ().
Pull top lever() back to build pressure in
reservoir.
Observe pressure gauge () and adjust
inlet airsupply to achieve 10 psi (0.7 bar)
in reservoir. If inlet air supply cannotbe
adjusted, push top lever() to center
position when reservoir pressure
reaches 10 psi (0.7 bar).
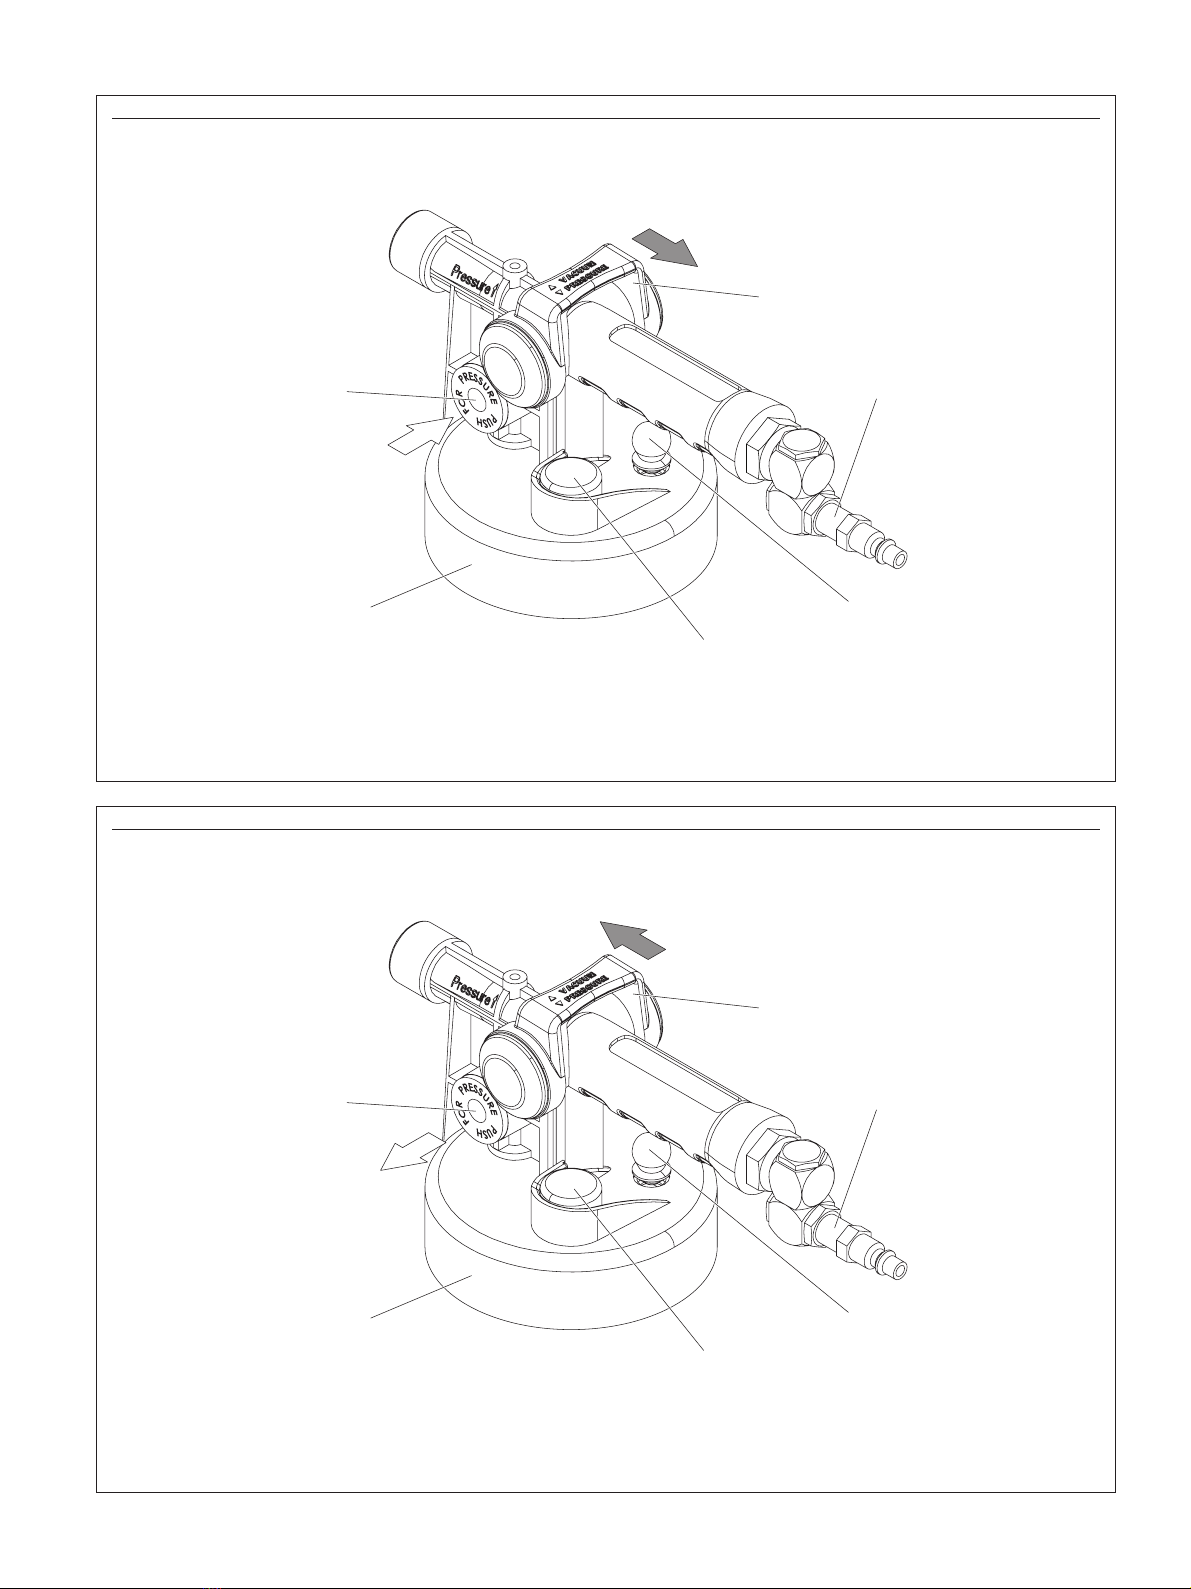
Open shut-off valve on fluid dispensing
hose () and watch pressure gauge ()
to ensure no leaks are present. If pres-
sure steadily drops, relieve remaining
pressure in system by tilting pressure
relief knob () located on lid (), remove
and retighten lid from dispensing reser-
voir() and adapteron master cylinder
reservoir, and rechecksystem for leaks.
Install lid and tighten securely.
Pull top lever() back to build pressure in
reservoir.
Observe pressure gauge () and adjust
inlet airsupply to achieve 10 psi (0.7 bar)
in reservoir. If inlet air supply cannotbe
adjusted, push top lever() to center
position when reservoir pressure
reaches 10 psi (0.7 bar).
Connectbleed reservoir to bleed screw
of firstcylinder to be bled.
Open bleed screw.
Allow fluid to flow outuntil only clear new
fluid with no visible air bubbles is
streaming from screw. Re-tighten bleed
screw to manufacturer’s recommended
torque.
Perform procedure on all remaining
bleed screws.
Extract as much used hydraulic fluid
from mastercylinder reservoir as possi-
ble (→ To evacuate fluid, page 4).
Refill with new fluid.
Select appropriate mastercylinder pres-
sure bleed adapterand install securely
onto master cylinderreservoir.
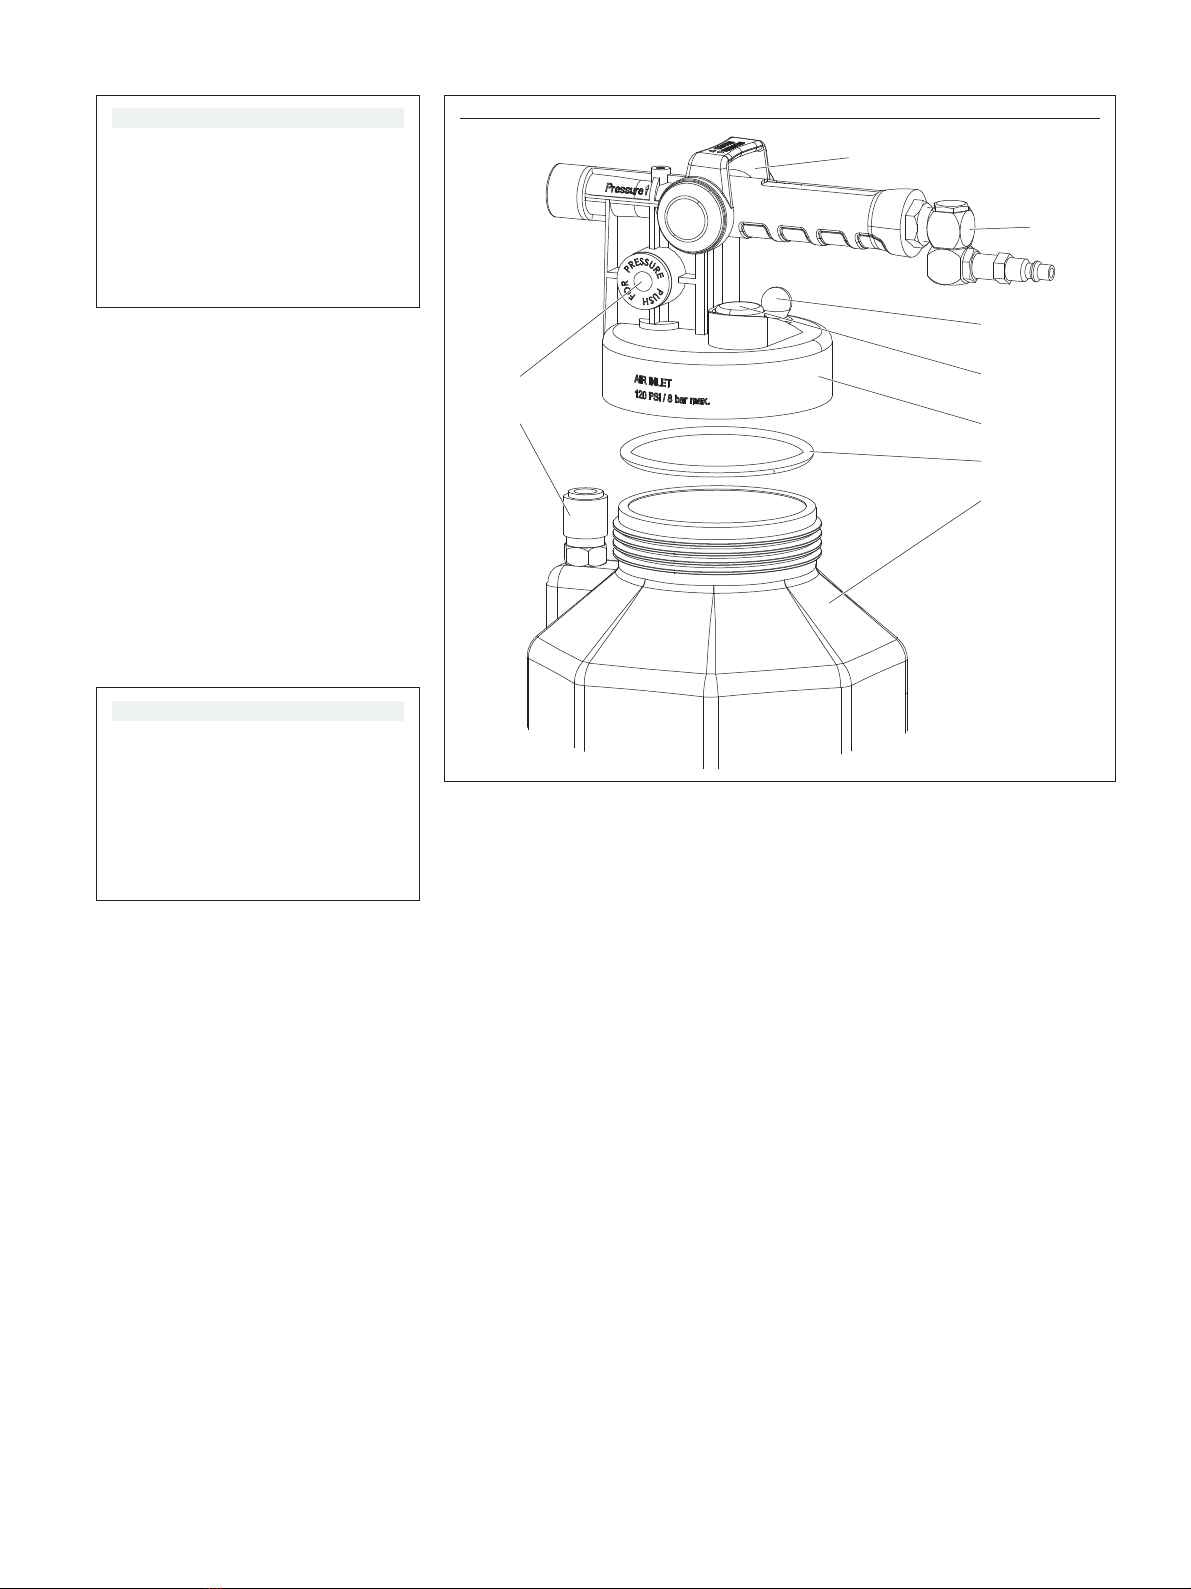
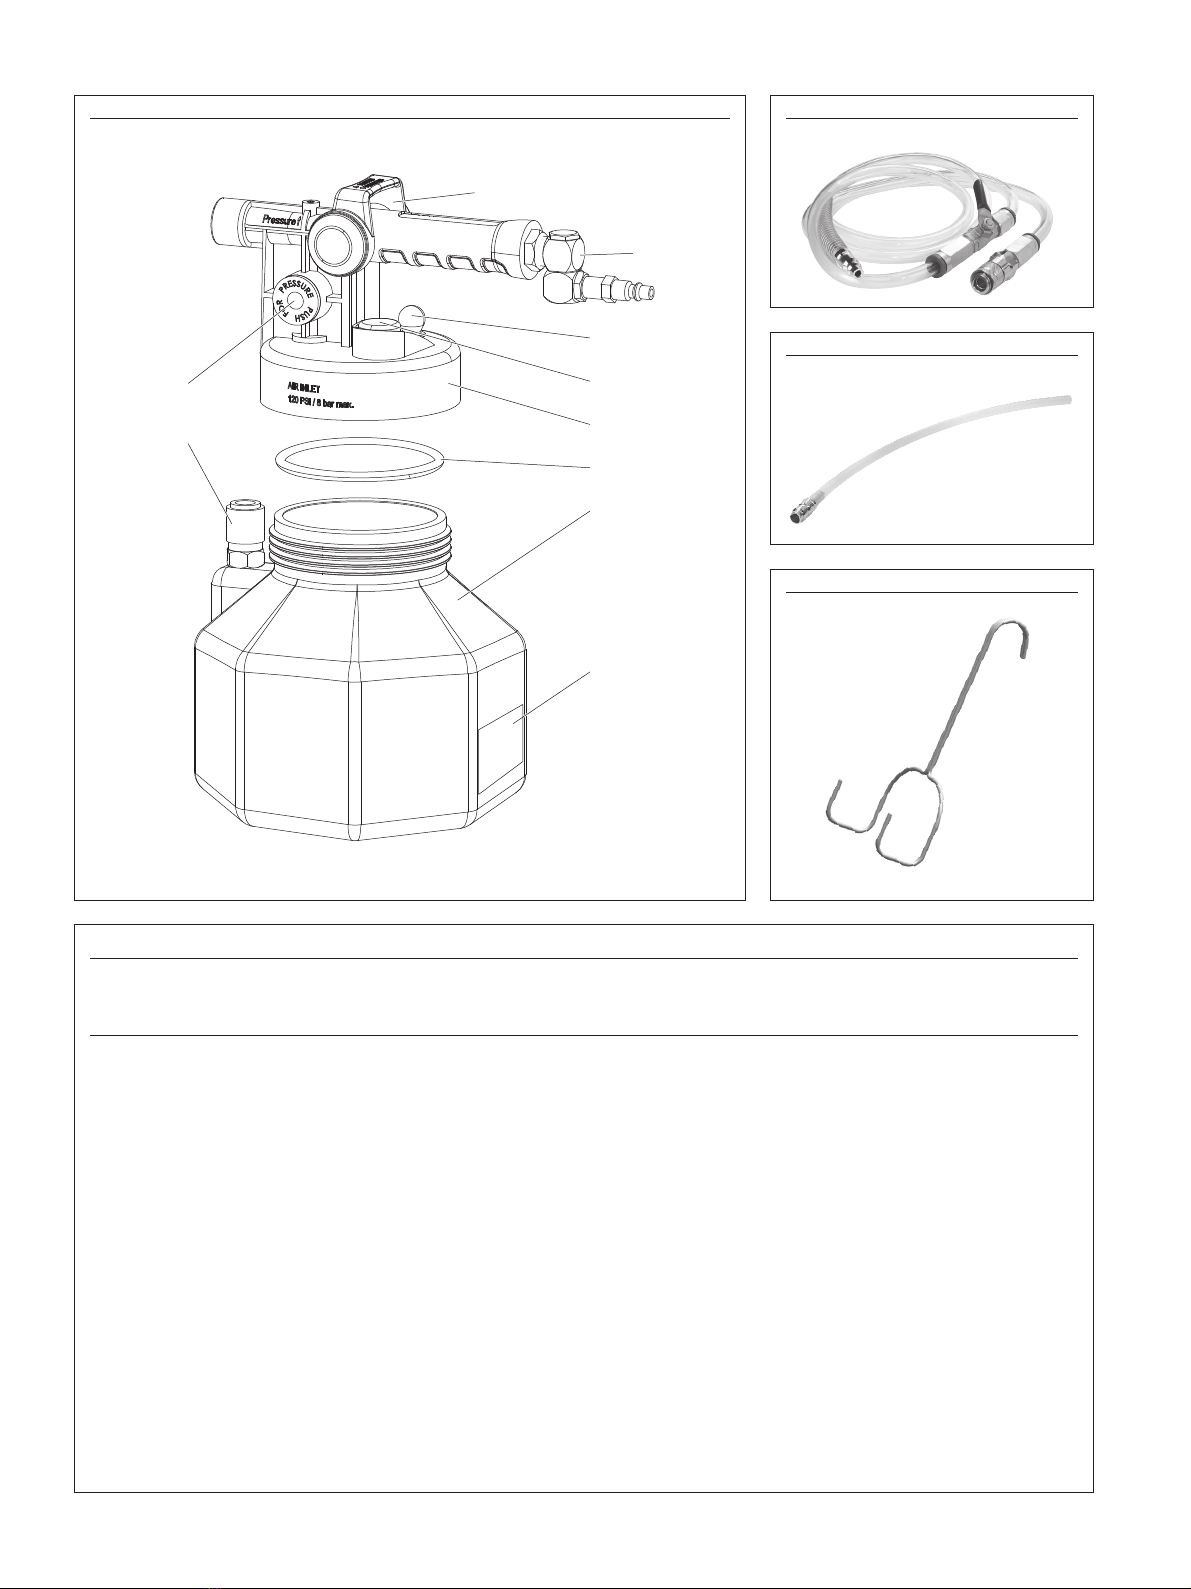
Before adding fluid to reservoir (),
connectfluid dispensing hose () to
quick-connect coupler() on reservoir.
(→ Fig. 4, page 7).
Connectopposite end of the fluid dis-
pensing hose () to the male quick-con-
nect coupler on the master cylinder
pressure bleed adapter.
Remove lid () from reservoir ()
and add up to 2 quarts (2 liters) of
manufacturer’s recommended new
hydraulic fluid.
Relieve pressure from reservoir () by
tilting pressure relief knob ().
6