Matrix Orbital GLK12232-25-WBL User manual

Contents
Contents ii
1 Introduction 1
1.1 What to Expect From the GLK12232-25-WBL . . ...................... 1
1.2 What Not to Expect From the GLK12232-25-WBL ...................... 1
1.3 Keypad Interface . . . ..................................... 1
1.4 mogd.exe ............................................ 1
1.5 Setting up ............................................ 2
1.6 Trying Out the GLK12232-25-WBL . ............................. 3
1.7 Trying out a Keypad . ..................................... 3
1.7.1 Here’s what to do: . . ................................. 3
1.8 Manual Over-ride . . . ..................................... 4
2 Connectionshttp://www.atmel.com/dyn/resources/prod_documents/doc2593.pdf 4
2.1 Connector Pinout . . . ..................................... 4
2.1.1 Power Connections . . ................................. 6
2.1.2 RS-232 Communications . . . ............................. 6
2.1.3 I2C Communications . ................................. 6
2.1.4 ACK . . . . . ..................................... 7
2.2 General Purpose Outputs . . . ................................. 7
3 Displaying Text 8
3.1 General . ............................................ 8
3.2 Writing Text to the Display . . ................................. 9
3.3 Text Commands . . . . ..................................... 9
3.3.1 Auto scroll on (254 81) ................................. 9
3.3.2 Auto scroll off (254 82) . . . ............................. 9
3.3.3 Set text insertion point (254 71 [col] [row]) ...................... 9
3.3.4 Set current text insertion point to top Left (254 72) .................. 10
3.3.5 Set text insertion point using pixel values (254 121 [x][y]) .............. 10
3.3.6 Set current font (254 49 [font ID]) . . . . . ...................... 10
3.3.7 Set font metrics (254 50 [metrics]) . . . . . ...................... 10
4 Displaying Graphics 10
4.1 General . ............................................ 11
4.2 Graphics Commands . ..................................... 11
4.2.1 Set drawing color (254 99 [color]) . . . . . ...................... 12
4.2.2 Draw line (254 108 [x1][y1][x2][y2]) . . . ...................... 12
4.2.3 Continue line (254 101 [x][y]) ............................. 12
4.2.4 Put pixel (254 112 [x][y]) . . ............................. 12
4.2.5 Draw outline rectangle (254 114 [color][x1][y1][x2][y2]) . .............. 12
4.2.6 Draw solid rectangle (254 120 [color][x1][y1][x2][y2]) . . .............. 12
4.2.7 Initialize bar graph (254 103 [ref][type][x1][y1][x2][y2]) .............. 13
4.2.8 Write to bar graph (254 105 [reference number][value]) . .............. 13
Matrix Orbital GLK12232-25-WBL ii

4.2.9 Display saved bitmap (254 98 [reference number][x][y]) . .............. 13
4.3 Flow Control . . . . . ..................................... 13
4.3.1 Enter Flow Control Mode (254 58 [full][empty]) . .................. 14
4.3.2 Exit Flow Control Mode (254 59) . . . . . ...................... 14
5 Keypad Interface 14
5.1 General . ............................................ 14
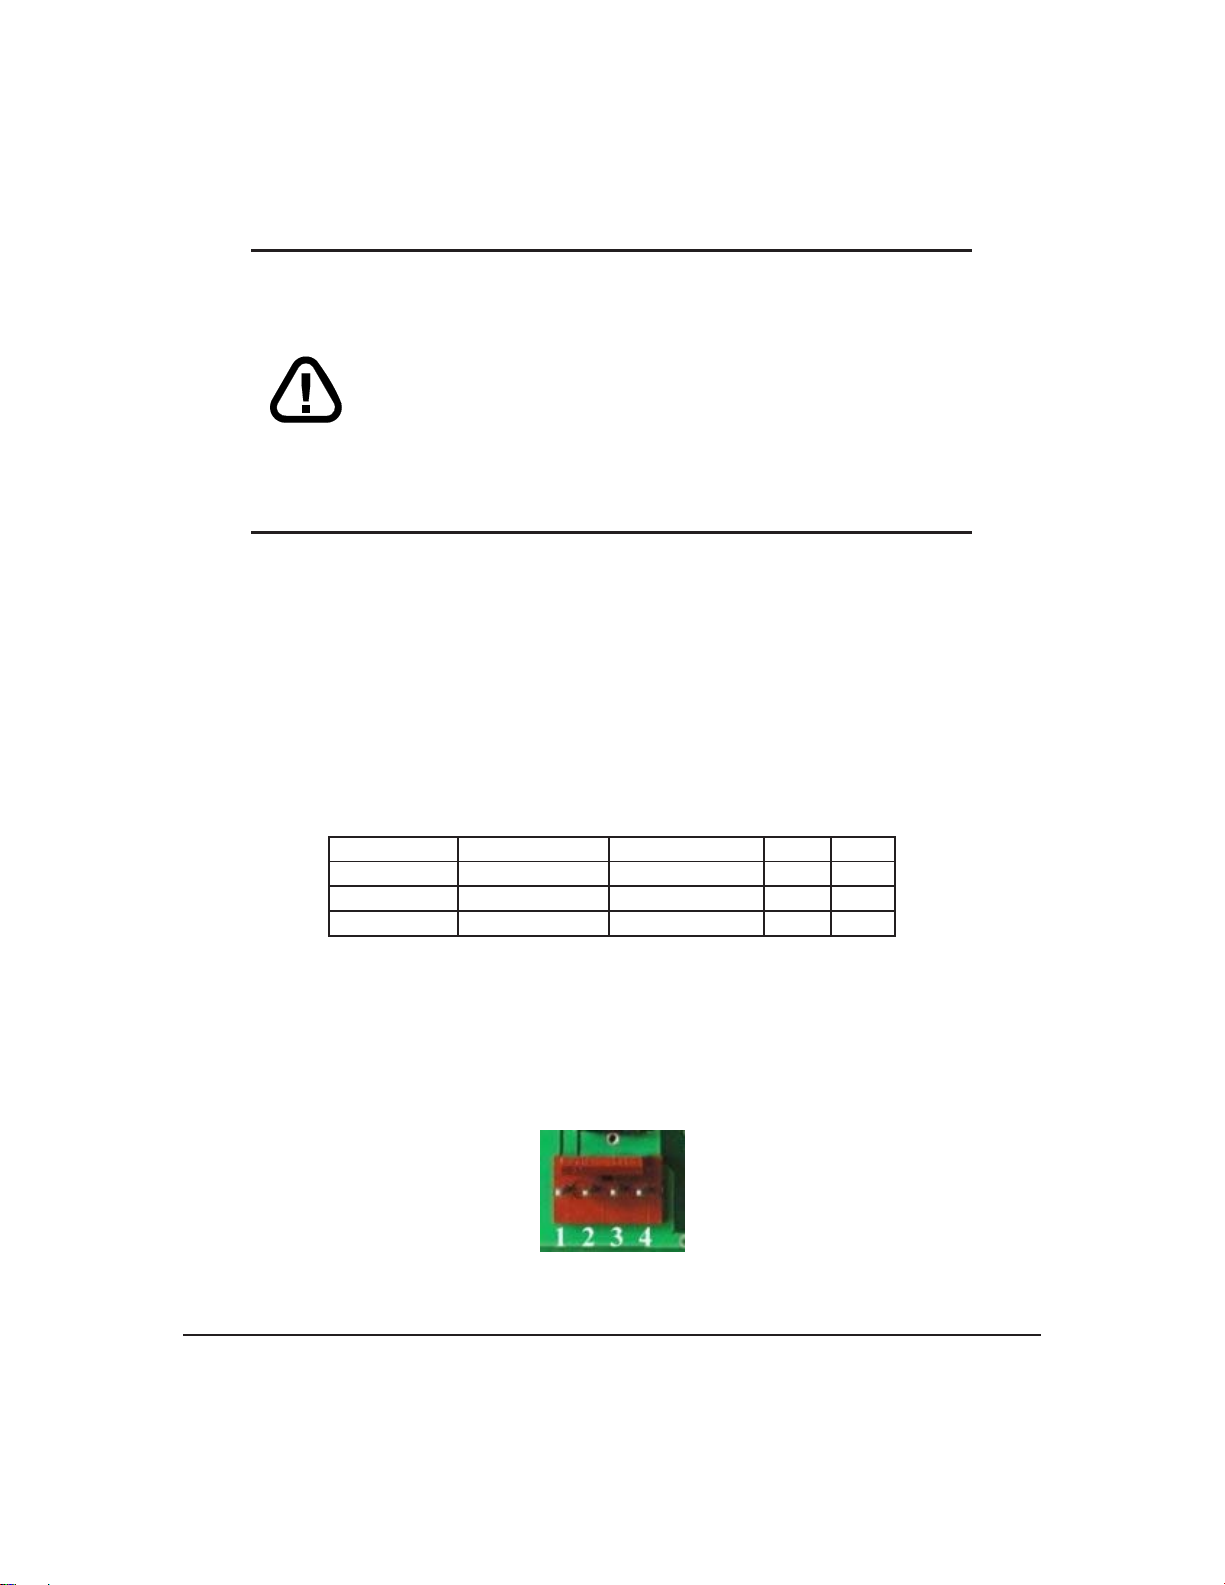
5.2 Connections . . . . . . ..................................... 15
5.3 I2C Interface . . . . . ..................................... 16
5.4 RS-232 Interface . . . ..................................... 16
5.5 Commands . . . . . . ..................................... 16
5.5.1 Auto repeat mode on (254 126 [mode]) . . ...................... 16
5.5.2 Auto repeat mode off (254 96) ............................. 17
5.5.3 Auto transmit keypresses on (254 65) . . . ...................... 17
5.5.4 Auto transmit keypresses off (254 79) . . . ...................... 17
5.5.5 Clear key buffer (254 69) . . . ............................. 17
5.5.6 Poll keypad (254 38) . ................................. 17
5.5.7 Set debounce time (254 85 [time]) . . . . . ...................... 18
6 Fonts and Graphics Files 18
6.1 General . ............................................ 18
6.2 Using mogd.exe . . . . ..................................... 18
6.3 Commands . . . . . . ..................................... 19
6.3.1 Erase file (254 173 [type] [ref]) . . . . . . ...................... 19
6.3.2 Purge memory (254 33 89 33) ............................. 19
6.3.3 Upload Font (254 36 [ref] [file size] [file data]) . . .................. 19
6.3.4 Upload Bitmap (254 94[ref] [file size] [file data]) . .................. 19
6.4 Working with Font Files . . . ................................. 19
6.4.1 Font File in Table Form . . . ............................. 20
6.4.2 Uploading the File to the Module . . . . . ...................... 20
6.4.3 A Sample Font File . . ................................. 21
6.5 Working with Bitmap Files . . ................................. 23
7 Miscellaneous Commands 23
7.1 General . ............................................ 23
7.1.1 Clear display (254 88) ................................. 24
7.1.2 Set contrast (254 80 [contrast]) ............................. 24
7.1.3 Set contrast and save (254 145 [contrast]) . ...................... 24
7.1.4 Backlight on (254 66 [minutes]) . . . . . . ...................... 24
7.1.5 Backlight off (254 70) ................................. 24
7.1.6 General purpose output on (254 86 [gpo #]) ...................... 24
7.1.7 General purpose output off (254 87 [gpo #]) ...................... 25
7.1.8 Set I2C address 254 51 [address]) . . . . . ...................... 25
7.1.9 Read module type (254 55) . . ............................. 25
7.1.10 Set RS-232 port speed (254 57 [speed]) . . ...................... 25
7.1.11 Set Serial Number (254 52 [byte1] [byte2] . ...................... 26
7.1.12 Read Serial Number (254 53) ............................. 26
Matrix Orbital GLK12232-25-WBL iii

7.1.13 Read Version Number 254 54) ............................. 26
8 Appendix: Command Summary 26
8.1 General . ............................................ 26
8.2 Issuing Commands . . ..................................... 27
8.3 Text Commands . . . . ..................................... 27
8.4 Graphics Commands . ..................................... 28
8.5 Keypad Interface Commands . ................................. 29
8.6 File System Commands ..................................... 30
8.7 Miscellaneous Commands . . ................................. 31
9 Appendix: Specifications 33
Matrix Orbital GLK12232-25-WBL iv

1 Introduction
The GLK12232-25-WBL comes equipped with the following features;
•122 x 32 pixel graphics display
•Text display using built in or user supplied fonts
•Adjustable contrast
•Backlighting
•Keypad interface
•RS-232 or I2C communications
1.1 What to Expect From the GLK12232-25-WBL
The GLK12232-25-WBLis designed as the display unit for an associated controller. The controller may
be anything from a single board, special purpose micro-controller to a PC, depending on the application.
This controller is responsible for what is displayed on the screen of the display.
The display provides a simple command structure to allow both text and graphicsto be transferredto the
screen. Text fonts and graphics, if desired, are stored in the display’s flash ROM and may be regarded as
’permanent’ in that they survive power-off periods and don’t change until explicitly reprogrammed.
The screen is backlit for low-light situations. Backlighting may be turned on or off under program
control. Contrast is adjustable to compensate for differing lighting conditions and viewing angles.
1.2 What Not to Expect From the GLK12232-25-WBL
Since the display is intended to be used with a controller, it does not have any built in text editing
functions. If a stream of ASCII characters is inputed they will be displayed, but the CR, LF, backspace, etc.,
will be ignored. If the user’s application requires these functions, they must be provided by the software in
the user’s controller, which can issue the appropriate positioning commands to the display.
1.3 Keypad Interface
The keypad interface takes row / column input and converts it to ASCII characters, which are delivered
out the RS-232 or I2C port to the associated controller. Note that the keypad is not used to directly control
any aspect of the operation of the display, which acts simply as a matrix to serial converter. In order to use
the keypad to control the display, the user must program their controller accordingly.
1.4 mogd.exe
Matrix Orbital has developed an interface program which exercises all the features of the display. It
is also used to manage font and graphics downloads. The program, called "mogd.exe", is provided on the
Matrix Orbital Cd and website.
To install mogd.exe follow these steps;
Matrix Orbital GLK12232-25-WBL 1

1. Insert the Matrix Orbital CD-ROM into the Cd drive.
2. Locate the file "mogd.zip". It should be in the "Download" directory.
3. Unzip mogd.zip to a temporary directory, using a program such as Winzip, Pkzip, etc.
4. Double click on "setup.exe".
5. Follow the instructions on the screen to complete the installation.
After installation is complete there will be a Matrix Orbital entry under "Programs" in the "Start Menu".
Click on this entry to run mogd.exe.
The first time mogd.exe is run, some information will be required;
•The port number to be used (usually COM1 or COM2)
•The baud rate for the connection. It is recommended to use 19,200 for initial startup of the display
•The type of display unit, set to 240 x 64 for the GLK12232-25-WBL
Once this information is entered, the program can be used to control all functions of the display.
1.5 Setting up
Before setting up an application the user may want to try out their display. This is easily done with a PC.
The following will be required;
•The PC cable available from Matrix Orbital (this is the simplest way to make test connections without
having to solder cables and connectors).
NOTE Make sure that the display is equipped with the proper connectorfor use with this
cable. This connector can be specified at time of order.
•A 5 V power supply
•A PC with a spare RS-232 port (COM1 or COM2)
•The mogd.exe program
•A power connector. The type used for 3.5" floppy drives works fine
•A 9 or 25 pin RS-232 serial cable. If using a 25 conductor cable, a 9 to 25 pin adapter will be required
Figure 1: Connections for Testing
Matrix Orbital GLK12232-25-WBL 2

1. Refer to the Figure above for the following steps.
2. Wire the connector to the power supply. On most connectors the RED lead will go to +5V and the
BLACK lead to GND.
NOTE The Manufacturer’s Warranty becomes void if the unit is subjected to over-voltage
or reversed polarity.
3. Connect the display to the PC using the serial cable and adapter if required.
4. Connect the power connector, making sure that the +5V goes to V+ as shown in the diagram.
5. Turn on the power: the LCD backlight should come on.
1.6 Trying Out the GLK12232-25-WBL
The unit should be connected to power and the PC and backlight should be on.
1. Use the mogd.exeprogram to exercise some of the features of the display to ensure everything works
properly.
2. To experiment with typing text, run a PC terminal program, such as Hyperterm. Make sure it’s con-
figured to use the correct port. Set the baud rate to 19,200.
If characters are typed on the keyboard, they should now appear on the display screen. Please note that CR,
backspace, etc., won’t have any effect. Text will wrap around to the nextline when the end of a line has been
reached.
1.7 Trying out a Keypad
Since a number of different keypad types can be connected to the display, the results may be a little
unpredictable. At this point all we need to do is make sure that the keypad and interface work, and possibly
generate an ASCII map for any programming needs.
The keypad interface on the display converts a row / column connection to an ASCII character. By
default, a keypress is transmitted as serial data immediately. Keypad buffering can be selected using the
appropriate commands.
1.7.1 Here’s what to do:
1. The PC should be running a terminal program such as Hyperterm.
2. With the display connected to the PC, plug in the keypad. If the connector has fewer pins than the one
on the display, center it as well as possible.
Matrix Orbital GLK12232-25-WBL 3

NOTES
•The keypadconnector must be wired with columns on one side and rows on the other
side of the center of the connector. If the keypadisn’t wired this way, an adapter will
need to be made. Another method would be to rewire the connector to meet this
requirement.
•The connector is reversible. Reversing the connector will not damage the keypad or
the display, but will however,change the ASCII character map.
3. Press a key on the keypad. An upper case ASCII character (A-Y) should appear on the PC screen.
Different keys should generate different characters.
To experiment, reverse the connector and see if it generates a more logical set of characters. Ultimately, the
program in the micro-controllerwill have to ’map’ these charactersto the ones markedon the keypad,which
will likely be different.
1.8 Manual Over-ride
Manual over-ride should only be required in one instance. If for some reason the module is set at a baud
rate which cannot be produced by the host system and all communication to the display is lost, then the user
should follow this simple procedure;
1. Turn off the display.
2. Put a jumper on pins 5 and 6 of the keypad connector.
3. Power up the display. The baud rate is now set to 19,200.
4. Remove the jumper and change the RS-232 port settings to the desired baud rate.
5. Turn off the display.
6. Power up the display.
NOTE This procedure does not change settings in the memory chip, it uses default set-
tings stored in the main processor. This allows the user to communicate with the display
when all other communications are lost. Once able to communicate with the display, the
user may then change the default settings in the memory chip.
2 Connectionshttp://www.atmel.com/dyn/resources/prod_doc
2.1 Connector Pinout
Refer to the diagram below for this chapter.
Matrix Orbital GLK12232-25-WBL 4

Figure 2: Electrical Connections
All connections are made via a 25 pin in-line connector area near the bottom edge of the PCB. Pin
descriptions are as follows;
Table 1: Pin Descriptions
Pin Marked Function Pin Marked Function
1 Yellow do not use 14 C1 Keypad column 1
2 Black ground 15 C2 Keypad column 2
3 Black ground 16 C3 Keypad column 3
4 Red +5V power input 17 C4 Keypad column 4
5 SCL I2C clock 18 C5 Keypad column 5
6 SDA I2C data 19 R1 Keypad row 1
7 GND ground 20 R2 Keypad row 2
8 Rx RS-232 receive data 21 R3 Keypad row 3
9 Tx RS-232 transmit data 22 R4 Keypad row 4
10 +5V +5V power input 23 R5 Keypad row 5
11 G1 General purpose output 1 24 Rst do not use
12 G2 General purpose output 2 25 Cont do not use
13 GND ground for GPOs
Matrix Orbital GLK12232-25-WBL 5

2.1.1 Power Connections
WARNINGS
•Do not apply any power with reversed polarization.
•Do not apply any voltage other than the specified voltage.
•Do not use any cables other than the cables supplied by Matrix
Orbital, unless aware of the modifications required.
•Do not under any circumstances use an unmodified floppy drive
power cable.
•Do not apply power to both the DB-9 connector AND the 4-pin
power connector.
•Do not apply more than +5Vdc to pin #9 of the DB-9 connector.
2.1.2 RS-232 Communications
A group of four connections (pins 7-10) provide for RS-232 communications and power. A 4 pin SIP
connector soldered to these pins can be connected to a Matrix Orbital supplied PC cable.
The RS-232 connector on the PC cable is wired so that a standard ’straight through’ 9 pin D-sub cable
may be used to connect the modules to a standard serial port such as COM ports on PCs. Note that this
device complies with the EIA232 standard in that it uses signal levels from +/- 3V to +/- 12V. It will not
operate correctly at TTL (0 to +5V) levels.
Table 2: RS-232 Pinout
Pin Number Direction Description LCD Host
2 Data from LCD Data Out (LCD) Tx Rx
3 Data to LCD Data In (LCD) Rx Tx
5 - Ground gnd gnd
2.1.3 I2C Communications
The display has I2C communications runs at 100 Kbps and supports up to 127 units on a single com-
munications line. The I2C data line operates on 5 volt CMOS levels. The power connector is also the I2C
communication line.
Figure 3: Power and I2C Connector
Matrix Orbital GLK12232-25-WBL 6

Table 3: Connector Pinout
Pin 4 Ground
Pin 3 SDA (I2C data)
Pin 2 SCL (I2C clock)
Pin 1 Vdc
2.1.4 ACK
The idea of ACK is to indicate when the data has been received correctly. ACK does not indicate data
incorrectly received. ACK simply fails to indicate when data is correctly received. Clearly, this is of limited
usefulness and even less so with Matrix Orbital modules. Matrix orbital modules are not capable of failing
to acknowledge an incorrectly received byte in response to that byte’s transition. They are only capable of
failing to acknowledgethe bytes following the byte, which weren’t received. To fully understand the reasons
for this one needs to understand something about how a Matrix Orbital module processes data. Basically the
reason why a Matrix Orbital module might fail to receive a byte correctly is that it was unable to process the
byte previousbefore the failed byte was transmitted. Because the module cannotpossibly knowthat it would
be unable to store the byte before the next byte was received it cannot know to not ACK. The reason for this
situation in deference to situations one might be familiar with (i.e., memory chips, etc) is that the Matrix
Orbital module employs a micro-processor to perform these data storage functions. A memory chip takes
care of these things entirely withinhardware subsystemswhich operate at the same speed as the transmission
themselves.
The displayuses a standard Phillips 7bit addressas defined by Phillips. However,Matrix Orbital specifies
I2C address in 8bits. The 8th bit, least significant bit (LSB or Low Order Bit) of the 8bit address is a read
/ write bit. If we take a standard Phillips 7bit address of 45hex this would be in binary; 1000101. This is
7bits. Matrix Orbital would describe the Phillips I2C address of 45hex as 8Ahex. The read address would
be 8Bhex.
For more information on Phillips I2C please visit;
2.2 General Purpose Outputs
The displayhas two generalpurpose outputs, G1and G2. These are providedto conthttp://www.atmel.com/dyn/resources/prod_do
relays or other electronic devices. This allows external devices to be turned on or off using the PC or con-
troller and software commands.
The two outputs differ slightly in specification;
•G1 provides an output which is switched LOW when ON. When G1 is OFF it is pulled up to +5V
through 150 kohms, in other words it can only be used to ’ground’ an external device. Maximum
current is 20 mA.
•G2 provides an output which is switched LOW when ON. When G2 is OFF it is pulled up to +5V,
supplied by the module. Maximum current is 20 mA.
Both outputs are referenced to ground.
Typical use of these outputs is shown in the Figure below.
Matrix Orbital GLK12232-25-WBL 7

Figure 4: Using the General Purpose Outputs
If the device which is being driven by a GPO requires a relatively high current (such as a relay) it must
have an internal resistance greaterthan 250 ohms, or mustbe current limited to 20mA by means of a suitable
resistor.
NOTE The GPOs do not have any over current or over / under voltage protection so care
must be taken when using them. For instance if the external device is a relay it must be
fully clamped (using a diode and capacitor) to absorb any generated back electro-motive
force (EMF).
Figure 5: Clamping a Relay
3 Displaying Text
This chapter describes the various text-display commands in detail.
3.1 General
Text is displayed on the display using fonts saved in its internal flash memory. The display is supplied
with a 5x7 font installed. If this is suitable, there will be no need to install any other fonts.
Matrix Orbital GLK12232-25-WBL 8

3.2 Writing Text to the Display
When the displayreceivesa character,it displays that characterat the position currentlydefined. The next
character sent to the module then advances to the following position on the display. Characters are drawn
using the currently selected font, and only characters defined in the current font are actually processed.
Characters which are not defined by the current font are ignored, and the positioning is not advanced for the
next character.
The position wheretext is to be displayed is a single pixel locationstored in the display’s volatile memory
and maintained internally by the display’s firmware. It can be manually manipulated with two commands;
1. Set current text position (254 71 [col] [row]) positions the characters using a text oriented coordinate
system, dividing the display into character cells.
2. Set text cursor - pixel values (254 121 [x][y]) Sets text cursor to position (x,y), where x and y are in
pixels. Value is top left corner of next text character. This positions the character at a specific pixel,
allowing more ’fine grained’ control when needed.
3.3 Text Commands
In this section commands are identified by their names and decimal values. Hex and ASCII equivalents
are given in the summary.
3.3.1 Auto scroll on (254 81)
When auto scrolling is on, it causes the display to shift the entire display’s contents up to make room for
a new line of text when the text reaches the scroll position defined by the "Set font metrics" command in the
display memory (normally the bottom right character position - default value for the GLK12232-25-WBL is
64).
3.3.2 Auto scroll off (254 82)
When auto scrolling is disabled, text will wrap to the top left corner of the display area. Existing graphics
or text in the display area are not erased before text is placed. When using proportional fonts without auto
scrolling, care should be taken to clear areas where text is being written, particularly when wrapping occurs.
This may be done using the "Draw solid rectangle" command with the colour set to white.
3.3.3 Set text insertion point (254 71 [col] [row])
This command sets the insertion point to the [column] and [row] specified. The insertion point is posi-
tioned using the base size of the currentfont (this command does notposition the insertion point at a specific
pixel). The pixel column used is determined by multiplying the width of the widest character in the font
by [column]. The pixel row used is determined by multiplying the height of the font by [row + interline
spacing].
Matrix Orbital GLK12232-25-WBL 9

3.3.4 Set current text insertion point to top Left (254 72)
This command moves the text insertion point to the top left of the display area, based on the metrics of
the current font.
3.3.5 Set text insertion point using pixel values (254 121 [x][y])
This command sets the next position for text placement to an individual pixel location. The coordinate
([x position],[y position]) defines a pixel on the screen where the top left corner of the screen is defined as
(0,0). This pixel location will be used as the top left corner of the next character of text which is sent to the
module without any regard to ’font metrics’ like character spacing or line spacing.
3.3.6 Set current font (254 49 [font ID])
This command instructs the display to use the font specified by [font identifier] as the default font. The
value specified should refer to a font already present in the display’s memory.
NOTE The font ID is established when the font is saved to the display, normally using
the mogd.exe program. The installed 5x7 font ID is "1", unless changed by user.
3.3.7 Set font metrics (254 50 [metrics])
Where [metrics] = [left margin][top margin][xspace][y space][scroll row]
This command defines the metrics of a font already present in the display’s memory.
•[left margin]specifies the first pixel column to use for the first character in a row. In some instances, a
font may not evenly fit on the screen, and dividing the extra space between the margins will improve
the overall appearance of the font.
•[top margin] specifies the top pixel row to begin drawing the first row of text on the display area.
•[x space] specifies the number of pixels to place between characters (i.e., character spacing).
•[y space] specifies the number of pixels to place between rows of text (i.e., line spacing).
•[scroll row] specifies the pixel row where scrolling should start (or, if auto scrolling is off, where
wrapping should occur). Typically, this value should be set to the first pixel row immediately below
the last row of text that will fit the display.
4 Displaying Graphics
This chapter describes the various graphics-display commands in detail.
Matrix Orbital GLK12232-25-WBL 10

4.1 General
Since the display is a bit mapped device, it may be used to display graphics. Graphic images may be
created by means of a pixel-oriented graphics program, saved as bitmaps, and loaded into the display using
the mogd.exe program. Images may be saved in the display’s memory, and displayed upon command, or
they may be downloaded ’on the fly’ (inline) during display operation.
Note that ’saved’ and ’on the fly’ graphics images are processed differently. These differences must be
taken into account when processing graphics.
•Saved bitmaps: These use each byte (8 bits) to represent a vertical column of 8 pixels. The next byte
represents the next column to the right. If the graphic is ’taller’ than 8 pixels, the LSB of the next data
byte will be the next pixel. Orientation is top to bottom - LSB to MSB. Pixels / bits are ’packed’ - that
is, if the height of the graphic is not an even multiple of 8, the leftover bits go on the next X column
to the right, etc.
•Inline bitmaps: These are processed horizontally, and each byte represents a horizontal row of 8 bits,
with the next byte representing the next 8 bits to the right. Orientation is left to right - MSB to LSB,
which is the opposite to the serial transmission sequence (bytes are sent LSB first).
Figure 6: Graphic Bitmaps
Each pixel in a bitmap is described by a single bit, and may only have the values ON or OFF. For
example, shades of grey are not supported.
4.2 Graphics Commands
In this section commands are identified by their names and decimal values. Hex and ASCII equivalents
are given in the summary.
The coordinate origin (0,0) is at the top left corner of the display. X values go from 0 to 239 (increasing
toward the right) and Y values go from 0 to 63 (increasing toward the bottom).
Matrix Orbital GLK12232-25-WBL 11

4.2.1 Set drawing color (254 99 [color])
This command sets the drawing color for subsequent graphic commands that do not have the drawing
color passed as a parameter. The parameter [color] is the value of the color where white 0 Hex, and black is
255 Hex.
NOTE All non-zero values will display as black.
4.2.2 Draw line (254 108 [x1][y1][x2][y2])
This command will draw a line from (x1,y1) to (x2,y2) using the current drawing color. Lines may
be drawn from any part of the display to any other part, but may be important to note that the line may
interpolate differently right to left, or left to right. This means that a line drawn in white from right to left
may not fully erase the same line drawn in black from left to right.
4.2.3 Continue line (254 101 [x][y])
This command will draw line with the current drawing color from the last line end (x2,y2) to (x,y). This
command uses the global drawing color so the “Set drawingcolor” command should be used before the first
line segment if required.
4.2.4 Put pixel (254 112 [x][y])
This command will draw a pixel at (x,y) using the current drawing color. The unit processes these
requests fast enough to keep up with a steady stream at 115 kbaud, so flow control is not required.
4.2.5 Draw outline rectangle (254 114 [color][x1][y1][x2][y2])
This command draws a rectangular box in the specified color (0 = white, non-zero = black). The top left
corner is specified by (x1,y1) and the bottom right corner by (x2,y2).
4.2.6 Draw solid rectangle (254 120 [color][x1][y1][x2][y2])
This command draws a solid rectangle in the specified color (0 = white, non-zero = black). The top left
corner is specified by (x1,y1) and the bottom right corner by (x2,y2). Since this command involves consid-
erable processing overhead, we strongly recommend the use of flow control, particularly if the command
is to be repeated frequently.
This procedure is common for monitoring applications where there is a ’field’ on the display that is
constantly being updated from, say, a temperature sensor.
Matrix Orbital GLK12232-25-WBL 12

4.2.7 Initialize bar graph (254 103 [ref][type][x1][y1][x2][y2])
This command initializes a bar graph referred to by number [reference number] of type [type] with size
from (x1,y1) (top left) to (x2,y2) (bottom right). A maximum of 16 bar graphs with reference numbers from
0 to 15 can be initialized as;
•[type = 0] Vertical, bottom referenced
•[type = 1] Horizontal left referenced
•[type = 2] Vertical top referenced
•[type = 3] Horizontal right referenced
The bar graphs may be located anywhere on the display, but if they overlap, they will not display properly.
NOTE It is important that [x1] is less than [x2], and [y1] is less than [y2].
This command doesn’t actually draw the graph, it must be ’filled in’ using the “Write to bar graph” com-
mand, described below. The unit saves time by only drawing that part of the bar graph which has changed
from the last write, so the representation on the screen may not survive a screen clear or other corruptive
action. A write of value zero, followed by new values will restore the proper look of the bar graph.
4.2.8 Write to bar graph (254 105 [reference number][value])
Once the bar graph has been initialized it can be ’filled in’ using this command. This command sets the
bar graph [reference number] to value [value]. [value] is given in pixels and should not exceed the available
height / width of the graph. (If it does, the graph will simply be written to its maximum size.)
4.2.9 Display saved bitmap (254 98 [reference number][x][y])
This command causes a previously stored bitmap referenced by [reference number] to be displayed to
the screen at pixel location (x, y) where this location defines the top left corner of the bitmap. Bitmaps and
fonts may use the same reference numbers, for example it is possible to have both a bitmap 1 and a font 1.
NOTE The reference number is established when the bitmap is saved, normally using
mogd.exe.
4.3 Flow Control
The display has built in flow control which is very useful duringdirect bitmap display and multiple pixel
placement. Flow control is enabled or disabled by two commands. If flow control is enabled, the display
will return an "almost full" message (0xFE) to the micro-controller when its internal buffer fills to a defined
level, and an "almost empty" message (0xFF) when the buffer contents drop to a defined level.
Matrix Orbital GLK12232-25-WBL 13

4.3.1 Enter Flow Control Mode (254 58 [full][empty])
NOTE Flow control applies only to the RS-232 interface. It is not available for I2C.
This command enables flow control. When the buffer fills so that only [full] bytes are available the display
will return an "almost full" message (0xFE) to the micro-controller. When the buffer empties so that only
[empty] bytes remain the display will return an "almost empty" message (0xFF) to the micro-controller.
The display will return the "almost full" message for every byte sent to the display until the used buffer
space once more drops below the [full] level.
Whether the user is in ’flow control mode’ or not, the module will ignore display or command bytes
which would overrun the buffer. While in ’flow control mode’ the unit will return 0xFE when the buffer is
almost full even though it may have already thrown rejected data away. The buffer size for the display is 96
bytes.
When using this command in an application, selection of the value for the buffer almost full should be
considered very carefully. This is a critical aspect of using this command to it’s full potential. When using a
host system or PC which contains a FIFO, the user shouldset the value of equal to or greater than the size of
the FIFO. The reason for this is that the FIFO may be full when the host system receives 0xFE. In the case
of 16550 UART the size at its maximum is 16, therefore the value of should be set to 16 or greater.
NOTE This mode must not be used during loading of fonts and bitmaps. It is highly
recommended for use with direct screen write and multiple pixel placements.
4.3.2 Exit Flow Control Mode (254 59)
This command turns off flow control. Bytes may overflow the buffer without warning.
5 Keypad Interface
This chapter describes the keypad interface and associated commands in detail.
5.1 General
The display keypad interface processes the keypad row / column matrix into a serial (RS-232 or I 2C)
data byte stream. Aside from this processing, the keypad has no effect on the display. If it is necessary to
send keystrokes to the display, they must be routed through the micro-controller.
Matrix Orbital GLK12232-25-WBL 14

5.2 Connections
Figure 7: Keypad Connector
The connector is not ’keyed’ so the keypad will probably plug in either of two ways. The display will
not be damaged by reversing the connector. However, the keypad will generate a different ASCII character
mapping for each position. If the connector has fewer than 10 pins it should be centered on the display
connector.
The diagram shows the logical layout (row 1, column 1 in upper left). The connector for the keypad is a
10 pin 0.1" spacing male header. Pins 1 through 5 are columns and pins 6 through 10 are rows. The keypad
is scanned whenever a key is pressed; there is no continuous key scan. This means that key presses are dealt
with immediately without any appreciable latency. This also prevents electrical noise which is often caused
by continuous key scans.
NOTE Please note that keypads may be laid out in a different pattern. If this is the case,
the user will need to interpret the key codes differently.
Table 4: Keypad Layout
Columns
1 2 3 4 5
1 A B C D E
Rows 2 F G H I J
3 K L M N O
4 P Q R S T
5 U V W X Y
NOTE The keypad connector must be wired with columns on one side and rows on the
other side of the center of the connector. In situations where the keypad isn’t wired this
way an adapter will need to be made, or the user should rewire the connector to meet this
requirement.
Matrix Orbital GLK12232-25-WBL 15

5.3 I2C Interface
The keypad is read by I2C master read. In short, this means that a read of the module will always return
the first unread key press. A read is initiated by writing to the module with its base address plus 1, then
clocking the module’s return byte after the module releases the SDA line. Much more detail on this basic
I2C function can be found in the I2C specification by Phillips. A good reference is also available at;
The module contains a ten key press buffer so that it can be polled for key presses at an infrequent rate
(every 500 to 1000 mS is typical). All returned key presses indicate the presence or absence of additional
logged key presses by the most significant bit (MSB - bit 7). If the user has pressed two keys since the last
poll of the keypad interface, the first read will return the key code with bit 7 set and the second read will
return the key code with bit 7 clear. The application must take into account this bit to keep up with user key
presses. If there are no keypresses detected, the module will return zero (0x00).
5.4 RS-232 Interface
By default on any press of a key, the module will immediately send out the key code at the selected baud
rate. This behavior can be modified using commands found in the next section.
5.5 Commands
5.5.1 Auto repeat mode on (254 126 [mode])
[mode] = 0 gives Resend Key Code mode
[mode] = 1 gives Key down / Key up code mode
Two Modes of auto repeat are available and are set via the same command.
1. Resend Key Code: This mode is similar to the action of a keyboard on a PC. In this mode, when a
key is held down, the key code is transmitted immediately followed by a 1/2 second delay. After this
delay, key codes will be sent via the RS-232 interface at a rate of about 5 codes per second. This mode
has no effect if polling or if using the I2C interface.
2. Keydown / Key up codes: This mode may be used when the typematic parametersof the Resend Key
code mode are unacceptable or if the unit is being operated in polled mode. The host system detects
the press of a key and simulates an auto repeat inside the host system until the key release is detected.
In this mode, when a key is held down, the key code is transmitted immediately and no other codes will be
sent until the key is released. On the release of the key, the keyrelease code transmitted will be a value equal
to the key down code plus 20 hex. For example, the key code associated with key ’P’ (0x50) is pressed, the
release code is ’p’ (0x70).
In RS-232 polled mode or via the I2C interface, the key down / key up codes are used. However, the user
should be careful of timing details. If the poll rate is slower than the simulated auto-repeat it is possible that
polling for a key up code will be delayed long enough for an unwanted key repeat to be generated.
Matrix Orbital GLK12232-25-WBL 16
Table of contents
Other Matrix Orbital Computer Hardware manuals