Matsui MAT37LW507E User manual

COLOUR TELEVISION WITH REMOTE CONTROL
FÄRG TV MED FJÄRRKONTROLL
EΓXPΩMH THΔEOPAΣH
FARVE - TV MED FJERNETJENING
OPERATING INSTRUCTIONS
Oδηγίες Xρήσως
BRUKSANVISNING FÖR
BETJENINGSVEJLEDNING
MAT37LW507E
MAT42LW507E
01-ENG-37737W-42737W-1072 UK-37-42 INCH 17MB15 OEM-(HD READY)(WO VGA-WO PIP)(S)-50101853.p6502.04.2007, 11:171

- 2 -
Safety Precautions
Please read thefollowing recommended safety pre-
cautions carefully for your safety
1. Power Source
The set should be operated only from a 220-240V
AC, 50 Hz. outlet. Please check your household
voltage is the same as the rated voltage of the set,
or if in doubt consult a qualified electrician.
2. Power Cord
Do not place the set, a piece of furniture,etc. on the
power cord(mains lead) orpinch the cord. Handle the
power cord by the plug. Do not pull out the plug by
tuggingthe cordandnever touchthepower cord when
your hands are wet as this could cause a short circuit
orelectricshock.Nevermakeaknot inthe cordortie it
with other cord. The power cord should be placed in
such a way that they are not likely to be stepped on.
A damaged power cord can cause fire or give you
anelectricshock.Whenitisdamagedandneedtobe
changed, it should be done by qualified technician.
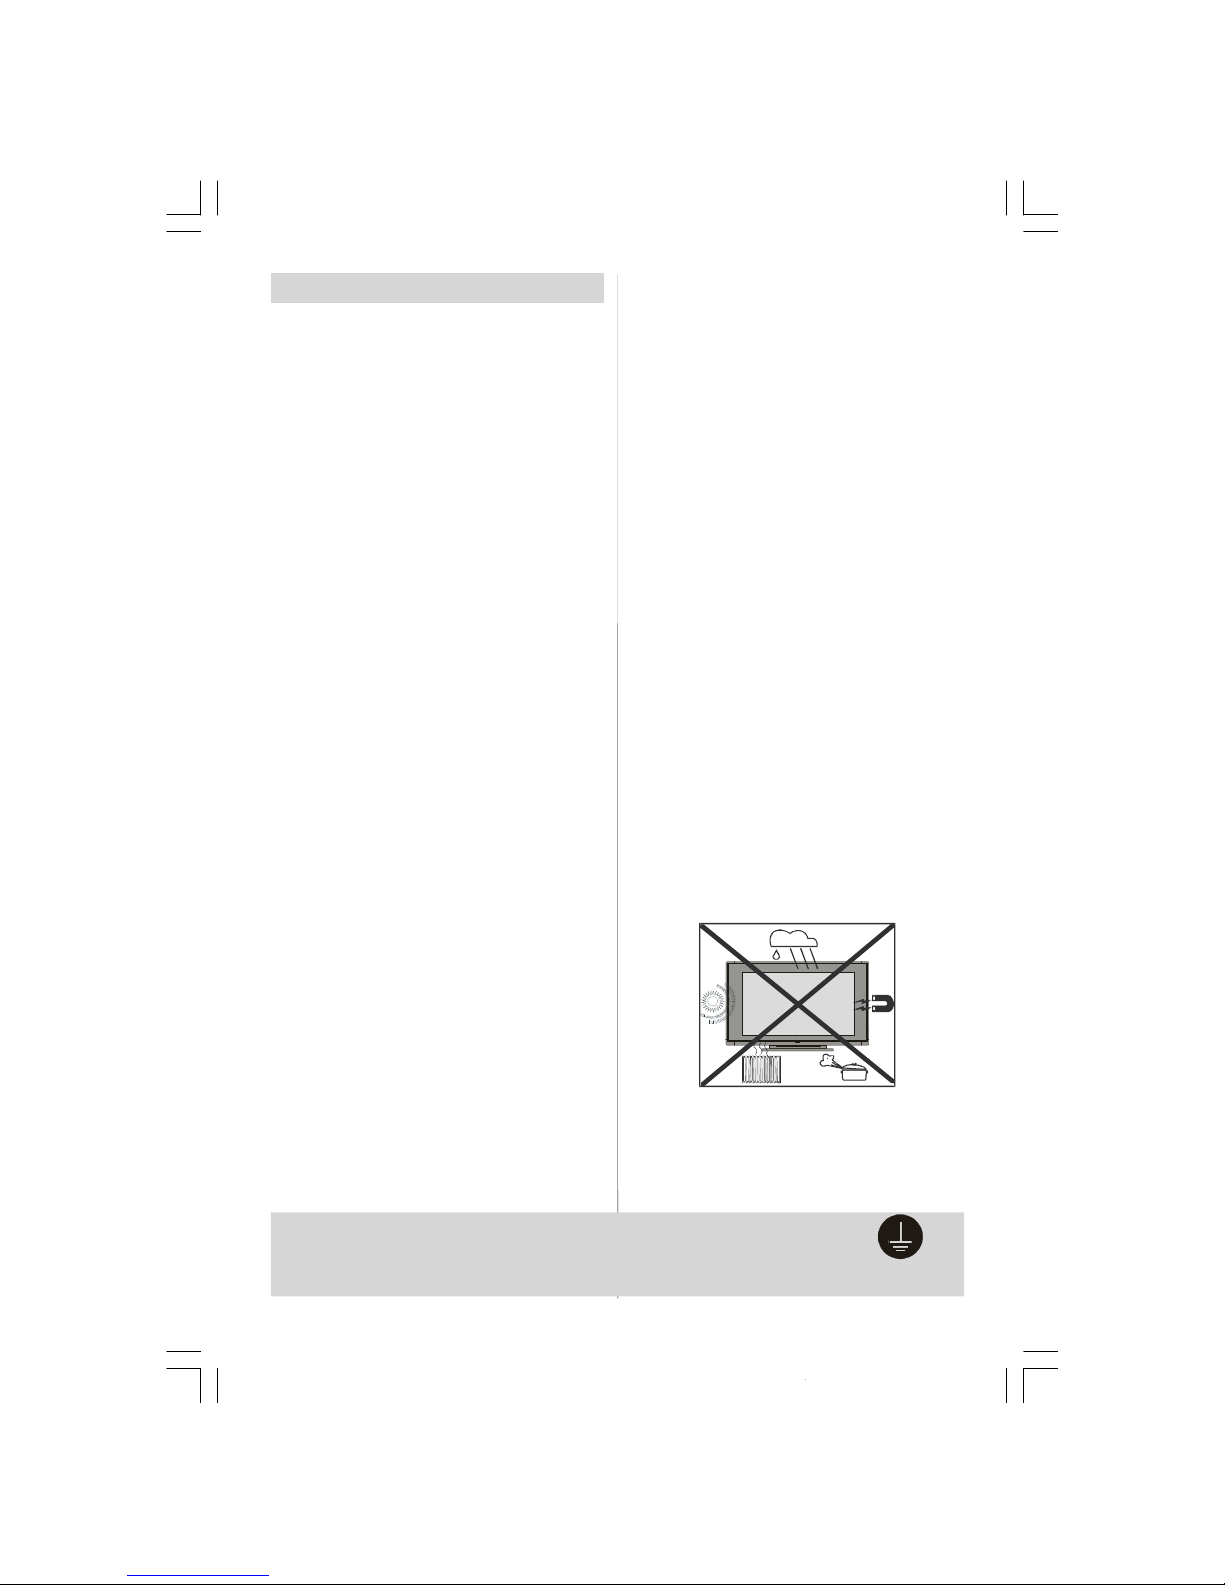
3. Moisture and Water
Donotusethisequipmentinahumidanddampplace
(avoid the bathroom, the sink in the kitchen, and near
the washing machine). Do not expose this equipment
to rain or water, as thismay be dangerous and do not
place objects filled with liquids,such as flower vases
on top of the set.Avoid from dripping or splashing.
Ifanysolidobjectorliquidfallsintothecabinet,unplug
the set and have it checked by qualified personnel
before operating it any further
4. Cleaning
Before cleaning, unplug the set from the wall outlet. Do
notuseliquidoraerosolcleaners. Usesoftanddrycloth.
5. Ventilation
The slots and openings on the back cover are in-
tended for ventilation and to ensure reliable opera-
tion. To prevent overheating, these openings must
not be blocked or covered in anyway.
6.Heat and Flames
The set should not be placed near to naked flames
and sources of intense heat, such as an electric
heater. Ensure that no naked flame sources, such
as lighted candles, are placed on top of the set
7. Lightning
In case of storm and lightning or when going on holi-
day, disconnect the power cord from the wall outlet.
8. Replacement Part
Whenreplacement parts are required, be sure the ser-
vice technician has used replacement parts which are
specifiedbythe manufacturer orhavethe samespeci-
ficationsastheoriginalone.Unauthorisedsubstitutions
may resultin fire, electrical shock, or other hazards.
9 . Servicing
Please refer all servicing to qualified technician. Do
not remove the cover yourself as this may result in
an electric shock.
WARNING: When the device is not in use for a
long time, disconnect from power.
Instructions for waste disposal:
• Packaging and packaging aids are recyclable and
should principally be recycled. Packaging materials,
such as foil bag, must be kept away from children.
• Battery, including those which is heavy metal-free,
should not be disposed of with household waste.
Please dispose of used battery in an environmen-
tally sound manner. Find out about the legal regu-
lations which apply in your area.
• Cold cathode fluoresant lamp in LCD PANEL con-
tains a small amount of mercury, please follow local
ordinates or regulations for disposal.
• The mains plug is used to disconnect the TV
from the mains and therefore it shall remain
readily operable.
Warning: To prevent injury, this device must be
securely attached to the floor/wall in ac-
cordance with the installation instrutions.
“DO NOTLEAVEYOUR TVATSTAND-BYOROPER-
ATINGWHENYOULEAVEYOURHOUSE”
"The LCD panel is very high technology product
with about a million thin film transistors, giving you
fine picture details. Occasionally, a few non-active
pixels may appear on the screen as a fixed point of
blue, green or red. Please note that this does not
affect the performance of your product."
Be sure to ground the connection properly.
Connect the ground terminal of TV with the ground terminal provided at the power
outlet using the enclosed power cord. If the provided plug does not fit your outlet,
consult an electrician for replacement of the obsolete outlet.
Surely connect
the ground wire.
01-ENG-37737W-42737W-1072 UK-37-42 INCH 17MB15 OEM-(HD READY)(WO VGA-WO PIP)(S)-50101853.p6502.04.2007, 11:172

- 3 -
TV Accessory
1 2
3
4 5
6
8
9
7
0
III
GUIDE
WIDE
SOUND PICTURE
FEATURE
INSTALL
PC
ABC
DEF
GHI
STU
VWX
YZ
EXIT
PQRJKL MNO
TV
A
V
DTV
-/ --
P<P
Remote Control
Part Number: 30037770
Battery
Part Number: 30002391
Contents
Safety Precautions...............................................................................................................................2
TV Accessory......................................................................................................................................3
Preparation ...........................................................................................................................................4
Before Switching On Your TV..............................................................................................................4
LCDTV.................................................................................................................................................5
RemoteControl Buttons ........................................................................................................................5
Peripheral Equipment Connections .......................................................................................................6
Switching The TV ON/OFF ...................................................................................................................7
InitialSettings........................................................................................................................................7
Operating The TV .................................................................................................................................8
Menu System........................................................................................................................................8
Other Features ...................................................................................................................................13
Teletext...............................................................................................................................................14
ConnectPeripheral Equipment ............................................................................................................16
Tips ....................................................................................................................................................17
Specifications .....................................................................................................................................18
Aerial Connection ...............................................................................................................................19
01-ENG-37737W-42737W-1072 UK-37-42 INCH 17MB15 OEM-(HD READY)(WO VGA-WO PIP)(S)-50101853.p6502.04.2007, 11:173

- 4 -
Preparation
Forventilation, leave a space of at least 10 cm free all
around the set. To prevent any fault and unsafe situa-
tions,pleasedonotplaceanyobjects ontop oftheset.
Use this apparatus in moderate climates.
Features
• Remote controlled colour television.
• 100 programmes from VHF, UHF bands or cable
channels can be preset.
• It can tune cable channels.
• Controlling the TV is very easy by its menu driven
system.
• It has2 SCART sockets for external devices (such
as video, video games, audio set, etc.)
• Stereo sound system (German+Nicam).
• Full function Teletext .
Fastext (1000 Pages), TOP text.
• Headphone connection.
• Direct channel access.
•A.P.S. (Automatic Programming System).
•All programmes can be named.
• Forward or backward automatic tuning.
• Sleep timer.
• Child Lock.
•Automatic sound mute when no transmission.
• NTSC Playback.
•AV in and S-VHS in are available.
• It has an HDMI connector for Digital Video and
Audio. This connection is also designed to accept
High Definition signals.
• AVL (Automatic Volume Limiting)
• When no validsignal is detected, after 5 minutes the
TV switches itself automatically tostand-by mode.
• PLL (Frequency Search)
• Stereo PCAudio Input
• 3D Comb Filter
•Audio Line Out
Before Switching On Your TV
Power Connection
IMPORTANT: The TV set is designed to operate
on 220-240V AC, 50 Hz.
•After unpacking, allow the TV set to reach room tem-
perature before you connect the set to the mains.
Connections To The Aerial Input Socket
VHF/UHF
75
REAR OF THE TV
CABLE TV
NOTE : ConnecttheaerialorcableTVplugtotheAerial
input socket located at the rear of the TV and
connect the cable plugcomingout from the TV
outsocketlocatedonthedevices(VCR,DVB-T
etc.)tothissocketaswell.
How To Connect Other Devices
IMPORTANT: Switch off the TV before connecting
any external device.
Sockets for external connections are at the rear
side of the TV. For connection of other devices via
SCART refer to the manuals of the related devices.
Inserting Batteries In The Remote
ControlHandset
• Remove the battery cover located on the back of
the handset by gently pulling downwards from
the indicated part.
• Insert two AAA/R03 or equivalent type batteries
inside. Place the batteries in the right direction.
• Replace the battery cover.
NOTE: Remove the batteries from remote
control handset when it is not to be used for
a long period.Otherwise it can be damaged
due to any leakage of batteries.
01-ENG-37737W-42737W-1072 UK-37-42 INCH 17MB15 OEM-(HD READY)(WO VGA-WO PIP)(S)-50101853.p6502.04.2007, 11:174

- 5 -
Remote Control Buttons
= Stand By
YELLOW / FEATURE =
FeatureMenu
BLUE / INSTALL =InstallMenu
=Update/NoFunction
=Hold
/GUIDE=IndexPage
/PC=Reveal/NoFunction
0 - 9 = Direct Programme
-/-- / EXIT =NoFunction
V+ = VolumeUp
P + = ProgrammeUp
TV
DTV
=TV/ Quit Menu
AV
=Source Select
PP =PictureMode Selection
(Natural, Cinema,Dynamic)
= Cursor Up
1
2
3
4
5
6
8
9
7
0
III
GUIDE
WIDE
SOUND
PICTURE
FEATURE
INSTALL
PC
ABC
DEF
GHI
STU
VWX
YZ
EXIT
PQRJKL MNO
TV
A
V
DTV
-/--
P<P
LCD TV
TV/AV
MENU
P/CH
TV/AV
MENU
P/CH
Stand-By
TV/AV
Menu
-Program+
-Volume+
S
L
R
L
R
SUB-OUT
Headphone
= Cursor Right
OK/SELECT =Okay/FreezePicture
= Cursor Down
M= Main Menu
= Cursor Left
I-II =Mono/Stereo - Dual A-B
/INFO=Info
- P = Programme Down
=Mute
- V = Volume Down
P<P=PreviousProgramme
/WIDE/ =Wide/ Expand
/ = No Function / Mix
=Teletext
= Time / Subpage
31
RED / SOUND = SoundMenu
32
GREEN / PICTURE = PictureMenu
01-ENG-37737W-42737W-1072 UK-37-42 INCH 17MB15 OEM-(HD READY)(WO VGA-WO PIP)(S)-50101853.p6502.04.2007, 11:175

- 6 -
S-VHS Input ------>EXT-4S
Video Input
Audio Inputss
Audio Line Out
Headphone
Power cord input
Power On/Off switch
PCAudio input
Aerial
SCART 2 (EXT-2)
SCART 1 (EXT-1)
HDMI Input (EXT-5)
ComponentAudio Inputss
Component Video (YPbPr) Inputs
Subwoofer Out
EXT-4
EXT-3
Peripheral Equipment Connections
TV/AV
MENU
P/CH
S
L
R
L
R
SUB-OUT
S
L
R
L
R
SUB - O U T
O
J
220V-240V
AC~50 Hz POWER
01-ENG-37737W-42737W-1072 UK-37-42 INCH 17MB15 OEM-(HD READY)(WO VGA-WO PIP)(S)-50101853.p6502.04.2007, 11:176

- 7 -
Switching The TV ON/OFF
To switch the TV on:
Your TV will switch on in two steps:
1- Connect the power supply cord to the system.
Press On/Off switch at the rear of the TV. Then
the TV switches itself to stand-by mode and the
LED becomes BLUE located on the front of the
TV.
2- To switch on the TV from stand-by mode either:
Press a digit button on the remote control so that a
programme number is selected,
or,
Press “ ”, "-P/CH" or "P/CH+" button on the right
side of the TV or press “-P/CH” or “P/CH+” button
on the remote control, so that last switched off
programme is selected.
By either ways the TV will switch on and the LED
will turn off.
To switch the TV off:
• Press the “stand-by” button on the remote con-
trol, so the TV will switch to stand-by mode and
the LED will become BLUE,
or,
Press the “ ” button located on the right side of
the TV, so the TV will switch off and the LED will
becomeBLUE.
To power down the TV completely, press On/Off
switch,
or
unplug the power cord from the mains socket.
Initial Settings
Initial APS (Automatic Programming
System)
The following menu will be displayed on the screen
when you turn your TV on for the first time. APS,
searches and sorts all channels and stores them
automatically on your TV, according to the trans-
mission of programme systems in your area.
AUTO PROGRAM
PLEASE CHECK ANTENNA CABLE
Language
English
AUTO. PROGRAMMING SYSTEM
Country
UK
OK
Cancel
First of all choose Language and Country by us-
ing “
” or “
” and “
” or “
” buttons. This will
affect the sort process in APS. To start APS, press
the RED or “OK” button.
APS is running...
UK - I 155,25 Mhz
Cancel
01 - C-01
After APS is finalized, the programme table will ap-
pear on the screen. In the programme table you will
see the programme numbers and names assigned
to the programmes.
If you do not accept the locations and / or the
programmenames ofprogrammes,youcanchange
them from theProgram Menu.
01-ENG-37737W-42737W-1072 UK-37-42 INCH 17MB15 OEM-(HD READY)(WO VGA-WO PIP)(S)-50101853.p6502.04.2007, 11:177

- 8 -
• For a two digit programme number enter the sec-
ond digit after pressing the first digit within 2 sec-
onds.
Menu System
Your TV has been designed with a menu system to
provide easy manipulation of a multifunction sys-
tem.
Press the “M” button to enter the menu. Press “
”
or “
” button to select a menu title and then “
” or
“
” button to select a menu item and “
” or “
” or
“OK” button to enter the menu item.
You can access the menus directly by pressing the
coloured buttons on the remote control:
RedButton Sound Menu
Green Button PictureMenu
Yellow Button Feature Menu
Blue Button InstallMenu
• Press the “M” or button to return to the pre-
vious menu.
Picture menu
By pressing “
” or “
” button, select the first icon.
Picture menu appears on the screen.
OK
Mode Cinema
Contrast
PAL 50Hz
Brightness
Sharpness
Colour
Colour Temp Warm
Noise Reduction
Reset
10
24
62
32
Film Mode
Off
3D Comb
Off
Off
PICTURE
Mode
By pressing “
” or “
” button, select Mode. Press
“
” or “
” button to choose one of these options:
Natural,Cinema and Dynamic.
Picture Mode can be directly changed via pressing
the “PP” button on the remote control.
Operating The TV
You can operate your TV using both the remote
control handset and the buttons on the set.
Operating with the buttons on the TVset
Volume setting and programme selection can be
made by using the buttons on the control panel at
the top of the TV.
Volume Setting
Press the "VOLUME-" button to decrease volume
orthe"+ VOLUME" button toincrease volume, soa
volume level scale (slider) will be displayed at the
bottom of the screen.
Programme Selecting
Press the "+P/CH" button to select the next
programme or the"P/CH-" buttonto select the pre-
vious programme.
Entering The Menu
Press the “M” button on the control panel at the top
of the TV to enter the menu.
"+P/CH" /"PCH-" and "VOLUME -" /"+ VOLUME"
buttons on the TV are used as navigation buttons in
themenu.
AV Mode
Press the "TV / AV" button on the control panel at
the top of the TV to switch your TV to EXT modes.
Operating With Remote Control
The remote control handset of your TV is designed
to control all the functions of your TV. The functions
will be described in accordance with the menu sys-
tem of your TV.
FunctionsofthemenusystemaredescribedinMenu
System section.
Volume Setting
Press the “V+” button to increase volume. Press
the“- V” buttontodecrease volume.Avolume level
scale (slider) will be displayed at the bottom of the
screen.
Programme Selecting
(Previous or next programme)
• Press the “-P” button to select the previous
programme.
• Press the “P+” button to select the next
programme.
Programme Selecting (direct access):
Press digit buttons on the remote control handset to
select programmes between 0 and 9. The TV will
switch to the selected programme after a short
delay.
01-ENG-37737W-42737W-1072 UK-37-42 INCH 17MB15 OEM-(HD READY)(WO VGA-WO PIP)(S)-50101853.p6502.04.2007, 11:178

- 9 -
Contrast
By pressing “
” or “
” button, select Contrast.
Press “
” button to increase contrast. Press “
”
button to decrease contrast. Contrast level can be
adjusted between 0 and 63.
Brightness
By pressing “
” or “
” button, select Brightness.
Press “
” button to increase brightness. Press “
”
button to decrease brightness. Brightness level can
be adjusted between 0 and 63.
Sharpness
By pressing “
” or “
” button, select Sharpness.
Press “
” button to increase sharpness. Press “
”
button to decrease sharpness. Sharpness level can
be adjusted between 0 and 31.
Colour
By pressing “
” or “
” button, select Colour.
Press “
” button to increase colour. Press “
” but-
tonto decrease colour. Colourlevel canbeadjusted
between 0 and 99.
Hue
This item is displayed in picture menu when the TV
receives an NTSC signal. By pressing “
” or “
”
button, select Hue. Press “
” button to increase
hue level. Press “
” button to decrease hue level.
Hue level can be adjusted between -31 and 31.
Colour Temp
By pressing “
” or “
” button, select Colour
Temp. Press “
” or “
” button to choose one of
these options: Cool,Normal and Warm.
Noise Reduction
This item is used to reduce the image noise and
improve the picture quality at weak signals.
By pressing “
” or “
” button, select Noise Re-
duction. Press “
” or “
” button to set Noise re-
duction level to Off,Low,Medium or High.
Film Mode
Films are recorded at a different number of frames
per second to normal television programmes.
By pressing “
” or “
” button, select Film Mode.
Press “
” or “
” button to set this feature On or Off.
Turn this feature on when you are watching films to
see the fast motion scenes clearly.
3D Comb
3D Comb is used to improve colour transitions and
colour quality of pictures.
By pressing “
” or “
” button, select 3D Comb.
Press “
” or “
” button to set this feature On or Off.
Reset
By pressing “
” or “
” button, select Reset. Press
“
” or “
” or “OK” button to reset the picture modes
to factory default settings.
Sound menu
By pressing “
” or “
” button, select the second
icon. Sound menu appears on the screen.
Volume
Equalizer
Balance
Headphone
Sound Mode
10
0
Stereo
AVL
Effect
Dynamic Bass
On
Off
Off
SOUND
Subwoofer
Off
Volume
By pressing “
” or “
” button, select Volume.
Press “
” button to increase volume level. Press “
”
button to decrease volume level. Volume level can
be adjusted between 0 and 63.
Equalizer
By pressing “
” or “
” button, select Equalizer..
Press “
” or “
” or “OK” button to enter equalizer
menu.
Equalizer
Sound Mode
User
120Hz
500Hz
1.5kHz
5kHz
0
10kHz
0
0
0
0
SOUND
01-ENG-37737W-42737W-1072 UK-37-42 INCH 17MB15 OEM-(HD READY)(WO VGA-WO PIP)(S)-50101853.p6502.04.2007, 11:179

- 10 -
In equalizer menu the sound mode can be changed
to User, Pop, Rock, Jazz, Flat and Classic by
pressing “
” or “
” button. Equalizer menu settings
can be changed only when Sound Mode is User.
Select the desired frequency by “
” or “
” button
and increase or decrease the frequency gain by
pressing “
” or “
” button.
Press the“M” buttontoreturntothepreviousmenu.
Balance
By pressing “
” or “
” button, select Balance.
Press “
” button to increase balance to the right.
Press “
” button to increase balance to the left.
Balance level can be adjusted between-31 and 31.
Headphone
By pressing “
” or “
” button, select Headphone.
Press“
”or“
”or“OK”buttontoenterhedphonemenu.
Headphone
Sound Mode
Balance
10
0
Stereo
Volume
SOUND
volume
By pressing “
” or “
” button, select Volume.
Press “
” button to increase hp volume level.
Press “
” button to decrease hp volume level.
Headphone volume level can be adjusted be-
tween 0 and 63.
sound mode
Bypressing“
”or“
”button,selectSound Mode.
Press“
”or“
”buttontochangesoundmode.
Sound mode is used to identifysound mode of the
headphone and can be set to mono, stereo,
dual A or dual B according to the transmission.
balance
By pressing “
” or “
” button, select Balance.
Press “
”buttonto increasebalancetotheright.
Press “
” button to decrease balance to the left.
Balance level can be adjusted between -31 and
31.
Press the “M” button to return to the previous
menu.
Sound Mode
By pressing “
” or “
” button, select Sound
Mode. Press “
” or “
” button to change the mode.
You can select Mono,Stereo, Dual A or Dual B
mode,onlyiftheselectedchannelsupportsthatmode.
In case of bilingual broadcast (Dual Sound), you
can select original or dubbed language using mode
option.
AVL
Automatic Volume Limiting (AVL) function adjusts
the sound to obtain fixed output level between pro-
grams, having different sound levels.
Pressing “
”or“
” button willturnthis featureon or off.
Effect
You can use this feature to switch the sound effect
on or off. If the current sound system is Mono and
the sound effect is switched on, then the sound will
be heard as if it is Stereo. If the current sound sys-
tem is Stereo, switching this effect on will give a
more spatial effect.
Pressing “
”or“
” button willturnthis featureon or off.
Dynamic Bass
Dynamic Bass is used to increase bass effect of
the TV set.
Bypressing“
”or“
”button,select Dynamic Bass.
By pressing “
” or “
” button set Dynamic bass to
Low,HighorOff.Itis notrecommendedtoselectHigh
iflisteningat highvolumelevels. Thereis a subwoofer
output that can accept an active subwoofer if you
wish to create very high levels of Bass.
Subwoofer is active only if Dynamic Bass is set to
Off.
SubWoofer
It is possible to connect an external, active
subwoofer to the set to give a much deeper bass
effect.
By pressing “
” or “
” button, select Subwoofer..
Subwoofer can be set to On or Off.
Dynamic Bass is not available if Subwoofer is set to
On.
Set Subwoofer to On when you connect an exter-
nal subwoofer to the set.
01-ENG-37737W-42737W-1072 UK-37-42 INCH 17MB15 OEM-(HD READY)(WO VGA-WO PIP)(S)-50101853.p6502.04.2007, 11:1710

- 11 -
Feature menu
By pressing “
” or “
” button, select the third icon.
Feature menu appears on the screen.
Sleep Timer
Child Lock
Language
Ext-2 Out
Default Zoom
Off
Off
English
EXT - 1
Panoramic
Menu Background
Translucent
Menu Timeout
30 sec
Teletext Language
West
FEATURE
Sleep Timer
By pressing “
” or “
” button, select Sleep Timer..
The timer can be programmed between Off and 2
hours in steps of 10 minutes by pressing “
” or “
”
button. If sleep timer is activated, at the end of the
selected time, the TVautomatically goes intostand-
by mode.
Child Lock
You can use this feature to prevent children from
turning the TV on or changing programmes or ad-
justments etc. without remote control.
The child lock feature can be set by “
” or “
” but-
ton to either On or Off. When Off is selected, there
will be no difference in the operation of your TV.
When Onis selected, the TV can only be controlled
by the remote control handset. In this case the con-
trol panel buttons, except the Power on/off button,
at the rear side of the TV will not work. If one of
these buttons is pressed, “Child Lock On” will be
displayed on the screen.
Language
By pressing “
” or “
” button, select Language.
By pressing “
” or “
” button, you can select the
language.
Ext-2 Out
By pressing “
” or “
” button, select Ext-2 Out.
You can set Ext-2 Out to TV, EXT-1, EXT-3, EXT-4
or EXT-5 by pressing “
” or “
” button.
Note: Only audio output is available for EXT-3 and
EXT-5.Theotheroptionshavebothaudioand
video outputs.
Default Zoom
By pressing “
” or “
” button, select Default
Zoom. You can set Default Zoom to Panoramic,
4:3 or 14:9 Zoom by pressing “
” or “
” button.
If there is no WSS or aspect ratio (picture size)
information and zoom mode is selected as Auto by
pressing the “WIDE” button, then the zoom mode
will automatically change to Default Zoom setting.
See also Zoom Modes on page 13.
Menu Background
By pressing “
” or “
” button, select Menu Back-
ground. Youcanchangemenubackgroundto Trans-
lucent or Opaque by pressing “
” or “
” button.
Menu Timeout
By pressing “
” or “
” button, select Menu
Timeout. Press “
” or “
” button to change menu
timeout to 15 sec, 30 sec or 60 sec.
Teletext Language
By pressing “
” or “
” button, select Teletext
Language. Press “
” or “
” button to change Tele-
text Language to West, East, Cyrillic, Turk/Gre
or Arabic. This will normally be set to West for
Western Europe.
Install menu
By pressing “
” or “
” button, select the fourthicon.
Install menu appears on the screen.
Program
By pressing “
” or “
” button, select Pro-
gram. Press “
” or “
” button to select the pro-
gram number. You can also enter a number via
01-ENG-37737W-42737W-1072 UK-37-42 INCH 17MB15 OEM-(HD READY)(WO VGA-WO PIP)(S)-50101853.p6502.04.2007, 11:1711

- 12 -
digit buttons on the remote control. There are
100 program storage between 0 and 99.
Band
Band can be selectedeither “C” or “S” by press-
ing “
” or “
” button.
Channel
Channel can be changed by “
” or “
” button
or Digit Buttons.
Colour System
By pressing “
” or “
” button, select Colour
System. Press “
” or “
” button to change the
colour systemtoPAL, SECAM, PAL60 orAUTO.
If Sound System is set to I, SECAM is not avail-
able for the Colour System.
Note:InEXTmode,youcanchoose NTSC3.58
and NTSC 4.43 as well.
Sound System
By pressing “
” or “
” button, select Sound
System. Press “
” or “
” button to change the
sound system toBG, DK, I, L or LP.
Fine Tune
Bypressing“
”or“
”button,select Fine Tune.
Press “
” or “
” button to adjust the tuning.
Search
By pressing “
” or “
” button, select Search.
Press “
” or “
” button to start program search-
ing. The searching will stop when a signal is
found. You can also enter a frequency value
directly by pressing the digit buttons.
VCR (Video Cassette Recorder)
• If you want to watch aVCR source thenit will be
better to set VCR mode “on”. For this, while the
cursor is on this item press the“
” or “
” buttons
to set it “On”.
• If you want to watch a DVD, then you must
set this item “Off”.
Store Program
By pressing “
” or “
” button, select Store
Program. Press “
” or “
” or “OK” button to
store the adjustments. “Program Stored” will be
displayed on the screen.
Program menu
By pressing “
” or “
” button, select the fifth icon.
Program menu appears on the screen.
01 ITV
02 ZDF
03 CH5
04 C - 02
05 C - 05
06 C - 06
07 C - 08
08 C - 21
09 C - 23
10 C - 35
11 C - 43
12 C - 64
13 C - 68
14 S - 40
15 -----
16 - - - - -
17 - - - - -
18 - - - - -
19 - - - - -
20 - - - - -
Name
Insert
Delete
APS
PROGRAM
By moving the cursor in four directions you can
reach 20 programmes in the same page. You can
scroll the pages up or down by pressing the navi-
gationbuttonstoseealltheprogrammesinTVmode
(except theAV mode). Bycursoraction, programme
selection is done automatically.
Name:
To change the name of a decided programme, se-
lect the programme and press theRED button.
The first letter of the selected name starts to blink.
Press “
” or “
” button to change that letter and
“
” or “
”button toselect theotherletters.Bypress-
ing the RED button, you can store the name.
Insert:
Select the programme which you want to insert by
navigationbuttons.Press theGREENbutton.Bynavi-
gation buttons move the selected programme to the
decidedprogrammespaceandpresstheGREENbut-
ton again.
Delete:
To deletea programme, press the YELLOW button.
Pressing the YELLOW button againerases the se-
lected programme from the programme list, andthe
programmes below shift one up.
APS (Automatic Programming System)
When you press the BLUE button forAPS, the follow-
ing warning screen will be displayed.
01-ENG-37737W-42737W-1072 UK-37-42 INCH 17MB15 OEM-(HD READY)(WO VGA-WO PIP)(S)-50101853.p6502.04.2007, 11:1712

- 13 -
WARNING !
Country
UK
All prestored programs
OK
Cancel
will be deleted
PROGRAM
Press the BLUE button to cancelAPS if you do not
want to delete your existing programme list.
To continue APS, first select the country by pressing
“
”or“
”buttonandthenpresstheREDor“OK”button.
APS is running...
UK - I 155,25 Mhz
Cancel
01 - C-01
After APS is finalized, the programme table will ap-
pear on the screen.
Source menu
By pressing “
” or “
” button, select the sixth icon.
Source menu appears on the screen.
TV
EXT - 1
EXT - 2
EXT - 2S
EXT - 3
EXT - 4S
EXT - 4
EXT - 5
SOURCE : TV
In source menu, highlight a source by pressing “
”
or “
” button and switch to that mode by pressing
“
” or “
” or “OK”button.
Other Features
TV Status
Programme Number,Programme Name,
Sound Indicator and Zoom Mode are displayed
on the upper right side of the screen when a new
programme is entered, button is pressed.
Mute Indicator
It is placed in the upper left side of the screen when
enabled.
To cancel mute, there are two alternatives; the first
one is pressing the button and the second one
is increasing/decreasing the volume level.
Freeze Picture
You can freeze the picture on the screen by press-
ing the OK button.
ZoomModes
Zoom modecan be changed by pressing the WIDE
button. You can change the screen size according
to the picture aspect ratio. Select the optimum one
from the following ZOOM modes.
Auto:
When a WSS (Wide Screen Signalling) signal,
which shows the aspect ratio of the picture, is
included in the broadcast signal or the signal from
an external device, the TV automatically changes
the ZOOM mode according to the WSS signal.
• When the AUTO mode does not function correctly
due to poor WSS signal quality or when you
want to change the ZOOM mode, change to an-
other ZOOM mode manually.
Full:
This uniformly stretches the left and right sides of a
normal picture (4:3 aspect ratio) to fill the wide TV
screen.
• For 16:9 aspect ratio pictures that have been
squeezed into a normal picture (4:3 aspect ratio),
use the Full mode to restore the picture to its
original shape.
Cinema:
This zooms up the wide picture (16:9 aspect ratio)
to the full screen.
01-ENG-37737W-42737W-1072 UK-37-42 INCH 17MB15 OEM-(HD READY)(WO VGA-WO PIP)(S)-50101853.p6502.04.2007, 11:1713

- 14 -
16:9 Subtitle:
This zooms up the wide picture (16:9 aspect ratio)
with subtitles to the full screen.
“Default Zoom” Modes:
4:3
Use to view a normal picture (4:3 aspect ratio) as
this is its original shape.
14:9 Zoom:
This zooms up the wide picture (14:9 aspect ratio)
to the upper and lower limits of the screen.
Panoramic:
This stretches the left and right sides of a normal
picture (4:3 aspect ratio) to fill the screen, without
making the picture appear unnatural.
Thetopand bottomof the picture are slightly cut off.
Teletext
Teletext is an information system that displays text
on your TV screen. Using the Teletext information
system you can view a page of information on a
subject that is available in the list of contents (in-
dex).
To Operate Teletext
• Select a TV station where Teletext is being trans-
mitted.
• Press the button. Usually the list of contents
(index)is displayed on the screen.
GUIDE
WIDE
SOUND
PICTURE
FEATURE
INSTALL
PC
To Select A Page Of Teletext
• Press the appropriate digit buttons for the re-
quired Teletext page number.
The selected page number is displayed in the top
left corner of the screen. The Teletext page counter
searches until the selected page number is located,
the desired page is then displayed on the screen.
• Press the “
” or “P +” button to move the Tele-
text screen forward one page at a time.
• Press the “
” or “- P” button to move the Tele-
text screen backward one page at a time.
To Select Index Page
• To select the page number of the index (generally
page 100), press the button.
To Select Teletext With A TV
Programme
• Press the button. The text is now superim-
posed over the programme on the screen.
• Press the button again to return to the Teletext
page.
To Select Double Height Text
• Press the button for the top half of the infor-
mation page to be displayed in double height text.
• Press the button again for the bottom half of
the information page to be displayed in double
01-ENG-37737W-42737W-1072 UK-37-42 INCH 17MB15 OEM-(HD READY)(WO VGA-WO PIP)(S)-50101853.p6502.04.2007, 11:1714

- 15 -
height text.
• Press the button once more for the full page of
normal height text.
To Reveal “Concealed” Information
• Pressing the button once will reveal answers
on a quiz or games page.
• Pressing the button again will conceal the re-
vealed answers.
To Stop Automatic Page Change
The teletext page you have selected may contain
more information than what is on the screen; the
rest of the information will be displayed after a pe-
riod of time.
• Press the button to stop the automatic page
change.
• Press the button again to allow the next page
to be displayed.
To Select A Subcode Page
Subcode pages are subsections of long Teletext
pages that can only be displayed on the screen one
section at a time.
• Select the required Teletext page.
• Press the button.
• Select the required subcode page number by
pressing four digit buttons (e.g. 0001).
• If the selected subcode page is not displayed in a
short time, press the button. TV programme
will be displayed on the screen.
• Teletext page number will be displayed on the up-
per left corner of the screen when the selected
page is found.
• Press the button to display the selected Tele-
text page.
To Exit Teletext
• Press the button. The screen will switch to TV
mode.
To Display The Time
• While watching a TV programme with Teletext
transmission press the button. The current
time information, captured from Teletext will be
displayed on the screen.
• If the programme being watched does not have
Teletext transmission, no information will be dis-
played.
Fastext
Your TV supports the 1000 page Teletext system.
When the page number of any of the 1000 pages in
memory is entered, the system will not search for
the requested page; instead it will display the page
automatically.Iftherequestedpageisnotinmemory,
thesystem will search for the requestedpage num-
ber andsave the1000 pagesincludingtherequested
page into memory after finding it.
• Press the “
”button to move the Teletext screen
forward one page at a time.
• Press the “
”button to move the Teletext screen
backward one page at a time.
For Fastext
The subject-heading for the information may have a
particular colour.
• Press an appropriate RED,GREEN,YELLOW or
BLUE button in order to reach the relevant page
quickly.
For TOP text
TOP text mode of operation will be activated auto-
matically according to the transmission.
• If TOP text transmission is present, colour coded
buttons will appear in status row.
• If TOP text transmission is not present, status row
will not appear.
The subject-heading for information may be located
in coloured box.
In Top mode the “
”or “
”commands will re-
quest the next or previous pagerespectively. If TOP
text transmission is not available, in case of opera-
tion of these commands, wraparound occurs. For
example page 100 appears to be one greater than
page 199.
01-ENG-37737W-42737W-1072 UK-37-42 INCH 17MB15 OEM-(HD READY)(WO VGA-WO PIP)(S)-50101853.p6502.04.2007, 11:1715

- 16 -
Connect Peripheral Equipment
There is a wide rangeof audio andvideo equipment
that can be connected to your TV.
The following connection diagrams show you where
thedifferent(Optional)equipmentshouldbeconnected
at the rear side of the TV.
High Definition
Your LCD Television is capable of displaying High
Definition pictures from devices such as a High
Definition Satellite Receiver or DVD Player. These
devices must be connected via the HDMI socket
(EXT-5)orComponent Socket(EXT-3).Thesesock-
ets can accept either 720p or 1080i signals.
Note: For proper connection of a device to HDMI
input of your TV via using a DVI-to-HDMI
cable,useExtAudioIn(PCAudioIn)forsound
connection.
Via The SCART
LCD TV has 2 SCART sockets. If you want to con-
nect peripherals (e.g. video, decoder, etc.) which
have SCART sockets to the TV, use SCART 1 or
SCART2.
If an external device is connected via the SCART
sockets, the TV will be switched to AV mode auto-
matically.
• Do not connect Digital Set Top Box devices via
SCART 1. UseSCART2.
Via Aerial Input
If you want to connect to your TV, peripherals like
video recorders or decoders, but the device you
want to connect does not have a SCART socket,
you should connect it to the Aerial input of the TV.
If the VCR is connected via Aerial input it is
suggested to use Programme 0.
Decoder
Cable TV offers you a wide choice of programmes.
Most of them are free, others are to be paid for by
the viewer. This means that you will need to sub-
scribe to the broadcasting organisation whose
programmes you wish to receive. This organisation
will supply you a corresponding decoder unit to
allow the programmes to be unscrambled.
For further information ask your dealer. See also
the booklet supplied with your decoder.
Connect a decoder with an aerial socket
to the TV
• Connect the aerial cable.
Connect a decoder without an aerial
socket to the TV
• Connect the decoder to the TV with a SCART
cable to SCART 1.
TV And Video Recorder
• Connect the aerial cables.
Better picture quality can be obtained if you also
connect a SCART cable to SCART sockets.
Playback NTSC
To use this option you can;
• Connect an NTSC VCR player to a SCART socket
at the rear side of the TV.
• Connect an NTSC VCR player toRCA Jacks at the
right side of the TV.
Then,press
AV
buttonto selectappropriatesource.
Copy Facility
Source selection for VCR recording.
• Select Feature menu.
• Select Ext-2 Out by pressing “
” or “
” button.
• Select a source to copy the picture from that
source.
Search For And Store The Test Signal
Of The Video Recorder
• Unplug the aerial cable from the aerial socket of
your video recorder.
• Switch on your TV and put the video recorder on
the test signal. (See the booklet for your video re-
corder.)
• Enter the Install menu and select search.
• Search for the test signal of your video recorder
in the same way as you searched for and stored
the TV signals. Store the test signal under
programme number 0.
• Replace the aerial cable in the aerial socket of
your video recorder once you have stored the test
signal.
Camera And Camcorder
To Connect To AV Input
Connect your camera or camcorder to AV (EXT-4)
input at the right side of the TV.
• Connect your equipment to the TV via VIDEO (yel-
low),AUDIO R (red) and AUDIO L (white) inputs.
You must connect the jacks to the input using the
samecolour.
01-ENG-37737W-42737W-1072 UK-37-42 INCH 17MB15 OEM-(HD READY)(WO VGA-WO PIP)(S)-50101853.p6502.04.2007, 11:1716

- 17 -
To Connect To S-VHS Input
Connect your camera or camcorder S-VHS input
(EXT-4S) at the right side of theTV.
• Connect yourequipment to theTV via S-VHS input
and audio inputs of AV inputs by using S-VHS
cables.
EXT-2 S Mode
If theequipment connected to yourTV set supports
S-Video (Y/C) output from Euroconnector, you can
have a better picture quality by selecting EXT-2 S
mode and connecting your equipment to the EXT.2
(EXT-2 S) terminal of TV. See your equipment’s
booklet to check if your equipment has such fea-
ture.
Connect The Decoder To The Video
Recorder
SomevideorecordershaveaspecialSCARTsocket
for decoder.
• Connect a SCART cable to the SCART socket of
your decoder and to the special SCART socket of
your video recorder. Refer to the booklet of your
video recorder.
• To connect your video recorder to the TV,
refer to the TV and Video Recorder section.
If you want to connect more equipment to your TV,
consult your dealer.
Connecting Headphones
Use the stereo headphone socket at the right side
of the TV, to connect headphones.
Connecting Subwoofer
Use Subwoofer Out socket to connect an exter-
nal, active subwoofer to the set to give a much
deeper bass effect.
Connecting External Equipment
To connect audio amplifiers or home theatre sys-
tems to your TV, use theAudio Line Outs of theTV.
Tips
Care Of The Screen
Clean thescreen with a slightly damp, soft cloth. Do
not use abrasive solvents as they may damage the
TV screen coating layer.
Poor Picture
Have you selected the correct TV system? Is your
TV set or house aerial located too close to non-
earthed audio equipment or neon lights, etc.?
Mountains or high buildings can cause double pic-
tures or ghost images. Sometimesyou can improve
the picture quality by changing the direction of the
aerial.
Is the picture or Teletext unrecognisable? Check if
you have entered the correct frequency.
The picture quality may degrade when two periph-
erals are connected to the TV at the same time. In
such a case, disconnect one of the peripherals.
No Picture
Is the aerial connected properly?Are the plugs con-
nectedtightlytotheaerialsocket?Istheaerialcable
damaged? Are suitable plugs used to connect the
aerial? If you are in doubt, consult your dealer.
No Picture could mean that your TV is not receiv-
ing a transmission. Have you selected the correct
button on the remote control?
Sound
Has the mute button been pressed?
Sound is coming from only one of the speakers. Is
the balance set to one extreme? See Sound menu.
Remote Control
Your TV no longer responds to the remote control.
Perhaps the batteries are exhausted. If so you can
still use the local buttons at the side of the TV.
Have you selected the wrong menu? Press the
button to return to TV mode or press the “M” button
to return to the previous menu.
No solution:
Do not attemt to repair the TV yourself. Contact a
qualified service engineer.
01-ENG-37737W-42737W-1072 UK-37-42 INCH 17MB15 OEM-(HD READY)(WO VGA-WO PIP)(S)-50101853.p6502.04.2007, 11:1717

- 18 -
Connect Peripheral Equipment
Aerial Connection
VHF/UHF
75
Round 75 ohm coaxial cable
Rear of TV
Outdoor Aerial Connection
S
L
R
L
R
SUB-OUT
ANT.IN
VCR
AV-1
AV-2
LCD TV
...or through a satellite decoder...
ANT.IN
RF Lead to Aerial
Satellite LNB lead
RF Lead from
Satellite to TV
Aerial
• Scart Lead to
EXT-1 on TV.
TV VCR
LCD TV
...or through a VCR and satellite decoder.
ANT.IN
ANT.IN
RF Lead to
Aerial
RF Lead
from VCR to
Satellite
RF Lead from
VCR to TV
Satellite LNB lead
Aerial
VCR
• Scart Lead to
onTV.EXT-1
AV-1
TV VCR
AV-2
LCD TV
camcorder connection
headphone connection
either connect the aerial straight to your TV...
Aerial (RF) Socket
wall
socket
Aerial (RF)
Lead
...or connect the aerial through a VCR...
Aerial (RF) Socket
wall
socket
Aerial (RF)
Lead
Aerial (RF) Socket VCR Optimal Scart Lead
TV to VCR
(RF) connector(RF) connector
lead VCR to TV
DC IN
IN/OUT
A/VIN/OUT
OUT
Headphone
• It is recommended that a scart lead should be fitted between your TV and
VCR to enhance your picture and sound quality. Scart leads are essential
if you have a stereo TV and VCR and wish to obtain stereo sound from
your equipment. These leads can be purchhased from your dealer
or anygood High Street electrical retailer.
01-ENG-37737W-42737W-1072 UK-37-42 INCH 17MB15 OEM-(HD READY)(WO VGA-WO PIP)(S)-50101853.p6502.04.2007, 11:1718

- 19 -
Specifications
TV BROADCASTING
PAL/SECAMB/GD/KK'I/I'L/L'
RECEIVINGCHANNELS
VHF(BANDI/III)
UHF(BANDU)
HYPERBAND
CABLE TV (S1-S20/ S21-S41)
NUMBER OFPRESET CHANNELS 100
CHANNEL INDICATOR
On Screen Display
RF AERIAL INPUT
75 Ohm (unbalanced)
OPERATING VOLTAGE
220-240V AC, 50 Hz.
AUDIO
German+NicamStereo
AUDIO OUTPUT POWER (WRMS.) (%10 THD)
2 x 8
PANEL
16:9 display, 37” Screen Size
POWER CONSUMPTION (W)
180 W
2,3 W (Stand-by)
D L H
DIMENSIONS (mm)
Weight (kg)
With foot
Without foot
250
128 1062
1062 646
607 21,2
19,4
PANEL
16:9 display, 42” Screen Size
POWER CONSUMPTION (W)
210 W
1,3 W (Stand-by)
D L H
DIMENSIONS (mm)
Weight (kg)
With foot
Without foot
285
124 1185
1185 744
693 29,2
26,4
HDMI Display Modes List
Horizontal pixels x
Vertical Scan Line Front Rate Aspect Ratio
1920x1080i 60Hz 16:9
1920x1080i 50Hz 16:9
1280x720p 60Hz 16:9
1280x720p 50Hz 16:9
720x576p 50Hz 16:9
720x480p 60Hz 16:9
720x576i 50Hz 16:9
720x480i 60Hz 16:9
640x480 60Hz 4:3
01-ENG-37737W-42737W-1072 UK-37-42 INCH 17MB15 OEM-(HD READY)(WO VGA-WO PIP)(S)-50101853.p6502.04.2007, 11:1719
This manual suits for next models
1
Table of contents
Other Matsui TV manuals