RF Exposure Warning: This Wireless LAN ( local area network)
device has been evaluated under FCC Bulletin OET 65 and found
compliant to the requirements as set forth in CFR 47 Sections
2.1091, 2.1093, and 15.247 (b) (4) addressing RF exposure from
radio frequency devices. The radiated output power of this Wireless
LAN device is far below the FCC radio frequency exposure limits.
Nevertheless, this device should be used in such a manner that the
potential for human contact ( closer than 8”) during normal opera-
tion is minimized. When nearby persons have to be kept to ensure
RF exposure compliance, in order to comply with RF exposure
limits established in the ANSI C95.1 standards, the distance
between the antennas and the user should be greater than 20 cm
( approx. 8”). This equipment complies with FCC RF radiation expo-
sure limits set forth for an uncontrolled environment. This device
and its antenna(s) must not be co-located or used in conjunction
with any other antenna or transmitter.
Matsuyan
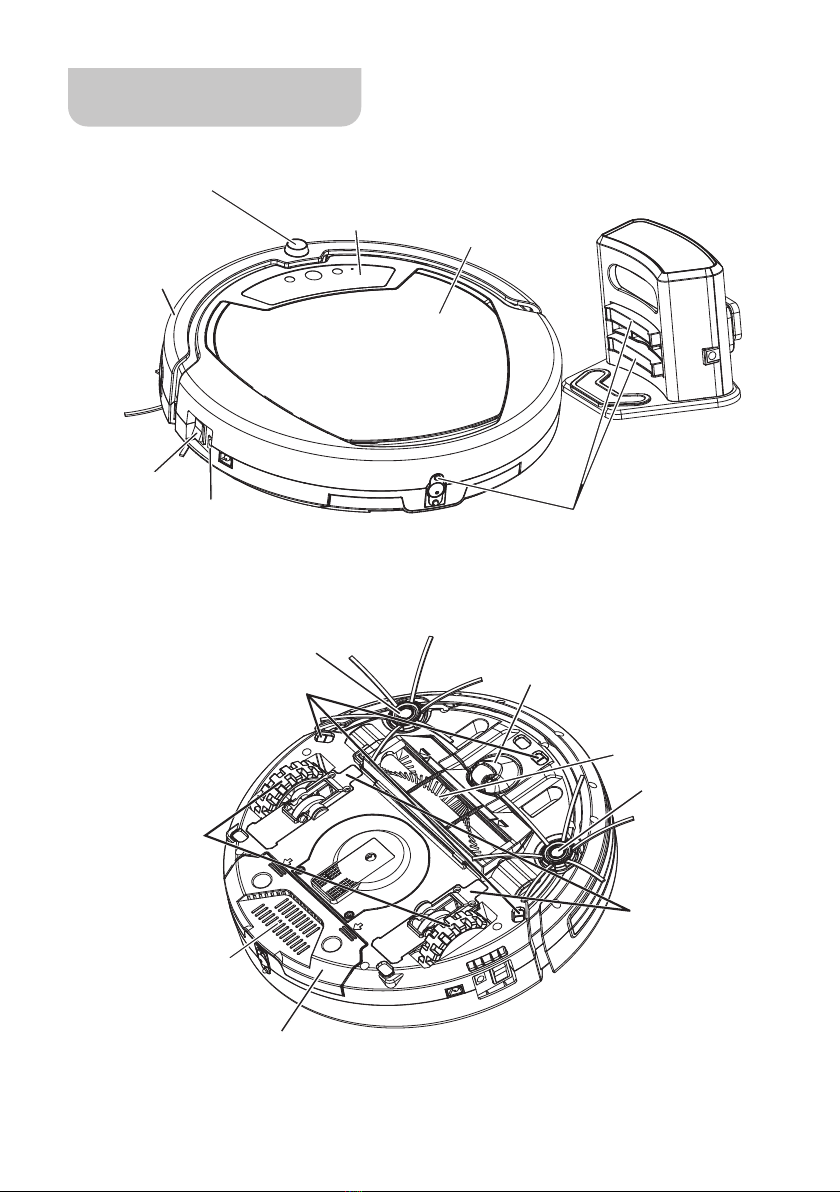
03
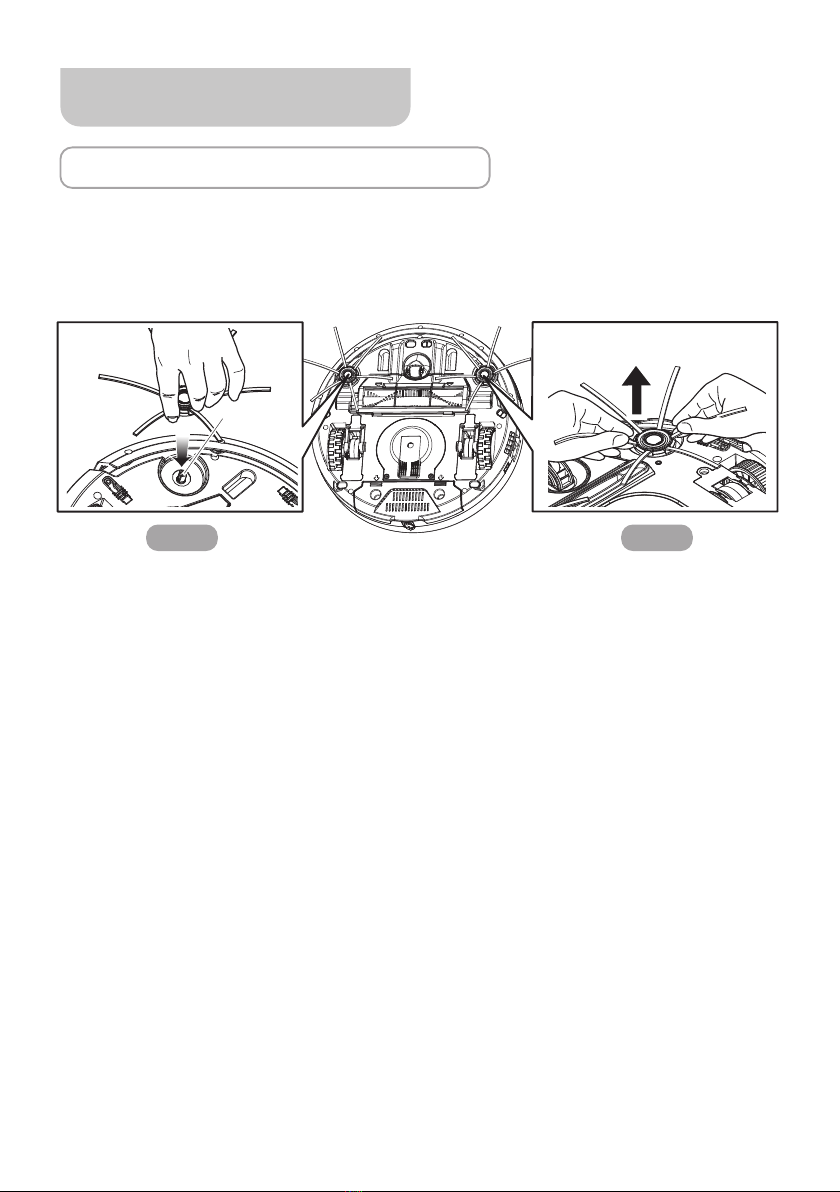
1.
2.
3.
4.
5.
6.
7.
8.
9.
Please apply the same model’s battery (D.C. Lithium-ion
INR18650 4S1P 14.6V 2500mAh) and adaptor (20V 1200mA) as
equipped with the packing.
The external flexible cable or cord of this adaptor cannot be
replaced; if the cord is damaged, the adaptor shall be scrapped.
When placing the batteries into the reservoir, please be sure that
the polarity of the batteries matches with the indication marked
inside the battery reservoir. Otherwise, the power cannot be
switched on.
Forbid any un-rechargeable or different type/model battery.
Applying un-rechargeable battery will cause the machine mal-
functions.
The battery is rechargeable. Please use the voltage and current
specified on the packing. If you are not sure of the voltage and
current of your house, please contact your local power company
or a licensed electrician.
Use only the battery supplied with your Vesta G.
Charging adaptor is for indoors only.
WARNING: For the purposes of recharging the battery, only use
the detachable supply unit provided with this appliance.
Do not recharge the battery if the cable or plug of the battery is
damaged.
BATTERY AND RECHARGING INSTRUCTIONS: