4 mm
4 mm
11.1
13.0
12.1
12.0
14.0
12.2
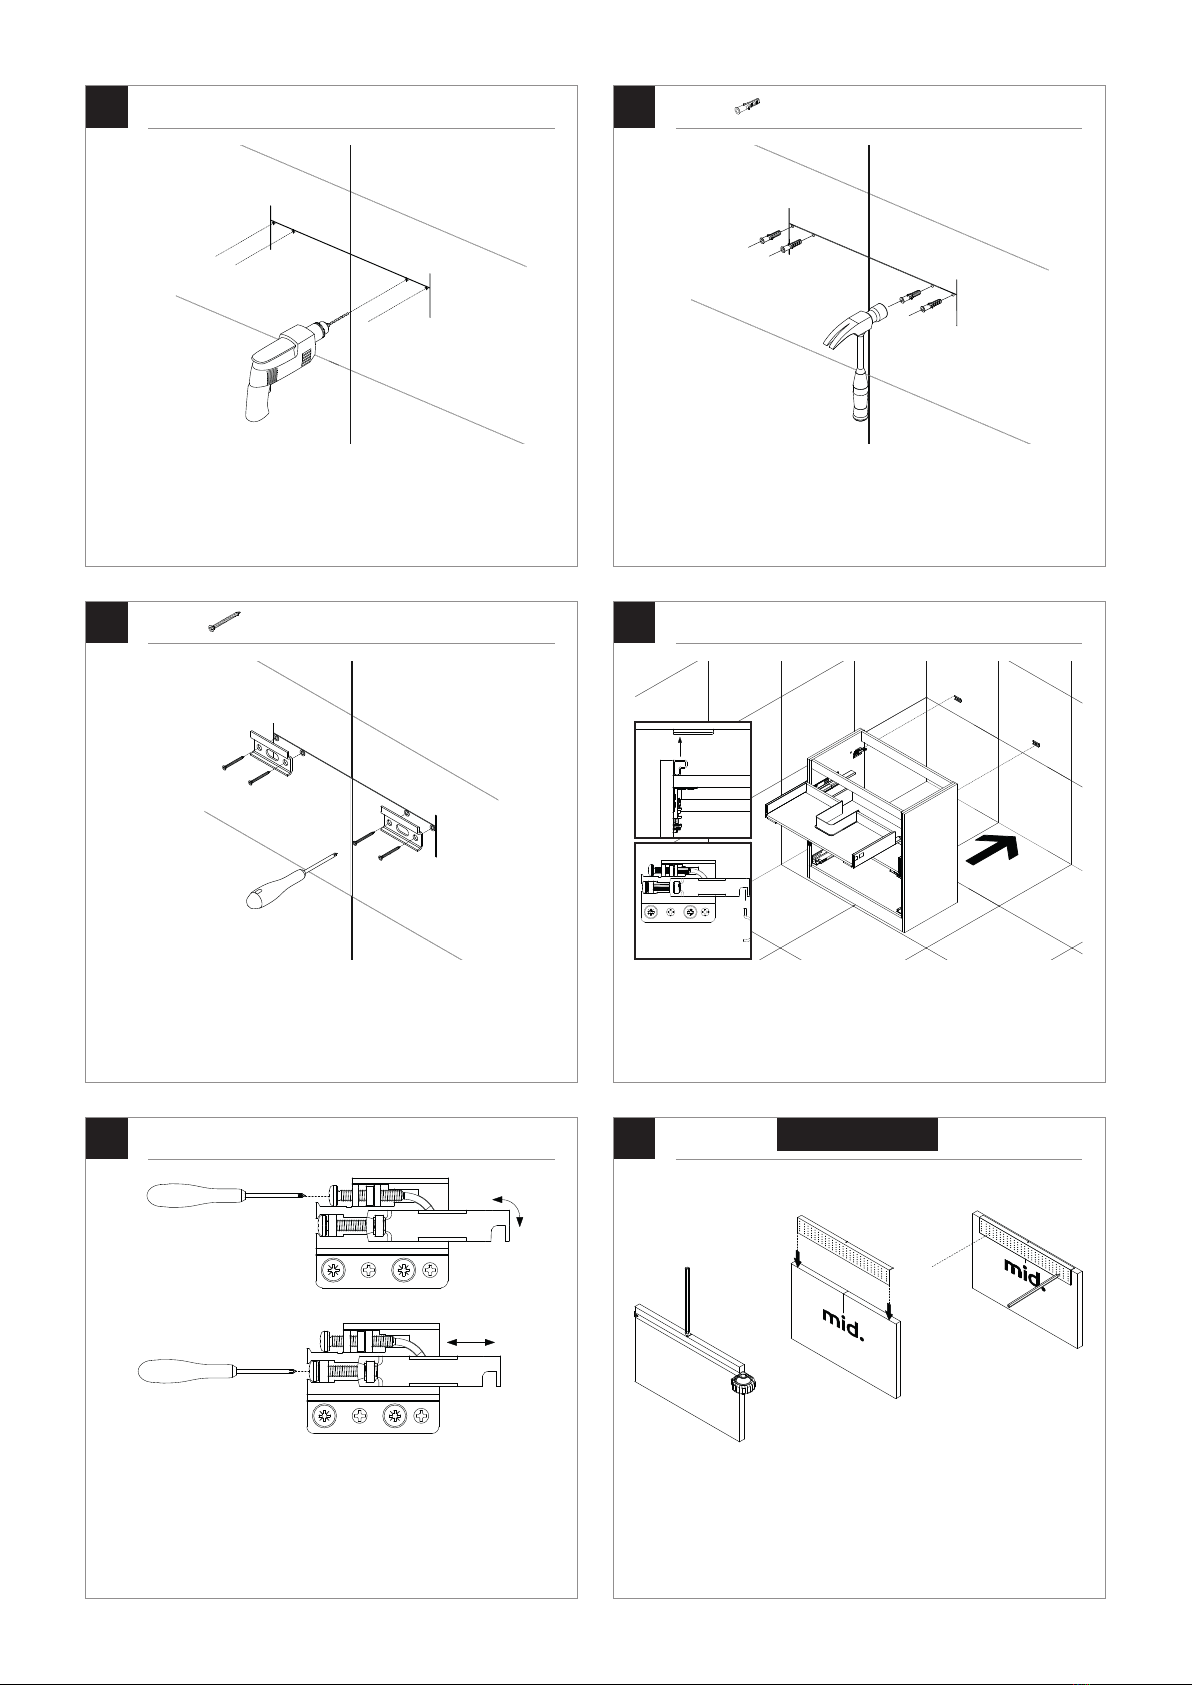
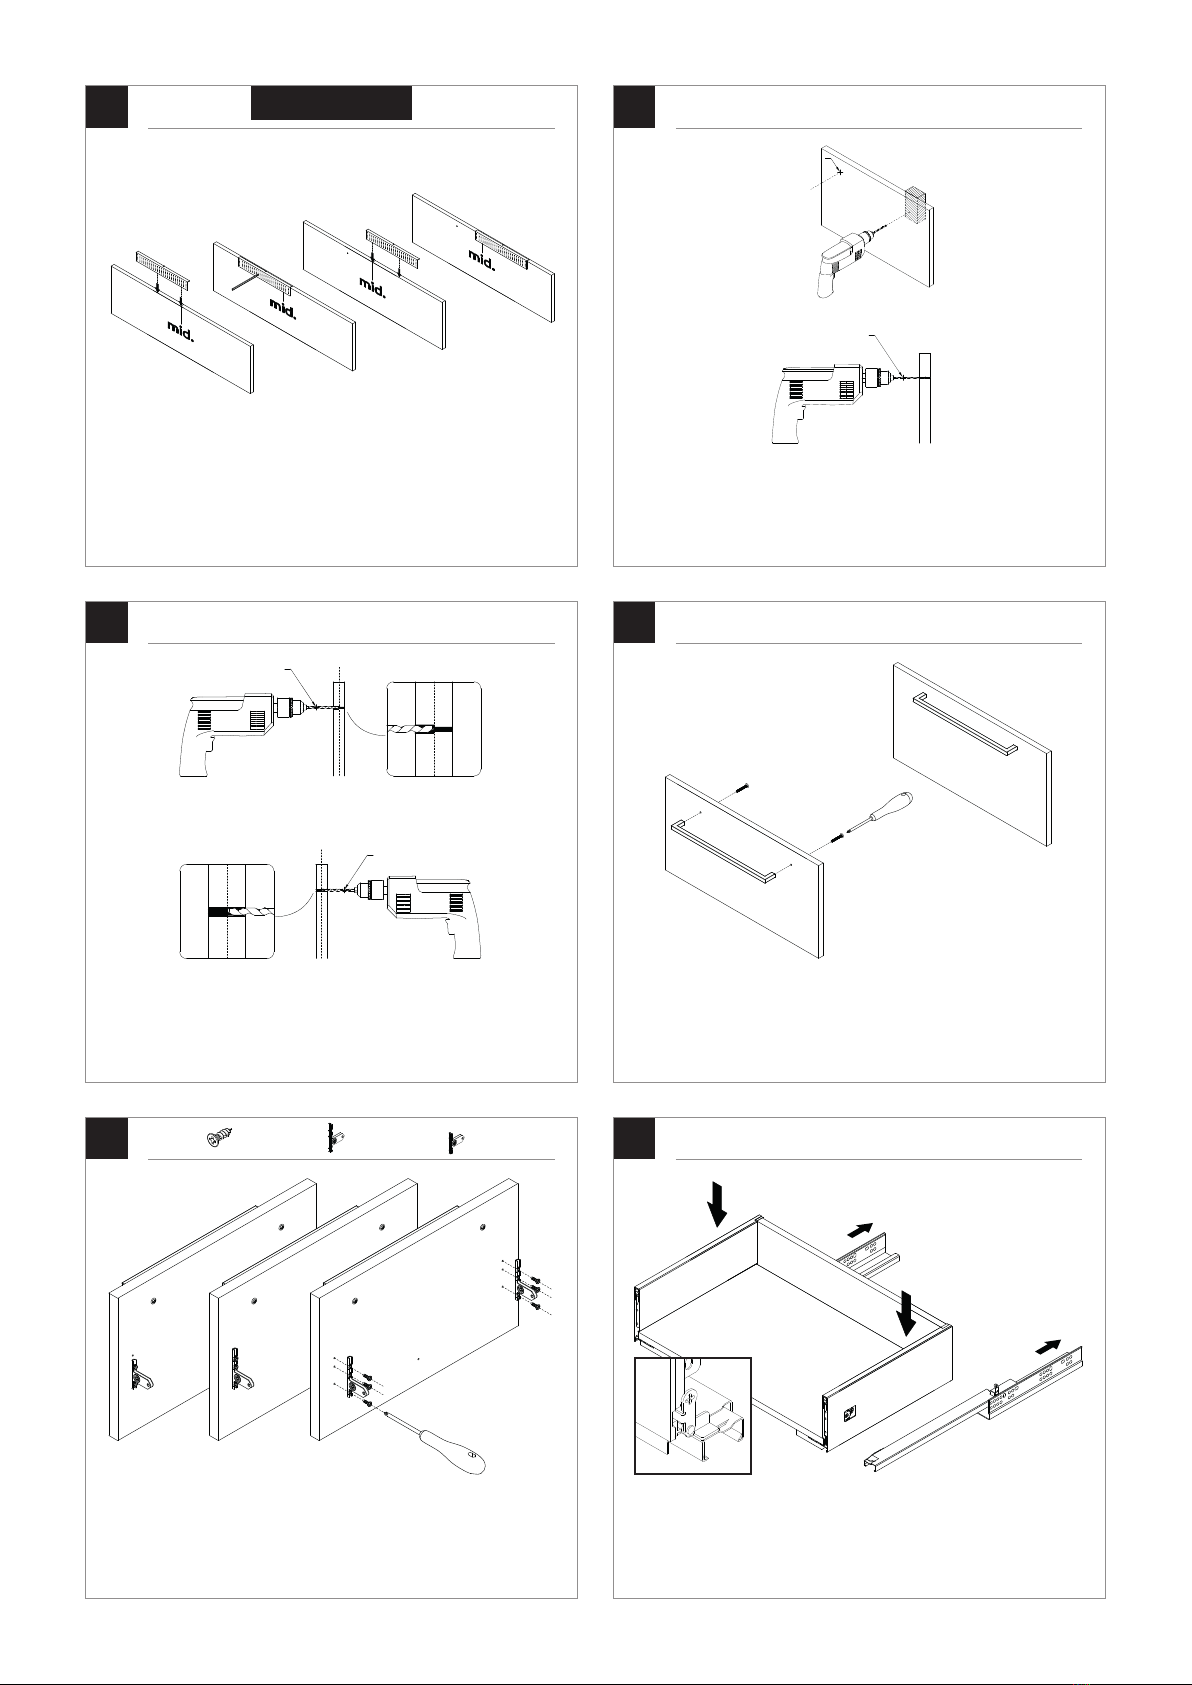
Markeer het midden van het front. Gebruik de bijgeleverde boormal om aan beide
zijden van het middelpunt 320 mm af te tekenen. Hierdoor komt de totale hart-op-
hart maat op 640 mm.
Mark the centre of the front panel. Use the supplied drilling template to mark a
320 mm distance on both sides of the centre. The total centre-to-centre distance
will now be 640 mm.
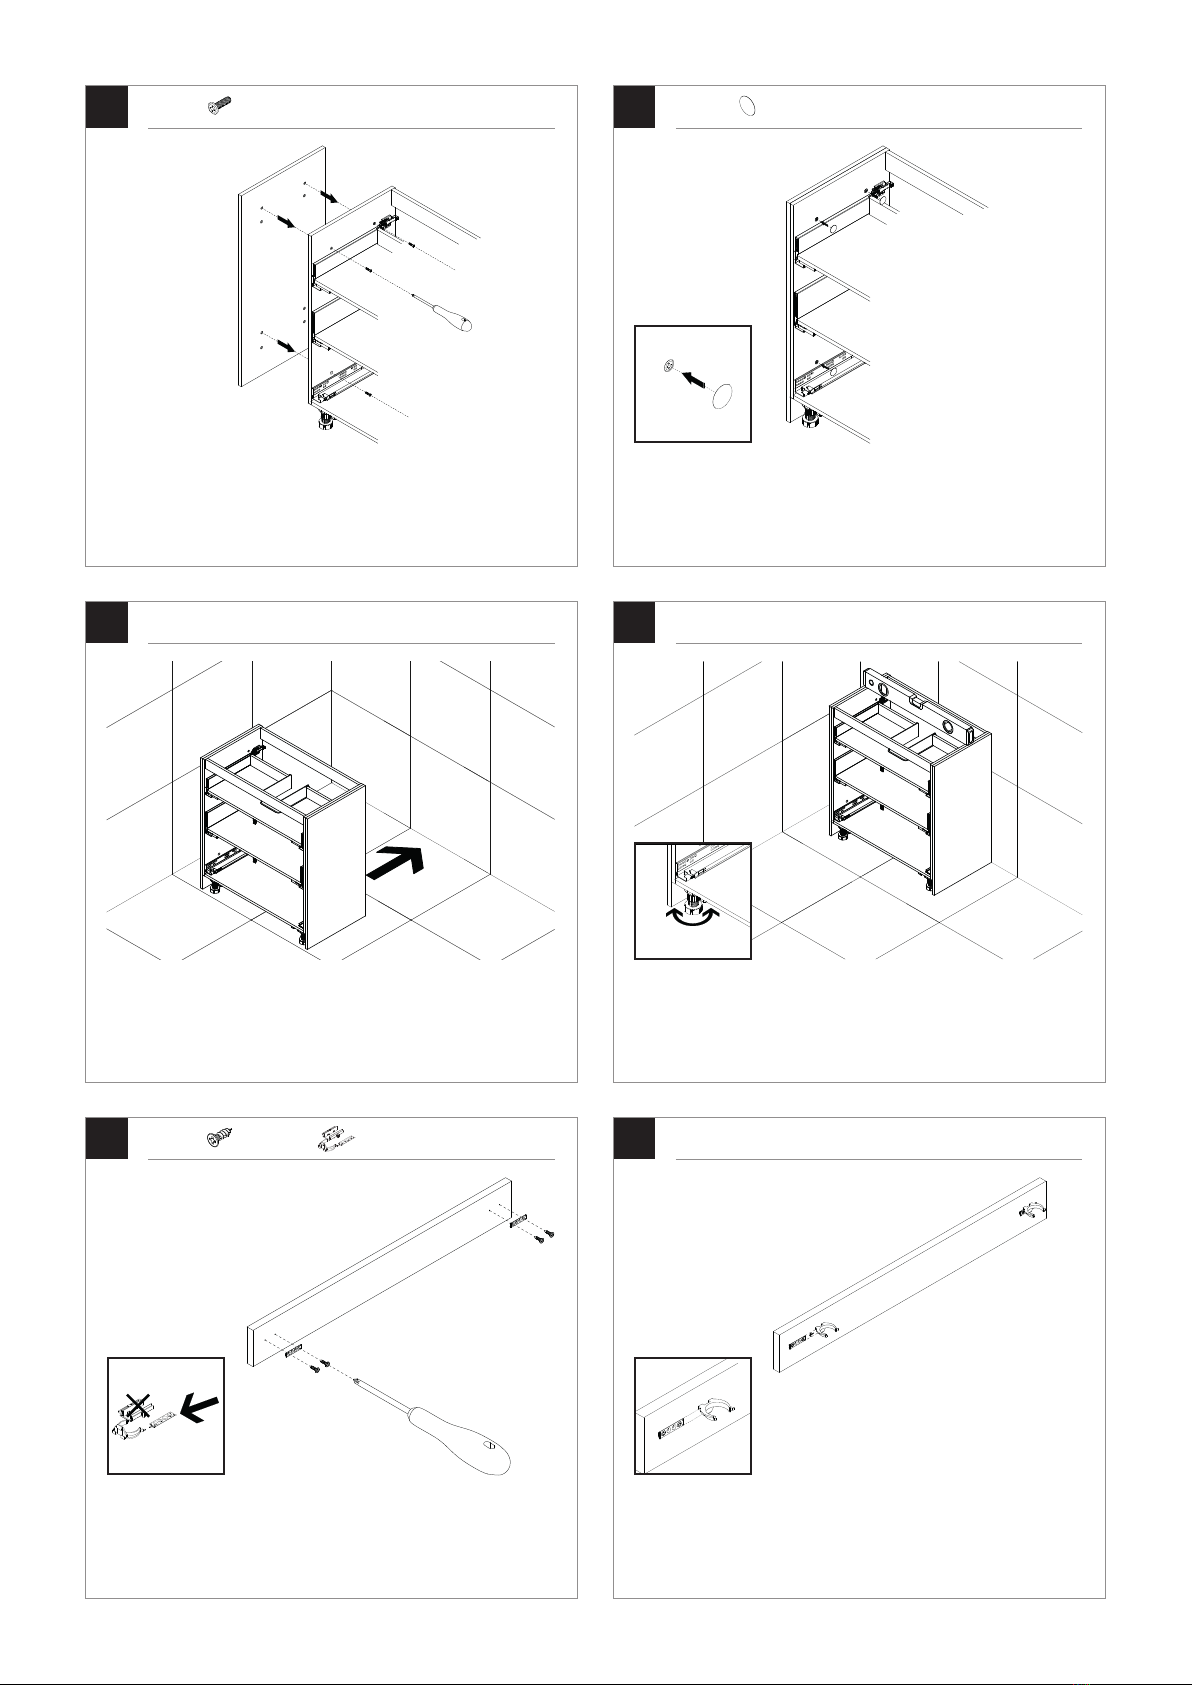
Schroef de lage adapters op het front wat u aan de bovenste lade wilt bevestigen.
Schroef de hoge adapters vast aan de overige fronten. Gebruik hierbij een
handschroevendraaier om beschadigingen te voorkomen.
Attach the low adapters to the front panel you want install on the top drawer.
Attach the high adapters to the remaining front panels. Attention: use a
screwdriver to avoid any damage.
Boor de gaten in de juiste maat. Gebruik hiervoor een boor van Ø4 mm. Boor via
beide zijden tot de helft om beschadigingen te voorkomen.
Use a Ø4 mm drill bit to drill the holes to the correct size. To avoid any damage,
drill half way on both sides.
Boor de gaten voor. Gebruik hiervoor een boor van Ø2 mm. Houd een blokje tegen
de achterzijde van het boorgat om rafels of beschadigingen te voorkomen.
Use a Ø2 mm drill bit to drill the holes. Hold a small piece of wood on the backside
of the drill hole to avoid any damage.
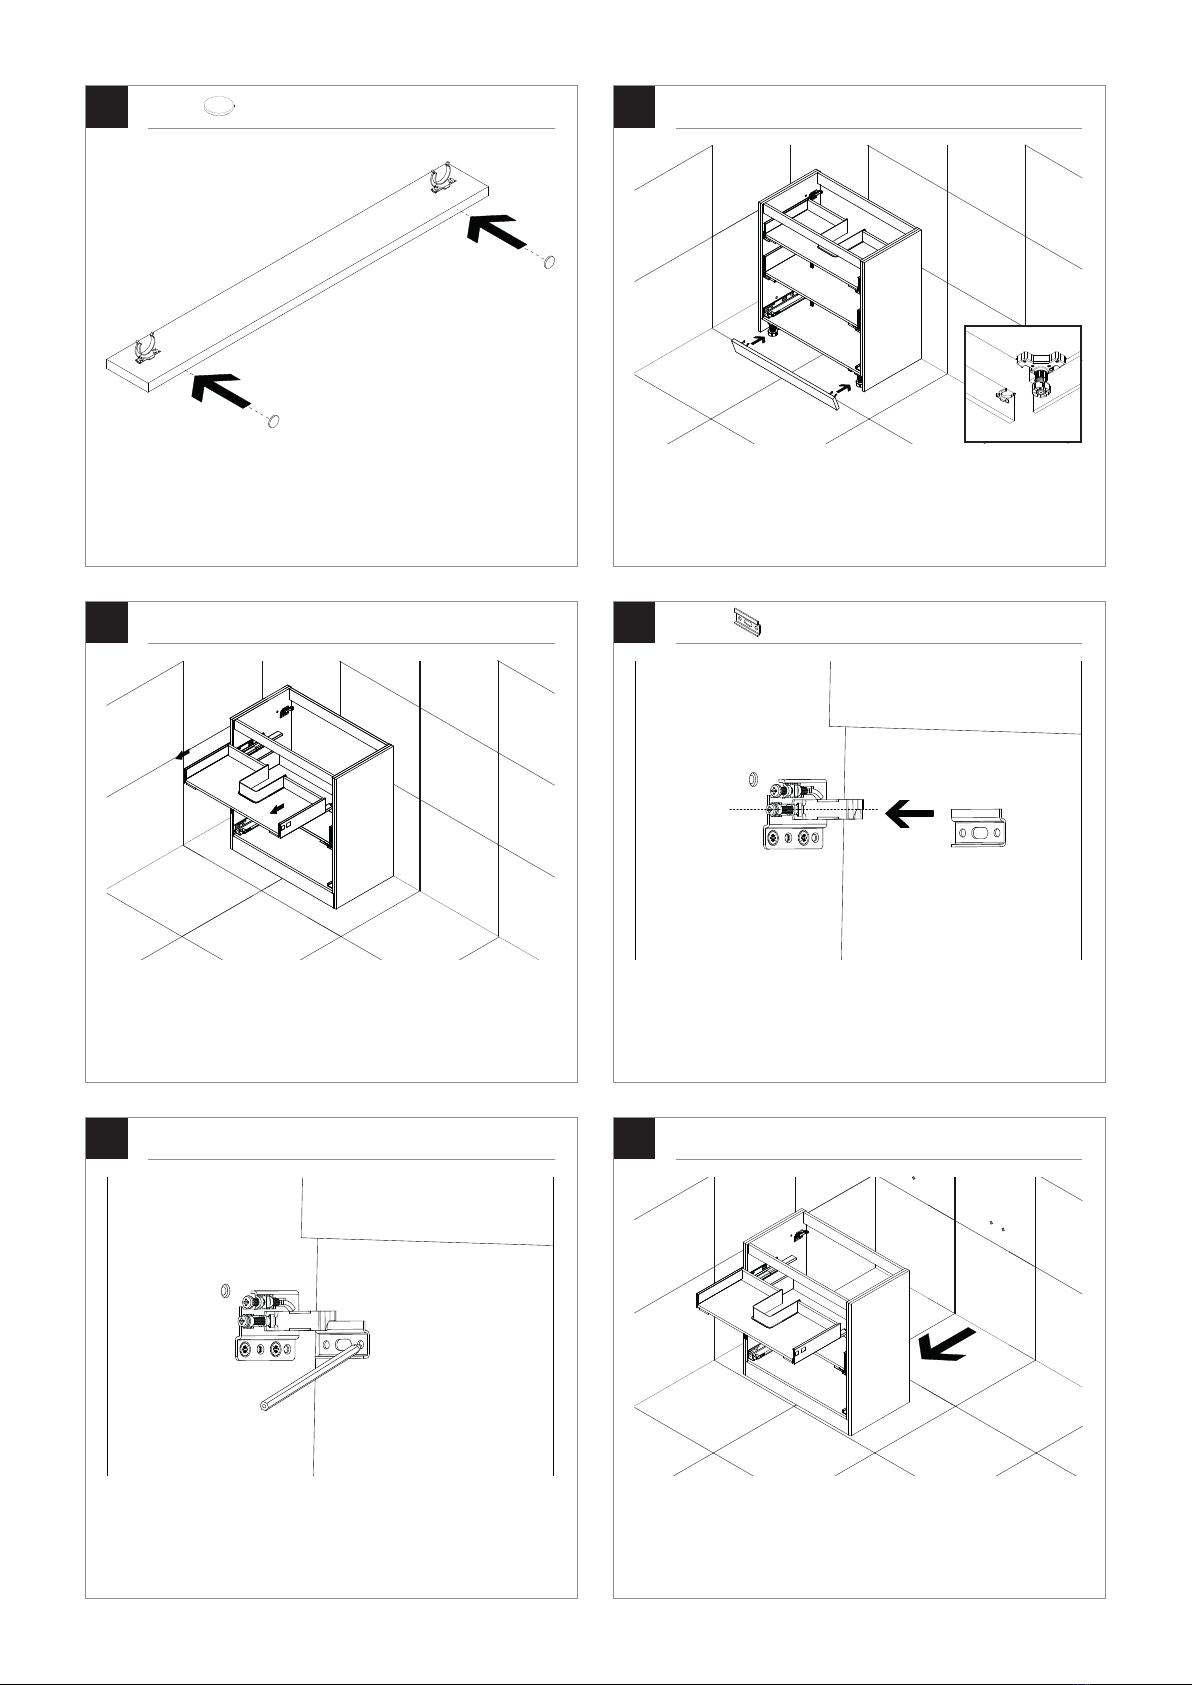
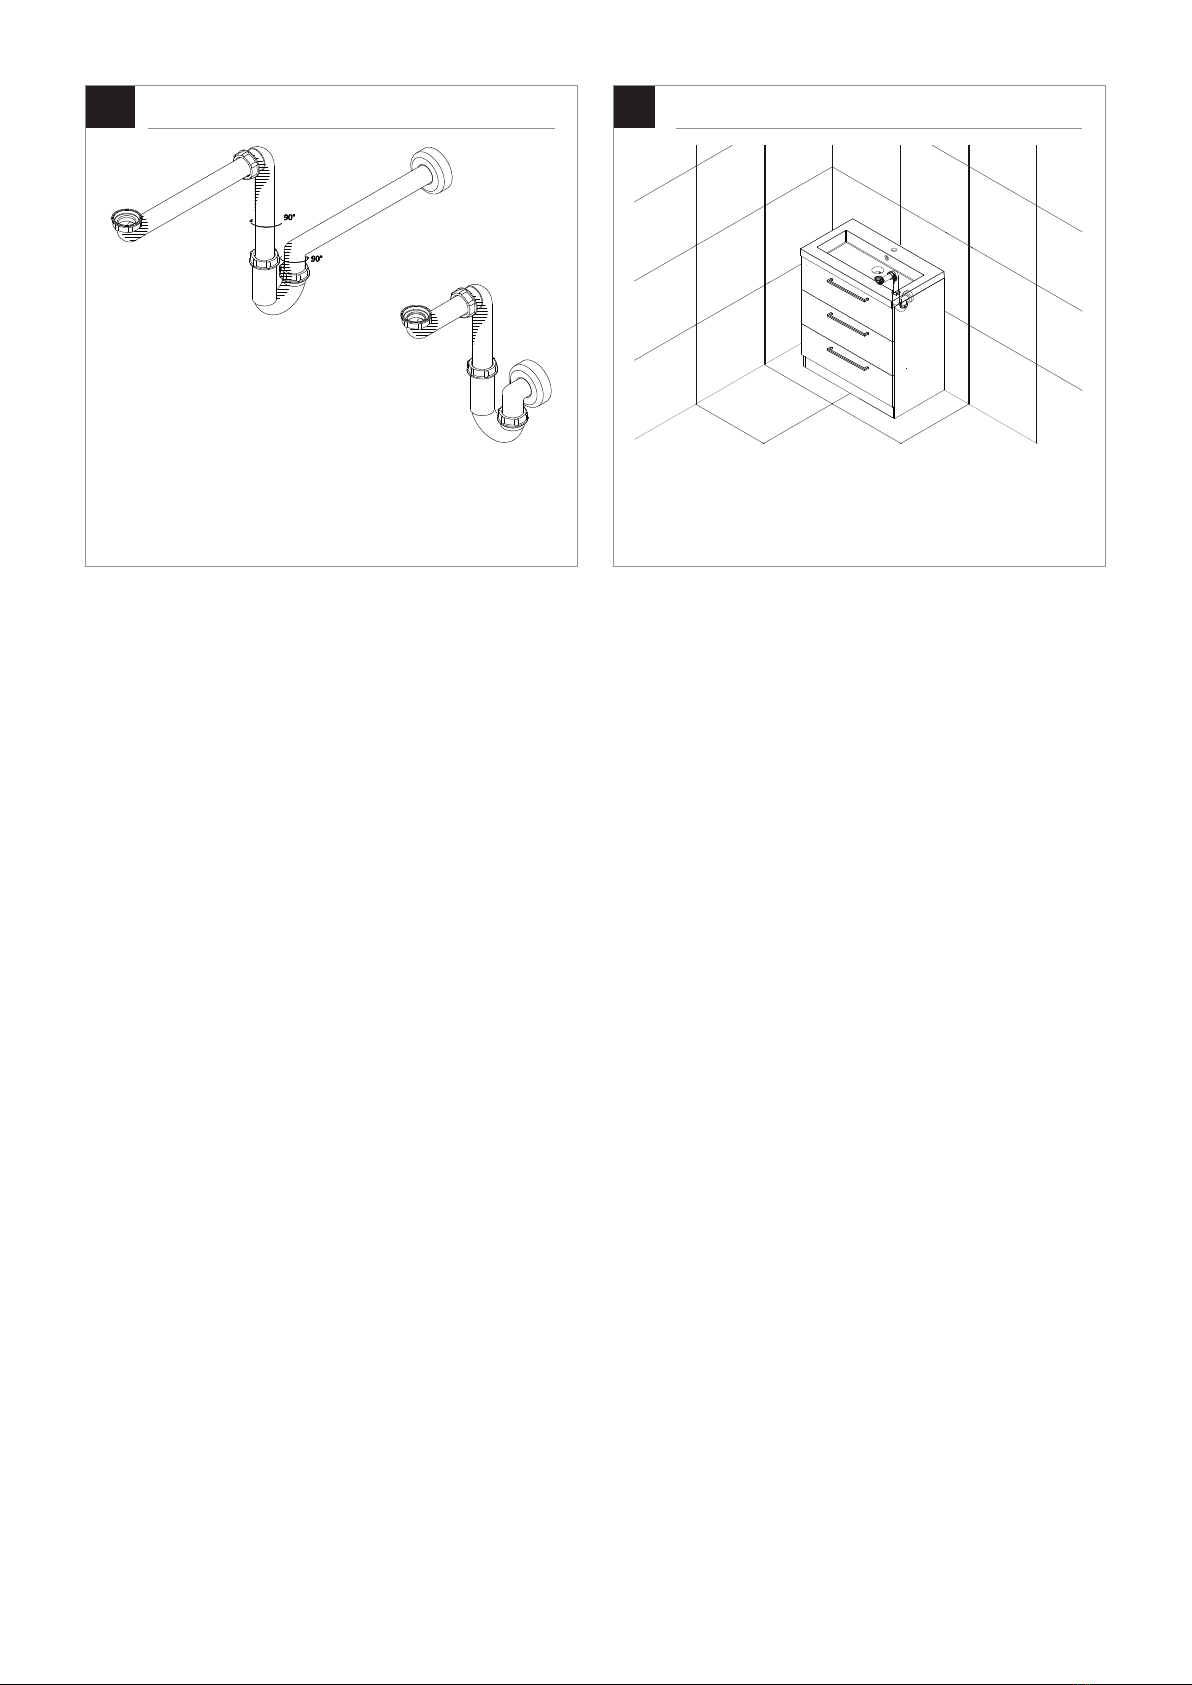
Schuif de geleiders volledig uit het meubel. Plaats de lade op de geleiders en duw
de geleiders aan de achterkant vast.
Fully extend the drawer runners of the cabinet. Place the drawer on top of the
drawer runners and click them into place on the backside of the drawer.
Plaats de handgreep. Gebruik hierbij een handschroevendraaier om
beschadigingen te voorkomen.
Attach the handle. Use a hand screwdriver instead of an electric screwdriver to
avoid any damage.
2 mm
2 mm
A7. 16x
7
A11. 4x A12. 2x
640 mm