manuals.online logo
Brands
  1. Home
  2. •
  3. Brands
  4. •
  5. Mazda
  6. •
  7. Automobile
  8. •
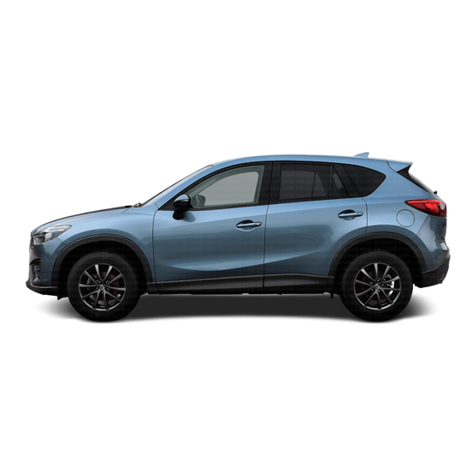
  9. Mazda 2014 CX-5 Guide

Mazda 2014 CX-5 Guide

Other manuals for 2014 CX-5

1

Other Mazda Automobile manuals

Mazda 2002 Tribute User manual

Mazda

Mazda 2002 Tribute User manual

Mazda PROTEGE 5 Guide

Mazda

Mazda PROTEGE 5 Guide

Mazda 2008 Mazda3 4-Door User manual

Mazda

Mazda 2008 Mazda3 4-Door User manual

Mazda 3 2018 User manual

Mazda

Mazda 3 2018 User manual

Mazda 2007 Mazdaspeed 3 User manual

Mazda

Mazda 2007 Mazdaspeed 3 User manual

Mazda 2001 Tribute User manual

Mazda

Mazda 2001 Tribute User manual

Mazda 2015 CX-9 User manual

Mazda

Mazda 2015 CX-9 User manual

Mazda 2008 MX-5 Miata User manual

Mazda

Mazda 2008 MX-5 Miata User manual

Mazda 2008 CX-9 User manual

Mazda

Mazda 2008 CX-9 User manual

Mazda CX-5 Reference manual

Mazda

Mazda CX-5 Reference manual

Mazda 3 2004 User manual

Mazda

Mazda 3 2004 User manual

Mazda 1990 MIATA User manual

Mazda

Mazda 1990 MIATA User manual

Mazda 2014 MAZDA2 User manual

Mazda

Mazda 2014 MAZDA2 User manual

Mazda 2 User manual

Mazda

Mazda 2 User manual

Mazda MX-5 Miata Guide

Mazda

Mazda MX-5 Miata Guide

Mazda 2007 Mazdaspeed 3 Guide

Mazda

Mazda 2007 Mazdaspeed 3 Guide

Mazda 1983 RX7 User manual

Mazda

Mazda 1983 RX7 User manual

Mazda 2009 Mazda5 User manual

Mazda

Mazda 2009 Mazda5 User manual

Mazda Mazda2 Guide

Mazda

Mazda Mazda2 Guide

Mazda Tribute Assembly instructions

Mazda

Mazda Tribute Assembly instructions

Mazda 2007 MX-5 Miata User manual

Mazda

Mazda 2007 MX-5 Miata User manual

Mazda 3 2019 User manual

Mazda

Mazda 3 2019 User manual

Mazda 2007 Mazdaspeed 3 User manual

Mazda

Mazda 2007 Mazdaspeed 3 User manual

Mazda 2007 Mazdaspeed 3 Guide

Mazda

Mazda 2007 Mazdaspeed 3 Guide

Popular Automobile manuals by other brands

Jeep Compass user guide

Jeep

Jeep Compass user guide

Mitsubishi 3000GT Service manual

Mitsubishi

Mitsubishi 3000GT Service manual

Chevrolet Traverse 2012 owner's manual

Chevrolet

Chevrolet Traverse 2012 owner's manual

Oldsmobile 1996 Achieva owner's manual

Oldsmobile

Oldsmobile 1996 Achieva owner's manual

Cadillac 2005 CTS Personalization guide

Cadillac

Cadillac 2005 CTS Personalization guide

Toyota AVALON HYBRID Warranty & maintenance guide

Toyota

Toyota AVALON HYBRID Warranty & maintenance guide

Toyota HILUX Owner's manual supplement

Toyota

Toyota HILUX Owner's manual supplement

Lincoln 2015 NAVIGATOR owner's manual

Lincoln

Lincoln 2015 NAVIGATOR owner's manual

Toyota Corolla 2002 owner's manual

Toyota

Toyota Corolla 2002 owner's manual

Toyota 2002 MR2 Spyder owner's manual

Toyota

Toyota 2002 MR2 Spyder owner's manual

Toyota Camry Hybrid 2012 Warranty & maintenance guide

Toyota

Toyota Camry Hybrid 2012 Warranty & maintenance guide

Subaru 2014 Forester Quick manual

Subaru

Subaru 2014 Forester Quick manual

Toyota Avensis ZZT251 2003 Service and repair manual

Toyota

Toyota Avensis ZZT251 2003 Service and repair manual

Mercedes-Benz 2013 SL Operator's manual

Mercedes-Benz

Mercedes-Benz 2013 SL Operator's manual

Chrysler 300 2013 Product highlights

Chrysler

Chrysler 300 2013 Product highlights

Toyota Corolla 2008 owner's manual

Toyota

Toyota Corolla 2008 owner's manual

Volkswagen california d3519cdb02a9dab29cd827771f7c11a

Volkswagen

Volkswagen california d3519cdb02a9dab29cd827771f7c11a

Dodge 2006 Dakota owner's manual

Dodge

Dodge 2006 Dakota owner's manual

manuals.online logo
manuals.online logoBrands
  • About & Mission
  • Contact us
  • Privacy Policy
  • Terms and Conditions

Copyright 2025 Manuals.Online. All Rights Reserved.

2014M{zd{ cx-5
SMART START GUIDE
2014M{zd{ cx-5
SMART START GUIDE
www.MazdaUSA.com
KEYLESS ENTRY SYSTEM
• This system allows you to lock and unlock the doors by pushing the
desired buttons.
CAUTION: RED Key Indicator Light may illuminate if either advance
key or keyless entry key is placed in the cup holder. The key can sometimes
not be detected in the cup holder.
CAUTION:
• Make sure vehicle is OFF and take the keyless entry system key with
you when leaving the vehicle.
• There is no warning beep if the IGN or ACC is ON and the key is taken
out of the vehicle, OR if the key is locked inside the vehicle.
21
Key
Electric Liftgate Opener
Advanced Key
Lock
Unlock
Panic Alarm
ADVANCED KEYLESS
ENTRY SYSTEM
• This system allows you to lock
and unlock the doors without
taking the key out.
While Carrying the
Advanced Key…
• Unlock the driver’s door by
pushing the driver’s door request
switch once.
• Unlock all doors (and liftgate)
by pushing the driver’s door request
switch once or twice (depending
on personalization setting, page 8)
OR by pushing the passenger’s
door request switch once.
• Lock all doors (and liftgate) by
pushing any request switch once.
• Open the liftgate by pushing
the electric liftgate opener when
ignition is OFF. With ignition ON,
vehicle must be in Park (A/T) or
have parking brake set (M/T).
NOTE: When the liftgate opener switch is
pushed, the liftgate will open slightly. If the
liftgate is not opened within 1.5 seconds, the
liftgate latch locks (you will hear it lock) and
the liftgate cannot be opened or closed from
this slightly raised position. To open/close
the liftgate, push the liftgate opener switch,
open the liftgate within 1.5 seconds, then
close it. The door/liftgate ajar warning light
will be on if the liftgate is not fully closed.
Door Request Switch
Liftgate Request Switch
Unlock
• Push once
to unlock
driver’s door
or all the doors
(depending on
personalization
setting).
• Push twice
(within three
seconds) to
unlock all doors
and liftgate.
Panic Alarm
• Push for one
second or more
to activate alarm.
• Push Lock,
Unlock, or Panic
Alarm to turn
alarm off.
Lock
• Push once to
lock all doors
and liftgate.
• Push twice
(within ve
seconds) for
horn sound
verication
that all doors
are locked.
NOTE: Vehicles equipped with the Advanced Keyless Entry System and the
Keyless Entry System both use the same type of keyless entry transmitter.
However, only vehicles equipped with the Advanced Keyless Entry System allow
you to lock and unlock the doors/liftgate with the door/liftgate request switches
(without taking the key out of your purse or pocket).
Vehicles equipped with the Keyless Entry System do not have request switches
on the doors/liftgate. To lock and unlock the doors/liftgate, the corresponding
transmitter button must be pushed.
NOTE: Refer to your Owner’s Manual for additional details about
“Personalization Features”.
43
ACCELERATED WARM-UP SYSTEM (AWS)
Vehicle Starting:
Your vehicle is equipped with SKYACTIV combustion technology. This
technology includes AWS (Accelerated Warm-up System) for optimal
emission performance during cold starting conditions.
Cold Start (e.g., First start of the day on cold mornings):
Depress the brake (Automatic Trans.) or clutch (Manual Trans.), when the
key indicator light turns green push the START/STOP button.
What you will notice: On start-up, the engine speed and sound are
higher (1500 RPM) for 30 seconds to 1 minute to quickly bring the catalyst
to efcient operating temperature. The RPM will reduce to idle once the
temperature is achieved. This is normal engine operation under cold
start conditions.
NOTE: You can drive the vehicle during AWS activation, no need to wait.
Normal Start (Emission components within optimal
temperature range):
Depress the brake (Automatic Trans.) or clutch (Manual Trans.), when the
key indicator light turns green push the START/STOP button.
www.MazdaUSA.com
Key
STARTING THE ENGINE
While Carrying the Key…
• Start the engine by pushing the START/STOP button, while
pushing the clutch pedal (manual transmission) or the brake pedal
(automatic transmission).
• Shut the engine OFF by placing the vehicle in Park, then push the
START/STOP button.
• Activate Accessories (ACC) by pushing the START/STOP button
once without pushing the clutch or brake pedal.
• To turn the ignition to the ON position, push the START/STOP
button twice without pushing the clutch or brake pedal.
The key indicator light in the instrument cluster will show GREEN
(engine ready to start) when the key is detected and the clutch pedal (M/T)
or the brake pedal (A/T) is pushed. If the KEY warning light illuminates
RED, or the START/STOP button indicator light ashes AMBER, this
could indicate a problem with the engine starting system and the inability
to start the engine or switch the ignition to ACC or ON. Have your vehicle
inspected at an Authorized Mazda Dealer as soon as possible.
Emergency Engine Start
If the engine cannot be started
due to a dead key battery:
1Push the brake pedal (A/T)
or the clutch pedal (M/T).
2While the indicator light
ashes GREEN, touch
the START/STOP button
using the back side of the
transmitter (as shown).
3After the GREEN indicator
light illuminates constantly,
push the START/STOP
button with your nger
to start the engine.
Transmitter
Emergency Engine Stop:
Pushing and holding the
START/STOP button or repeatedly
pushing the button while the engine
is running will turn the engine OFF.
Use only in case of an emergency.
Emergency Vehicle Entry:
If the key cannot be used due to
a malfunction or dead key battery,
use the auxiliary key (below) to
lock or unlock the doors.
Auxiliary Key Release
Auxiliary Key
Key (Rear)
START/STOP Button
Indicator Light
Slide/Tilt Switch
Seat can be moved back
and forth, raised, lowered,
or tilted with this control.
Recline Switch
Push forward or backward
to adjust seatback angle.
ELECTRONICALLY OPERATED DRIVER SEAT CONTROLS
(if equipped)
FRONT SEAT WARMER
The driver and front passenger seats can be warmed by pushing the
applicable seat warmer button while the ignition is ON.
Seat temperature increases with the number of illuminated indicator lights
(0-OFF, 1-Low, 2-Mid, 3-High).
www.MazdaUSA.com
Lumbar Support
Adjustment
To increase rmness,
push and hold the front
part of the switch. Release
at desired rmness.
To decrease rmness,
push and hold the rear part
of the switch.
Slide Release Lever
Pull lever up to move seat
backward or forward.
Recline Lever
Pull up to adjust seatback angle.
MANUAL SEAT CONTROLS
Height Adjustment Lever
Raise or lower seat height
by repeatedly pulling up or
pushing down on the lever.
65
Seats
NOTE: 8-way power seat shown above. 6-way power seat also available.
Seatback Knob
FOLDING SECOND-ROW SEATS
1Support the seatback with your hand.
2Push the rear seatback knob down (red indicator is visible when seat
is in the unlocked position).
3Bring the seatback forward.
Low High
Folding Rear Seatbacks Down
OR
Returning rear seats to upright position
1Raise seatbacks until they lock into position (red indicator is not visible
when seat is in the locked position).
2Pull on the top of the seatbacks from inside the vehicle to make sure
they are locked.
3Check that all seat belts are routed properly for passenger use.
Folding Only Center Seat Down
NOTE: 4:2:4 type rear seats shown.
Using remote handle:
1Check that rear seats are clear
of objects.
2Open the liftgate and pull
the left and right side remote
handle levers.
Using remote handle:
1Store center seat
head restraint.
2Check that rear seats are clear.
3Open the liftgate and pull only
the smaller of the left side
remote handle levers.
Customize the following vehicle functions
using the audio SETUP button:
• Door Locks
• Lighting Control
• Wiper Control
PERSONALIZATION FEATURES
OUTSIDE TEMPERATURE DISPLAY UNIT CHANGE
The outside temperature unit can be switched between Celsius and
Fahrenheit using the following procedure:
1With the ignition switched OFF, push and hold the INFO button on the
steering wheel. Continue holding the INFO button for 5 seconds or
longer while switching the ignition ON.
2Release the INFO button when the outside
temperature display ashes.
3Push the up or down part of the INFO
switch to change the outside temperature
unit to Celsius or Fahrenheit.
4Push and hold the INFO button until the
outside temperature display stops ashing.
SETTING YOUR CLOCK
• Push the Hbutton to set the hour.
• Push the Mbutton to set the minutes.
Push the :00 button to reset clock to
nearest hour.
87
Seats www.MazdaUSA.com
Feature Highlights
Driver’s View
LIGHTING/
TURN SIGNALS
( PP. 13 -14 )
BLUETOOTH
HANDS-FREE/
AUDIO
(PP. 29-30, 35-36)
HOOD
RELEASE
CLIMATE CONTROL
( PP. 2 5 -2 6 )
TILT/TELESCOPING
STEERING WHEEL
LEVER
SEAT WARMERS
(P. 6 )
PASSENGER AIRBAG
OFF INDICATOR1
BSM
(P. 2 2)
TPMS
SET
(P. 20 )
NAVIGATION
SYSTEM
SD CARD
(P. 3 3)
AUDIO
(WITHOUT 5.8” LCD)
(PP. 2 7-2 8 )
ACCESSORY
SOCKET
START/STOP
BUTTON
(P. 4)
AFS
(P. 19)
TCS
OFF
CRUISE
CONTROL
1This indicator light illuminates to remind you that the front passenger’s front/side airbags
and seat belt pretensioner will not deploy during a collision. The reason for this is that the
weight in the seat is less than approximately 66 lbs. Always wear your seat belt and secure children in the rear
seats in appropriate child restraints. See the Owner’s Manual for important information on this safety feature.
NOTE: Indicator light turns off when conditions have been met for necessary airbag deployment.
See Owner’s Manual for further information.
www.MazdaUSA.com
CLOCK
(P. 8 )
NAVIGATION/AUDIO
(WITH 5.8” LCD)
( PP. 2 9 - 3 4 )
INFORMATION
DISPLAY
(P. 2 4 )
HAZARD
WARNING
WIPER/
WASHER
(P. 14)
ILLUMINATION
DIMMER
(Instrument Cluster)
(PP. 11-12 )
109
DASHBOARD
ILLUMINATION/
DIMMER1/TRIP METER2
GLOSSARY OF WARNING AND INDICATOR LIGHTS
NOTE: See Owner’s Manual for more details and explanations.
1• Rotate the knob to adjust the brightness of the instrument cluster and other dashboard illuminations.
2• Push to toggle between trip meter (A & B).
•
When a trip meter is selected, push and hold to reset to zero.
Instrument Cluster
TPMS NOTE: Low ambient temperature and/or high altitude causes tire pressures to
drop and may turn the TPMS warning light on. If the warning light comes on, check the tire
pressure and ll the tires as soon as possible, preferably before moving the vehicle and
warming up the tires. Tire pressure should be checked when the tires are cold.
TCS
OFF
Traction Control System (TCS)
Off Indicator Light
Low Engine Oil Pressure
Traction Control System
(TCS)/Dynamic Stability
Control (DSC)
On: TCS/DSC malfunction
Flashing: TCS/DSC operating
Shift Position Indicator Light
KEY Warning Light RED (pp. 1, 3)
KEY Indicator Light GREEN (pp. 3-4)
Power Steering Malfunction
Air Bag/Front Seat Belt
Pretensioner System Malfunction
Turn Signals/Hazard
Warning Indicator Lights
4WD
4WD Warning Light
On:
Flashing: Stop vehicle/tow to
Mazda dealer.
Check Engine Light
Master Warning Light
Tire Pressure
Monitoring System
(TPMS) Warning Light (p. 20)
On/Warning Beep: Low tire
pressure in one or more tires.
Flashing: TPMS Malfunction
Security Indicator Light
Cruise Main Indicator Light
On (AMBER)/Cruise Set
Indicator Light On (GREEN)
Automatic Transaxle
Warning Light
Lights On (Exterior) (p. 13)
BSM
OFF
BSM OFF
(Blind Spot Monitoring) (p. 22)
Seat Belt
Unbuckled/Malfunction
Headlight High Beams On (p. 13)
Brake Warning Light
Parking brake on/low brake
uid/malfunction
AFS
OFF
Adaptive Front Lighting
System (AFS) OFF (p. 19)
Charging System
Malfunction
Door/Liftgate Ajar
Low Washer Fluid Level
Warning Light
ABS (Antilock Brake
System) Malfunction
Low Fuel Level
Check Fuel Cap ( p. 17)
Perform
Maintenance
FUEL
GAUGE
ODOMETER/
TRIP METER
ENGINE COOLANT TEMP LIGHTS
Since this vehicle does not use an engine coolant
temperature gauge, red and blue engine coolant
temperature lights are used to indicate high and low
coolant temperature.
Red Coolant Temp Light
Flashing: Engine is starting to run hot.
Drive slowly to reduce engine load.
On: Engine is overheating. Safely pull over to
the side of the road and turn the engine off.
Refer to the Owner’s Manual for more information.
Blue Coolant Temp Light
On: Engine coolant is cold and no warm
air is available for heater/defroster.
Off: Engine coolant is warm and warm air is
available for heater/defroster.
The light may stay on for a few minutes after
start-up when the engine is cold, but the
vehicle can be driven with the light on or off.
INFORMATION
DISPLAY
AMBIENT
TEMPERATURE
www.MazdaUSA.com
See page 8 or the
Owner’s Manual for
further information.
IMPORTANT: When your
display setting is set on “AUTO”,
the instrument cluster and
display may become dimmer
when the headlights are on.
If the display and instrument
cluster become too dim or too
bright when the headlights are
on, simply rotate the dimmer
knob located on your instrument
cluster to adjust the brightness.
Type B cluster is shown. Type A
cluster is similar, but with warning
lights in different locations.
SHIFT POSITION
INDICATOR LIGHT
SPEEDOMETERTACHOMETER
1211
Lights www.MazdaUSA.com
(cont’d on pg. 19)
NOTE: The DRL (Daytime Running Lights) automatically turn on when the ignition
is switched ON. To disable/enable this feature see your Authorized Mazda Dealer.
NOTE:
• You can adjust the timing of the Auto Headlights OFF and the sensitivity of the
Auto Light Control. 1413
WINDSHIELD/REAR WINDOW WIPER/WASHER CONTROL LEVER
AUTO:The rain sensor senses the amount of rainfall and turns the wipers
on or off. Rotate inner ring away from you (clockwise) for more sensitivity
(requires less rain to turn wipers on) and toward you (counterclockwise)
for less sensitivity (requires more rain to turn wipers on).
LIGHTING CONTROL/TURN SIGNAL LEVER
Wipers
Pull lever
to dispense
windshield
washer uid
Less sensitive
More sensitive
1
2
3
HI
LO
AUTO
OFF
MIST
Rear Window
Wiper/Washer
(Hatchback)
INT:Intermittent
ON: Normal speed
:Washer/wiper
(hold as desired)
:Turns tail,
parking, and
dashboard
lights on.
Pull
to Flash
High Beams
AUTO:The light
sensor automatically
determines when to turn
the headlights on or off.
:Turns fog lights
on only when
headlights are on.
Push for
High Beams
CAUTION: If the ignition is ON, turn the AUTO wipers OFF when going
through a car wash, or while cleaning or touching the windshield.
NOTE: Vehicles not equipped with AUTO wipers will have INT wipers. Set
the lever to INT and choose an interval timing by rotating the ring between fast
and slow.
: Turns tail, parking,
dashboard, and headlights on.
Smart Turn: To signal a lane change,
push the turn signal lever up or down
halfway and release. The turn signal
indicator will ash three times.
(Refer to Owner’s Manual for
“Personalization Features”)
ACTIVE ADAPTIVE SHIFT (AAS) CONTROL
AAS will automatically adjust how and when the transmission shifts gears
based on road conditions and your driving style.
The transmission may stay in a lower gear longer than usual when going up
or down hills or driving around corners. This feature gives you better control
and a more connected driving experience.
Transmission
MANUAL SHIFT MODE
The Manual Shift Mode gives you the feel of driving a manual transmission
by allowing you to manually shift to control engine rpm and torque when
more control is desired.
To Use
Manual Shift Mode:
• Shift the lever
from D to M.
To Shift Up
To A Higher Gear:
• Tap the shift lever
back (+) once.
To Shift Down
To A Lower Gear:
• Tap the shift lever
forward (-) once. 6-SPEED MANUAL TRANSMISSION
• Push the clutch pedal completely down to start
the engine and to shift gears.
• To place the transmission in Reverse, place shifter
in the neutral position, push the shifter knob
down, move to the left and push forward.
www.MazdaUSA.com
HILL LAUNCH ASSIST (HLA)
HLA helps assist you when accelerating
the vehicle from a stop while on a hill
or slope.
When the brake pedal is released and the accelerator pedal is pushed,
HLA prevents the vehicle from rolling forward or backward. It operates
on a downward slope when the shift lever is in the reverse (R) position,
and on an upward slope when the shift lever is in a position other than
the reverse (R) position.
NOTE: The HLA system will hold the vehicle for a maximum of 2.0 seconds
while the driver is changing from the brake pedal to the accelerator pedal.
ACCELERATOR PEDAL KICKDOWN SWITCH*
The accelerator pedal is equipped with a kickdown
switch to give the driver more control and to improve
fuel economy.
When you depress the accelerator 95% of the way,
you will feel an increase in resistance. Push harder,
and you will feel a click as you activate the kickdown
switch. The transmission will usually downshift (depending
on engine speed) and the engine will switch to maximum
power mode. This kickdown switch function is the same in
both Manual mode and in “D”.
*Available on vehicles with automatic transmission only.
AUTOMATIC TRANSMISSION (Type A)
Various Lockouts:
Indicates that you must depress the
brake pedal and hold in the lock-release
button to shift (The ignition must be
switched ON).
Indicates the shift lever can be
shifted freely into any position.
Indicates that you must
hold in the lock-release
button to shift.
Lock-Release Button
AUTOMATIC TRANSMISSION (Type B)
Various Lockouts:
Indicates the shift lever can be
shifted freely into any position.
Indicates that you must depress
the brake pedal to shift
(The ignition must be
switched to ON).
Lower
Gear
Higher
Gear
NOTE: Changing to manual mode can be done while driving the vehicle.
Lower
Gear
Higher
Gear
1615
Fuel
FUEL DOOR
To avoid scratching the paint during refueling, secure the fuel ller cap
as shown.
FUEL DOOR RELEASE
(located on oor in front of driver’s seat)
To open, pull the fuel door release.
Fuel
Regular Unleaded Fuel –
87 Octane
Fuel Tank Capacity
• 2WD – 14.8 gallons
• AWD – 15.3 gallons
www.MazdaUSA.com
1817
FUEL ECONOMY
To achieve the best fuel economy:
• Drive sensibly. Speeding, rapid acceleration
and excessive braking will lower fuel economy.
• Observe the speed limit. Fuel economy can decrease rapidly
at speeds above 60 mph.
• Keep tires properly inflated. Under-inated tires will lower
fuel economy.
• Use the recommended grade of oil specified in the owner’s
manual and keep the engine properly maintained. Visit your
Authorized Mazda Dealer who specializes in the servicing of
Mazda engines.
• Monitor the Current Fuel Economy in the Information Display.
The current fuel economy is calculated every 2 seconds.
Additional items that also help increase fuel economy:
• Remove excess weight. Heavy items in the vehicle will lower
fuel economy.
• Avoid excessive idling. Idling for long periods will waste gas.
• Use cruise control. Using cruise control on the highway helps to
maintain a constant speed and saves gas.
• Use overdrive gears. Using overdrive gearing reduces the vehicle’s
engine speed, which saves gas and reduces engine wear.
• Use a quality gasoline with the recommended octane. Use of higher
octane gasoline will not improve your fuel economy.
Visit www.ecodrivingusa.com or www.fueleconomy.gov for
more information.
FUEL ECONOMY:
To achieve the best fuel economy,
visit www.fueleconomy.gov for
more information.