manuals.online logo
Brands
  1. Home
  2. •
  3. Brands
  4. •
  5. MAZE
  6. •
  7. Irrigation System
  8. •
  9. MAZE Moisture Sensing Irrigation Kit User manual

MAZE Moisture Sensing Irrigation Kit User manual

INSTRUCTIONS
EN
Moisture Sensing
Irrigation Kit
32
Moisture Sensing
Irrigation Kit
How the Watering Sensors work 3
Water connection 4
Simple installation 6
Correct Watering Sensor Setting 8
Required quantity of Watering Sensors 9
Use of distribution drippers 10
Tips and troubleshooting 11
Accessories 12–13
CONTENTS HOW THE WATERING SENSORS WORK
The Moisture Sensing Irrigation
Kit is a fully automatic plant
watering system which func-
tions without the need for a
timer. Each Watering Sensor is
both a sensor and a dripper and
reacts to the soil moisture con-
tent. If the soil becomes dry,
the pressure in the Watering
Sensor goes down, causing a
valve to open and watering to
begin. When the soil is su-
ciently moist again, the release
of water is automatically
stopped. Each Watering Sen-
sor reacts completely inde-
pendently. Therefore the plants
are watered individually, ac-
cording to whether or not they
are thirsty. At least 1 Watering
Sensor should be installed in
each plant or pot and then con-
nected to the shared feeding
tube. A correctly installed sys-
tem need not be readjusted for
the whole season.
WARRANTY
This Product is covered by a
2-year warranty from the
date of purchase. Should you
not be entirely satisfied with
a product, please send us the
faulty part together with
proof of purchase. Dry soil Wet soil
54
Moisture Sensing
Irrigation Kit
WATER CONNECTION WATER CONNECTION
When connecting to a Maze MINItank with a
threaded tap use the female threaded connect-
er in conjunction with the tap connector (nut is
not required).
Alternatively if using another container or buck-
et, the tank connecter can be connected by
making a 12mm hole in the tank.
The tank/container must be at least 0.5 m high-
er than the Watering Sensors for every 5m of
tube but no more than 14 meters higher.
1
2
3/4“ max.
6 bar
Borehole
12 mm
[¹⁄₂”]
Pressure reducerTank connector
If connecting to mains pressure use a pressure
reducer that regulates the pressure to around 1
bar.
With one water connection you can operate a
system of up to 60 meters (250 Watering Sen-
sors) assuming you have enough pressure. If you
fit the tee provided with the product immedi-
ately downstream of the pressure reducer, you
can operate systems of up to 2 x 60 m (500
Watering Sensors). Heat the feeding tube before
installation (in hot water or sunshine) so that it
is easier to fit. Do not kink the tube!
76
Moisture Sensing
Irrigation Kit
15 min
SIMPLE INSTALLATION
STEP 1
Unscrew the green watering
head and place the ceramic
sensor in the water for at least
15 minutes.
Then screw back together un-
derwater, tightening firmly
down to the ring (A). The sensor
must be completely filled with
water.
Now that the Watering Sensor
is filled with water and screwed
back together, leave it in the
water for at least another 15
minutes.
STEP 2 STEP 3
15 min
A
Insert the Watering Sensor in the soil near the roots, pushing
it down to the depth indicated (B) and leaving a gap of about
20 to 25 cm between each Watering Sensor. Make sure it is
firmly anchored in the earth. Put the Watering Sensor with
the end-piece (D) at the end of the installation. If necessary,
take o the T-piece (C) and replace it with the end-piece
(D).
STEP 4
B
CD
CONNECTION TO THE
FEEDING TUBE
Take the feeding tube and cut o
pieces of the appropriate length and
use them to connect the individual
Watering Sensor inserts. Take the
tube pieces and push them firmly
onto the T-pieces of the Watering
Sensors. Make sure the tube is firm-
ly in place. Do not use lubricants
(grease, soap, etc.) when pushing
on the pieces!
STEP 5
IMPORTANT:It is essential to water the soil several times
before fitting the individual Watering Sensors.
98
Moisture Sensing
Irrigation Kit
To evacuate the air from the
feeding tube open the adjust-
ment screw by turning it anti-
clockwise. Water will now run
out of the drip tube which must
extend about 8 cm out of the
Watering Sensor (E). Then
close the adjustment screw
again, turning it slowly clock-
wise and leaving just one drop
of water sitting on the drip tube.
Then close the adjustment
screw further, turning it by an-
other 2 arrows (1/4 turns) clock-
wise (F). The Watering Sensor
must not release any water if
the soil is wet.
CHECKS
After installation check the
water discharge for about 1-2
weeks and, if necessary, adjust
the setting by opening (more
water) or closing (less water).
In most cases the setting will
only need to be adjusted by 1/2
an arrow (G).
STEP 6 - CORRECT WATERING SENSOR SETTING
ca. 8 cm
E F G
IMPORTANT: All the Watering Sensors must be “closed” before
adjusting the setting. Turn on the tap. There must be no drips
coming from anywhere.
REQUIRED QUANTITY OF WATERING SENSORS
One Watering Sensor will water a diameter of
approx. 20-25 cm of soil.
A e.g. to water balcony flower boxes:
100 cm [39”] in length: min. 4 Watering Sensors
80 cm [32”] in length: min. 3 Watering Sensors
60 cm [24”] in length: min. 2 Watering Sensors
C Distribution drippers can also be used in rel-
atively large pots, containers or beds instead of
additional watering sensors. One Watering Sen-
sor and 5 distribution drippers will water an area
measuring 40 cm in width and 50 cm in length.
B e.g. to water tubs and planters:
Up to 25 cm [10”] Ø: 1 Watering Sensors (B1)
25 to 40 cm [10 to 16”] Ø: 2 Watering Sensors (B2)
40 to 50 cm [16” to 20”] Ø: 3 Watering Sensors (B3)
WHAT YOU NEED:
A
CB
100 cm
20 cm
40 cm
25cm
B1 B2
B3
50cm
50cm
40cm
Watering
Sensor
Distribution dripper
Feeding tube Drip tube
1110
Moisture Sensing
Irrigation Kit
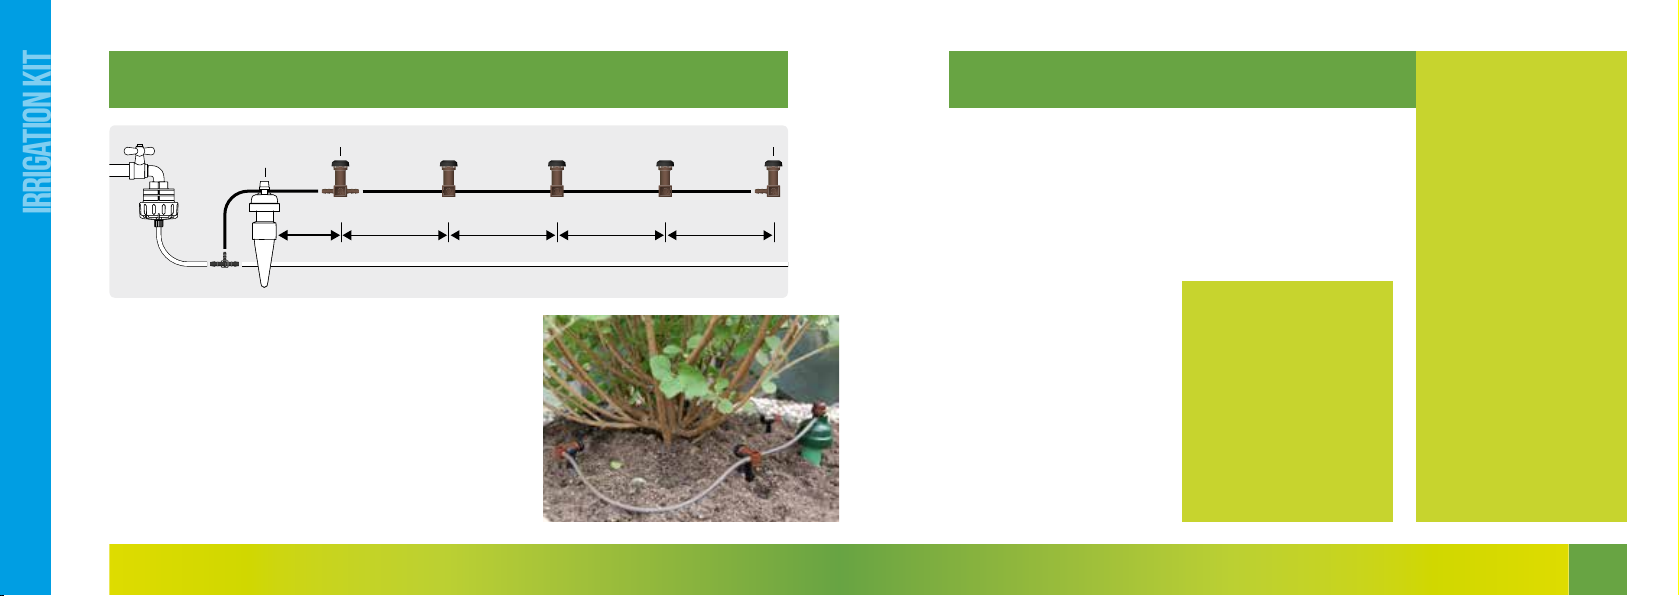
20 cm20 cm20 cm20 cm
max. 5x
8 cm
USE OF DISTRIBUTION DRIPPERS – Sold separately
Take the thin drip tube and cut o pieces approx. 20 cm long.
Then connect a maximum of 5 distribution drippers together
and fit the end distribution dripper at the end of the chain.
Lay the chain of distribution drippers anywhere around the
roots of the plants. It is important to leave a distance of approx.
8 cm between the Watering Sensor and the nearest distribu-
tion dripper. First set the Watering Sensor as instructed in
Step 6 and then connect the chain with the Watering Sensor.
The black screw need not be adjusted unless a distribution
dripper can be seen to be releasing less water. In this case
loosen the black screw by one turn. Unscrew completely and
clean once a year.
T-Piece
Watering sensor
Distribution dripper End distribution dripper
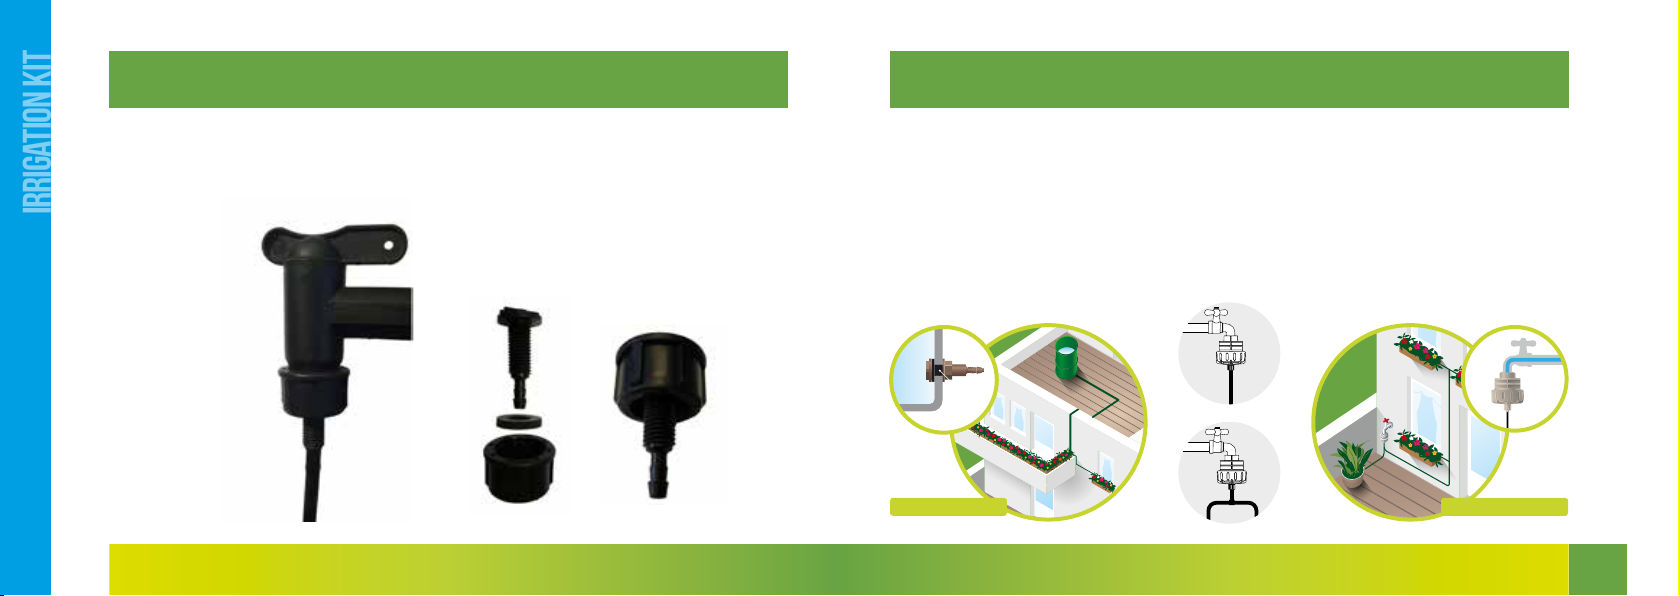
WHAT SHOULD I DO IF…
... THERE IS NO WATER IN THE SEN-
SOR?
Causes: air intake, poor screw fitting,
drip tube kinked, poor anchorage in
soil, water supply cut o.
Solution: refill the Watering Sensor
with water and screw tight down to
marking ring.
... THE WATERING DIAMETER IS TOO
SMALL?
Cause: drip tube too short. The water
is getting through to the ceramic
sensor too quickly.
Solution: lengthen drip tube to 8 cm.
... THE WATERING SENSOR DOESN’T
TURN OFF?
Cause: low air temperature (can be
the case after cold nights), The Wa-
tering Sensor turns o slower
Solution: close adjustment screw by
about 1/2 a marking.
... THERE IS NO WATER COMING OUT
OF THE DRIP TUBE?
Cause: tube blocked, gummed up or
intake kinked.
Solution: take the drip tube out slight-
ly and squeeze out the flat part with
your fingers.
This watering system has been
specially developed for outdoor
plants and may not be used in
-
doors. Protect plants from falling
over and do not place on mois-
ture-sensitive ground. Any water
which may escape must not cause
damage (e.g. flow into cellar
rooms).
Preparing for winter (in sub-ze-
ro conditions) Empty the tank
before winter and remove the
pressure reducer. Wash down the
insides and outsides of all the
Watering Sensor inserts with
water, removing encrusted soil
from the cones with sandpaper.
All the tubes can be left outside.
Store the pressure reducer and
watering sensors in a frost-free
location.
Fertilisation
Slow-release fertilisers are rec-
ommended, preferably added to
the soil when planting. Alterna-
tively, add fertiliser to the plants
once a month with a watering can.
IM PORTANT:
Always leave the tap open / refill
the water tank in time. Even in
rainy weather. If the water supply
is cut o for a longer period of
time, the roots could draw the
water out of the sensor.
Do not be deceived if the surface
of the earth is dry. The water
spreads out underground in the
shape of an onion. In most cases,
only the surface of the soil under
the drip tube is visibly moist.
1312
Moisture Sensing
Irrigation Kit
Pressure Reducer
1 Bar - 3/4’’
Ø 3 mm
inkl. T-Piece 8-3-8 For large plants
Watering sensor
Ø 8 mm
Feeding Tube black/white
Tank Connector
Ø 8mm
Drip Tube
Watering sensor maxi
Ø 8 / 8 mm
Shut-O Valve
Hose Security Clamp
Ø 8 + 3 mm
ACCESSORIES
Ø 8 / 8 mm Ø 8 / 8 mm Ø 8 / 8 / 8 mm + 8 / 3 mm Ø 3 / 3 mm
Tee + End-PieceHose union Elbow
Mini-tee
Mini-hose union
Support for feeding tube and
distribution dripper
Distribution dripper Professional watering monitor
Ø 3 / 3 /3 mm Ø  3 mm Watering monitor
ACCESSORIES
Produced for Maze by Blumat, Made in AustriaCheck our website for items held in stock. mazeproducts.com.au

Popular Irrigation System manuals by other brands

Tyco Fire Product Gem TY-B Series instruction manual

Tyco Fire Product

Tyco Fire Product Gem TY-B Series instruction manual

Reliable F1FR42 Series manual

Reliable

Reliable F1FR42 Series manual

Rain Bird GRDNERKIT instruction sheet

Rain Bird

Rain Bird GRDNERKIT instruction sheet

Tyco ILLUSION quick start guide

Tyco

Tyco ILLUSION quick start guide

Viking VK502 Technical data

Viking

Viking VK502 Technical data

Toro TS120 operating manual

Toro

Toro TS120 operating manual

Irrigatia SOL-C12 Installation and operation

Irrigatia

Irrigatia SOL-C12 Installation and operation

Sime GEMINI Installation, use and maintenance

Sime

Sime GEMINI Installation, use and maintenance

Toro 53707 installation guide

Toro

Toro 53707 installation guide

Viking VK960 Technical data

Viking

Viking VK960 Technical data

Hunter ST Series owner's manual

Hunter

Hunter ST Series owner's manual

Tyco TY-B Series quick start guide

Tyco

Tyco TY-B Series quick start guide

W&H OsseoSet 200 Instructions for use

W&H

W&H OsseoSet 200 Instructions for use

Compacta International Smartenit RainBee8 5010Z quick start guide

Compacta International

Compacta International Smartenit RainBee8 5010Z quick start guide

Viking M Technical data

Viking

Viking M Technical data

Munters Green Field user manual

Munters

Munters Green Field user manual

Autopot 36Pot system Set-up guidelines

Autopot

Autopot 36Pot system Set-up guidelines

Tyco EC-HS Installation

Tyco

Tyco EC-HS Installation

manuals.online logo
manuals.online logoBrands
  • About & Mission
  • Contact us
  • Privacy Policy
  • Terms and Conditions

Copyright 2025 Manuals.Online. All Rights Reserved.