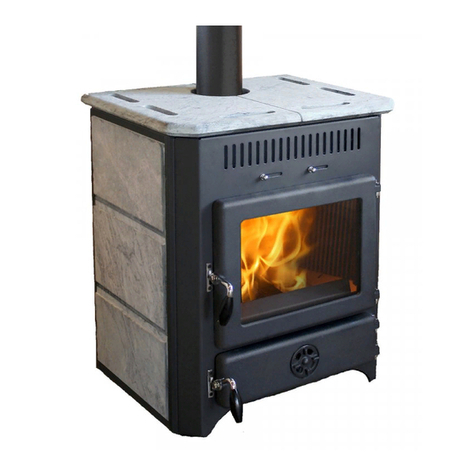
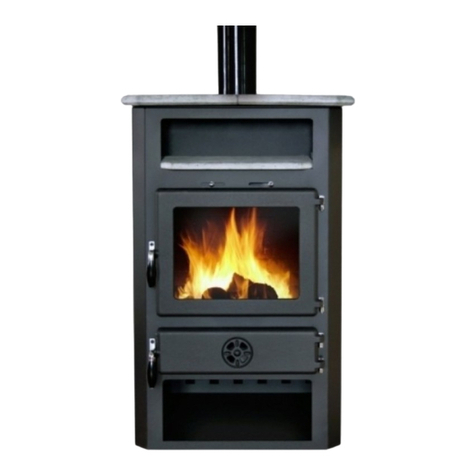
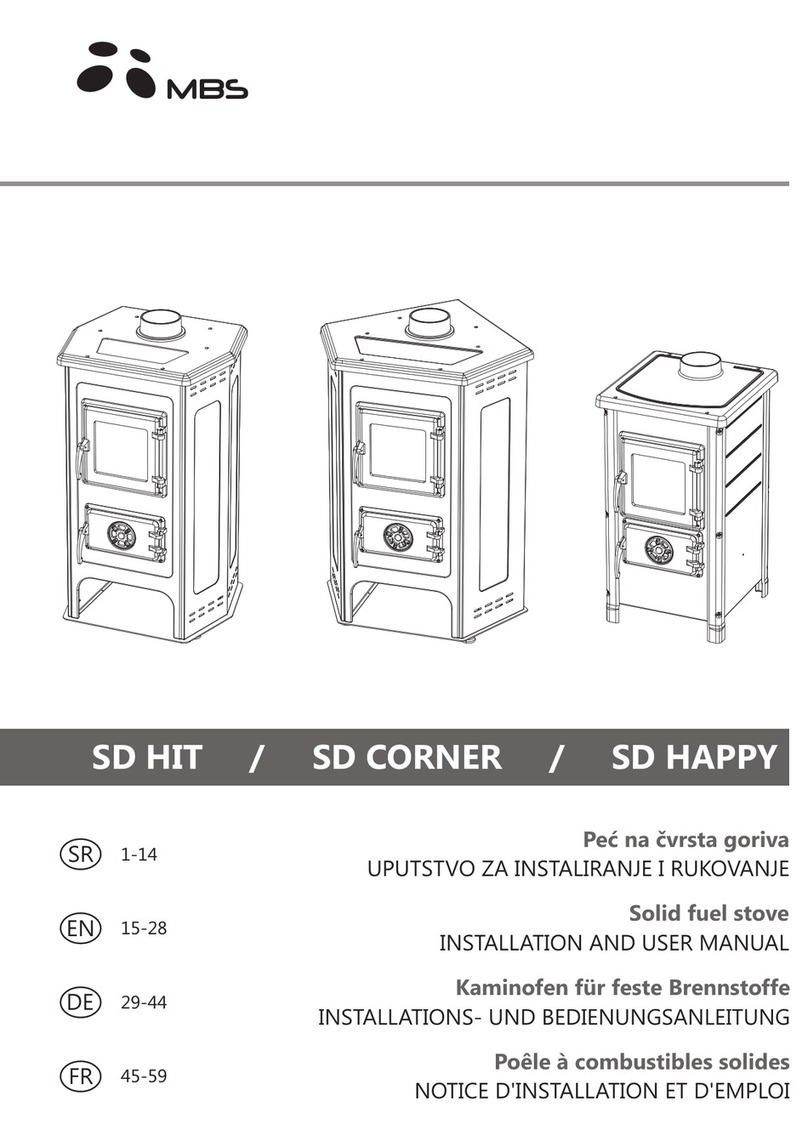
MBS HELLIA User manual

Pellet Stove
HELLIA
INSTRUCTIONS FOR INSTALLATION AND USE


Pellet Stove -
HELLIA -
8kW
1
DEAR CUSTOMER
Thank you for trust ng us and dec d ng to buy our product.
You made a good cho ce, s nce the stove has techn cal character st cs that place t at the very top of ts
class, wh ch you w ll see dur ng operat on.
Please read these nstruct ons carefully before us ng the stove, as t w ll prov de you w th adv ces for
proper handl ng.
We bel eve that you w ll become one of our many sat sf ed customers.
’’M lan Blagojev ć’’ A.D.
Smederevo
CONTENT: 1. Introduct on................................................................................................
2
2. General Safety Informat on 2
3. General Notes 3
3.1. Respons b l ty
3
3.2. Spare Parts 3
3.3. Packag ng
3
3.4. Combust on
3
3.5. Stove Parts 5
3.6. Techn cal Informat on
6
4. Safety Dev ces
6
5. Stove Pos t on ng and Installat on 6
5.1. Env ronment 6
5.2. Connect ng the Stove to the Ch mney 7
5.3. Stove Connect on Examples 8
6. Stove Comm ss on ng – Obl gat on of the Author zed Person...................13
7. Stove Clean ng and Ma ntenance 13
7.1. Da ly Stove Clean ng 13
7.2. Annual Stove Ma ntenance 13
7.3. Glass Bra d 13
8. The Pellet
14
9. Use
14
9.1. Stove Comm ss on ng 15
9.2. Adjust ng the Heat ng Intens ty (Heat ng Power) 16
9.3. Adjust ng the Room Temperature ...................................................... 16
9.4. Ach ev ng the Des red Temperature Dur ng Operat on ...................... 17
9.5. Turn ng the Stove Off.........................................................................17
9.6. Start ng the Sp ral and the D spenser w thout Start ng the Stove Due
to Lack of Pellet ................................................................................. 17
9.7. Remote Control 18
9.8. D splay Clock and Date Sett ng 19
9.9. Language Sett ng 20
9.10. Stove Operat on Programm ng 21
Da ly Programm ng ...........................................................................
21
Weekly Programm ng .......................................................................
23
Weekend Programm ng ...................................................................
24
9.11.STAND - BY M ode Programm ng 26
9.12. Pellet Type
27
9.13. Stove Clean ng Warn ng Message 27
10. Alarms
28
11.Warranty Statement
31

INSTRUCTIONS FOR INSTALLATION AND USE
2
1. INTRODUCTION
Important:
Pl as r ad th s instructions car fully. Th y
d scrib s all th phas s and giv s all th
advic s for smooth stov op ration.
In cas of non-complianc with th s instructions for
us , th manufactur r do s not b ar any liability for
th caus d damag .
Notic :
Th stov commissioning (th first start-up) must b
p rform d by an authoriz d p rson. In th v nt of a
fault or d f ct, for which a solution is d scrib d in
th instructions, th s rvic by a t chnician will b
charg d!
How to Us th Instructions:
W th these nstruct ons, A.D. "M lan Blagojev ć" wants to
prov de the user w th all the necessary nformat on for the
safe use of the stove, n order to avo d poss ble damage
to the stove, tems around the stove and njur es dur ng
mproper use of the stove.
Warning:
These nstruct ons are an ntegral part of the stove,
please check whether t was del vered w th the stove. In
case the nstruct ons are lost or damaged, request a copy
of nstruct ons from the company "M lan Blagojev ć" A.D.
Smederevo or from an author zed d str butor.
Th stov is int nd d for h ating purpos s. Th
us of th stov for any oth r purpos is strictly
prohibit d.
In th v nt of such op ration, A.D. “Milan
Blagoj vić” Sm d r vo do s not b ar any liability for
th caus d damag .
A.D. “Milan Blagoj vić” Sm d r vo shall not b
liabl for physical and m chanical damag if it
occurs during th transport from th company to
th distributor and from to distributor to th us r!
2. GENERAL SAFETY INFORMATION
The nstallat on must be carr ed out by author zed
persons who are l able to the user for the nstalled stove
and who w ll guarantee that such nstalled stove shall be
free of any nterference n the work that could occur due
to poor nstallat on of the stove.
Important:
•Ch ldren and persons w th reduced mental and phys cal
ab l t es must not operate the stove.
•Do not allow pets near the stove.
•The stove generates heat dur ng operat on. Do not make
contact w th hot parts of the stove (glass, flue, doors)
because of r sk of burns.
•Do not allow ch ldren to touch the hot parts of the stove.
•Do not op n th stov door whil in op ration.
•D spose of the ash from the ashtray when the stove and
the ash are cold.
•Clean the f rebox and the nner parts of the stove
when the stove s d sconnected from power and
when the stove and the ash are cold.
•Only use or g nal spare parts suppl ed only by the
stove manufacturer.
•Only use pellet as fuel.
•Ensure constant supply of clean a r to the room
were the stove s nstalled.
•The appl ance s made of recyclable mater als
•Dur ng the stove operat on, the ch mney draft must be
12±2Pa.
•A stove no longer n use must be d sposed at a
des gnated locat on n compl ance w th the
recommendat ons for d sposal of used electr cal and
electron c dev ces.
•Do not turn off the stove by pull ng out the cable from
the socket. Follow the nstruct on from sect on
“Handl ng”
•Ch ldren can play next to the stove only under adult
superv s on.
• All compla nts assessed as malfunct ons or poor
funct on ng of the stove should be reported to the
factory or author zed serv ce center by phone or n
wr t ng. You w ll f nd the techn cal serv ce numbers
at the end of these nstruct ons.
• Dur ng the f rst comm ss on ng, the products of
combust on of the protect ve coat ng and evaporat on
of pa nt from the nstalled parts may appear. In that
case, you must vent late the room unt l the products
and unpleasant odors are el m nated.
• If unauthor zed persons perform serv c ng or any
repa rs and alterat ons to the stove, the stove owner shall
not have the r ght to serv ce guaranteed by the
manufacturer's warranty, and A.D. "M lan Blagojev c"
Smederevo shall not be l able for any damage caused
after unauthor zed serv c ng.
•The stove rests on adjustable legs that need to be
adjusted so that the stove s stable and not to be
t lted.
• The stove s equ pped w th a dev ce for burn ng pellet,
therefore gn t ng t n any other way than prescr bed s
proh b ted.
• Any stove malfunct on shall be rect f ed by the
factory or an author zed serv ce center.

Pellet Stove -
HELLIA -
8kW
3
3. GENERAL NOTES
Stoves must be nstalled n rooms only. Stoves are
controlled by an electron c d splay, so that combust on s
fully automated and controlled v a electron cs. Turn ng
the stove on and off and the des red power are controlled
electron cally. Th s s enabled v a 5 stove operat on
modes. Therefore, such control of the stove’s operat on
guarantees safe operat on.
The f re-pot where the pellet burns s constructed to
enable most of the combust on products to end up n the
ashtray. However, the f re-pot must be checked da ly
s nce not every pellet s of the same qual ty, so the
combust on products may reta n at the bottom of the f re-
pot (see sect on “Stove Clean ng and Ma ntenance”).
The glass has a spec al a r c rculat on for self-clean ng,
however glass sta n ng due to poor qual ty pellets cannot
be avo ded, as well as the appearance of a sl ghtly
gray sh color due to dust st ck ng on the glass dur ng
several hours of operat on.
3.1 Liability
A.D. "M lan Blagojev ć" Smederevo den es both c v l and
cr m nal l ab l ty by del ver ng th s manual, for any
acc dents caused by complete or part al non-compl ance
w th the contents of these nstruct ons.
A.D. "M lan Blagojev ć" Smederevo den es any l ab l ty
ar s ng from mproper use of the stove by the user,
m suse of the stove by the user, nadequate
mod f cat ons and alterat ons to the stove or for use of
nadequate stove spare parts
The manufacturer den es any c v l or cr m nal l ab l ty
ar s ng out of:
• Poor stove ma ntenance
• Non-compl ance w th the manufacturer’s nstruct ons
and adv ces
• Stove not be ng used n accordance w th the protect on
nstruct ons.
•Installat on not n accordance w th the country’s
regulat ons
• The stove be ng nstalled by an unauthor zed person
•Mod f cat ons and changes not approved by the
manufacturer
• Use of non-or g nal spare parts
•Damages due to natural d sasters or ma ns fa lures
(floods, l ghtn ng str kes, ncrease n ma ns voltage,
etc.)
• Poor ma ntenance of the flue ducts and the ch mney
• Use of nadequate pellet
3.2 Spar Parts
Only use or g nal spare parts. It s not recommended to
wa t for the components to become fully damaged before
exchange. Exchange the damaged parts before full
damage to avo d poss ble njur es and malfunct ons.
Order spare parts exclus vely from author zed d str butors
or d rectly from the manufacturer bear ng n m nd the
del very per od.
WARNING!
If th fir -pot ov rloads during th stov op ration,
th p ll ts may s lf-ignit in th p ll t storag ,
th r for it is MANDATORY to cl an th compl t
stov according to th instructions for us , ch cking
th condition of s aling braids on th fir box door,
ashtray door and fir -pot.
If th stov is still ov rloading, contact th MBS
s rvic c nt r at: 026/633 670
3.3. Packaging
Th packaging is d sign d to provid for good
prot ction du to stove man pulat on However, desp te
th s, damage s poss ble due to transport from the
company to the d str butor and from the d str butor to the
user. It s necessary to nspect the stove and n case of
some damage nform the author zed d str butor or A.D.
"M lan Blagojev ć" Smederevo and report the problem n
order to solve t as qu ckly as poss ble.
MBS shall not b liabl for physical and m chanical
damag if it occurs during transport from th company to
th distributor and from th distributor to th us r!
The stove packag ng s removed when the stove s
nstalled, .e. before the stove s put nto operat on. All
mater als are recyclable. Packag ng mater als (styrofoam,
plast c bags, polyester parts) should be kept away from
ch ldren.
Plast c parts of the packag ng are d sposed n the
des gnated locat ons n accordance w th the regulat ons.
Burn ng or destroy them contrary regulat ons s
proh b ted. The wooden parts of the packag ng are
connected w th na ls, therefore, uncover and d spose of
them carefully to avo d njury.
3.4. Combustion
Combustion is a proc ss b tw n fu l and an
oxidant, wh r heat s created due to change n
chem cal components. L ght n the form of can appear
when heat s released, n the form of embers or flame.
Three elements necessary for combust on are:
• Flammable fuel (pellet)
• Ox dant (oxygen, usually from the a r)
• Ign t on (electr c heater)

INSTRUCTIONS FOR INSTALLATION AND USE
4
In order to ach eve combust on, the fuel and the ox dant
must be ava lable n the proper rat o. The react on
between these two elements s started by a stoked heater
wh ch gn tes the pellets that are n the stove f re-pot, then
the fuel and the ox dant are m xed result ng n
combust on. Th s s the so-called hot react on start
because the heat transfers from the glow ng l ghter to the
pellet. Combust on can be one of the nd cators of
whether everyth ng s all r ght w th the dev ce.
The follow ng examples may help to properly respond
and know what to do before call ng for serv ce center.
Image 1a shows nadequate combust on n the form of a
weak flame. In th s case, t s necessary to check
whether the flue ducts are unobstructed, .e. f there s
any clogg ng nclud ng n the ch mney. The next step s
to check f the stove s d rty. If not cleaned for a long
t me, the flue ducts ns de the stove can become clogged
(see sect on "Stove Clean ng and Ma ntenance ").
F nally, check that the parts of the stove have been
properly returned to the r place.
If the f re-pot s d splaced, excess a r may enter lead ng
to overload ng of the f re-pot (Image 1b) and the flame
may be too strong (Image 1c), wh ch can lead to the
burn ng of pellets n the storage. You should also check
all s l cone bra ds that lose the r elast c ty over t me and
thus affect the seal ng of the stove.
Imag 1a
Imag 1b
(Image 1c)
In add t on to these recommendat ons, combust on s also
affected by the qual ty of pellet, wh ch s expla ned n the
sect on on pellet.
If th r is nothing wrong with th applianc but
th d scrib d issu still occurs, imm diat ly
inform th authoriz d s rvic c nt r or th
company’s s rvic d partm nt in writing or by
phon .
Imag 2 shows the flame correspond ng to proper
combust on and stove operat on. The flame s a yellow-
wh te color, and there s a m n mal quant ty of dust and
unburned pellet n the f re-cup.
Imag 2

Pellet Stove -
HELLIA -
8kW
3.5. Stov Compon nts (Image 3)
1 – electron c controller
2 – pellet conta ner door
3 – pellet conta ner
4– top plate
5– s de
6– f rebox door
7– f rebox door glass
8– f rebox door handle
9– ashtray door
10 – ashtray
11 – burner
12 – front
13 – legs
14 – flue
15 – thermal sw tch
16 – on/off sw tch
17 – power connect on cable
18 – room temperature probe
Image 3

INSTRUCTIONS FOR INSTALLATION AND USE
3.6. T chnical Information
The table shows techn cal nformat on for three stove models - 8kW.
MODEL HELLIA
D mens ons (HxWxL) mm 1000x520x560
Ch mney connect on mm On the back s de Ø80
He ght from the floor to the flue connect on ax s mm 220
Voltage (50Hz) V 230
Electr cal part power W 550
Stove power kW
8
Ut l zat on degree
%
90
We ght kg 120
CO em ss on reduced to 13% O2
%
0.02
Output gas temperature °C 140
Fuel Pellet
Pellet storage capac ty (depend ng on the pellet) kg 15
M n consumpt on
kg/h
0.8
Max consumpt on
kg/h
1.9
Requ red draft
Pa
2-12
IMPORTANT!
It is pr f rabl to us a U.P.S. (Un nterrupt ble Power Suppl es – m n mum 600W s ne wave rect f er) to avo d problems n
case of power fa lure.
Damag du to pow r failur or larg fluctuations in th supply voltag is not cov r d by th warranty!
4. SAFETY DEVICES
The stove s equ pped w th soph st cated safety dev ces
that stop the operat on of the stove n case of unforeseen
s tuat ons, thus prevent ng all consequences that may be
caused by mproper operat on of the stove.
In any case, when a problem occurs, the dev ces w ll
stop add ng pellet and the phase of stove shutt ng down
w ll beg n. Th s w ll be man fested by a correspond ng
alarm on the d splay (more deta ls n the "Alarms"
sect on).
5. STOVE POSITIONING AND INSTALLATION
5.1 Environm nt
Pos t on ng the stove s key to successful heat ng.
Before you dec de where to pos t on the stove, you
must cons der the follow ng:
• The stove s connected to voltage of 230V/50Hz.
•The connect on locat on must be determ ned n
accordance w th the requ rements of the power
d str butor and the current regulat ons.
• The power cable must be un nterrupted and free of
damage, must not pass over heated parts of the
stove or over other dev ces that may damage t.
• The load-bear ng capac ty of the floor where the
stove s nstalled must be suff c ent to w thstand the
we ght of the stove.
• Combust on a r cannot be obta ned from closed rooms
(garages) or from rooms w thout vent lat on. Vent lat on
must be prov ded so that fresh a r, wh ch s needed for
combust on, reaches the stove.
• It s not recommended to nstall the stove n a bedroom,
bathroom or a room ntended for storage.
• If the stove s nstalled on a wooden floor, t s
recommended to nstall a protect ve plate (glass,
alum num sheet) that exceeds the d mens ons of the
stove, 10 cm on the s de and 30 cm on the front.
• It s best to nstall the stove n the largest room n the
fac l ty n order to fully ut l ze the stove.

Pellet Stove -
HELLIA -
8kW
•The m n mum room s ze where t may be nstalled s 20-
25 m2, otherw se the stove w ll not be properly ut l zed.
• The nstaller should guarantee easy access to the stove
and ch mney.
• The stove must not be placed n the mmed ate
v c n ty of wooden elements, cool ng dev ces, plast c
furn ture elements or other flammable mater als.
• The m n mum front d stance from flammable mater als
should be 100 cm, s de d stance 25 cm and back
d stance 25 cm.
5.2 Conn cting th Stov to th Chimn y
Before you nstall the stove, check whether the ch mney
s des gned n accordance w th regulat ons, whether
there are obstacles n the ch mney and cracks that must
be repa red. Class c masonry ch mneys or duct
ch mneys can be used as flues, but the ducts must be
well sealed at the jo nts and nsulated so as not to create
condensat on. The smoke extract on system (ch mney)
made of metal p pes must be earthed n accordance w th
current legal regulat ons. Th s s requ red by law. The
ch mney earth ng connect on must be ndependent of the
stove earth ng.
The stove must not be nstalled w thout a ch mney. If the
stove s nstalled w thout a ch mney, the owner s
respons ble for any d sturbances n the operat on of the
stove.
The ch mney must have the follow ng features:
• The top of the ch mney must be w nd res stant
•The top of the ch mney must be equ pped w th a cap for
ra n protect on.
•Max mum cross-sect on 15x15 cm (15 cm d ameter),
max mum he ght 4 - 5 m.
•It must have a seal at the connect on between
the flue ducts and the ch mney.
• It must have an nspect on f tt ng.
• It must have a sect on for condensate collect on and
dra nage.
The stove s constructed to be connected to the ch mney
w th flue ducts of 80 mm d ameter. Flex ble p pes for
stove’s connect on to the ch mney are not allowed. The
flue ducts from the stove to the ch mney must be nstalled
so to observe the t ghtness of the jo nt. W r comm nd
using flu ducts with rubb r s aling l m nts, if flu
ducts do not hav rubb r or som oth r silicon
s alant, you must plac t mp ratur silicon on th
inn r rim of th duct to conn ct th m, oth rwis
smok may l ak at th joints. Smok is a product of
combustion and stains th walls with black spots.
The stove must be nstalled on only one ch mney
(external or nternal) and only one stove can be nstalled
on one ch mney. The use of mash at the end of flue ducts
s absolutely proh b ted because the stove may not
funct on well. No more than 3 curves at an angle of 90°
can be used to connect to the ch mney, the max mum
length of hor zontal flue ducts can be 1 m wh le the
max mum vert cal length can be a max mum of 2.5 m.
Important:
Before nstall ng the stove, check the draft n the
ch mney, s nce t s one of the key factors for proper
stove operat on. You w ll f nd an example below of
the eas est method to check f the ch mney draft s
suff c ent.
You need one l ghted candle to check the ch mney draft.
Br ng the candle flame to the ch mney connect on
open ng and f the flame bends towards the open ng, the
draft s sat sfactory (Image 4b). If the flame bends only
sl ghtly th s nd cates a problem w th the ch mney and
poor draft (Image 4a). Please note that th s s an
emp r cal check of the ch mney and does not have to be
def n t ve, the most def n t ve checks are performed w th
dev ces des gned for th s purpose.
Wh n th A.D. "Milan Blagoj vić" Sm d r vo t am
insp cts th r port d complaint, th y will p rform an
obligatory ch ck of th chimn y draft with a d vic
c rtifi d according to th Europ an standard.
Imag 4a
Imag 4b
If the ch mney draft s poor, make sure to check f the
ch mney s free of defects. The ch mney could be
located w th n the bu ld ng ( nternal ch mney) or outs de
of the bu ld ng (external ch mney). If the stove s
nstalled w th an external ch mney, t must be nsulated.

INSTRUCTIONS FOR INSTALLATION AND USE
Chimn y d f cts may includ :
• Poorly des gned w ndsh eld
• Fore gn objects, protrus ons or other obstacles
n the ch mney
• Ch mney cracks
• Accumulated soot (due to lack of clean ng)
• Duct nserted too deep n the ch mney
• F replace w thout a door or another open ng
on the ch mney
5.3 Stov Conn ction Exampl s
Image 5 shows the back of the stove where the flue
pos t on s v s ble.
Imag 5
The connect on of the stove to the ch mney s performed
w th flue ducts that have seal ng rubber at the jo nts and
conta n a tee w th a condensate conta ner so that n case
of condensat on, t does not return from the ch mney to
the bo ler!
The follow ng pages show some of the examples of
proper and mproper stove connect on.

Pellet Stove -
HELLIA -
8kW
Conn ction to Ext rnal Chimn y
Image 6 shows the correct connect on to the
external ch mney.
The ch mney must have proper nsulat on. The top must
be f tted w th a cap for ra n and w nd protect on, wh le the
bottom must be f tted w th a tee for collect on of
condensate n the ch mney.
Imag 6

INSTRUCTIONS FOR INSTALLATION AND USE
Conn ction to Int rnal Chimn y
Image 7 shows the correct way to connect the stove to
the nternal ch mney. 80 mm d ameter flue ducts are
used for connect on w th n a room. The ducts do not
have to be nsulated, but t s mportant to prov de
adequate seal ng at the duct connect ons.
A condensat on system s also mandatory to avo d
problems n operat on. The top of the ch mney must be
f tted w th a cap for ra n and w nd protect on, and f the
ch mney s exposed to outs de cond t ons, t must be
nsulated.
Imag 7

Pellet Stove -
HELLIA -
8kW
Conn ction for a Combination of Int rnal and Ext rnal
Chimn y
Image 8 shows the stove nstallat on w th a
comb nat on of nternal flue ducts and an external
ch mney.
The external ch mney must be nsulated, the top must
be f tted w th a cap for ra n and w nd protect on, and t
must have a condensat on regulat on system.
The nternal flue ducts do not have to be nsulated,
they must have adequate seal ng at the jo nts. It s very
mportant to place a rosette (ch mney plug) on the wall
and seal t t ghtly so that t does not leak smoke, f the
smoke comes n contact w th the wall, the react on may
result n sta n ng. A condensat on system on the flue
ducts s also requ red.
Imag 8

INSTRUCTIONS FOR INSTALLATION AND USE
T
Note:
If the ue ducts are installed without a tee and the
condensaon container as in Image 9, you must prevent
condensaon and dust accumulaon in certain zones of
the ue curves.
This type of stove installaon is allowed with mandatory
regular maintenance and cleaning of ue ducts.
Otherwise, described problems may occur due to chimney
clogging.
Imag 9
Image 10 shows how to nstall the stove to a
masonry ch mney (1). The masonry ch mney must
Condensation and dirt accumulation
be f tted w th an nspect on f tt ng for clean ng (2) and
ra n and w nd protect on (3).
Above are some of the examples wh ch often occur, t s
mportant to have the stove nstalled by a person w th
expert se n stove and ch mney nstallat on.
Imag 10
3
1
2
45
°
2
45
°
1
<
1,5m
3

Pellet Stove -
HELLIA -
8kW
6. STOVE COMMISSIONING – OBLIG TION OF THE UTHORIZED PERSON
After the stove had been correctly nstalled accord ng to
the requ rements and regulat ons, the stove w ll be put
nto operat on. Please observe the follow ng adv ces:
• Dur ng the f rst comm ss on ng, the pa nted parts of
the stove w ll burn, wh ch w ll cause a certa n amount
of smoke and unpleasant odor. Therefore, you must
prov de good a r c rculat on n order to vent late the
room and remove unpleasant odors as soon as
poss ble.
• Dur ng the f rst comm ss on ng, we recommend to
have a profess onal present for at least 30 m nutes
and have h s assurance that all requ rements for the
safe operat on of the stove have been met.
• Make sure to check f the stove s properly connected to
power and the ch mney, that t s at a safe d stance from
flammable mater als, that t had h gh qual ty pellet and
suff c ent nflow of fresh a r.
•Make sure to check whether the probe measur ng the
room temperature s not n contact w th or near a heat
source, because f t s, the stove w ll not have the
correct nformat on about the room temperature. We
recommend plac ng t 10 cm from the floor and away
from the flue that s heated dur ng the stove operat on.
• When all cond t ons are met, set the sw tch (shown n
Image 4 under number 16) to pos t on 1. Then follow
the nstruct ons from sect on “Handl ng and
Operat ng the Stove".
7. STOVE CLE NING ND M INTEN NCE
Stove clean ng s a key factor for proper funct on ng. By
gnor ng th s procedure, there s a r sk of a number of
ssues that may occur. The stove should be cleaned
only when t s d sconnected from the power and when
the stove and ash are completely cold.
Stove ma ntenance can be performed on a da ly, weekly,
monthly and annual bas s. All levels w ll be expla ned n
deta l below and users must str ctly adhere to these
adv ces and recommendat ons so not to nval d the
product warranty and to prevent poss ble damage to the
product and the env ronment.
7.1. Daily Stov Cl aning:
Th s refers to the da ly ma ntenance of the stove, wh ch
s m n mal. The da ly ma ntenance ncludes remov ng the
ash from the stove f re-pot n the f rebox, clean ng the
f re-pot, clean ng the area around the f re-pot, clean ng
the glass, clean ng the pellet storage. Ash s removed
w th a vacuum ng dev ce (vacuum cleaner), when the
stove s completely cold.
Clean by open ng the f rebox door (Image 2, pos. 6),
then remov ng the cup (Image 2, pos. 11) and empty ng
all the contents.
All f re-pot open ngs must be cleaned to ensure good a r
c rculat on necessary for proper combust on. After that,
all the dust from the f rebox and the space around the
f re-pot must be vacuumed.
If the pellet s of low qual ty, a layer of slag w ll form
because the pellet d d not burn, and such pellet may
produce res n at the bottom of the f re-pot. If the f re-pot
s not properly cleaned, the f re-pot w ll overload and the
stove may self- gn te. It is also v ry important to
prop rly r turn th fir -pot in plac ,
Th stov glass must be cleaned w th a dry cloth. If
needed, you may use water and m ld detergents, but
only f the glass s cold. If th glass is hot, it may
crack in contact with wat r.
Abras ve agents can damage the glass. The glass
must be completely dry before start ng the stove
aga n.
P ll t storag cl aning s performed by vacuum ng the
res dual dust com ng from the sack along w th the pellet.
If the dust nserted along w th the pellet accumulates at
the bottom of the storage and reaches the d spenser n
suff c ent quant ty, t may cause the d spenser to clog.
7.2. Annual Stov Maint nanc :
The manufacturer recommends to perform annual
stov maint nanc by an author zed serv ce center
after the heat ng season. Th s refers to fan and flue ducts
clean ng. The annual ma ntenance s subject to charge
accord ng to the current pr ce l st!
7.3. Wool Braid
We recommend chang ng them after the heat ng season
because they ma nta n the seal ng of the stove. They are
located on the f rebox door, the clean ng l d, the
combust on f re-pot and on the ashtray.
After prolonged use, the glass bra d may come off. If th s
happens dur ng the heat ng season, and the bra d was
not worn out, t s poss ble to attach t w th s l cone
res stant to h gh temperatures. Other bra ds (flat) are
self-adhes ve and do not requ re s l cone, but should be
replaced w th a bra d w th the same character st cs.
Glass braids ar consumabl s and ar not subj ct
to r gular s rvic .
Failur to r turn th fir -pot, cl aning lids and
ashtray prop rly and according to th instructions
may caus ov rloading and poor combustion of th
p ll ts. If th fir -pot ov rflows, turn off th stov
imm diat ly and, aft r cooling, cl an as xplain d in
th instructions or call for s rvic .

INSTRUCTIONS FOR INSTALLATION AND USE
8. THE PELLET
D scription:
Pellet s a product obta ned by press ng sawdust from
dry, h gh-calor e wood. Sawdust s subjected to h gh
pressure where t heats up and creates a natural b nder.
No add t onal b nders are allowed dur ng press ng. As a
pure b omass product, the pellet s CO2 neutral, .e. t
does not contr bute to the greenhouse effect. Wood as
the bas c ngred ent of pellets s a renewable energy
source and the fuel of the future.
This stov us s p ll t of 6 mm in diam t r and
10-25 mm in l ngth, oth rwis issu s may
occur in th op ration of th stov .
The pellet qual ty s def ned by the DIN 51731 standard.
P ll t charact ristics:
Pellet length ….................................................. 10-25mm
Pellet d ameter.........................................................≤6mm
Load dens ty.......................................................650kg/m3
Energy value........................................................5kWh/kg
Mo sture ................................................................. 6-8%
Ash..........................................................................<1.5%
Spec f c we ght...................................................>1kg/dm3
Us of p ll t in MBS stov s:
We recommend procur ng the pellet from author zed
pellet d str butors and manufacturers who can guarantee
for the pellet qual ty. The pellet should be stored n
cond t ons prescr bed by the manufacturer.
In case the pellet becomes wet, certa n ssues may
occur n the operat on of the stove. If you buy pellet
made of low-qual ty wood that conta ns res n, the stove
w ll not funct on properly. Some of the operat ng ssues
are:
• Large quant ty of dust
• The stove qu ckly becomes d rty and needs
frequent clean ng
• The f re-pot s not completely cleaned dur ng stove operat on
• The f re-pot overloads
• The glass qu ckly becomes d rty and black
• Inadequate combust on n the f rebox
• D spenser clogg ng
• Vacuum n the storage due to the pellet st ck ng to the
pellet storage walls
Should any of the above occur, “Milan Blagoj vić“
A.D. Sm d r vo shall not be found l able.
9. HANDLING
The control panel (Image 11) enables commun cat on
w th the program select on v a keys. The d splay and the
nd cators (on the LCD d splay) nform the operator on
the stove operat on.
LEGEND
K ys:
1 – temperature ncrease and program funct on
for chang ng the day, t me temperature
2 – temperature decrease and program funct on for
chang ng the day, t me temperature
3 – program change SET
4 – ON/OFF, ex t program
5 – heat ng ntens ty decrease
6 – heat ng ntens ty ncrease
Control pan l c ntral s ction display:
7 – clock – programm ng act ve -
8 – heater – heater act vated -
9 – pellet d agram v ew – fuel supply act ve -
10 – turb ne – exhaust fan act ve -
11 – fan- fresh a r fan act ve -
12 – pump – not installed for this stove type
(installed in boiler stoves) -
13 – alarm nd cator -
14 – clock
15 – room temperature nd cator
16 – operat on mode nd cator (P1, P2,...P5)
17 – stove operat on nformat on

INSTRUCTIONS FOR INSTALLATION AND USE
Imag 11
1
7-13 14 16
6
08 10
18.5°C P-
4 OFF
23
15 17
45

Pellet Stove -
HELLIA -
8kW
9.1. Stov Commissioning
Once the stove s connected to
power, set the power sw tch located
at the back of the stove to pos t on 1.
The d splay w ll show the follow ng
messages: t me, room temperature,
heat ng ntens ty value (from P1 to
P5) OFF – the stove s not n
funct on (Image 12).
Imag 12
Hold key 4 (ON) for several seconds.
When the d splay message changes
from OFF to START, the stove w ll
start operat ng (Image 13) and the
heater s act vated followed by
message LIGHTER WAIT (Image
14).
Imag 13
Imag 14
After that, the messages LIGHTER
WAIT (l ghter start ng) LOAD PELLET
and FIRE WAIT (Images 15 and 16)
appear alternately nd cat ng that the
stove has been loaded w th pellet
wh ch was nserted nto the burner and
the f re s expected to be l t n the
f rebox.
Imag 15
Imag 16
ENGLISH SERBIAN
07 33
16.5°C
P-4 OFF
UBACIVA
N PELETA
P-
4
16.5°
C
07 3
6
07 36
16.5°C P-
4 LOAD
PELLET
07 35
16.5°C
P-4 START
16.5°C P-4 16.5°C P-
4
LIGHTER ZAGREVAN
WAIT UPALJACA
07 3
6
07 3
6
07 42
16.5°
C
FIRE
WAIT
07 4
2
P-
4
16.5°
C
P-
4
CEKANJ
E
PLAMEN
A

INSTRUCTIONS FOR INSTALLATION AND USE
Once the flame s l t n the burner
and the exhaust gases’
temperature s ach eved, the l ghter
s turned off and the d splay shows
the message FLAME LIGHT
(Image 17).
Imag 17
Once the flame s stable, the d splay
shows the message WORK (Image
18).
Imag 18
When the stove s n a stable
process, the pellet feed ntens ty s
decreased and the burner f re-pot s
cleaned from the unburned pellet
every 10-15 m nutes for 40 -70
seconds followed by the d splay
message CLEANING FIRE-POT
(Image 19).
Imag 19
9.2. Adjusting th H ating Int nsity
(H ating Pow r)
Keys 5 or 6 are used to select the
des red heat ng ntens ty, wh ch can be
read from the d splay show ng the
message SET POWER and the values
from 01 to 05 (Image 20). The h ghest
heat ng ntens ty s 05!
Imag 20
9.3. Adjusting th room
t mp ratur
Press key 1 or 2 to set the des red
room temperature you want the stove
to ach eve! The d splay w ll show the
current room temperature at t w ll
read SET TEMP ROOM as shown n
(Image 21)
Imag 21
ENGLISH SERBIAN
07 43
16.5°C P-4
RAD 5
5
07 43
16.5°C P-4
WORK 5
5
RAZGORE
V CASICE
P-
4
16.5°
C
P-
4
07 4
2
07 42
16.5°
C
FLAM
E
LIGHT
18.5°C P-4 18.5°C P-
4
CLEANING CISCENJE
FIRE-POT CASICE
07 5
4
07 5
4
0
5
0
5
SET
POWE
R
PODES
I
SNAG
U
2
2°
C
SE
T
TE
M
P
R
O
O
2
2°
C
PO
DE
SI
TE
M-
SO
BE

Pellet Stove -
HELLIA -
8kW
9.4. Achi ving th D sir d
T mp ratur During Op ration
Once the set room temperature s
ach eved, the stove goes to the
economy mode where t saves fuel,
and the d splay shows the message
WORK MODULAT as shown n Image
21.
ENGLISH SERBIAN
Imag 21
9.5. Turning th Stov Off
Turn off the stove by press ng key 4
for 4 seconds. The feeder stops
work ng, the exhaust fan stays on for
about 10 m nutes unt l the exhaust
gases’ temperature drops below the
set value, wh le the flame s
ext ngu shed and the stove
temperature s lowered. Also, the
fresh a r fan add t onally blows out the
a r unt l the stove cools down. Th s
act v ty s followed by the d splay
message CLEANING FINAL, wh ch
ncludes nd cators that the fan s
runn ng, as shown n Image 22.
Imag 22
Once the stove has cooled down, the
fans stop work ng and the message
OFF appears on the d splay nd cat ng
that the stove has been turned off as
shown n Image 23.
Imag 23
It w ll be poss ble to restart the stove
5-7 m nutes after t was turned off.
9.6. Starting th Spiral and th
Disp ns r without Starting th
Stov Du to Lack of P ll t
If the stove turns off due to the lack of
pellet n the storage and the
d spenser, the d splay w ll show the
correspond ng message and alarm
(more deta ls n chapter “Alarms”).
In th s case, the pellet d spenser sp ral
s empt ed and the stove may not
mmed ately start when start ng aga n
because of a small amount of pellet!
M
CISCENJ
E
ZAVRSN
O
CLEANIN
G FINAL
22°C P-4 22°C P-
4
08 3
3
08 3
3
22 30
21.5°C P-
4 OFF
22 30
21.5°C P-
4 OFF
WORK RAD
MODUULAT
EKONOMIK
P-
4
12 0
0
22°C
P-
4
12 0
0
22°C
Table of contents
Other MBS Stove manuals
Popular Stove manuals by other brands

Regency
Regency Ultimate U39 Owners & installation manual

SEVERIN
SEVERIN DK 1013 Dimensions

Hunter Stoves
Hunter Stoves Herald 5 Installation and operating instructions

Ashley
Ashley AW1120E owner's manual

Jøtul
Jøtul PF 732 Installation, operation and maintenance manual

Heat Design
Heat Design FW5C Installation and operating instructions

Brasslite
Brasslite Turbo II-D instructions

Stanley
Stanley Tara Non Boiler Eco Installation and operating instructions

Palazzetti
Palazzetti MULTIFIRE IDRO NT 15 GENERAL INFORMATION - WARNINGS - INSTALLATION - MAINTENANCE

Harman Stove Company
Harman Stove Company Pellet Pro 2 manual

MCZ
MCZ Kaika Oyster Installation and use manual

Dimplex
Dimplex CLUB manual