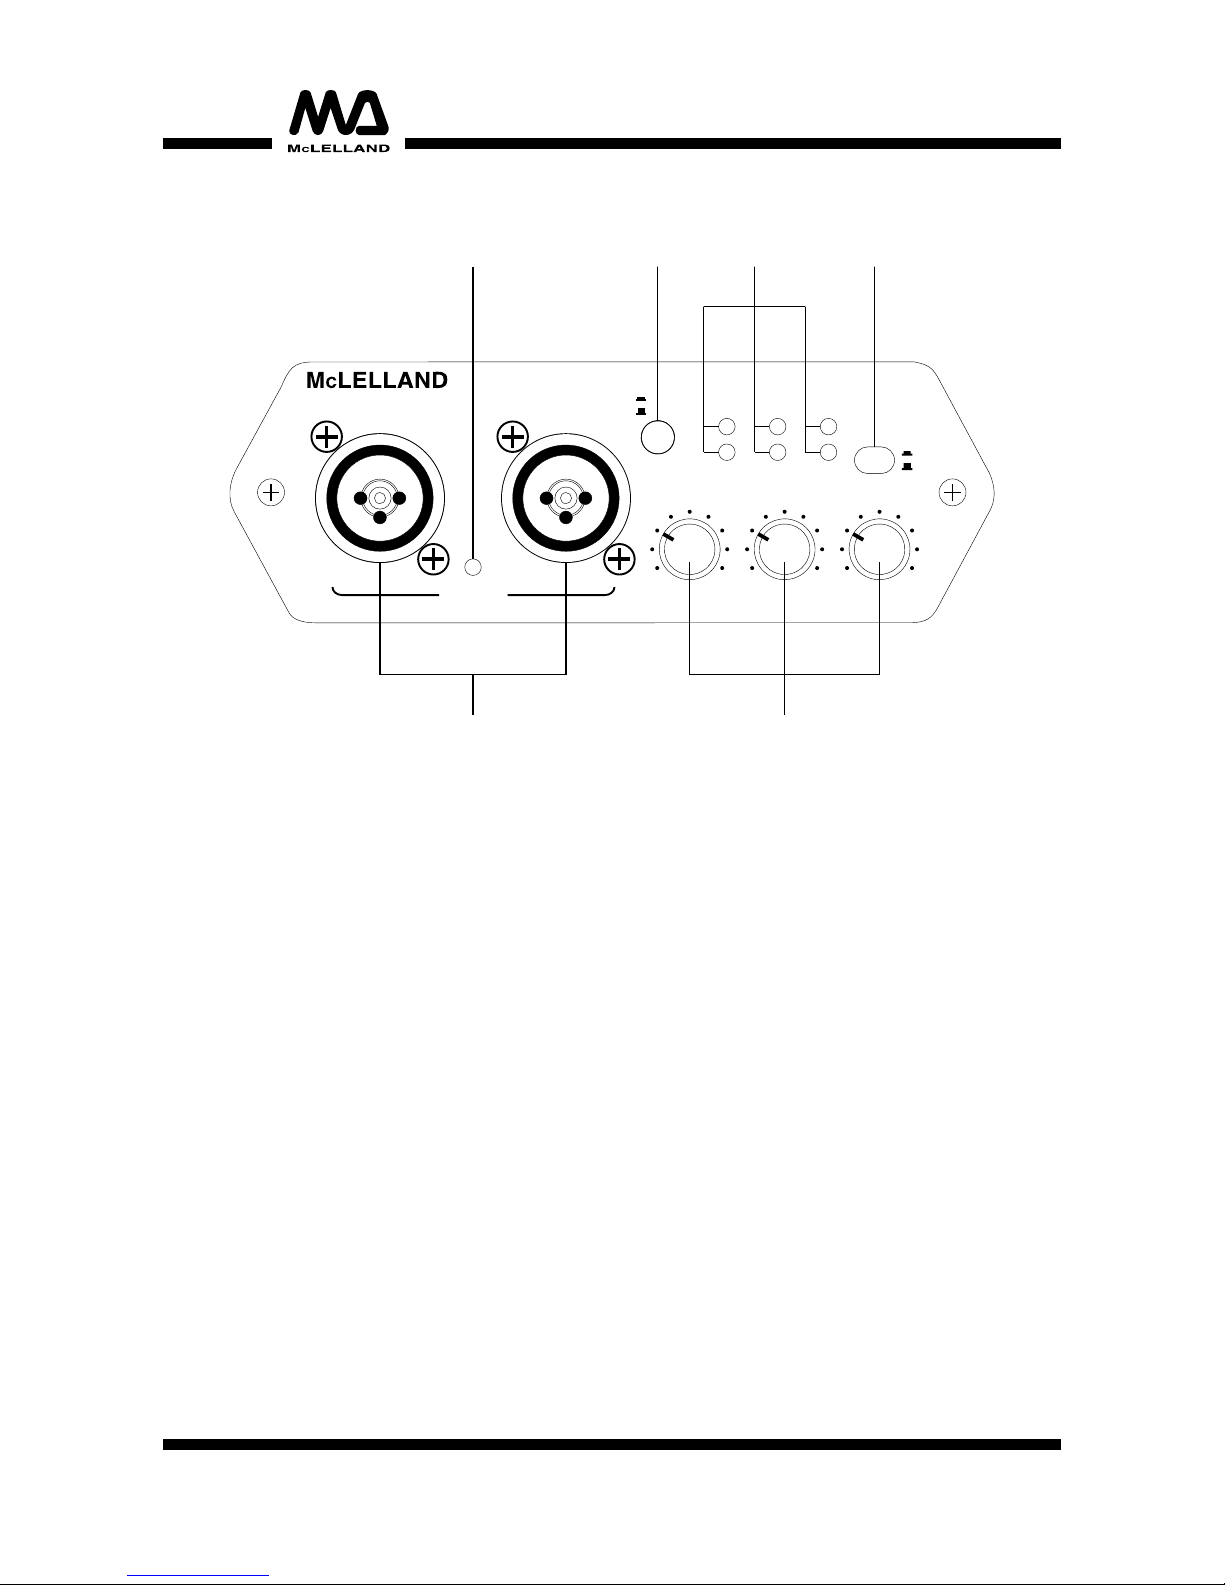
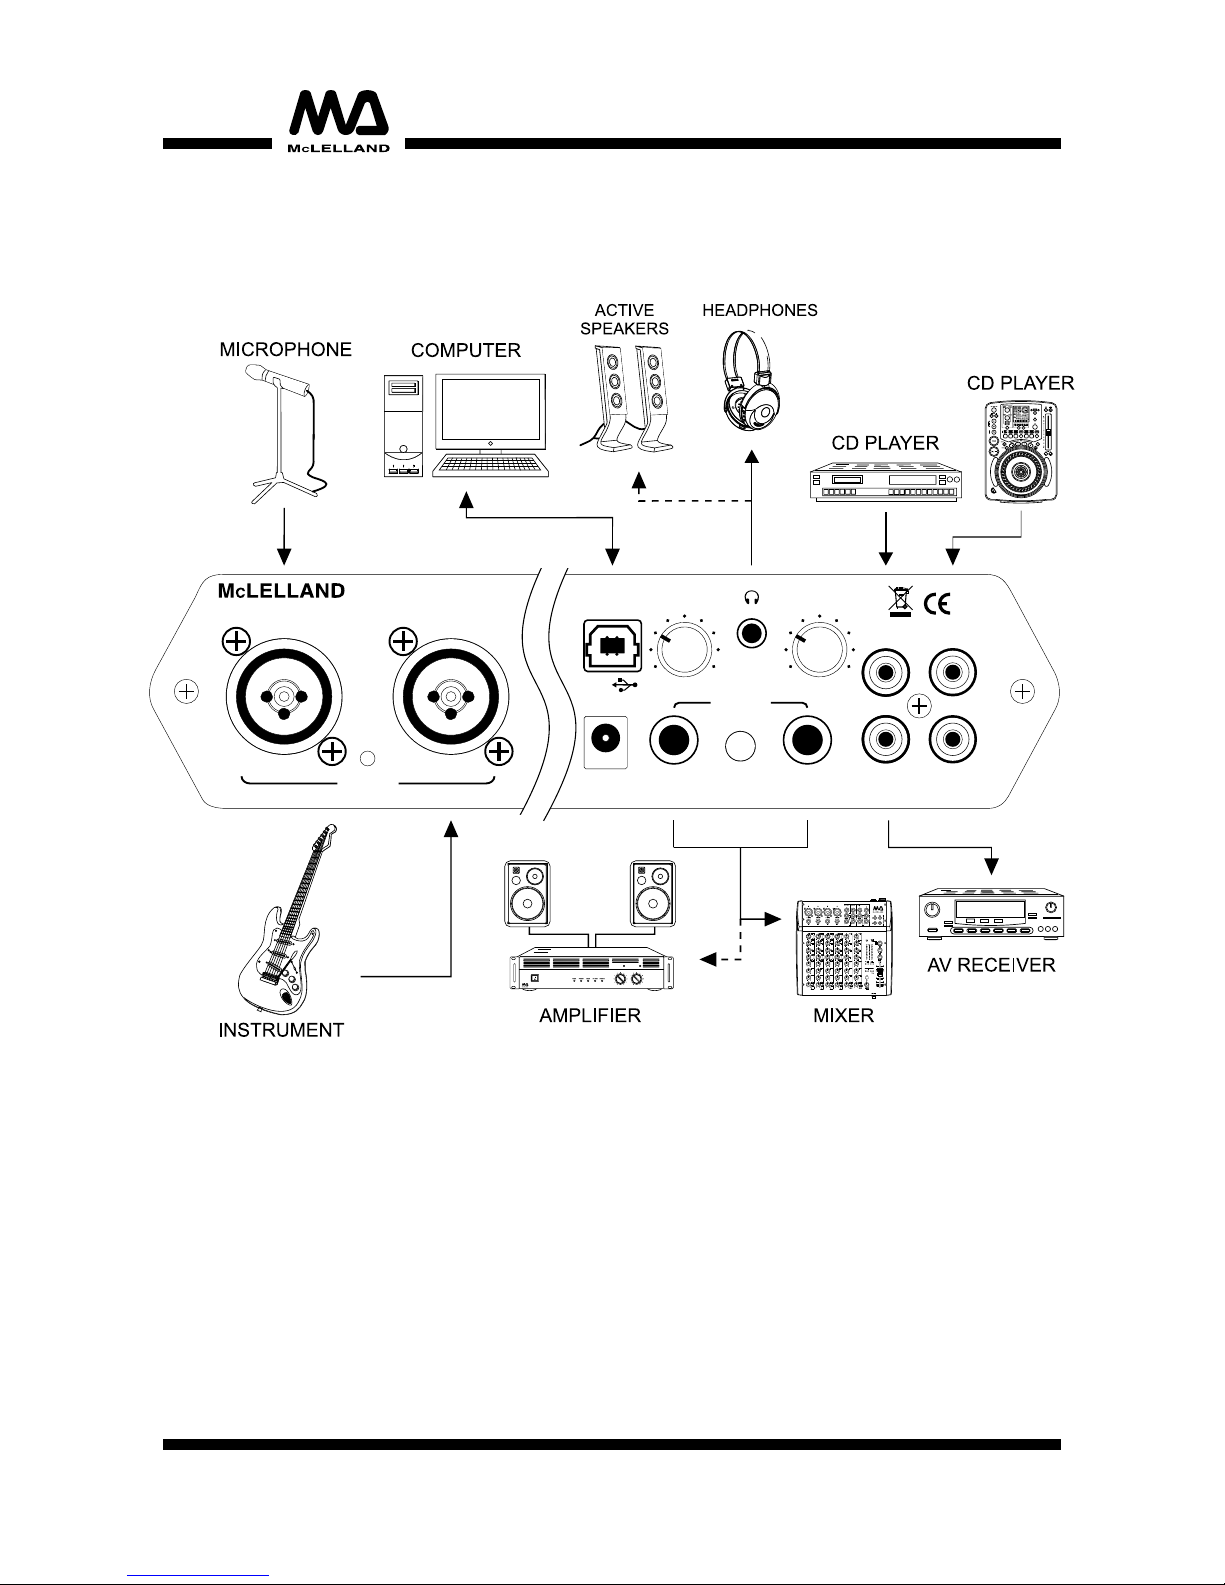
1. Both microphones and high-impedance music instruments such as electric guitars or electric
bass guitars can be connected to the Mic/Instrument inputs:
• Connect microphones(balanced or unbalanced) via XLR plugs or 6.3mm jacks. Balanced
cables provide +6 dB more output and guarantee a better protection against interference in
case of long cable runs.
• For phantom-powered microphones a +48V phantom power can be switched on. Connect
high-impedance music instruments via 6.3mm jacks.
2. For connecting a signal source with line level output(e.g. CD player) use the stereo RCA IN
connectors(white jack = left, red jack = right).
3. For the amplification or recording of the preamplified signals of the Mic/Instrument inputs
and RCA IN and the signals from the computer connect a PA amplifier for speakers or
subsequent units with line level to the R/L balanced 6.3mm jacks OUTPUT.
4. Use the USB cable to connect the audio interface to an available USB port on your computer.
The audio interface is compatible with both PC and Mac computers and requires no
installation procedure or drivers for the correct functioning.
5. To monitor the analog input signals and the signals from the computer connect stereo
headphones with 3.5mm plug to MONITOR output. Alternatively, a monitor system such as
desktop speakers may be connected to the output.
6. For connection of a digital audio signal in S/PDIF format use the S/PDIF IN jack. The input
can only be used in connection with a computer.
7. A subsequent digital audio device with S/PDIF input can be connected to the S/PDIF OUT
jack to pickup the signals from the computer. The output can only be used in connection with
a computer.
8. For an operation independent of the computer the audio interface can also be supplied with
power via the supplied power unit or battery:
• Connect the cable of the power unit to the power input 9V AC/DC and the power unit to a
power outlet. Use the unit only with the supplied power unit. Always disconnect the mains
connector when you wish to change connections, move the unit to a different place or if it is
not used for a longer period.
• To insert the battery remove the battery cover. Insert the 9V battery as indicated in the
battery compartment. Close the compartment again with the cover. If the audio interface is
not used for a longer period(approx. 1-2 weeks), please remove the battery to prevent
damage in case of battery leakage.
NOTE: Batteries are hazardous waste which need to be disposed of appropriately. If
the device is to be disposed, the batteries have to be removed first. Make sure that the
poles are correct when inserting the battery. Never let batteries lying around openly as
there is the danger that these can be swallowed by children or domestic animals.
Immediately consult a doctor when batteries are swallowed! Leaking or damaged
batteries can cause irritations when getting into contact with the skin. In this case use
appropriate protective gloves. Make sure that the batteries cannot be short-circuited,
thrown into the fire and be charged. There is a danger of explosion. Should any liquid
enter the device nevertheless, remove the batteries immediately.
CONNECTIONS
7