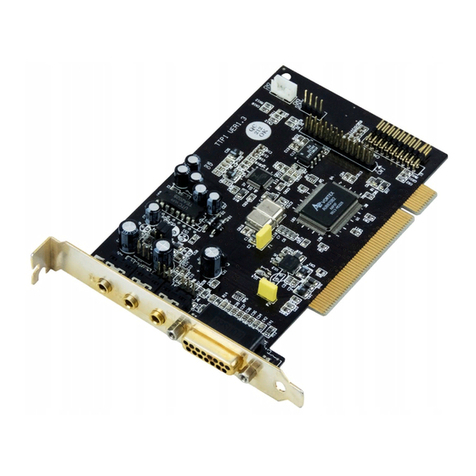
Media Vision pro audio spectrum 16 mac User manual

PRO
AUDIO
Installation
Guide

Media Vision Software License
Statement
The
software
described
in
this
manual
is
protected
by
US
and
inter-
national copyright
laws.
You
must
not
copy
the
software for
any
purpose
other
than
making
archival copies for
the
sole
purpose
of
backing-up
our
software for protection against loss.
The
software
must
not
be
used
on
two
or
more
machines
at
the
same
time.
FCC
Compliance
Statement
This
equipment
has
been
tested
and
found
to
comply
with
the
lim-
its
of
a Class B digital device.
pursuant
to
Part
15
of
the FCC Rules.
Operations is subject to
the
following two conditions:
(1)
this
device
may
not
cause
harmful
interference; (2) this device
must
accept
any
interference received. including interference
that
may
cause
undesired
operation.
These
limits are designedto provide
reasonable protection against
harmful
interference
in
residential
installations.
This
equipment
generates. uses.
and
can radiate
radio
frequency energy.
and
if
not
installed
and
used
in
accordance
with
the
instructions.
may
cause
harmful
interference to radio
communi-
cations. However.
there
is
no
guarantee
that
interference will
not
occur
in
a
particular
installation.
If
this
equipment
does
cause
interference to radio
or
television
equipment
reception.
which
can
be
determined
by
turning
the
equipment
off
and
on.
the
user
is encouraged to
try
to correct
the
interference
by
one
or
more
of
the
following measures:
• Re-orient
or
relocate
the
receiving
antenna
• Move
the
equipment
away
from the receiver
• Plug
the
equipment
into
an
outlet
and
circuit differentfrom
that
which
powers
the receiver
•
If
necessary.
the
user
should
consult
the
dealer
or
an experi-
enced
radio/television technician
for
additional suggestions.
CAUTION:
Only
equipment certified to
comply
with Class B (com-
puter
input/output
devices. terminals. printers. etc.) shouldbe
attached to
this
equipment.
and
must
have
shielded interface
cables.
This digital
apparatus
does
not
exceed
the
Class B limits
for
radio
noise emissions from digital
apparatus
set
out
in
the
Radio Interfer-
ence Regulations
of
the
Canadian
Department
of
Communications.
Finally.
any
changes
or
modifications to the
equipment
by
the
user
not
expressly
approved
by
the
grantee
or
manufacturer
could
void
the
user's authorityto
operate
such
equipment.
Limited
Warranty
(1)
Media
Vision
warrants
to
you
that
the
Software will perform
substantially
in
accordance
with
the
Documentation for a
period
of
one
year
after deliveryto you. You
must
report all defects
and
return
the
Software to
Media
Vision
with
a
copy
of
your
sales
receipt
within
such
period
to
be
eligible for
warranty
service.
If
the
Software fails to
comply
with
this warranty.
your
sole
and
exclu-
sive remedy. at
Media
Vision·s
option
and
cost. will
be
to
either
provide all corrections
required
for
any
errors.
or
replace
the
Soft-
ware.
(2)
Media
Vision
warrants
to
you
that
the
Sound
Card
will
be
free
from significant defects
in
materials
and
workmanship
for
a
period
of
three
yearsfrom
the
date
of
purchase;
the
stereo speakers will
be
warranted
for a
period
of
one
year
from
the
date
of purchase;
the
CD-ROM Drive
will
be
warranted
for
a
period
of
ninety
days
from
the
date
of purchase.
Media
Vision·s
sale
and
exclusive
remedy
with
respect
to defective
hardware
will be.
at
Media
Vision·s
option. to
repair
or
replace the hardware.
if
it is
determined
to
be
defective
by
Media
Vision
in
its
sole
discretion.
or
refund
the
pur-
chase
price of
the
hardware.
(3)
Media
Vision does not
and
cannot
warrant
the
performance
or
results
you
may
obtain
by
using
the
software.
hardware
or
docu-
mentation.
The
foregoing states
the
sole
and
exclusive
remedies
Media
Vision will provide for
breach
of warranty. Except
for
the
foregoing
limited
warranty.
Media
Vision
makes
no
warrants.
express
or
implied. as to non-infringement
of
third
party
rights.
merchantability.
or
fitness for
any
particular
purpose.
(4)
Some
states
do
notallow
the
exclusion
of
implied
warranties
or
limitations
on
how
long
an
implied
warranty
may
last. so
the
above
limitations
may
not
apply
to
you.
This
warranty
gives
you
specific
legal rights. You
may
have
other
rights
which
vary
from state to
state.
(5)
In
no
event
will
Media
Vision
be
liable to
you
for
any
conse-
quential
or
incidental damages. including
any
lost
profits
or
lost
savings.
even
if
a
Media
Vision representative
has
been
advised
of
the
possibility
of
such
damages.
or
for
any
claim
by
any
party.
(6)
Some
states
do
not allow
the
exclusion
of
limitation
of
inciden-
tal
or
consequential damages.
so
the
above limitation
or
exclusion
may
not
apply
to you.
Trademarks
Media
Vision. Pro AudioSpectrum 16
Mac.
Sound
Tools 16.
and
PAS
Mixer
are trademarks
of
Media
Vision. Inc.
Macintosh
is a reg-
istered
trademark ofApple Computer. Inc.
Indiana
Jones
and
the
Fate
of
Atlantis is a trademark
of
LucasArt. TRAXSequencer.
Quicktunes.
and
Audio
Producer
are trademarks
of
PassportSoft-
ware.
AlI
other
trademarks
and
registeredtrademarks
are
the
property
of
their
respective companies.
Credits
ProAudioSpectrum
16 Mac Installation Guidedesigned. written.
and
illustrated
by
Jim Rogers.
Book
design
and
layout
done
using
FrameMaker®. Artwork created
with
Adobe
IllustratorTM.

CONTENTS
GETTING STARTED 1
Computer
System
Requirements
.................................
2
Check
Package Contents
........................................
3
If
Anything
is
Missing
......................................
4
Handle
Contents Carefully!
..................................
4
Bundled
Software
..........................................
4
Registration &
Support
........................
·
.................
5
Send
in
Your Registration
Cards
..............................
5
Contacting
Media
Vision, Inc. .
...............................
5
Using
the
Bulletin
Board
....................................
6
HARDWARE SETUP 7
MACINTOSH II MODELS
.......................................
8
Remove
Computer
Cover
....................................
8
Discharge Yourself
.........................................
8
Select
a
NuBus
Slot
........................................
9
Remove
Slot
Covers
.......................................
10
Install PAS 16
Sound
Card
..................................
10
Re-Assemble Your
Macintosh
...............................
11
Connect Interface Cable
....................................
11
Position
Patch
Panel
.......................................
11
MACINTOSH
LC
.............................................
12
Remove
Computer
Cover
...................................
12
Discharge Yourself
........................................
12
Remove
Slot
Cover
........................................
13
Install PAS 16
Sound
Card
..................................
13
Replace
Cover
............................................
14
Connect
Interface Cable
....................................
14
Position
Patch
Panel
.......................................
14

CONTENTS
(cant.)
SOFTWARE INSTALLATION
15
Installing
Your
Software
.......................................
16
PAS 16
System
Extension
..................................
16
Joystick Control
Panel
.....................................
18
PAS 16
Mixer
Control
Panel
................................
19
Sound
Tools
16
Application
................................
20
USING YOUR PAS
16
Mac
EQUIPMENT
21
The
PatchPanel
.............................................
22
Joystick
Connector
........................................
22
Headphones
Connector
....................................
24
Mic
IN
Connector
.........................................
25
Stereo
IN Connectors
......................................
26
Stereo
OUT Connectors
....................................
27
MIDI Connectors
..........................................
28
SOUND THEORY
29
Principles
of
Sound
..........................................
30
Macintosh
Sounds
...........................................
31
Digitized
Sound
..........................................
31
Sound
Sampling
..........................................
32
Sound
Resolution
.........................................
33
LIST
OF
TABLES
Table
1
Table
2
Table 3
Supported
Models
......................................
2
Media
Vision
Telephone
Numbers
.........................
5
Pro
Audio
Spectrum
16
Mac
Specifications
.................
35

GETTING STARTED
Congratulations
on
your
purchase
ofPro AudioSpectrum
16
MACTM
(hereafter
called
PAS
16 Mac) from
Media
Vision, Incorporated.
This combination
of
hardware
and
software greatly
expands
the
capabilities
of
your
Macintosh computer.
For
example,
you'll
be
able to:
• Increase
the
quality
of
sound
input
and
output
for
your
Macintosh.
• Connecta
variety
of
other
devices
to
your
Macintosh
for
greaterflexibility
with
both
input
and
output
operations.
You
don't
need
to
know
much
about
sound,
or
the
way
your
Macintosh
uses
it,
to get
the
most
out
of
your
PAS
16
Mac. However,
if
you'd
like to
learn
a little
more about
sound
theories (such as digitizing
methods
and
sampling
rates),
take
a
few
minutes
and
read
SOUND THEORYbeginning
on
page 29.
This
guide explains
how
to install
your
PAS
16
Mac
hardware
and
software.
You'll also find instructions
for
using
your
new
equipment
-
such
as
how
to con-
nect
other
input
and
output
devices. Please follow all instructions
in
this guide
closelyto
ensure
that
your
PAS
16
Mac
equipment
works
properly.

GETTING
STARTED
2
Computer System Requirements
The
following
table
shows
the
Macintosh
models
you
can
use
with
your
PAS 16
Mac
system
and
the
type
of
expansion
slot
required
for
each:
Table 1 •
Supported
Models
Model Expansion
Slot
Requirement
LC ProcessorDirect
Slot
(PDS)
IIsi NuB
us
Perfonna
400
PDS
IIvx NuB
us
In
addition,
your
system
must
meet
all of
the
following requirements:
• You
must
be
running
either
System
7.0
or
later,
or
System
6.0.7.
• Your
Macintosh
must
have
a
minimum
of
4 megabytes (MB)
of
RAM
memory.
• Your
hard
disk
must
have
at
least
2 megabytes (MB)
of
free space.
• You
must
have
one
expansion
slot
available
inside
your
computer.
See
the
preceding
table
for
specific
requirements.

Check Package Contents
Check Package Contents
Make
sure
your
package contains
the
items
shown
here:
•
••
••••
••••
•
1 ea.
Patch
Panel
EITHER.
..
1 ea. NuBus Card
...
OR
1 ea.
LC
Card
1
ea.
Product
Disk
1
ea.
Interface Cable
NOTE:
Your
package
contains one
or
the
other
of
the
cards
shown here,
but
not both.
If
you
have a
Macintosh
LC,
you
need
the
LC
Card -otherwise.
you
need
the
NuBus
card
for
your Macintosh II-class
computer.
Utiliti
Guide
2
ea.
Software
Packages
and
Sound
Tools
16
User's
Guide
3

GETTING
STARTED
4
If
Anything
is
Missing
If
your
package
is
missing
any
of
the
items
shown
in
the
illustration
on
the
pre-
ceding page,
contact
our
Customer
SeIVice
Department.
See
Table 2, Media
Vision Telephone Numbers,
on
page
5.
Remember,
your
package
contains
only
one
of
the
Cards
shown
in
the
diagram.
Please
make
sure
you
have
the
correct
Card
for
your
particular
model
of
Macintosh.
Handle
Contents
Carefully!
Please
do
not
Wlwrap
your
NuBus
or
LC
Card
yet.
It's
wrapped
in
a
special
anti-
static
bag
and
you
should
not
open
the
bag
until
you're
ready
to
install
the
card
in
your
computer.
Bundled
Software
The
following
software
is
included
with
your
PAS
16
Mac:
Media
Vision's
Sound
Tools 16
is
a
program
for
recording, editing,
and
play-
ing
your
audio
files.
LucasArts IndianaJones
and
the Fate
of
Atlantis
is
a challenging
adventure
game
that
has
been
especially
modified
to
take
advantage
of
the
sound
syn-
thesis
available
on
your
PAS
16
Mac
equipment.
PassportDesign's
TRAX
Quicktunes
is
a collection of
standard
MIDI song
files
designed
for
use
in
multimedia
presentations;
Audio
Produceris a
pow-
erful
multimedia
player
that
incorporates
the
recording, editing,
and
play-
back
of
digital
audio,
MIDI,
and
CD
Audio
files.
If
You
Need Help
With
the Bundled Software...
If
you
need
help
with
the
games
or
other
software
included
with
PAS
16
Mac,
call
the
help
line
for
the
specific
piece
of
software
you
want
to
know
about.
You'll
find
the
help
line
telephone
numbers
in
the
individual
software
manuals.

Registration & Support
Registration & Support
Send
in
Your Registration
Cards
Before proceeding,
please
fill
out
and
mail
the
registration
card
enclosed
in
your
package.
As
a registeredPAS
16
Mac
owner
you
automatically
receive
the
latest
news
about
this
and
other
Media
Vision
products.
Also
fill
out
and
mail
the
registration
cards
included
with
each
of
the
software
packages
you
received
with
PAS
16
Mac.
This
entitles
you
to
receive
additional
benefits from
the
manufacturers
of
the
software.
Contacting Media Vision,
Inc.
Please
use
the
telephone
numbers
in
this
table
for
contacting
Media
Vision, Inc.
Table
2.
Media Vision Telephone
Numbers
Service
Phone
Number
Notes
Main
Phone
Number
Sales Office
Media
Vision Bulletin
Boards
(800) 348-7116
(510) 770-8600
(800) 845-5870
(510) 770-0968
-
or-
(510) 770-0527
Both
numbers
support
300
to
14,400
Baud
General
inquiries
and
information.
8 bits,
No
parity, 1
stop
bit.
Assign
your
own
Account
Name
and
Password.
5

GETTING
STARTED
6
Using
the
Bulletin
Board
If
you
are calling
the
Bulletin
Board
(BBS) for
the
first time, just
answer
the on-
screen questions
and
create
your
own
password. You
can
then
download
infor-
mation
about
your
PAS
16
Mac
system.
Here's
an
example showing
how
to
use
the
BBS
to
download
a hypothetical file
named
SAMPLE.SIT:
At
the
Main
Menu,
choose
F
for
Files.
At
the
Files
Menu,
choose
D
for
Download.
Enter
the
file
name
SAMPLE.SIT
and
press
Return.
At
this
point
you
must
tell
your
communications software to
download
the file.
Refer to
your
communications software's
manuals
for
the
proper
steps.

HARDWARE SETUP
This
section
shows
how
to
set
up
the
hardware
components
you
received
with
your
PAS
16
Mac
package.
Take
a
few
moments
to
study
this
section
before
beginning
the
actual
installation.
The
installation
process
is
easiest
if
you
have
a
general
understanding
of
the
steps
you
need
to
complete
before
you
begin.
If
you're
installing
your
PAS 16
Mac
equipment
on
a
Macintosh
II
-model
computer,
follow
the
instructions
on
page
8 through.
page
11.
The
instructions
specifically
describe
installation
on
a
Macintosh
IIci;
however,
the
procedures
vmy
only
slightly
from
one
model
to
another.
Have
your
Owner's
Manual
handy
for
reference.
If
you're
installing
your
equipment
on
a
Macintosh
LC,
the
steps
differ
slightly
from
those
for
the
Macintosh
II-model
machines.
You
should
follow
the
instructions
beginning
on
page
12.
And,
have
your
Owner's
Manual
handy
for
reference.

HARDWARE
SETUP
Screw
attaching cover
to
chassis
Pull
rear
of
cover
up
and toward
you
8
MACINTOSH
II
MODELS
Remove Computer Cover
Shut
down
your
computer
system
and
turn
the
power
OFF to all of
your
equipment.
Leave
the
power
cord
connected
between
your
computer
and
the
power
outlet
to
help
ground
your
equipment.
1 Working from
the
rear
of
your
Macintosh,
remove
the
screw
that
attaches
the
cover
to
the
chassis.
Put
the
screw
where
you
can
find
it
later.
2
On
the
rear
side of
the
cover
are
two
plastic
handles.
Working from
the
front
of
your
computer, lift
up
on
the
two
handles
to
unsnap
the
cover
from
the
chassis.
3
Pull
the
rear
part
of
the
cover
straight
up
and
slightly
toward
you
to
an
angle of
about
75°.
4
Gently
work
the
tabs
holding
the
cover
to
the
front
panel
out
of
their
slots.
Then
set
the
cover
aside safely
out
of
your
way.
Discharge Yourself
CAUTION!
Power
Supply
might
be
hot.
With
your
hand,
lightly
touch
the
power
supply
unit
inside
your
computer.
This
disperses
any
static electricity
that
might
be
present
in
your
body
and
prevents
damage
to
your
equipment.

Motherboard
'----
NuBus Slots
Power Switch
MACINTOSH
II
MODELS
Select
a
NuBus
Slot
Look
straight
down
inside
your
computer
chassis
and
you're
looking
at
the
motherboard.
Find
the
NuBus
slots
on
the
left
side
of
the
motherboard.
Some
slots
might
already
be
in
use.
You
need
a
NuBus
slot
to
install
your
PAS
16
Sound
Card.
If
you
don't
have
a
NuBus
slot available,
or
if
you
want
to
switch
an
existing
card
to a
different slot,
complete
the
steps
below.
Otherwise,
determine
which
slot
you
want
to
use
and
proceed
to
the
next
step,
Remove
Slot
Covers
on
page
10.
t
Determine
which
NuBus
slot
you
want
to
use.
2
Check
for
any
cables
connected
to
the
card
on
the
rear
panel,
or
connected
to
the
motherboard,
or
connected
to
other
com-
ponents.
If
there
are any,
disconnect
them.
3
If
there
is
a
screw
holding
the
card
in
place,
remove
it.
4 Grasp
the
card
by
its
top
edges
and
pull
finnly
but
gently
straight
up
to
disconnect
the
card
from
the
NuBus
slot.
5
Make
sure
you
haven't
left
any
screws
or
other
metals
objects
inside
the
chassis,
and
then
locate
the
Power
Switch
on
the
rear
panel.
Press
the
Power
Switch
to
restart
your
Macintosh.
You
don't
need
to
replace
the
cover
or
monitor
for this step.
However,
you
must
restart
in
order
to
reset
the
NuBus
from
the
settings
on
the
card
you
just
removed.
6 Wait
about
10
seconds
and
then
press
the
Power
switch
to
turn
your
Macintosh
off
again.
If
you
plan
to
reinstall
the
card
you
just
removed
in
a different slot,
install
your
PAS
16
Sound
Card
first,
and
then
re-install
the
card
you
just
removed.
9

HARDWARE
SETUP
This
connector
is
designed
to
fit
over a
NuBus
slot.
10
Remove Slot Covers
Corresponding
to
the
NuBus
slot
you've
selected,
there
might
be
a
metal
plate
covering
the
opening
at
the
rear
of
the
chassis.
If
necessary,
remove
the
metal
plate.
There
might
also
be
a plastic
cover
over
the
opening
on
the
other
side.
If
it's present,
remove
it
by
pushing
it
out
from
the
inside
of
the
chassis.
Install PAS 16 Sound Card
Note
the
connector
at
the
bottom
of
the
card.
It
is
designed
to
fit snugly
over
one
of
your
NuBus
slots.
1
Hold
your
PAS 16
Sound
Card
by
its
top
edges
and
carefully
position
it
over
the
NuBus
slot
so
that
the
connector
on
the
card
aligns
with
the
slot.
2 Install
the
card
by
pushing
it
down
gently
so
that
the
connector
seats
fully
over
the
NuBus
slot.
Do
not
force
the
connectors
into
the
slot.
Carefully align
the
connectors
with
the
slot
and
finnly,
but
gently,
push
the
card
down.
If
you
encounter
undue
resistance,
remove
the
card, realign
it,
and
try
again.

Interface
Cable-
Patch
Panel •
•• •
••••
••••
_.
MACINTOSH
II
MODELS
Re-Assemble Your Macintosh
The
inside
front
part
of
your
cover
has
two
plastic tabs
on
either
side
that
fit
into
two
matching
slots
on
the
front
edge of
the
chassis.
1
Check
to
make
sure
you
haven't
left
any
loose
screws
or
other
metal
objects
inside
your
chassis.
2
Hold
the
cover
in
place, align
the
two
tabs
with
their
matching
slots,
and
insert
the
tabs
into
the
slots.
3
Lower
the
rear
part
of
the
cover
and
snap
it
into
place
against
the
rear
panel
of
the
chassis.
4 Replace
the
screw
you
removed
earlier
to
attach
the
cover
to
the
chassis.
Connect Interface Cable
Locate
the
Patch
Panel
and
Interface Cable
in
your
PAS
16
Mac
package.
1
Attach
one
end
of
the
InterfaceCable
to
the
connector
on
the
rear
of
your
PAS
16
Sound
Card,
which
is
now
visible
at
the
rear
panel
of
your
Macintosh.
2
Attach
the
other
end
of
the
Interface Cable
to
the
matching
connector
found
on
one
end
of
your
Patch
Panel.
Position Patch Panel
You
can
position
your
Patch
Panel
anywhere
that
suits
you.
Until
you've
used
it
for a
while
and
decided
which
devices
you
want
to
keep
connected
most
of
the
time,
you'll
probably
want
to
keep
it
in
a
readily
accessible spot.
Installation
of
your
PAS
16
Mac
equipment
is
complete.
Be
sure
to
re-connect
all
power
cords
and
cables,
and
then
turn
to
page
15
to
install
your
software.
11

HARDWARE
SETUP
12
Screw
attaching
cover
to
chassis
Lift
the
cover straight
up
and
away from
the
chassis
MACINTOSH
LC
Remove Computer Cover
Shut
down
your
computer
system
and
turn
the
power
OFF
to all of
your
equipment.
Leave
the
power
cord
connected
between
your
computer
and
the
power
outlet
to
help
ground
your
equipment.
1 Working from
the
rear
of
your
Macintosh,
remove
the
screw
that
attaches
the
cover
to
the
chassis.
Put
the
screw
where
you
can find
it
later.
2
On
the
rear
side
of
the
cover
are
two
plastic
handles.
Working from
the
front of
your
computer, lift
up
on
the
two
handles
to
unsnap
the
cover
from
the
chassis.
3 Lift
the
cover
straight
up
and
away
from
the
chassis.
Then
set
the
cover
aside safely
out
of
your
way.
Discharge Yourself
Locate
any
unpainted,
metal
surface
inside
your
Macintosh
and,
with
your
hand,
lightly
touch
the
metal
surface.
This
disperses
any
static electricity
that
might
be
present
in
your
body
and
prevents
damage to
your
equipment.
CAUTION!
Surfaces
might be
hot.

~=
.....
=
....
=J
R'm~
""
,'ot
ow",
by
J
pushing
it
out
from
the
inside
of
your
Macintosh
This connector
plugs into your PDS
---------,
Expansion Slot
MACINTOSH
LC
Rem
ave
Slot Cover
On
the
rear
panel
of
your
Macintosh
LC
you'll
find
a plastic
cover
over
the
access
port
to
your
PDS
expansion
slot. You
must
remove
the
cover
to
have
access to
the
connector
on
your
PAS 16
Sound
Card
after
it
is
installed.
To
remove
the
cover,
reach
inside
the
chassis
and
push
it
out
from
the
inside.
Install PAS 16 Sound Card
VVAI3N.ING!
Handle your Card
dare
fully
.
AV9iqtpucbipg apy
9fttw.connectionpor
tfle
.•..
blJipsi9h
the.
datd.
Note
the
connector
at
the
bottom of
the
card.
It
is
designed
to
plug
into
the
PDS
expansion
slot
inside
your
Macintosh
LC.
t
Hold
your
PAS
16
Sound
Card
by
its edges
and
carefully
position
it
over
the
PDS
slot
so
that
the
connector
on
the
card
aligns
with
the
slot.
2 Install
the
card
by
pushing
it
down
gently.
The
connector
must
seat
fully
over
the
PDS
slot,
and
the
connector
on
the
rear
of
the
card
must
fit
into
the
expansion
slot
open-
ing
you
made
available
in
the
previous
step.
This
connector
must
be
accessible
at
the
rear
of
your
computer
so
you
can
con-
nect
your
PatchPanel
in
a
later
step.
Do
not
force
the
connectors into
the
slot.
Carefully
align
the
connectors
with
the
slot
and
firmly,
but
gently,
push
the
card
down.
If
you
encounter
undue
resistance,
remove
the
card, realign it,
and
try
again.
13

HARDWARE
SETUP
Interface Cable
~
Patch Panel
14
• •
•••
••••
••••
-.
Replace Cover
The
inside
front
part
of
your
cover
has
two
plastic
tabs
on
either
side
that
fit
into
two
matching
slots
on
the
front
edge of
the
chassis.
1
Hold
the
cover
in
place, align
the
two
tabs
with
their
matching
slots,
and
insert
the
tabs
into
the
slots.
2
Lower
the
rear
part
of
the
cover
and
snap
it
into
place
against
the
rear
panel
of
the
chassis.
3 Replace
the
screw
you
removed
earlier
to
attach
the
cover
to
the
chassis.
Connect Interface Cable
Locate
the
Patch
Panel
and
Interface Cable
in
your
PAS
16
Mac
package.
1
Attach
one
end
of
the
InterfaceCable to
the
connector
on
the
rear
of
your
PAS
16
Sound
Card,
which
is
now
visible
on
the
rear
panel
of
your
Macintosh
LC.
2
Attach
the
other
end
of
the
Interface Cable
to
the
connector
found
on
one
end
of
your
Patch
Panel.
Position Patch Panel
You
can
position
your
Patch
Panel
anywhere
that
suits
you.
Until
you've
used
it
for
a
while
and
decided
which
devices
you
want
to
keep
connected
most
of
the
time,
you'll
probably
want
to
keep
it
in
a
readily
accessible spot.
Installation
of
your
PAS 16
Mac
equipment
is
complete.
Be
sure
to re-connect all
power
cords
and
cables,
and
then
go
to
page
15
to
install
your
software.

PAS
16
Mac
Product
Disk
SOFTWARE INSTALLATION
Your PAS
16
Mac
Product
Disk
contains
the
software
you
need
to
operate
your
equipment.
NOTE:
Please
make
a
copy
of
your
PAS
16
Mac
Product
Disk.
Store
your
origi-
nal
disk
in
a
safe
place
and
use
your
copy
from
here
on.
Insert
the
copy
of
your
Product
Disk
into
your
disk
drive
and,
if
necessal)',
open
the
disk's
window
by
double-clicking
the
disk
icon
on
your
desktop.
Your
disk
should
contain
the
items
shown
here:
~
[IlJ
PAS16
Mixer
JoyStick
~
PAS16 Sound Tools
16

SOFlWARE
INSTALLATION
16
Installing Your Software
This
section briefly describes
the
software
components
found
on
your
Product
Disk
and
also
explains
how
to
install
each
one.
PAS
16
System
Extension
This
software
component
is
required.
It
is a
System
Extension (or, INIT)
and
it
must
be
installed
in
your
System
Folder. PAS 16 contains
the
software necessaIY
to
control
the
functions
on
your
PAS 16
Mac
Patch
Panel.
Once
installed, PAS
16
loads
automatically
during
startup,
and
you
see
the
PAS
16 icon
appear
momentarily
at
the
bottom
of
your
screen.
To
install
the
PAS
16
System Extension:
1
Select
the
PAS 16
icon
and
drag
it
on
top
of
your
System
Folder
icon.
Then,
release
the
mouse
button.
~
---~
(PI
PAS16
System
Folder
If
you're
using
System
7.0
or
later, a dialog
box
appears
asking
if
you
want
to install
this
component
in
your
Extensions
folder. Click
OK
to
copy
PAS
16
to
that
folder.
If
you're
using
System
6.0.7,
the
PAS
16
INIT copies directly
into
your
System
Folder.
2 Restart
your
Macintosh
so
that
the
PAS
16
system
extension
is
able to
load
into memory.
If
you
prefer,
you
can
wait
until
after
you've
installed
the
other
PAS 16
Mac
software (as
explained
in
the
remainder
of
this
section)
before
restarting.
Resolving Conflicts between System Extensions
If
you
load
other
system
extensions
during
startup,
one
or
more
of
them
might
conflict
with
PAS
16
and
cause
your
Macintosh
to
malfunction
in
various
ways.
If
you
experience
such
problems
after
installingPAS 16,
you
need
to
isolate
your
system
extensions
to
determine
which
one
is
causing
the
problem.
The
follow-
ing
steps
explain
how
to
do
this.
This manual suits for next models
1
Table of contents
Popular Sound Card manuals by other brands

SIIG
SIIG DP SoundWave 7.1 PCIe Quick installation guide
RME Audio
RME Audio DIGI96/8 PAD user guide

Digitus
Digitus DS-33700 user manual
Digigram
Digigram VX442e user manual
Phoenix Sound Systems
Phoenix Sound Systems PHOENIX BIG SOUND Special instructions for installation and use

Creative
Creative Sound Blaster Live! Getting started
