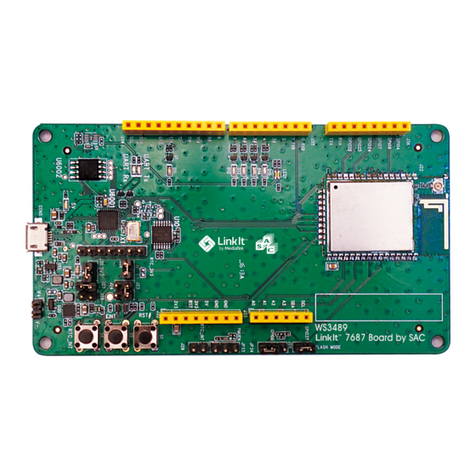
Mediatek Labs LinkIt Connect 7681 Instruction Manual

© 2015 M e di aTe k In c .
This document contains information that is proprietary to MediaTek Inc.
Unauthorized reproduction of this information in whole or in part is strictly prohibited.
M
MediaTek LinkIt™ Connect 7681
Developer's Guide
Version: 1.2
Release date: 12
th
May 2016
Specifications are subject to change without notice.

MediaTek LinkIt™ Connect 7681 Developer's Guide
© 2015, 2016 MediaTek Inc.
Page i of iv
This document contains information that is proprietary to MediaTek Inc.
Unauthorized reproduction or disclosure of this information in whole or in part is strictly prohibited.
Document Revision History
Revision
Date
Description
1.0 3rd January 2015 Initial release
1.0 31st January 2015 Update to code in 2.4.1, “Code your firmware”
Correction to path names in 3.1, “make”
Typo in FOTA FW description Appendix A
1.1 23rd January 2016 Updated instructions in 2.2.1, “Installing Cygwin”
Updated instructions in 2.4.3.1 “Uploading the firmware from
Windows”
Correction to the code in 5.3.1, “Creating a TCP client that
connects to a remote TCP server” and 5.3.2, “Create a TCP
server and allow others to connect”.
1.2 12th May 2016 Updated commands with long dash with “-” throughout.

MediaTek LinkIt™ Connect 7681 Developer's Guide
© 2015, 2016 MediaTek Inc.
Page ii of iv
This document contains information that is proprietary to MediaTek Inc.
Unauthorized reproduction or disclosure of this information in whole or in part is strictly prohibited.
Table of Contents
1.
Introduction.....................................................................................................................................................1
1.1. MediaTek MT7681 ............................................................................................................................................... 1
1.2. MediaTek LinkIt™ Connect 7681 Development Platform................................................................ 2
1.3. MediaTek LinkIt Connect 7681 SDK........................................................................................................... 2
1.4. LinkIt Connect 7681 HDK ................................................................................................................................4
1.5. Join Our Ecosystem .......................................................................................................................................... 5
2.
Getting started ..............................................................................................................................................6
2.1. Environment ........................................................................................................................................................ 6
2.2. Installing MediaTek LinkIt Connect 7681 SDK for Windows .......................................................... 7
2.3. Installing MediaTek LinkIt Connect 7681 SDK for Linux ................................................................ 15
2.4. Your First Project............................................................................................................................................. 15
3.
Tools guide.................................................................................................................................................... 21
3.1. make ...................................................................................................................................................................... 21
3.2. Firmware uploader.......................................................................................................................................... 21
3.3. Additional tools................................................................................................................................................22
4.
Programming Guide...................................................................................................................................23
4.1. Creating software projects .........................................................................................................................23
4.2. Source File Structure.................................................................................................................................... 24
4.3. Firmware boot up flow..................................................................................................................................27
4.4. User callbacks .................................................................................................................................................. 29
4.5. Wi-Fi State Machine (Station mode).......................................................................................................32
4.6. API Interface Guide ........................................................................................................................................ 34
4.7. Smart Connection Guide ............................................................................................................................. 36
5.
Using the APIs .............................................................................................................................................. 41
5.1. Connecting MT7681 to an AP...................................................................................................................... 41
5.2. Configuring MT7681 as an AP.................................................................................................................... 43
5.3. Using uIP for TCP/IP operations............................................................................................................... 44
6.
Troubleshooting ........................................................................................................................................ 50
6.1. Compile Errors ................................................................................................................................................. 50
6.2. Firmware upload errors ................................................................................................................................ 51
6.3. Use Log to debug............................................................................................................................................ 52
6.4. Unresponsive board........................................................................................................................................57
Appendix A
Flash Layout .................................................................................................................. 58

MediaTek LinkIt™ Connect 7681 Developer's Guide
© 2015, 2016 MediaTek Inc.
Page iii of iv
This document contains information that is proprietary to MediaTek Inc.
Unauthorized reproduction or disclosure of this information in whole or in part is strictly prohibited.
Lists of tables and figures
Table 1 The interface APIs of MT7681................................................................................................................................4
Table 2 The Internet APIs of MT7681.................................................................................................................................4
Table 3 The Wi-Fi functions of MT7681 ............................................................................................................................4
Table 4 Key specifications of the LinkIt Connect 7681 development board...................................................5
Table 5 Key specifications of the LinkIt Connect 7681 module ............................................................................5
Table 6 uploader command switches............................................................................................................................. 21
Table 7 Source files stored in the root folder............................................................................................................. 25
Table 8 Content of the customizable folder .............................................................................................................. 26
Table 9 The build configuration settings files........................................................................................................... 26
Table 10 The four MT7681 software images.................................................................................................................27
Table 11 Parameters of StartSmartConnection API................................................................................................. 36
Table 12 Return value of StartSmartConnection API..............................................................................................37
Table 13 Return value of StopSmartConnection API...............................................................................................37
Table 14 MT7681 Flash Layout (XIP=60KB)................................................................................................................... 61
Table 15 MT7681 Flash Layout (XIP Region=164KB)................................................................................................. 62
Table 16 Common Config (0x11000)................................................................................................................................ 63
Table 17 Station Mode Config/Setting........................................................................................................................... 64
Table 18 AP Mode Config/Setting.................................................................................................................................... 65
Table 19 User Config/Setting ............................................................................................................................................. 65
Figure 1 Block diagram of the MT7681 ...............................................................................................................................1
Figure 2 The software architecture of the MT7681 ....................................................................................................3
Figure 3 Cygwin Net Release Setup Program welcome screen............................................................................ 7
Figure 4 Choosing the installation type in the Cygwin setup dialog.................................................................. 7
Figure 5 Accept the default installation settings.......................................................................................................8
Figure 6 Define where the downloads packages will be stored...........................................................................8
Figure 7 Use the direct connection unless you access the Internet using a proxy .....................................9
Figure 8 Select a nearby mirror site from which to download..............................................................................9
Figure 9 The installer downloads information about Cygwin.............................................................................10
Figure 10 Select the make and gcc-core packages...................................................................................................10
Figure 11 Selecting make and gcc-core packages....................................................................................................... 11
Figure 12 Details of any dependent packages are shown ..................................................................................... 12
Figure 13 The progress of download and installation is displayed ................................................................... 12
Figure 14 Any post install script errors are displayed.............................................................................................. 13
Figure 15 Click Finish to complete the installation .................................................................................................. 13
Figure 16 Compiling the MT7681 firmware on Linux................................................................................................. 17
Figure 17 Connect the LinkIt Connect 7681 development board to a USB cable........................................18
Figure 18 The connected COM port identified in Device Manager..................................................................... 18
Figure 19 Example of the source files folder structure on Windows.............................................................. 24
Figure 20 The boot sequence of MT7681 ..................................................................................................................... 28

MediaTek LinkIt™ Connect 7681 Developer's Guide
© 2015, 2016 MediaTek Inc.
Page iv of iv
This document contains information that is proprietary to MediaTek Inc.
Unauthorized reproduction or disclosure of this information in whole or in part is strictly prohibited.
Figure 21 The flow of callback function in MT7681..................................................................................................30
Figure 22 The Wi-Fi state machine.................................................................................................................................. 34
Figure 23 The UI of the IoT Manager app.......................................................................................................................37
Figure 24 The position of the AP setting in Flash .................................................................................................... 43
Figure 25 The reset switch on the LinkIt Connect 7681 development board.............................................. 52

MediaTek LinkIt™ Connect 7681 Developer's Guide
© 2015, 2016 MediaTek Inc.
Page 1 of 65
This document contains information that is proprietary to MediaTek Inc.
Unauthorized reproduction or disclosure of this information in whole or in part is strictly prohibited.
1.
Introduction
There is an increasing trend towards connecting every imaginable electrical or electronic device
found in the home. For many of these applications developers simply want to add the ability to
remotely control a device — turn on a table lamp, adjust the temperature setting of an air-
conditioner or unlock a door.
The MediaTek MT7681 chipset is designed to fulfil this need.
1.1.
MediaTek MT7681
The MediaTek MT7681 is a compact Wi-Fi System-on-Chip (SoC) with embedded TCP/IP stack for
IoT devices. By adding the MT7681 to an IoT device it can connect to other smart devices or to
cloud applications and services.
Connectivity on the MT7681 is achieved using Wi-Fi, in either Wi-Fi station or access point (AP)
mode.
In Wi-Fi station mode, MT7681 connects to a wireless AP and can then communicate with web
services or cloud servers. A typical use of this option would be to enable a user to control the
heating in their home from a home automation website.
To simplify the connection of an MT7681 chip to a wireless AP in Wi-Fi station mode, the MediaTek
Smart Connection APIs are provided. These APIs enable a smart device app to remotely provision
a MT7681 chip with AP details (SSID, authentication mode and password).
In AP mode, an MT7681 chip acts as an AP, enabling other wireless devices to connect to it directly.
Using this mode, for example, the developer of a smart light bulb could offer users a smartphone
application that enables the bulbs to be controlled from within the home.
To control the device an MT7681 is incorporated into, the chip provides five GPIO pins and one
UART port. In addition PWM is supported in software, for applications such as LED dimming.
A block diagram illustrating the components of the chipset is shown in Figure 1.
Figure 1 Block diagram of the MT7681

MediaTek LinkIt™ Connect 7681 Developer's Guide
© 2015, 2016 MediaTek Inc.
Page 2 of 65
This document contains information that is proprietary to MediaTek Inc.
Unauthorized reproduction or disclosure of this information in whole or in part is strictly prohibited.
Key features of the MT7681 chipset:
•Wi-Fi station and access point (AP) modes
•802.11b/g/n (in station mode) and 802.11b/g (in AP mode)
•TCP/IP stack
•5 GPIO pins and 1 UART port
•software PWM emulation for LED dimming
•firmware upgrade over UART, APIs for FOTA implementation
1.2.
MediaTek LinkIt™ Connect 7681 Development Platform
To enable developers and makers to take advantage of the features of the MT7681 chipset,
MediaTek Labs offers the MediaTek LinkIt Connect 7681 development platform, consisting of an
SDK, HDK and related documentation.
For software development the SDK is provided for Microsoft Windows and Ubuntu Linux. Based on
the Andes Development Kit, the MediaTek LinkIt Connect 7681 SDK enables developers to compile
and upload firmware to control an IoT device in response to instructions received wirelessly.
For IoT device prototyping, the LinkIt Connect 7681 HDK delivers the LinkIt Connect 7681
development board. The development board consists of a LinkIt Connect 7681 module, micro-USB
port and pins for each of the I/O interfaces of the MT7681 chipset. This enables you to quickly
connect external hardware and peripherals to create device prototypes. The LinkIt Connect 7681
module, which measures just 15 x 18mm, is designed to easily mount on a PCB as part of
production versions of the IoT device.
1.3.
MediaTek LinkIt Connect 7681 SDK
To enable the development of software for MediaTek LinkIt Connect 7681 development platform
an SDK is provided for Microsoft Windows and Ubuntu Linux. The SDKs can be downloaded from
the MediaTek website.
The MediaTek LinkIt Connect 7681 SDK, based on the Andes Development Kit, enables you to
create firmware to control an IoT device in response to instructions received wirelessly over a WiFi
connection.
The key features of the MediaTek LinkIt Connect 7681 SDK are:
•libraries for all the MT7681 APIs, including MediaTek Smart Connection and FOTA firmware
updates
•C-like language
•command line compiler, based on Andes Development Kit:
oLinux tool chain package: Andes_Linux_BSP320_Toolchains.tgz
oWindows tool chain package: Andes_Windows_Toolchains.rar
•firmware upload tool
•source and binary code for MT7681 firmware
•MediaTek Smart Connection app (IoT Manager) with examples for Android and iOS,
including source code

MediaTek LinkIt™ Connect 7681 Developer's Guide
© 2015, 2016 MediaTek Inc.
Page 3 of 65
This document contains information that is proprietary to MediaTek Inc.
Unauthorized reproduction or disclosure of this information in whole or in part is strictly prohibited.
•example source code : IoT Server, AT Command Parser, Data Command Parser and X-
Modem
•versions available for Microsoft Windows (requires Cygwin) and Ubuntu Linux
1.3.1.
Software Architecture
The software architecture of the MT7681 provides for access to its hardware features through
four APIs — Wi-Fi API, Security API, Interface API and Control API — as shown in Figure 2.
Figure 2 The software architecture of the MT7681
The SDK includes this software stack as:
•binary releases for the Wi-Fi protocol stack (including station mode, AP mode and
authentication protocols) and the I/O interface control.
•source code release for all the other elements in the architecture, including TCP/IP stack,
UART data parser and alike.

MediaTek LinkIt™ Connect 7681 Developer's Guide
© 2015, 2016 MediaTek Inc.
Page 4 of 65
This document contains information that is proprietary to MediaTek Inc.
Unauthorized reproduction or disclosure of this information in whole or in part is strictly prohibited.
1.3.2.
API Function Overview
The functions provided in each API are outlined in Table 1, Table 2 and Table 3. For full API and
function descriptions please refer to the MediaTek LinkIt Connect 7681 API Reference.
Interface API
SPI read/write Read and write data from and to the built-in Flash memory through a SPI
interface.
UART Read and write data from and to the UART interface.
GPIO Control the mode and state of five GPIO pins.
PWM Provide simple PWM functionality on all five GPIO pins.
Table 1 The interface APIs of MT7681
Internet API
TCP/IP TCP/IP stack functions.
UDP UDP protocol functions.
FOTA Provide Firmware Over The Air (FOTA) features, enabling wireless firmware
upgrades.
Table 2 The Internet APIs of MT7681
Wi-Fi Functions
WEP/WPA Wi-Fi security authentication functions.
Table 3 The Wi-Fi functions of MT7681
1.4.
LinkIt Connect 7681 HDK
The LinkIt Connect 7681 development board, co-designed with Seeed Studio, provides easy access
to the five GPIO pins and one UART port — each with an LED — of the MT7681, to quickly connect
peripheral controllers and electronic circuits. The MT7681 is provided on the LinkIt Connect 7681
module, which was co-designed with AcSiP. This module, which is only 15 x 18mm, will also be
available separately for direct integration into your product’s PCB.
Key features of the LinkIt Connect 7681 development board:
•access to the five GPIO pins and one UART port provided by MT7681, with attached LEDs
•access t0 the UART port from the USB port.
•Wi-Fi antenna integrated on LinkIt Connect 7681 module
•power over USB (Micro USB port)
•open source hardware board reference design, including schematic, layouts, and pin
details.
The LinkIt Connect 7681 development board will be available from Seeed Bazaar.

MediaTek LinkIt™ Connect 7681 Developer's Guide
© 2015, 2016 MediaTek Inc.
Page 5 of 65
This document contains information that is proprietary to MediaTek Inc.
Unauthorized reproduction or disclosure of this information in whole or in part is strictly prohibited.
The key specifications of the LinkIt Connect 7681 development board are shown in Table 4.
Category
Feature
Spec
PCB Size 50 x 31 mm
Power USB 5V Input (micro USB)
GPIO Pins Pin Count
Voltage
5
3.3v
GPIO LEDs 5
UART Set Count
Voltage
1
3.3v
UART LEDs 2 (TX/RX)
Table 4 Key specifications of the LinkIt Connect 7681 development board
The key specifications of the LinkIt Connect 7681 module are shown in Table 5.
Category
Feature
Spec
Microcontroller
Chipset
Core
Clock Speed
MT7681
ANDES N9
80MHz
Module Size 15 x 18 mm
Memory Flash
RAM
1MB
64KB
Power Operate voltage 3.3v
GPIO Pins Pin Count
Voltage
5
3.3v
PWM Output Pins Pin Count
Voltage
PWM levels
5
3.3v
0~20
UART Set Count
Voltage
1
3.3v
Wi-Fi Spec Station mode
Access point (AP) mode
802.11 b/g/n
802.11 b/g
Table 5 Key specifications of the LinkIt Connect 7681 module
1.5.
Join Our Ecosystem
Wearables and Internet of Things are the next wave in the consumer gadget revolution. MediaTek
is a key player in this field, combining the best of two worlds —the existing MediaTek ecosystem
of phone manufacturers, electronic device manufacturers, and telecom operators combined with
the open, vibrant maker community world.
No matter whether you’re a maker, device manufacturer, student, DIY hobbyist, or programmer,
you can use this powerful yet simple platform to create something innovative. You can join the
MediaTek LinkIt ecosystem by registering on labs.mediatek.com, we look forward to you joining
our ecosystem and creating something great together.

MediaTek LinkIt™ Connect 7681 Developer's Guide
© 2015, 2016 MediaTek Inc.
Page 6 of 65
This document contains information that is proprietary to MediaTek Inc.
Unauthorized reproduction or disclosure of this information in whole or in part is strictly prohibited.
2.
Getting started
This section provides a guide to getting started with the MediaTek LinkIt Connect 7681
development platform and covers:
•the supported environments for development.
•installing and configuring the MediaTek LinkIt Connect 7681 SDK.
•creating your first project.
2.1.
Environment
Currently MediaTek LinkIt Connect 7681 SDK supports Microsoft Windows and Ubuntu Linux
platforms.
2.1.1.
Microsoft Windows
To run MediaTek LinkIt Connect 7681 SDK for Windows the Cygwin environment is needed. Cygwin
is a large collection of GNU and Open Source tools that provide functionality similar to a Linux
distribution on Microsoft Windows. Cygwin is available for all recent, commercially released x86
32-bit and 64-bit versions of Windows, starting with Windows XP SP3. Using the latest version of
Cygwin is recommended.
In addition, a tool to unpack RAR archives is required.
2.1.2.
Ubuntu Linux
MediaTek LinkIt Connect 7681 SDK for Linux requires Ubuntu Linux. Any version can be used,
however the latest LTS version is recommended.

MediaTek LinkIt™ Connect 7681 Developer's Guide
© 2015, 2016 MediaTek Inc.
Page 7 of 65
This document contains information that is proprietary to MediaTek Inc.
Unauthorized reproduction or disclosure of this information in whole or in part is strictly prohibited.
2.2.
Installing MediaTek LinkIt Connect 7681 SDK for Windows
2.2.1.
Installing Cygwin
Download the appropriate Cygwin installation package to match your Windows environment from
the Cygwin website: namely setup-x86.exe for 32-bit machines or setup-x86-64.exe for 64-bit
machines.
Open the downloaded installation package. In the welcome screen, see Figure 3, click Next.
Figure 3 Cygwin Net Release Setup Program welcome screen
In the Choose A Download Source screen, see Figure 4, choose Install from Internet and click
Next,
Figure 4 Choosing the installation type in the Cygwin setup dialog

MediaTek LinkIt™ Connect 7681 Developer's Guide
© 2015, 2016 MediaTek Inc.
Page 8 of 65
This document contains information that is proprietary to MediaTek Inc.
Unauthorized reproduction or disclosure of this information in whole or in part is strictly prohibited.
In the Select Root Install Directory screen, see Figure 5, click Next to accept the default setting.
Figure 5 Accept the default installation settings
In the Select Local Package Directory screen, see Figure 6, click Next to accept the default
location.
Figure 6 Define where the downloads packages will be stored

MediaTek LinkIt™ Connect 7681 Developer's Guide
© 2015, 2016 MediaTek Inc.
Page 9 of 65
This document contains information that is proprietary to MediaTek Inc.
Unauthorized reproduction or disclosure of this information in whole or in part is strictly prohibited.
In the Select Your Internet Connection screen, see Figure 7, define your proxy if you use one
otherwise use Direct Connection and click Next.
Figure 7 Use the direct connection unless you access the Internet using a proxy
In the Choose A Download Site screen, see Figure 8, select a mirror site: for the best download
speed select a site that you think is nearby. Click Next.
Figure 8 Select a nearby mirror site from which to download

MediaTek LinkIt™ Connect 7681 Developer's Guide
© 2015, 2016 MediaTek Inc.
Page 10 of 65
This document contains information that is proprietary to MediaTek Inc.
Unauthorized reproduction or disclosure of this information in whole or in part is strictly prohibited.
The installer now downloads details and displays progress in the Progress screen, see Figure 9.
Figure 9 The installer downloads information about Cygwin
In the Select Package screen, select the make and gcc-core packages from the Devel category
leaving other items at their default settings.
Figure 10 Select the make and gcc-core packages

MediaTek LinkIt™ Connect 7681 Developer's Guide
© 2015, 2016 MediaTek Inc.
Page 11 of 65
This document contains information that is proprietary to MediaTek Inc.
Unauthorized reproduction or disclosure of this information in whole or in part is strictly prohibited.
The easiest way to select make and gcc-code is by expanding Devel and scrolling down to find
gcc-core first and then make (the packages are listed alphabetically) as shown in Figure 11. Don’t
use the search filter.
Figure 11 Selecting make and gcc-core packages

MediaTek LinkIt™ Connect 7681 Developer's Guide
© 2015, 2016 MediaTek Inc.
Page 12 of 65
This document contains information that is proprietary to MediaTek Inc.
Unauthorized reproduction or disclosure of this information in whole or in part is strictly prohibited.
Click Next. The Resolving Dependencies screen, see Figure 12, displays showing details of any
dependent packages for your selection, click Next.
Figure 12 Details of any dependent packages are shown
The Progress screen, see Figure 13, shows the progress of the download and installation of your
selected components. When installation has completed, click Next.
Figure 13 The progress of download and installation is displayed

MediaTek LinkIt™ Connect 7681 Developer's Guide
© 2015, 2016 MediaTek Inc.
Page 13 of 65
This document contains information that is proprietary to MediaTek Inc.
Unauthorized reproduction or disclosure of this information in whole or in part is strictly prohibited.
The Postinstall Script Errors screen, see Figure 14, may display with details of any issues with the
installation. Review any issues and determine what if any action you need to take, if any. Click
Next.
Figure 14 Any post install script errors are displayed
In the Create Icons screen, see Figure 15, click Finish.
Figure 15 Click Finish to complete the installation
Cygwin is now installed. You can now continue to install the MediaTek LinkIt Connect 7681 SDK.
Adding the cygwin\bin and cygwin\lib folders to the system path is recommended. To do this, at
the Windows command prompt (cmd) execute path %path%;C:\cygwin\bin;C:\cygwin\lib.

MediaTek LinkIt™ Connect 7681 Developer's Guide
© 2015, 2016 MediaTek Inc.
Page 14 of 65
This document contains information that is proprietary to MediaTek Inc.
Unauthorized reproduction or disclosure of this information in whole or in part is strictly prohibited.
2.2.2.
Installing the MediaTek LinkIt Connect 7681 SDK for Windows
Download the MediaTek LinkIt Connect 7681 SDK for Windows from the MediaTek Labs website
and extract its content to a suitable drive.
Locate the tool chain file Andes_Windows_Toolchains.rar in the ToolChain folder, and extract
its contents (folder
nds32le-elf-newlib-v2j) to C:\cygwin, the root folder of the Cygwin
installation.
If you’ve chosen to install Cygwin in a folder other than the default, you’ll need to:
1) modify the tool chain’s configuration file, which is located at C:\<chosen folder>
\nds32le-elf-newlib-v2j\cygwin-andes.bat , so that the highlighted code in the
following code example matches the folder you installed Cygwin into:
@echo off
@rem Batch file for Andes Technology Product to launch Cygwin
set TOP=C:\cygwin
set TOP=%TOP:\=/%
set TMP=C:\cygwin\cygwin_tmp
set PATH=C:\cygwin\bin;%CD%\bin
set HOME=%CD%\bin
IF EXIST "C:\cygwin\bin\bash.exe" set SHELL=/bin/bash
"C:\cygwin\bin\bash.exe" --login -i
:END
Save the configuration file.
2) modify the compiler’s configuration file, which is located in the SDK under
Src\mak\MT7681\compiler.mk. Modify the highlighted section of the TOOLCHAINS setting
to map to the location of the nds32le-elf-newlib-v2j folder in the Cygwin installation
folder, as shown below.
#******************************************************************************
# TOOLCHAINS DEFINE
#******************************************************************************
#For Windows TS
TOOLCHAINS = /cygdrive/C/cygwin/nds32le-elf-newlib-v2j/bin
Save the compiler.mk file.

MediaTek LinkIt™ Connect 7681 Developer's Guide
© 2015, 2016 MediaTek Inc.
Page 15 of 65
This document contains information that is proprietary to MediaTek Inc.
Unauthorized reproduction or disclosure of this information in whole or in part is strictly prohibited.
You’re ready to start developing code for the MediaTek LinkIt Connect 7681 development
platform.
2.3.
Installing MediaTek LinkIt Connect 7681 SDK for Linux
Download the MediaTek LinkIt Connect 7681 SDK for Linux from the MediaTek Labs website and
extract its content to a suitable location.
Locate the tool chain file Andes_Linux_BSP320_Toolchains.tgz in the ToolChain folder, and
extract its contents (folder
nds32le-elf-newlib-v2j) to the folder AndesTools.
Now locate the Src folder and make sure the three shell script files (flash_merge.sh,
flash_merge_xip164.sh and header.sh) are executable, by running chmod as follows:
linux:~/Src$chmod 755 *.sh
linux:~/Src$ls -l *.sh
-rwxr-xr-x flash_merge.sh
-rwxr-xr-x flash_merge_xip164.sh
-rwxr-xr-x header.sh
linux:~/Src$
Now locate Src\mak\MT7681\compiler.mk and modify the TOOLCHAINS setting to map to the
location of the nds32le-elf-newlib-v2j folder in your Linux user folders, as shown below.
#**************************************************************************
*****
# TOOLCHAINS DEFINE
#**************************************************************************
*****
#For Linux TS
TOOLCHAINS = /home/xxxx/AndesTools/nds32le-elf-newlib-v2j/bin
Where ‘xxxx’ is your Linux account name.
Save the compiler.mk file and you’re ready to start developing your code for the MediaTek LinkIt
Connect 7681 development platform.
2.4.
Your First Project
This section describes how to create, compile, and upload to the LinkIt Connect 7681 development
board a simple application that blinks the GPIO2 LED every second.
Table of contents
Other Mediatek Labs Microcontroller manuals
Popular Microcontroller manuals by other brands
Freescale Semiconductor
Freescale Semiconductor NXP DEMO9S08SF4 Get to know
NXP Semiconductors
NXP Semiconductors LPC1114 Getting started with

Fujitsu
Fujitsu F2MC-16LX Series Hardware manual
ELAN Microelectronics Corporation
ELAN Microelectronics Corporation RISC II Series Product specification
Texas Instruments
Texas Instruments SimpleLink CC2650STK Getting started
Cypress Semiconductor
Cypress Semiconductor CY3655-EXT enCoRe II quick start guide
