Medion MD 41035 User manual

MD 41035
DVD Recorder
User’s Manual
©2004Medion®. All rights reserved.

This symbol alerts the user
that there are important
operating and maintenance
instructions in the literature
regarding this unit.
CAUTION: TO REDUCE THE RISK OF
ELECTRIC SHOCK, DO NOT REMOVE
COVER. NO USER-SERVICEABLE
PARTS INSIDE. REFER SERVICING TO
QUALIFIED SERVICE PERSONNEL.
2MD 41035 DVD Recorder
User’s Manual
IMPORTANT SAFETY INSTRUCTIONS
CAUTION: TO PREVENT ELECTRIC SHOCK, MATCH WIDE BLADE OF PLUG TO
WIDE SLOT IN OUTLET AND ENSURE PLUG IS FULLY INSERTED.
WARNING: TO REDUCE THE RISK OF FIRE OR ELECTRIC SHOCK, DO NOT
EXPOSE THIS APPLIANCE TO RAIN OR MOISTURE.
CAUTION
RISK OF ELECTRIC SHOCK.
DO NOT OPEN.
This symbol warns the
user of uninsulated
voltage within the unit
that can cause dangerous
electric shock.
CAUTION:
THIS DVD VIDEO RECORDER IS A CLASS 1 LASER DEVICE. USE OF CONTROLS, ADJUSTMENTS
OR PERFORMANCE OF PROCEDURES OTHER THAN THOSE SPECIFIED HEREIN MAY RESULT IN
HAZARDOUS RADIATION EXPOSURE. DO NOT OPEN COVERS AND DO NOT ATTEMPT TO
REPAIR THE UNIT YOURSELF. REFER SERVICING TO QUALIFIED PERSONNEL.
This product incorporates copyright protection technology that is protected by method claims of
certain U.S. patents and other intellectual property rights owned by Macrovision Corporation and
other rights owners. Use of this copyright protection technology must be authorized by Macrovision
Corporation, and is intended for home and other limited viewing uses only unless otherwise
authorized by Macrovision Corporation. Reverse engineering or disassembly is prohibited.

3MD 41035 DVD Recorder
User’s Manual
IMPORTANT SAFETY INSTRUCTIONS
Caution
READ THE SAFETY AND OPERATING INSTRUCTIONS before operating your DVD video recorder
and retain the instructions for future use.
FOLLOW INSTRUCTIONS AND HEED ALL WARNINGS on the DVD video recorder and in this manual.
Installation
1. The power supplyofthis DVD recorder is AC100~240V, 50/60Hz, please don’tuse
incorrectpower outlets.Ifyou areunsure ofthe power supplyvoltage,please askyour
local electricitycompany.
2. Please connect the power plug only to a proper outlet.
Ifthe plug does notfit, aska qualified electrician to replaceyour obsolete outlet.
Please do not modify the plug yourself. To do so will void this safety feature.
3. Arrange cords so that they will not be stepped on or pinched by
anything placed on or against them. Especially be careful at
plug-ins, receptacles, or cord exit points from the DVD video
recorder. Frayed power cords or damaged plugs are hazardous,
please ask a qualified service technician to replace your power
cord in any of these cases.
Overloaded power outlets and extension cords may cause fire or electrical shock
hazards.
4. Do not cover or block the ventilation holes in the DVD video
recorder cabinet. Doing so may damage the DVD video recorder
or DVD video disc.
Do not place your DVD video recorder on a soft surface, the
ventilation holes can be blocked from the bottom. Avoid placing
it in a small space such as a bookshelf unless ventilation is adequate.
5. Avoid placing the DVD video recorder in an environment with excessive humidity,
sudden temperature changes, or extreme hot or cold temperatures. Otherwise,
condensation may form inside the unit.
6. To avoid accidental damage or injury, please place your DVD
video recorder on a stable and flat surface with no vibration; do
not put any heavy objects on top of it. Please use with a sturdy
stand or table recommended by the manufacturer only; and
follow all the instructions regarding the use of stands or tables.
7. Use care when moving the DVD video recorder on a cart. A
sudden stop, excessive force or uneven surface may cause the
cart to overturn.
8. Do not use any accessory that is not recommended by the
product manufacturer.
9. Unplug this product from the wall outlet and contact Customer Care immediately
under the following conditions:
a) When the power cord or plug is damaged.
b) If any liquid is spilled on, or object has fallen into the product.
c) If the product has been exposed to rain or water.
d) If the product does not operate normally when you follow the instructions in
the user manual.
e) If the product has been dropped or damaged in any way.

10. The product should be placed well away from any heat source such as a radiator,
heater, stove, or any electrical home appliance that produces heat.
Operation/Cleaning
1. Keep your DVD video recorder away from strong magnetic objects.
2. Keep your DVD video recorder away from humid locations, such
as bathtub, sink, laundry, humid basement, or swimming pool.
3. Use only with accessories recommended by the manufacturer in
order to avoid fire, shock or other accident.
4. If your DVD video recorder is exposed to rain, placed in a wet area or struck by a
strong impact, please unplug it immediately and contact Customer Care before
turning it back on.
5. To protect your DVD video recorder during a thunder storm, or
when it won’t be used for a long period of time, please unplug
it from the power outlet and disconnect the cable system. This
will prevent possible damage to the product from lightning or
power surges.
6. Unplug your DVD video recorder before cleaning. Use a damp
cloth for cleaning. Do not use cleaning fluid or aerosol as they
may cause damage, fire, or electrical shock if the liquid runs into
the recorder. Those materials may also tarnish the coating of
your DVD video recorder.
7. Never open or remove the cover or make any adjustment which is not described in
the user manual as it may expose you to an electrical shock or other hazardous
situation, or cause serious damage to your DVD video recorder. Your DVD video
recorder must be serviced by a qualified technician only.
8. Keep any liquids or any unnecessary objects away from your DVD
video recorder. Never turn on your DVD video recorder if any
liquid or small metal object has entered the unit, or an electrical
short, fire or electrical shock may result. In this case, please
unplug your DVD video recorder immediately and contact
Customer Care.
9. Remove the plug from the power outlet before cleaning. Use a damp cloth. Please
don’t use cleaning liquid or aerosol. Don’t allow liquid to drip into the recorder, it
may cause fire or electric shock. Cleaning fluids will erode the surface.
10. Power cord:
• Always hold the plug when removing the power cord. Do not pull the cable.
• Don’t touch the power cord with a wet hand, it may lead to a short on circuit or
you may get an electric shock.
• Don’t let items rest on the power cord.
• Don’t tie or knot the power cord.
• Take care that the power cord is not tripped over or stepped on.
11. When the recorder is temporarily not in use, set the power to stand-by. If the
recorder won’t be used for an extended period, remove the plug from the power
outlet.
12. Emergency
If the following occurs, unplug the unit and contact Customer Care immediately:
• If liquid or metal drops into the unit.
• If an abnormal playback status appears.
4MD 41035 DVD Recorder
User’s Manual
IMPORTANT SAFETY INSTRUCTIONS

Service
1. Do not attempt to fix this DVD video recorder yourself, please unplug it and contact
Customer Care.
2. Make sure the technician uses manufacturer-recommended parts for replacement.
Substituted may cause fire, electrical shock, or other hazardous situations.
3. Be sure the technician performs a complete safety check to ensure your DVD video
recorder can be operated safely.
Laser Radiation
1. Please obey all operating instructions in this manual to avoid radiation damage.
2. The laser light in this machine can damage human eyes. Please don’t open the
case. If the unit needs service, please contact Customer Care.
Condensation Warning
Condensation may form on the pickup lens under the following conditions.
• When a heater is turned on.
• In a steamy or very humid room.
• When the unit is suddenly moved from a cold to a warm environment.
If condensation forms inside the unit, it may not operate properly. If you suspect that
condensation has formed in the unit, turn off the power and wait approximately one
hour for condensation to evaporate.
Outside Antenna
An outside antenna system should not be located in the vicinity of overhead power
lines or other electric light or power circuits, or where it can fall into such power lines
or circuits. When installing an outside antenna system, extreme care should be taken to
avoid touching such power lines or circuits because contact with them could be fatal.
CLASS 1
LASER PRODUCT
This is a class-1 laser
product. Use of controls
or adjustments or
procedures other than
those specified herein
may result in hazardous
laser light beam
exposure.
5MD 41035 DVD Recorder
User’s Manual
IMPORTANT SAFETY INSTRUCTIONS

Disc Use
1. Take out the disc as shown to the right. Hold the edge and center of
the disc. Don’t touch the varnish side as this may damage the
information on the disc.
2. Don’t put stickers or labels on the disc surface. This will cause a
weight bias on the disc and lead to abnormal playback.
3. Please don’t scratch or spot the varnish side.
4. The rotational speed of the disc is very high. Please don’t use any
broken, scratched, cracked or bent disc or it will damage the DVD
recorder.
5. Disc cleaning
Finger prints or dirty spots on the disc will reduce the reflection,
which will lead to a poor signal. With a poor signal, the playing
performance will decrease. Please use a soft cloth to wipe the disc
straight from center to the outer edge. If the disc is too dirty, you can
use a damp soft cloth to wet the disc first, and then wipe it with a
dry soft cloth.
Never use cleaning liquid, methylbenzene, diluted formula, anti-
static liquid or other solution for disc cleaning; it may damage the
surface of the disc.
6. Storage of the disc
• Put the discs in the original box to prevent bending or other
damage to the disc.
• Don’t put the discs in areas with high temperature, high
humidity or in direct sunlight.
• Please read any instructions on the disc label carefully.
6MD 41035 DVD Recorder
User’s Manual
IMPORTANT SAFETY INSTRUCTIONS
1
2
3
4
5

Contents
7MD 41035 DVD Recorder
User’s Manual
contents
Important Safety Instructions . . . . . .3
Caution . . . . . . . . . . . . . . . . . . . . .3
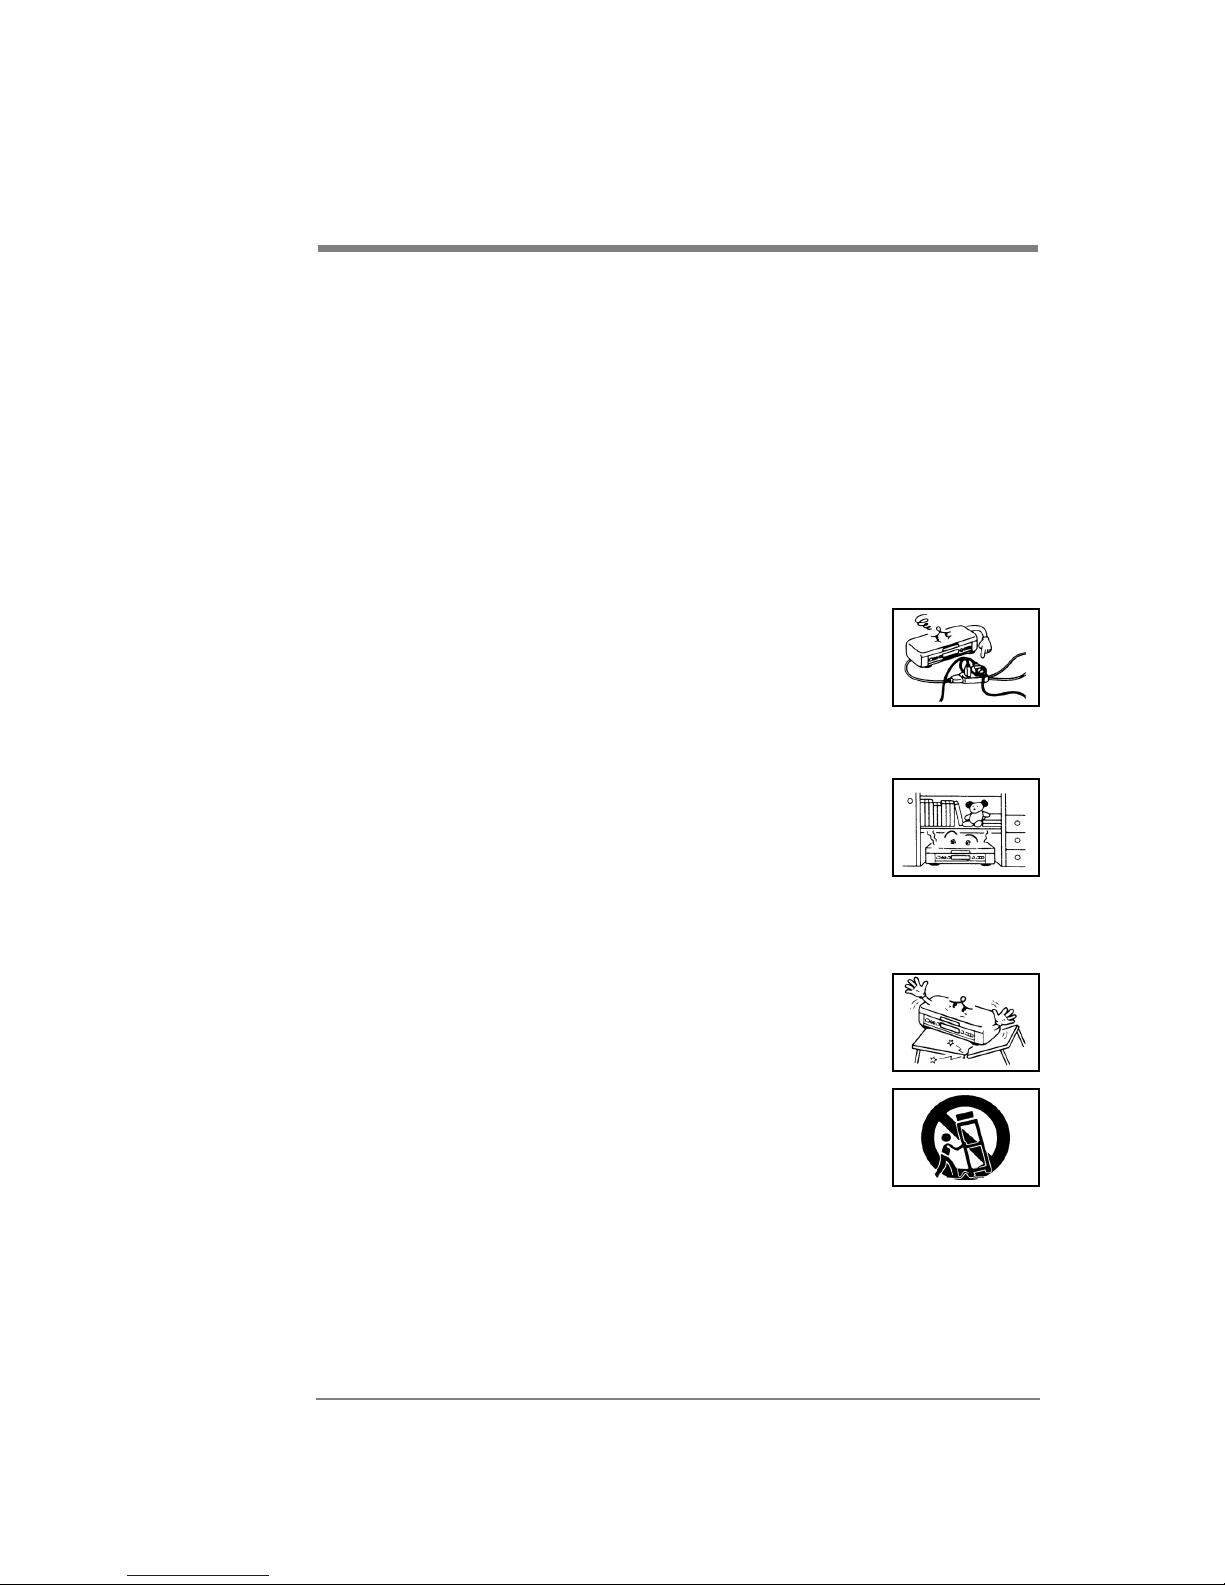
Installation . . . . . . . . . . . . . . . . . .3
Operation/Cleaning . . . . . . . . . . . . .4
Service . . . . . . . . . . . . . . . . . . . . .5
Laser Radiation . . . . . . . . . . . . . . .5
Condensation Warning . . . . . . . . . .5
Outside Antenna. . . . . . . . . . . . . . .5
Disc Use. . . . . . . . . . . . . . . . . . . . .6
Contents . . . . . . . . . . . . . . . . . . . . .7
Thank You… . . . . . . . . . . . . . . . . .9
…for Choosing This Product! . . . . . .9
Features . . . . . . . . . . . . . . . . . . . .9
Package Contents . . . . . . . . . . . . . .9
Compatibility . . . . . . . . . . . . . . . .10
Recommendations for
Optimal Picture Quality . . . . . . . . .10
Copy Protection . . . . . . . . . . . . . .10
Copyrights . . . . . . . . . . . . . . . . . .10
Panels and Connections . . . . . . . . .11
Front Panel . . . . . . . . . . . . . . . . .11
Rear panel . . . . . . . . . . . . . . . . . .11
Basic (Composite) Connection . . . . .12
Other TV Connections . . . . . . . . . . .14
S-Video . . . . . . . . . . . . . . . . . .15
Component Video . . . . . . . . . . . .15
AV Amplifier/Receiver Connection . .16
Digital Audio . . . . . . . . . . . . . . .16
Analog 5.1 Audio . . . . . . . . . . . .16
Connect to Other Video Inputs . . . .17
ConnectaCamcorder.. . . . . . . .17
Connect a VCR or DVD Player . . . . .17
Tips . . . . . . . . . . . . . . . . . . . . . . .18
Control Buttons and Display . . . . . .19
Front Panel Buttons . . . . . . . . . . .19
Display Window . . . . . . . . . . . . . .19
Remote Control . . . . . . . . . . . . . . .20
Remote Control Buttons . . . . . . .21
Basic Playback Functions . . . . . . . . .23
Preparation: . . . . . . . . . . . . . . . . .23
Primary Settings . . . . . . . . . . . . . .23
Start Playback . . . . . . . . . . . . . . . .24
Skip Playback . . . . . . . . . . . . . . .24
DVD . . . . . . . . . . . . . . . . . . . . .24
VCD/Audio CD . . . . . . . . . . . . . . .24
Pause/Step . . . . . . . . . . . . . . . . . .25
Fast Forward/Rewind . . . . . . . . . .25
DVD . . . . . . . . . . . . . . . . . . . . .25
VCD/Audio CD . . . . . . . . . . . . . . .25
Slow Motion . . . . . . . . . . . . . . . . .25
Stop . . . . . . . . . . . . . . . . . . . . . .25
Disc Playback OSD (On Screen Display) 26
DVD Playback OSD . . . . . . . . . . . . .26
VCD/Audio CD Playback OSD . . . . . . .27
Advanced Playback Functions . . . . . .28
Repeat Playback . . . . . . . . . . . . . .28
DVD . . . . . . . . . . . . . . . . . . . . .28
VCD/Audio CD . . . . . . . . . . . . . . .28
A-B Repeat Playback . . . . . . . . . . .28
Shuffle . . . . . . . . . . . . . . . . . . . .29
Program Playlists . . . . . . . . . . . . .29
CD-DA, MP3, JPEG,
VCD Program Playback . . . . . . . . .29
Cancel Programmed Playback . . . .29
Display JPEG Photos . . . . . . . . . . . .30
Digest . . . . . . . . . . . . . . . . . . . .30
Title Playback . . . . . . . . . . . . . . .30
(DVD only) . . . . . . . . . . . . . . . . .30
DVD Menu . . . . . . . . . . . . . . . . . .30
(DVD only) . . . . . . . . . . . . . . . . .30
Playing Multiple Angles . . . . . . . . .30
Change Subtitle Language . . . . . . .30
Change Audio Language . . . . . . . . .31
Direct Selection . . . . . . . . . . . . . .31
PBC Playback Control . . . . . . . . . . .31
Zoom . . . . . . . . . . . . . . . . . . . . .31
Bookmark Memory . . . . . . . . . . . .32
Create Bookmark . . . . . . . . . . . .32
Jump to Bookmark . . . . . . . . . . .32
Clear Bookmark . . . . . . . . . . . . .32
NTSC/PAL and Progressive Scan . . . .32

8MD 41035 DVD Recorder
User’s Manual
contents
General Setup . . . . . . . . . . . . . . . .33
Entering the Setup Menu . . . . . . . .33
How to Setup . . . . . . . . . . . . . . . .33
Setup Menu Structure . . . . . . . . . .33
Language . . . . . . . . . . . . . . . . . . .34
Aspect Ratio . . . . . . . . . . . . . . . . .35
16:9 (Wide) . . . . . . . . . . . . . . . .35
4:3 (Letterbox) . . . . . . . . . . . . .35
4:3 (Pan Scan) . . . . . . . . . . . . . .35
Channel Search . . . . . . . . . . . . . . .35
Add/Delete Channel . . . . . . . . . . .35
Audio Setup . . . . . . . . . . . . . . . . .36
Analog Output . . . . . . . . . . . . . .36
Digital Output . . . . . . . . . . . . . .36
Date and Time . . . . . . . . . . . . . . .36
Parental Controls . . . . . . . . . . . . .36
Password . . . . . . . . . . . . . . . . . . .36
Factory Reset . . . . . . . . . . . . . . . .37
Disc Media . . . . . . . . . . . . . . . . . .37
Record Speed . . . . . . . . . . . . . . . .37
Auto Chapter . . . . . . . . . . . . . . . .37
Schedule . . . . . . . . . . . . . . . . . . .37
Preparing Discs for Recording . . . . .38
Compatible Discs . . . . . . . . . . . . . .38
Disc Types . . . . . . . . . . . . . . . . . .38
Initialize a New Disc . . . . . . . . . . .38
Scheduled Disc Recording . . . . . . . .39
Scheduling a Recording . . . . . . . . .39
Stop an In-Process
Scheduled Recording . . . . . . . . . . .39
Recording Quality . . . . . . . . . . . . .40
Correct a Scheduled Recording . . . .40
Cancel a Scheduled Recording . . . .40
Troubleshooting
Scheduled Recordings . . . . . . . . . .40
Manual Disc Recording . . . . . . . . . .41
Pause recording . . . . . . . . . . . . . .41
Recording from External Devices . . .42
Recording from a Camcorder ... .42
Editing Discs . . . . . . . . . . . . . . . . .43
Erase Whole Disc . . . . . . . . . . . . .43
(DVD+RW only) . . . . . . . . . . . . . .43
Erase One Title . . . . . . . . . . . . . . .43
(DVD+RW only) . . . . . . . . . . . . . .43
Play Full Title . . . . . . . . . . . . . . . .43
Edit DVD Compatibility . . . . . . . . . .44
Insert Chapter . . . . . . . . . . . . . . .44
Remove Chapter . . . . . . . . . . . . . .44
Hide Title . . . . . . . . . . . . . . . . . .45
Show Title . . . . . . . . . . . . . . . . . .45
New Picture . . . . . . . . . . . . . . . . .45
Finalize a DVD+R . . . . . . . . . . . . . .45
Troubleshooting . . . . . . . . . . . . . .46
Additional Information . . . . . . . . . .50
Regional Code . . . . . . . . . . . . . . .50
Technical Specifications . . . . . . . . .50
Glossary . . . . . . . . . . . . . . . . . . .51

9MD 41035 DVD Recorder
User’s Manual
Thank You…
…for Choosing This Product!
Welcome to the latest in television technology. Your new DVD recorder features easy-to-
use, on-screen menus and closed caption capabilities - all in a space-saving design.
Quite simply, you’ve selected one of the best products in its class. We are proud to offer
a DVD recorder that will bring you convenient, dependable service and enjoyment for
years to come.
This manual is provided to help you set up your DVD recorder and take advantage of its
many features.
Keep this manual in a safe place for future reference. Record your product model
number and serial number here, for use in event of loss or theft.
Model number:
Serial number:
Features
• This DVD recorder can play in NTSC and PAL under progressive or interlace scan
output.
• This unit can be connected with a Dolby Digital or DTS compatible amplifier /
receiver for home theater surround sound.
• Record cable or broadcast TV signal through the antenna, or record video and audio
from an external input such as a DVD player or VCR.
• Schedule up to 8 separate recordings.
Package Contents
• Remote control (includes 2 AAA batteries)
• Power Cord
• TV antenna cable
•BlankDVD+RWdisc
•Video signalcable (composite,yellowconnector)
•Componentvideocable(green, blue, andredconnectors)
•Usermanual / Quick manual
preface

Compatibility
• Recordable Disc Types
This unit can record to DVD+R and DVD+RW discs. Recorded discs may not be
playable on all conventional DVD players.
• Playable Disc and Media Types
DVD Video, SVCD, DVD+RW, DVD+R, CD-R, DVD-RW, DVD-R, CD-RW, Audio CD, MP3,
and JPEG.
Recommendations for Optimal Picture Quality
The unit is a precision device which is manufactured with highly accurate technology.
Fingerprints or friction on the disc will affect reading from the laser pickup lens, and it
will ruin the image quality. In the worst case scenario, neither video nor audio will be
played from a dirty or scratched disc. To obtain optimum picture quality, the recorder
should be cleaned after every 1,000 hours of use. Please note that this period may vary
depending on the environment (temperature, humidity, dust, etc.). Please contact your
supplier for details.
Copy Protection
This DVD video recorder supports Macrovision copy protection.
This will prevent copy-protected materials from being recorded normally.
Copyrights
• Copyright
The law prohibits copying copyrighted material without the permission of the owner
of the copyright.
• Copy protection
If you attempt to copy a DVD disc with CSS (Content Scrambling System), a DVD copy protection code,
the anti-copy protection function of your DVD recorder will be started to prevent illegal copying.
10 MD 41035 DVD Recorder
User’s Manual
preface
Dolby and the double-D symbol are registered trademarks of Dolby Laboratories.
DTS and DTS Digital Surround are registered trademarks of Digital Theater Systems, Inc.

11MD 41035 DVD Recorder
User’s Manual
Panels and Connections
Front Panel
VIDEO:Composite video in for recording from external video equipment such as a
camcorder.
AUDIO L/R:Standard stereo sound connections for recording from external equipment
such as a camcorder. “L” stands for “left” and “R” stands for “right”.
Rear panel
1. POWER CORD SOCKET.
2. ANTENNA:connect cable or TV antenna to “IN” and your TV to “OUT”.
3. VIDEO IN / AUDIO IN: These jacks are the same as the ones on the front of your DVD
recorder. Use them to connect to another video device that you wish to record, such
as a DVD player or VCR.
4. S-VIDEO:For connecting to a TV or monitor’s S-Video input jack.
5. VIDEO OUT:Video signal output.
6. COMPONENT VIDEO OUT:component signal output, for connection with a component
(Y/CB/CR) or progressive scan (Y/PB/PR) device.
7. AUDIO OUT:analog audio output.
8. DIGITAL:Digital audio signal output connector for use with a Digital Audio Receiver/
Audio DA Converter.
panels and connections

12 MD 41035 DVD Recorder
User’s Manual
Basic (Composite) Connection
Before changing or connecting any cables, please make sure all devices are
turned off to avoid any electronic discharge that may damage the unit.
This chart shows the basic connections necessary for using your DVD recorder with a TV.
Other types of connections are shown on the following pages. Before you get started,
we recommend that you assess all of the equipment that you would like to connect and
review the following pages closely.
panels and connections

This DVD recorder is equipped with a standard composite (AV) video connection, S-Video
connection, and component (YPBPR/ YCBCR) video input. Component provides the best
picture signal, but is not available on all TVs. S-Video provides excellent quality, but not
as good as component. Composite video provides good video quality, but it is not as
good as S-Video or component.
Choose the best way to connect devices depending on your particular equipment.
For a basic (composite) connection, please follow the steps below using the diagram to
the left as a guide.
Use the supplied AV cable (red, white, and yellow connectors) to connect the
DVD recorder to your TV’s AV input jacks.
Connect one end of the provided TV antenna cable to ANTENNA OUT on the DVD
recorder. Connect the other end to the antenna (RF) input on your TV.
Use another TV antenna cable to connect the TV antenna or CATV coaxial cable
from your wall outlet with ANTENNA IN on the DVD recorder.
Connect the power cord to an easily accessible AC outlet.
Please note that unlike some VCRs, the DVD recorder will not use the TV antenna
connection to carry sound and video to your TV, although it will pass through the
broadcast or cable signal provided by that connection. You must make a separate audio
and video connection in order to watch DVDs played on your DVD recorder on your TV.
4
3
2
1
13MD 41035 DVD Recorder
User’s Manual
panels and connections

Other TV Connections
S-Video and Component Video connections carry only the video signal, not audio. To
hear sound when using either of these connections, you will also need to make a
separate audio connection. You can do this by connecting the red and white portions of
the AV cable but NOT the yellow portion. This will play stereo sound through your TV (if
your TV is capable of producing stereo sound). You can also follow the instructions on
the following pages to connect your DVD recorder to an AV amplifier/receiver to send
sound to external speakers.
14 MD 41035 DVD Recorder
User’s Manual
panels and connections

S-Video
Connectone end ofthe S-Video cable to one ofthe S-Video connections on the backof
the DVD recorder, and connectthe other end to the S-Video In jackon your TV.
Component Video
Connect the component cable (green, blue, and red connectors) to the COMPONENT VIDEO
OUT on the rear panel of the DVD recorder and the corresponding component video in
connections on your television. Make sure to match the colors on the cable connectors
with the colors on the ports.
LConnect EITHER the S-Video OR the Component Video cable to your TV. Not both.
2
1
15MD 41035 DVD Recorder
User’s Manual
panels and connections

16 MD 41035 DVD Recorder
User’s Manual
AV Amplifier/Receiver Connection
The following connections are shown as an example only. Please choose the correct
connections for your equipment. For example, you should use either an analog or a
digital audio connection – not both. If you are using a digital connection, you should
use either optical or coaxial – not both.
Digital Audio
For an optical connection, connect an optical cable (also referred to as Toslink)
to OPTICAL DIGITAL OUT on the DVD recorder and OPTICAL DIGITAL IN on the AV
Amplifier or TV.
For a coaxial connection, connect a coaxial digital audio cable to COAXIAL
DIGITAL OUT on the DVD recorder and COAXIAL DIGITAL IN on the AV Amplifier or TV.
Analog 5.1 Audio
For analog audio, connect analog AUDIO OUTPUT and VIDEO OUTPUT on your DVD
recorder to analog AUDIO INPUT and VIDEO INPUT on your AV Amplifier or TV.
L
Optical and coaxial
digital audio cables
sold separately.
2
1b
1a
panels and connections
You must use
the correct audio
settings to avoid loud
noise from your
speakers. Please refer
to Audio Setup on
page 36.
FR: Front right speaker.
Placed in front of the
listener to his or her
right.
Center: Center speaker.
Placed directly in front
of the listener.
SR: Surround right
speaker. Placed behind
the listener to his or
her right.
SL: Surround left
speaker. Placed behind
the listener to his or
her left.
SUB: Subwoofer. This
speaker carries low
frequency sounds and
can be placed
anywhere in the room
as long as it is close to
the ground.
FL: Front left speaker.
Placed in front of the
listener to his or her
left.


18 MD 41035 DVD Recorder
User’s Manual
Tips
1. Most cables and AV connectors on your equipment follow a standard color code.
Observing this color code can be very helpful when connecting your AV equipment.
2. We have provided many different options for audio and video connections so that
you can choose the best for your needs. However, you only need one video
connection and one audio connection between your DVD recorder and your TV.
3. If your antenna/CATV connection is attached to your DVD recorder, and your DVD
recorder is attached to your TV with another antenna cable, you will be able to
watch TV without turning on your DVD recorder.
4. Attaching your DVD recorder to a VCR and then attaching the VCR to the TV will
produce very poor quality video and recordings. The DVD recorder should be
attached directly to the TV.
panels and connections

Control Buttons and Display
1. STANDBY/ON: Puts the unit in and out of standby mode.
2. DISC TRAY
3. OPEN/CLOSE : Opens and closes disc tray.
4. PREV : Jump to the previous chapter.
5. STOP : Stop playback/recording.
6. PLAY : Plays the current disc.
7. NEXT : Jump to the next chapter.
8. RECORD
: Record currently playing channel/video.
9. DISPLAY WINDOW: Shows current status of DVD recorder.
Display Window
1. Dolby Digital sound display
2. DTS sound display
3. Title: Display the current title (DVD)
4. Track: Display the current track (VCD)
5. Chapter: Display the current chapter
6. The selected song in program
7. External input for recording
8. Start scheduled recording
9. Title in repeat play
10. A to B repeated playback
11. Channel from external AV amplifier
12. Display the disc type: DVD, VCD, MP3
13. Playback in progress
14. Play/record is currently paused
19MD 41035 DVD Recorder
User’s Manual
control buttons and display

Remote Control
Before using the remote control, put 2 AAA
batteries into the battery compartment.
Please make sure the +/- terminals are
placed correctly, following the instructions
printed in the battery compartment. Point
the remote control at the remote receiver on
the DVD recorder.
20 MD 41035 DVD Recorder
User’s Manual
control buttons and display
Table of contents
Other Medion DVD Recorder manuals
Popular DVD Recorder manuals by other brands

JVC
JVC BD-X200E instructions

Panasonic
Panasonic DMR-EZ28P Service manual

MicroBoards Technology
MicroBoards Technology Premium Pro user manual

Pioneer
Pioneer DVR-550H-S - Multi-System DVD Recorder Operating instruction

Sony
Sony VRDMC6 - DVDirect Compact Size DVD Burner Specifications

jWIN
jWIN JD-VD904 quick guide