English 1
Table of Contents
Congratulations
Indication for Use
Important Safeguards
● DANGER
● CAUTION
● WARNING
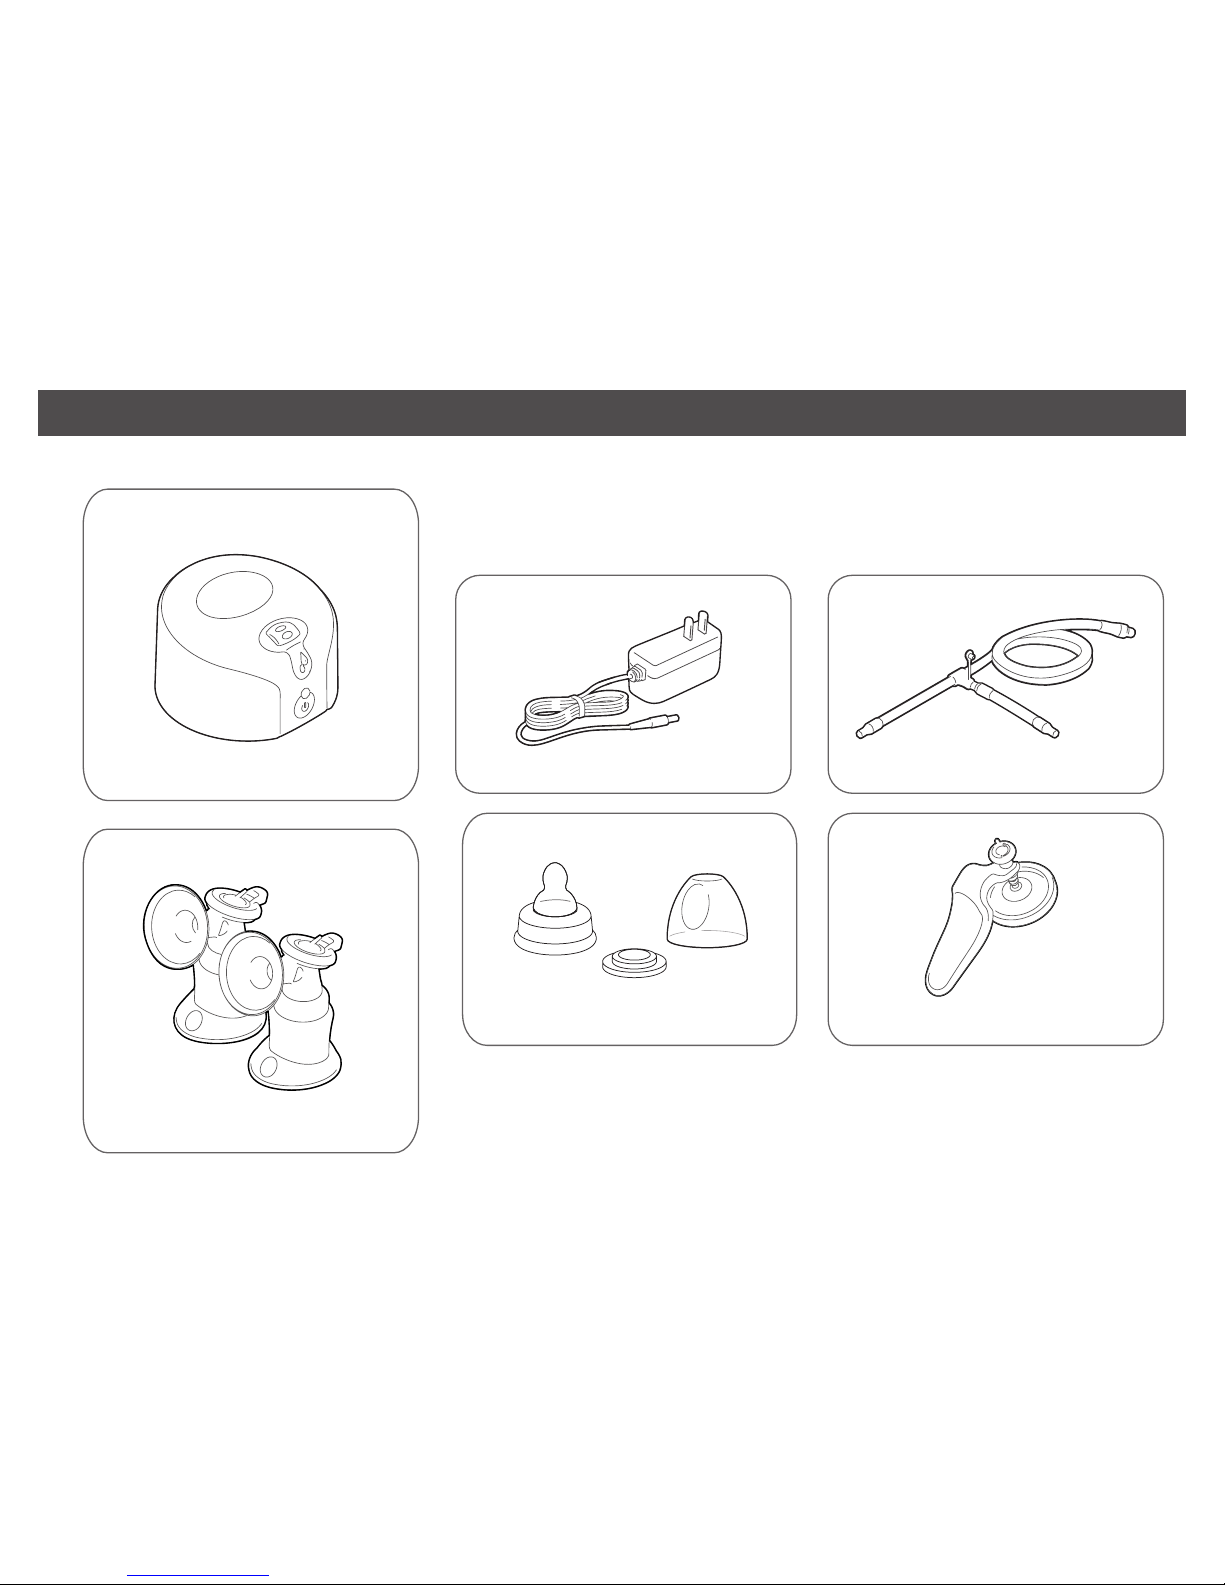
Parts Guide
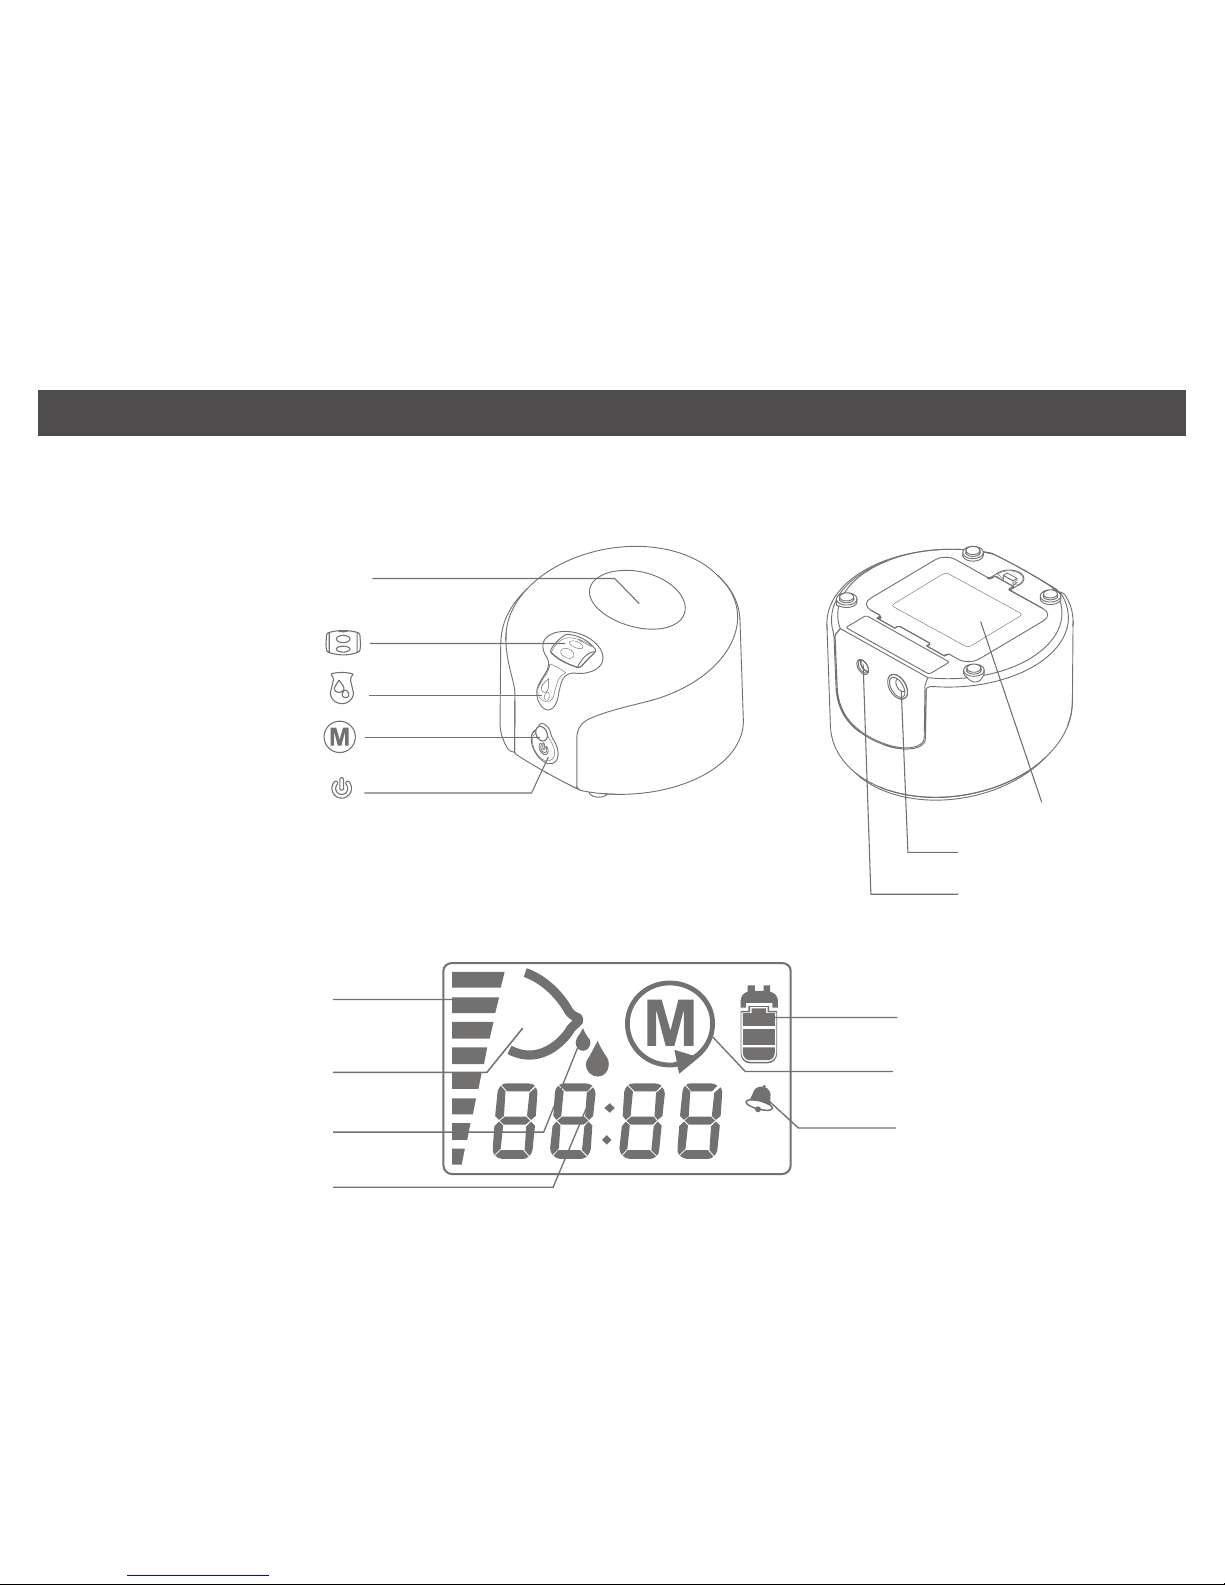
● Electrical Pump Main Unit
● LCD Screen Guide
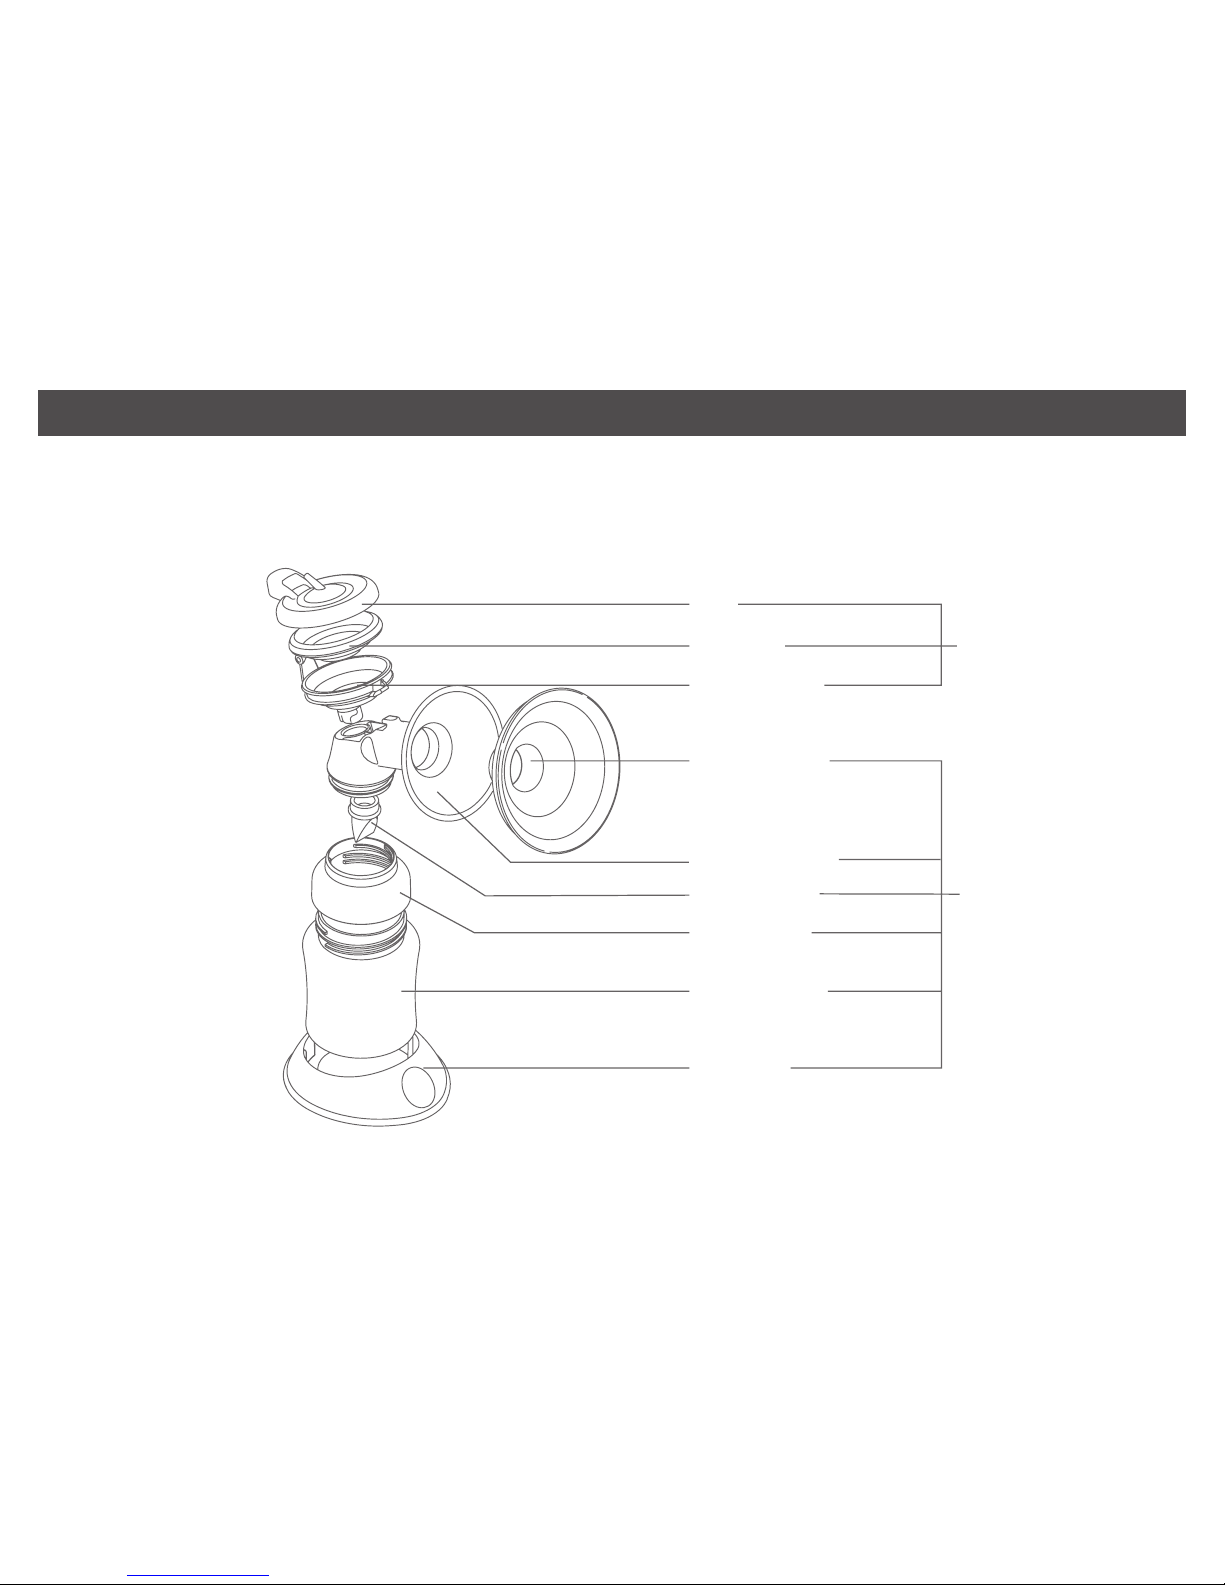
● Expression Collection Combo Kit
How to Assemble the Expression Collection Kit
How to Assemble Electric-pump Diaphragm Kit
How to Assemble Expression Collection Combo Kit
Power Options
● Using your AC/DC Adapter (included)
● Using 4 AA Alkaline Batteries ( (Batteries not included)
● Install the Batteries (AA Alkaline)
Pumping Instructions
Suction Level
M Button
Setting the Time
● How to Adjust the Clock
Alarm Clock Mode
● How to Adjust the Alarm
Cleaning Instructions
● Sanitize Prior to First Use
● Before Each Use
● General Cleaning Instructions
.........................................................................................................................
......................................................................................................................
................................................................................................................
...................................................................................................................................
..................................................................................................................................
.................................................................................................................................
...............................................................................................................................
..............................................................................................................
.......................................................................................................................
......................................................................................................
.......................................................................
.......................................................................
.................................................................
..........................................................................................................................
..................................................................................................
.............................................................................
........................................................................................................
.................................................................................................................
............................................................................................................................
....................................................................................................................................
........................................................................................................................
..................................................................................................................
.....................................................................................................................
..................................................................................................................
.................................................................................................................
................................................................................................................
..........................................................................................................................
...........................................................................................................
0
0
3
3
3
3
5
6
6
7
8
11
12
14
14
15
16
18
23
24
25
25
27
27
29
29
29
29