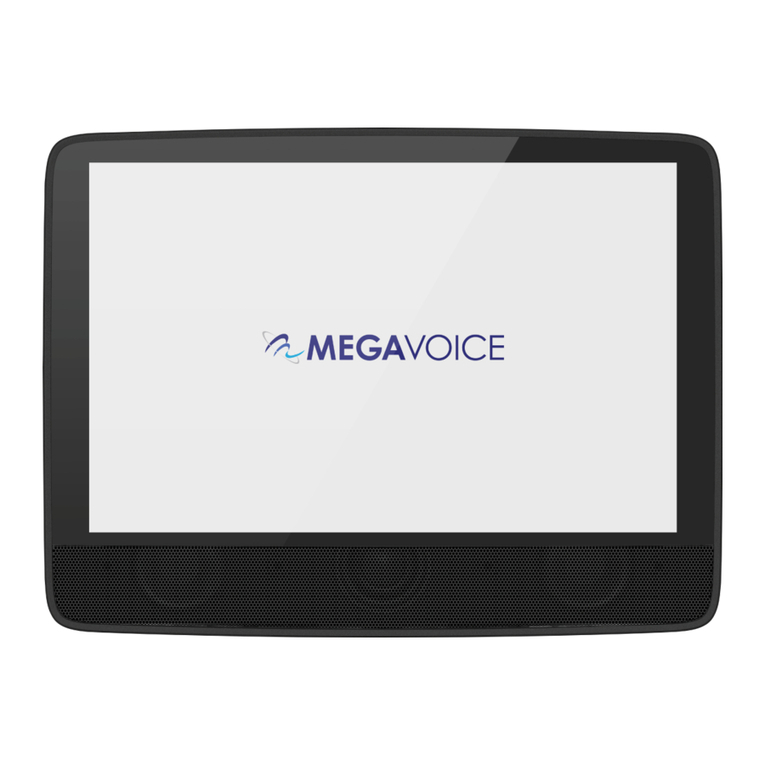
Megavoice Envision B Series User manual

Envision B Series User Manual 20211213.docx || © 2021 MegaVoice Ltd. || Page 1 of 44
Envision models B01 and B02

Envision B Series User Manual 20211213.docx || © 2021 MegaVoice Ltd. || Page 2 of 44
Easy Start!
To turn your MegaVoice Envision on, press and hold the power
button on the back of the player until the “Starting Up…” screen
is displayed. Once the Home Screen is displayed the tablet is
ready.
To begin use, make sure the currently selected input source is
populated with the correct folder structure and file types.
To turn the tablet off, press the power button again for about 2
seconds. The power-off dialog will appear with a confirmation
bar. Swipe to the right to shut Envision down. 1
1Envision may also be shut down or restarted from the Information Screen.
About the Screen
Your Envision includes a 10.1”, 800 x 1280 pixels, IPS touch screen.
•“Tap” works practically everywhere. “Drag” works for all sliders. “Swipe” works in the browser views. 2
•After 1 minute of inactivity, the screen will time out automatically, but the tablet is still on. 3
•If the screen is still untouched for an additional 15 minutes, and playback inactive, Envision turns itself off.
•At any time during operation, a click on the power button will turn the screen off, but the player is still on. A
second click restores the screen. 3
•If the screen is turned off during active playback, the player will remain on as long as playback continues.
2See Trackpad for behavior when A/V is active. 3Except when output is to an active A/V device.

Envision B Series User Manual 20211213.docx || © 2021 MegaVoice Ltd. || Page 3 of 44
Important Features
Power on/off
Screen on/off
Hardware
reset switch
Type-C USB
charge and
data connector
Right hand
grip
Left hand
grip
Label area
Charge LED
microSD
card reader
3.5mm Stereo
Audio Jack
Type-A USB
OTG
connector
Audio/Visual
connector
(B02 only)

Envision B Series User Manual 20211213.docx || © 2021 MegaVoice Ltd. || Page 4 of 44
Audio/Visual (A/V)
Envision model B02 provides an A/V connector for output to most A/V compliant devices
(computer monitors, TVs, etc.). Use the 2m A/V cable included, or your standard A/V cable
with the adaptor (shown at left) to attach an A/V device. 1
When an A/V device is connected, the A/V icon will appear at the top of the screen.
Tap this icon to open a menu.
The menu choices are as follows:
•A/V device (audio/video) 2
•A/V device (audio/video) + TABLET (audio) 3
•TABLET (audio/video) 4
The current setting is always the highlighted one. Tapping on any of the 3 options will
transfer audio and video output to your selection and close the menu.
1For devices that provide multiple A/V input connections, make sure it is set to use the correct A/V port.
2Minor cropping of the top edge of the display may occur with some large screen TVs or monitors.
3This option causes audio to be output to both the A/V device (if it has speakers) and to Envision’s internal
speakers concurrently. If both are working, and the sound is not good, try muting the audio from one or the other.
4This option returns full audio/video control to the tablet, terminating the A/V connection.

Envision B Series User Manual 20211213.docx || © 2021 MegaVoice Ltd. || Page 5 of 44
Trackpad
When Envision is in A/V mode (B02 only), the touch screen becomes a trackpad (or touchpad). A pointer (or
cursor) appears on the A/V device screen. Using the pointer is the method for operating the tablet while in A/V
mode.
Placing your finger on the Envision touch screen surface and moving it changes the cursor location in the same
manner. Once you lift your finger, movement ceases and the cursor remains in place.
•To select an item or toggle a setting, hover the pointer over it and tap once.
•To “drag” an item (like a slider or browser view list) double-tap it while keeping your finger on the surface and
then move in the desired direction. While dragging, the cursor will change format . As long as your finger
remains on the tablet surface, “drag” will continue to work.
•If you cannot readily see the pointer because it blends into the background of the current screen, it is possible
to force it to the center by tapping 4 times anywhere on the screen within 3 seconds.
•See some screen examples below…

Envision B Series User Manual 20211213.docx || © 2021 MegaVoice Ltd. || Page 6 of 44
In the example above, the A/V menu is open while the pointer is just below the volume adjustment icon. The volume icon is
tapped once to close the A/V menu, and a second time to select and open the volume slider control.
In the example above, if you double-tap the screen while pointing to the slider, the cursor changes format and enables you to
“grab” the slider so that it can be moved to the left or right. Once you remove your finger, the “grab” is released and the
cursor changes back to the white pointer. Or you could simply point to the area desired and double-tap. The slider control will
jump to that position.

Envision B Series User Manual 20211213.docx || © 2021 MegaVoice Ltd. || Page 7 of 44
Player Storage
Envision “B” series supports 3 types of accessible storage:
•Internal/fixed
•External/removable microSD
•External/removable Type-A/OTG
The current input device is user selectable from the Input Device Selection Screen and remains current until
changed2or removed2(external storage only) by the user. For device details and specifications, please see Input
Devices.
To connect a microSD card, insert it into the card reader slot with the brass contacts
facing away from you (with the label side up as in the illustration). Gently press the
card inwards until it locks in place. To remove1the card, use your fingernail and
gently press it in until the card releases so you can reach it.
1When removing a card, take care that it does not spring out when released!
To connect an OTG device, gently insert it into the Type-A connector next to the
microSD card reader slot. It will only fit in correctly when the side with the 2
openings is facing you (per the illustration).
2To ensure that bookmarks are saved, please return to the Home Screen before removing either device.

Envision B Series User Manual 20211213.docx || © 2021 MegaVoice Ltd. || Page 8 of 44
Player Security/USB Access
The following security settings and USB access are configured for the B01 and B02 models:
•Internal Storage: Encrypted1or Unencrypted files accessible only by USB SLS2cable
•External microSD4: Encrypted1files only accessible by USB Data or SLS2cables
•External Type-A/OTG5: Encrypted1files only NOT accessible by USB cable3
1Requires special Encryption Tool software. Contact your sales representative for details.
When encrypted files are required and unencrypted are encountered by Envision, they are skipped/ignored.
2SLS Type-C USB cables are only available from MegaVoice. Contact your sales representative for details.
3Due to internal USB limitations, when an SLS or data-only cable is connected and an OTG device is present in the
Type-A connector, the connection becomes charge-only. If, however, an OTG device is not connected at the time,
Envision will switch to computer communication mode and the Internal storage and External microSD card (if
present) will be accessible.
For access to the contents of the OTG device, please connect it directly to a computer or a connected USB hub.
Regardless of the cable type, charging also occurs while connected.
4For access to the External microSD, please make sure it is present in the microSD card reader before connecting
the USB cable.
5 Faulty or low-quality OTG devices may cause Envision to lock up when connecting them.

Envision B Series User Manual 20211213.docx || © 2021 MegaVoice Ltd. || Page 9 of 44
The Home Screen
Above: Envision is connected for charging (completed), an external audio device is connected, A/V device is connected (but not
active), the volume is being adjusted, external microSD and OTG are connected but Internal Storage is the selected input.
Charge Indication
(fully charged)
Battery
Capacity
Volume
Adjustment
Brightness
Adjustment
Go to
Image
Screen
Go to
Video
Screen
Go to
Info
Screen
Volume /
Brightness
Sliders
microSD
(connected)
Go to
Audio
Screen
Go to Input
Device Selection
Screen
Internal
Storage
(selected)
OTG
(connected)
A/V device
(B02 only /
connected)

Envision B Series User Manual 20211213.docx || © 2021 MegaVoice Ltd. || Page 10 of 44
Charge indication
When the Type-C USB charging cable is connected to the charging port on the back of the player, the battery will
charge, the charge indication icon will appear at the top of the screen and blink. The charge LED will also light up
in red on the back of the device (but does not blink). Once fully charged the screen icon stops blinking, becomes
highlighted and the LED will turn green. Both the icon and LED will persist until the cable is disconnected.
See Charging Instructions for more details.
Battery capacity
This icon always shows the current battery capacity according to the chart below:
When blinking, capacity is 5% or lower*
When not blinking, capacity is between 6% and 20% Charging is recommended when red!
Capacity is between 21% and 40%
Capacity is between 41% and 60%
Capacity is between 61% and 80%
Capacity is between 81% and 100%
*When the capacity drops below the minimum required for operation, Envision will turn itself off.

Envision B Series User Manual 20211213.docx || © 2021 MegaVoice Ltd. || Page 11 of 44
Volume adjustment
When tapping the volume icon, the volume slider is displayed. The volume may be adjusted by moving the icon
on the slider either left (softer) or right (louder). As the volume is changed, the icon appearance will change as
well. Sliding the indicator all the way to the left will mute the player. When muted this icon will be
displayed: . Tapping the volume icon again (or anywhere else on the screen) will hide the slider. Volume
may be changed at any time, whether playback is active or not.2 3
Speakers and Audio Out
The Envision contains two very powerful internal speakers for resounding output.
You may also connect any audio output device to the 3.5mm stereo audio jack on the back of the tablet. When a
plug is inserted, the internal speakers will turn off, the volume icon will change to and audio will be output to
the connected device. When removing the plug, the internal speakers will turn back on and the icon will change
back to .
Brightness adjustment
When the brightness icon is tapped, the brightness slider will be displayed. The brightness can be adjusted by
moving the icon on the slider either left (darker) or right (brighter). Tapping the brightness icon again (or
anywhere else on the screen) will hide the slider. Brightness may be changed at any time, whether playback is
active or not.1 2 3
1The brightness icon is hidden during an A/V connection since brightness is controlled from the external device.
2Using moderate brightness and volume settings will preserve battery life.
3The volume and brightness sliders share the same area on the screen so only one may be accessed at a time.

Envision B Series User Manual 20211213.docx || © 2021 MegaVoice Ltd. || Page 12 of 44
Internal Storage
Since internal storage is permanent, this icon will always show at the top of the screen. When internal storage is
the current input source the icon is highlighted. Selection of this storage may only be done from the Input Device
Selection Screen.
microSD Storage
Using microSD storage is optional and is done by inserting a card in the external microSD connector. The icon
shows in the top controls if there is a microSD card present in the card reader; otherwise, the area is blank. When
it is chosen as the current input device, it becomes highlighted. Selection of this storage may only be done from
the Input Device Selection Screen. For limitations on microSD see Input Devices.
OTG Storage
Using OTG storage is optional and is done by inserting an OTG device in the external OTG connector. The icon
shows in the top controls if there is an OTG device connected to the tablet; otherwise, the area is blank. When it
is chosen as the current input device, it becomes highlighted. Selection of this storage may only be done from the
Input Device Selection Screen. For limitations on OTG see Input Devices.
A/V (B02 only)
This icon only appears when an A/V device is connected. It changes to this icon when the device becomes
active. See section Audio/Visual (A/V) for details.

Envision B Series User Manual 20211213.docx || © 2021 MegaVoice Ltd. || Page 13 of 44
Image
Image screen –Main
Envision supports most BMP, GIF, JPG and PNG image file types. All Image files are stored in the Image folder. This
folder may contain Individual image folders or single-file images.
*If there are no valid folders or files in the Image folder, Envision displays “The folder is empty”.
Envision will attempt to generate thumbnail images for each image file present. If thumbnail files are included for
folders, they must be JPG files like other thumbnails but with the extension changed to MVI.
*If an empty rectangle is displayed as the thumbnail, it typically means that the file is in progressive format that
Envision cannot display.
After selecting the Image icon, the initial screen lists all the folders and/or files that are currently available in the
root Image folder. If there are more items than can fit on a single screen, the previous row and/or next row
icons will be displayed at the top/bottom respectively. A tap on either icon will scroll by one row.
*Whenever the previous/next row icons appear, you may also swipe up or down to adjust the display.
If some of the icons represent folders containing multiple image files, or even other sub-folders, there are three
browser “views” you may select to present the image items within that folder:
Thumbnail , Medium and List .
To select a folder or image file, tap on the file/folder (or its name) and it becomes highlighted. Once highlighted it
is considered “selected”. Tap again to open it in the Image Viewer.

Envision B Series User Manual 20211213.docx || © 2021 MegaVoice Ltd. || Page 14 of 44
Image screen –Thumbnail view
This type of icon is
shown when there is a
thumbnail image or
when the thumbnail is
generated from the
image itself
Selected
This type of icon is
shown when a
thumbnail image
cannot be generated
and a thumbnail file is
not present
Go to
Audio
Screen
Go to
Video
Screen
Go to
Home
Screen
Image
(selected)

Envision B Series User Manual 20211213.docx || © 2021 MegaVoice Ltd. || Page 15 of 44
Image screen –Medium view
This type of icon
is shown when
Envision cannot
render a
thumbnail of the
image file
Selected
Previous
Next
This type of icon
represents an
image file that
Envision cannot
display

Envision B Series User Manual 20211213.docx || © 2021 MegaVoice Ltd. || Page 16 of 44
Image screen –List view
This is the most compact of the three views. To choose an image file for display, tap once to select (highlight) and
then again to display it in the Image Viewer.
Thumbnail
View
Medium
View
List View
(selected)
Previous
Screen
Selected

Envision B Series User Manual 20211213.docx || © 2021 MegaVoice Ltd. || Page 17 of 44
Image Viewer screen
Controls will auto-
hide after several
seconds. Tap will
also display and
hide the controls.
Upper and lower
controls will auto-
hide after several
seconds. A tap
anywhere will also
toggle the controls
on or off.
Back to
previous
screen
Zoom control:
Out, Actual, In
Current
zoom level
Fit
Vertical
Pan Controls:
Left, Right, Up,
Down and
Center
Fit to
Screen
Fit to
Sides
Rotate
Left
Rotate
Right
Begin
Slideshow

Envision B Series User Manual 20211213.docx || © 2021 MegaVoice Ltd. || Page 18 of 44
Image Slideshow Screen
Controls will auto-
hide after several
seconds. Tap will
also display and
hide the controls.
Upper and lower
controls will auto-
hide after several
seconds. A tap
anywhere will also
toggle the controls
on or off.
Back to
Image
Viewer
Slideshow Speed:
From 2 to 20
second delay
between images
Shuffle
Previous
Image
Next
Image
Play
Pause

Envision B Series User Manual 20211213.docx || © 2021 MegaVoice Ltd. || Page 19 of 44
Slideshow Speed
The time between images may be adjusted from 2 seconds to 20 seconds. The change can be made at any time
during the slideshow presentation. The setting will persist until changed or a default reset is executed.
The slideshow will loop through all the images in the current folder at the set delay.
Shuffle
This feature will randomly shuffle the display order of all the images in the current folder. Tap once to turn the
feature on and a second time to turn it off. The setting will persist until changed or a default reset is executed.
Previous file
Tap once to display the previous file in the current folder. If the first file in the folder is current, the player will
navigate to the last file in the folder. This feature will work during the Slideshow or when it is paused. If Shuffle is
turned on, the shuffled order is used.
Play/Pause
While the Slideshow is active, the Pause icon is displayed. Tap on it to suspend the Slideshow. The icon will
change to the Play icon. Tap again to resume. The icon will revert to the Pause icon.
When the Slideshow is paused, it will remain in that state until manually resumed.
Next file
Tap once to begin playback of the next file in the current folder. If the last file in the folder is current, the player
will navigate to the first file in the folder. This feature will work during the Slideshow or when it is paused. If
Shuffle is turned on, the shuffled order is used.

Envision B Series User Manual 20211213.docx || © 2021 MegaVoice Ltd. || Page 20 of 44
Audio
Envision supports most AAC/M4A, APE, FLAC, MP3, OGG and WAV file types. All Audio is stored in the Audio
folder. The Audio folder may contain other folders, or single audio files. Each folder may contain individual audio
files or even other sub-folders.
*If there are no valid folders or files in the Audio folder, Envision displays “The folder is empty”.
After selecting the Audio icon, the initial screen lists all the folders and/or files that are currently available in the
root Audio folder. If there are more items than can fit on a single screen, the previous row and/or next row
icons will be displayed at the top/bottom respectively. A tap on either icon will scroll by one row.
*Whenever the previous/next row icons appear, you may also swipe up or down to scroll the display.
There are three browser views you may select to present the Books and the Chapters within a Book:
Thumbnail , Medium and List .
To select a folder or file tap the icon (or its name) and it becomes highlighted. Once highlighted it is considered
“selected”. Tap again to open it.
Other manuals for Envision B Series
1
This manual suits for next models
2
Table of contents
Other Megavoice Tablet manuals

