Mellert SLT TL 257Ex User manual
Use of the helmet lamp TL257 - Ex
The helmet lamp TL257 Ex is fitted with five most luminous LED’s
and offers a clearly focused and steady projected image due to an
optical light concentration. This helmet lamp is an ideal essential
complement of your equipment in the area with explosion risk in
the sectors 1, 2 and 21, 22 through its harmonised light spreading
and the individually adjustable luminous angle.
The 3 switching cycles enable an operation of 2 LED’s for the
local range, 3 LED’s for the remote range or all 5 LED’s at the
same time. Fastening of the lamp directly on the helmet ensures a
uniform and centred weight arrangement and position - the lamp
therefore always flashes in the line of sight.
The lamp can be purchased with different accessories, like a
helmet holder or a reflecting band.
Mounting and removing of the lamp on the helmet is truly simple
and to be done with a few turns with no need of any tool.
Technical Data
Lighting distance: 50 m
Lighting time: 24 h
Batteries: 3 x AA 1,5 V
Weight: 280 g without batteries
Lighing appliances: 5 x LED white
Light intensity: 5 x 18000 mcd
Life-time: > 20000 h (LED)
Ambient temperature range: - 20°C up to + 40°C
Housing: IP54
Type-tested Batteries
Maintenance and care of the lamp
Please clean the lamp only with a moist cloth – Danger can occur
through static charging. The sealing rings have to be checked and
lubricated with silicone grease after each battery replacement.
Deposits, like e.g. dirt, salt, sand or other impurities are to be
removed carefully. We recommend a regular cleaning of the len-
ses of the lamp to ensure a constant lighting quality. In case of
damage of the sealing rings or other parts, the article can NO
LONGER be used in ex-areas. The batteries should not be ex-
posed to direct sunlight or be dried above a fire. Do not store
batteries over 60°C (146°F).
Malfunctions
As soon as the reliability of the lamp is not provided anymore, it
must be switched off and removed immediately from the risk area.
The non intended reconnection must be secured. We recommend
to send the lamp in this case to the manufacturer for overhauling
Cases in which the lamp is not to be used any more:
Transport damages
Visible damages at the housing
Improper strain of the lamp
Unreadable labelling of the lamp
Exceeding of allowed critical values
Improper storage of the lamp
Occurance of failures
For any further queries, please contact our Customer Service.
Guarantee and Liability
This article has a guarantee of 2 years for manufacture and mate-
rial, except the batteries. This guarantee does not apply to articles
which have been improperly used, modified, neglected (incl. usual
wear), damaged through accidents or exposed to abnormal oper-
ating conditions as well as to a faulty handling.
We assume no liability whatsoever for direct, indirect conse-
quences caused by accident. This also applies for any other type
of damage as a result of the use of this lamp. We will likewise
assume no liability at all for damage to property or to persons
caused by faulty handling or non-observance of the safety instruc-
tions. In case damages are detected on the lamp, please DO
NOT USE IT anymore !
Be aware of life threatening danger!
Safety instructions
The use of the lamp calls for the observance of the usual safety
instructions by the user in order to eliminate any operating error of
the lamp.
If the luminous power of the lamp is not satisfying
any more, the batteries have to be replaced.
Following safety instructions are to be followed when
changing the batteries:
The battery cover should only be opened in a non-hazardous
environment!
We recommend to replace all 3 batteries at once.
Never fit in mixed new and used batteries.
Only batteries of the accordingly allowed type can be fitted in
(see table under Technical Data).
Only use batteries of same type and same manufacturer.
Please observe the polarity of the batteries.
Carrying along of additional batteries in ex-areas is not permit-
ted.
The danger zone marking is noted down at the lamp housing. The
article is NOT adapted for a permanent use in danger zone 0 and
20!
Mellert SLT GmbH & Co.KG
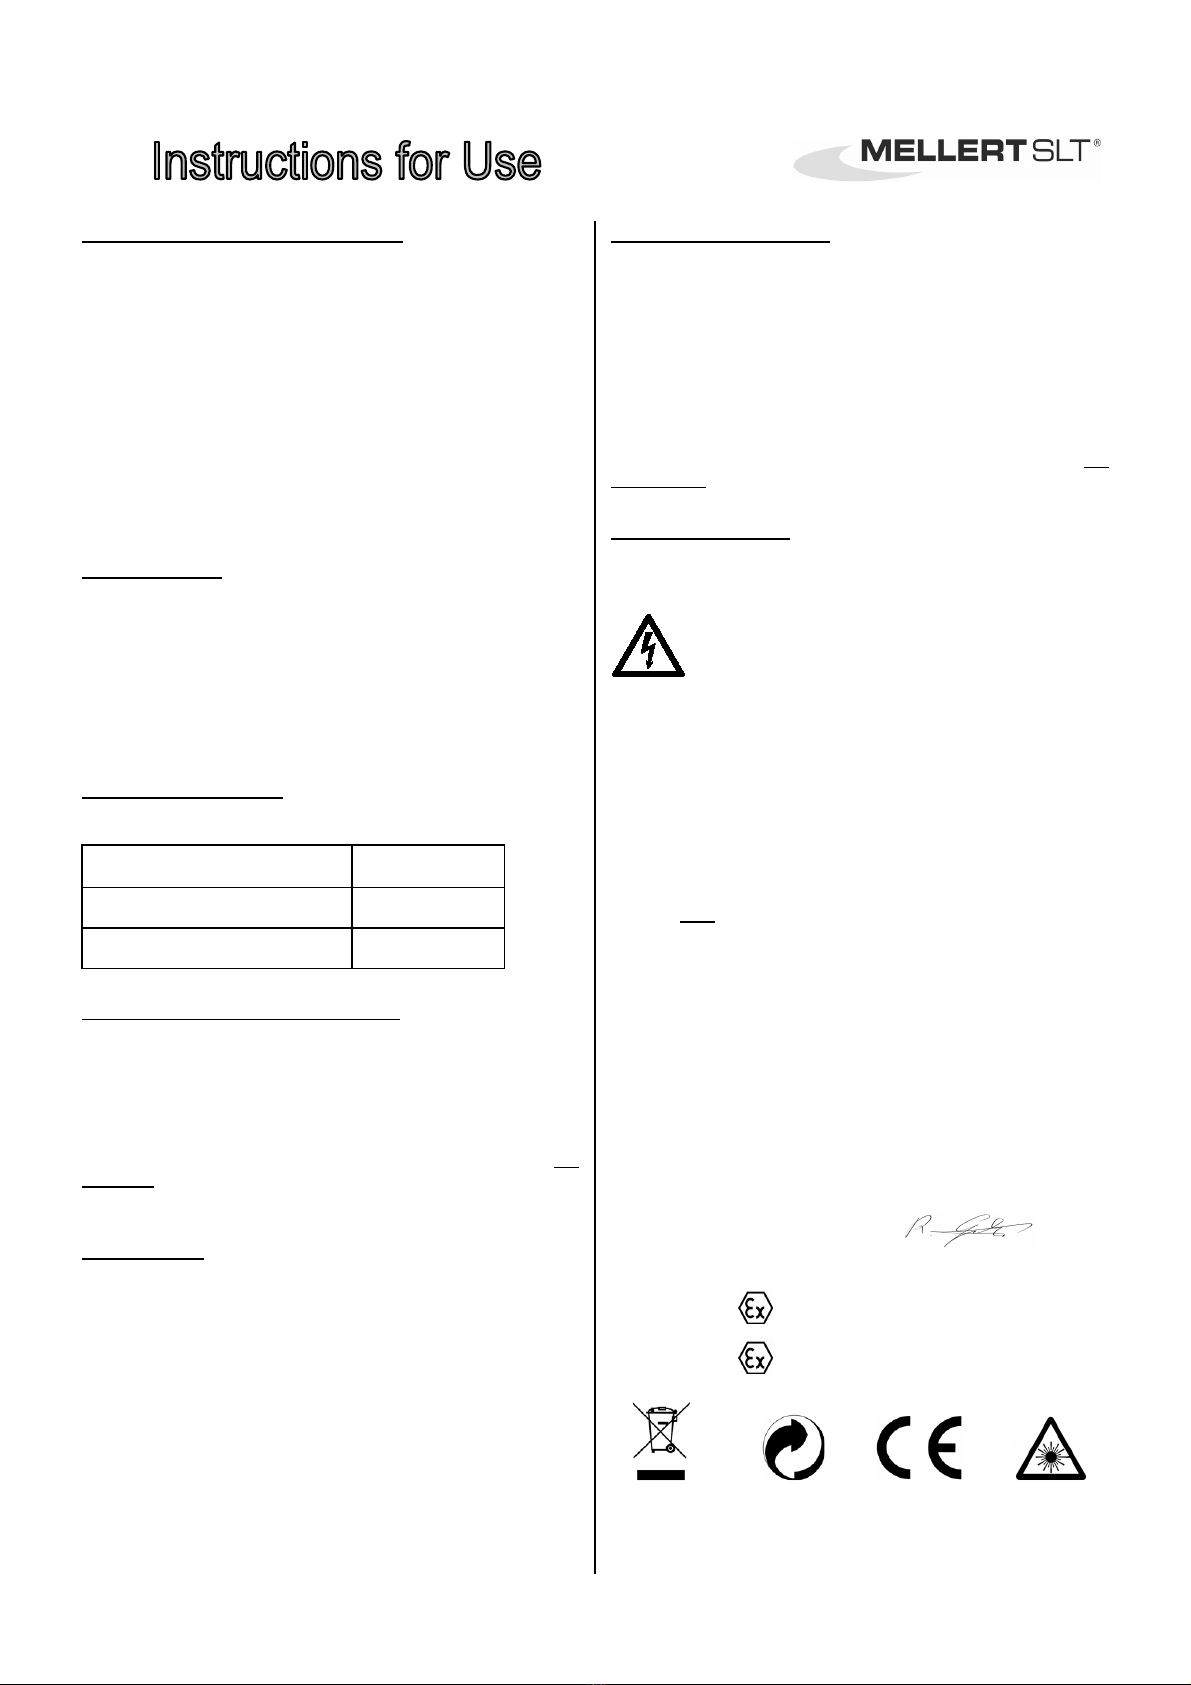
Declaration of Conformity, EU-Guideline 94/9/EG
We, Company Mellert SLT GmbH & Co.KG, Langenmorgen 2, 75015 Bretten,
declare under our exclusive liability for the delivery of the product
Model Type: TL257 Ex
Standard: EN 60079-0:2004 ; EN 60079-11:2007 ; EN 61241-
0:2006
. EN 61241-11:2006
object of this declaration that it complies with the basic health and safety re-
quirements of the ATEX-Guideline 94/9/EG, provided that the model mentioned
above is used, maintained and serviced according to the attendant instructions.
Inspection Authority for EC – Type approval: IBEXU
Mellert SLT GmbH & Co KG
Bretten, 2
nd
Mai 2007 (R. Gelmroth, Director)
Code:
II 2G Ex ia IIC T4 or
II 2D Ex ia D21 T 135 °C
Manufacturer Type
Energizer E92
AA, LR 06
1,5 V
VARTA/ High Energy 4906
AA, LR 06
1,5 V
85.590.
-
9
51
.00
Information about the Lamp:
Assembly VisorLite I:
Mellert SLT GmbH & Co. KG ⋅
⋅⋅
⋅D-75015 Bretten / Germany - Fax +49 (0)7252 / 505 - 10 ⋅
⋅⋅
⋅www.mellert-slt.com
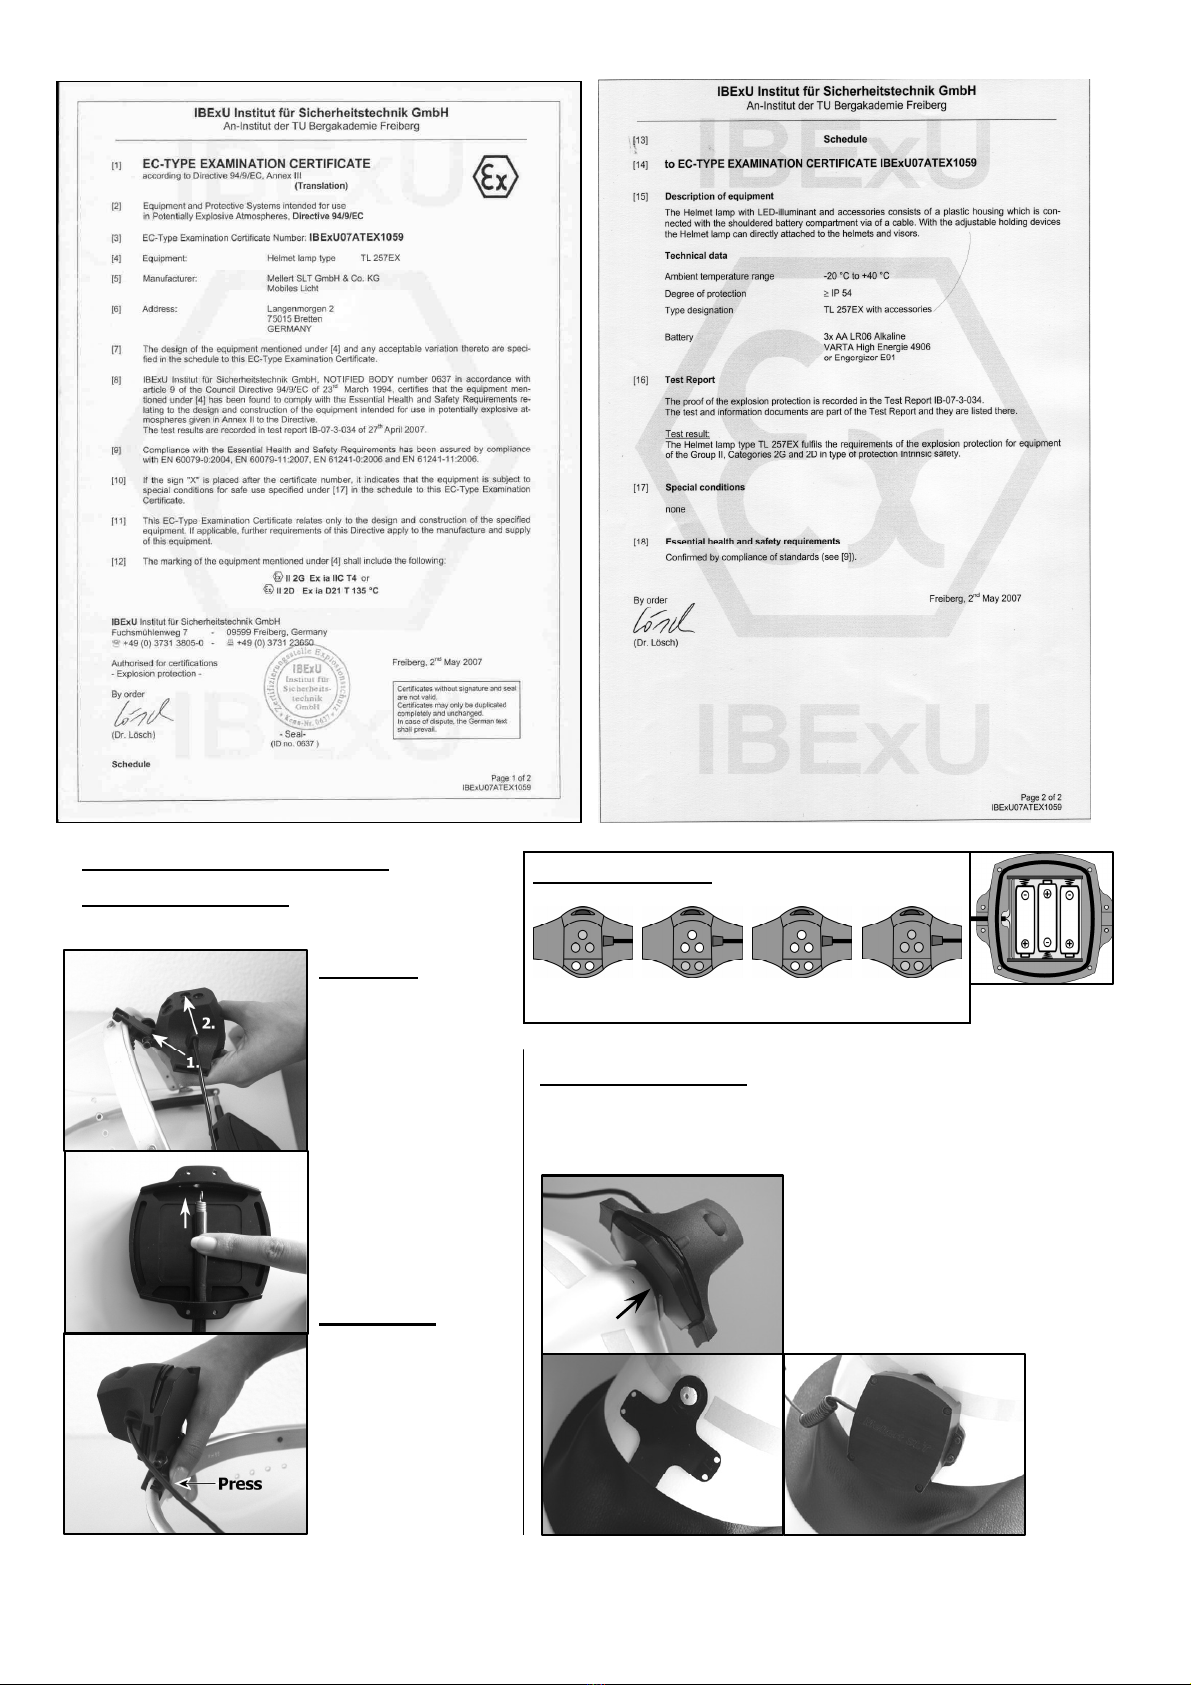
Assembly
:
Set the tilted back lamp
fixture centred at the
inner edge of the sight
holder, incline to the front
until the holder snaps in.
(Fig.1.1). Lead the spring
of the sight holder (incl.
rubber protection) through
the clips of the battery
compartment, mind the
installation true to side!
(Fig.1.2). Refit as usual
the sight holder incl. fas-
tened lamp fixture and
battery compartment at
the helmet.
Dismantling:
For dismantling, press in
the centre inside of the
lamp fixture – the fixture is
released,
tilts automatically
backwards and can easily
be removed.
Fig. 1.1
Fig. 1.2
Fig. 1.3
Lighting functions:
2 x
LED
Nahbereich
3 x
LED
Fernbereich
5
x LED
Nah- Fernbereich
O
FF
3 x LR 06 - 1,5 V
included
Fig. 2.1
Fig. 2.2
Fig. 2.3
Assembly
VisorLite II:
Slide in the lamp with fixture into
the collet at the helmet until it
snaps in. (Fig.2.1).
Loosen then the rear plastic screw at the
helmet, push then the battery compartment
with the bent over clip from below on the
helmet until the boreholes are aligned.
Tighten again the plastic screw with care..
(Fig.2.2).
Slide on the battery compartment with the
lateral recess on one side at the corre-
sponding clip until the end, insert then the
second clip in the second recess on the
other side until the boreholes of the fixture
are aligned with those of the battery com-
partment. Tighten steadily the screws pro-
vided to this aim. (Fig.2.3).

Use of the helmet lamp TL257 - Ex
The helmet lamp TL257 Ex is fitted with five most luminous LED’s
and offers a clearly focused and steady projected image due to an
optical light concentration. This helmet lamp is an ideal essential
complement of your equipment in the area with explosion risk in
the sectors 1, 2 and 21, 22 through its harmonised light spreading
and the individually adjustable luminous angle.
The 3 switching cycles enable an operation of 2 LED’s for the
local range, 3 LED’s for the remote range or all 5 LED’s at the
same time. Fastening of the lamp directly on the helmet ensures a
uniform and centred weight arrangement and position - the lamp
therefore always flashes in the line of sight.
The lamp can be purchased with different accessories, like a
helmet holder or a reflecting band.
Mounting and removing of the lamp on the helmet is truly simple
and to be done with a few turns with no need of any tool.
Technical Data
Lighting distance: 50 m
Lighting time: 24 h
Batteries: 3 x AA 1,5 V
Weight: 280 g without batteries
Lighing appliances: 5 x LED white
Light intensity: 5 x 18000 mcd
Life-time: > 20000 h (LED)
Ambient temperature range: - 20°C up to + 40°C
Housing: IP54
Type-tested Batteries
Maintenance and care of the lamp
Please clean the lamp only with a moist cloth – Danger can occur
through static charging. The sealing rings have to be checked and
lubricated with silicone grease after each battery replacement.
Deposits, like e.g. dirt, salt, sand or other impurities are to be
removed carefully. We recommend a regular cleaning of the len-
ses of the lamp to ensure a constant lighting quality. In case of
damage of the sealing rings or other parts, the article can NO
LONGER be used in ex-areas. The batteries should not be ex-
posed to direct sunlight or be dried above a fire. Do not store
batteries over 60°C (146°F).
Malfunctions
As soon as the reliability of the lamp is not provided anymore, it
must be switched off and removed immediately from the risk area.
The non intended reconnection must be secured. We recommend
to send the lamp in this case to the manufacturer for overhauling
Cases in which the lamp is not to be used any more:
Transport damages
Visible damages at the housing
Improper strain of the lamp
Unreadable labelling of the lamp
Exceeding of allowed critical values
Improper storage of the lamp
Occurance of failures
For any further queries, please contact our Customer Service.
Guarantee and Liability
This article has a guarantee of 2 years for manufacture and mate-
rial, except the batteries. This guarantee does not apply to articles
which have been improperly used, modified, neglected (incl. usual
wear), damaged through accidents or exposed to abnormal oper-
ating conditions as well as to a faulty handling.
We assume no liability whatsoever for direct, indirect conse-
quences caused by accident. This also applies for any other type
of damage as a result of the use of this lamp. We will likewise
assume no liability at all for damage to property or to persons
caused by faulty handling or non-observance of the safety instruc-
tions. In case damages are detected on the lamp, please DO
NOT USE IT anymore !
Be aware of life threatening danger!
Safety instructions
The use of the lamp calls for the observance of the usual safety
instructions by the user in order to eliminate any operating error of
the lamp.
If the luminous power of the lamp is not satisfying
any more, the batteries have to be replaced.
Following safety instructions are to be followed when
changing the batteries:
The battery cover should only be opened in a non-hazardous
environment!
We recommend to replace all 3 batteries at once.
Never fit in mixed new and used batteries.
Only batteries of the accordingly allowed type can be fitted in
(see table under Technical Data).
Only use batteries of same type and same manufacturer.
Please observe the polarity of the batteries.
Carrying along of additional batteries in ex-areas is not permit-
ted.
The danger zone marking is noted down at the lamp housing. The
article is NOT adapted for a permanent use in danger zone 0 and
20!
Mellert SLT GmbH & Co.KG
Declaration of Conformity, EU-Guideline 94/9/EG
We, Company Mellert SLT GmbH & Co.KG, Langenmorgen 2, 75015 Bretten,
declare under our exclusive liability for the delivery of the product
Model Type: TL257 Ex
Standard: EN 60079-0:2004 ; EN 60079-11:2007 ; EN 61241-
0:2006
. EN 61241-11:2006
object of this declaration that it complies with the basic health and safety re-
quirements of the ATEX-Guideline 94/9/EG, provided that the model mentioned
above is used, maintained and serviced according to the attendant instructions.
Inspection Authority for EC – Type approval: IBEXU
Mellert SLT GmbH & Co KG
Bretten, 2
nd
Mai 2007 (R. Gelmroth, Director)
Code:
II 2G Ex ia IIC T4 or
II 2D Ex ia D21 T 135 °C
Manufacturer Type
Energizer E92
AA, LR 06
1,5 V
VARTA/ High Energy 4906
AA, LR 06
1,5 V
85.590.
-
9
51
.00

Information about the Lamp:
Assembly VisorLite I:
Mellert SLT GmbH & Co. KG ⋅
⋅⋅
⋅D-75015 Bretten / Germany - Fax +49 (0)7252 / 505 - 10 ⋅
⋅⋅
⋅www.mellert-slt.com
Assembly:
Set the tilted back lamp
fixture centred at the
inner edge of the sight
holder, incline to the front
until the holder snaps in.
(Fig.1.1). Lead the spring
of the sight holder (incl.
rubber protection) through
the clips of the battery
compartment, mind the
installation true to side!
(Fig.1.2). Refit as usual
the sight holder incl. fas-
tened lamp fixture and
battery compartment at
the helmet.
Dismantling:
For dismantling, press in
the centre inside of the
lamp fixture – the fixture is
released, tilts automatically
backwards and can easily
be removed.
Fig. 1.1
Fig. 1.2
Fig. 1.3
Fig. 2.1
Fig. 2.2
Abb. 2.3
Assembly VisorLite II:
Slide in the lamp with fixture into
the collet at the helmet until it
snaps in. (Fig.2.1).
Loosen then the rear plastic screw at the
helmet, push then the battery compartment
with the bent over clip from below on the
helmet until the boreholes are aligned.
Tighten again the plastic screw with care..
(Fig.2.2).
Slide on the battery compartment with the
lateral recess on one side at the corre-
sponding clip until the end, insert then the
second clip in the second recess on the
other side until the boreholes of the fixture
are aligned with those of the battery com-
partment. Tighten steadily the screws pro-
vided to this aim. (Fig.2.3).
Lighting functions:
2 x
LED
Nahbereich
3 x
LED
Fernbereich
5
x LED
Nah- Fernbereich
O
FF
3 x LR 06 - 1,5 V
included


