Melnor 4501 User manual
English
1
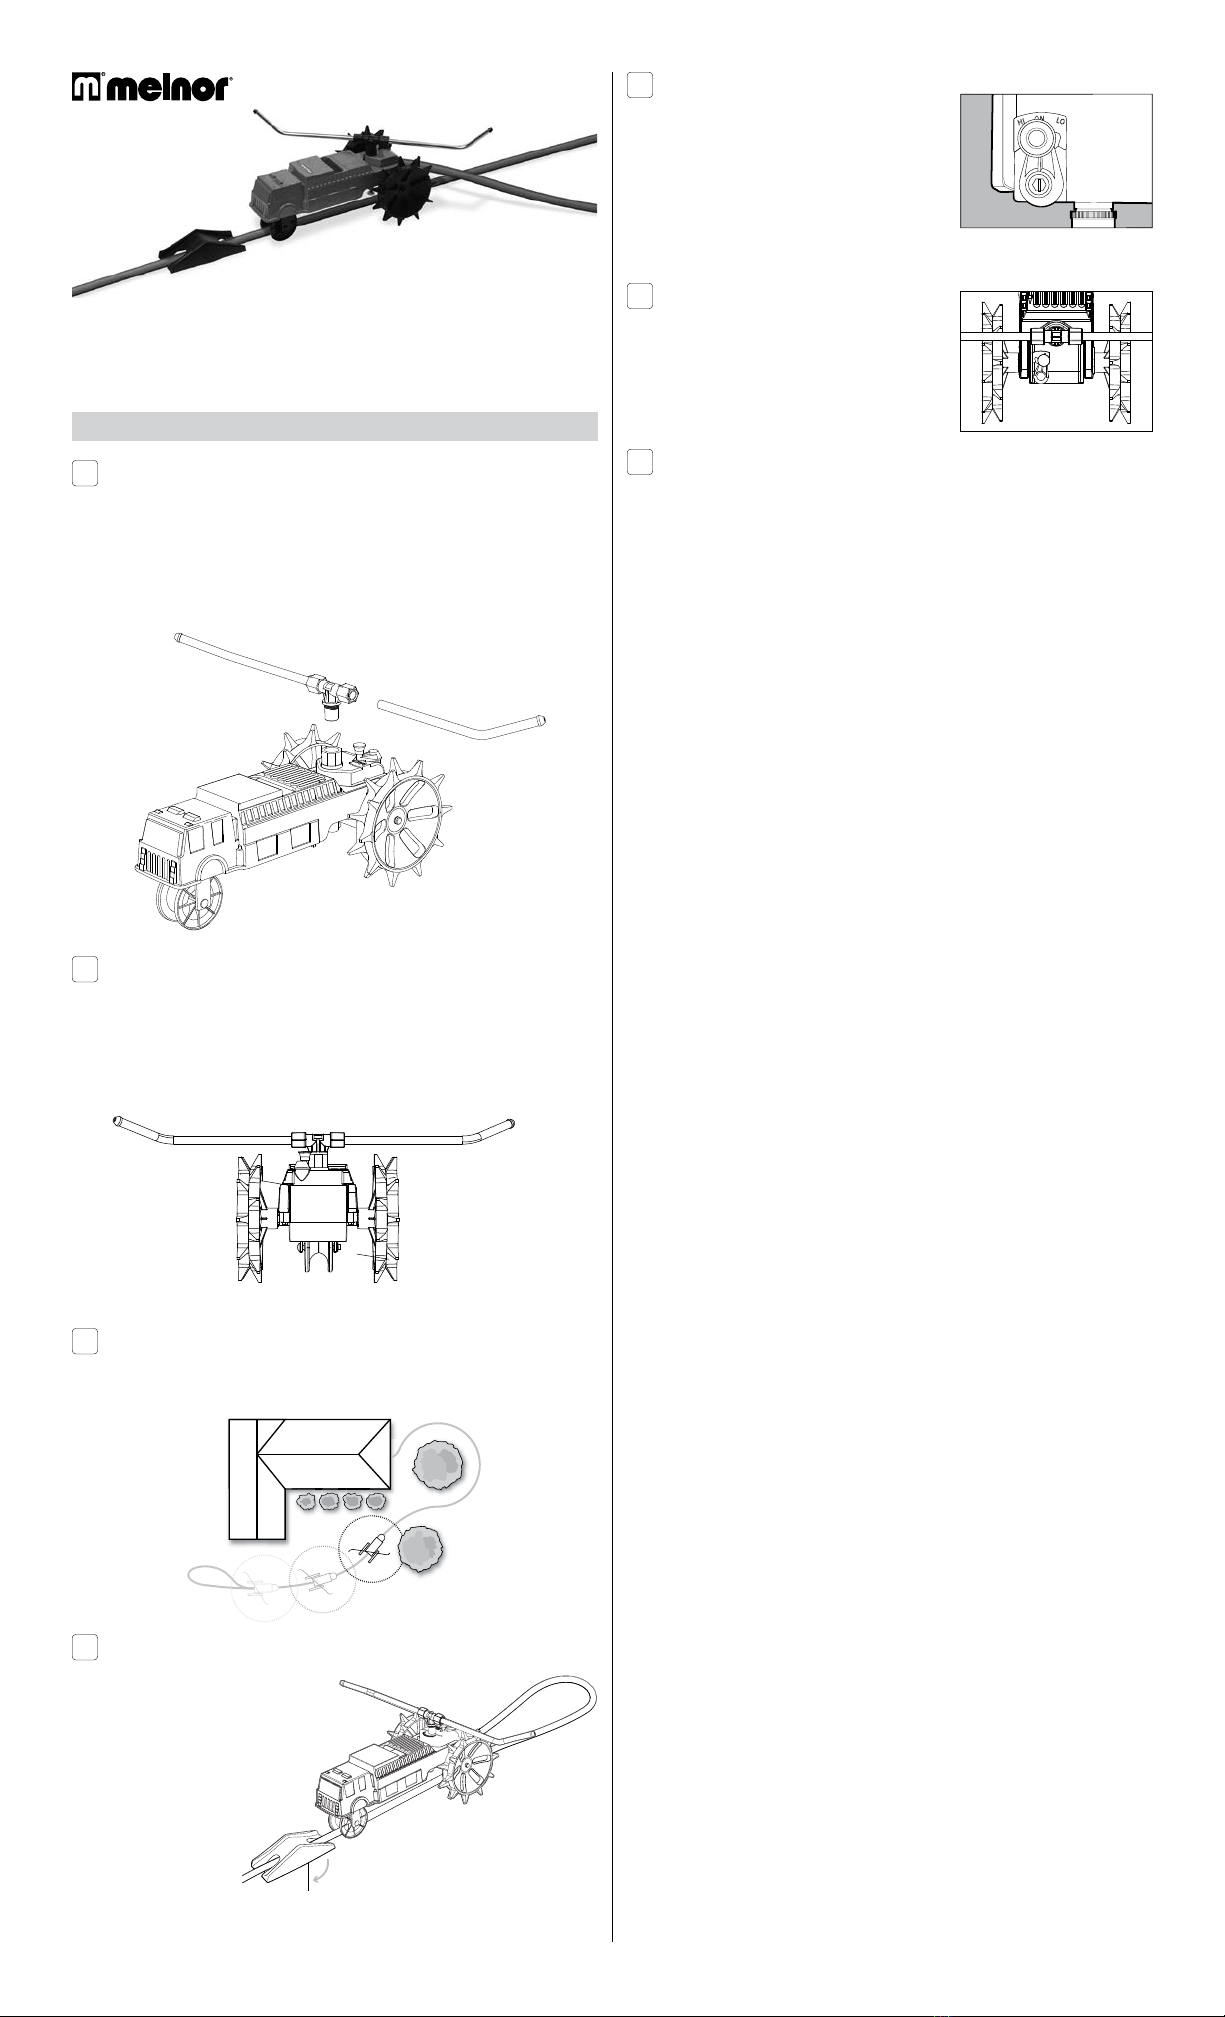
Assemble the Sprinkler
Remove the sprinkler body from the carton and place on a solid surface.
CAUTION: The sprinkler body is made of cast iron. It is very heavy and could cause
injury or be damaged if dropped.
Attach the spray arm with the attached “T” connector to the sprinkler body. Tighten firmly with your
hands. Do not overtighten. Loosen the remaining nut on the “T” connector and insert the second
spray arm as far as it will go. Tighten the nut to hold the arm in place.
2
Adjust the Spray Arms
With the sprinkler hose connection on the back facing you, the tip of the left arm should point
toward you and the tip of the right arm should point away from you. Slightly loosen the nuts to
adjust the spray arms. To water the maximum area, turn both spray arms upward to about a
30-degree angle; to water the minimum area, turn the spray arms just below horizontal.
3
Lay Out the Hose
When in use, the sprinkler will travel along the length of the hose, toward the faucet.Arrange the
hose in the yard where you want to water.
4
Add the Stop Ramp
The sprinkler is equipped with an automatic
shut-off. The shut-off is activated when the
sprinkler travels over the stop ramp. Place
the stop ramp over the hose in the spot
where you want the sprinkler to stop.
Lay the hose straight for about five feet
on either side. Insert the flip-down
spike into the ground.
5
Set the Sprinkler Speed
The sprinkler has three speed settings. LO makes the
sprinkler move slowly while watering and will result in a
more thorough watering. HI makes the sprinkler move
more quickly and will result in a lighter watering. N(Neutral)
stops the forward movement of the sprinkler allowing you
to use it as a stationary sprinkler. To adjust, pull up on the
speed selector knob and move to the desired setting.
6
Attach the Hose
Screw the end of the hose into the back of the sprinkler.
Place the sprinkler over the hose so that the back wheels sit
on either side of it and the front wheel lies on top.
7
Begin Watering
Turn on the faucet and check to make sure that the sprinkler is spraying and moving properly. The
movement is very slow even when the speed is set to high. When the sprinkler reaches the stop
ramp the watering will cease. Turn off the faucet, remove the hose and empty out excess water
before storing.
CAUTION: Do not leave the hose under pressure when not watering. The hose could
burst.
4501
Lawn Rescue Traveling Sprinkler
Arroseur enjambeur Pelouse-secours
Aspersor móvil “salvacésped”
User Instructions ■Mode d’emploi ■Instrucciones para el usario
4501_INS_00


