TFP461
Page 5 of 6
Installation
TYCO RAPID RESPONSE Series LFII
Dry Type Residential Horizontal Side-
wall Sprinklers must be installed in
accordance with this section.
General Instructions
The Series LFII Dry Type Residential
Horizontal Sidewall Sprinklers must
only be installed in fittings that meet
the requirements of the Design Criteria
section. For other important require-
ments regarding piping design and
sealing of the clearance space around
the Sprinkler Casing, see the Design
Criteria section.
Do not install any bulb type sprinkler
if the Bulb is cracked or there is a loss
of liquid from the Bulb. With the sprin-
kler held horizontally, a small air bubble
should be present. The diameter of the
air bubble is approximately 1/16 in.
(1,6 mm).
A leak-tight 1 in. NPT sprinkler joint
should be obtained by applying a min-
imum-to-maximum torque of 20 to 30
lb-ft (26,8 to 40,2 N∙m). Higher levels
of torque can distort the sprinkler Inlet
or Frame with consequent leakage or
impairment of the sprinkler.
Do not attempt to compensate for
insufficient adjustment in an Escutch-
eon Plate by under- or over-tightening
the sprinkler. Re-adjust the position of
the sprinkler fitting to suit.
Note: Install horizontal sidewall sprin-
klers only in the horizontal position
with their centerline of waterway par-
allel to the ceiling. The word TOP on the
Deflector is to face towards the ceiling.
Step 1. With a non-hardening pipe-
thread sealant such as Teflon tape
applied to the inlet threads, hand-
tighten the sprinkler into the sprinkler
fitting.
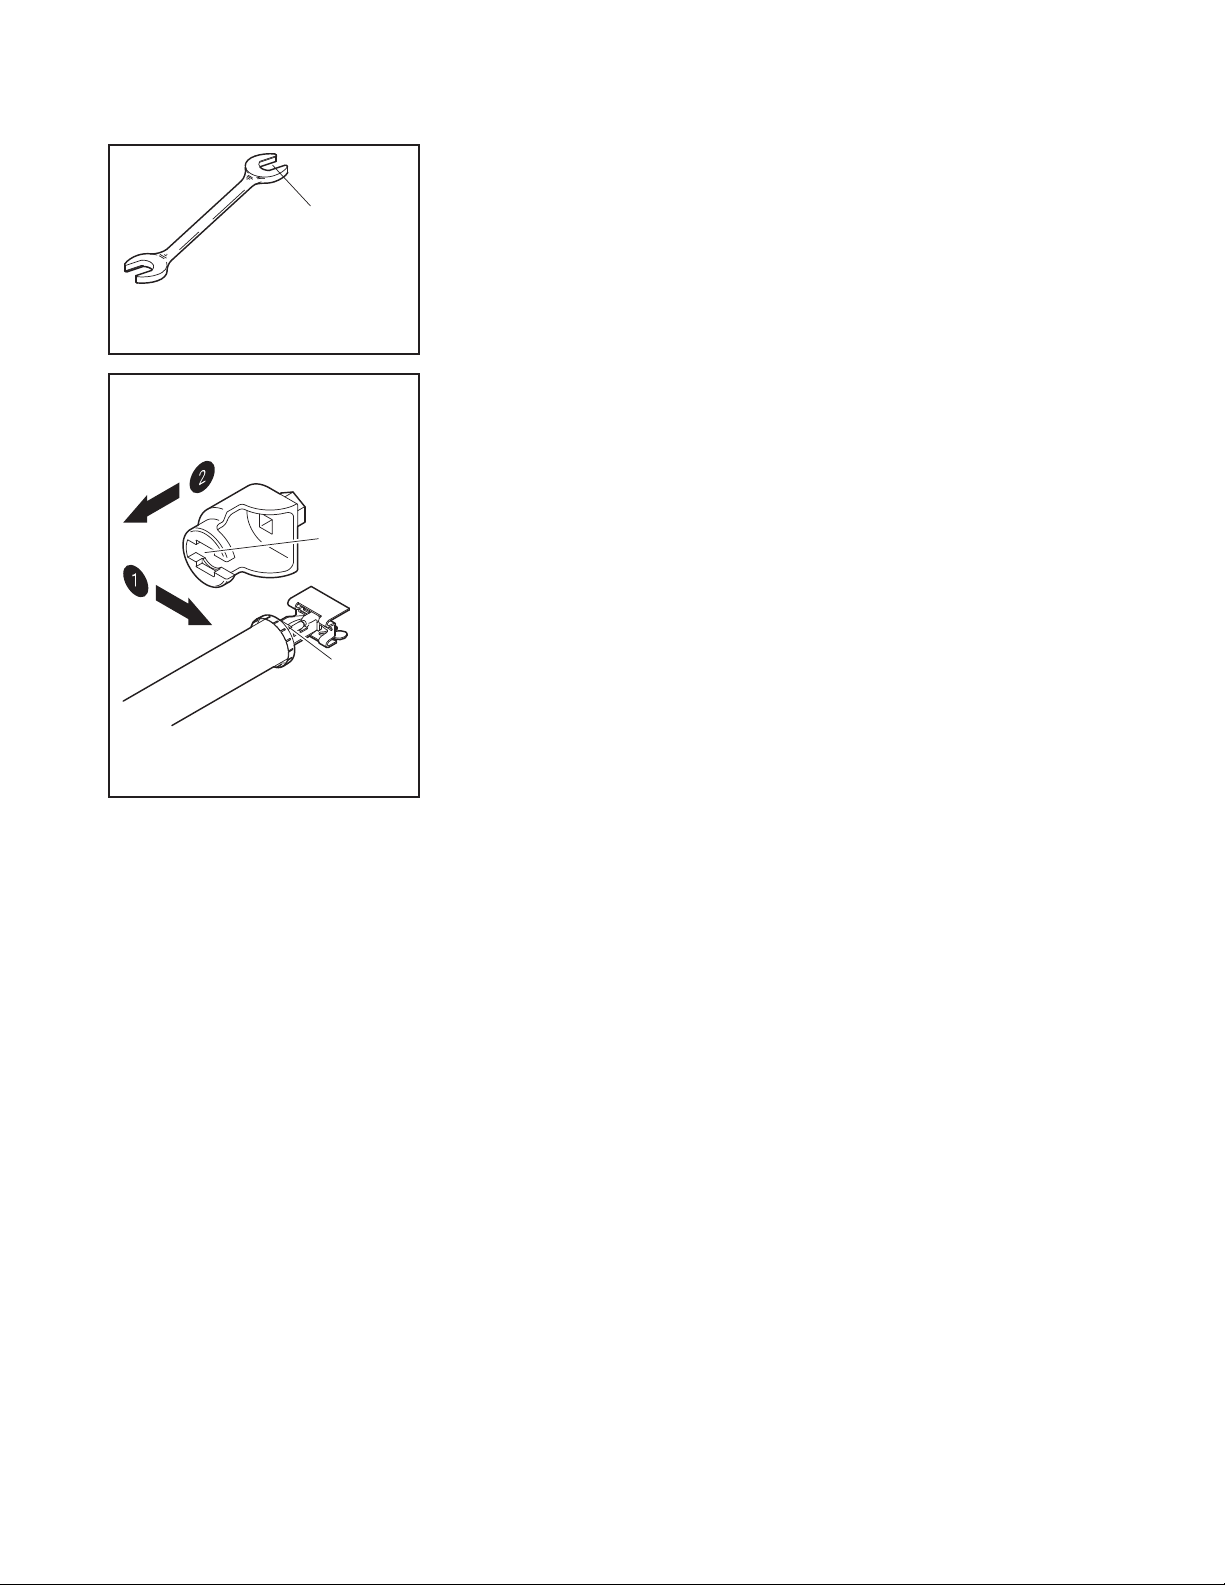
Step 2. Wrench-tighten the sprinkler
using a pipe wrench on the Inlet Band
or the Casing (see Figure 1), or using
the W-Type 6 or W-Type 7 Sprinkler
Wrench as follows:
•
For plain-barrel horizontal sidewall
sprinklers, apply the Wrench
Recess End “A” of the W-Type 6
Sprinkler Wrench (see Figure 6) to
the Wrench Flat.
•
For recessed horizontal sidewall
sprinklers, apply the Wrench
Recess of the W-Type 7 Sprinkler
Wrench to the Wrench Flat
(see Figure 7).
Clearance Space
When connecting an area subject to
freezing and an area containing a wet-
pipe sprinkler system, the clearance
space around the sprinkler barrel of
Dry Type Residential Sprinklers must
be sealed, in accordance with the
NATIONAL FIRE PROTECTION ASSO-
CIATION. Due to temperature differ-
ences between the two areas, the
potential for the formation of conden-
sation in the sprinkler and subsequent
ice build-up is increased. If this con-
densation is not controlled, ice build-up
can occur that might damage the dry
type sprinkler and/or prevent proper
operation in a re situation.
Use of the Model DSB-2 Dry Sprin-
kler Boot, described in Technical Data
Sheet TFP591 and shown in Figures 4
and 5, can provide the recommended
seal.
If sprinkler removal is necessary,
remove the sprinkler using the same
wrenching method noted above. Sprin-
kler removal is easier when a non-hard-
ening sealant was used and torque
guidelines were followed. After removal,
inspect the sprinkler for damage.
Step 3. After installation of the gypsum
board or other wall/soffit finish material,
slide the Style 20 Recessed Escutch-
eon Closure over the sprinkler. Push
the closure over the mounting plate
until its flange contacts the wall.
Care and
Maintenance
TYCO RAPID RESPONSE Series LFII
Dry Type Residential Horizontal Side-
wall Sprinklers (TY2335) must be main-
tained and serviced in accordance with
this section.
Before closing a fire protection system
main control valve for maintenance
work on the fire protection system
that it controls, obtain permission to
shut down the affected fire protection
systems from the proper authorities
and notify all personnel who may be
affected by this action.
Absence of a Recessed Escutch-
eon Plate or a Domed Concealed
Cover Plate to cover a clearance hole
can delay sprinkler operation in a fire
situation.
The owner must assure that the sprin-
klers are not used for hanging any
objects and that the sprinklers are only
cleaned by means of gently dusting
with a feather duster; otherwise, non-
operation in the event of a fire or inad-
vertent operation may result.
A Vent Hole is provided in the Bulb
Seat (see Figure 1) to indicate if the
Series LFII Dry Type Residential Hor-
izontal Sidewall Sprinkler is remain-
ing dry. Evidence of leakage from the
Vent Hole indicates potential leakage
past the Plug with Sealing Assembly
and the need to remove the sprinkler
to determine the cause of leakage (e.g.,
an improper installation or an ice plug).
Close the fire protection system control
valve and drain the system before
removing the sprinkler.
Sprinklers which are found to be
leaking or exhibiting visible signs of
corrosion must be replaced.
Automatic sprinklers must never be
painted, plated, coated, or other-
wise altered after leaving the factory.
Modified sprinklers must be replaced.
Sprinklers that have been exposed to
corrosive products of combustion, but
have not operated, should be replaced
if they cannot be completely cleaned
WRENCH
RECESS
WRENCH
FLAT
IN TO ENSURE
ENGAGEMENT
WITH SPRINKLER
(USE END "A"
ONLY)
FIGURE 7
W-TYPE 7 RECESSED
SPRINKLER WRENCH
FIGURE 6
W-T YPE 6
SPRINKLER WRENCH