Additional Features
ADDITIONAL FEATURES
HOOD RELEA SE
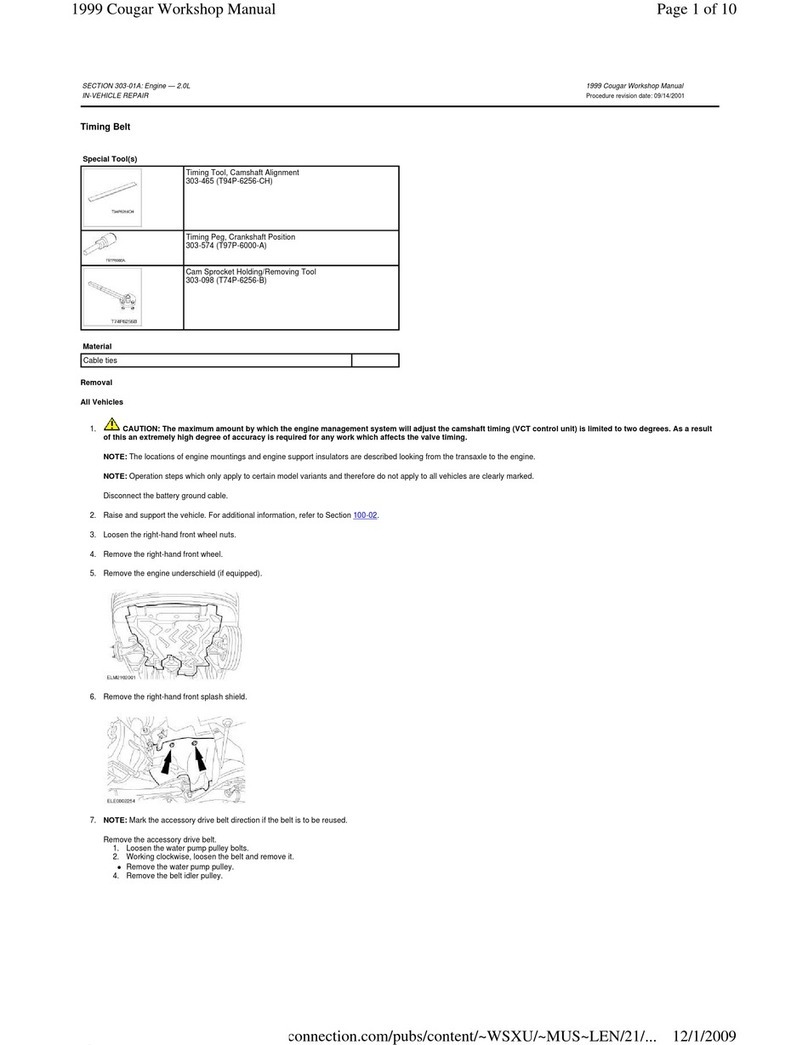
The hood release handle is located below theinstrument panel. Pull the
handle toward you to release. From the front of your vehicle, release the
auxiliarylatch under the front center of the hood and lift until thelift
cylindershold it open.
POWER WIND OWS
Press the bottom portion ofthe switch to lower; the upper portion to raise.
To use the one touch downfeature,press the doublearrow and release
quickly;the window will open fully. Depress again to stop window
operation. The window lock featureallows only the driver to operate the
power windows. Pressthe left side of the window lock to prevent
passengers from controlling power windows; press the right side to restore
use of the controls.
EXTERIOR MIRRORS
PowerSide View Mirrors:To adjustthese mirrors,select the left arrow to
adjust tothe left mirror;the right arrow to adjust the right mirror.Move the
controlin the direction you would like to adjust the mirror. Return tothe
center position to lock the mirrors in place.
Heated Mirrors (If equipped): These mirrors warm upto remove ice,mist
and fog when the rear window defrost is activated;attempting to remove
ice with anice scraper or to readjust the mirrorglass if it is frozen in place,
could cause damage to the glass and mirrors.
Fold-Away Mirrors:Pull the sidemirrors in carefully when driving through a
narrow space, like an automatic carwash.
Ford Motor Company
Customer Relationship Center
P.O. Box 6248
Dearborn, MI 48121
1-800-392-3673 (FORD)
(TDD for the hearing impaired:
1-800-232-5952)
All information contained in this
Mercury Quick Reference Guide was
accurate at the time of duplication.We
reserve the right to change features,
operation and/or functionality of any
vehicle specification at any time.Your
Mercury dealer is the best source for the
most current information.
For detailed operating and safety
information, please consult your
Owner’s Guide.
April 2006 First Printing Quick Reference Guide
2007 MERCURY GRAND MARQUIS
QUICK REFERENCE GUIDE
ME R CU R Y GR A ND MA R Q UI S Litho in U .S.A.
SPECIFICATIONS
Message Center (If equipped)
With the ignition in the ON position, themessage center (located on your
instrument cluster) displays important vehicle information througha
constant monitor of vehicle systems.
The premium display severity indicatorhelps you determine the nature of
the information being displayed: red for high severity, amber for medium
severity, non-lit for information only.
Youcan select different features for the message center to display byusing the message center controls
locatedin the center of the instrument panel.
Press the SETUP controlto display SYSTEMS CHECK, DISPLAY (odometer/speedometer), TEXT SIZE
(normal/large), UNITS (english/metric), LANGUAGE, and OIL MINDER START VALUE. Pressthe SELECT
controlto select functionsin the SETUP menus.Press the INFO control to display the trip odometer,
distance to empty,average fueleconomy,the instantaneous fuel economy and trip elapsed drive time.
Press the RESET controlto reset the functions shown in the INFOand SETUP menus.
Please refer to your Owner's Guide for complete details on the message center display features.
TRUNK RELEASE
Your trunk releaseis located on the trimpanel of the driver’s door; press the
controlto open the trunk.
ELECTRON IC COMPASS (If equipped)
Located in the overheadconsole,this compass may beaffected when you
drive near large buildings, bridges, power lines and powerful broadcast
antennas. To make compassadjustments,please consult your Owner’s Guide.
POWER SEATS (If equipped)
The power seat controlsare located insideeach front door. Pressthe top
controlto tilt the seat backforward or backward. Slide the lower control to
move theseat forward or backward. Press either end of the lower control to
move theseat cushion up or down.
REMOTE E NTRY SYSTEM
The remote entry system allows you to lock or unlock all vehicle
doors without a key.
Unlocking the doors
Press this control to unlock the driver’s door.The interior lamps will
illuminate with the ignition OFF.Press thecontrol a second time
within five seconds to unlock all doors.
Locking the doors
Press this control to lock all doors.Press again to confirm that all
doors arelocked.The horn will chirpand the parking lamps and tail
lamps willflash.
Opening the trunk
Press this control onceto open the trunk.
Sounding the panic alarm
The panicfeature operates with the key in theOFF position.
Press this control to activate the alarm.Todeactivate the alarm, pressthe
controlagain, or turn the ignition to ON.
CAUTION: Do notuse CD with adhesive label**
1|VOLUME/POWERCONTROL
Pressthe controlto turn the audio system on or
off.Turn the control to raise or lower the volume.
2|AM/FMAND CD
In radio mode, press AM/FM to select AM,FM1
andFM2 frequencybands.In CDmode,press to
stop play and beginradioplay.Press CD toenter
CD mode and toplay a CDalready in the system.
3|SAT AND SCAN/SHUF
SCAN/SHUF - Press tohear a brief sampling of all
listenable stations in radio mode, or tosample all
selections in CD mode. Press again to stopat the
desired selection. SHUF - Press and hold to play
CD tracks in random order,press againto stop.
SAT- SAT is only available when equipped with
Satellite radio. Your Audiophile radiocomes
equipped with Satellite readycapability. The kit
to enable Satellite receptionis available through
your Mercury dealer. Detailed Satellite
instructions are included withthe dealer
installed kit.The dealerinstalled Satellite kitis
available only inthe continental United States.
4|SEEK FUNCTION
The SEEK function controlworks in radio,tape
and CDmodes.In radio mode, press the left
arrow to find thenext listenable station down
the frequency band; press the right arrow to find
the next listenable station up the frequency
band. In tape or CD mode,pressthe left arrow
for the previous selection or track;pressthe right
arrow for the nextselection or track.
5|TUNE-CAT
Tomove to the nextfrequency down the radio
band,press the left arrow. Press theright arrow
to moveup the band to thenext station;
hold thearrow to move quickly through the
other stations.
6|BASS+ TREBLE CONTROL
Pressthe BASS or TREB control, then press the
left SEL-TEXT arrow to decrease the levelof
BASS orTREB; press theright SEL-TEXT arrow
to increase the level.
7|BALANCE + FADE
Press BAL anduse the left SEL-TEXT arrowto shift
the sound to theleft speakers;pressthe right
SEL-TEXT arrow to shift soundto the right
speakers. PressFADEand the right SEL-TEXT
arrow to shiftsound tothe frontspeakers; press
the left SEL-TEXT arrow to shiftsound to the rear.
8|RADIOSTATION MEMORY PRESET
Thesecontrols canbe used to selectup to six
presetAM stationsand twelve FM stations (six
in FM1 andsix in FM2). Choose the frequency
band with the AM/FM select control. Selecta
station, thenpress and holdthe memory preset
control until the sound returns. Your selection
will be held in the memory.
9|E ECTING THE CD
Press this button to stopand eject a CD.
For more detailed information on the functions
of this audio system,please consult your
Owner's Guide.
* If yourGrand Marquis is equippedwith an AM/FMstereo with
cassetteradio,please consultyour Owner’s Guidefor more
detailedinformation.
** CDs withadhesive labelsand irregularlyshaped CDs may get
stuckin the CD player.HomemadeCDs should be identifiedwith
permanentfelt tip markerrather than adhesivelabels.
Audiophile AM/FM Satellite Compatible Stereo
In-Dash Six CD Sound System (If equipped*)
45
6 7
23
9
8 88
1
ROADSIDE ASSISTANCE
During your vehicle’s 3-year/36,000-mile limited warranty period, every newMercury vehicle
includesthe assurance andsupport of a 24-hour emergency RoadsideAssistance program.
RoadsideAssistance includes such servicesas fuel delivery, tire changes, jump starts, and helpwhen
you are locked out of your vehicle.
Please complete your Roadside Assistance identification card and keep it inyour wallet for quick
reference. Thiscard can be found inyour glove compartment, in your Mercury Owner's Guide
portfolio.
FUEL PUMP SHUT-OFF SWITCH
If you’re involvedin a collision andattempt to restartyour vehicle,your engine may crank but not
start. That may meanthe fuel shut-off switch has been activated.You’llfind the switch on theleft
side of thetrunk, behindthe left rear tail light and the trunk liner. For informationon resetting,
please consult your Owner’s Guide.
All information contained in this Mercury Quick Reference Guide was accurateat the time of
duplication. Wereserve the right to change features, operation and/or functionality of any vehicle
specification at any time. Your Mercury dealer is thebest source for themost current information.
For detailed operatingand safety information, please consult yourOwner’s Guide.
LOCATION O F THE S PARE TIRE
AND A CK
Your vehicle will be equipped with either
a full-size spare or a temporary spare.The
temporary spare is smaller than a regular
tire and designed for emergency use only.
Either spare will be locatedon a shelf in the
trunk,just under the rear window.The jack
may be located behind the minispare tire or
behind thefull size spare tire.
FUS ES
If electrical components inyour vehicle arenot
working, a fuse may have blown.Blown fuses
are identified by a broken wire within the fuse.
To learn about changingfuses, please consult
your Owner’s Guide for details.
UNLEADED FUEL RECOMMENDATIONS
Use“Regular”unleaded gasoline with an
(R+M)/2octane rating of 87. Mercury does
not recommend using“Regular”gasoline
with an octane rating of 86 or lower in high
altitudeareas.
TIR E PRESSURE
Adjustthe tire pressureto the recommended
specifications found onthe Safety Compliance
Certification Label.When checkingpressure,use
an accurate tire pressuregauge. Checktire
pressure when the tires arecold, afterthe
vehiclehas been parked for atleast one hour or
has been driven less than 1 mile(1.6 km).
Warning: Improperly inflated tirescan affect
vehiclehandling and can failsuddenly,possibly
resulting in loss of vehiclecontrol.
6W3 -19G217-AA
*F6W3J19G217AA*
MODEL YEAR
2007 GRAND MARQUIS
QU ICK R EFERE NCE GUI DE

