Merlin 58184 Assembly instructions

Visit our website at: http://www.harborfreight.com
58184
3/8" NPT (F)
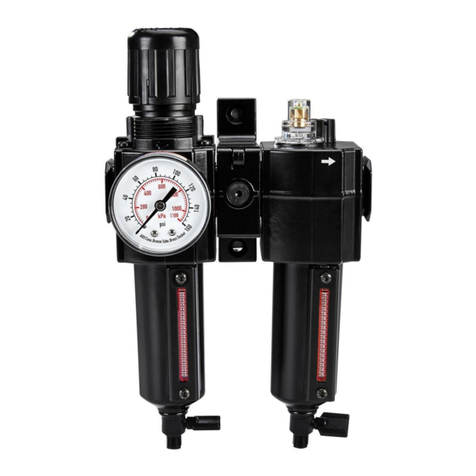
FILTER/REGULATOR/LUBRICATOR
Owner’s Manual & Safety Instructions
Save This Manual Keep this manual for the safety warnings and precautions, assembly,
operating, inspection, maintenance and cleaning procedures. Write the product’s serial number in the back
of the manual (or month and year of purchase if product has no number). Keep this manual and the receipt
in a safe and dry place for future reference. 23i
When unpacking, make sure that the product is intact
and undamaged. If any parts are missing or broken,
please call 1-888-866-5797 as soon as possible.
Copyright©2023 by Harbor Freight Tools®. All rights reserved.
No portion of this manual or any artwork contained herein may be reproduced in
any shape or form without the express written consent of Harbor Freight Tools.
Diagrams within this manual may not be drawn proportionally. Due to continuing
improvements, actual product may differ slightly from the product described herein.
Tools required for assembly and service may not be included.
Read this material before using this product.
Failure to do so can result in serious injury.
SAVE THIS MANUAL.

Page 2 For technical questions, please call 1-888-866-5797. Item
58184
Specifications
Flow 60 CFM Max. at 90 PSI
Gauge Range 0 PSI - 160 PSI
Max. Pressure 250 PSI
Filtration 40 Microns
Inlet and Outlet Size 3/8" NPT
IMPORTANT SAFETY INFORMATION
1. Do not exceed maximum pressure.
2. If a problem occurs, have the problem corrected
before further use.
Do not use damaged equipment.
3. RISK OF BURSTING! Never connect
to an air source that is capable of
exceeding 250 psi.
Over pressurizing the tool may cause
bursting, abnormal operation, breakage of the tool
or serious injury to persons. Use only clean, dry,
regulated compressed air at the rated pressure
or within the rated pressure range as marked on
the tool. Always verify prior to using the tool that
the air source has been adjusted to the rated air
pressure or within the rated air-pressure range.
4. Do not operate the Compressor in
explosive atmospheres, such as in the
presence of flammable liquids, gases or
dust. Compressor motors produce sparks
which may ignite the dust or fumes.
5. Assemble only according to these instructions.
Improper assembly can create hazards.
6. Wear ANSI-approved safety goggles,
ANSI-approved ear protection, and heavy-
duty work gloves during assembly.
7. Turn off and unplug compressor before
installing any accessory.
8. Keep assembly area clean and well lit.
9. Keep bystanders out of the area during assembly.
10. Do not assemble when tired or when under the
influence of alcohol, drugs or medication.
11. Only use included adapter. Designed
for compressed air use only.
12. Refer to compressor’s instruction manual
before installing any accessory.
13. This product is not a toy. Do not allow
children to play with or near this item.
14. Always dress appropriately for the task at hand
noting loose articles of clothing, jewelry, or hair
can become entangled in moving parts.
15. Do not leave tools connected to the
air supply when not in use.
16. Do not leave the system pressurized or
connected to the air supply when not in use.
17. Use as intended only.
18. Inspect before every use; do not use
if parts are loose or damaged.
19. The warnings, precautions, and instructions
discussed in this manual cannot cover all possible
conditions and situations that may occur with the
given accessory and system the operator attached
it to. It must be understood by the operator that
common sense and caution are factors which cannot
be built into this product, but must be supplied by the
operator.
20. Maintain product labels and nameplates
on the tool. These carry important safety
information. If unreadable or missing, contact
Harbor Freight Tools for a replacement.
SAVE THESE INSTRUCTIONS.

Page 3For technical questions, please call 1-888-866-5797.Item
58184
Installation
Read the ENTIRE IMPORTANT SAFETY INFORMATION section at the beginning of this document
including all text under subheadings therein before set up or use of this product.
WARNING! TO PREVENT SERIOUS INJURY:
Make sure air supply is off and release all residual
pressure in system before installing Regulator.
1. Thread gauge onto front of Regulator body.
2. Make sure connector is properly installed
between the filter/regulator and the lubricator.
Note: If regulator and lubricator are to be mounted in
separate locations, remove connector with 5mm hex
wrench (sold separately). Regulator and Lubricator
can be installed with 3/8" NPT threaded fittings.
3. Securely mount in vertical position as close
as possible to the air tool connection.
Note: Air flow must be in the same direction as
arrows on regulator and lubricator bodies.
4. Connect air supply to inlet port.
Connect air tool to outlet port.
System piping should be 3/8" minimum.
Avoid using unnecessary fittings and
couplings that restrict the flow of air.
Inlet Outlet
Connector
Regulator Lubricator
Operating Instructions
1. Pull adjustment knob upwards to unlock. Turn knob
counter-clockwise until it stops (closed position).
2. Turn adjustment knob clockwise until
desired outlet pressure is reached.
3. Push down adjustment knob to lock.
4. Add air tool oil ONLY to lubricator
bowl using one of two methods:
a. Remove oil fill plug and add oil until reaching
top of level indicator; replace plug.
b. Push bowl upwards over safety catch, then rotate
counterclockwise 45° and lower. Fill with oil until
reaching top of level indicator; replace bowl.
5. Use a flat head screwdriver to adjust oil flow for air
tool. Turn oil flow adjust screw counterclockwise
to increase oil flow or clockwise to decrease.
Adjustment
Knob
Outlet
Pressure
Oil Fill
Plug
Oil Flow
Adjust
Lubricator
Bowl and
Level Indicator
Filter
Bowl and
Level
Indicator
Moisture
Drain
Oil Drain
Maintenance
1. BEFORE EACH USE, inspect the general
condition of the tool. Check for:
• loose fittings,
• cracked or deformed O-rings,
• damaged pressure gauge or hose,
• any other condition that may
affect its safe operation.
2. AFTER EACH USE, drain water and
debris from moisture drain.
a. Turn drain valve vertical to drain bowl.
b. Turn drain valve horizontal to close valve.
Moisture
Drain

26677 Agoura Road • Calabasas, CA 91302 • 1-888-866-5797
3. PERIODICALLY, remove filter
bowl and filter for cleaning:
a. Relieve all air pressure in the system.
b. Push bowl upwards over safety catch,
then rotate counterclockwise 45°.
c. Lower and remove bowl. Clean
any debris from bowl interior.
d. Unthread plastic nut under filter and
replace old filter with new filter.
e. Reassemble plastic nut and bowl.
Filter Bowl
and Level
Indicator
Record Product’s Serial Number Here:
Note: If product has no serial number, record month and year of purchase instead.
Note: Reference UPC 193175433947.
Limited 90 Day Warranty
Harbor Freight Tools Co. makes every effort to assure that its products meet high quality and durability standards,
and warrants to the original purchaser that this product is free from defects in materials and workmanship for the
period of 90 days from the date of purchase. This warranty does not apply to damage due directly or indirectly,
to misuse, abuse, negligence or accidents, repairs or alterations outside our facilities, criminal activity, improper
installation, normal wear and tear, or to lack of maintenance. We shall in no event be liable for death, injuries
to persons or property, or for incidental, contingent, special or consequential damages arising from the use of
our product. Some states do not allow the exclusion or limitation of incidental or consequential damages, so the
above limitation of exclusion may not apply to you. THIS WARRANTY IS EXPRESSLY IN LIEU OF ALL OTHER
WARRANTIES, EXPRESS OR IMPLIED, INCLUDING THE WARRANTIES OF MERCHANTABILITY AND FITNESS.
To take advantage of this warranty, the product or part must be returned to us with transportation charges
prepaid. Proof of purchase date and an explanation of the complaint must accompany the merchandise.
If our inspection verifies the defect, we will either repair or replace the product at our election or we may
elect to refund the purchase price if we cannot readily and quickly provide you with a replacement. We will
return repaired products at our expense, but if we determine there is no defect, or that the defect resulted
from causes not within the scope of our warranty, then you must bear the cost of returning the product.
This warranty gives you specific legal rights and you may also have other rights which vary from state to state.
Other Merlin Controllers manuals
Popular Controllers manuals by other brands
Elesta
Elesta AHS Series Mounting

ICM Controls
ICM Controls ICM325HNV Installation, operation & application guide
Mold-Masters
Mold-Masters TempMaster M3 Series quick guide
Computer Automation Technology
Computer Automation Technology CAT-800 manual

Lantronix
Lantronix SecureLinx user guide

Frymaster
Frymaster 3000 Replacement manual
