MetalMaster EWM-75 User manual
OPERATION MANUAL
Edition No : EWM-75-1
Date of Issue : 02/2021
Model. EWM-75
Order Code S225
English Wheels

2
OPERATION MANUAL
NOTE:
In order to see the type and model of the machine, please see the
specication plate. Usually found on the back of the machine. See
example (Fig.1)
Fig.1
ENGLISH WHEEL
MACHINE
EWM-75
MODEL NO.
SERIAL NO.
DATE OF MANF.
Note:
This manual is only for your reference. Owing to the continuous improvement of the
Metalmaster machine, changes may be made at any time without obligation or notice.
Please ensure the local voltage is the same as listed on the specication plate before
operating any electric machine.
Distributed by
www.machineryhouse.co.nz
MACHINE DETAILS

3
OPERATION MANUAL
C O N T E N T S:
1. GENERAL MACHINE INFORMATION
1.1 Specications.............................................................. 4
1.2 Accessories Included................................................ 4
1.3 Identication............................................................... 5
2. IMPORTANT INFORMATION
2.1 General Metalworking Machine Safety............. 6
2.2 Specic Safety For English Wheels...................... 8
3. SETUP
3.1 Unpacking.................................................................... 9
3.2 Assembly...................................................................... 9
4. OPERATION
4.1 Operation Overview................................................. 10
4.2 Tracking Patterns....................................................... 11
5. MAINTENANCE
5.1 Cleaning And Oiling................................................. 11
Spare Parts............................................................................ 12
Risk Assessment Sheets.................................................... 15

4
OPERATION MANUAL
1.1 SPECIFICATION
Order Code S225
MODEL EWM-75
Operation (Type) Hand Operated
Mild Steel - Capacity (mm/gauge) 1.6 / 16
Copper - Capacity (mm/gauge) 2.0
Throat Depth (mm) 711
Top Anvil Size (mm) Ø203 x 50
Radius Dies (mm) 50, 73, 101, 152, 203, 305
Working Height (mm) 1200
Dimensions (L x W x H) (mm) 350 x 90 x 350
Packing Dimensions (L x W x H) (mm) 89 x 77.5 x 18.5
Weight (kg) 73
1.2 ACCESSORIES INCLUDED
Includes 50.8, 76.2, 101.6, 152.4, 203.2, 304.8mm
radius dies & 1 x at die
Instruction Manual
Fig. 2
5
OPERATION MANUAL
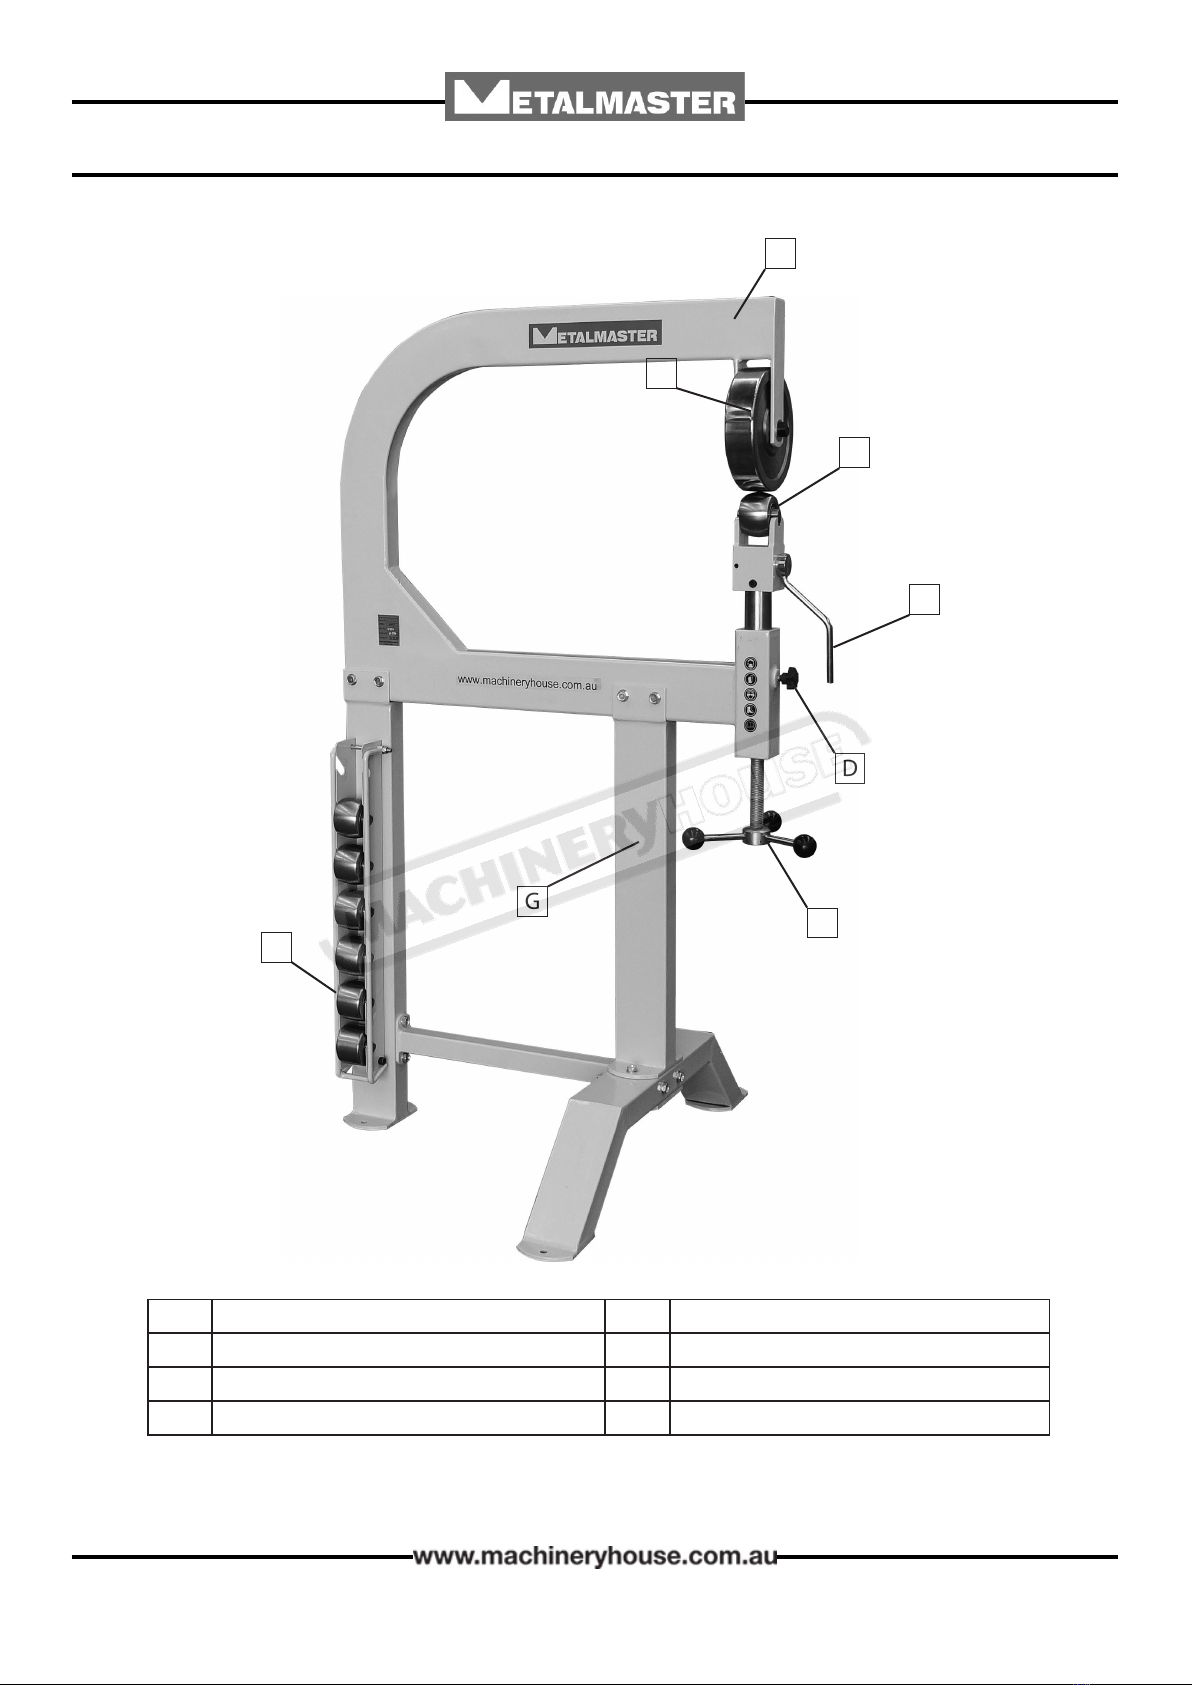
AMain Frame EAdjusting Handle
BBottom Die FTop Die
CHandle GStand
DLocking Knob HBottom Die Rack
A
B
H
D
F
1.3 IDENTIFICATION
C
E
G
6
OPERATION MANUAL
: When using any tool, basic safety precautions should always be followed
to reduce the risk of personal injury and damage. Read the instruction manual before using any
tool or machine!
1. Keep work area clean. Cluttered areas invite injuries.
2. Observe work area conditions. Do not use machines or power tools in damp or wet
locations. Don’t expose to rain. Keep the work area well lit. Do not use electric power tools
or machinery in the presence of ammable gases or liquids.
3. Keep children away. Children must never be allowed in the work area. Do not let them
handle machinery, tools, or extension cords.
4. Store idle equipment. When not in use, tools must be stored in a dry location to inhibit
rust. Always lock up tools and keep out of reach of children.
5. Do not force tool. It will do the job better and more safely at the rate for which it was
intended. Do not use inappropriate attachments in an attempt to exceed the tool capacity.
6. Use the right tool for the job. Do not attempt to force any machine, tool or attachment to
do the work of a larger industrial tool. Do not modify, and do not use any tool for a
purpose for which it was not intended.
7. Dress properly. Do not wear loose clothing or jewelry as they can be caught in moving
parts. Protective, electrically non-conductive clothes and non-skid footwear are
recommended when working. Wear restrictive hair covering to contain long hair.
8. Use eye and ear protection. Always wear ANSI approved impact safety goggles. Wear
a full face shield if you are producing metal lings or wood chips. Wear an ANSI approved
dust mask or respirator when working around metal, wood, and chemical dusts and mists.
9. Do not overreach. Keep proper footing and balance at all times. Do not reach over or
across running machines. Keep hands and ngers clear of moving parts.
10. Maintain tools with care. Keep tools clean for better and safer performance. Follow the
instructions for lubricating and changing accessories. Handles must be kept clean, dry,
and free from oil and grease at all times.
11. Remove adjusting keys and wrenches. Check that keys and adjusting wrenches are
removed from the tool or machine work surface before plugging it in.
12. Stay alert. Be attentive and use common sense. Do not operate any machine or tool when
you are tired.
13. Check for damaged parts. Before using any machine or tool, parts that appears damaged
should be carefully checked to determine that it will operate properly and perform its
intended function safely. Check for alignment and binding of moving parts. Any broken
parts or mounting xtures, or any other condition that may aect proper operation. Any
part that is damaged should be properly repaired or replaced by a qualied technician. Do
not use the machine or tool if any switch does not turn on and o properly.
2.1 GENERAL METALWORKING MACHINE SAFETY
7
OPERATION MANUAL
2.1 GENERAL METALWORKING MACHINE SAFETY
14. Replacement parts and accessories. When servicing, use only identical replacement parts.
The use of any other parts will void the warranty. Only use accessories intended for use
with the machine or tool.
15. Do not operate machinery if under the inuence of alcohol or drugs. Read warning labels
if taking prescription medicine to determine if your judgment or reexes are impaired
while taking drugs. If there is any doubt, do not operate the machinery or tools.
16. Maintenance. For your safety, service and maintenance should be performed regularly by a
qualied technician.
17. Workpiece may be sharp. After bending or cutting workpieces use caution. Be aware of
sharp edges or metal debris of metal that may be created. Use heavy duty gloves when
handling the workpiece.
18. Health and re hazards. Understand that the health and re hazards can vary from
material to material. Make sure all appropriate precautions are taken.
19.Clean-up when nished. Clean machines and the surrounding area when the operation is
nished.
20.Use proper lock out procedures. When servicing or cleaning machines, make sure that the
machine cannot be started by accident.
DO NOT
×Do not distract an operator. Horseplay can lead to injuries and should be strictly prohibited.
×Do not wear loose clothing, gloves, necktie’s, rings, bracelets or other jewellery that can be
come entangled in moving parts. Conne long hair.
×Do not handle cuttings by hand because they are very sharp. Do not free a stalled cutter
without turning the power o rst. Do not clean hands with cutting uids.
×Do not use rags or wear gloves near moving parts of machines.
×Do not use compressed air to blow debris from machines or to clean dirt from clothes.
×Do not force the machine. It will do the job safer and better at the rate for which it was
designed.
BEFORE OPERATING ANY MACHINE, TAKE TIME TO READ AND UNDERSTAND
ALL SAFETY SIGNS AND SYMBOLS. IF NOT UNDERSTOOD SEEK EXPLANATION
FROM YOUR SUPERVISOR.
MACHINES ARE SAFEGUARDED TO PROTECT THE OPERATOR FROM INJURY
OR DEATH WITH THE PLACEMENT OF GUARDS. MACHINES MUST NOT BE
OPERATED WITH THE GUARDS REMOVED OR DAMAGED.

8
OPERATION MANUAL
2.2 SPECIFIC SAFETY FOR ENGLISH WHEELS
DO NOT use this machine unless you have been instructed in its safe use
and operation and have read and understood this manual.
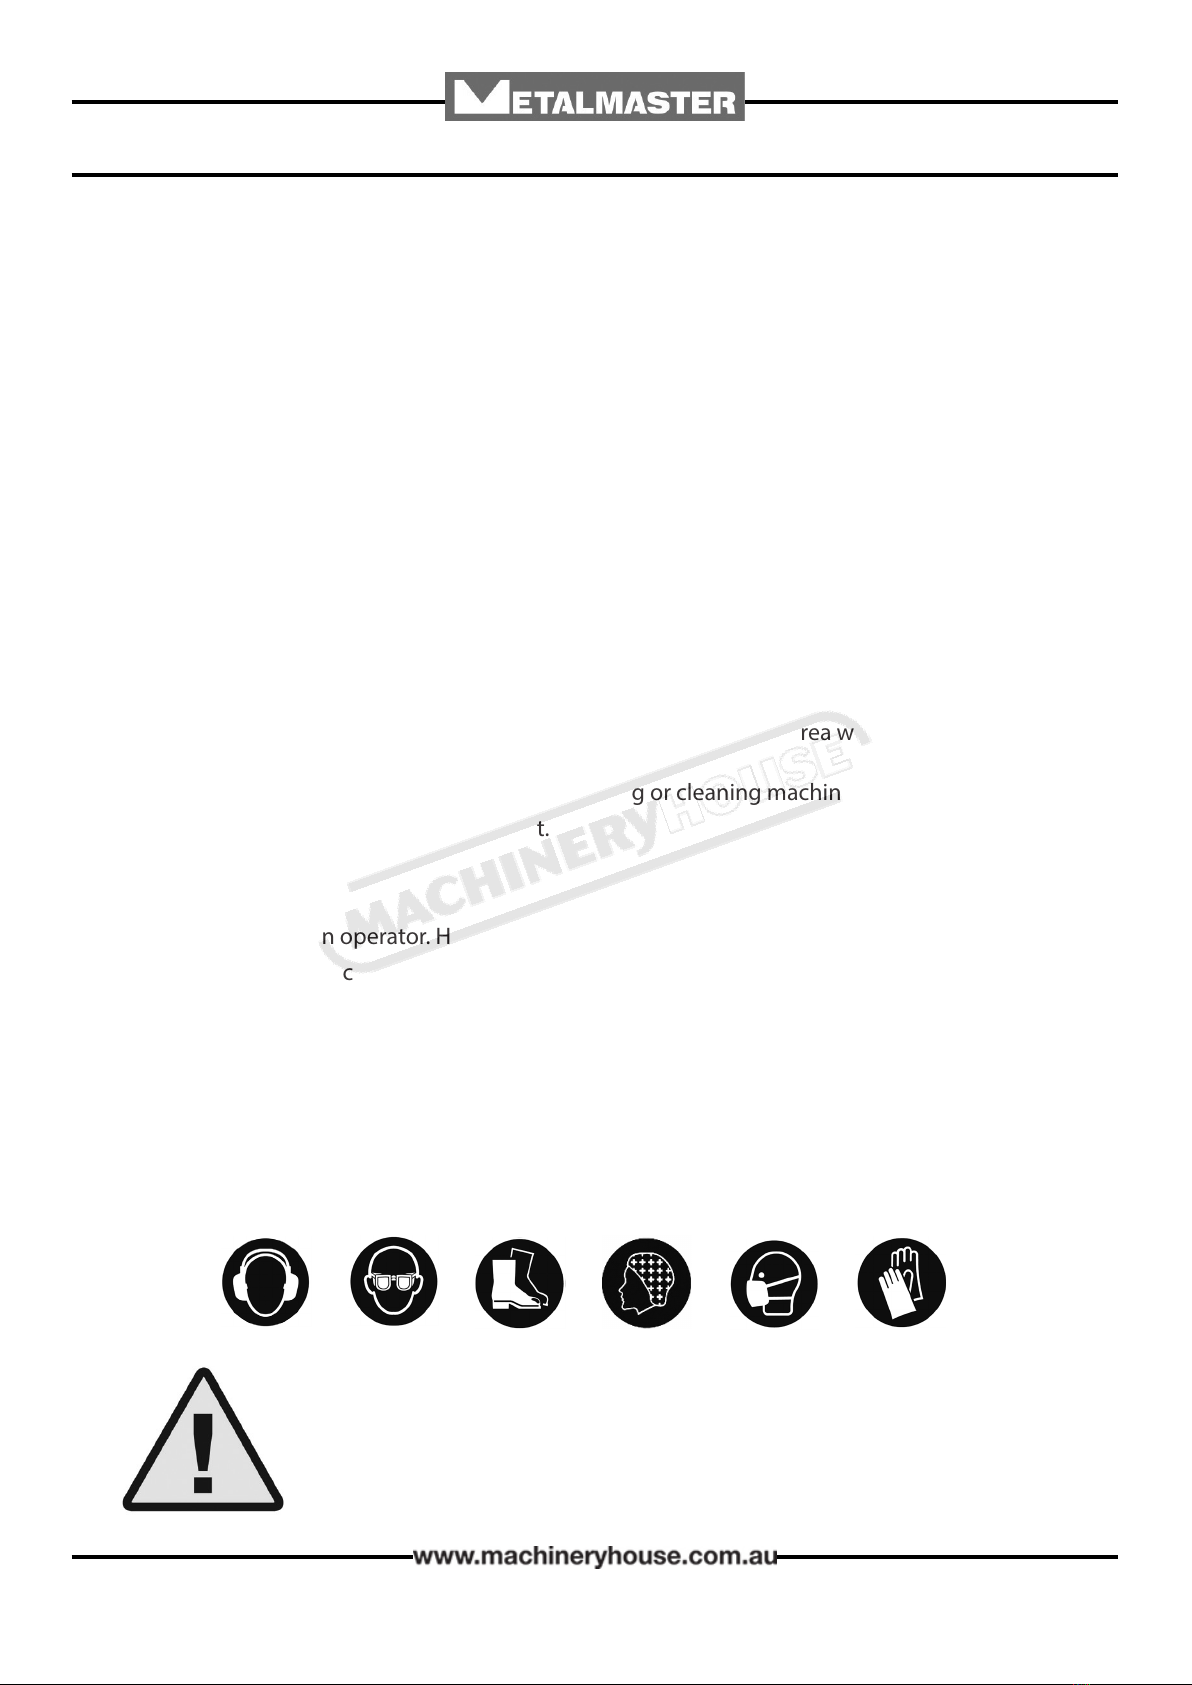
Safety glasses must be worn at
all times in work areas.
Close tting protective clothing or
overalls are encouraged
Appropriate protective footwear
with substantial uppers must be
worn.
Rings and jewelery must NOT be
worn in the workshop
PRE-OPERATIONAL SAFETY CHECKS
1. Ensure you are familiar with the operation of the English Wheel
2. Check for any damage or parts missing
3. The area around the machine must be clean and free of trip hazards.
4. Any forming die must be inspected for safe use i.e. no cracks.
5. Ensure safety glasses or goggles are available and are worn by all persons in the vicinity.
6. Any test piece, project or material (work piece) to be worked must be of an appropriate
thickness and safe to use on this equipment.
7. Faulty equipment must not be used. Immediately check suspect machinery.
OPERATIONAL SAFETY CHECKS
1. Place your test piece, project or material (work piece) securely between the top and bottom
dies
2. Do not over reach. Maintain a balanced stance at all times, so that you do not fall or lean
against the machine.
3. Use the English Wheel by moving the workpiece is a forward and back action, to slowly
work the material.
4. Keep hands and ngers away from the dies.
5. Wear leather gloves when handling the work piece.
6. Use the right tool. Do not force a die set to do a job that it was not designed to do.
7. Give your work undivided attention. Looking around, carrying on a conversation and
“horseplay” are careless acts that can result in serious injury
8. DO NOT apply excessive force to the English Wheel.
AFTER OPERATION COMPLETED
1. Clean the machine and place any tools and equipment in the appropriate storage area.
2. Place all scrap or waste in the appropriate bin.
POTENTIAL HAZARDS
Beware of high forces applied Eye injuries – ying or shattering objects
Pinch and squash Laceration injuries
Gloves should be worn when
handling the work piece
Ear protection should be used in
loud and noisy conditions
9
OPERATION MANUAL
3. SETUP
3.1 UNPACKING
When unpacking, check to make sure that all parts shown in the Parts Diagram are included. If
any parts are missing or broken, please contact the distributer
3.2 ASSEMBLY
THE METALMASTER English Wheel will require minor assembly prior to operation. It is import-
ant that the entire manual is read to become familiar with the unit BEFORE you
assemble and use the Machine. Before assembling the English Wheel, be sure that you have all
parts described in the Parts List. (Fig.3.1)
To assemble the machine:
1. Layout the English Wheel components on the oor where the unit will be located and
mounted. The oor must be able to support the weight of the English Wheel and the
workpieces.
2. Attach the Front Stand (15#) under the Front Tube (16#) so that the mounting holes align.
Insert the two Bolts M10 x 85mm (25#) with a M10 washer (24#) from the top. Once the
bolts are ready, place the plate (18) over the bolts with a M10 Washers (24#), and then a
M10 nut (26#)
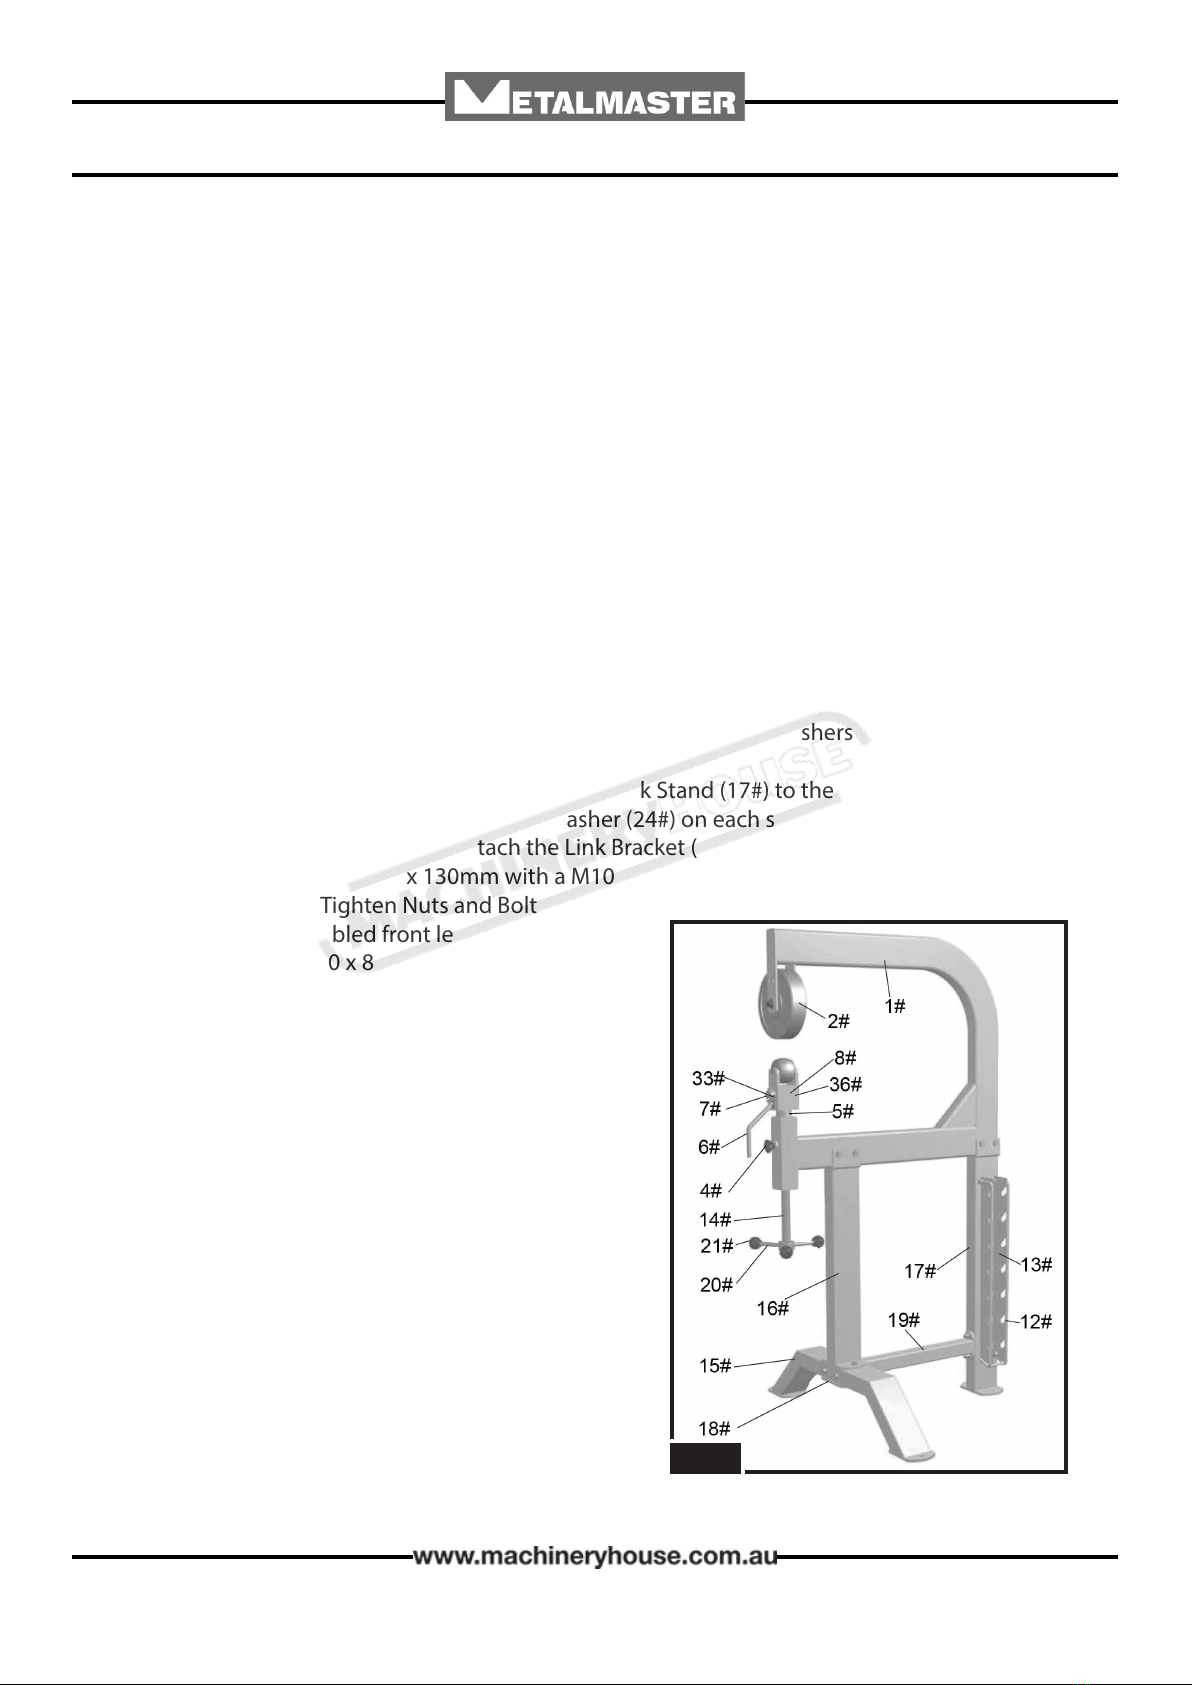
3. With the parts laying on the oor, attach the Back Stand (17#) to the main frame (1#) using
the two M10 x 80mm bolts with a M10 Washer (24#) on each side of the main frame and
secure with a M10 Nut ((26#). Attach the Link Bracket (19#) to the Back Stand (17#) using
the two Bolts (35#), M10 x 130mm with a M10 Washers (24#) both sides of the frame, and
M10 Nuts (26#). Tighten Nuts and Bolts securely.
4. Attach the assembled front leg (16#, 15#) using
the two Bolts M10 x 80mm (23#), with a M10
Washers (24#),on each side of the frame, then
M10 nut (26#).
5. Attach the link bracket (19#) to the front leg
assembly (16#, 15#) with the two bolts M10 x
85mm (25#) with a M10 washer (24#) both sides
of the frame and secured with a M10 nut (26#0
6. With the help of at least two other people, lift the
assembled Frame so that it is upright.
7. Securely tighten all assembled frame
components.
8. Insert Steel Tube (5#) into the Bottom Die Yoke
(8#). Secure with two Screws M8 x 12mm (32#).
Place Assembly into the mounting hole in Frame
(1#).
9. Screw Knob (4#) into the threaded hole on Frame
(1#). Lift and turn Steel Tube (5#) so that the Knob
(4#) seats into the slot of Steel Tube (5#). Tighten
Knob (4#).
Fig. 3.1
10
OPERATION MANUAL
3. SETUP
10. Insert the Eccentric Shaft (7#), with the Handle (6#), into the hole of Bottom Die Yoke
(8#).
11. Thread each Handle Lever (20#) into the Thread Rod (14#). and securely tighten. Thread on
to the Handle the Balls (21#).
12. Screw Thread Rod (14#) into the bottom of Frame (1#). and into Steel Tube (5#) already
installed in Frame (1#).
13. Place the Top Die (2#) with Bearings (9#) on each side, into the top of the Frame (1#). Secure
in place with Shaft (3#), Washers M20, and M16mm(22# & 37#),and M16 Nut (31#). Securely
tighten.
14. Mount the Bottom Die Rack (13#) to the Back Stand (17#) using two Bolts M8 x 65mm(28#),
M8 Washers both sides (29#), and M8 Nuts (30#). Securely tighten.
15. Mount the Lock Bracket (12#) onto the Bottom Die Rack (13#) using M8 x 95mm Bolt (34#),
M8 Washer (29#), and M8 Nut (30#). Securely tighten.
16. Install Shafts (10#) in each Bottom Die (11#-01 to 11#-06) with Bearings (9#).
17. Open the Lock Bracket (12#) and place each Bottom Die (11#-01 to 11#-06) on the
Bottom Die Rack (13#). Each Bottom Die has its size stamped on it. Place in order of size on
the Bottom Die Rack (13#).
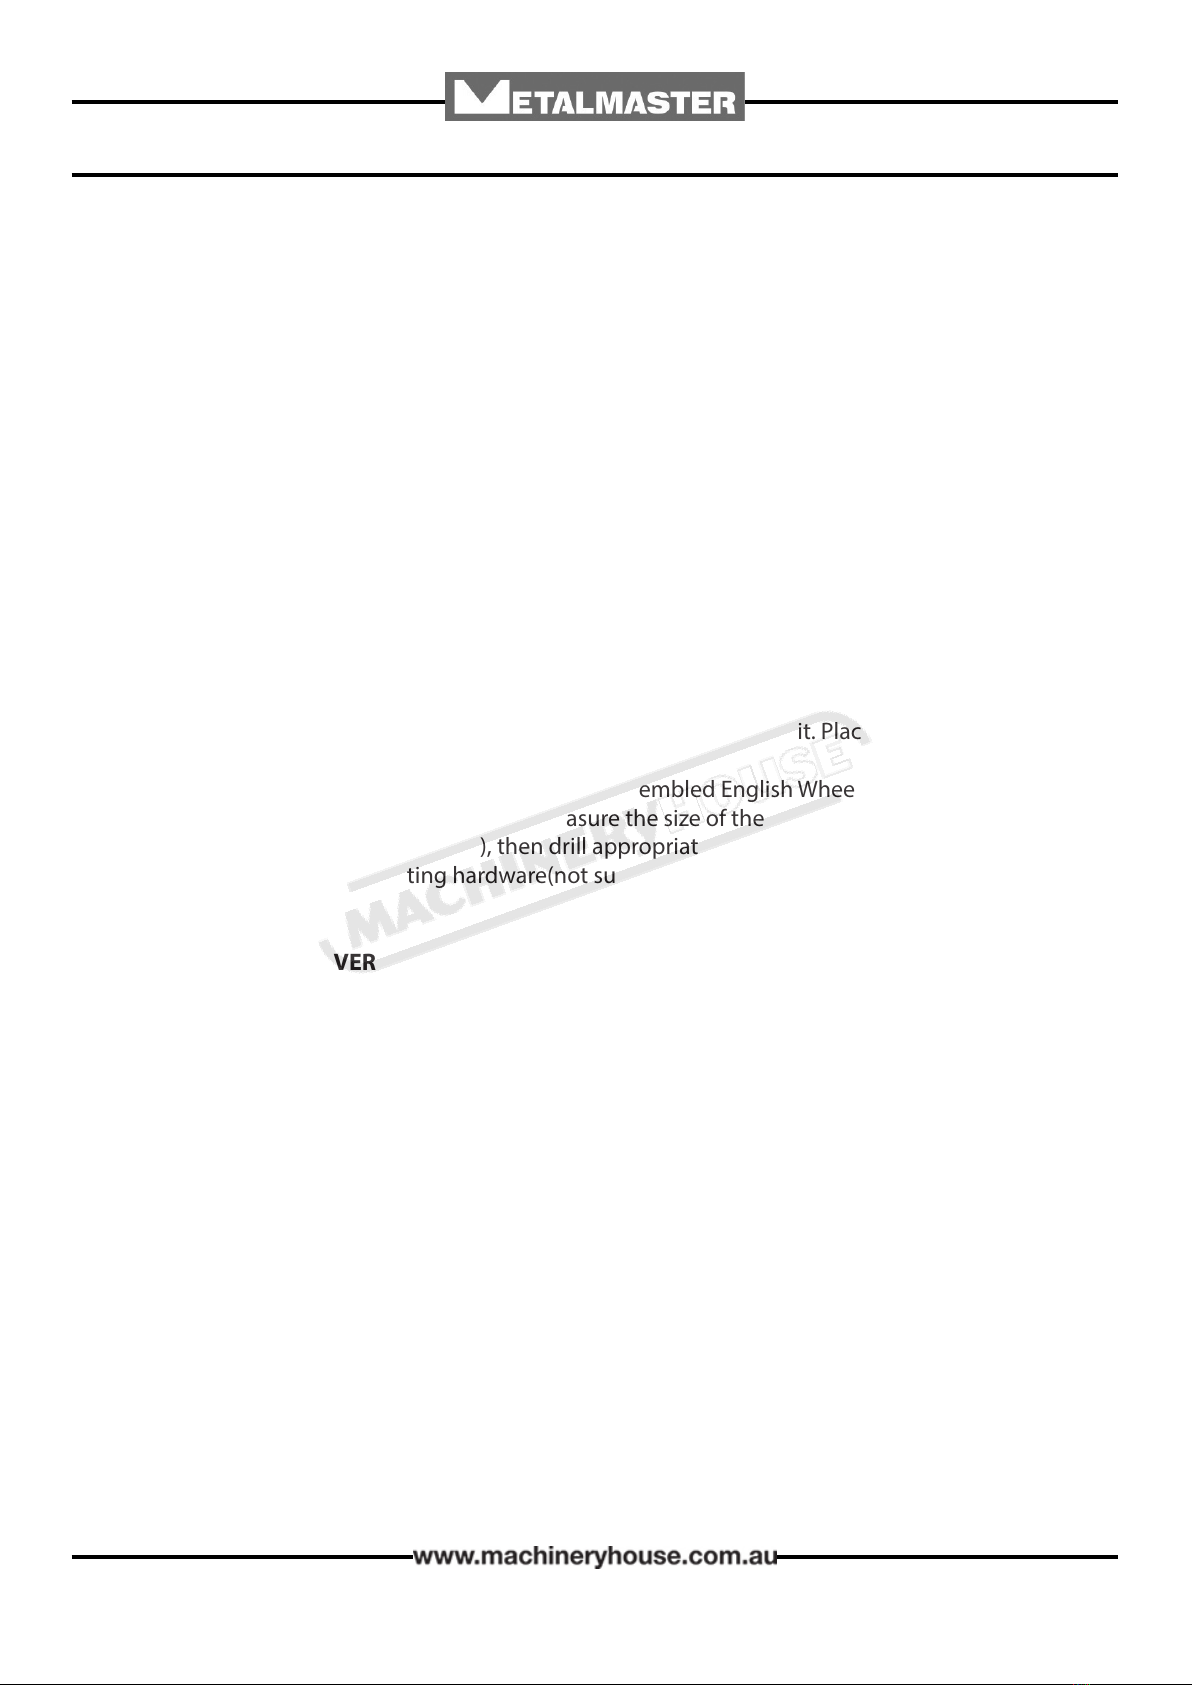
18. With the help of two other people, move the assembled English Wheel to the location
where it will be mounted to the oor. Measure the size of the mounting holes in the Front
Stand (15#) and Back Stand (17#), then drill appropriate size holes in the oor to
accommodate the mounting hardware(not supplied).
4. OPERATION
4.1 OPERATIONAL OVERVIEW
The instructions in this section are written with the understanding that the operator has the
necessary knowledge and skills to operate this machine.
1. Select the Bottom Die from the Bottom Die Rack (13#), and place on the Bottom Die in
the Yoke(8#). When selecting the Bottom Die, consider the type and hardness of the metal
being formed as well as the desired curvature of the metal.
2. Insert the workpiece in between the Top Die (2#) and the Bottom Die.
3. Turn the hand wheel (Thread Rod 14#) to raise or lower the Bottom Die Yoke (8#) for an
appropriate clearance (or pinching) of the metal between the two dies. It is better to have
a loose pinch than a tight one. A tight pinch will make it harder to push the metal through
the dies and may cause unwanted creasing. A loose pinch makes it easier to push the metal
through the dies, and with more accuracy. It may take more passes to form the
metal, however.
4. Turn Knob (4#) clockwise until tight.
5. Begin forming the metal by pushing and pulling it over the dies.
6. If a small adjustment is required between the dies, loosen Knob (4#) and turn the handle
(6#). This causes the Eccentric Shaft (7#) to slightly raise or lower the Bottom Die. Tighten
Knob (4#) again before proceeding.
11
OPERATION MANUAL
5. MAINTENANCE
5.1 CLEANING AND OILING
When nished with the machine always clean down the machine and oil with a light oil all
moving parts and machined surfaces. Inspect the general condition of the tool. Check for loose
screws,misalignment or binding of moving parts,cracked or broken parts, and any other condi-
tion that may aect its safe operation. If abnormal noise or vibration occurs, have the problem
corrected before further use. Do not use damaged equipment.
5.2 MAINTENANCE SCHEDULE
Maintenance Chart
Maintenance Type Before
Use
After
Use Weekly Monthly Every 6
Months Yearly
Inspect Tools for damage x
Wipe o with clean cloth x x x x x
Oil moving parts with light oil x
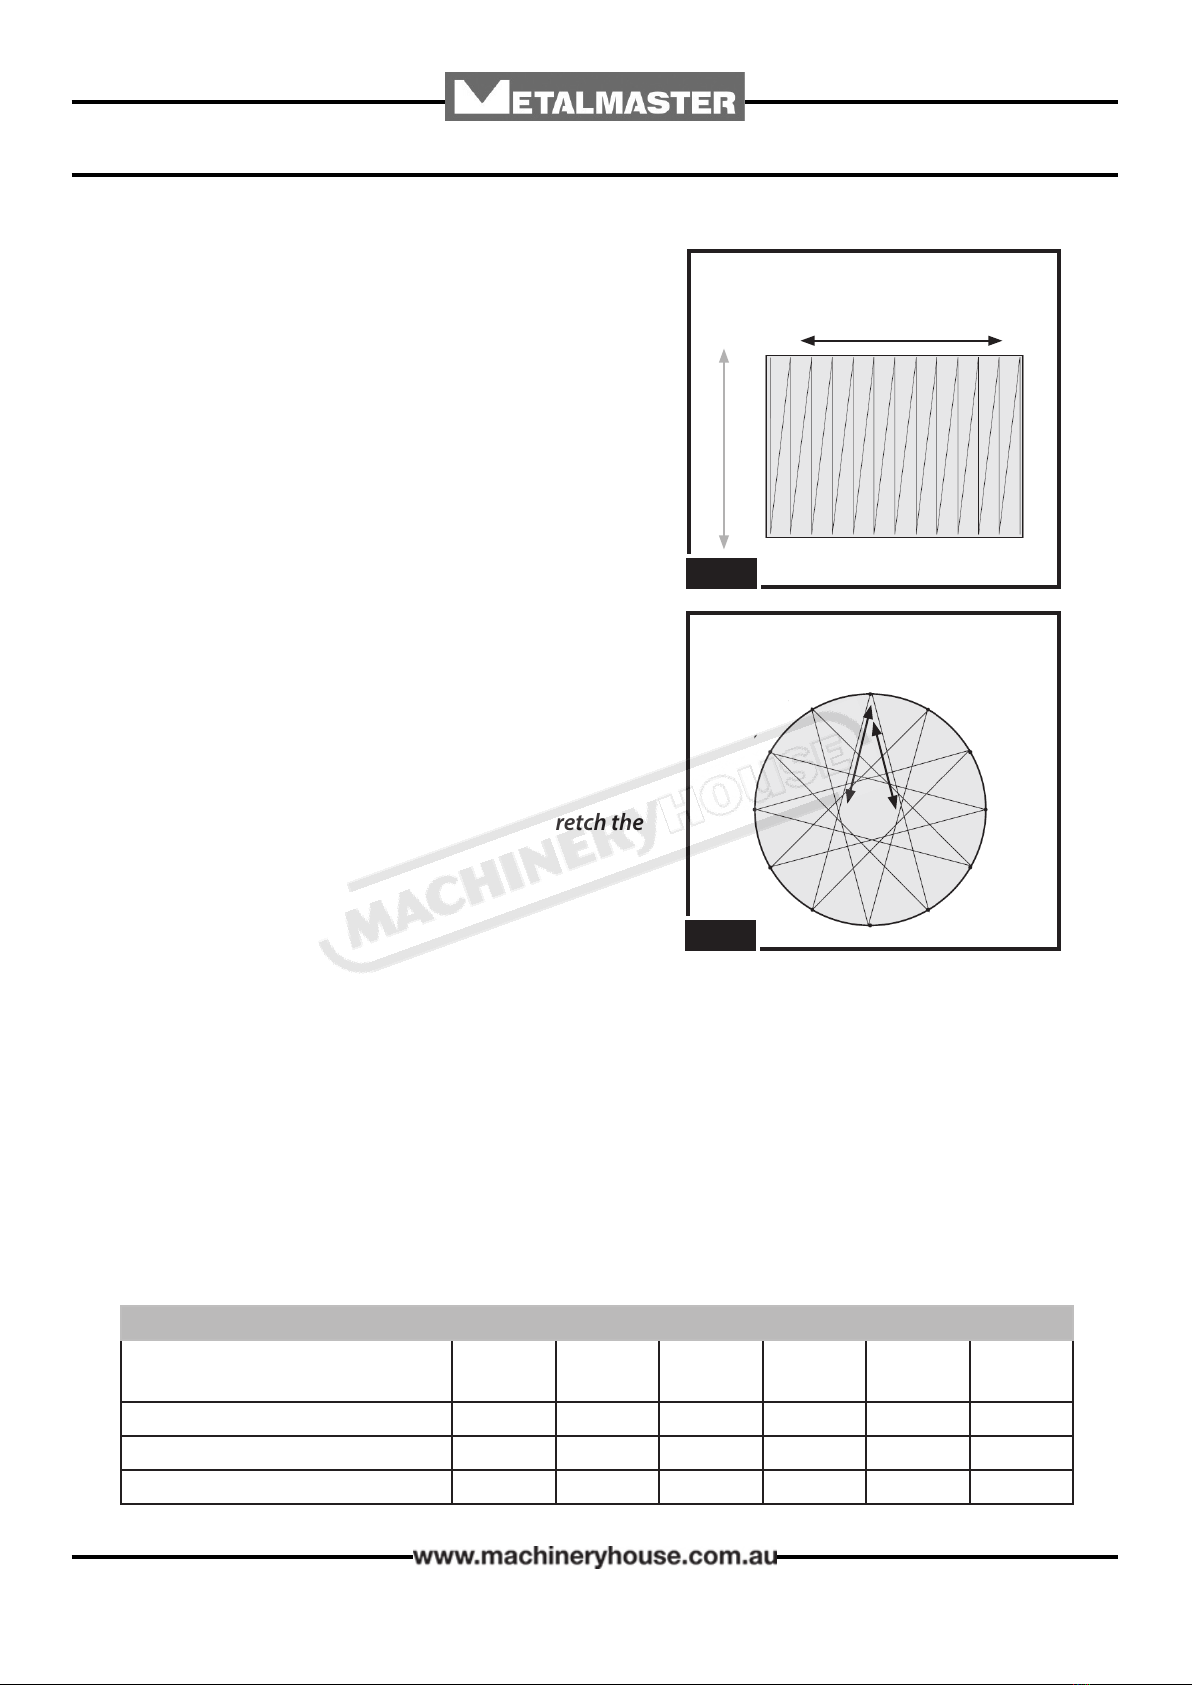
When metal passes between the upper and lower
dies, a “track” or shiny line is pressed into the metal.
Various tracking patterns can be used to shape work-
pieces depending upon their shape or size.
Bellow are a list of patterns and their use.
Zigzag Pattern
This pattern can be used for a series of forms.(Fig. 4.1)
Note: Try keeping the tracks close to each other
in a consistent pattern
Star Pattern
The star pattern is useful for shaping round
workpieces. (Fig. 4.2)
Note: Avoid rolling directly over center of
workpiece, as too many passes could overstretch the
metal.
4.2 TRACKING PATTERNS Move
Between
the dies Feed Following the
Pattern
Feed Following the
Pattern
Fig. 4.1
Fig. 4.2

12
OPERATION MANUAL
SPARE PARTS SECTION
Spare Parts Diagram................................................. 13
Spare Parts List........................................................... 14
The following section covers the spare parts diagrams and lists that were current at the time
this manual was originally printed. Due to continuous improvements of the machine, changes
may be made at any time without notication.
HOW TO ORDER SPARE PARTS
1. Have your machines model number, serial number & date of manufacture
on hand, these can be found on the specication plate mounted on the machine
2. A scanned copy of your parts list/diagram with required spare part/s
identied.
NOTE: SOME PARTS MAY ONLY BE AVAILABLE AS AN ASSEMBLY
3. Go to www.machineryhouse.com.au/contactus and ll out the inquiry form attaching a
copy of scanned parts list.
CONTENTS
Edition No : EWM-75-1
Date of Issue : 02/2021
Model. EWM-75
Order Code S225
English Wheels

13
OPERATION MANUAL
SPARE PARTS DIAGRAM
14
OPERATION MANUAL
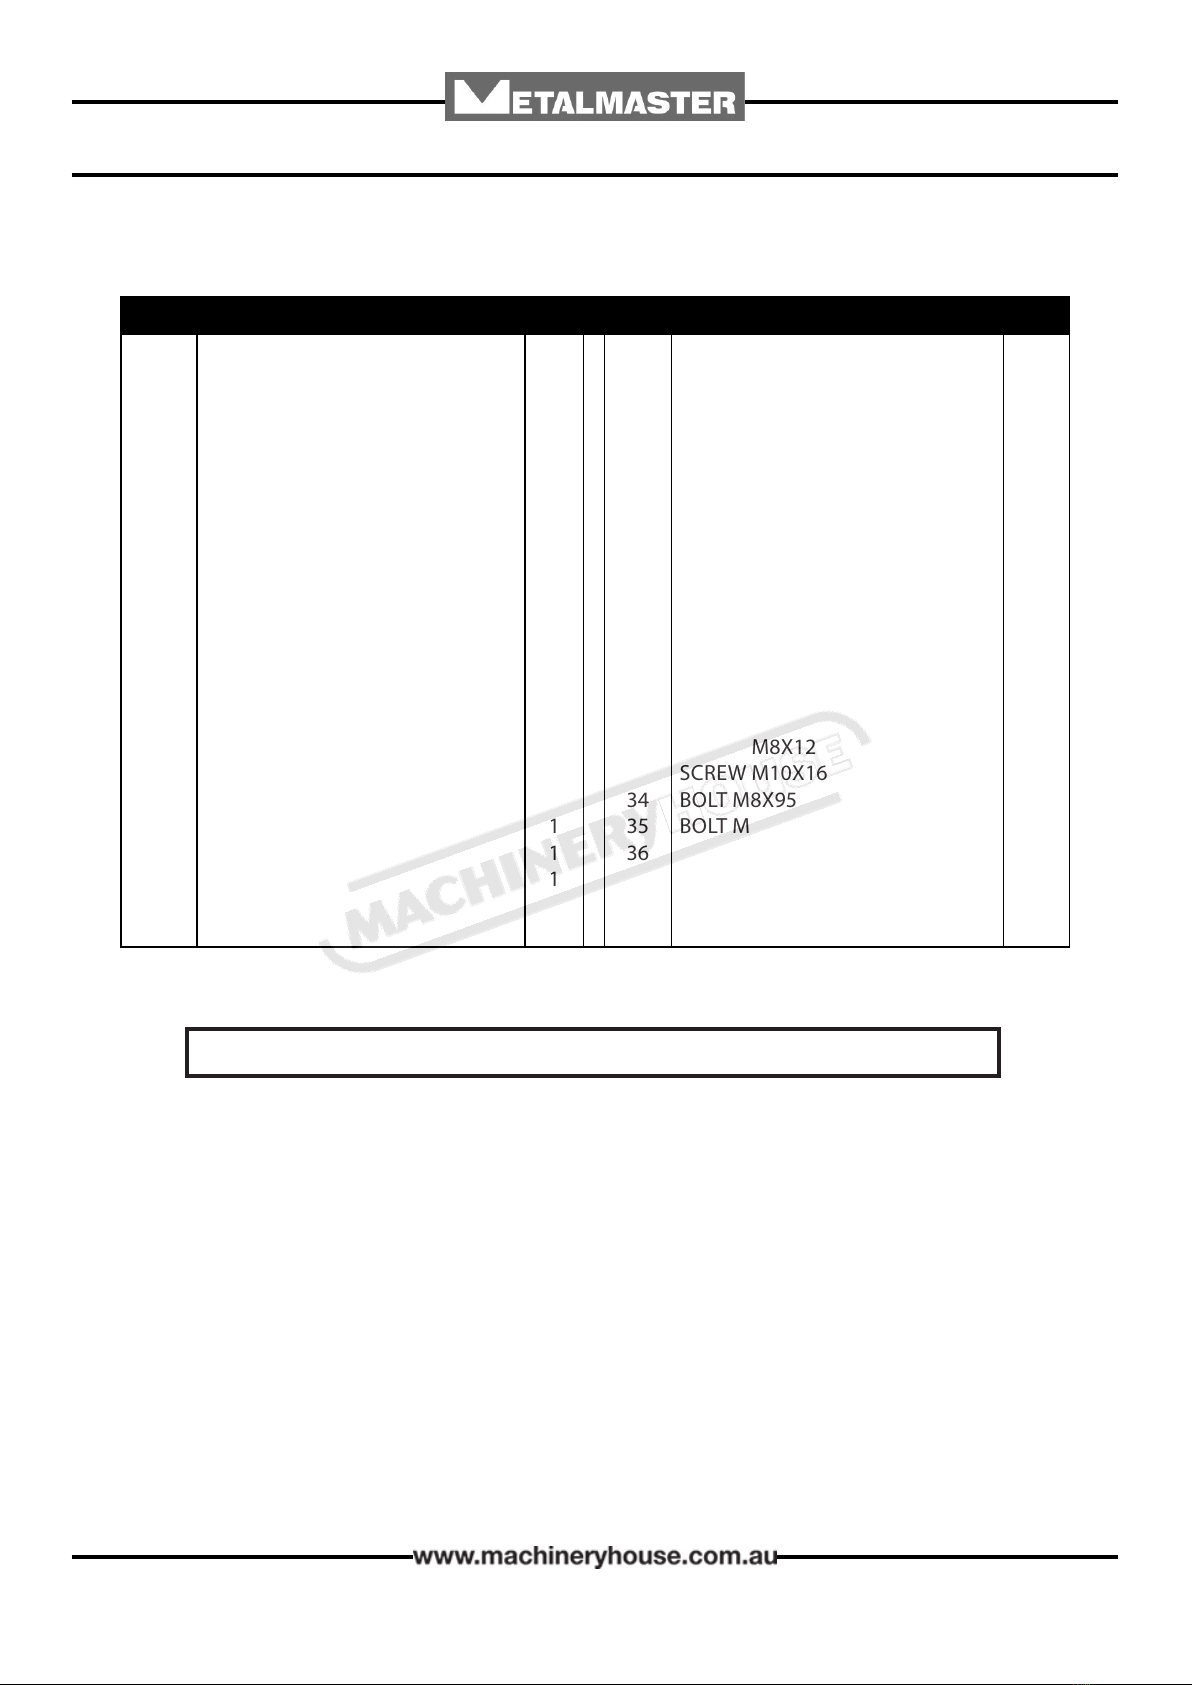
SPARE PARTS LIST
ITEM DESCRIPTION QT Y. ITEM DESCRIPTION QT Y.
1
2
3
4
5
6
7
8
9
10
1101
1102
1103
1104
1105
1106
1107
12
13
14
15
16
FRAME
TOP DIE
SHAFT
KNOB
STEEL TUBE
HANDLE
ECCENTRIC SHAFT
BOTTOM DIE YOKE
BEARING
SHAFT
BOTTOM DIE 50.8MM/2″
BOTTOM DIE 76.2MM/3″
BOTTOM DIE 101.6MM/4″
BOTTOM DIE 152.4MM/6″
BOTTOM DIE 203.2MM/8″
BOTTOM DIE 304.8MM/12″
FLAT DIE
LOCK BRACKET
BOTTOM DIE RACK
THREAD ROD
FRONT STAND
FRONT TUBE
1
1
1
1
1
1
1
1
16
7
1
1
1
1
1
1
1
1
1
1
1
1
17
18
19
20
21
22
23
24
25
26
27
28
29
30
31
32
33
34
35
36
37
38
BACK STAND
PLATE
LINK BRACKET
HANDLE LEVER
HANDLE BALL
WASHER 20MM
BOLT M10X80
WASHER 10MM
BOLT M10X85
NUT M10
SCREW M10X15
BOLT M8X65
WASHER 8MM
NUT M8
NUT M16
SCREW M8X12
SCREW M10X16
BOLT M8X95
BOLT M10X130
SCREW M4X12
WASHER 16MM
HEX KEY WRENCH 3MM
1
1
1
3
3
1
4
20
2
11
1
2
6
3
1
2
1
1
4
1
1
1
NOTE: SOME INDIVIDUAL PARTS MAY ONLY BE AVAILABLE AS AN ASSEMBLY
General Machinery Safety Instructions
1. Read the entire Manual before starting
machinery. Machinery may cause serious injury if
not correctly used.
2. Always use correct hearing protection when
operating machinery. Machinery noise may cause
permanent hearing damage.
3. Machinery must never be used when tired, or
under the influence of drugs or alcohol. When
running machinery you must be alert at all times.
4. Wear correct Clothing. At all times remove all loose
clothing, necklaces, rings, jewelry, etc. Long hair
must be contained in a hair net. Non-slip protective
footwear must be worn.
5. Always wear correct respirators around fumes
or dust when operating machinery. Machinery
fumes & dust can cause serious respiratory illness.
Dust extractors must be used where applicable.
6. Always wear correct safety glasses. When
machining you must use the correct eye protection
to prevent injuring your eyes.
7. Keep work clean and make sure you have good
lighting. Cluttered and dark shadows may cause
accidents.
8. Personnel must be properly trained or well
supervised when operating machinery. Make
sure you have clear and safe understanding of the
machine you are operating.
9. Keep children and visitors away. Make sure
children and visitors are at a safe distance for you
work area.
10. Keep your workshop childproof. Use padlocks,
Turn off master power switches and remove start
switch keys.
11. Never leave machine unattended. Turn power off
and wait till machine has come to a complete stop
before leaving the machine unattended.
12. Make a safe working environment. Do not use
machine in a damp, wet area, or where flammable
or noxious fumes may exist.
13. Disconnect main power before service
machine. Make sure power switch is in the off
position before re-connecting.
14. Use correct amperage extension cords.
Undersized extension cords overheat and lose
power. Replace extension cords if they become
damaged.
15. Keep machine well maintained. Keep blades
sharp and clean for best and safest performance.
Follow instructions when lubricating and changing
accessories.
16. Keep machine well guarded. Make sure guards
on machine are in place and are all working
correctly.
17. Do not overreach. Keep proper footing and
balance at all times.
18. Secure workpiece. Use clamps or a vice to
hold the workpiece where practical. Keeping the
workpiece secure will free up your hand to operate
the machine and will protect hand from injury.
19. Check machine over before operating. Check
machine for damaged parts, loose bolts, Keys and
wrenches left on machine and any other conditions
that may effect the machines operation. Repair and
replace damaged parts.
20. Use recommended accessories. Refer to
instruction manual or ask correct service officer
when using accessories. The use of improper
accessories may cause the risk of injury.
21. Do not force machinery. Work at the speed and
capacity at which the machine or accessory was
designed.
22. Use correct lifting practice. Always use the
correct lifting methods when using machinery.
Incorrect lifting methods can cause serious injury.
23. Lock mobile bases. Make sure any mobile bases
are locked before using machine.
24. Allergic reactions. Certain metal shavings and
cutting fluids may cause an ellergic reaction in
people and animals, especially when cutting as the
fumes can be inhaled. Make sure you know what
type of metal and cutting fluid you will be exposed
to and how to avoid contamination.
25. Call for help. If at any time you experience
difficulties, stop the machine and call you nearest
branch service department for help.
Machinery House
requires you to read this entire Manual before using this machine.
English Wheel Safety Instructions
1. Maintenance. Make sure all moving parts are
locked down before any inspection, adjustment or
maintenance is carried out.
2. English Wheel Condition. English Wheel machine
must be maintained for a proper working condition.
Never operate a English Wheel machine that
has damaged or worn parts. Scheduled routine
maintenance should performed on a scheduled
basis.
3. Roll Condition. Never operate a English Wheel
machine with damaged or badly worn Rolls. Replace
if required. Rolls should never be greased or
lubricated as rolls will slip the material and will not
bend.
4. Hand Hazard. Keep hands and fingers clear from
moving parts. Serious injury can occur if hand or
finger tips get pinched by rolls and can be dragged
into machine.
5. Gloves & Glasses. Always wear leather gloves and
approved safety glasses when using this machine.
6. Avoiding Entanglement. Tie up long hair and use
the correct hair nets to avoid any entanglement with
the English Wheel machine moving parts.
7. Understand the machines controls. Make sure you
understand the use and operation of all controls.
8. Work area hazards. Keep the area around the
English Wheel machine clean from oil, tools, chips.
Pay attention to other persons in the area and
know what is going on around the area to ensure
unintended accidents.
9. Guards. Do not operate this machine without the
correct guards in place. Necessary guards protect
you from injuries by rolls and moving gears and
parts.
10. Material condition. Material must be clean out of
oil and dry. Oily material can slip and will not bend.
11. Material hardness. Make sure your hardness is
the same throughout the material, we recommend
that you use certified material. Never bend hard
steel, glass or fragile material on this machine.
12. Level machine. Level the machine on a flat
concrete surface by using a spirit level.
13. Feeding material. Making a tight bend in one pass
is not possible. So you need several passes before
you can achieve a certain radius. Tighter curves
and full radius always need more passes.
14. Call for help. If at any time you experience
difficulties, stop the machine and call you nearest
branch service department for help.
Machinery House
requires you to read this entire Manual before using this machine.

Manager:
English Wheel
D
SHEARING
Developed in Co-operation Between A.W.I.S.A and Australia Chamber of Manufactures
This program is based upon the Safe Work Australia, Code of Practice - Managing Risks of Plant in the Workplace ( WHSA 2011 No10 )
Authorised and signed by:
NEW MACHINERY HAZARD IDENTIFICATION, ASSESSMENT & CONTROL
PLANT SAFETY PROGRAM
No.
Hazard
Identification
Item
Hazard
PUNCTURING
MEDIUM
Assessment
Wear gloves to prevent cuts from sharp material.
B
C
LOW
Risk Control Strategies
(Recommended for Purchase / Buyer / User)
Ensure machine is bolted down.
Secure & support work material.
CRUSHING
CUTTING, STABBING,
Keep hands clear from moving parts on rolls.
MEDIUM
Revised Date:
www.machineryhouse.com.au
www.machineryhouse.co.nz
12th March 2012
Plant Safety Program to be read in conjunction with manufactures instructions
Safety officer:
This manual suits for next models
1
Table of contents
Other MetalMaster Lathe manuals


Popular Lathe manuals by other brands

Jet
Jet JWL-1840DVR Operating instructions and parts manual

EINHELL
EINHELL TC-WW 1000/1 operating instructions

Jet
Jet JWL-1442VS owner's manual

Van Norman
Van Norman 204 Instruction manual and parts list

Master Quality Power
Master Quality Power MW40018 instruction manual

Scheppach
Scheppach Lata 5.0 Translation from the original instruction manual

Wadkin
Wadkin BZL operating instructions

Precision matthews
Precision matthews PM-1236T manual

Optimum
Optimum OPTI turn TU 3008G operating manual

Record Power
Record Power MAXI-1 Original instruction manual

Jet
Jet JWL-1640VS operating instructions

Arc Euro Trade
Arc Euro Trade SC3 Dismantling and reassembly guide


