Metravi DT2350P User manual

STROBOSCOPE
This Stroboscope is small in size,
light in w eight, easy t o carr y.
Although complex and advanced, it is
convenient to use and operate. Its
ruggedness will allow many years of
use if proper operating techniques are
followed. Please read the
following instructions carefully and
always keep this manual within easy
reach.
1. FEATURES
* When the speed of the moving
object matches the flash rate of
the stroboscope, the moving
object appears still. The unit can
give the operator the illusion of
's t o p p e d m o t i o n ' w h e r e i n
actuality the equipment under
observation is in a moving state.
By adjusting the flashing rate,
equipment in motion appears to
be standing still. With a slight
adjustment, movement can be
viewed in apparent slow motion.
Which enables the observer or
the operator to study the process
in action.
* Wide measuring range & high
resolution.
* Digital display gives exact
reading with no guessing or
errors.
* Flash timer control conserves flash
tube life.
* External trigger allows unit to be
automatically
* Strong flash light at low range and
week flash light at high range.
2. SPECIFICATIONS
Display : 10 mm (0.4") LCD
( Liquid Crystal Display )
Parameters Measured: FPM
( Flashes Per Minute)
Ranges :
2350A: 50~12,000 FPM
2350B: 50~40,000 FPM
2350C: 50~20,000 FPM
2350D: 50~30,000 FPM
2350E: 50~2,000 FPM
(Model E is specially designed
for Printing and Textile industry)
Resolution :
0.1 FPM(50~999.9 FPM)
1 FPM(over 1000 FPM)
+
-
Accuracy : ±(0.05%n+1d )
Sampling Time : 0.3 second
External trigger level: 3-24 V
H/L range:
Flashing light is much brighter at
low range than at high range.
Strobe Flash tube type:
Xenon lamp
Operating conditions :
Temp: 0~40℃
Humidity: <85% RH
Power supply : 220V A.C. (Default)
110V A.C.
÷
Size: 215x85x180 mm
(8.5x3.3x7.1 inch)
Weight: about 1000g
Internal/external triggering conversion
With x2, 2 for fast check
Accessories:
Carrying case.....................1pc.
Operation manual...............1pc.
Spare flashing tube.............1set.
3.FRONT PANEL DESCRIPTIONS
3-1 Flash Tube (Xenon lamp)
3-2 Power Switch
3-3 Display
3-4 Range Switch
3-5 Coarse
(Flashing Rate Adjusting Knob)
3-6 Fine
(Flashing Rate Adjusting Knob)
3-7 Jack for external triggering signal
3-10 ÷2 button for fast check
3-9 x2 button for fast check
3-8 Internal/external triggering button
4. MEASURING PROCEDURE
3-1
3-3
3-2
3-4
3-5
3-7
3-6
3-8
3-9
3-10
Fig. 1
4 . 1 "M a r k " t h e o b j e c t t o b e
meas u r ed by eit h e r visual l y
noting an inherent distinguishing
characteristics (such as a label
scratch, etc. ) or physically
marking the object with a small
piece of tape, pencil mark, etc.
4.2 Plug the supplied power cable
into the power cable jack of the
instrument. Plug the other end of
the cable into an appropriate AC
power source. Do not plug the
device into an incorrect power
source otherwise damage to the
i n s t r u m e n t w i l l r e s u l t . U s e
the ON/OFF switch to turn the
instrument on or off.
4.3 Depress the H/L button (3-4) to
select the Hi range or Low range.
For different models, the upper
limits vary. Please note, flashing
light is much brighter at low
range than that at hi range in
order to prolong lifetime of
strobe light.
4.4 Adjust the Coarse Knob 3-5
or the Fine Knob 3-6 from
highest FPM downward. The
true RPM can be noted once the
frozen appears and the first
single image of “Mark”appears.
S e e c ha rt in ta bl e 1 a n d
a c c o m p a n y i n g d i a g r a m f o r
further explanation.
4.5 To verify RPM reading, press
“ ÷ ”
press “x”
2 , a single image should
appear again. And 2 , 2
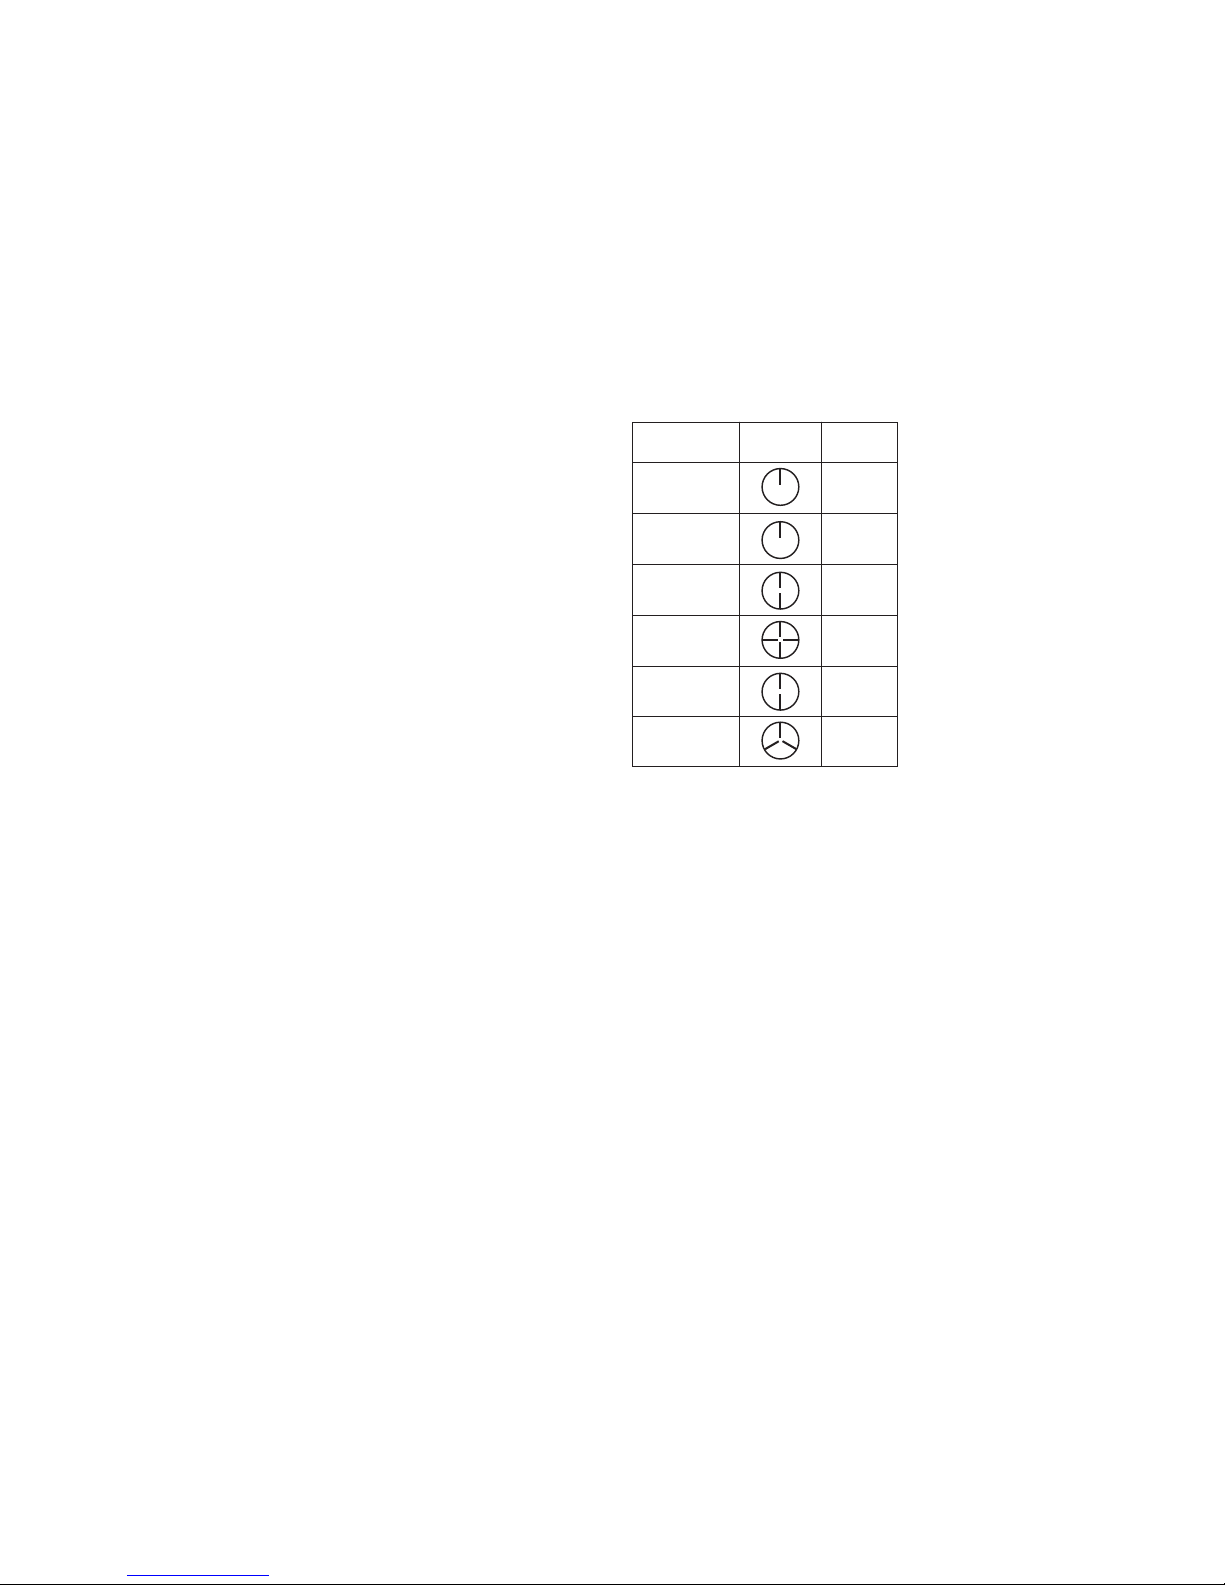
Table 1
Shaft Rot ation
n
and Flashi ng n0
relatioship
Stopped
Imag es note
Single
imag es
n=kn0
k=1,2...
Single
imag es
n=n0
2 imag es
n=1/2n0
n=3/4n0
n=5/2n0
n=1/3n0
4 imag es
2 imag es
3 imag es
in following places: explosive areas,
near water, oil, dust, or chemicals,
areas where temperature is too high.
6. FLASH TUBE REPLACEMENT
when reading is displayed but unit is
not flashing, the tube might be
needed to be replaced.
7. AUTO STOP FLASHING
The strobe light of stroboscope will
stop flashing about 5 minutes after
power on the stroboscope in order
to prolong lifetime of strobe light.
To make it work again, one have to
power off the stroboscope and power
it on again.
images should appear.
4.6 While measuring, use th e
RANGE button to select the
range as desired. The Low range
is used for measurements below
2,500 RPM (for E type) or 5,000
RPM (for A to D type). At low
range, flashing light is much
brighter.
4.7 Use the Ext/Int button to select
the external trigger or internal
trigger way as desired.
5.NOTES
5.1 This device causes moving
ob jects to appear still. Take
precautions against accidental
contact with moving objects.
5.2 Do not look at the emitted light
for long periods of time; it can be
harmful to the eyes.
5.3 Do not touch the flash tube.
5.4 Do not operate or store instrument


