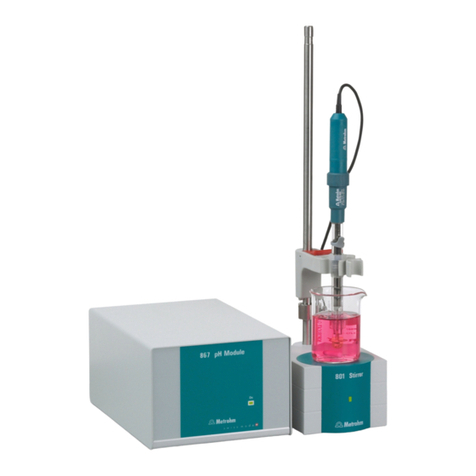
Metrohm 900 User manual

900 Touch Control
Manual – Short Instructions
8.900.8011EN


Metrohm AG
CH-9100 Herisau
Switzerland
Phone +41 71 353 85 85
Fax +41 71 353 89 01
www.metrohm.com
900 Touch Control
Manual – Short Instructions
8.900.8011EN 04.2017

Technical Communication
Metrohm AG
CH-9100 Herisau
This documentation is protected by copyright. All rights reserved.
This documentation has been prepared with great care. However, errors
can never be entirely ruled out. Please send comments regarding possible
errors to the address above.
Documentation in additional languages can be found on
http://documents.metrohm.com.
Melody for the BEEP command: excerpt from "En Altfrentsche", with kind
permission of the Laseyer Quartett, Appenzell.

■■■■■■■■■■■■■■■■■■■■■■ Table of contents
■■■■■■■■ III
Table of contents
1 About these short instructions 1
2 Introduction 2
2.1 Instrument description ......................................................... 2
2.2 Titration and measuring modes .......................................... 2
2.3 About the documentation ................................................... 4
2.3.1 Symbols and conventions ........................................................ 4
3 Safety instructions 6
3.1 General notes on safety ....................................................... 6
3.2 Electrical safety ..................................................................... 6
3.3 Tubing and capillary connections ....................................... 7
3.4 Flammable solvents and chemicals ..................................... 7
3.5 Recycling and disposal ......................................................... 8
4 Overview of the instrument 9
5 Installation 11
5.1 Setting up the instrument .................................................. 11
5.1.1 Packaging .............................................................................. 11
5.1.2 Checks .................................................................................. 11
5.1.3 Location ................................................................................ 11
6 Operation 12
6.1 Switching the instrument on and off ............................... 12
6.2 Fundamentals of operation ............................................... 14
6.2.1 Touch-sensitive screen ........................................................... 14
6.2.2 Display elements and controls ................................................ 15
6.2.3 Status display ........................................................................ 16
6.2.4 Entering text and numbers ..................................................... 17
7 Maintenance 19
Index 20


■■■■■■■■■■■■■■■■■■■■■■ 1 About these short instructions
■■■■■■■■ 1
1 About these short instructions
The present short instructions contain important chapters from the more
detailed manual. In addition to an introduction, safety instructions and an
overview of the instruments, you will also find information about the
installation and operation of the 900 Touch Control in addition to docu-
ments regarding conformity and warranty. You will find the more detailed
manual as a PDF file on the external storage medium included in the
scope of delivery.

2.1 Instrument description ■■■■■■■■■■■■■■■■■■■■■■
2■■■■■■■■
2 Introduction
2.1 Instrument description
The 900 Touch Control is an operating unit with a touch-sensitive screen.
You can operate the following control instruments with the 900 Touch
Control:
■Titrandos
■Sample Processors
■846 Dosing Interface
■867 pH Module
■856 Conductivity Module
With the 900 Touch Control, you can conveniently manage all of your
titrants, sensors, methods, etc. For example, you can connect a USB flash
drive to the USB connector as an external storage medium. You can use
this additional memory not only to store your methods and determina-
tions, but also to create a backup together with all of the data and set-
tings of your system. Thanks to the integrated Ethernet connector, the
device can be connected to your network, thus offering you the following
options, among others:
■Saving data to a PC within the network
■Printing reports on a network printer
■Sending displayed messages as e-mails
2.2 Titration and measuring modes
The 900 Touch Control supports the following titration and measuring
modes. Whether a particular mode is available or not depends on the type
of the control instrument connected.
■DET
Dynamic equivalence point titration. The reagent is added in variable
volume steps.
Measuring modes:
–pH (pH measurement)
–U (potentiometric voltage measurement)
–Ipol (voltametric measurement with selectable polarization cur-
rent)
–Upol (amperometric measurement with selectable polarization
voltage)

■■■■■■■■■■■■■■■■■■■■■■ 2 Introduction
■■■■■■■■ 3
■MET
Monotonic equivalence point titration. The reagent is added in con-
stant volume steps.
Measuring modes:
–pH (pH measurement)
–U (potentiometric voltage measurement)
–Ipol (voltametric measurement with selectable polarization cur-
rent)
–Upol (amperometric measurement with selectable polarization
voltage)
■SET
Endpoint titration at one or two specified endpoints.
Measuring modes:
–pH (pH measurement)
–U (potentiometric voltage measurement)
–Ipol (voltametric measurement with selectable polarization cur-
rent)
–Upol (amperometric measurement with selectable polarization
voltage)
■STAT
Titration with constant maintenance of the measured value.
Measuring modes:
–pH (pH measurement)
–U (potentiometric voltage measurement)
■MAT
Manual titration with manual dosing and manual ending.
Measuring modes (optional):
–pH (pH measurement)
–U (potentiometric voltage measurement)
■KFT
Volumetric water content determination according to Karl Fischer.
Measuring modes:
–Ipol (voltametric measurement with selectable polarization cur-
rent)
–Upol (amperometric measurement with selectable polarization
voltage)
■KFC
Coulometric water content determination according to Karl Fischer.
Measuring mode:
–Ipol (voltametric measurement with selectable polarization cur-
rent)

2.3 About the documentation ■■■■■■■■■■■■■■■■■■■■■■
4■■■■■■■■
■BRC
Coulometric bromine index determination. Determining the amount of
double bonds in e.g. mineral oils.
Measuring mode:
–Ipol (voltametric measurement with selectable polarization cur-
rent)
■MEAS
Measuring modes:
–pH (pH measurement)
–U (potentiometric voltage measurement)
–Ipol (voltametric measurement with selectable polarization cur-
rent)
–Upol (amperometric measurement with selectable polarization
voltage)
–T (temperature measurement)
–Conc (concentration measurement with or without standard
addition)
–Cond (conductivity measurement)
■CAL
Electrode calibration.
Measuring mode:
–pH (calibration of pH electrodes)
–Conc (calibration of ion-selective electrodes)
–Cond (calibration of conductivity measuring cells)
–ELT (Electrode test for pH electrodes)
2.3 About the documentation
CAUTION
Please read through this documentation carefully before putting the
instrument into operation. The documentation contains information
and warnings which the user must follow in order to ensure safe opera-
tion of the instrument.
2.3.1 Symbols and conventions
The following symbols and formatting may appear in this documentation:
Cross-reference to figure legend
The first number refers to the figure number, the sec-
ond to the instrument part in the figure.

■■■■■■■■■■■■■■■■■■■■■■ 2 Introduction
■■■■■■■■ 5
Instruction step
Carry out these steps in the sequence shown.
Method Dialog text, parameter in the software
File ▶ New Menu or menu item
[Next] Button or key
WARNING
This symbol draws attention to a possible life-threat-
ening hazard or risk of injury.
WARNING
This symbol draws attention to a possible hazard due
to electrical current.
WARNING
This symbol draws attention to a possible hazard due
to heat or hot instrument parts.
WARNING
This symbol draws attention to a possible biological
hazard.
CAUTION
This symbol draws attention to possible damage to
instruments or instrument parts.
NOTE
This symbol highlights additional information and
tips.

3.1 General notes on safety ■■■■■■■■■■■■■■■■■■■■■■
6■■■■■■■■
3 Safety instructions
3.1 General notes on safety
WARNING
This instrument may only be operated in accordance with the specifica-
tions in this documentation.
This instrument has left the factory in a flawless state in terms of technical
safety. To maintain this state and ensure non-hazardous operation of the
instrument, the following instructions must be observed carefully.
3.2 Electrical safety
The electrical safety when working with the instrument is ensured as part
of the international standard IEC 61010.
WARNING
Only personnel qualified by Metrohm are authorized to carry out service
work on electronic components.
WARNING
Never open the housing of the instrument. The instrument could be
damaged by this. There is also a risk of serious injury if live components
are touched.
There are no parts inside the housing which can be serviced or replaced
by the user.
Supply voltage
WARNING
An incorrect supply voltage can damage the instrument.
Only operate this instrument with a supply voltage specified for it (see
rear panel of the instrument).

■■■■■■■■■■■■■■■■■■■■■■ 3 Safety instructions
■■■■■■■■ 7
Protection against electrostatic charges
WARNING
Electronic components are sensitive to electrostatic charges and can be
destroyed by discharges.
Do not fail to pull the power cord out of the power socket before you
set up or disconnect electrical plug connections at the rear of the
instrument.
3.3 Tubing and capillary connections
CAUTION
Leaks in tubing and capillary connections are a safety risk. Tighten all
connections well by hand. Avoid applying excessive force to tubing
connections. Damaged tubing ends lead to leakage. Appropriate tools
can be used to loosen connections.
Check the connections regularly for leakage. If the instrument is used
mainly in unattended operation, then weekly inspections are manda-
tory.
3.4 Flammable solvents and chemicals
WARNING
All relevant safety measures are to be observed when working with
flammable solvents and chemicals.
■Set up the instrument in a well-ventilated location (e.g. fume cup-
board).
■Keep all sources of flame far from the workplace.
■Clean up spilled liquids and solids immediately.
■Follow the safety instructions of the chemical manufacturer.

3.5 Recycling and disposal ■■■■■■■■■■■■■■■■■■■■■■
8■■■■■■■■
3.5 Recycling and disposal
This product is covered by European Directive 2012/19/EU, WEEE – Waste
from Electrical and Electronic Equipment.
The correct disposal of your old instrument will help to prevent negative
effects on the environment and public health.
More details about the disposal of your old instrument can be obtained
from your local authorities, from waste disposal companies or from your
local dealer.

■■■■■■■■■■■■■■■■■■■■■■ 4 Overview of the instrument
■■■■■■■■ 9
4 Overview of the instrument
8
7
6
5
4
3
2
1
Figure 1 Front 900 Touch Control
1Display
Touch screen.
2Fixed key [Home]
Opens the main dialog.
3Fixed key [Back]
Opens the next-higher dialog page.
4Fixed key [Help]
Opens the online help for the dialog dis-
played.
5Fixed key [Print]
Opens the print dialog.
6Fixed key [Manual]
Opens the manual control.
7Fixed key [STOP]
Cancels the running determination.
8Fixed key [START]
Starts a determination.

■■■■■■■■■■■■■■■■■■■■■■
10 ■■■■■■■■
5
4
3
21
Figure 2 Rear 900 Touch Control
1Ethernet connector (RJ-45)
For connecting to a network.
2USB connector (type A)
For connecting printers, USB sticks, USB
hubs, etc.
3Power switch
Switches the instrument on/off.
4Type plate
Contains the serial number.
5Connection cable
For the connection of the Touch Control to
a control device (socket "Controller").

■■■■■■■■■■■■■■■■■■■■■■ 5 Installation
■■■■■■■■ 11
5 Installation
The connection between the Touch Control and the control device
(Titrando, etc.) is described in the respective manual, as is the configura-
tion of the titration system with its peripheral devices, e.g. stirrers and
dosing devices.
5.1 Setting up the instrument
5.1.1 Packaging
The instrument is supplied in protective packaging together with the sepa-
rately packed accessories. Keep this packaging, as only this ensures safe
transportation of the instrument.
5.1.2 Checks
Immediately after receipt, check whether the shipment has arrived com-
plete and without damage by comparing it with the delivery note.
5.1.3 Location
The instrument has been developed for operation indoors and may not be
used in explosive environments.
Place the instrument in a location of the laboratory which is suitable for
operation, free of vibrations, protected from corrosive atmosphere, and
contamination by chemicals.
The instrument should be protected against excessive temperature fluctu-
ations and direct sunlight.

6.1 Switching the instrument on and off ■■■■■■■■■■■■■■■■■■■■■■
12 ■■■■■■■■
6 Operation
6.1 Switching the instrument on and off
Switching on the instrument
CAUTION
Peripheral devices (e.g., printers) must be connected and switched on
before you switch on the 900 Touch Control.
NOTE
English is set as the default dialog language when the instrument is
switched on for the first time.
Information about changing the dialog language can be found in the
chapter Selecting the dialog language of the detailed manual.
Proceed as follows:
1■Press the power switch on the left-hand side of the back panel of
the 900 Touch Control.
The 900 Touch Control and the control instrument are initialized
and a system test is carried out. This process takes some time.

■■■■■■■■■■■■■■■■■■■■■■ 6 Operation
■■■■■■■■ 13
NOTE
If a buret unit is connected, then a request appears to carry out
the Prepare function:
All tubings and the cylinder are rinsed with the Prepare function.
The preparing of the buret unit is described in the chapter Manual
control of the detailed manual.
■Confirm the message with [OK].
The main dialog is displayed:

6.2 Fundamentals of operation ■■■■■■■■■■■■■■■■■■■■■■
14 ■■■■■■■■
Switching off the instrument
CAUTION
The 900 Touch Control must be switched off by pressing the power
switch on the rear of the instrument before the electricity supply is
interrupted. If this is not done, then there is a danger of data loss.
Because the power supply for the Touch Control is provided through
the control instrument (Titrando, etc.) you must never disconnect the
control instrument from the mains (e.g., by switching off with a con-
nector strip) before you have switched off the Touch Control.
Proceed as follows:
1Press the power switch on the left-hand side of the back panel of the
900 Touch Control.
The current data is saved and the system is shut down. This process
takes just a short time. At the same time, all other instruments con-
nected to the 900 Touch Control via a USB cable are also being
switched off.
6.2 Fundamentals of operation
6.2.1 Touch-sensitive screen
The entire 900 Touch Control user interface is touch-sensitive. Simply
touch a few of the buttons on the interface to learn how a touch-sensitive
screen reacts. You can always return to the main dialog by touching [ ].
In order to activate an element on the 900 Touch Control user interface,
just touch the screen with your fingertip, finger nail, the eraser of a pencil
or a stylus (special tool for operating instruments with touch-sensitive
screens).
CAUTION
Never touch the touch screen with a pointed or sharp object such as a
ballpoint pen.
In the default setting, the software is configured in such a way that an
acoustic signal will be generated every time an active control is touched.
This setting can be deactivated in the system settings.
Other manuals for 900
1
Table of contents
Other Metrohm Control Unit manuals
