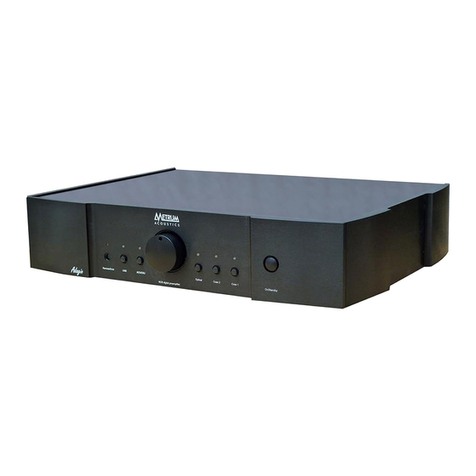
Metrum Acoustics Forte User manual

Made by
ALL Engineering
Power amplifier "
Forte
ForteForte
Forte
"
User manual
Updated 24-04-2017

Made by
ALL Engineering
Introduction
Our Forte power amplifier was designed for use in conjunction with our
digital preamp Adagio. However based on normal standards as used in hifi
the Forte can be used with almost any analog or digital pre amplifier. Both
RCA or LR inputs are selectable on the back side of the unit.
The front end of the Forte is not based on classic differential circuits
(having too much gain) but based on class A tube simulated circuitry
running on the same high voltage (350V) as tubes normally doing. As a
result the circuit has very high bandwidth and very low distortion without
any feedback. Just a little feedback is used to give this amp the right
amplification and damping factor. As a result the Forte sounds as a hybrid
without the disadvantages like aging as normal tubes will have over time.
As a lot of power is available your loudspeakers are protected against any
form of malfunction and will be disconnected immediately in such cases.
The inputs of the Forte can be switched between balanced or single ended
by a switch on the back side of the unit.
Remark
The Forte will reach its maximum performance after a two weeks of
intensive use!

Made by
ALL Engineering
Forte and Adagio together

Made by
ALL Engineering
IMPORTANT SAFETY INSTRUCTIONS
. Read Instructions.
2. Keep these Instructions.
3. Heed all arnings.
4. Follow all Instructions.
5. Do not use this apparatus near water.
6. Clean only with a dry cloth.
7. Do not install near any heat sources such as radiators, heat registers, stoves, or other apparatus
(including amplifiers) that produce heat.
8. Unplug this apparatus during lightning storms or when unused for long periods of time.
9. Refer all servicing to qualified service personnel. Servicing is required when the apparatus
has been damaged in any way, such as a power-supply cord or plug is damaged, liquid has
been spilled or objects have fallen into the apparatus, the apparatus has been exposed to
rain or moisture, does not operate normally, or has been dropped.
0. The Forte must be placed on a firm, level surface where it is not exposed to dripping
or splashing.
. Before making connections to the amplifier , ensure that the power is off and other components
are in mute or stand-by mode. Make sure all cable terminations are of the highest quality,
free from frayed ends, short circuits, or cold solder joints.
2. THERE ARE NO USER SERVICEABLE PARTS INSIDE THE "Forte" amplifier.
Please contact All Engineering if you have any questions not addressed in this guide.
3. All Engineering cannot be held accountable and/or responsible for any form of damage or health
issues inflicted to you, other people, pets, companies and non-living objects, that are caused by any
form of usage of the product which is not described in this manual.
4.By actually using this product and turning it on for the first time, you agree to these terms

Made by
ALL Engineering
What is in the Box
•The Forte amplifier
•Power cord (only Euro or USA based power cords)
•Remote cable
• USB stick ( user manual)

Made by
ALL Engineering
Connections
Caution!
Please connect your interconnects first before connecting the mains power cable!
•Power requirements: Check if the product is made conform the power requirements of your
area. On the back side the product is marked for the specific mains voltage.
•RCA inputs: Use single ended cables to connect the Forte to your single ended pre amplifier.
Select the input switches to “RCA input” setting for both channels.
•XLR inputs: Use balanced XLR3 cables to connect the Forte to your balanced pre amplifier.
Select the input switches to “XLR input” setting for both channels.
•Loudspeaker outputs: The RED binding post is connected to the amplifier output . Connect
to this post the (+) terminal on the loudspeaker. The BLACK binding post is connected to
signal ground. Connect to this post the (-) terminal on the loudspeaker.
The Output binding posts provide three different interconnect options. Combinations
may be used when bi-wiring. Cables should be kept as short as practical and should never be
terminated with connectors that may become confused for AC power connectors. Cables
should be dressed away from input and power cables.
1. Banana plugs offer a quick disconnect option. Before inserting a banana plug into the
binding post be sure to tighten the post nut to avoid rattling and to provide full insertion
of the banana plug.
2. Spade lugs provide high contact area and secure fastening. Lugs should be gold plated.
3. Stripped bare wire up to 4 mm diameter can be inserted through the hole in the binding
post and held in place by tightening the post knob. Note that copper wire is malleable and
may require further tightening after the initial installation.

Made by
ALL Engineering
•Remote switch: Depending the type of pre amplifier it is possible to switch the Forte “On” or
“Off”. In conjunction with the “Adagio ” pre amplifier a dedicated cable is supplied to
connect both products together. For connection a 3 pole XLR mini connector can be used and
depending the way your pre amplifier should be connected, it can be wired accordingly. The
following connections are available:
A) Common
B) Normally closed the Forte will be switched off.
C) Normally open. When closed the Forte will be switched on.

Made by
ALL Engineering
•Loudspeaker terminals: Loudspeakers can be used having an nominal impedance between 4
and 8 Ohms.
•Mains supply: First check the marks on the backside of the "Forte" to be sure it matches the
power requirements for the specific country.
•Mains inlet: Use the supplied power cable to a grounded power outlet. Never use the Forte
amplifier without proper grounding!!
Operation
•On/Standby switch : In standby position all capacitors are charged but quiescent current in
both power amps is reduced to zero. The front panel electronics are still watching the state
of both power amplifiers. hen the Forte is switched to “on” quiescent current will build up
slowly.
•Remote function: By connecting the remote cable (supplied) between the Forte amp an the
Adagio pre amplifier the green remote indication on the Forte will lit. By using the remote
option it is only possible to control the Forte via the On/standby switch on the Adagio pre
amplifier. The Standby/on button on the Forte will be disabled in this state.

Made by
ALL Engineering
•Error indication and protection: In normal conditions the error led will be switched off all the
time. However If one of the channels has a malfunction, the control circuit will immediately
remove the mains power from the power circuits but also disconnect the loudspeaker from
both amplifiers. As a result the error led will flash to indicate an error.
ERROR HANDLING
In case of an error there can be a serious reason that the control circuit will remove the power from
the power amplifiers. In such case it is impossible to switch the amplifier on again except by
removing the mains power for a while. By removing the mains power completely ( by using the
power switch on the back side of the unit) the control circuits will get a hard reset. However in cases
of real hardware troubles the amplifier comes back into the error state again.
•In case of malfunction remove your loudspeaker connections first!
•Never try to reset the amplifiers with both loudspeakers connected!
•During a reset make sure that the problem is solved and the error led
remains off before connecting the loudspeakers again!!!

Made by
ALL Engineering

Made by
ALL Engineering
Technical specs :
Working principle: Class A/B ampusing tube simulated circuitry in the gain stage.
Power supply: 400 VA toroidial transformer
Power consumption: Standby < 5 Watts
Full operation 80- 400 Watts
Power requirement: 110/115V AC or 220/230 V AC 60/50Hz
Inputs: 2x XLR 3, 2x x RCA.
Input voltage: 240 mV RMS for 1 Watt 1.74 Volts RMS for 50 Watts.
8Ohm
load.
Input impedance: Single ended 15 kOhms . Balanced 60 kOhms
Outputs: 2x Loudspeaker binding posts.
Output voltage: 20 Volts RMS max.
Frequency response: 10Hz - 100 kHz -3 dB. Internal bandwidth 0.5 MHz
Distortion: 0.015% 50 Watts close before clipping point
Noise: 300 µVolt RMS
Damping factor: >200
Slew rate: 50V/µSec
Dimensions hxwxd: 85 x 440 x 320 mm.
Weight: 15kg.
Subject to change without notice.
Metrum Acoustics
Ambachtsweg 4K
3953BZ Maarsbergen
The Netherlands
Tel: +31 (0)343437331
Email: info@metrum-acoustics.com
Website: http://www.metrum-acoustics.com
Table of contents
Other Metrum Acoustics Amplifier manuals
