MH MH-03-D-B1-0-1 User manual
40 1
20V ULTRA
Drill 2Ah KIT
(MH-03-D-B1-0-1)
INSTRUCTION MANUAL
Customer Service
Phone: 1-886-608-5212
E-Mail: [email protected]
Register your tool on www.motorheadtools.com for a Free Extended Warranty!
WARNING: Read and understand all instructions.
@motorheadtools
TARJETA DE GARANTÍA
KIT ULTRA taladro de 20 V y 2 Ah (MH-03-D-B1-0-1)

23
20V ULTRA Drill 2Ah KIT (MH-03-D-B1-0-1)
CONTENTS
OVERVIEW
20V ULTRA Drill 2Ah KIT (MH-03-D-B1-0-1)
Overview/specification/pack Content ............................................................................................................................. 3-4
Safety Guideline ........................................................................................................................................................................... 5
General Power Tools Safety Warnings ................................................................................................................................ 5
Work Area Safety ........................................................................................................................................................... 6
Electrical Safety ............................................................................................................................................................... 6
Battery Tool Use And Care .......................................................................................................................................... 6
Personal Safety ................................................................................................................................................................ 6
Power Tool Use And Care ............................................................................................................................................ 7
Service ................................................................................................................................................................................ 8
Drill safety warning ....................................................................................................................................................... 8
Fcc Safety....................................................................................................................................................................................... 9
Specific Safety Rules.................................................................................................................................................................. 10
Stay Alert........................................................................................................................................................................................ 10
Symbols........................................................................................................................................................................................... 11
Safety Warnings And Instructions......................................................................................................................................... 12
Charging & Operation ........................................................................................................................................................... 13-17
Troubleshooting ......................................................................................................................................................................... 17
Maintenance/maintenance ...................................................................................................................................................... 18
Recycling/warnings ................................................................................................................................................................... 18
Accessories ................................................................................................................................................................................... 19
Warranty ........................................................................................................................................................................................ 19
Warranty Card .............................................................................................................................................................................. 20
Warranty Conditions .................................................................................................................................................................. 20
CALIFORNIA PROP 65
WARNING: Some dust created by power sanding, sawing, grinding, drilling and other
construction activities contains chemicals known to the state of California to cause
cancer, birth defects or other reproductive harm. Some examples of these chemicals are:
• Lead from lead-based paints,
• Crystalline silica from bricks and cement and other masonry products, and
• Arsenic and chromium from chemically-treated-lumber.
Your risk from these exposures varies, depending on how often you do this type of work.
To reduce your exposure to these chemical: work in a well ventilated area, and work with
approved safety equipment, such as those dust masks that are specially designed to
filter out microscopic particles.”
For more information go to www.motorheadtools.com
www.P65Warnings.ca.gov
Electronic Version of this Manual Available on www.motorheadtools.com
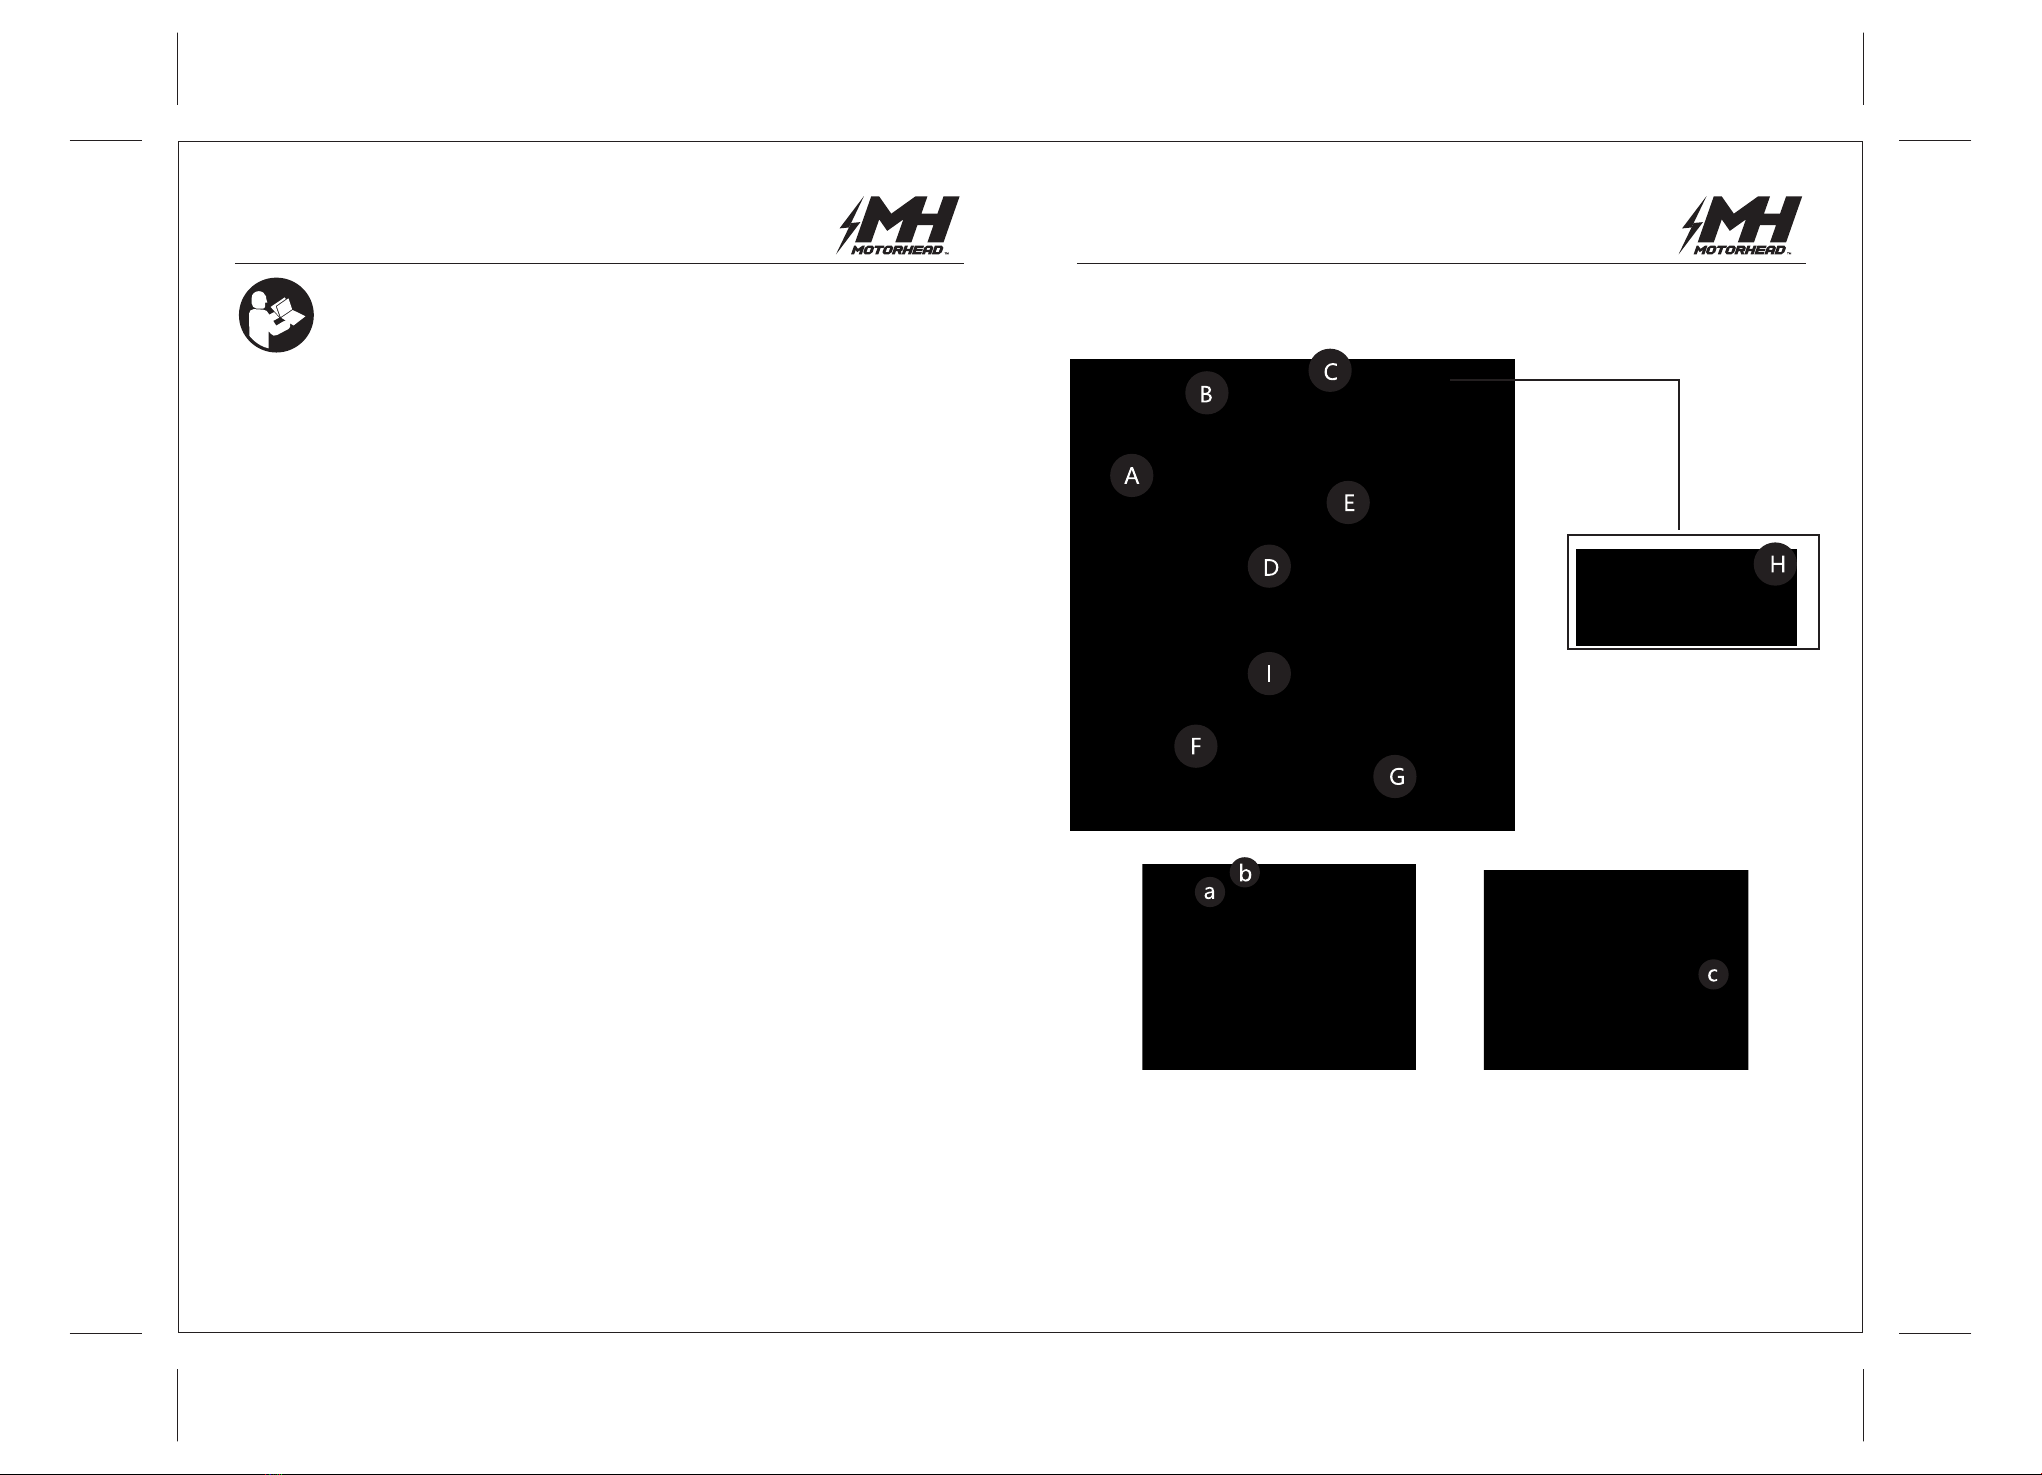
A1/2 In.(13mm)chuck
EForward / reverse switch
BTorque regulation ring
FBattery pack
GBelt clip
CTwo speed selector H
DVariable speed trigger with electric brake I
Spirit level
LED work light
aBattery indicator button
bBattery indicator lights cBattery lock button

45
SPECIFICATIONS SAFETY GUIDELINES
Be sure to read and understand this manual for your safety. When using this product it is
important to read and understand this information. It will protect you and help prevent any
problems.
Here are the guidelines to help you understand the symbols used in this guide.
DANGER: indicates a potentially hazardous situation which could result in a death
or serious injury.
WARNING: indicates the situation which could result in death or serious injury.
CAUTION: indicates a potentially hazardous situation which could result in mild to
moderate injury.
NOTICE: When used without the Safety Alert symbol, this indicates a potentially
hazardous which, if not avoided, can result in property damage.
• 20V Max Li-ion battery
• 1/2"(13mm) keyless chuck
• No Load Speed: 0-440/0-1650 RPM
• 16+1 position adjustable torque clutch
• Variable speed reversible trigger with electric brake
• Comfortable rubberized grip
• Bright LED work light
• 1 hour charging time
• 1pc tool bag
INCLUDES:
• 20V Cordless drill/driver
• Quick charger-Model: MH-03-C-B1-20V1H-1 (1 Hr for 2Ah battery, 2Hrs for 4Ah battery)
• 2.0AH LITHIUM ION BATTERY
• 6pcs HSS Drill Bits 1/8, 5/32, 11/64, 1/4, 5/16, 3/8
• 16pcs S2 impact Driver Bits
• 1” – PH1, PH2, PH3, PZ1,PZ2, SL5/32,SL1/4,SL3/16
• HEX5/32,1/4,3/16 Star 20,25,30, Square S2,S3
• 1pc 2-3/8” Quick Change
• Instruction manual
Please read before returning this product for any reason:
If you have questions or experience a problem with your MOTORHEAD
purchase, call 1-886-608-5212 from 8:00 a.m. to 5:00 p.m. Eastern
Standard Time, Monday through Friday.
WARNING: Read all of the instructions and pay close attention to the safety warnings.
Failure to follow the warnings and instructions can result in electric shock fire and or
serious injury.
SAVE THESE WARNINGS AND INSTRUCTIONS
YOU MAY NEED TO REFER TO THEM LATER
The term "power tool" in the warnings refers to your mains-operated (corded) power tool
or battery-operated (cordless) power tool.
SAFETY WARNINGS AND INSTRUCTIONS
a) This manual contains important safety and operating instructions.
b) Be sure that any attachments are recommended or sold by MOTORHEAD; use of
attachments by other manufacturers may not meet the same require-ments and can
result in fire, electric shock, or injury.
c) Never pull by the cord - always pull by the plug when disconnecting.
d) Never open the power tool - there are no parts inside that are serviceable by the
customer.
e) NEVER incinerate the power tool when it is ready to be discarded. It can explode in a
fire.
20V ULTRA Drill 2Ah KIT (MH-03-D-B1-0-1) 20V ULTRA Drill 2Ah KIT (MH-03-D-B1-0-1)

67
SAVE THESE INSTRUCTIONS
1) General power tool safety warnings-Work area safety
• Keep work area clean and well lit. Cluttered or dark areas invite accidents.
• Do not operate power tools in explosive atmospheres, such as in the presence of
flammable liquids, gases or dust. Power tools create sparks which may ignite the dust or
fumes.
• Keep children and bystanders away while operating a power tool. Distractions can cause
you to lose control.
2) General power tool safety warnings- Electrical safety
• Power tool plugs must match the outlet. Never modify the plug in any way. Do not use
any adapter plugs with earthed (grounded) power tools. Unmodified plugs and matching
outlets will reduce risk of electric shock.
• Avoid body contact with earthed or grounded surfaces, such as pipes, radiators, ranges
and refrigerators. There is an increased risk of electric shock if your body is earthed or
grounded.
• Do not expose power tools to rain or wet conditions. Water entering a power tool will
increase the risk of electric shock.
• Do not abuse the cord. Never use the cord for carrying, pulling or unplugging the power
tool. Keep cord away from heat, oil, sharp edges or moving parts. Damaged or
entangled cords increase the risk of electric shock.
• When operating a power tool outdoors, use an extension cord suitable for outdoor use.
Use of a cord suitable for outdoor use reduces the risk of electric shock.
• If operating a power tool in a damp location is unavoidable, use a residual current
device (RCD) protected supply. Use of an RCD reduces the risk of electric shock.
• Be sure to use electrical supplies that are suitable for the conditions. If working
outdoors, use extension cords rated for outdoor use (marked "W-A" or HWn) - this
reduces the risk of electrical shock.
• If you have to work in a damp location, be sure to use a ground fault circuit interrupter
(GFCI) protected supply. This will help reduce the risk of electrical shock.
3) General power tool safety warnings- Battery tool use and care
• Recharge only with the charger specified by the manufacturer. A charger that is suitable
for one type of battery pack may create a risk of fire when used with another battery
pack.
• Use power tools only with specifically designated battery packs. Use of any other
battery packs may create a risk of injury and fire.
• When battery pack is not in use, keep it away from other metal objects, like paper clips,
coins, keys, nails, screws or other small metal objects, that can make a connection from
one terminal to another. Shorting the battery terminals together may cause burns or a
fire.
• Under abusive conditions, liquid may be ejected from the battery; avoid contact. If
contact accidentally occurs, flush with water. If liquid contacts eyes, additionally seek
medical help. Liquid ejected from the battery may cause irritation or burns.
• Do not use a battery pack or tool that is damaged or modified. Damaged or modified
batteries may exhibit unpredictable behaviour resulting in fire, explosion or risk of injury.
• Do not expose a battery pack or tool to fire or excessive temperature. Exposure to fire
or temperature above 130 °C may cause explosion.
NOTE The temperature “130 °C” can be replaced by the temperature “265 °F”.
• Follow all charging instructions and do not charge the battery pack or tool outside the
temperature range specified in the instructions. Charging improperly or at temperatures
outside the specified range may damage the battery and increase the risk of fire.
5) General power tool safety warnings- Personal safety
• Stay alert, watch what you are doing and use common sense when operating a power
tool. Do not use a power tool while you are tired or under the influence of drugs, alcohol or
medication. A moment of inattention while operating power tools may result in serious
personal injury.
• Use personal protective equipment. Always wear eye protection. Protective equipment
such as a dust mask, non-skid safety shoes, hard hat or hearing protection used for
appropriate conditions will reduce personal injuries.
to power source and/or battery pack, picking up or carrying the tool. Carrying power
tools with your finger on the switch or energising power tools that have the switch on
invites accidents.
• Remove any adjusting key or wrench before turning the power tool on. A wrench or a key
left attached to a rotating part of the power tool may result in personal injury.
• Do not overreach. Keep proper footing and balance at all times. This enables better
control of the power tool in unexpected situations.
• Dress properly. Do not wear loose clothing or jewellery. Keep your hair and clothing away
from moving parts. Loose clothes, jewellery or long hair can be caught in moving parts.
• If devices are provided for the connection of dust extraction and collection facilities,
ensure these are connected and properly used. Use of dust collection can reduce
dust-related hazards.
• Do not let familiarity gained from frequent use of tools allow you to become complacent
and ignore tool safety principles. A careless action can cause severe injury within a
fraction of a second.
• Be sure to properly connect and use any devices that extract and collect dust. When
used properly, dust collection can reduce situations related to dust and debris hazards.
• Do not run the cordless drill while carrying it at your side. A spinning socket or bit could
become entangled with clothing and injury may result.
• Disconnect the plug or remove the battery pack from tool and place the switch in the
locked or "OFF" position before making any assembly adjustments, changing
accessories, performing any inspection, maintenance or cleaning procedures. Such
preventive safety measures reduce the risk of starting the tool accidentally.
• Do not use the cordless drill if it has been damaged, left outdoors in the rain, snow, wet
or damp environments, or immersed in liquid.
5) General power tool safety warnings- Power tool use and care
• Do not force the power tool. Use the correct power tool for your application. The correct
power tool will do the job better and safer at the rate for which it was designed.
Any power tool that
cannot be controlled with the switch is dangerous and must be repaired.
• Disconnect the plug from the power source and/or remove the battery pack, if detachable,
from the power tool before making any adjustments, changing accessories, or storing
power tools. Such preventive safety measures reduce the risk of starting the power tool
accidentally.
• Store idle power tools out of the reach of children and do not allow persons unfamiliar with
the power tool or these instructions to operate the power tool. Power tools are dangerous
in the hands of untrained users.
• Maintain power tools and accessories. Check for misalignment or binding of moving parts,
damaged, have the power tool repaired before use. Many accidents are caused by poorly
maintained power tools.
• Keep cutting tools sharp and clean. Properly maintained cutting tools with sharp cutting
edges are less likely to bind and are easier to control.
• Use the power tool, accessories and tool bits etc. in accordance with these instructions,
taking into account the working conditions and the work to be performed. Use of the
20V ULTRA Drill 2Ah KIT (MH-03-D-B1-0-1) 20V ULTRA Drill 2Ah KIT (MH-03-D-B1-0-1)
89
6) General power tool safety warnings- Service
• Have your power tool serviced by a qualified repair person using only identical
replacement parts. This will ensure that the safety of the power tool is maintained.
• Never service damaged battery packs. Service of battery packs should only be
1. Use auxiliary handle(s), if supplied with the tool. Loss of control can cause personal
injury.
2. Hold power tool by insulated gripping surfaces, when performing an operation where
the cutting accessory may contact hidden wiring or its own cord. Cutting accessory
contacting a ″live″wire may make exposed metal parts of the power tool ″live″and
could give the operator an electric shock.
3. Let bit cool before touching, changing or adjusting it. Bits heat up dramatically while in
use, and can burn you.
4. If the drill bit jams, release the Trigger immediately; drill torque can cause injury or break
bit.
5. Avoid unintentional starting. Prepare to begin work before turning on the tool.
6. Do not lay the tool down until it has come to a complete stop. Moving parts can grab the
surface and pull the tool out of your control.
7. When using a handheld power tool, maintain a firm grip on the tool with both
hands to resist starting torque.
8. Do not leave the tool unattended when the Battery Pack is connected. Turn o the tool,
and remove the Battery Pack before leaving.
9. The battery Charger gets hot during use. The Charger’s heat can build up to unsafe
levels and create a fire hazard if it does not receive adequate ventilation, due to an
electrical fault, or if it is used in a hot environment.
Do not place the Charger on a flammable surface.
Do not obstruct any vents on the Charger.
Especially avoid placing the charger on carpets and rugs; they are not only flammable,
but they also obstruct vents under the charger.
Place the Charger on a stable, solid, nonflammable surface (such as a stable metal work-
bench or concrete floor) at least 1 foot away from all flammable objects, such as drapes or
walls. Keep a fire extinguisher and a smoke detector in the area. Frequently monitor the
Charger and Battery Pack while charging.
10. This product is not a toy. Keep it out of reach of children.
11. People with pacemakers should consult their physician(s) before use. Electromagnetic
fields in close proximity to heart pacemaker could cause pacemaker interference or
pacemaker failure.
12. The warnings, precautions, and instructions discussed in this instruction manual cannot
cover all possible conditions and situations that may occur. It must be understood by the
operator that common sense and caution are factors which cannot be built into this
product.
• Keep handles and grasping surfaces dry, clean and free from oil and grease. Slippery
handles and grasping surfaces do not allow for safe handling and control of the tool in
unexpected situations.
7) Drill safety warnings
is connected.
. Consult the dealer or an experienced radio /TV technician for help.
FCC SAFETY
This device complies with part 15 of the FCC Rules.
Operation is subject to the following two conditions:
(1) This device may not cause Harmful interference, and
(2) This device must accept any interference received, including interference that may
cause undesired operation.
WARNING: Changes or modification to this unit not expressly approved by the party
responsible for compliance could void the user’s authority to operate the equipment.
NOTE: This equipment has been tested and found to comply with the limits for a Class B
digital device, pursuant to part 15 of the FCC Rules.
This limits are designed to provide reasonable protection against harmful interference in a
residential installation. This equipment generates, uses and radiate radio frequency energy
and, if not installed and used in accordance with the instruction, may cause harmful
interference to radio communication. However, there is no guarantee that interference will
not occur in a particular installation. If this equipment does cause harmful interference to
radio or television reception, which can be determined by turning the equipment o and
on, the user in encouraged to try to correct the interference by one or more of the
following measures:
. Reorient or relocate the receiving antenna.
. Increase the separation between the equipment and receiver.
20V ULTRA Drill 2Ah KIT (MH-03-D-B1-0-1) 20V ULTRA Drill 2Ah KIT (MH-03-D-B1-0-1)
• Avoid prolonged contact with dust from construction activities like power sanding,
sawing, grinding, and drilling. Always wear protective clothing and immediately wash
any exposed areas with soap and water.
If you allow dust to get into your eyes or mouth, or stay on your skin, you risk absorption of
these harmful chemicals.
WARNING: Dust from use of this tool on construction material may cause serious
and/or permanent respiratory (or other) injury. Direct the particles away from your face,
and be sure to use NIOSH/OSHA approved respiratory protection against dust exposure.
ALWAYS FOLLOW THE SAFETY RULES FOR USE OF THIS PRODUCT. You can
get seriously hurt by using this tool unsafely or incorrectly.
• Always use caution, particularly if operating the power tool around electrical wiring.
Your tool has insulated gripping surfaces - be sure to hold the power tool by these
surfaces to avoid electrical shock if the cutting part of the tool should make contact with
a "live" wire.
• Only operate the tool when you are securely holding it with both hands; do not leave
the tool running.
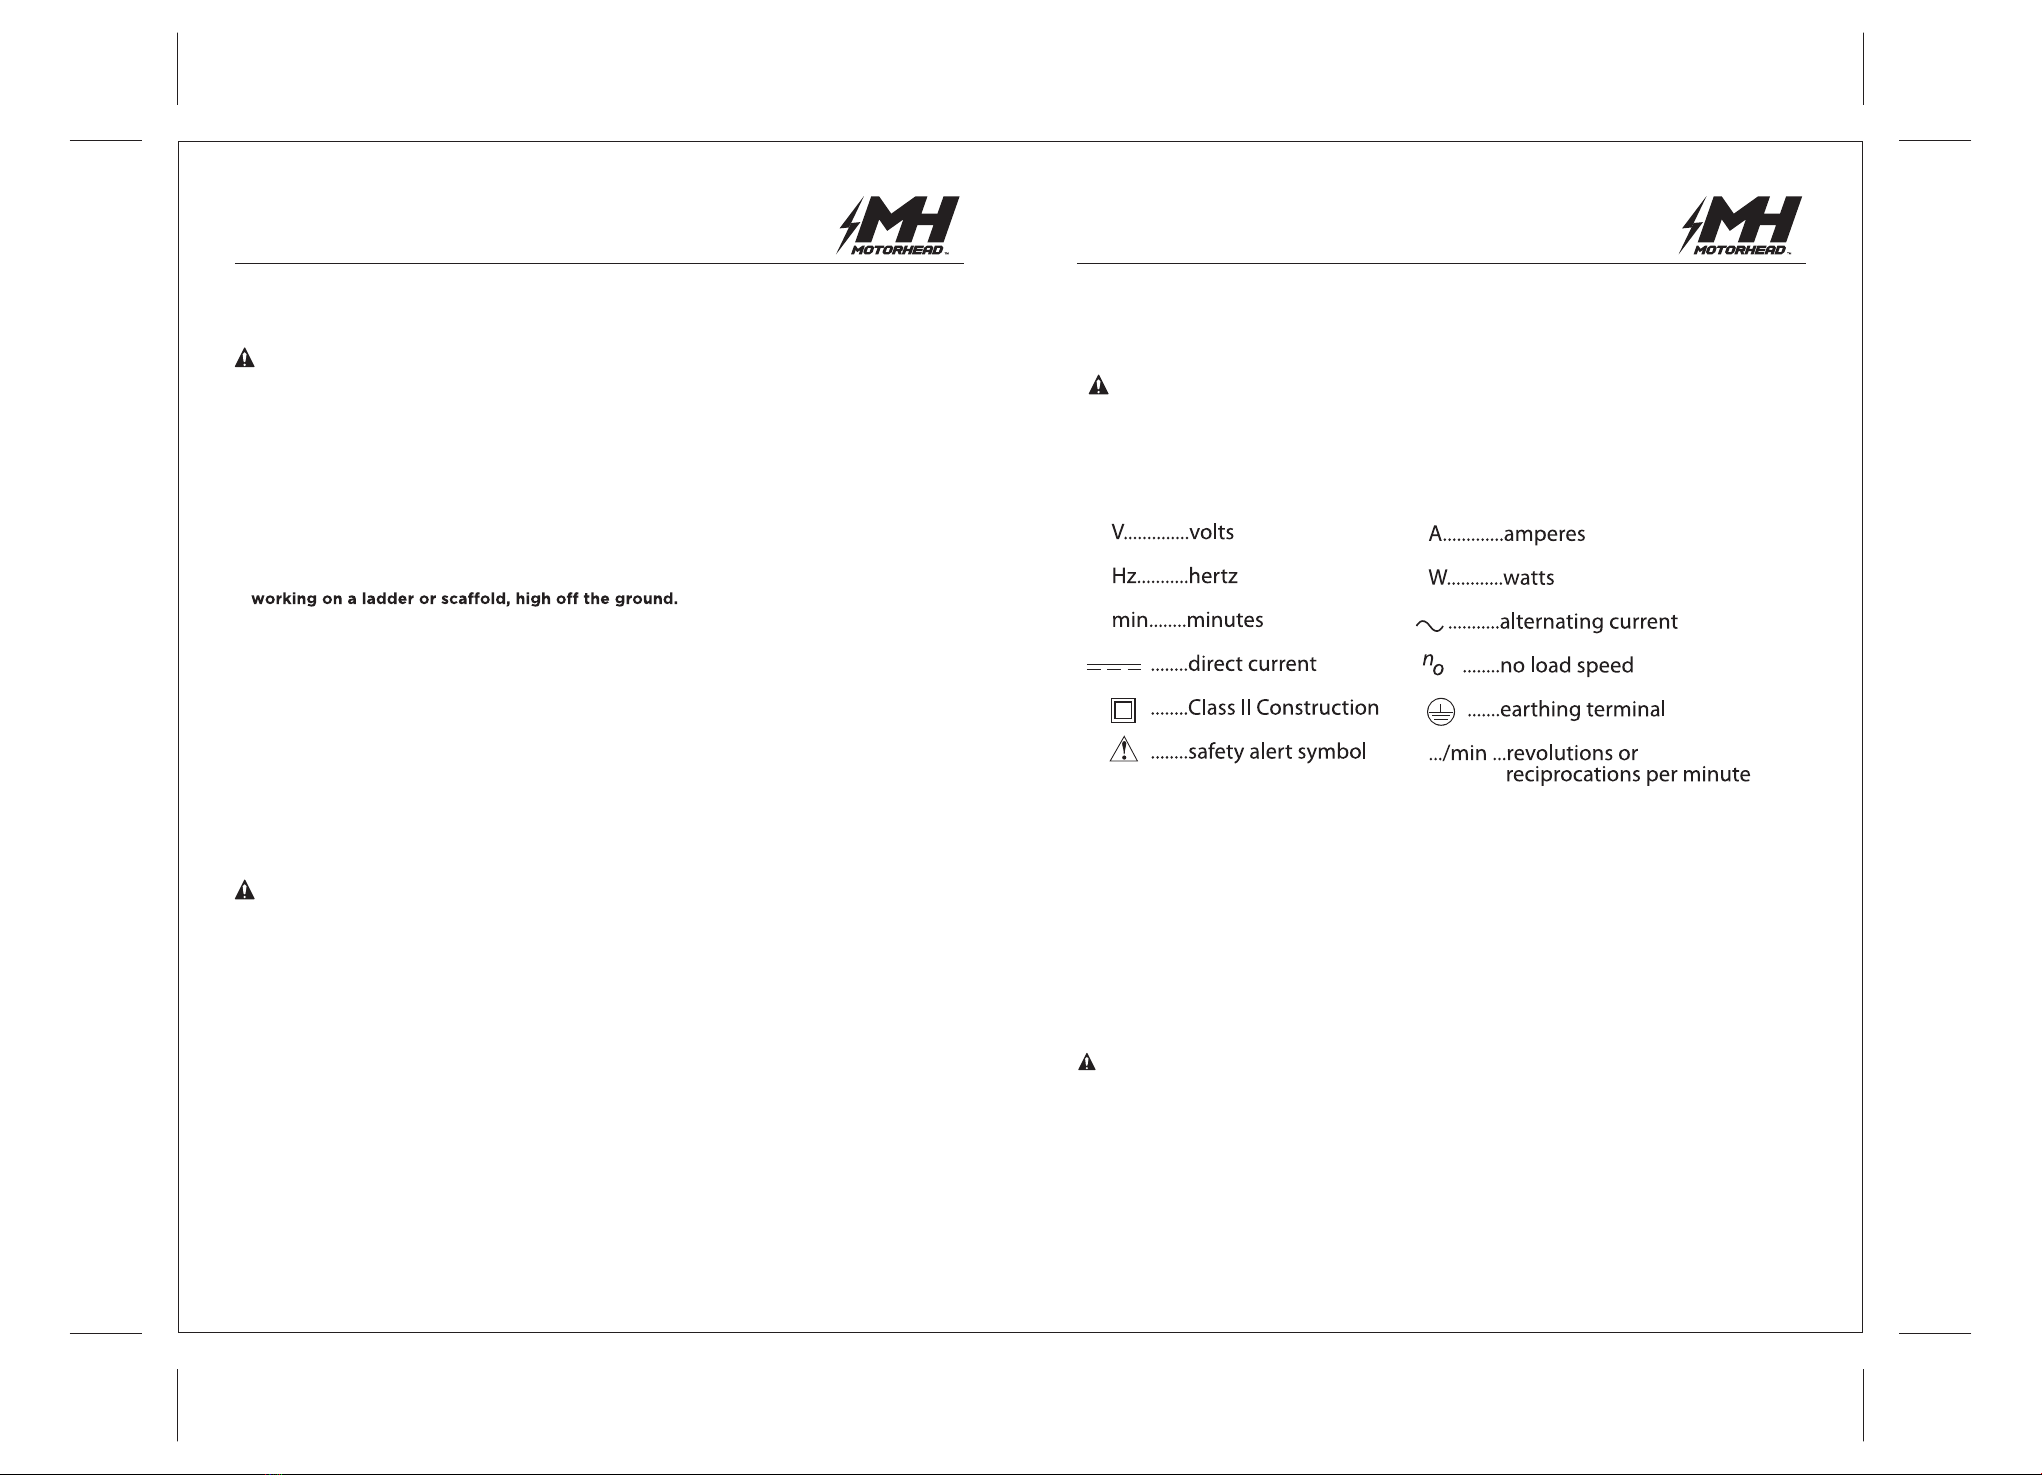
SYMBOLS
For your easy reference, here are the tools symbols you may see on your tool label:
• Don't use water on your work surface - this tool is not waterproofed.
• Always ventilate your working area adequately.
• Make sure to use appropriate respiratory protection. Use of this tool on some paints,
wood and particular products may produce dust containing hazardous substances.
WARNING: Do not allow the terminals of the battery to contact metal objects when
carrying or storing the battery.
If the battery terminals come in contact with conductive materials, it can cause fires - so
use caution when transporting the battery. NOTE: the US Department of Transportation
Hazardous Material Regulations (HMR) prohibit transporting batteries in commerce or on
airplanes (i.e. packed in suitcases and carryon luggage) UNLESS they are properly
protected from short circuits. Take special precaution when transporting individual
batteries to make sure the terminals are well insulated and protected from anything that
could contact them and cause a short circuit.
10 11
STAY ALERT
Watch what you are doing and use common sense. Don't operate any tool when you are
tired.
WARNING: Some dust created when using power tools to sand, grind, drill or saw
and/or other construction activities contains chemicals known to the State of California
to cause cancer, birth defects or other reproductive harm. Some examples of these types
of chemicals:
• lead from lead-based paint
• Crystalline silica from bricks and cement and other masonry products
• Arsenic and chromium from chemically treated lumber
Your risk from these exposures varies depending on how often you do work that involves
these materials.
To reduce exposure risk, work in a well ventilated area with approved safety equipment like
dust masks that are designed to filter out microscopic particles.
• For optimum control of your power tool, always use the auxiliary handles if that come
with the tool.
• Your tool has insulated gripping surfaces - be sure to hold the power tool by these
surfaces to avoid electrical shock if the cutting part of the tool should make contact
with a "live" wire.
• For best safety measures, lay the tool on itfs side when not in use, particularly if you're
If tools with large battery packs
can stand upright, but they're easily tipped over, which could cause result in an injury.
• Power tools exert extreme force - be sure the item you are working on is firmly secured
with clamps or other reliable means. Do not try to hold the item by hand or against your
body - you might lose control and be injured.
• Keep hair, clothing or gloves away from air vents, as they may become entangled in
the moving mechanism around these areas.
• Hold the tool firmly with both hands. Use the auxiliary handle if avail-able; if there is no
auxiliary handle, grip the handle at the bottom. Losing control of the device can result in
personal injury.
SPECIFIC SAFETY RULES
• Exposure to loud noise can cause hearing damage. Always wear ear a protection when
using power equipment.
WARNING: ALWAYS use safety glasses. Everyday eye glasses are NOT safety glasses.
• Use face or dust mask if operation is dusty.
ALWAYS WEAR CERTIFIED SAFETY EQUIPMENT:
• ANSI Z87.1 eye protection (CAN/CSA Z94.3)
• ANSI SI 2.6 (S3.19) hearing protection
• NIOSH/OSHA respiratory protection
20V ULTRA Drill 2Ah KIT (MH-03-D-B1-0-1) 20V ULTRA Drill 2Ah KIT (MH-03-D-B1-0-1)

12 13
SAFETY WARNINGS AND INSTRUCTIONS:
Charging The Battery Pack
• This manual contains important safety and operating instructions.
• Before using the battery charger, read and become familiar with all of the use
instructions and caution markings on the battery charger, battery pack, and product
using battery pack.
• CAUTION: Always use MOTORHEAD battery packs to reduce the possibility of injury;
other battery types may burst, causing potentially harmful results.
• Keep the charger out of bad elements, such as rain and snow.
• Be sure that any attachments are recommended or sold by MOTORHEAD; use of
attachments by other manufacturers may not meet the same requirements and can result
in fire, electric shock, or injury.
• Never pull by the cord - always pull by the plug when disconnecting the charger.
• Make sure the cord is clear and secure - do not step on, trip or otherwise damage or
stress the cord.
• Extension cords - refer to ELECTRICAL SAFETY (CONT.) - EXTENSION CORD USE in
this manual.
• Use only the supplied charger when charging your drill.
hazardous or damage the drill.
• Use only one charger when charging.
• Never open the charger or power tool - there are no parts inside that are serviceable
by the customer. Return the power tool to MOTORHEAD for service.
• Never attempt to open or modify battery for any reason. Released electrolyte is
corrosive and may cause damage to eyes and skin. It may be toxic if swallowed.
• NEVER incinerate the power tool or battery pack when they are ready to be discarded.
The batteries can explode in a fire.
• There are certain conditions, such as extreme usage, charging or temperature
conditions that can result in a small amount of leakage from the battery pack cells. This
does not indicate a failure - however, should the outer seal get broken and the leakage
touches your skin:
a. Immediately wash with soap and water.
b. Neutralize with a mild acid such as lemon juice or vinegar.
c. In case the battery liquid gets in your eyes, flush your eyes with clean water for a
minimum of 10 minutes and seek immediate medical attention. MEDICAL NOTE: the liquid
is a 25-35% solution of potassium hydroxide.
CHARGING & OPERATION
Charging The Battery Pack
- Charging indications
Chargers are designed to use standard 120 volt AC, 60 Hz power. Do not use DC or any
other voltage.
BEFORE ATTEMPTING TO CHARGE YOUR BATTERY PACK, THOROUGHLY READ ALL
THE SAFETY INSTRUCTIONS.
• Batteries will reach full performance after about five charge/discharge cycles.
• Always have drill rotation switch in neutral/lock position when removing or inserting
battery to avoid unintentional starting.
• The step of the battery pack has positive and negative terminal markings on it. Align
these with the identical markings on the top of the charging stand and insert pack into
base. (Pack will not insert properly if reversed)
• Normal charging time is 1 hour. The charger will charge the battery at the normal
charging is complete. After the battery is fully charged according to the charging time
provided in the instructions, remove the battery pack from the charging stand. Battery
temperature will cool to normal.
• When charging more than one battery pack, allow 15 minutes between charges.
• After many charge/discharge cycles, your battery will lose its ability to hold a charge.
It should then be replaced. Dispose of batteries at an appropriate waste disposal
facility. Do not throw batteries away in common trash receptacles.
• Place and charge the Battery Pack on a dry fireproof location in a room where the
temperature is from +39.2°F(4°C)-104°F(40°C).
• During charging the battery, the Battery Pack, Charger base, and Adapter may become
warm when you touch it. This is a normal condition, and does not indicate a problem.
• lf recharging a newly spent Battery pack, make sure it is undamaged and cool
completely.
• Always unplug the Charger when charging completed.
• Be sure the battery is cool before using it.
• Insert the switching adapter/plug into a 120V household current receptacle.
• The green light is the charge indicator. When the charger is connected to AC
household current, the green light is on.
• The red light is the power indicator. When the battery is properly inserted into the
charger and charging, the red light is on.
Indicator lights
20V ULTRA Drill 2Ah KIT (MH-03-D-B1-0-1) 20V ULTRA Drill 2Ah KIT (MH-03-D-B1-0-1)
14 15
- Inserting and removing the battery
- Switch lock
• Always have drill rotation switch in neutral/lock position when removing or inserting
battery to avoid unintentional starting.
• To insert, simply push pack in until lock spring clicks.
• To remove battery pack from the tool, press the lock spring buttons (d in the functional
description) and pull out.
• The switch trigger can be locked in
the center position.
• This helps to reduce the possibility of
accidental starting when not in use. To
lock the switch trigger, place the
direction of rotation selector in the
center position.
SWITCH (E in the functional description)
The drill is started and stopped by depressing and releasing the ON/OFF switch trigger.
- Rotation direction
• Direction of rotation is controlled by
the direction of rotation selector
located above the switch trigger.
• Right: To select forward rotation,
forward/reverse lever to the left side of
the tool.
• Left: To select reverse rotation, push
the lever to the right side of the tool.
• This tool has a variable speed switch that delivers higher speed and torque with
increased trigger pressure.
• Speed is controlled by the amount of switch trigger depression.
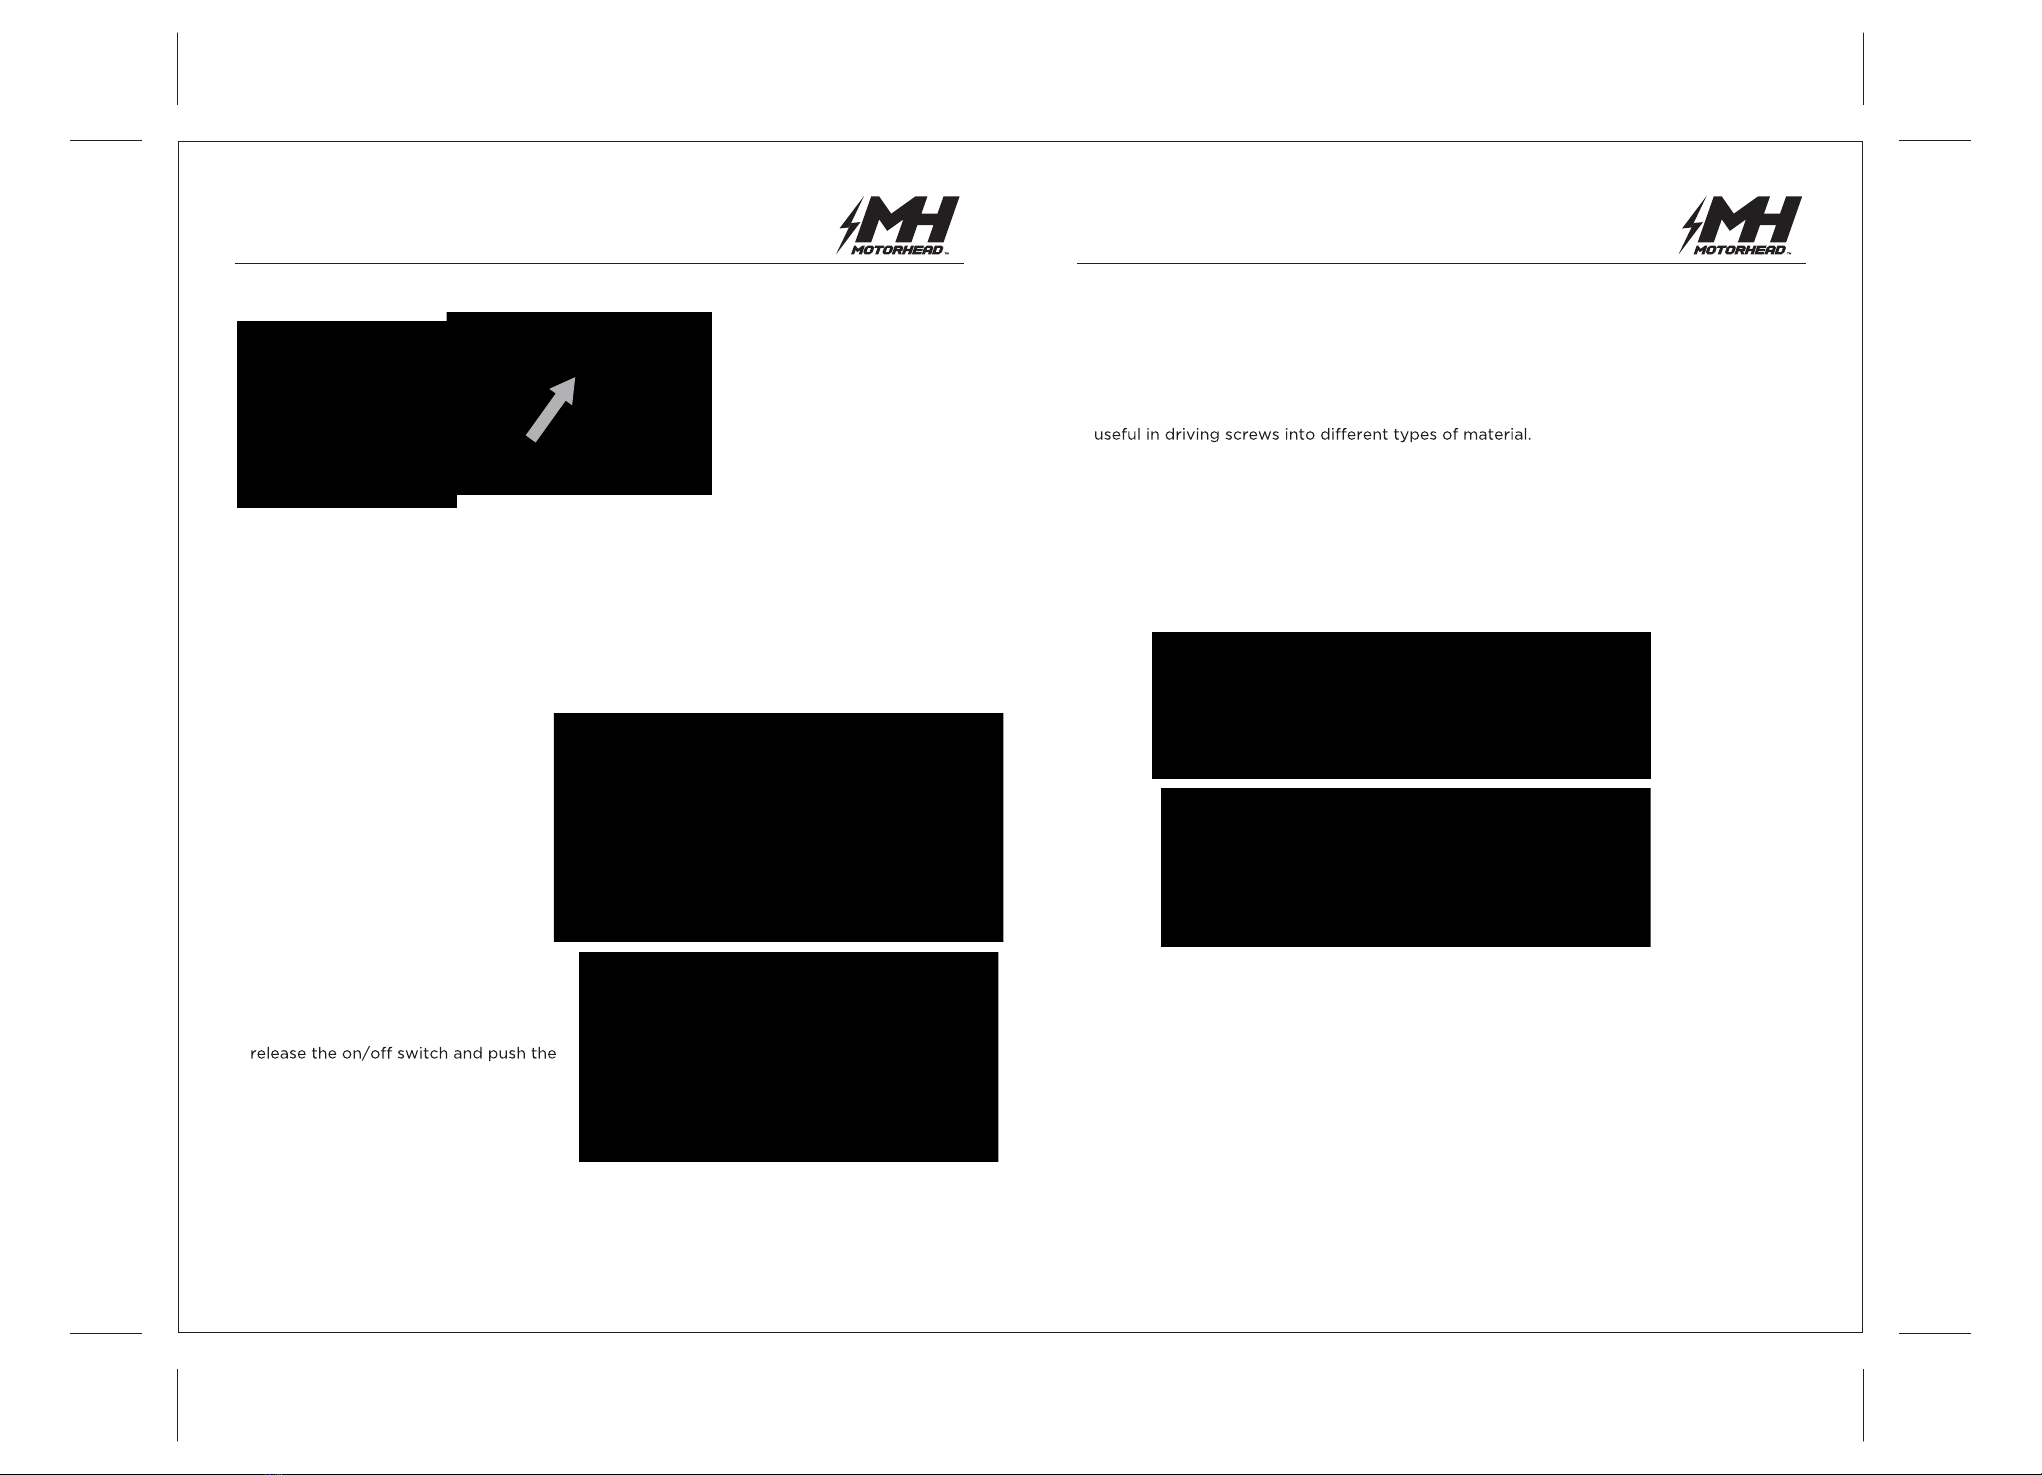
- Variable speed
NOTE: Mark “1”is Low speed position, mark “2” is High speed position that moulding
onto the button of two speed selector .
• The drill has a two-speed gear train designed for drilling at 1 (LOW) or 2 (HIGH) speed. A
gear selector is located on top of the drill to select either low or high speed. When you
push the button forward and select low speed range, the speed will decrease but will
provide more power and torque. When using drill in the high speed range. Speed will
increase but will provide less power and torque. Use low speed for high power and
torque application and high speed for fast drilling applications.
Important: NEVER adjust this two speed selector whilst the drill is running. Always let it
come to a complete stop first.
Torque Regulator
Mode Selector
• This is a 16+1 position ring (B in the functional description) situated between the chuck
and the drill body.
• When arrow on the top of the housing points to 1 on the Torque indicator scale, torque is
at minimum before the clutch disengages the chuck from the drive.
• When indicator is just past 16, output is at maximum before it is disengaged. This is
• More torque will set a screw deeper into material, less torque will prevent it stripping.
Larger screws require more torque to drive than small ones. A little trial and error will
show you which is the optimum setting for the situation.
• Release the trigger when the clicking sound indicates the chuck will not turn further.
• For drilling, always use the drill setting, indicated by the pictogram of a drill bit at this
setting, the drive does not disengage from the chuck.
20V ULTRA Drill 2Ah KIT (MH-03-D-B1-0-1) 20V ULTRA Drill 2Ah KIT (MH-03-D-B1-0-1)
16 17
Drilling
• Only use sharp drill bits.
• Secure work properly; do not try to hold object by hand. (Refer to Safety Instructions)
• Be sure to wear appropriate, required safety equipment. (Refer to Safety Instructions)
• Make sure work area is safe and secure. (Refer to Safety Instructions)
• Start drilling slowly, using light pressure to start the hole and prevent the bit from
slipping out of it.
• Drill in a straight line, applying enough pressure to keep the bit biting, but not too
much to stall the motor or deflect the bit.
• HOLD THE DRILL FIRMLY WITH TWO HANDS TO CONTROL THE TWISTING ACTION.
can damage the drill.
• Minimize stalling upon breakthrough by reducing applied pressure and reducing speed
through the last part of the hole.
• Once the hole is drilled, keep the motor running as you pull the drill bit out of the hole
to reduce jamming.
• When drilling metals (except for cast iron and brass) use a cutting lubricant such as
sulphurized cutting oil or lard oil. Note: cast iron and brass should be drilled dry.
• Drilling wood builds up chips in the flutes of twist drill bits. Frequently pull the bit out
of the wood and clear the woods chips from the bit flutes during use.
- Drilling in wood
• Holes in wood can use the same twist drill bits that you would use for metal (or spade
bits). Make sure the bits are sharp and frequently stop to clear the wood particles from
the flutes.
- Drilling in metal
• When drilling metals (except for cast iron and brass) use a cutting lubricant such as
sulphurized cutting oil or lard oil. Note: cast iron and brass should be drilled dry.
- Drilling in masonry
• Use carbide tipped masonry bits {refer to Drilling Section). Drill evenly keeping a
uniform force on the drill, but not too much or you can crack the brittle material. If you
are experiencing a smooth, even flow of dust, that indicates a good drilling rate.
TROUBLESHOOTING
Problem Possible cause
• Battery not installed properly
• Battery not charged • Check battery installation
• Check battery charging
requirements
• Insert battery into charger
until red LED appears
• Plug Charger into working outlet.
Refer to “Important Charging
Notes” for derails
• Move charger and tool to
a surrounding air temperature
of above 39.2°F (4°C) or below
104°F (40°C)
• Battery not installed into
charger
• Charger not plugged in
• Surrounding air temperature
too hot or cold
Possible solution
• Unit will not start
• Battery will not
charge
LED Light
Installing And Removing A Bit And A Drill
The LED work-light ( I in the functional description) can light prior to motor running if you
press the switch lightly, which keep the work area to be lighted for checking clearly at first,
and it lights also during your operation.
WARNING:
Do not stare directly at the light beam. Never aim the beam at any person or an object
other than the work piece.
Do not deliberately aim the beam at personnel and ensure that it is not directed towards
the eye of a person for longer than 0.25s.
Center the rotation direction knob to prevent the motor accidentally starting.
To insert a drill bit or other accessory:
• Grasp the rear half of the chuck (A) with one hand and use your other hand to rotate the
front half in the counterclockwise direction, as viewed from the chuck end.
• Insert the bit or other accessory fully into the chuck, and tighten securely by holding the
rear half of the chuck and rotating the front portion in the clockwise direction as viewed
from the chuck end.
WARNING: Never attempt to tighten drill bits or any other accessory by holding the front
part of the chuck and turning the tool on - damage and/or personal injury can result.
20V ULTRA Drill 2Ah KIT (MH-03-D-B1-0-1) 20V ULTRA Drill 2Ah KIT (MH-03-D-B1-0-1)

18 19
MAINTENANCE
Keep the tool clean using a soft damp (not wet) cloth. Do not use solvents on the plastic
parts.
Lubrication is not necessary. After long use, have an authorized service center maintain
and lubricate the tool.
Should the chuck require replacement,
Remove the battery pack
Open the chuck jaws as widely as possible so you can get at the chuck retaining screw.
Unscrew the chuck retaining screw with a Phillips screwdriver. Note that this is a left hand
threaded screw and you remove it by turning it clockwise. Clamp the shorter arm of a large
Allen wrench in the chuck, aligning it with the jaws so they grip three of its six flat sides.
Place the drill on a flat surface, and support the chuck with a piece of wood about 1/2" (13
mm) above that surface. Or press the drill body on the working table and make the chuck
hanging in the air. (Be careful with your hand!) Strike the long arm of the wrench with a
hammer so that the chuck turns counter-clockwise and unscrews from the spindle. This
may require a fairly sharp blow.
Repeat the process in reverse to install a new chuck.
To maintain the best performance of your rechargeable Li-ion battery, protect it from
overheating, both from overcharging and during storage. Occasionally charge the battery
for 1 hour. The battery may also benefit from a full discharge from time to time.
IMPORTANT: to assure product SAFETY and RELIABILITY, all maintenance, repairs or
adjustments (other than those mentioned in this manual) should be performed by
authorized repair centers using identical replacement parts.
RECYCLING/WARNINGS
RBRC in cooperation with MOTORHEAD and other battery users, has established programs
in the United States and Canada to facilitate the collection of spent lithium-ion batteries.
Help protect our environment and conserve natural resources by contacting your local
1- 877-2-RECYCLE.
WARNING: Only use recommended accessories - use of unauthorized accessories can
be hazardous and/or result in injury or damage.
This product contains lead, a chemical known to the State of California to cause cancer,
and birth defects or other reproductive harm.
Battery posts, terminals and related accessories contain lead and lead compounds,
chemicals known to the State of California to cause cancer and reproductive harm.
Wash hands after handling!
The RBRC™ Seal (Rechargeable Battery Recycling Corporation) on the lithium-ion
battery (or battery pack) indicates that the cost of recycling the battery or
battery pack have already been paid by MOTORHEAD. In some areas it is illegal to
dispose spent lithium-ion batteries in the trash or municipal solid waste streams
and the RBRC program provides an environmentally conscious alternative.
THE RBRC™ SEAL
ACCESSORIES
WARRANTY
WARNING: Changes or modifications to this unit not expressly approved by the party
responsible for compliance could void the user's authority to operate the equipment.
WARNING: Only use recommended accessories - use of unauthorized accessories can be
hazardous and/or result in injury or damage.
The following accessories should be used only in these sizes:
•BITS, METAL DRILLING-Up to 1/2 In.(12.7mm)
•BITS/MASONRY DRILLING-Up to 1/2 In.(12.7mm)
•WOOD DRILLING- Up to 1/2 In.(12.7mm)
FULL TWO YEAR HOME USE WARRANTY
MOTORHEAD warrants this product for two years against defects in materials and assem-
bly. This LIMITED WARRANTY does not cover products that are improperly used, abused,
altered or repaired by unauthorized personnel.
This warranty does not apply to accessories. This warranty gives you specific legal rights
and you may have other legal rights which vary from state to state or province to province.
For warranty questions, replacement, or repair, call American Customer Service at
1-866-608-5212.
This product is not intended for commercial use
Register your product at www.motorheadtools.com for a free extended warranty and
If you need accessories for use with your tool, most recommended accessories are
available online through major retailers and MOTORHEADTOOLS.COM. If you need
accessory information, please call: 1-866-608-5212.
WARNING: Do not expose battery to fire or intense heat as it may explode. If Battery
contains add. If case should become cracked, dispose of immediately taking adequate
safety precautions to prevent damage to persons or property.
20V ULTRA Drill 2Ah KIT (MH-03-D-B1-0-1) 20V ULTRA Drill 2Ah KIT (MH-03-D-B1-0-1)
CONTAINS NON-SPILLABLE
SEALED LITHIUM-ION BATTERY.
BATTERY MUST BE RECYCLED
OR DISPOSED OF PROPERLY.

KIT ULTRA taladro
de 20 V y 2 Ah
(MH-03-D-B1-0-1)
MANUAL DE INSTRUCCIONES
@motorheadtools
ADVERTENCIA: Lea y comprenda todas las instrucciones.
Servicio al cliente
Teléfono: 1-886-608-5212
Registre su herramienta en www.motorheadtools.com para recibir una
garantía ampliada gratuita.
WARRANTY CARD
20V ULTRA Drill 2Ah KIT (MH-03-D-B1-0-1)
20 21
KIT ULTRA taladro de 20 V y 2 Ah (MH-03-D-B1-0-1)
CONTENIDO
DESCRIPCIÓN
KIT ULTRA taladro de 20 V y 2 Ah (MH-03-D-B1-0-1)
......................................................................................... 23-24
................................................................................................................................................................. 25
.............................................................. 25
............................................................................................................................. 26
....................................................................................................................................................... 26
..................................................................................................... 26
...................................................................................................................................................... 26
.......................................................................................................... 27
............................................................................................................................................................................ 28
................................................................................................................. 28
................................................................................................................................................................. 29
.......................................................................................................................................... 30
..................................................................................................................................................................... 30
....................................................................................................................................................................................... 31
..................................................................................................................... 32
............................................................................................................................................................... 33-37
............................................................................................................................................................. 37
............................................................................................................................................................................ 38
........................................................................................................................................................... 38
..................................................................................................................................................................................... 39
.......................................................................................................................................................................................... 39
...................................................................................................................................................................... 40
....................................................................................................................................................... 40
PROPOSICIÓN 65 DE CALIFORNIA
ADVERTENCIA: El polvo producido por el lijado, corte, esmerilado y taladrado mecánicos, y
por otras actividades de construcción, contiene sustancias químicas que, conforme al estado
de California, producen cáncer, defectos congénitos u otros daños reproductivos. Algunos
ejemplos de estas sustancias químicas son:
• El plomo de pinturas a base de plomo.
• La sílice cristalina de ladrillos, cemento y otros productos de mampostería.
• El arsénico y el cromo de la madera tratada con sustancias químicas.
El riesgo derivado de estas exposiciones varía, según la frecuencia con la que realice este
tipo de trabajo.
Para reducir su exposición a estos químicos: trabaje en un área bien ventilada y con equipos
de seguridad aprobados, como las máscaras antipolvo que están especialmente diseñadas
para filtrar las partículas microscópicas.
Para obtener más información, visite www.motorheadtools.com
www.P65Warnings.ca.gov
La versión electrónica de este manual está disponible en www.motorheadtools.com
Descripción/Especificaciones/Contenido del paquete
Pautas de seguridad
Advertencias generales de seguridad para las herramientas eléctricas
Seguridad en el área de trabajo
Seguridad eléctrica
Uso y cuidado de la herramienta con batería
Seguridad personal
Uso y cuidado de la herramienta eléctrica
Servicio
Advertencia de seguridad del taladro
Seguridad de la FCC
Reglas de seguridad específicas
Manténgase alerta
Símbolos
Instrucciones y advertencias de seguridad
Carga y operación
Solución de problemas
Mantenimiento
Reciclado/advertencias
Accesorios
Garantía
Tarjeta de garantía
Condiciones de la garantía
A
E
B
C
D
F
G
H
I
a
bc
Portabrocas 1/2 in (13 mm)
Anillo de regulación del par de torsión
Selector de dos velocidades
Gatillo de velocidad variable con freno eléctrico
Interruptor de avance/retroceso
Batería
Clip para cinturón
Nivel
Luz LED de trabajo
Botón del indicador de batería
Luces del indicador de batería
Botón de bloqueo de batería
22 23

KIT ULTRA taladro de 20 V y 2 Ah (MH-03-D-B1-0-1) KIT ULTRA taladro de 20 V y 2 Ah (MH-03-D-B1-0-1)
ESPECIFICACIONES PAUTAS DE SEGURIDAD
INCLUYE:
CONSERVE ESTAS INSTRUCCIONES Y ADVERTENCIAS PORQUE
PUEDE LLEGAR A NECESITARLAS MÁS ADELANTE
• Batería de iones de litio de 20 V máx.
• Portabrocas sin llave de 1/2" (13 mm)
• Velocidad sin carga: 0-440/0-1650 RPM
• Embrague del par de torsión ajustable de 16+1 posiciones
• Gatillo reversible de velocidad variable con freno eléctrico
• Cómodo agarre engomado
• Luz LED de trabajo brillante
• Tiempo de carga de 1 hora
• Taladro / destornilladores por iones de litio sin cable de 20V
• Cargador rápido–Modelo: MH-03-C-B1-20V1H-1 (1 hora para batería de 2 Ah;
2 horas para batería de 4 Ah)
• BATERÍA DE IONES DE LITIO DE 2.0AH
• 6 brocas de acero de alta velocidad (HSS) de 1/8, 5/32, 11/64, 1/4, 5/16, 3/8
• 16 brocas para destornillador de impacto S2
• 1": PH1, PH2, PH3, PZ1, PZ2, SL5/32, SL1/4, SL3/16
• Hexagonal 5/32, 1/4, 3/16; estrella 20, 25, 30; cuadrada S2, S3
• 1 pieza para cambio rápido 2-3/8"
• Manual de instrucciones
• 1 bolsa para herramientas
Lea esta información antes de devolver este producto por
cualquier motivo:
Si tiene alguna pregunta o algún problema con la compra
de su MOTORHEAD, llame al 1-886-608-5212 de 8:00 a.m.
a 5:00 p.m., hora estándar del Este, de lunes a viernes.
Por su seguridad, asegúrese de leer y comprender este manual. Para utilizar este
producto, es importante que lea y entienda esta información. Lo protegerá y ayudará a
prevenir problemas.
Estas son las pautas para ayudarlo a entender los símbolos que se usan en esta guía.
PELIGRO: indica una situación potencialmente peligrosa que podría derivar en
lesiones graves o la muerte.
ADVERTENCIA: indica una situación que podría provocar lesiones graves o la muerte.
PRECAUCIÓN: indica una situación potencialmente peligrosa que podría derivar en
lesiones entre leves y graves.
AVISO: Cuando se usa sin el símbolo de Alerta de seguridad, esto indica un peligro
potencial que, si no se evita, puede ocasionar daños a la propiedad.
ADVERTENCIA: Lea todas las instrucciones y preste mucha atención a las advertencias
de seguridad. El incumplimiento de las advertencias e instrucciones puede provocar una
descarga eléctrica, un incendio y/o lesiones graves.
El término “herramienta eléctrica” en las advertencias hace referencia a su herramienta
eléctrica alimentada por la red eléctrica (con cable) o a su herramienta eléctrica
alimentada a batería (inalámbrica).
INSTRUCCIONES Y ADVERTENCIAS DE SEGURIDAD
a) Este manual contiene instrucciones importantes de seguridad y funcionamiento.
b) Asegúrese de que todos los accesorios estén recomendados o hayan sido vendidos
por MOTORHEAD; es posible que el uso de accesorios de otros fabricantes no
responda a los mismos requisitos y podría provocar incendios, descargas eléctricas o
lesiones.
c) Nunca jale del cable; al desconectar la herramienta, hágalo del enchufe.
d) Nunca abra la herramienta eléctrica; las piezas internas no pueden ser reparadas por
el cliente.
e) NUNCA incinere la herramienta eléctrica si está lista para ser desechada. Puede
explotar en el fuego.
24 25
• Mantenga el área de trabajo limpia y bien iluminada. Las áreas llenas de objetos u
oscuras propician accidentes.
• No opere herramientas eléctricas en atmósferas explosivas, como en presencia de
líquidos inflamables, gases o polvo. Las herramientas eléctricas originan chispas que
pueden encender el polvo o los gases.
• Mantenga a niños y espectadores alejados mientras usa una herramienta eléctrica. Las
distracciones pueden hacer que pierda el control.
1) Advertencias generales de seguridad para las herramientas
eléctricas - Seguridad en el área de trabajo
• Los enchufes de la herramienta eléctrica deben coincidir con el tomacorriente. Nunca
modifique el enchufe en modo alguno. No utilice ningún enchufe adaptador con las
herramientas eléctricas con conexión a tierra. Los enchufes sin modificar y que coincidan con
los tomacorrientes reducen el riesgo de descarga eléctrica.
• Evite el contacto físico con las superficies con conexión a tierra, como tuberías, radiadores,
estufas y refrigeradores. Existe un mayor riesgo de descarga eléctrica si su cuerpo está
conectado a tierra.
• No exponga las herramientas eléctricas a la lluvia o a condiciones húmedas. Si ingresa agua
en la herramienta eléctrica, aumentará el riesgo de descarga eléctrica.
• No maltrate el cable. Nunca utilice el cable para transportar, jalar o desenchufar la
herramienta eléctrica. Mantenga el cable alejado del calor, los aceites, los bordes filosos y las
piezas en movimiento. Los cables dañados o enredados aumentan el riesgo de descarga
eléctrica.
• Al operar una herramienta eléctrica en el exterior, utilice un cable alargador adecuado para
tal uso. El uso de un cable adecuado para exteriores reduce el riesgo de descarga eléctrica.
• Si es inevitable que tenga que usar una herramienta eléctrica en un lugar húmedo, utilice
una fuente de alimentación protegida por un dispositivo de corriente residual (RCD). El uso
de un dispositivo de corriente residual (RCD) reduce el riesgo de descarga eléctrica.
• Asegúrese de utilizar los suministros que sean adecuados para las condiciones. Si trabaja en
el exterior, use cables alargadores indicados para tal uso (calificados como “W-A” o HWn).
Esto reduce el riesgo de descarga eléctrica.
• Si tiene que trabajar en un lugar húmedo, asegúrese de usar una fuente de alimentación
protegida por un interruptor de circuito con descarga a tierra (GFCI). Esto ayudará a
reducir el riesgo de descarga eléctrica.
1) Advertencias generales de seguridad para las herramientas
eléctricas - Seguridad eléctrica
GUARDE ESTAS INSTRUCCIONES
KIT ULTRA taladro de 20 V y 2 Ah (MH-03-D-B1-0-1) KIT ULTRA taladro de 20 V y 2 Ah (MH-03-D-B1-0-1)
contacto con los ojos, también busque atención médica. El líquido que sale de la batería
puede causar irritación o quemaduras.
• No use baterías o herramientas que estén dañadas o hayan sido modificadas.
Las baterías
dañadas o modificadas podrían mostrar un comportamiento impredecible, provocando
incendio, explosión o riesgo de lesiones.
• No exponga la batería o la herramienta al fuego o a temperaturas excesivas.
Es posible que
la exposición al fuego o a temperaturas superiores a los 130 °C cause una explosión. NOTA: la
temperatura “130 °C” puede ser sustituida por “265 °F”.
• Siga todas las instrucciones de carga y no cargue la batería o herramienta fuera del rango de
temperatura que se especifica en las instrucciones.
Una carga incorrecta o a temperaturas
fuera del rango especificado puede dañar la batería y aumentar el riesgo de incendio.
• Permanezca alerta, controle lo que está haciendo y utilice el sentido común cuando emplee
una herramienta eléctrica.
No utilice una herramienta eléctrica si está cansado o bajo los
efectos de alguna droga, alcohol o medicamento. Un momento de descuido mientras se
usa una herramienta eléctrica puede provocar lesiones personales graves.
• Use equipo de protección personal.
Utilice siempre protección ocular. Los equipos de
protección, como máscara antipolvo, calzado de seguridad antideslizante, casco de
seguridad o protección auditiva, usados en las condiciones adecuadas, reducirán las
lesiones personales.
• Evite el arranque accidental.
Asegúrese de que el interruptor esté en la posición de
apagado antes de conectar la herramienta a la fuente de alimentación y/o a las baterías,
levantarla o transportarla. Transportar herramientas eléctricas con el dedo en el
interruptor o dar energía a las herramientas eléctricas con el interruptor encendido
puede provocar accidentes.
• Retire cualquier llave o accesorio de ajuste antes de encender la herramienta eléctrica.
Dejar una llave o un accesorio acoplado a una pieza giratoria de la herramienta eléctrica
puede provocar lesiones personales.
• No se extralimite.
Conserve la estabilidad y el equilibrio adecuados en todo momento.
Esto permite un mejor control de la herramienta eléctrica en situaciones inesperadas.
• Vístase adecuadamente.
No use ropa holgada ni joyas. Mantenga su cabello y la ropa lejos
de las piezas móviles. La ropa holgada, las joyas y el cabello largo pueden quedar
atrapados en las piezas móviles.
• Si se proporcionan los dispositivos de conexión para los servicios de aspiración y
recolección de polvo, asegúrese de que estos estén conectados y que se usen
correctamente.
El uso del recolector de polvo puede reducir los peligros relacionados
con el polvo.
• No deje que la familiaridad obtenida con el uso frecuente de las herramientas haga que se
confíe demasiado e ignore los principios de seguridad de las herramientas.
Una acción
imprudente puede causar lesiones graves en fracciones de segundo.
• Asegúrese de conectar y usar adecuadamente cualquier dispositivo para extraer y recoger
polvo.
Cuando se lo utiliza correctamente, el recolector de polvo puede reducir las
situaciones de peligro relacionadas con el polvo y los residuos.
• No encienda el taladro inalámbrico mientras lo transporta.
Un conector giratorio o broca
se puede enredar en la ropa y provocar lesiones.
• Desconecte el enchufe o retire la batería de la herramienta y coloque el interruptor en la
posición “OFF” (apagado) o de bloqueo antes de realizar cualquier ajuste en el ensamblaje,
cambiar accesorios o realizar un procedimiento de inspección, mantenimiento o limpieza.
Estas medidas de seguridad preventivas reducen el riesgo de encender la herramienta en
forma accidental.
• No utilice el taladro inalámbrico si está dañado, si ha quedado bajo la lluvia, la nieve, en
ambientes húmedos o mojados o si ha estado sumergido en líquidos.
1) Advertencias generales de seguridad para las herramientas
eléctricas - Seguridad personal
• Recargue solamente con el cargador especificado por el fabricante.
Un cargador que es
adecuado para un tipo de batería puede generar un riesgo de incendio cuando se utiliza con
otra batería.
• Utilice las herramientas eléctricas sólo con las baterías específicamente designadas.
El uso
de cualquier otra batería puede crear un riesgo de lesiones e incendio.
• Cuando no utilice la batería, manténgala lejos de otros objetos metálicos, como clips,
monedas, llaves, clavos, tornillos u otros objetos metálicos pequeños, que puedan hacer una
conexión de una terminal con otra.
Si se genera un cortocircuito entre las terminales de la
batería, esto puede causar quemaduras o un incendio.
• En condiciones de maltrato a la unidad, el líquido puede ser expulsado de la batería; evite el
contacto.
Si entra en contacto accidentalmente, enjuague con agua. Si el líquido entra en
1) Advertencias generales de seguridad para las herramientas
eléctricas - Uso y cuidado de la herramienta con baterías
26 27
7) Advertencias para el taladro percutor inalámbrico
1. Use la empuñadura auxiliar, si se suministra con la herramienta. La pérdida de control
puede provocar lesiones personales.
2. Sujete la herramienta eléctrica por las superficies de agarre aisladas cuando realice una
operación en la que el accesorio de corte pueda entrar en contacto con cables ocultos o
con su propio cable. Un accesorio de corte que entre en contacto con un cable con
corriente puede hacer que las piezas metálicas expuestas de la herramienta eléctrica
conduzcan la corriente y le den una descarga eléctrica al operador.
3. Deje que la broca se enfríe antes de tocarla, cambiarla o ajustarla. Las brocas se
calientan mucho mientras están en uso y pueden quemarlo.
4. Si la broca se atasca, suelte el gatillo de inmediato; el par de torsión del taladro puede
provocar lesiones o romper la broca.
5. Evite el arranque accidental. Prepárese para comenzar a trabajar antes de encender la
herramienta.
6. No apoye la herramienta hasta que se haya detenido completamente. Las piezas
móviles pueden tocar la superficie y hacer que pierda el control de la herramienta.
7. Cuando utilice una herramienta eléctrica manual, agarre firmemente la herramienta con
ambas manos para resistir el par de torsión de arranque.
8. No deje la herramienta sin supervisión cuando las baterías estén conectadas. Apague la
herramienta y retire las baterías antes de irse.
9. El cargador de la batería se calienta durante el uso. El calor del cargador puede llegar a
niveles inseguros y crear un peligro de incendio si no recibe una ventilación adecuada,
debido a una falla eléctrica o si se utiliza en un entorno caluroso.
No coloque el cargador sobre una superficie inflamable.
No obstruya los conductos de ventilación del cargador.
En particular, evite colocar el cargador sobre alfombras y tapetes; además de ser
inflamables, estos obstruyen los conductos de ventilación que están debajo del cargador.
Coloque el cargador sobre una superficie estable, sólida y no inflamable (como un banco
de trabajo metálico estable o suelo de hormigón) por lo menos a 1 pie (30.5 cm) de
distancia de todos los objetos inflamables, como cortinas o paredes. Tenga un extintor de
incendios y un detector de humo en el área. Durante la carga, controle con frecuencia el
cargador y las baterías.
10. Este producto no es un juguete. Manténgalo fuera del alcance de los niños.
11. Las personas con marcapasos deben consultar a su médico antes de usar este produc-
to. Los campos electromagnéticos en estrecha cercanía a un marcapasos cardíaco
podrían causar una interferencia o falla en el marcapasos.
12. Las advertencias, precauciones e instrucciones analizadas en este manual de instruc-
ciones no pueden cubrir todas las posibles condiciones y situaciones que pudieran
ocurrir. El operador debe comprender que el sentido común y la precaución son factores
que no vienen incorporados con este producto.
• No fuerce la herramienta eléctrica. Utilice la herramienta eléctrica correcta para la
aplicación. La herramienta eléctrica correcta hará el trabajo mejor y más seguro y a la
velocidad para la que fue diseñada.
• No utilice la herramienta eléctrica si el interruptor no la enciende y la apaga. Cualquier
herramienta eléctrica que no pueda ser controlada mediante el interruptor es peligrosa y
debe ser reparada.
• Desconecte el enchufe de la fuente de alimentación y/o retire la batería de la
herramienta eléctrica, si es desmontable, antes de realizar ajustes, cambiar accesorios
o guardar las herramientas eléctricas. Estas medidas de seguridad preventivas reducen
el riesgo de encender la herramienta eléctrica en forma accidental.
• Guarde las herramientas eléctricas que no use fuera del alcance de los niños y no
permita que la usen personas que no estén familiarizadas con la herramienta eléctrica
ni con estas instrucciones. Las herramientas eléctricas son peligrosas en las manos de
usuarios inexpertos.
• Dé mantenimiento a las herramientas eléctricas y sus accesorios. Verifique que no haya
desalineación, fijación de las piezas móviles o daños; haga reparar la herramienta
eléctrica antes de usarla. Muchos accidentes ocurren por el poco mantenimiento de las
herramientas eléctricas.
• Mantenga las herramientas de corte afiladas y limpias. Las herramientas de corte, con
bordes filosos, que reciben el mantenimiento adecuado tienen menos probabilidades de
atascarse y son más fáciles de controlar.
• Utilice la herramienta eléctrica, los accesorios, las brocas y demás en conformidad con
estas instrucciones, teniendo en cuenta las condiciones de trabajo y la labor por
realizar. El uso de una herramienta eléctrica para una actividad diferente para la que fue
diseñada podría dar como resultado una situación peligrosa.
• Mantenga las empuñaduras y las superficies de agarre secas, limpias y libres de aceite
y grasa. Las empuñaduras y superficies de agarre resbaladizas no permiten la
manipulación segura y el control de la herramienta en situaciones inesperadas.
1) Advertencias generales de seguridad para las herramientas
eléctricas - Uso y cuidado de la herramienta eléctrica
• Su herramienta eléctrica debe ser reparada por una persona calificada, utilizando
únicamente piezas de repuesto idénticas. Esto garantizará que se mantenga la
seguridad de la herramienta eléctrica.
• Nunca repare las baterías dañadas. El servicio de las baterías sólo se debe ser realizado
por el fabricante o los proveedores de servicio autorizados.
1) Advertencias generales de seguridad para las herramientas
eléctricas - Servicio
Este dispositivo cumple con el Apartado 15 de las Normas de la Comisión Federal de
Comunicaciones (Federal Communications Commission, FCC). La operación está sujeta
a las dos condiciones siguientes:
(1) Este dispositivo no puede causar interferencia perjudicial, y
(2) Este dispositivo debe aceptar cualquier interferencia recibida, incluso una
interferencia que pueda causar un funcionamiento no deseado.
ADVERTENCIA: Las alteraciones o los cambios realizados a esta unidad no
aprobados expresamente por la parte responsable del cumplimiento de las normas
podrían anular la autoridad del usuario para operar el equipo.
NOTA: Este equipo ha sido evaluado y se ha determinado que cumple con los límites
para un dispositivo digital Clase B, conforme al Apartado 15 de las Normas de la FCC.
Estos límites están diseñados para brindar una protección razonable frente a
interferencias perjudiciales en una instalación residencial. Este equipo genera, utiliza e
irradia energía de radiofrecuencia y, si no se instala y usa de acuerdo con las
instrucciones, puede causar interferencias perjudiciales en las radiocomunicaciones. Sin
embargo, no existe garantía de que no ocurrirá interferencia en una instalación en
particular. Si este equipo causa interferencia perjudicial en la recepción de radio o
televisión, lo que puede determinarse al encender y apagar el equipo, el usuario debe
intentar corregir la interferencia mediante una o más de las siguientes medidas:
• Reorientar o trasladar la antena receptora.
• Aumentar la separación entre el equipo y el receptor.
• Conectar el equipo a un tomacorriente en un circuito diferente de aquel en el cual esté
conectado el receptor.
• Consultar con el distribuidor o un técnico de radio/TV con experiencia para obtener
ayuda.
SEGURIDAD DE LA FCC
KIT ULTRA taladro de 20 V y 2 Ah (MH-03-D-B1-0-1) KIT ULTRA taladro de 20 V y 2 Ah (MH-03-D-B1-0-1)
28 29

MANTÉNGASE ALERTA
Observe lo que está haciendo y utilice el sentido común. No opere ninguna herramienta
si está cansado.
• Para un control óptimo de la herramienta eléctrica, use siempre las empuñaduras auxiliares,
si es que se incluyen con la herramienta.
• Su herramienta cuenta con superficies de agarre aisladas; asegúrese de sostener la
herramienta eléctrica por estas superficies para evitar una descarga eléctrica en caso de
que la pieza de corte de la herramienta entre en contacto con un cable con corriente.
• Para obtener mejores medidas de seguridad, coloque la herramienta de lado cuando no
esté en uso, especialmente si trabaja sobre una escalera o andamio, lejos del suelo.
Las
herramientas con baterías grandes pueden quedar paradas, pero se caen con facilidad, lo
que podría causar una lesión.
• Las herramientas eléctricas ejercen una fuerza extrema; asegúrese de que la pieza en la que
esté trabajando esté firmemente asegurada con abrazaderas u otros medios confiables.
No
intente sostener la pieza con la mano ni contra el cuerpo, porque podría perder el control
y lesionarse.
• Mantenga el cabello, la ropa y los guantes lejos de los conductos de ventilación, ya que
pueden atascarse en el mecanismo móvil alrededor de estas áreas.
• Sostenga la herramienta firmemente con ambas manos. Use la empuñadura auxiliar, si la
unidad dispone de una; si no tiene empuñadura auxiliar, agarre el mango de la parte
inferior.
Perder el control del dispositivo puede derivar en lesiones personales.
ADVERTENCIA: El polvo producido al utilizar herramientas eléctricas para lijar, esmerilar,
taladrar o cortar, y por otras actividades de construcción, contiene sustancias químicas que,
conforme al estado de California, producen cáncer, defectos congénitos u otros daños
reproductivos. Algunos ejemplos de estos tipos de sustancias químicas:
• El plomo de pinturas a base de plomo.
• La sílice cristalina de ladrillos, cemento y otros productos de mampostería.
• El arsénico y el cromo de la madera tratada con sustancias químicas.
El riesgo derivado de estas exposiciones varía, según la frecuencia con la que realice
trabajos que involucren estos materiales.
Para reducir el riesgo de exposición, trabaje en un área bien ventilada y con equipos de
seguridad aprobados, como las máscaras antipolvo que están diseñadas para filtrar las
partículas microscópicas.
ADVERTENCIA: El polvo producido por el uso de esta herramienta en materiales de
construcción puede causar lesiones respiratorias (o de otro tipo) graves y/o permanentes.
Dirija las partículas lejos de la cara y asegúrese de usar la protección respiratoria aprobada
por NIOSH/OSHA contra la exposición al polvo.
ADVERTENCIA: No permita que las terminales de la batería entren en contacto con
objetos metálicos cuando transporte o almacene la batería.
Si las terminales de la batería entran en contacto con materiales conductores, pueden
causar incendios, así que tenga cuidado al transportar la batería. NOTA: las
Reglamentaciones sobre materiales peligrosos (Hazardous Material Regulations, HMR) del
Departamento de Transporte de EE. UU. prohíben el transporte de baterías en el comercio
o en aviones (es decir, en maletas y equipajes de mano) A MENOS QUE estén
adecuadamente protegidas contra cortocircuitos. Tenga especial precaución cuando
transporte baterías individuales y asegúrese de que las terminales estén bien aisladas y
protegidas contra todo lo que pueda hacer contacto con ellas y causar un cortocircuito.
• Evite el contacto prolongado con el polvo de las actividades de construcción como el
lijado, corte, esmerilado y taladrado mecánicos. Utilice siempre ropa de protección y lave
inmediatamente con agua y jabón cualquier área expuesta.
Si permite que el polvo le entre en los ojos o la boca, o que se mantenga en la piel, corre
el riesgo de absorber estas sustancias químicas nocivas.
KIT ULTRA taladro de 20 V y 2 Ah (MH-03-D-B1-0-1) KIT ULTRA taladro de 20 V y 2 Ah (MH-03-D-B1-0-1)
SIGA SIEMPRE LAS REGLAS DE SEGURIDAD PARA EL USO DE ESTE PRODUCTO.
Puede
resultar gravemente lastimado por el uso imprudente o incorrecto de esta herramienta.
• Manéjese siempre con precaución, particularmente si opera la herramienta eléctrica cerca
de cableado eléctrico.
Su herramienta cuenta con superficies de agarre aisladas;
asegúrese de sostener la herramienta eléctrica por estas superficies para evitar una
descarga eléctrica en caso de que la pieza de corte de la herramienta entre en contacto
con un cable con corriente.
• Sólo opere la herramienta cuando la esté sosteniendo firmemente con ambas manos;
no
deje la herramienta funcionando.
• No utilice agua sobre la superficie de trabajo;
esta herramienta no es resistente al agua.
• Ventile siempre su área de trabajo de manera adecuada.
• Asegúrese de usar la protección respiratoria apropiada.
El uso de esta herramienta en
algunas pinturas, maderas y productos determinados puede producir polvo con
sustancias peligrosas.
SÍMBOLOS
Para facilitar su consulta, aquí están los símbolos que puede ver en la etiqueta de su herramienta:
Voltios
Hercio
minutos
corriente continua
Construcción Clase II
símbolo de advertencia
de seguridad
amperios
vatios
corriente alterna
velocidad sin carga
terminal de tierra
revoluciones o
reciprocidades por minuto
REGLAS DE SEGURIDAD ESPECÍFICAS
ADVERTENCIA: SIEMPRE use gafas de seguridad. Los anteojos de uso diario NO
son anteojos de seguridad.
• Use una máscara facial o antipolvo si la operación produce polvillo.
UTILICE SIEMPRE EQUIPOS DE SEGURIDAD CERTIFICADOS:
• Protección ocular, ANSI Z87.1 (CAN/CSA Z94.3)
• Protección auditiva, ANSI SI 2.6 (S3.19)
• Protección respiratoria NIOSH/OSHA
• La exposición a ruidos fuertes puede provocar daños auditivos. Siempre utilice una
protección auditiva cuando use equipos eléctricos.
30 31

CARGA Y OPERACIÓN
Cómo cargar las baterías
- Indicaciones de carga
Luces indicadoras
KIT ULTRA taladro de 20 V y 2 Ah (MH-03-D-B1-0-1) KIT ULTRA taladro de 20 V y 2 Ah (MH-03-D-B1-0-1)
INSTRUCCIONES Y ADVERTENCIAS DE SEGURIDAD:
Cómo cargar las baterías
• Este manual contiene instrucciones importantes de seguridad y funcionamiento.
• Antes de utilizar el cargador de la batería, lea y conozca todas las instrucciones de uso e
indicaciones de precaución en el cargador de la batería, las baterías y el producto que
utiliza las baterías.
• PRECAUCIÓN: Use siempre baterías MOTORHEAD para reducir la posibilidad de
lesiones; otros tipos de baterías pueden estallar, causando resultados posiblemente
nocivos.
• Mantenga el cargador lejos de factores perjudiciales, tales como la lluvia y la nieve.
• Asegúrese de que todos los accesorios estén recomendados o hayan sido vendidos por
MOTORHEAD; es posible que el uso de accesorios de otros fabricantes no responda a los
mismos requisitos y podría provocar incendios, descargas eléctricas o lesiones.
• Nunca jale del cable; al desconectar el cargador, hágalo del enchufe.
• Asegúrese de que el cable esté liberado y seguro: no lo pise, no lo tense, no lo dañe ni se
tropiece con él.
• Cables de extensión: consulte la sección SEGURIDAD ELÉCTRICA (CONTINUACIÓN) -
USO DE CABLE ALARGADOR en este manual.
• Utilice únicamente el cargador provisto cuando cargue su taladro. El uso de otro
cargador puede ser peligroso o puede dañar el taladro.
• Utilice un solo cargador cuando realice la carga.
• Nunca abra el cargador ni la herramienta eléctrica; las piezas internas no pueden ser
reparadas por el cliente. Devuelva la herramienta eléctrica a MOTORHEAD para su
mantenimiento.
• Nunca intente abrir o modificar la batería por ningún motivo. El electrolito liberado es
corrosivo y puede provocar daño en los ojos y en la piel. Puede ser tóxico si se ingiere.
• NUNCA incinere la herramienta eléctrica ni las baterías cuando estén listas para ser
desechadas. Las baterías pueden explotar en el fuego.
• Existen determinadas condiciones, como el uso extremo, condiciones de carga y
temperatura que pueden provocar una pequeña fuga de las células de las baterías. Esto
no indica una falla. Sin embargo, si el sello externo se rompe y la fuga entra en contacto
con la piel:
a. Lávese inmediatamente con agua y jabón.
b. Neutralice con un ácido suave, como jugo de limón o vinagre.
c. En caso de que el líquido de la batería entre en contacto con los ojos, enjuágueselos con
agua limpia como mínimo por 10 minutos y busque atención médica inmediata.
NOTA MÉDICA: el líquido es una solución de hidróxido de potasio al 25 %-35 %.
Los cargadores están diseñados para usar una alimentación estándar de 120 voltios de
AC, de 60 Hz. No utilice DC ni ningún otro voltaje.
ANTES DE INTENTAR CARGAR LAS BATERÍAS, LEA BIEN TODAS LAS INSTRUCCIONES
DE SEGURIDAD.
• Las baterías alcanzarán un rendimiento máximo después de aproximadamente cinco
ciclos de carga y descarga.
• El interruptor de rotación del taladro debe estar siempre en posición neutra o de
bloqueo al retirar o instalar la batería, para evitar el arranque accidental.
• El peldaño de la batería tiene grabadas las marcas de la terminal positiva y la terminal
negativa. Alinee estas marcas con las de la parte superior de la base de carga e inserte
la batería en la base. (La batería no se insertará correctamente si está al revés).
• El tiempo normal de carga es de 1 hora. El cargador cargará la batería a una velocidad
normal hasta que la carga se haya completado. La luz indicadora de carga, de color
rojo, se apagará una vez que la carga esté completa. Después de que la batería esté
completamente cargada de acuerdo al tiempo de carga proporcionado en las
instrucciones, retire la batería de la base de carga. La temperatura de la batería bajará.
• Al cargar más de una batería, espere 15 minutos entre cargas.
• Después de muchos ciclos de carga y descarga, la batería perderá su capacidad de
mantener la carga. Entonces, deberá reemplazarla. Deseche las baterías en una
instalación de eliminación de residuos apropiada. No tire las baterías en los
contenedores de basura comunes.
• Coloque y cargue las baterías en un lugar seco y a prueba de incendios, en una
habitación donde la temperatura esté entre los 39.2 °F (4 °C) y los 104 °F (40 °C).
• Durante la recarga, las baterías, la base del cargador y el adaptador pueden estar
calientes al tocarlos. Esta condición es normal y no indica un problema.
• Si va a recargar una batería recién agotada, asegúrese de que esté en buen estado y
de que se haya enfriado por completo.
• Desenchufe siempre el cargador cuando la carga esté completa.
• Asegúrese de que la batería esté fría antes de usarla.
• Inserte el adaptador/conector de conmutación en un tomacorriente de tensión
doméstica de 120 V.
• La luz verde es el indicador de carga. Cuando el cargador se conecta a una tensión
domestica de AC, se enciende la luz verde.
• La luz roja es el indicador de encendido. Cuando la batería está correctamente
insertada en el cargador y se está realizando la carga, se enciende la luz roja.
32 33

- Colocación y extracción de la batería
- Bloqueo del interruptor
- Dirección de rotación
- Velocidad variable
Regulador de par de torsión
KIT ULTRA taladro de 20 V y 2 Ah (MH-03-D-B1-0-1) KIT ULTRA taladro de 20 V y 2 Ah (MH-03-D-B1-0-1)
• El interruptor de rotación del taladro debe estar siempre en posición neutra o de
bloqueo al retirar o instalar la batería, para evitar el arranque accidental.
• Para insertarla, simplemente empuje la batería hasta que el resorte de bloqueo haga clic.
• Para retirar la batería de la herramienta, presione los botones de resorte de bloqueo (“d”
en la descripción funcional) y tire hacia afuera.
• Este es un anillo de 16+1+1 posiciones (“B” en la descripción funcional) que está situado
entre el portabrocas y el cuerpo del taladro.
• Cuando la flecha en la parte superior de la carcasa apunta al 1 en la escala indicadora de
torsión, el par de torsión está al mínimo antes de que el embrague desenganche el
portabrocas de la transmisión.
• Cuando el indicador se encuentra justo después de la posición 16, la potencia está al
máximo antes de que se desenganche. Esto es útil para colocar tornillos en diferentes
tipos de materiales.
• Un mayor par de torsión hará que el tornillo se inserte con mayor profundidad en el
material; un menor par de torsión evitará que se desprenda. Los tornillos grandes
requieren mayor par de torsión para moverse que los pequeños. Un poco de ensayo y
error le mostrará cuál es la mejor configuración para la situación.
• Suelte el gatillo cuando el sonido de clic le indique que el portabrocas no gira más.
• Para taladrar, use siempre la configuración del taladro, indicada por el pictograma de una
broca en esta configuración; la transmisión no se desengancha del portabrocas.
NOTA: La marca “1” es la posición de baja velocidad, la marca “2” es la posición de alta
velocidad; ambas moldeadas sobre el botón del selector de dos velocidades.
• El taladro tiene un tren de engranajes de dos velocidades que está diseñado para
taladrar a velocidad 1 (BAJA) y 2 (ALTA). El selector de marchas se encuentra en la parte
superior del taladro para seleccionar la velocidad baja o la alta. Cuando presione el botón
hacia adelante y seleccione un rango de velocidad bajo, la velocidad disminuirá, pero
proporcionará más potencia y par de torsión. Cuando utilice el taladro en el rango de
velocidad alto, la velocidad aumentará, pero proporcionará menos potencia y par de
torsión. Use una velocidad baja para las aplicaciones que requieran una mayor potencia y
par de torsión, y una velocidad alta para las aplicaciones que requieran perforaciones
rápidas.
Importante: NUNCA ajuste este selector de dos velocidades mientras el taladro está en
funcionamiento. Siempre deje que se detenga por completo.
• Esta herramienta tiene un interruptor de velocidad variable que ofrece una mayor
velocidad y par de torsión con una mayor presión del gatillo.
• La velocidad es controlada por la depresión ejercida sobre el gatillo del interruptor.
• El gatillo del interruptor se puede
bloquear en la posición central.
• Esto ayuda a reducir la posibilidad de
un arranque accidental cuando no esté
en uso. Para bloquear el gatillo del
interruptor, coloque el selector de
dirección de rotación en la posición
central.
• La dirección de rotación es controlada
por el selector de dirección de rotación
que está ubicado por encima del gatillo
del interruptor.
• Derecha: Para seleccionar una rotación
hacia adelante, suelte el interruptor de
encendido/apagado y empuje la palanca
de avance/retroceso hacia el lado
izquierdo de la herramienta.
• Izquierda: Para seleccionar una rotación
en reversa, empuje la palanca hacia la
derecha de la herramienta.
INTERRUPTOR (“E” en la descripción funcional)
El taladro se enciende y se detiene al oprimir y soltar el gatillo del interruptor ON/OFF
(encendido/apagado).
Selector de modos
34 35

Taladrado
- Taladrado en mampostería
SOLUCIÓN DE PROBLEMAS
Problema Posible causa
• La batería no está colocada
correctamente.
• La batería no está cargada.
• Revise la colocación de la batería.
• Verifique los requisitos para la
carga de la batería.
• Inserte la batería en el cargador
hasta que se encienda la luz LED roja.
• Enchufe el cargador en un tomacorriente
que funcione. Consulte “Notas
importantes sobre la carga” para
obtener detalles.
• Mueva el cargador y la herramienta a
un ambiente con una temperatura por
encima de los 39.2 °F (4 °C) o por
debajo de los 104 °F (40 °C).
• La batería no está colocada
en el cargador.
• El cargador no está enchufado.
• La temperatura ambiental está
demasiado caliente o fría.
Posible solución
• La unidad no
arranca.
• La batería no
carga.
• Solo use brocas afiladas.
• Sujete el trabajo correctamente; no intente sostener el objeto con la mano. (Consulte las
Instrucciones de seguridad).
• Asegúrese de usar el equipo de seguridad obligatorio adecuado. (Consulte las Instrucciones
de seguridad).
• Asegúrese de que el área de trabajo está segura y protegida. (Consulte las Instrucciones de
seguridad).
• Comience taladrando lentamente, aplicando una leve presión para abrir el orificio y evitar que
la broca se deslice hacia afuera.
• Taladre en línea recta, aplicando una presión suficiente para que la broca continúe
mordiendo, pero no demasiado como para frenar el motor o desviar la broca.
• SOSTENGA EL TALADRO FIRMEMENTE CON AMBAS MANOS PARA CONTROLAR LA ACCIÓN
DE TORSIÓN.
• En caso de que el taladro se frene, no intente arrancarlo haciendo clic en el gatillo de
encendido y apagado; esto puede dañar el taladro.
• Minimice el frenado mientras avanza reduciendo la presión aplicada y la velocidad en la
última parte del orificio.
• Una vez que el orificio está hecho, mantenga el motor en funcionamiento mientras extrae la
broca del orificio, para reducir los atascos.
• Cuando taladre metales (excepto el bronce y el hierro fundido) use un lubricante para corte
como el aceite de corte sulfurado o aceite de manteca de cerdo. Nota: el bronce y el hierro
fundido deben taladrarse en seco.
• El taladrado en madera produce astillas en las ranuras de las brocas helicoidales. Retire
frecuentemente la broca de la madera y limpie las astillas de madera de las ranuras de las brocas
durante el uso.
• Asegúrese de que el interruptor encienda y apague el taladro.
• Use brocas para mampostería con puntas de carburo (consulte la sección de Taladrado).
Taladre de manera pareja, manteniendo una fuerza uniforme sobre el taladro, pero no
demasiada o puede romper el material frágil. Si usted observa un flujo de polvo fluido y parejo,
eso indica que la velocidad de taladrado es buena.
- Taladrado en madera
• Para realizar orificios en madera, puede usar las mismas brocas helicoidales que utilizaría para
metal (o brocas pala). Asegúrese de que las brocas están afiladas y con frecuencia deténgase
para quitar las partículas de madera de las ranuras.
- Taladrado en metal
• Cuando taladre metales (excepto el bronce y el hierro fundido) use un lubricante para corte
como el aceite de corte sulfurado o aceite de manteca de cerdo. Nota: el bronce y el hierro
fundido deben taladrarse en seco.
Luz LED
Instalación y extracción de una broca y un taladro
KIT ULTRA taladro de 20 V y 2 Ah (MH-03-D-B1-0-1) KIT ULTRA taladro de 20 V y 2 Ah (MH-03-D-B1-0-1)
Al presionar el interruptor ligeramente, la luz LED de trabajo (“I” en la descripción funcional) se
puede encender antes de que el motor esté en marcha, lo que hace que el área de trabajo esté
iluminada para constatar que todo esté en orden en un primer momento, y también se
enciende durante su operación.
ADVERTENCIA:
No mire directamente el haz de luz. Nunca apunte el haz hacia cualquier persona u objeto
que no sea la pieza de trabajo.
No apunte deliberadamente el haz hacia el personal y asegúrese de que no esté dirigido a
los ojos de una persona durante más de 0.25 s.
Centre la perilla de dirección de rotación para evitar que el motor arranque
accidentalmente. Para insertar una broca u otro accesorio:
• Agarre la mitad trasera del portabrocas (A) con una mano y con la otra gire la mitad
delantera en sentido contrario al reloj, visto desde el extremo del portabrocas.
• Inserte completamente la broca u otro accesorio en el portabrocas y ajuste bien sujetando
la mitad trasera del portabrocas y girando la parte delantera en el sentido del reloj, visto
desde el extremo del portabrocas.
ADVERTENCIA: Nunca intente ajustar las brocas o cualquier otro accesorio sosteniendo la
parte delantera del portabrocas y encendiendo la herramienta; esto puede provocar
daños o lesiones personales.
36 37

MANTENIMIENTO
RECICLADO/ADVERTENCIAS
EL SELLO RBRC™
GARANTÍA
Para mantener la herramienta limpia, use un paño suave y húmedo (no mojado). No utilice
solventes en las piezas plásticas.
No es necesario el uso de lubricación. Después de un uso prolongado, lleve la herramienta a un
centro de mantenimiento autorizado para que reciba mantenimiento y lubricación.
Si el portabrocas requiere reemplazo, retire la batería.
Abra las mordazas del portabrocas tanto como sea posible de manera que pueda llegar al tornillo
de retención del portabrocas.
Desatornille el tornillo de retención del portabrocas con un destornillador Phillips. Tenga en
cuenta que este es un tornillo roscado izquierdo y debe sacarlo girando en sentido del reloj.
Sujete el brazo más corto de una llave Allen grande en el portabrocas, alineándolo con las
mordazas de modo que agarren tres de sus seis lados planos.
Coloque el taladro en una superficie plana y apoye el portabrocas sobre una pieza de madera de
aproximadamente 1/2" (13 mm) por encima de esa superficie. O bien, presione el cuerpo del
taladro sobre la mesa de trabajo y deje el portabrocas suspendido en el aire. (¡Tenga cuidado con
la mano!) Golpee el brazo largo de la llave con un martillo para que el portabrocas gire en sentido
contrario al reloj y se desenrosque del husillo. Esto puede requerir un golpe bastante fuerte.
Repita el proceso a la inversa para instalar un portabrocas nuevo.
Para mantener el mejor rendimiento de su batería de ion de litio recargable, evite que se
recaliente, tanto por la sobrecarga como durante el almacenamiento. Ocasionalmente, cargue la
batería durante 1 hora. De vez en cuando, la batería también puede beneficiarse por una descarga
completa.
IMPORTANTE: para garantizar la SEGURIDAD y la CONFIABILIDAD del producto, el
mantenimiento, las reparaciones y los ajustes (aparte de los mencionados en este manual)
deben ser realizados por centros de reparación autorizados con piezas de repuesto idénticas.
ADVERTENCIA: Utilice únicamente los accesorios recomendados; el uso de accesorios
no autorizados puede ser peligroso y/o provocar lesiones o daños.
Este producto contiene plomo, una sustancia química que, conforme al estado de
California, produce cáncer, defectos congénitos u otros daños reproductivos.
Los bornes, las terminales de las baterías y los accesorios relacionados contienen plomo
y compuestos de plomo; sustancias químicas que, conforme al estado de California,
producen cáncer y daños reproductivos. ¡Lávese las manos después de manipularlos!
La mayoría de los accesorios recomendados están disponibles en línea a través de las principales
tiendas y MOTORHEADTOOLS.COM, en caso de que necesite accesorios para su herramienta. Si
necesita información sobre los accesorios, llame al: 1-866-608-5212.
ADVERTENCIA:
Utilice únicamente los accesorios recomendados; el uso de accesorios no
autorizados puede ser peligroso y/o provocar lesiones o daños.
El sello RBRC™ (Corporación de Reciclaje de Baterías Recargables) en la batería (o
paquete de baterías) de ion de litio indica que el costo de reciclar la batería ya ha sido
pagado por MOTORHEAD. En algunas áreas, es ilegal eliminar las baterías de ion de
litio agotadas en la basura o en las cadenas de residuos sólidos municipales, y el
programa de la RBRC ofrece una alternativa que respeta el medio ambiente.
RBRC, en cooperación con MOTORHEAD y otros usuarios de baterías, ha establecido programas
en los Estados Unidos y Canadá para facilitar la recolección de baterías de ion de litio agotadas.
Ayude a proteger nuestro medio ambiente y a conservar los recursos naturales, comunicándose
con el centro de reciclado local para obtener información sobre dónde dejar las baterías agotadas,
o llame al 1-877-2-RECYCLE.
ADVERTENCIA: Las alteraciones o los cambios realizados a esta unidad no aprobados
expresamente por la parte responsable del cumplimiento de las normas podrían anular
la autoridad del usuario para operar el equipo.
Los siguientes accesorios deben utilizarse solo en los siguientes tamaños:
• BROCAS, TALADRADO EN METAL - Hasta 1/2 in (12.7 mm)
• BROCAS, TALADRADO EN MAMPOSTERÍA - Hasta 1/2 in (12.7 mm)
• TALADRADO EN MADERA - Hasta 1/2 in (12.7 mm)
GARANTÍA TOTAL DE DOS AÑOS PARA USO DOMÉSTICO
La garantía de MOTORHEAD cubre los defectos en los materiales y el ensamblaje de este
producto por dos años. Esta GARANTÍA LIMITADA no cubre los productos utilizados
incorrectamente, maltratados, alterados o reparados por personal no autorizado.
Esta garantía no se aplica a los accesorios. Esta garantía le otorga derechos legales específicos y
es posible que tenga otros derechos legales que varían de un estado a otro o de una provincia a
otra.
Para consultas sobre la garantía, reemplazos o reparaciones, comuníquese con el Servicio al
cliente estadounidense al 1-866-608-5212.
Este producto no está destinado para uso comercial
Registre su producto en www.motorheadtools.com para recibir una garantía ampliada gratuita y
ofertas adicionales.
KIT ULTRA taladro de 20 V y 2 Ah (MH-03-D-B1-0-1) KIT ULTRA taladro de 20 V y 2 Ah (MH-03-D-B1-0-1)
Las reparaciones deben ser realizadas por un centro de
reparaciones autorizado. Abrir esta herramienta puede invalidar su garantía.
Debido a la continua mejora del producto, nos reservamos el derecho
de cambiar las especificaciones del producto sin previo aviso.
ADVERTENCIA:
NOTA:
ACCESORIOS
ADVERTENCIA: No exponga la batería al fuego o al calor intenso, porque puede
explotar. Si la batería contiene aditivos. Si el estuche se rompe, deséchela de inmediato
tomando las precauciones de seguridad adecuadas para evitar daños a las personas o a
la propiedad.
CONTIENE UNA BATERÍA DE
IONES DE LITIO SELLADA NO
DERRAMABLE. LA BATERÍA DEBE
SER RECICLADA O DESECHADA
ADECUADAMENTE.
38 39
Table of contents
Languages:


