Mhouse PR1 Product manual

Mhouse srl
Via Pezza Alta 13
31046 Oderzo TV Italia
Tel. +39 0422 202 109
Fax +39 0422 852 582
www.mhouse.biz
Declaration of Conformity
According to Directive 89/336/EEC
Number 163/PR1/GB
Date: 05/02/2003 Revision: 0
The undersigned Lauro Buoro declares that
the following product:
Manufacturer’s name: NICE S.p.a.
Address: Via Pezza Alta 13, 31046 Z.I.
Rustignè - ODERZO - ITALY
Model: PR1
Meets the essential requirements of Directive
89/336/EEC concerning electromagnetic
compatibility.
Dichiarazione di conformità
Secondo la Direttiva 89/336/CEE
Numero 163/PR1/I
Data: 05/02/2003 Revisione: 0
Il sottoscritto Lauro Buoro, dichiara che il pro-
dotto:
Nome produttore: NICE S.p.a.
Indirizzo: Via Pezza Alta 13, 31046 Z.I.
Rustignè - ODERZO - ITALY
Modello: PR1
Soddisfa i requisiti essenziali della Direttiva
89/336/CEE sulla compatibilità elettromagne-
tica.
ODERZO, 05/02/2003
Déclaration de conformité
Selon la Directive 89/336/CEE
Numéro 163/PR1/F
Date: 05/02/2003 Révision: 0
Je, soussigné Lauro Buoro, déclare que le
produit:
Nom producteur: NICE S.p.a.
Adresse: Via Pezza Alta 13, 31046 Z.I.
Rustignè - ODERZO- ITALY
Modèle: PR1
Est conforme aux conditions essentielles
requises par la Directive 89/336/CEE sur la
compatibilité électromagnétique.
Konformitätserklärung
Nach EWG-Richtlinie 89/336
Nr. 163/PR1/D
Datum: 05/02/2003 Revision: 0
Der Unterzeichnete Lauro Buoro erklärt, dass
das Produkt:
Herstellername: NICE S.p.a.
Adresse: Via Pezza Alta 13, 31046 Z.I.
Rustignè - ODERZO - ITALY
Modell: PR1
Den wichtigsten Anforderungen der EWG-
Richtline 89/336 bezüglich der elektromagne-
tischen Verträglichkeit entspricht.
Declaración de conformidad
Según la Directiva 89/336/CEE
Número 163/PR1/E
Fecha: 05/02/2003 Revisión: 0
El suscrito, Lauro Buoro declara que el pro-
ducto:
Nombre del fabricante: NICE S.p.a.
Dirección: Via Pezza Alta 13, 31046 Z.I.
Rustignè - ODERZO - ITALY
Modelo: PR1
Satisface los requisitos generales de la
Directiva 89/336/CEE sobre la compatibilidad
electromagnética.
Verklaring van overeenstemming
Volgens Richtlijn 89/336/CEE
Nummer 163/PR1/NL
Datum: 05/02/2003 Revisie: 0
Ondergetekende Lauro Buoro verklaart dat
het artikel:
Naam fabrikant: NICE S.p.a.
Adres: Via Pezza Alta 13, 31046 Z.I. Rustignè
- ODERZO - ITALY
Model: PR1
Voldoet aan de essentiële eisen van de
Europese Richtlijn 89/336/CEE inzake elec-
tromagnetische compatibiliteit.
Lauro Buoro
(Amministratore Delegato)
Fig. 2 Fig. 3 Fig. 4
Fig. 5 Fig. 6 Fig. 7 (GD2)
Fig. 8 Fig. 9 Fig. 10 (GD2)
A
GB
I
F
D
E
NL
B
C

Warnings
•The installation, testing and set-up of automation devices for doors and gates
must be performed by qualified and experienced personnel who must also
determine the type of tests required based on the risks involved, and ensure
that laws, standards and regulations in force are complied with.
•MHOUSE disclaims responsibility for any damage resulting from improper use
of the product; the only use authorized by the manufacturer is the one
described in this manual.
•The packaging materials must be disposed of in compliance with the regula-
tions locally in force.
•The buffer battery must not be immersed in water or any other liquid sub-
stances. If liquid substances should penetrate inside the device, disconnect it
from the automation system immediately and call MHOUSE customer service;
using the device under these conditions could be hazardous.
•Do not place the buffer battery near heat sources or expose it to open flames;
this could damage the device and cause malfunctions, fire hazards or other
dangers.
•In case of prolonged inactivity, to avoid the possibility that harmful substances
may leak from the buffer battery, the latter should be disconnected from the
automation system and stored in a dry location.
Description and Intended Use
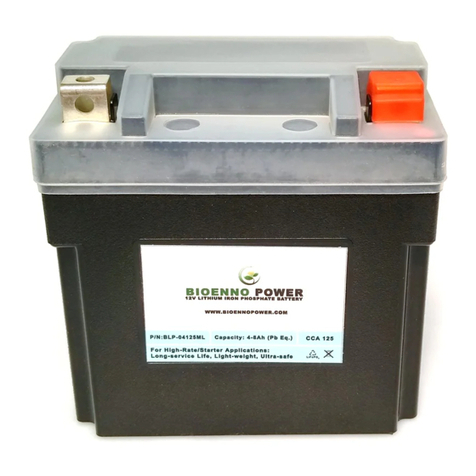
The PR1 buffer battery (Fig.1) may only be installed in gate automation systems
equipped with MHOUSE control units. The battery enables the storage of ener-
gy while the automation is powered by the electrical mains, energy that is
returned to the system in the event of a power failure (buffer operation); it enables
approximately ten gate activations in the absence of power from the electrical
mains.
Depending on the type of automation, when the system is powered by the buffer
battery the movements may take place at “slow” speed even if the “fast” speed
was selected.
Installation
Warning: the power supply to the system must be disconnected during instal-
lation of the PR1 buffer battery.
•Depending on the type of automation, remove the protection that covers the
battery connector: [A] for SL1 automation (Fig.2); [B] for WU2, WK2, WG2
automations (Fig.3) or [C] for GD2 automation (Fig.4).
•Insert the battery in its designated housing: for SL1 automation (Fig.5); for
WU2, WK2, WG2 automations (Fig.6) or for GD2 automation (Fig.7).
•Using the cable provided for this purpose, connect the buffer battery connec-
tor to the connector in the control unit: for SL1 automation (Fig.8); for WU2,
WK2, WG2 automations (Fig.9) or for GD2 automation (Fig.10).
Warning: plug the smaller connector into the buffer battery and the larger one
into the control unit; no polarity needs to be observed when plugging in the
connectors.
Operational Checks and Testing
The following tests should be carried out immediately after connecting the bat-
tery to the control unit.
•Make sure that the “L2” LED (Fig.1) is on, showing that the battery is supply-
ing energy to the system. Make sure that the different LEDs on the control unit
signal that the latter is operating properly.
•If these things do not occur it probably means that the battery is completely
exhausted; in this case proceed to the next step and wait a few hours with the
automation system powered by the mains before you test the operation of the
battery again.
•Connect the automation system to the mains power supply and see whether
the “L1” LED (Fig.1) lights up to signal that the battery is recharging correctly.
•Activate at least one opening and closing manoeuvre to make sure that the
system operates properly when it is powered by the electrical mains.
•Disconnect the automation system from the electrical mains; make sure that
the “L2” LED (Fig.1) lights up, then activate at least one opening and closing
manoeuvre to make sure that the system operates properly also when it is
powered by the battery.
Note: depending on the type of automation, when the system is powered by the
buffer battery the movements may take place at “slow” speed even if the “fast”
speed was selected.
•At the end of the tests, reconnect the automation to the electrical mains.
Maintenance, Storage Battery Replacement, Disposal
The PR1 buffer battery does not require any maintenance; however, in case of
long periods of inactivity, it should be disconnected from the system and stored
in a dry location.
Storage batteries should be replaced whenever their autonomy is significantly
reduced as a result of aging. This operation may only be performed by qualified
technicians; please contact MHOUSE customer service.
WARNING: storage batteries contain lead and other polluting substances; cer-
tain electronic components may contain polluting substances: do not dispose of
them with other common waste. Use the disposal methods established by the
regulations locally in force.
Technical Characteristics
PR1 is produced by NICE S.p.a. (TV) I, MHOUSE S.r.l. is an affiliate of the Nice
S.p.a. group.
Nice S.p.a., in order to improve its products, reserves the right to modify their
technical characteristics at any time without prior notice. In any case, the man-
ufacturer guarantees their functionality and fitness for the intended purposes.
Note: all the technical characteristics refer to a temperature of 20°C.
PR1 buffer battery
Note: the performances of lead-acid storage batteries are affected by their oper-
ating conditions: temperature, absorbed current, state of charge and age of the
storage battery may cause significant variations in the data shown below.
Type: 24V battery kit, complete with battery charger, suitable for powering gate
and door automation systems in the event of mains power failures.
Technology adopted: Storage of electrical power by means of maintenance-
free hermetic lead-acid storage batteries
Charge/discharge voltage: 28V at maximum charge; 16V at maximum dis-
charge (when it is totally exhausted, the battery is disconnected automatically)
Current delivered: Rated 4A; 7.5A for 3 seconds, starting current
Storage capacity: 1.2Ah, corresponding to an autonomy of approximately 12
hours with the automation system in stand-by mode; or 5 minutes with a load of
4A corresponding to an average of at least 10 manoeuvres
Complete recharge time: Approximately 16 hours
Storage battery life: Estimated at 4 ÷ 6 years; or, over 1000 cycles for 30%
discharge depth, over 500 cycles for 50% discharge, over 200 cycles for 100%
discharge.
Ambient operating temperature: -20 ÷ 50°C (storage battery efficiency
decreases at lower temperatures: at -10°C efficiency is 30%; storage battery life-
time decreases at higher temperatures: at 40°C, lifetime expectation could be
reduced to 2 years.
Use in acid, saline or potentially explosive atmosphere: No
Mounting and connections: Installation in the compartments provided in the
control units or gearmotors. Connection via supplied cable.
Protection class: IP30 (to be used only inside control units or gearmotors or
other protected environments)
Dimensions / weight: 104 x 53 h 143mm / 1450g
“PR1” Buffer Battery
GB
L2L1
Fig. 1

Avvertenze
•L’installazione, il collaudo e la messa in servizio delle automazioni per porte e
cancelli deve essere eseguita da personale qualificato ed esperto che dovrà
farsi carico di stabilire le prove previste in funzione dei rischi presenti; e di veri-
ficare il rispetto di quanto previsto da leggi, normative e regolamenti.
•MHOUSE non risponde dei danni risultanti da un uso improprio del prodotto;
diverso da quanto previsto nel presente manuale.
•Il materiale dell'imballaggio deve essere smaltito nel pieno rispetto della nor-
mativa locale.
•Evitare che la batteria tampone possa venire immersa in acqua o altre sostan-
ze liquide. Qualora sostanze liquide siano penetrate all'interno del dispositivo,
scollegarla immediatamente dall’automatismo e rivolgersi al servizio assisten-
za MHOUSE; l'uso del dispositivo in tali condizioni può causare situazioni di
pericolo.
•Non tenere la batteria tampone vicino a forti fonti di calore né esporla a fiam-
me; tali azioni possono danneggiarla ed essere causa di malfunzionamenti,
incendio o situazioni di pericolo
•Nel caso di lunghi periodi di inutilizzo, per evitare il rischio di perdite di sostan-
ze nocive dalla batteria tampone è preferibile scollegarla dall’automatismo e
custodirla in un luogo asciutto.
Descrizione e destinazione d’uso
La batteria tampone PR1 (Fig.1) può essere installata esclusivamente in impian-
ti di automazione per cancelli con centrali di comando MHOUSE; consente di
accumulare energia durante il periodo in cui l’automatismo è alimentato dalla
rete elettrica e di restituirla in caso di mancanza della tensione di rete (funziona-
mento tampone); permette circa una decina di azionamenti del cancello in
assenza di tensione della rete elettrica principale.
A seconda del tipo di automazione, quand’è in funzione la batteria tampone i
movimenti potrebbero avvenire in velocità “lenta” anche se fosse selezionata la
velocità “veloce”.
Installazione
Attenzione: le operazioni d’installazione della batteria tampone PR1 devono
essere eseguite in assenza di tensione di rete all’impianto.
•Aseconda del tipo di automazione, rimuovere la protezione che copre l’inne-
sto della batteria: [A] per automatismo SL1 (Fig.2); [B] per automatismi WU2,
WK2, WG2 (Fig.3) o [C] per automatismo GD2 (Fig.4).
•Inserire la batteria nell’apposito alloggio: per automatismo SL1 (Fig.5); per
automatismi WU2, WK2, WG2 (Fig.6) o per automatismo GD2 (Fig.7).
•Attraverso l’apposito cavo in dotazione collegare il connettore della batteria
tampone con il connettore nella centrale di comando: per automatismo SL1
(Fig.8); per automatismi WU2, WK2, WG2 (Fig.9) o per automatismo GD2
(Fig.10).
Attenzione: usare il connettore più stretto dal lato della batteria tampone e
quello più largo dal lato della centrale; nell’inserimento dei connettori non è
necessario rispettare alcuna polarità.
Verifica del funzionamento e collaudo
Le seguenti verifiche vanno fatte immediatamente dopo aver collegato la batte-
ria alla centrale.
•Verificare che il led “L2” (Fig.1) sia acceso ad indicare che la batteria sta for-
nendo energia all’impianto. Verificare che i vari led sulla centrale diano indica-
zione del corretto funzionamento della stessa.
•Se tutto questo non avviene è probabile che la batteria sia completamente
scarica; quindi eseguire il passo successivo ed attendere qualche ora con l’au-
tomazione sotto tensione di rete prima di eseguire nuovamente la verifica del
funzionamento.
•Collegare l’automazione alla tensione di rete e verificare che il led “L1” (Fig.1)
sia acceso ad indicare che la batteria si sta correttamente ricaricando.
•Eseguire almeno una manovra di apertura e chiusura dell’automazione con lo
scopo di verificare che tutto sia perfettamente funzionante nel caso di presen-
za di tensione di rete.
•Scollegare l’automazione dalla tensione di rete; verificare che il led “L2” (Fig.1)
sia acceso quindi eseguire almeno una manovra di apertura e chiusura del-
l’automazione per verificare che tutto sia perfettamente funzionante anche nel
caso di funzionamento a batteria.
Nota: a seconda del tipo di automazione, quand’è in funzione la batteria tam-
pone i movimenti potrebbero avvenire in velocità “lenta” anche se fosse selezio-
nata la velocità “veloce”.
•Al termine delle prove ricollegare l’automazione dalla tensione di rete.
Manutenzione, sostituzione degli accumulatori, smaltimento
La batteria tampone PR1 non necessita di alcuna manutenzione è però oppor-
tuno scollegarla dall’automazione nel caso di lunghi periodi di inutilizzo e custo-
dirla in un luogo asciutto.
La sostituzione degli accumulatori si rende necessaria quando, per effetto del-
l’invecchiamento, l’autonomia si riduce sensibilmente. Questa operazione può
essere eseguita solo da personale tecnico qualificato; rivolgersi al servizio assi-
stenza MHOUSE.
ATTENZIONE: gli accumulatori contengono piombo ed altre sostanze inquinan-
ti; alcuni componenti elettronici possono contenere sostanze inquinanti: non get-
tarli nei rifiuti comuni ma utilizzare i metodi previsti dai regolamenti locali.
Caratteristiche tecniche
PR1 è prodotto da NICE S.p.a. (TV) I, MHOUSE S.r.l. è una società del gruppo
NICE S.p.a.
Allo scopo di migliorare i prodotti, NICE S.p.a. si riserva il diritto di modificare le
caratteristiche tecniche in qualsiasi momento e senza preavviso, garantendo
comunque funzionalità e destinazione d’uso previste.
Nota: tutte le caratteristiche tecniche sono riferite alla temperatura di 20°C.
Batteria tampone PR1
Nota: le prestazioni degli accumulatori al piombo sono influenzati dalle condizio-
ni di utilizzo: temperatura, corrente assorbita, stato di carica e l’anzianità dell’ac-
cumulatore possono far variare sensibilmente i dati riportati.
Tipologia: Kit di batterie 24V completo di caricabatterie per l’alimentazione di
automatismi di cancelli e portoni automatici nel caso di mancanza di tensione
elettrica di rete.
Tecnologia adottata: Accumulo di energia elettrica con accumulatori ermetici
al piombo senza manutenzione.
Tensione carica-scarica: 28V alla massima carica; 16V alla massima scarica
(la batteria viene automaticamente scollegata quando è totalmente scarica).
Corrente erogabile: 4A nominali; 7,5A per 3 secondi, allo spunto
Capacità di accumulo: 1,2Ah, corrispondenti ad una autonomia di circa 12 ore
con automatismo in stand-by; oppure 5 minuti con un carico di 4A corrispon-
denti ad una media di almeno 10 manovre.
Tempo di ricarica completa: 16 ore circa
Vita accumulatori: stimata in 4 ÷ 6 anni; oppure, oltre 1000 cicli per profondi-
tà di scarica del 30%, oltre 500 cicli per scarica del 50%, oltre 200 cicli per sca-
rica del 100%.
Temperatura ambientale di funzionamento: -20 ÷ 50°C (l’efficienza degli
accumulatori diminuisce col diminuire della temperatura, a -10°C l’efficienza è
del 30%; la vita degli accumulatori diminuisce con l’aumentare della temperatu-
ra, a 40°C la vita può ridursi a 2 anni.
Utilizzo in atmosfera acida, salina o potenzialmente esplosiva: No
Montaggio e collegamenti: Inserimento nei vani appositamente predisposti
delle centrali o motoriduttori. Collegamento con apposito cavetto in dotazione.
Grado di protezione: IP30 (utilizzo solo all’interno delle centrali o motoriduttori
o altri ambienti protetti.
Dimensioni / peso: 104 x 53 h 143mm / 1450g
Batteria tampone “PR1”
I
L2L1
Fig. 1

IST 145 4862 Rev. 00
PR1
buffer battery
Installation instructions and warnings
Istruzioni ed avvertenze per l’installazione
Instructions et avertissements pour l’installation
Anweisungen und Hinweise für die Installation
Instrucciones y advertencias para la instalación
Installatievoorschriften en waarschuwingen

Avertissements
•L’installation, l’essai de fonctionnement et la mise en service des automatismes
pour portes et portails doivent être effectués par du personnel qualifié et expé-
rimenté qui devra se charger d’établir les essais prévus en fonction des risques
présents et de vérifier le respect de ce qui est prévu par les lois, les normes et
les réglementations.
•MHOUSE ne répond pas des dommages résultant d’une utilisation impropre
du produit, différente de celle qui est prévue dans ce manuel.
•Le matériau de l’emballage doit être mis au rebut dans le plein respect des nor-
mes locales.
•Éviter que la batterie tampon puisse être immergée dans l’eau ou dans d’aut-
res substances liquides. Si des substances liquides ont pénétré à l’intérieur du
dispositif, la déconnecter immédiatement l’automatisme et s’adresser au ser-
vice après-vente MHOUSE; l’utilisation du dispositif dans ces conditions peut
constituer des situations de danger.
•Ne pas conserver la batterie tampon à proximité de sources de chaleur ni l’ex-
poser à des flammes; ces actions peuvent l’endommager et être la cause de
problèmes de fonctionnement, incendie ou situations de danger.
•Dans le cas de longues périodes d’inactivité, pour éviter le risque de fuites de
substances nocives de la batterie tampon, il est préférable de la déconnecter
de l’automatisme et de la conserver dans un lieu sec.
Description et application
La batterie tampon PR1 (Fig.1) peut être installée exclusivement dans des auto-
matismes pour portails avec armoires de commande MHOUSE; elle permet
d’accumuler de l’énergie durant la période pendant laquelle l’automatisme est
alimenté par le secteur et de la restituer en cas d’interruption de la tension de
secteur (fonctionnement tampon); elle permet environ une dizaine d’actionne-
ments du portail en l’absence de tension du secteur d’alimentation principal.
Suivant le type d’automatisme, quand la batterie tampon est en service, les
mouvements pourraient être effectués à la vitesse “lente” même si on a sélec-
tionné la vitesse “rapide”.
Installation
Attention: les opérations d’installation de la batterie tampon PR1 doivent être
effectuées en l’absence de tension dans l’installation.
•Suivant le type d’automatisme, enlever la protection qui couvre le connecteur
de la batterie: [A] pour l’automatisme SL1 (Fig.2); [B] pour les automatismes
WU2, WK2, WG2 (Fig.3) ou [C] pour l’automatisme GD2 (Fig.4).
•Placer la batterie dans le logement prévu à cet effet: pour l’automatisme SL1
(Fig.5); pour les automatismes WU2, WK2, WG2 (Fig.6) ou pour l’automatis-
me GD2 (Fig.7).
•Àl’aide du câble fourni, connecter le connecteur de la batterie tampon au
connecteur dans l’armoire de commande: pour l’automatisme SL1 (Fig.8);
pour les automatismes WU2, WK2, WG2 (Fig.9) ou pour l’automatisme GD2
(Fig.10).
Attention: utiliser le connecteur le plus étroit du côté de la batterie tampon et
le plus large du côté de l’armoire; lors de la connexion des connecteurs, il n’est
pas nécessaire de respecter une polarité quelconque.
Vérification du fonctionnement et essai
Les vérifications suivantes doivent être faites immédiatement après avoir
connecté la batterie à l’armoire.
•Vérifier que la LED “L2” (Fig.1) est allumée, en indiquant ainsi que la batterie
fournit de l’énergie à l’installation. Vérifier que les diverses LED sur l’armoire
indiquent le fonctionnement correct de cette dernière.
•Si les LED ne fonctionnent pas, la batterie est probablement complètement à
plat; il faut donc effectuer l’opération successive et attendre quelques heures
avec l’automatisme connecté au secteur avant d’effectuer de nouveau la véri-
fication du fonctionnement.
•Connecter l’automatisme au secteur et vérifier que la LED “L1” (Fig.1) est allu-
mée en indiquant ainsi que la batterie est en train de se recharger.
•Effectuer au moins une manœuvre d’ouverture et de fermeture de l’automatis-
me pour vérifier si tout fonctionne parfaitement en présence de la tension de
secteur.
•Déconnecter l’automatisme de la tension de secteur; vérifier que la LED “L2”
(Fig.1) est allumée puis effectuer au moins une manœuvre d’ouverture et de
fermeture de l’automatisme pour vérifier si tout fonctionne parfaitement dans
le cas de l’alimentation par batterie.
N.B.: suivant le type d’automatisme, quand la batterie tampon est en service, les
mouvements pourraient être effectués à la vitesse “lente” même si on a sélec-
tionné la vitesse “rapide”.
•Àla fin des essais, reconnecter l’automatisme au secteur.
Maintenance, remplacement des accumulateurs, mise au rebut
La batterie tampon PR1 n’a besoin d’aucune maintenance; il est toutefois
nécessaire de la déconnecter de l’automatisme en cas de longues périodes d’i-
nactivité et de la conserver dans un lieu sec.
Le remplacement des accumulateurs est nécessaire quand, par effet du vieillis-
sement, l’autonomie se réduit sensiblement. Cette opération ne peut être effec-
tuée que par du personnel technique qualifié; s’adresser au service après-vente
MHOUSE.
ATTENTION: les accumulateurs contiennent du plomb et d’autres substances
polluantes; certains composants électroniques peuvent contenir des substances
polluantes: ne pas les jeter avec les ordures ménagères mais utiliser les métho-
des prévues par les réglementations locales.
F
Caractéristiques techniques
PR1 est produit par NICE S.p.a. (TV) I, MHOUSE S.r.l. est une société du grou-
pe NICE S.p.a.
Dans le but d’améliorer les produits, NICE S.p.a. se réserve le droit d’en modifier à
tout moment et sans préavis les caractéristiques techniques, en garantissant dans
tous les cas le bon fonctionnement et le type d’utilisation prévus.
N.B.: toutes les caractéristiques techniques se réfèrent à la température de
20°C.
Batterie tampon PR1
N.B.: les performances des accumulateurs au plomb sont influencées par les
conditions d’utilisation: la température, le courant absorbé, l’état de charge et
l’âge de l’accumulateur peuvent faire varier de manière sensible les données
indiquées.
Typologie: Kit de batteries 24 V avec chargeur de batteries pour l’alimentation
d’automatismes de portails et portes automatiques en cas de manque de ten-
sion électrique de secteur.
Technologie adoptée: Accumulation d’énergie électriques avec accumula-
teurs hermétiques au plomb sans maintenance.
Tension charge/décharge: 28 V à la charge maximum; 16 V à la décharge
maximum (la batterie est automatiquement déconnectée quand elle est totale-
ment à plat).
Courant fourni: 4 A nominaux; 7,5 A pendant 3 secondes, au démarrage.
Capacité d’accumulation: 1,2 Ah, correspondant à une autonomie d’environ
12 heures avec automatisme en stand-by; ou bien 5 minutes avec une charge
de 4 A correspondant à une moyenne d’au moins 10 manœuvres.
Temps de recharge complète: environ 16 heures.
Durée de vie des accumulateurs: estimée à 4 ÷ 6 ans; ou bien, plus de 1000
cycles pour décharge de 30%, plus de 500 cycles pour décharge de 50%, plus
de 200 cycles pour décharge de 100%.
Température ambiante de fonctionnement: -20 ÷ 50°C (l’efficacité des
accumulateurs diminue quand la température diminue, à -10°C l’efficacité est de
30%; la durée de vie des accumulateurs diminue avec l’augmentation de la tem-
pérature, à 40°C la durée de vie peut se réduire à 2 ans.
Utilisation en atmosphère acide, saline ou potentiellement explosive:
Non
Montage et connexions: Insertion dans les compartiments spécialement pré-
vus dans les armoires de commande ou dans les opérateurs.
Indice de protection: IP30 (utilisation uniquement à l’intérieur des armoires de
commande ou opérateurs ou bien dans d’autres milieux protégés).
Dimensions / poids: 104 x 53 h 143 mm / 1450 g
Batterie tampon “PR1”
L2L1
Fig. 1

D
Hinweise
•Installation, Endprüfung und Inbetriebsetzung der Automatisierungen für Türen
und Tore müssen von erfahrenem Fachpersonal ausgeführt werden, das ent-
scheiden muss, welche Tests je nach vorhandenen Risiken auszuführen sind
und das überprüfen muss, ob gesetzliche Vorschriften, Normen und Verord-
nungen eingehalten sind.
•MHOUSE übernimmt keinerlei Haftung für Schäden aufgrund von unsachge-
mäßem Gebrauch des Produkts, der anders als in der vorliegenden Anleitung
angegeben ist.
•Das Verpackungsmaterial ist unter Einhaltung der örtlichen Vorschriften zu ent-
sorgen.
•Die Pufferbatterie darf nicht in Wasser oder andere Flüssigkeiten getaucht wer-
den. Sollten Flüssigkeiten in die Vorrichtung eindringen, diese unverzüglich
vom Automatismus abtrennen und den MHOUSE Kundendienst zu Rate zie-
hen; der Gebrauch der Vorrichtung in solchem Zustand kann Gefahren verur-
sachen.
•Die Pufferbatterie nicht in der Nähe starker Wärmequellen halten und keinen
Flammen aussetzen; dies könnte zu Schäden oder Betriebsstörungen oder zu
Brand und Gefahren führen.
•Wenn die Pufferbatterie längere Zeit nicht benutzt wird, sollte sie vom Auto-
matismus getrennt und trocken aufbewahrt werden, um ein Auslaufen von
Schadstoffen aus ihr zu vermeiden.
Beschreibung und Einsatz
Die Pufferbatterie PR1 (Abb.1) darf ausschließlich in Automatisierungsanlagen für
Tore mit MHOUSE Steuerungen installiert werden; in ihr kann Energie gespei-
chert werden, wenn der Automatismus über Stromnetz gespeist ist, die dann im
Falle eines Blackouts zurückgegeben wird; sie dient für ca. zehn Torbewegun-
gen bei Stromausfall in der Hauptstromversorgung.
Je nach Automatisierung könnten die Bewegungen mit der Pufferbatterie lang-
sam sein, auch wenn die schnelle Geschwindigkeit gewählt ist.
Installation
Achtung: die Installationsarbeiten der Pufferbatterie PR1 müssen ohne Netz-
spannung an der Anlage ausgeführt werden.
•Je nach Automatisierung, den Schutzdeckel der Steckverbindung der Batte-
rie entfernen: [A] für den Automatismus SL1 (Abb.2); [B] für die Automatis-
men WU2, WK2, WG2 (Abb.3) o [C] für den Automatismus GD2 (Abb.4).
•Die Batterie in ihr Abteil einstecken: für den Automatismus SL1 (Abb.5); für die
Automatismen WU2, WK2, WG2 (Abb.6) oder für den Automatismus GD2
(Abb.7).
•Den Verbinder der Pufferbatterie durch das mitgelieferte Kabel am Verbinder in
der Steuerung anschließen: für den Automatismus SL1 (Abb.8); für die Auto-
matismen WU2, WK2, WG2 (Abb.9) oder für den Automatismus GD2
(Abb.10).
Achtung: den engeren Verbinder auf Seite der Pufferbatterie und den breite-
ren auf der Seite der Steuerung verwenden; beim Anschluss der Verbinder ist
eine Beachtung der Polung nicht erforderlich.
Überprüfung des Betriebs und Endprüfung
Folgende Überprüfungen gleich nach dem Anschluss der Batterie an der Steu-
erung ausführen.
•Prüfen, ob Led “L2” (Abb.1) leuchtet: das bedeutet, dass die Batterie der Anla-
ge Energie liefert. Prüfen, ob die verschiedenen Leds an der Steuerung anzei-
gen, dass diese korrekt funktioniert.
•Sollte all dies nicht der Fall sein, so ist die Batterie wahrscheinlich ganz leer;
daher den nächsten Schritt durchführen und vor einem erneuten Betriebstest
ein paar Stunden bei über Netz gespeister Automatisierung warten.
•Die Automatisierung an die Netzspannung anschließen und prüfen, ob Led
“L1” (Abb.1) aufleuchtet, was bedeutet, dass sich die Batterie korrekt auflädt.
•Der Automatisierung mindestens eine Öffnung und eine Schließung ausführen
lassen, um zu prüfen, ob bei Vorhandensein der Netzspannung alles einwand-
frei funktioniert.
•Die Automatisierung von der Netzspannung abtrennen und prüfen, ob Led
“L2” (Abb.1) aufleuchtet, dann Automatisierung mindestens eine Öffnung und
eine Schließung ausführen lassen, um zu prüfen, ob auch bei Batterieversor-
gung alles einwandfrei funktioniert.
Bitte bemerken: Je nach Automatisierung könnten die Bewegungen mit der Puf-
ferbatterie langsam sein, auch wenn die schnelle Geschwindigkeit gewählt ist.
•Die Automatisierung am Ende der Tests wieder an die Netzspannung
anschließen.
Wartung, Auswechseln der Akkus, Entsorgung
Die Pufferbatterie PR1 ist wartungsfrei, sollte jedoch im Falle längerer Nichtbe-
nutzung von der Automatisierung abgetrennt und trocken gelagert werden.
Das Auswechseln der Akkus ist erforderlich, wenn sich die Autonomie aufgrund
von Alterung erheblich reduziert. Dieser Vorgang darf nur von technischem Fach-
personal ausgeführt werden; wenden Sie sich bitte an den MHOUSE Kunden-
dienst.
ACHTUNG: Akkus enthalten Blei und sonstige Schadstoffe; auch einige elektro-
nische Komponenten können Schadstoffe enthalten: nicht in den Stadtmüll
geben, sondern nach den örtlichen Vorschriften entsorgen.
Technische Merkmale
PR1 ist von NICE S.p.a. (TV) I hergestellt, MHOUSE S.r.l. ist eine Gesellschaft der
NICE S.p.a. Gruppe.
Für eine Verbesserung der Produkte behält sich NICE S.p.a. das Recht vor, die
technischen Merkmale jederzeit und ohne vorherige Benachrichtigung zu
ändern, wobei aber vorgesehene Funktionalitäten und Einsätze garantiert blei-
ben.
Bitte bemerken: alle technischen Merkmale beziehen sich auf eine Temperatur
von 20°C.
Pufferbatterie PR1
Bitte bemerken: die Leistungen der Bleiakkus werden durch die
Einsatzbedingungen beeinflusst: Temperatur, Stromaufnahme, Ladezustand und
Alter der Batterie können die angegebenen Daten sogar bedeutend verändern.
Typik: 24V Akkusatz komplett mit Batterieladegerät für die Speisung von
Steuerungen von automatischen Türen und Toren bei Netzstromausfall.
Angewendete Technologie: Speichern von elektrischer Energie mit wartungs-
freien, hermetischen Bleiakkus.
Lade-/Entladespannung: 28V bei max. Ladung; 16V bei max. Entladung (die
Batterie wird automatisch abgetrennt, wenn sie ganz leer ist).
Stromabgabe: 4A Nennstrom; 7,5A für 3 Sekunden Spitzenstrom
Speichervermögen: 1,2Ah, entspricht einer Autonomie von ca. 12 Stunden mit
Steuerung in Stand-by, oder 5 Minuten mit einer Last von 4A, was einem
Durchschnitt von mindestens 10 Bewegungen entspricht.
Vollständige Aufladezeit: ca. 16 Stunden
Dauer der Akkus: ca. 4 ÷ 6 Jahre oder mehr als 1000 Zyklen bei einer
Entladung von 30%, mehr als 500 Zyklen bei einer Entladung von 50%, mehr als
200 Zyklen bei einer Entladung von 100%.
Umgebungs- und Betriebstemperatur: -20 ÷ 50°C (die Effizienz der Akkus
verringert sich, je niedriger die Temperatur ist; bei -10°C ist die Effizienz 30%; die
Dauer der Akkus verringert sich, je höher die Temperatur ist, bei 40°C kann sich
die Dauer auf 2 Jahre reduzieren).
Benutzung in säure- und salzhaltiger oder explosionsgefährdeter
Atmosphäre: Nein
Montage und Anschlüsse: Einbau in dazu vorgesehene Abteile an
Steuerungen oder Getriebemotoren.
Schutzart: IP30 (nur bei Gebrauch in Steuerungen oder Getriebemotoren oder
anderer geschützter Umgebung)
Abmessungen / Gewicht: 104 x 53 h 143mm / 1450g
Pufferbatterie “PR1”
L2L1
Fig. 1

E
Advertencias
•La instalación, ensayo y puesta en servicio de los automatismos para puertas
y cancelas deben ser llevados a cabo por personal cualificado y experto, que
deberá establecer los ensayos previstos, de acuerdo con los riesgos presen-
tes, y comprobar que se respeten las disposiciones de las leyes, normativas y
reglamentos.
•MHOUSE no responde de daños que deriven de un uso inadecuado del pro-
ducto; diferente de aquel previsto en este manual.
•El material del embalaje debe eliminarse respetando la normativa local en
materia.
•Evite que la batería compensadora pueda mojarse con agua u otras substan-
cias líquidas; si dichas substancias penetraran en el interior del dispositivo,
desconéctela de inmediato del automatismo y contacte al servicio de asisten-
cia MHOUSE; el uso del dispositivo en dichas condiciones puede causar situa-
ciones peligrosas.
•No coloque la batería compensadora cerca de fuentes de calor intensas ni la
exponga a las llamas; dichas acciones pueden arruinarla y provocar desper-
fectos, incendios o situaciones peligrosas.
•En el caso de períodos prolongados de inactividad, para evitar el riesgo de
fugas de substancias peligrosas de la batería compensadora, se aconseja
desconectarla del automatismo y guardarla en un lugar seco.
Descripción y uso previsto
La batería compensadora PR1 (Fig. 1) puede instalarse sólo en instalaciones de
automatismo para cancelas con centrales de mando MHOUSE; permite acu-
mular energía durante el período en que el automatismo está alimentado por la
corriente eléctrica y suministrarla si falta la tensión de red (funcionamiento com-
pensador); permite efectuar alrededor de diez accionamientos de la cancela sin
la corriente eléctrica principal.
Según el tipo de automatismo, cuando la batería compensadora está en fun-
cionamiento, los movimientos podrían ser más lentos, aun estando selecciona-
da la velocidad “rápida”.
Instalación
Atención: la batería compensadora PR1 debe montarse sin tensión de red en
la instalación.
•Según el tipo de automatismo, quite la protección que cubre la conexión de
la batería: [A] para automatismo SL1 (Fig. 2); [B] para automatismos WU2,
WK2, WG2 (Fig. 3) o [C] para automatismo GD2 (Fig. 4).
•Introduzca la batería en su compartimiento: para automatismo SL1 (Fig. 5);
para automatismos WU2, WK2, WG2 (Fig. 6), o para automatismo GD2 (Fig.
7).
•Con el cable suministrado conecte el conector de la batería compensadora al
conector en la central de mando: para automatismo SL1 (Fig. 8); para auto-
matismos WU2, WK2, WG2 (Fig. 9), o para automatismo GD2 (Fig. 10).
Atención: use el conector más estrecho del lado de la batería compensado-
ra y aquel más ancho del lado de la central; al conectar los conectores no es
necesario respetar las polaridades.
Control del funcionamiento y ensayo
Los siguientes ensayos deben realizarse inmediatamente después de haber
conectado la batería a la central.
•Controle que el led “L2” (Fig. 1) esté encendido, indicando que la batería está
suministrando energía a la instalación. Controle que los leds de la central indi-
quen que la misma central está funcionando correctamente.
•Si así no fuera, es probable que la batería esté descargada completamente;
entonces, realice el paso siguiente y espere algunas horas con el automatismo
bajo tensión de red antes de efectuar un nuevo control de funcionamiento.
•Conecte el automatismo a la tensión de red y controle que el led “L1” (Fig. 1)
esté encendido, indicando que la batería se está cargando correctamente.
•Realice por lo menos una maniobra de apertura y cierre del automatismo para
comprobar que todo funciona correctamente con la tensión de red.
•Desconecte el automatismo de la tensión de red; controle que el led “L2” (Fig.
1) esté encendido y realice por lo menos una maniobra de apertura y cierre del
automatismo para comprobar que todo funciona correctamente también con
el funcionamiento con batería.
Nota: según el tipo de automatismo, cuando está en funcionamiento la batería
compensadora, los movimientos podrían ser más lentos, aun seleccionando la
velocidad “rápida”.
•Al concluir los ensayos, conecte nuevamente el automatismo a la tensión de
red.
Mantenimiento, sustitución de los acumuladores, desguace
La batería compensadora PR1 no requiere ningún tipo de mantenimiento; es
necesario desconectarla del automatismo en el caso de períodos prolongados
de inactividad y guardarla en un lugar seco.
La sustitución de los acumuladores es necesaria cuando, por causa del enveje-
cimiento, la autonomía disminuye sensiblemente. Dicha operación puede ser
efectuada sólo por personal técnico cualificado; contacte al servicio de asisten-
cia MHOUSE.
ATENCIÓN: los acumuladores contienen plomo y otras substancias contami-
nantes; algunos componentes electrónicos pueden contener substancias con-
taminantes: no los arroje a los residuos comunes, sino que respete los métodos
previstos por las normativas locales.
Características técnicas
PR1 es producido por NICE S.p.a. (TV) I, MHOUSE S.r.l. es una sociedad del
grupo NICE S.p.a.
A fin de mejorar sus productos, NICE S.p.a. se reserva el derecho de modificar
las características técnicas en cualquier momento y sin previo aviso, garanti-
zando siempre la funcionalidad y el uso previstos.
Nota: todas las características técnicas se refieren a una temperatura de 20°C.
Batería compensadora PR1
Nota: las prestaciones de los acumuladores de plomo dependen de las condi-
ciones de uso: temperatura, corriente absorbida, estado de carga y envejeci-
miento del acumulador pueden modificar sensiblemente los datos indicados.
Tipo: Kit de baterías de 24V con cargador de baterías para la alimentación de
automatismos de cancelas y puertas automáticas cuando falta la tensión eléctri-
ca de red.
Tecnología adoptada: Acumulación de energía eléctrica con acumuladores
herméticos de plomo sin mantenimiento.
Tensión de carga-descarga: 28V con la carga máxima; 16V con la descarga
máxima (la batería se desconecta automáticamente cuando está descargada
totalmente).
Corriente suministrable: 4A nominales; 7,5A durante 3 segundos, en el pun-
to de arranque.
Capacidad de acumulación: 1,2Ah, correspondientes a una autonomía de
alrededor de 12 horas con automatismo en stand-by; o bien 5 minutos con una
carga de 4A correspondientes a un promedio de 10 maniobras como mínimo.
Tiempo de recarga completa: 16 horas aprox.
Vida de los acumuladores: estimada en 4 ÷ 6 años; o bien, más de 1000
ciclos para un estado de descarga del 30%, más de 500 ciclos para un estado
de descarga del 50%, más de 200 ciclos para un estado de descarga del 100%.
Temperatura ambiente de funcionamiento: -20 ÷ 50°C (la eficiencia de los
acumuladores disminuye al disminuir la temperatura, a -10°C la eficiencia es del
30%; la vida de los acumuladores disminuye al aumentar la temperatura, a 40°C
la vida puede reducirse a 2 años).
Uso en atmósfera ácida, salobre o con riesgo de explosión: No
Montaje y conexiones: Montaje en los compartimientos realizados en las cen-
trales o motorreductores.
Grado de protección: P30 (uso sólo en el interior de las centrales o motorre-
ductores u otros entornos protegidos)
Dimensiones / peso: 104 x 53 h 143 mm / 1450 g
Batería compensadora “PR1”
L2L1
Fig. 1

NL
Raadgevingen
•Installatie, eindtest en inbedrijfstelling van automatiseringen voor deuren en
hekken dienen door gekwalificeerd en ervaren personeel uitgevoerd te worden;
zij dienen zich ook te belasten met het vaststellen van de voorgeschreven tests
in functie van de aanwezige risico’s; bovendien dienen zij te controleren of wat
in wetten, voorschriften en reglementen voorzien is, ook wordt nageleefd.
•MHOUSE is niet aansprakelijk voor schade die door oneigenlijk gebruik van het
product - ander gebruik dan wat in deze handleiding voorzien is - veroorzaakt
is.
•Het verpakkingsmateriaal moet volgens de plaatselijk geldende voorschriften
verwerkt worden.
•Zorg ervoor dat de bufferbatterij niet in water of een andere vloeistof terecht
kan komen. Indien er vloeistof in het apparaat gekomen is, dient u dit
onmiddellijk van het automatisme los te koppelen en zich tot het servicecen-
trum MHOUSE te wenden; het gebruik van het apparaat in dergelijke omstan-
digheden kan een gevaarlijke situatie opleveren.
•Houd de bufferbatterij niet in de buurt van warmtebronnen of vuur; dit zou
schade aan de batterij en storingen, brand of gevaarlijke situaties kunnen ver-
oorzaken.
•
Indien de batterij langere tijd niet gebruikt wordt, is het raadzaam deze, ter voorko-
ming van het risico op lekkage van schadelijke stoffen uit de bufferbatterij, uit het
automatisme te verwijderen en op een droge plaats te bewaren.
Beschrijving en gebruikstoepassing
De bufferbatterij PR1 (Afb.1) mag uitsluitend geïnstalleerd worden in automatise-
ringssystemen voor hekken met besturingskasten MHOUSE; hiermee kan tij-
dens de periode dat het automatisme stroom ontvangt van het electriciteitsnet
energie opgeslagen worden en teruggeven worden wanneer de stroomvoorzie-
ning van het electriciteitsnet wegvalt (bufferfunctie); zonder stroomvoorziening
van het electriciteitsnet kunnen er een tiental bewegingen van het hek uitgevoerd
worden.
Afhankelijk van het type automatisering, zouden de bewegingen bij gebruik van
de bufferbatterij op “lage” snelheid uitgevoerd kunnen worden, ook al zou er
“hoge” snelheid ingesteld zijn.
Installatie
Let op: de installatiewerkzaamheden van de bufferbatterij PR1 dienen uitgevoerd
te worden terwijl de installatie van het electriciteitsnet losgekoppeld is.
•Verwijder afhankelijk van het type automatisering de bescherming die de
steekkoppeling van de batterij afdekt: [A] voor automatisme SL1 (Afb.2); [B]
voor automatismes WU2, WK2, WG2 (Afb.3) of [C] voor automatisme GD2
(Afb.4).
•Plaats de batterij in de daarvoor bestemde ruimte: voor automatisme SL1
(Afb.5); voor automatismes WU2, WK2, WG2 (Afb.6) of voor automatisme
GD2 (Afb.7).
•
Sluit de stekker van de bufferbatterij met de speciale meegeleverd kabel op de
stekker in de besturingskast aan: voor automatisme SL1 (Afb.8); voor automatis-
mes WU2, WK2, WG2 (Afb.9) of voor automatisme GD2 (Afb.10).
Let op: gebruik de smalste stekker aan de kant van de bufferbatterij en de
breedste aan de kant van de besturingskast; bij het insteken van de stekker
behoeft u geen acht te slaan op de polen.
Controle van de werking en eindtest
Onderstaande controles dienen onmiddellijk nadat u de batterij op de bestu-
ringskast hebt aangesloten, uitgevoerd te worden.
•
Controleer of het ledlampje “L2” (Afb.1) brandt, dat daarmee aangeeft dat de bat-
terij de installatie van stroom voorziet. Controleer of de verschillende ledlampjes
op de besturingskast aangeven dat deze correct functioneert.
•Als dit alles niet plaats vindt, is de batterij waarschijnlijk helemaal leeg; voer dan
de volgende stap uit en wacht enige uren terwijl de automatisering door het
electriciteitsnet van spanning wordt voorzien alvorens opnieuw de werking te
controleren.
•Sluit de automatisering op het electriciteitsnet aan en controleer of het ledlam-
pje “L1” (Afb.1) brandt om aan te geven dat de batterij correct bezig is zich op
te laden.
•Voer tenminste één openings-en sluitingsmanoeuvre van de automatisering uit
teneinde te controleren of alles perfect werkt wanneer de automatisering via
het electriciteitsnet van stroom voorzien wordt.
•Koppel de automatisering van het electriciteitsnet los; verifieer dat het ledlam-
pje “L2” (Afb.1) brandt, en voer dan tenminste één openings-en sluitingsma-
noeuvre van de automatisering uit om te controleren of alles ook bij werking op
de batterij perfect functioneert.
N.B.: Afhankelijk van het type automatisering, zouden de bewegingen bij gebruik
van de bufferbatterij op “lage” snelheid uitgevoerd kunnen worden, ook al zou er
“hoge” snelheid ingesteld zijn.
•Sluit nadat u de test beëindigd hebt, de automatisering weer op het electrici-
teitsnet aan.
Onderhoud, vervanging van de accumulatoren, afvalverwerking
De bufferbatterij PR1 vereist geen enkel onderhoud, maar het is goed deze van
de automatisering los te koppen wanneer ze voor langere tijd niet gebruikt wordt
en deze op een droge plaats te bewaren.
Vervanging van de accumulatoren is noodzakelijk wanneer ten gevolge van verou-
dering, de capaciteit aanzienlijk terugloopt. Dit mag alleen door gekwalificeerd
technisch personeel worden uitgevoerd; wend u tot het servicecentrum MHOUSE.
LET OP: de accumulatoren bevatten lood en andere milieuverontreinigende stof-
fen; sommige electronische onderdelen kunnen verontreinigende stoffen bevat-
ten: gooi ze niet met het normale afval weg, maar volg een in de plaatselijk gel-
dende voorschriften voorziene methode.
Technische kenmerken
PR1 wordt vervaardigd door NICE S.p.a. (TV) I, MHOUSE S.r.l. is een onderne-
ming van de groep NICE S.p.a.
Teneinde haar producten steeds beter te maken behoudt NICE S.p.a. zich het
recht voor de technische kenmerken op elk gewenst moment en zonder voor-
bericht te wijzigen, waarbij ze in ieder geval de functionaliteit en gebruiksbe-
stemming zoals die voorzien was, garandeert.
N.B.: alle technische kenmerken hebben betrekking op een temperatuur van
20°C.
Bufferbatterij PR1
N.B.: de prestaties van de loodzwavelaccumulatoren worden beïnvloed door de
gebruikscondities; temperatuur, opgenomen stroom, ladingspercentage en
ouderdom van de accumulator kunnen de hieronder weergegeven gegevens
aanzienlijk doen verschillen.
Typologie: Set batterijen 24V voorzien van batterijlader voor de stroomvoorzie-
ning van automatismes voor hekken en automatische deuren in geval van het
wegvallen van de stroom van het electriciteitsnet.
Toegepaste technologie: Accumulatie van electrische energie met onder-
houdsvrije dichte loodzwavelzuuraccumulatoren.
Spanning opgeladen-ontladen: 28V bij maximale lading; 16V bij maximale ontlading
(de batterij wordt automatisch afgesloten wanneer die helemaal leeg is)
Leverbare stroom: 4A nominaal; 7,5A gedurende 3 seconden, bij het starten
Accumulatievermogen: 1,2Ah, overeenkomend met een capaciteit van onge-
veer 12 uur bij automatisme in stand-by; of 5 minuten met een belasting van 4A
overeenkomend met een gemiddelde van ongeveer 10 manoeuvres.
Totale oplaadduur: 16 uur ongeveer
Levensduur accumulatoren: geschat op 4 ÷ 6 jaar; of ruim 1000 cycli voor
ontlading van 30%, ruim 500 cycli voor ontlading van 50%, ruim 200 cycli voor
ontlading van 100%.
Bedrijfstemperatuur omgeving: -20 ÷ 50°C (de doelmatigheid van de accu-
mulatoren neemt af met het dalen van de temperatuur, bij -10°C is de doelma-
tigheid 30%; de levensduur van de accumulatoren neemt af met het stijgen van
de temperatuur, bij 40°C kan de levensduur teruggebracht zijn tot 2 jaar)
Toepassing in zure, zoute of potentieel explosieve atmosfeer: Nee
Montage en aansluitingen: Inbouw in de speciaal daartoe bestemde ruimte
van de besturingskasten of reductiemotoren. Aansluiting via een speciaal mee-
geleverd kabeltje.
Beschermingsklasse: IP30 (alleen binnen de besturingskasten of reductiemo-
toren of een andere beschermde omgeving).
Afmetingen / gewicht: 104 x 53 h 143mm / 1450g
Bufferbatterij “PR1”
L2L1
Fig. 1
Table of contents
Languages:
