340 Snyder Avenue, Berkeley Heights, NJ 07922
Tech Support: 908-464-1094, 1 pm–5pm ET
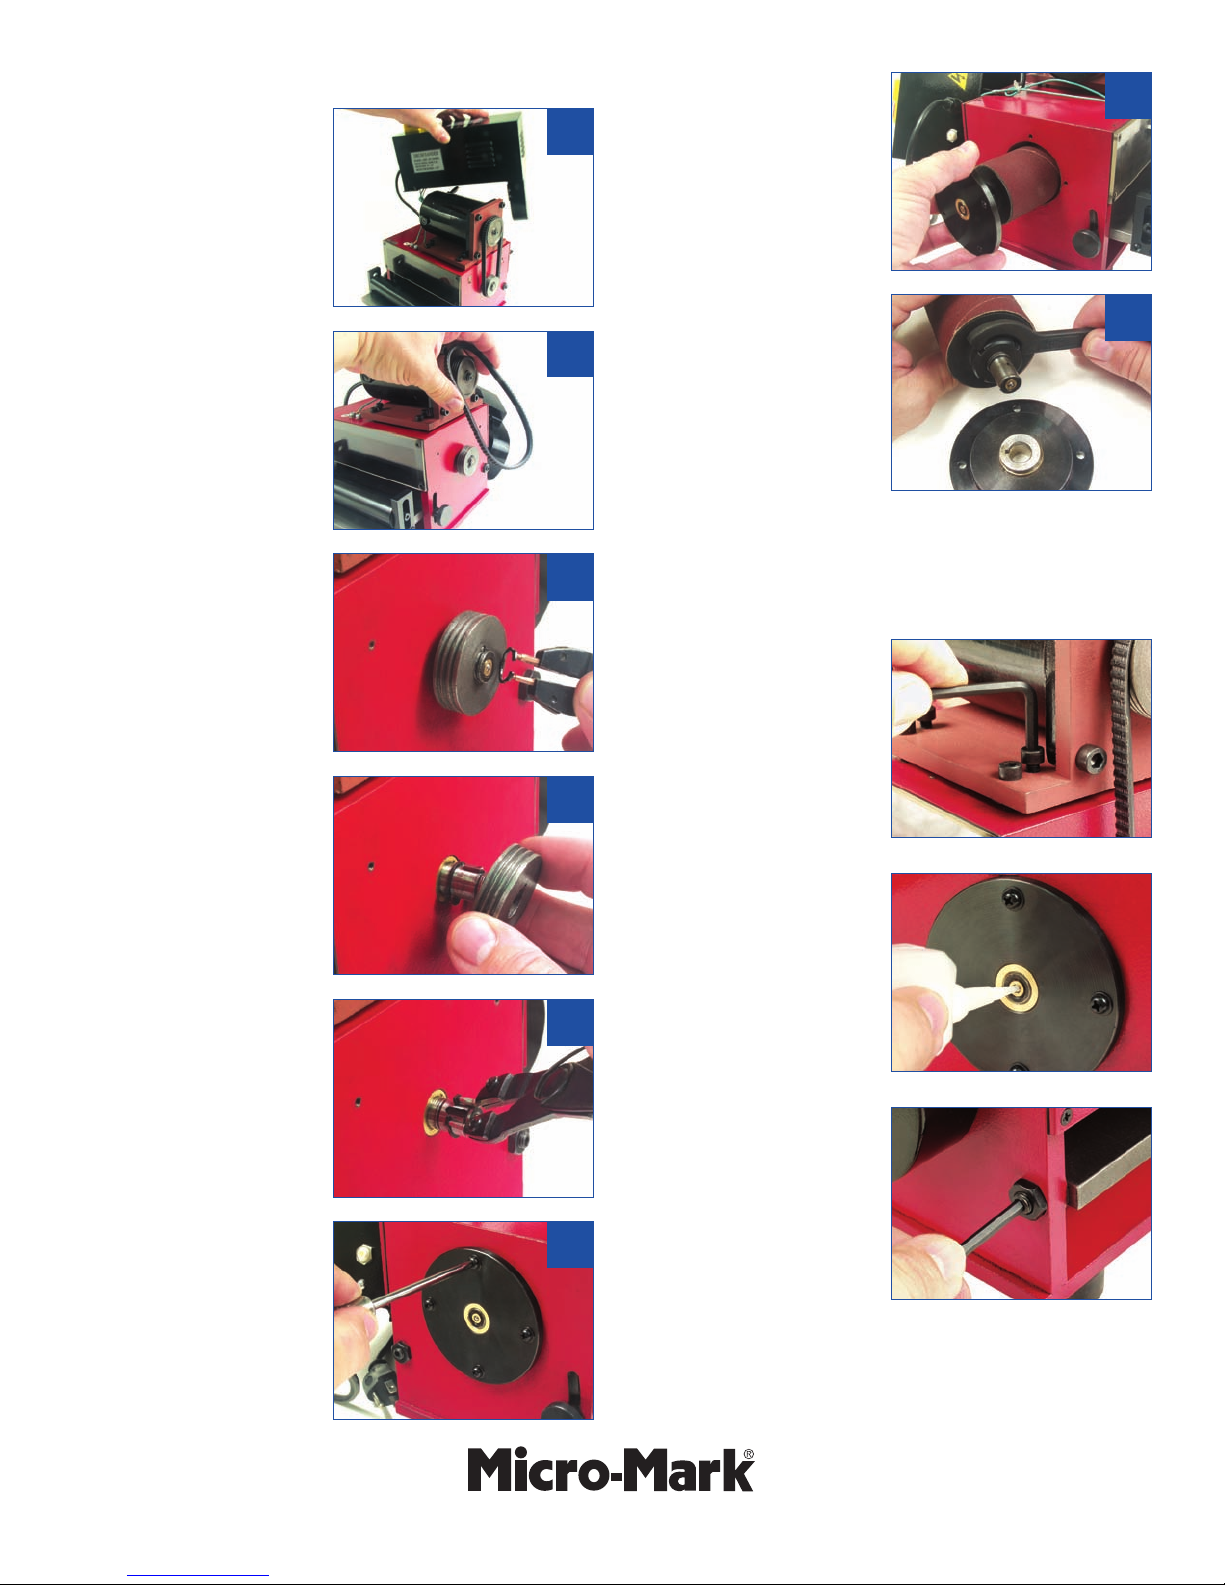
#83507 MICROLUXTM DRUM THICKNESS SANDER INSTRUCTIONS
Before using your Drum
Thickness Sander, install
the heavy steel roller on the
in-feed side of the machine.
To do this, loosen the screws
that hold the roller guide block
to the side of the table; the
screws should be loose
enough so that the block may
be tipped far enough to allow
the roller to be put in place.
Then, tighten the screws and
make sure the roller “floats”
vertically freely. The purpose of
the roller is to hold the wood
sheet in contact with the table
(this is the in-feed side of the
machine).
The hex head screw located
under the table is used to set
the gap between the table and
the sanding drum.
We recommend you use a
scrap piece of the wood you
intend to sand as a gauge to set
the gap. Be sure to tighten the
thumb screws before sanding.
The fitting on the rear of the
sander is used to connect a
standard 1-1/4” hose from your
shop vacuum cleaner.
2
The thumb screws located on
each side of the machine lock
the table in position.
3
4
This label indicates the
direction to feed the wood
sheet.
7
Set the gap so that the drum is
in light contact with your test
piece. Remove the test piece,
then turn on the machine.
Feed the test piece slowly and
steadily into the machine; be
sure to hold the wood down
against the table while doing
so. As the wood progresses
through the sander, use one
hand to continue the in-feed while your other hand reaches
around to pull the wood from the exit side of the machine.
Maintain a constant rate of feed to avoid burning sanding marks
in the surface of the wood.
The Drum Thickness Sander is a table top machine. It is quite
heavy and should stay in place during use; however, be careful
not to use excessive force while using the machine and cause it
to tip over.
Practice with some scrap wood to get the “feel” of the machine.
In a couple of passes, you'll be able to determine the correct gap
and feed rate for the material you are sanding.
Safety Precautions
Warning! The use of this machine may generate dust which
contains chemicals known to the State of California to cause
cancer and birth defects or other reproductive harm. The use
of dust masks, vacuum systems and other devices to eliminate
exposure to this dust is highly recommended. Persons using this
machine or in the vicinity of this machine while in operation
should wear safety glasses at all times.
Warning! This machine contains high-speed rotating parts.
Do not insert your fingers or any other part of your body into the
in-feed side, exit-side or vacuum port of this machine; otherwise,
severe injury could result. This machine is intended for sanding
the surfaces of wood sheets only; we recommend that gloves
are worn when handling wood sheets with a rough texture.
Warning! This machine does not employ a mechanism that
controls the feed rate of the wood sheets being sanded. The
wood sheets are fed into the machine and propelled through the
machine by hand. Please observe the feed direction indicated on
the label located on the side of the machine. Do not release your
grip of the wood sheet or it may be expelled from the machine at
a fast speed, which could cause injury to your person or damage
to nearby equipment.
Unplug the machine from the electrical outlet when not in use.
Always unplug the machine when performing any service, such
as changing the sanding drum sleeve or making adjustments.
8
The ON-OFF switches are
located on the top of the
machine. To turn the machine
on, press the green (I) button.
To turn the machine off, press
the red (O) button.
Instructions for Use
6
1
5