MicroNet SP907N User manual

User’s Manual
802.11N Wireless LAN USB Adapter
Model No.: SP907N
http://www.micronet.info

Table of Contents
Chapter 1 Introduction................................................................................. 1
1.1 Package Contents..........................................................................................1
1.2 Key Features .................................................................................................1
1.3 Safety Information........................................................................................2
1.4 System Requirements....................................................................................2
1.5 Specifications................................................................................................3
Chapter 2 Physical Description .................................................................. 4
2.1 USB Adapter.................................................................................................4
2.1.1 LED Indication....................................................................................................4
2.2 Hardware Installation....................................................................................5
Chapter 3 Drivers Installation & Configuration......................................... 6
3.1 Drivers Installation........................................................................................6
3.2 Connecting to Wireless Access Point...........................................................8
3.2.1 Using Windows Zero Configuration..............................................................11
Chapter 4 Configuration Utility................................................................. 15
4.1 Making Profile for Wireless Connection....................................................15
4.1.1 Setting Profile Manually..................................................................................15
4.1.2 Setting Profile via Site Survey.......................................................................19
4.2 802.1x..........................................................................................................21
4.2.1 Certification ......................................................................................................21
4.2.2 802.1x - CA Server..........................................................................................22
4.3 Network Statistics and Link Status.............................................................23
4.3.1 Network Statistics............................................................................................23
4.3.2 Link Status........................................................................................................24
4.4 Advanced Settings ......................................................................................26
4.5 QoS Settings................................................................................................28
4.6 About...........................................................................................................30
Chapter 5 Troubleshooting ....................................................................... 31
Chapter 6 Glossary.................................................................................... 32

1
Chapter 1 Introduction
Micronet SP907N, 11N Wireless LAN USB Adapter, delivers next generation wireless
solution of high speed and cost-efficient network. It is compliant with IEEE 802.11 Draft-N
and backward compatible with IEEE 802.11b/g. The USB adapter supports MIMO (Multi-In,
Multi-Out) technology, which uses two radio channels to enhance data rate and wireless
coverage. It is the part of the complete package of the new 11N high speed wireless
solution. Ideal installation is for both desktop computer and notebook with USB 2.0/1.1 port.
1.1 Package Contents
Prior to the installation of the device, please verify the following items are in the
package:
ySP907N 11n WLAN USB Adapter
yQuick Installation Guide
yManual CD
1.2 Key Features
y802.11b/g/Draft-N compatible.
yHigh-efficiency antenna that expands the scope of your wireless network.
yQoS function: control the bandwidth required for different applications.
ySupports major encryption methods like WEP, WPA, and WPA2 encryption.
yUSB 2.0 interface for easy installation.
yWireless access control - prevent unauthorized network access to your network
and computer.

2
1.3 Safety Information
In order to keep the safety of users, please read through the following safety
instructions:
yThis USB Adapter is designed for indoor use only.
yDo not put this device at or near hot or humid places. Also, do not leave this
device in the car in summer.
yThe USB Adapter is small enough to put in a child’s mouth, ear, or nose, and it
could cause serious or fatal injury.
yThere’s no user-serviceable part for the device. If users found the device is not
working properly, please contact the authorized dealer of purchase. Do not
disassemble the device, otherwise warranty will be void.
yIf the device falls into water, do not use it again before sending to the dealer of
purchase for inspection.
yIf users smell something strange, or even see some smoke coming out from the
router or power supply, remove the power supply or switch the electrical power off
immediately, and call authorized for help.
1.4 System Requirements
yAn empty USB 2.0 port (USB 1.1 will degrade the performance dramatically).
yWindows 2000, 2003, XP, or Vista operating system.
yCD-ROM drive.
yAt least 100MB of available disk space.

3
1.5 Specifications
Standards IEEE802.11b/ 802.11g / 802.11 Draft-N
Interface USB 2.0/1.1
Frequency Band 2.4000 ~ 2.4835GHz
Data Rate z11b: 1/2/5.5/11Mbps
z11g: 6/9/12/24/36/48/54Mbps
z11n (20MHz): MCS0-15, 32 with Half Guard
Interval Support (up to 144Mbps)
z11n (40MHz): MCS0-15, 32 with Half Guard
Interval Support (up to 300Mbps)
Output Power 16dBm ± 2dBm
Security zWEP 64/128
zWPA & WPA2
zCisco CCX V1.0, 2.0 and 3.0 Compliance
LED Indicators zLink
zActivity
Antenna 2 x Internal Antennas
MIMO Technology 2T2R MIMO Technology
Humidity 10~95% (Non-Condensing)
Temperature 32~131°F (0 ~ 55°C)
Operating System Windows 2000/XP/2003/Vista
Emission FCC, CE
4
Chapter 2 Physical Description
2.1 USB Adapter
2.1.1 LED Indication
LED Light Status Description
On Linked to a wireless access point
Blinking Currently transferring data
Link/
Activity Off Not linked to any wireless access point
5
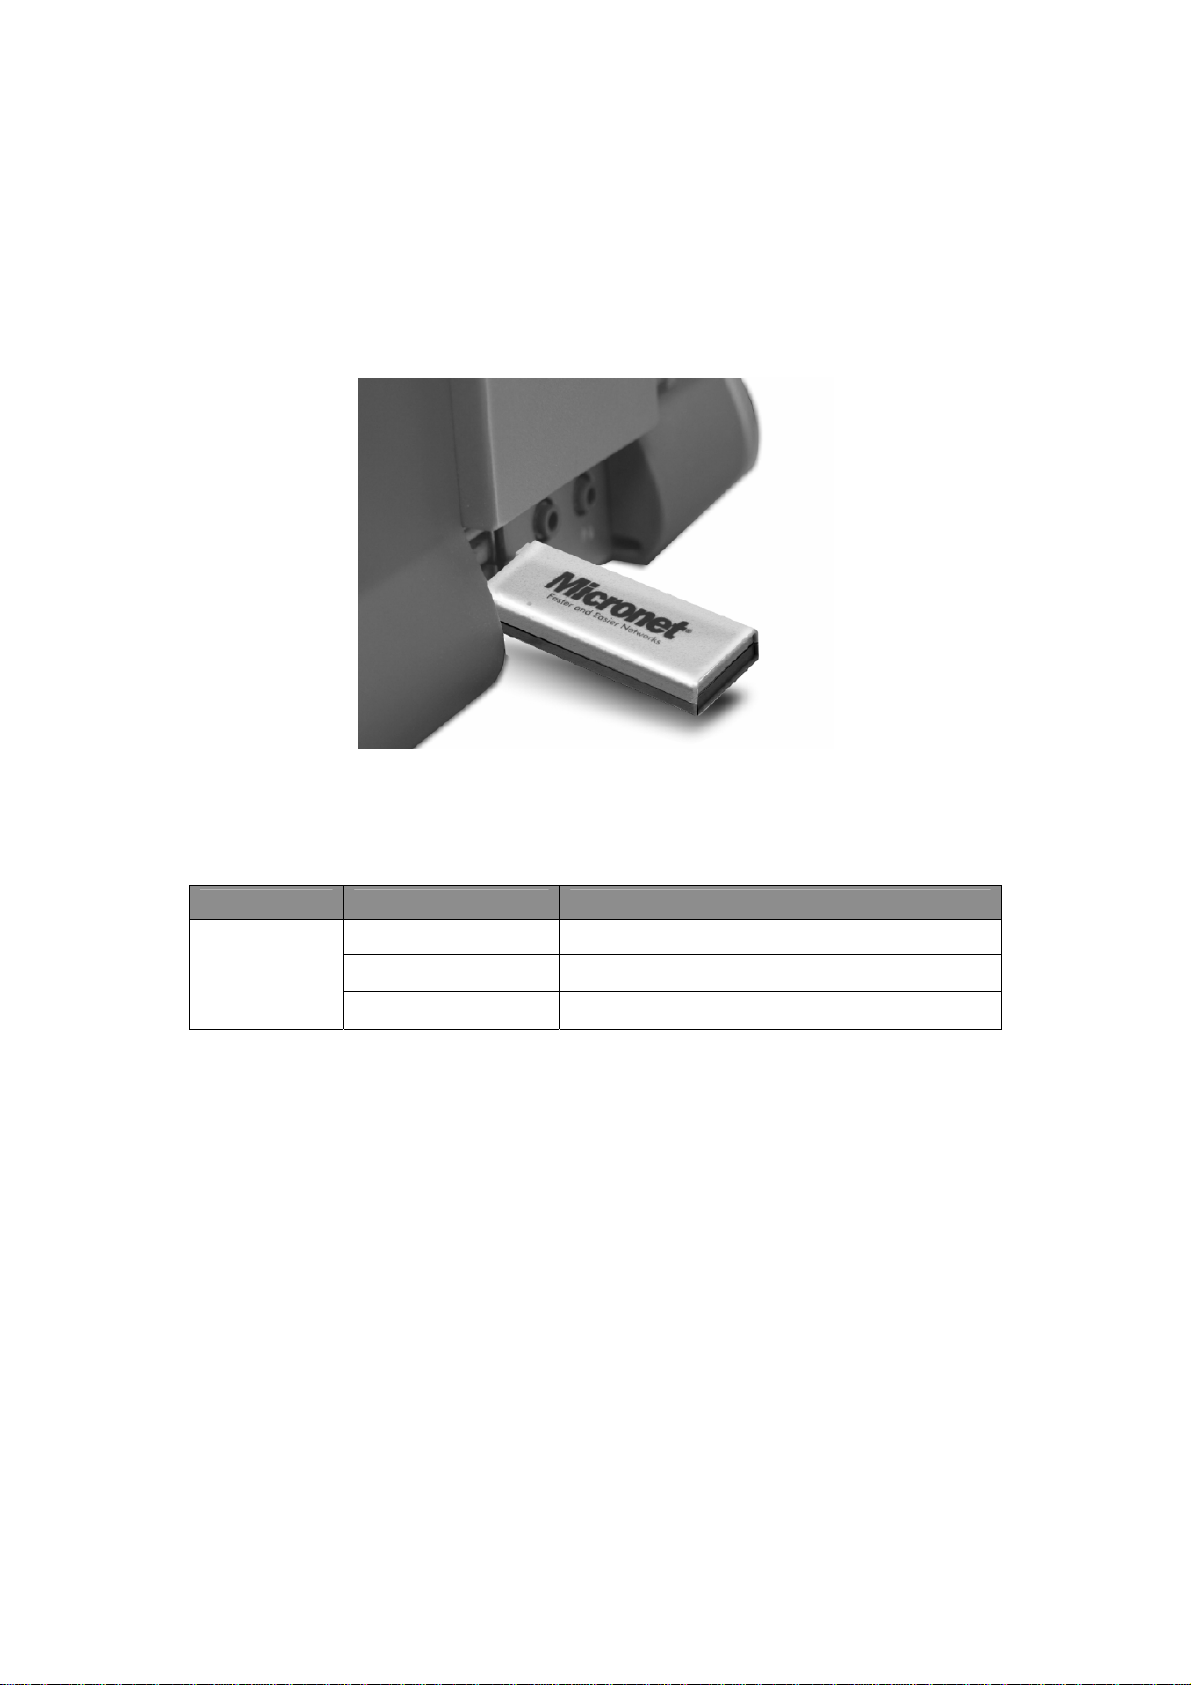
2.2 Hardware Installation
Please insert the wireless network card into an available USB 2.0/1.1 port of the
computer. Users can insert the card when the computer is either powered on or off.
After installing the hardware, the following message will appear. Select ‘Don’t show this
message again for this device’.
6
Chapter 3 Drivers Installation &
Configuration
3.1 Drivers Installation
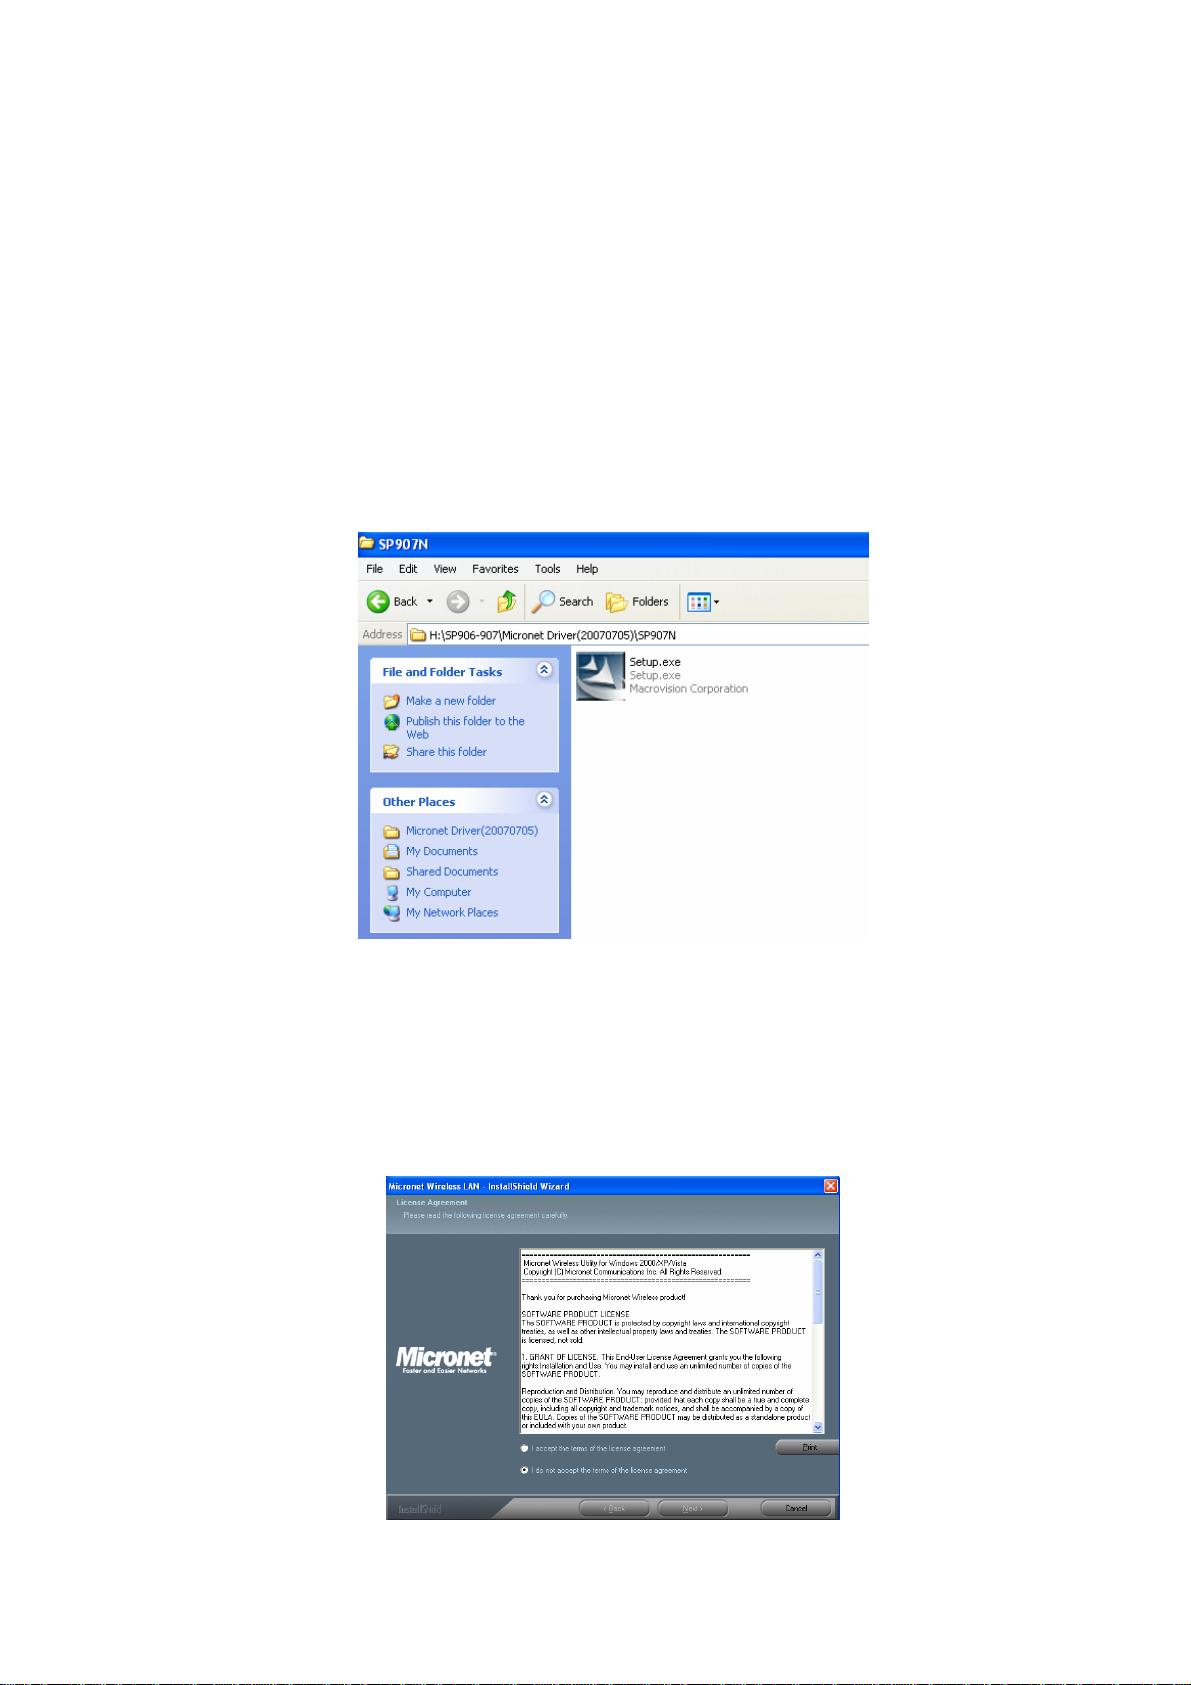
Step 1. Insert device driver CDOM into the CD/DVD ROM drive of the computer, and
execute ‘Setup.exe’ program in ‘Driver’ folder.
Please select ‘Allow’ if Windows indicates that ‘an unidentified program wants access
to your computer’.
Step 2. Please read the end user license agreement and select ‘I agree the terms of
the license agreement’ and click on <Next> to proceed.

7
Step 3. Please select ‘Optimize for WiFi mode’ for wireless compatibility, then click
<Next>. To enhance wireless performance, please select ‘Optimize for performance
mode’. However, in this mode, the wireless compatibility will not be guaranteed. If
users want to use this mode, it may not be able to communicate with older wireless
devices and wireless access point, such as 802.11b devices. However, the data
transfer rate will be enhanced in this mode. Users can select this mode when only
communicating with 802.11 Draft-N devices.
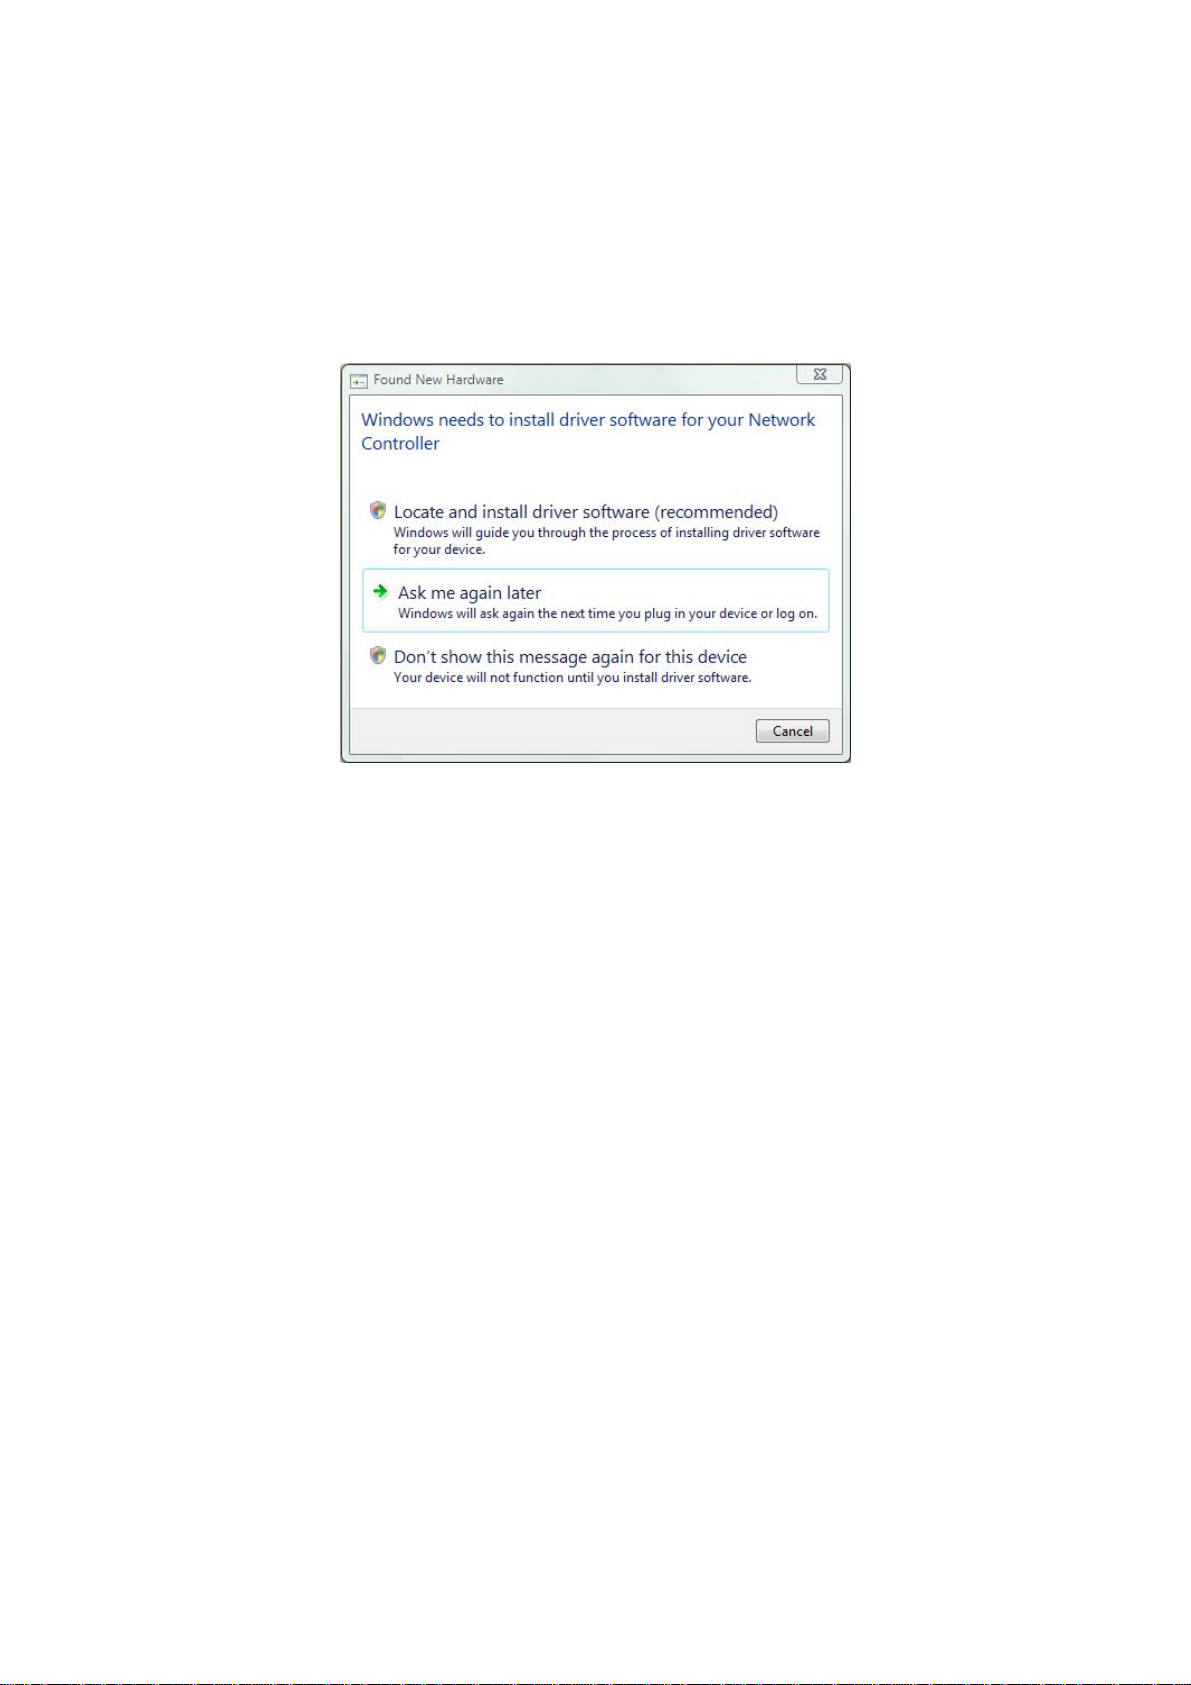
Step 4. Click <Install> to initiate the driver installation process.
If the ‘Found New Hardware’ message appears, please ignore and wait for the installation
to complete.

8
3.2 Connecting to Wireless Access Point
After installation is complete, wireless configuration utility will be shown as an icon at
the lower-right corner of the windows desktop. There are two ways users can configure
the wireless network card to connect to wireless access point: either using the
configuration utility, which comes with wireless card driver, or using built-in Windows
Zero Configuration utility. Click on the icon using right mouse key and select <Launch
Config Utilities>. To exit the utility, select <Exit>.
Step 1. Configuration utility will scan for available wireless access points automatically.
Please select an access point to connect and click <Connect>. If the preferred
wireless access point does not display, please click <Rescan> to try again. Users may
have to click <Rescan> for more than two times before the access point will show up.
Parameter Description
SSID The Service Set Identifier of wireless access point or other
network device. Users can think it as the name of access
point.
Table of contents
Other MicroNet Adapter manuals

MicroNet
MicroNet SP907NS User manual

MicroNet
MicroNet SP907G User manual

MicroNet
MicroNet EtherFast 100Mbps Fiber-Optic Adapter SP2515... User manual

MicroNet
MicroNet M807GP User manual

MicroNet
MicroNet SP907NL User manual

MicroNet
MicroNet SP907GK User manual

MicroNet
MicroNet SP906GL User manual

MicroNet
MicroNet SP907BB User manual

MicroNet
MicroNet SP907NP User manual

MicroNet
MicroNet SP170 User manual


