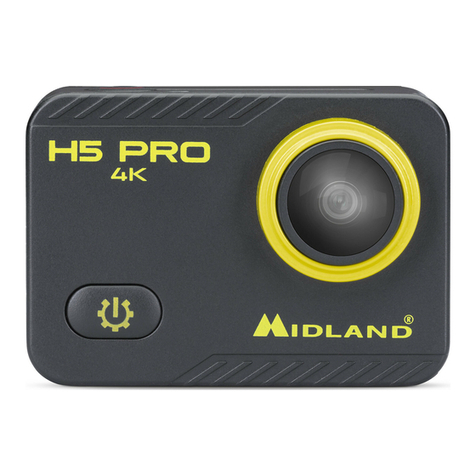
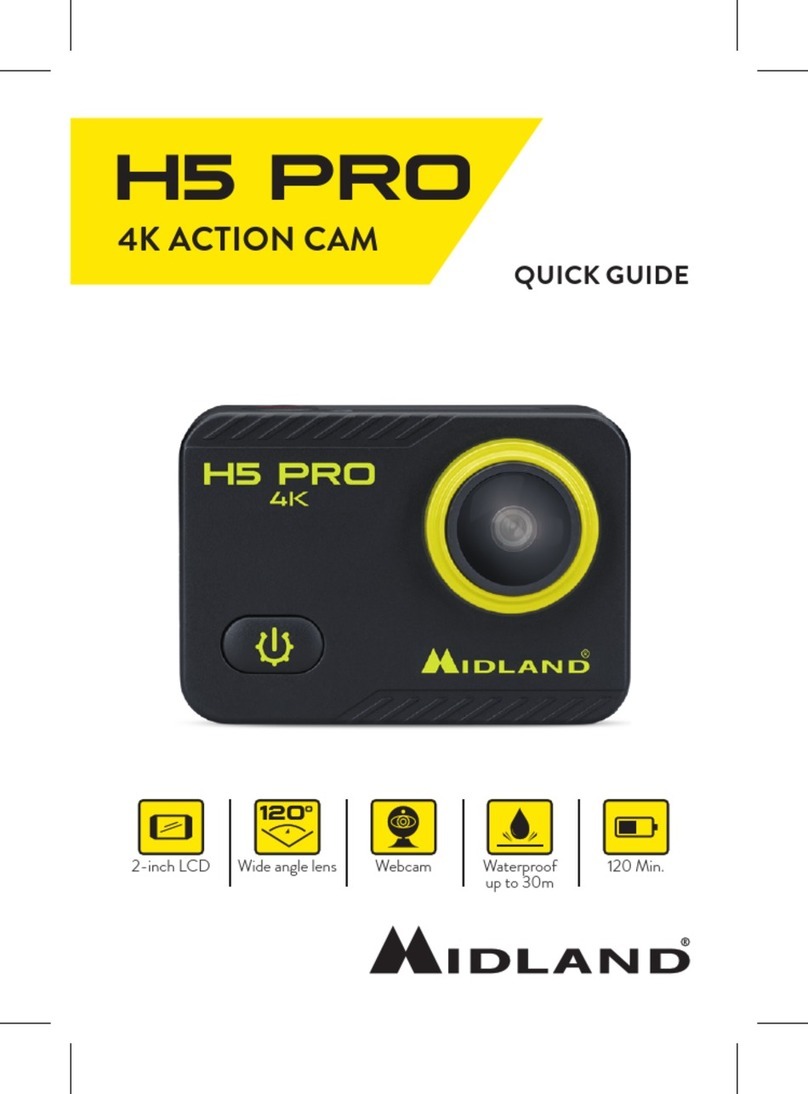
Midland H5 PRO User manual

Webcam2-inch LCD Wide angle lens Waterproof
up to 30m 120 Min.
ISTRUZIONI
INSTRUCTIONS
ANLEITUNG
MANUAL DE L’USUARIO
MANUEL D’UTILISATION
INSTRUKCJA OBSŁUGI
ΟΔΗΓΙΕΣ ΧΡΗΣΗΣ
4K ACTION CAM

1
ITALIANO
FREQUENZA POTENZA
2.4 GHz 11.22mW +- 1.41mW
CONTENUTO DELLA CONFEZIONE
1. Videocamera
2. Custodia waterproof 30m
3. Supporto manubrio
4. Pacco batteria Li-Ion
1050mAh
5. Aggancio rapido (x2)
6. Aggancio a vite
7. Supporto a 90° (x2)
8. Aggancio con vite fotografica
9. Supporto 180°
10. Supporto base piatta (x2)
11. Cavo USB
12. Fascette
13. Fascette di fissaggio
14. Fascetta in metallo
15. Pannetto per pulizia
1
2
5
4
6
8
3
9
7
14
15
10
11
12 13
L’apparato è di libero uso in tutti i paesi europei.
The equipment is free use in all UE countries.
Dieses Produkt kann in allen EU-Ländern verwendet werden.
El producto es de libre uso en todos los países de la UE.
Ce produit est libre d’utilisation dans tous les pays membre de l’UE.
Produkt dopuszczony do użytku we wszystkich państwach UE.
Το προϊόν και είναι ελεύθερη η χρήση του σε όλες τις χώρες της Ε.Ε.
O equipamento e de utilizacao livre em todos os paises da UE.

2 3
PER INIZIARE
Accensione: Premete il tasto Accensione/Modalità.
Spegnimento: Tenete premuto il tasto Accensione/Modalità.
Attivazione microfono: tenete premuto il tasto DOWN.
Disattivazione microfono: tenete premuto il tasto DOWN.
IMPOSTAZIONI GENERALI
Accendete la videocamera e premete ripetutamente il tasto
Accensione/Modalità per scorrere le varie funzioni.
Troverete:
Tenere premuto il tasto Scatto/Menu/Selezione per accedere al menu.
SCHERMATA PRINCIPALE MENU
1. Modo d’uso: personalizza le modalità Foto/Video.
2. Riproduci: riproduce foto/video.
HDMI/OUT
Presa di ricarica/dati
Tasto
Scatto/Menu/Selezione
LED WI-FI
WI-FI/MENU UP
Schermo
MIC MUTE/
MENU DOWN
Tasto accensione/modalità
Lente
Microfono
Alloggiamento
Memory Card
Altoparlante
Led stato
Led ricarica
DESCRIZIONE DEI TASTI
Seleziona modalità
Video Slow Ciclica Lapse
Foto Lapse
Sequenza
Timer
1
3
2
4

4 5
3. Impostazioni: regola le impostazioni della videocamera.
4. Ritorno: esce dal menu.
SELEZIONA MODALITÀ
Video Registrazione video
Slow Slow motion
Ciclica Abilita la sovrascrittura
a memoria piena
Lapse Registra video in modalità Time Lapse
Foto Scatta una singola fotografia
Lapse Scatta una serie di foto ad intervalli
di tempo prestabiliti
Sequenza Sequenza foto
Timer Timer autoscatto
FUNZIONAMENTO TASTI FRECCE
[Pressione lunga: abilita Wi-Fi
]Pressione lunga: attiva/disattiva il microfono
IMPOSTAZIONI SETTINGS
Modalità di navigazione menu
Per accedere alle impostazioni premere a lungo il tasto Scatto, scorrere
con i tasti UP/DOWN fino a selezionare
Seleziona modalità
Video Slow Ciclica Lapse
Foto Lapse
Sequenza
Timer
.
Utilizzare i tasti UP/DOWN per scorrere le impostazioni in questa
sezione del menu.
Utilizzare il tasto Accensione per spostarsi in questa sezione del menu:
Seleziona modalità
Video Slow Ciclica Lapse
Foto Lapse
Sequenza
Timer
Video
Resolution 4K30FPS
White
Balance Auto
EIS Turn Off
Image
Rotation
Wi-Fi
Information
Wi-Fi Turn Off
Turn Off

6 7
Successivamente premere di nuovo il tasto Scatto per selezionare
l’opzione desiderata.
Impostazioni video
H5 PRO deve essere impostata in modalità video.
• Risoluzione video
4K@30fps, 2.7K@30fps, 1080p@60fps, 720p@60/120fps
Micro SD 4K 30 2.7K 30 1080p 60 720p 60
32GB 80 min 120 min 60 min 120 min
60 GB 160 min 240 min 120 min 240 min
• Stabilizzatore d’immagine (EIS): on/o
• Bilanciamento del bianco (per regolare la luminosità in base alle
condizioni di utilizzo): automatico/soleggiato/nuvoloso/luce incan-
descente/luce fluorescente
• Esposizione (regola la luminosità del video): -3……+3 (i numeri
negativi rendono il video più scuro, i numeri positivi lo rendono
più chiaro)
• Metering (regola la messa a fuoco):
Migliore: fuoco bilanciato
Al centro: messa a fuoco nella parte centrale
Punto: messa a fuoco sul punto centrale
Esteso: fuoco esteso a tutto lo schermo
• Nitidezza: alta/media/bassa
• ISO (regola la sensibilità alla luce): maggiore è il valore, maggiore
è la sensibilità
• Sovrimpressione data (imprime la data sul video)
• Registra audio (attiva/disattiva il microfono)
Impostazioni videocamera
• Rotazione immagine (se attiva, capovolge il video che si registra)
• Wi-Fi (consente di collegare la action camera a smartphone
tramite APP)
• Informazioni Wi-Fi (viene visualizzato il nome della rete Wi-Fi e la
password per accedere)
• Ripristinare Wi-Fi? (ripristina il Wi-Fi alle impostazioni di fabbrica)
• Indicatore led (attiva/disattiva il led di stato)
• Screensaver automatico (Imposta o disattiva il tempo oltre il quale
lo schermo si spegne automaticamente)
• Spegnimento automatico (imposta o disattiva il tempo oltre il quale
H5 PRO si spegne automaticamente se non in uso)
• Suono tasti (attiva/disattiva il beep alla pressione dei tasti)
• Lingua (seleziona la lingua del menu)
• Formato orario (modifica il formato della data)
• Imposta ora (regola l’orario della videocamera)
• Imposta data (regolazione data della action camera)
• Formatta (cancella tutti i dati dalla scheda di memoria)
• Informazioni sul dispositivo (visualizza informazioni sul modello,
software e data dell’ultimo aggiornamento software)
• Reset impostazioni (riporta la videocamera alle impostazioni di
fabbrica)
Impostazioni foto
H5 PRO deve essere impostata in modalità Foto.
• Risoluzione foto: 16M – 13M
• Bilanciamento del bianco
• Esposizione
• Metering
• Nitidezza
• ISO
• Sovraimpressione data
UTILIZZO SU PC
Collegare H5 PRO al PC e selezionare la modalità desiderata.
• Ricarica
• Archiviazione di massa (la videocamera viene riconosciuta come
memoria esterna ed è possibile accedere ai file contenuti nella
memory card)
• Modalità telecamera (permette di utilizzare H5 PRO come
webcam. Non necessita di installazione driver)
8 9
APP VIDEOCAMERA
Collegamento alla APP “DV KING 4K”
L’applicazione DV KING 4K permette di controllare la videocamera a
distanza utilizzando uno smartphone o un tablet.
Le caratteristiche permettono il controllo della videocamera, di vedere in
diretta, riprodurre e condividere le foto/filmati selezionati.
1. Scaricare la APP DV KING 4K sul vostro smartphone o tablet presso
lo store Apple o Google Play, o in alternativa è possibile scaricarla da
www.midlandeurope.com nella sezione Supporto Prodotto.
2. Accendere la videocamera premendo il tasto Accensione/Modalità.
3. Per attivare il Wi-Fi premere a lungo il tasto UP*
4. Nelle impostazioni Wi-Fi del vostro smartphone o tablet, collegarsi
alla rete “Midland H5 PRO” seguita da una serie di numeri. Digitare la
password mostrato sul display della videocamera.
5. Aprire la APP DV KING 4K sul vostro smartphone o tablet.
* Premerlo di nuovo per spegnere il Wi-Fi.
COMPATIBILITÀ
La compatibilità può variare a seconda del dispositivo.
La riproduzione, la condivisione e l’accesso alla memory card della video-
camera possono non essere disponibili su alcuni dispositivi.
GARANZIA
Per informazioni sulla garanzia visitate il sito www.midlandeurope.com
CARATTERISTICHE TECNICHE
• Video: 4K@30fps, 2.7K@30fps, 1080p@60fps,
720@60/120fps formato MOV
• Foto: 16-13 MP formato jpg
• Lente: grandangolo 120°
• Connessione Wi-Fi
• Frequenza: 2.4GHz
• Potenza: 11.22mW ± 1.41mW
• Resistente all’acqua fino a 30mt di profondità con la custodia in
dotazione
• Display LCD a colori 2”
• Microfono/altoparlante incorporati
• Modalità operative: Video/Foto/Time Lapse/Riproduzione/
Webcam
• Menu multilingua: EN/IT/ES/PT/DE/DU/FR/RU/PL/TR/CZ/JP/
FIN/DK/SW/NW/HU/SL/GR
• Connessioni: USB 2.0 & micro HDMI
• Autonomia: fino a 120min in 1080P con Wi-Fi disattivato
• Memoria: supporta Micro SD classe 10 U3 fino a 128GB
• Batteria: Li-Ion 1050mAh
• Dimensioni: 41x59x23mm
• Peso: 58gr (batteria inclusa)
Le specifiche sono soggette a modifiche senza preavviso.

10 11
ENGLISH
FREQUENCY POWER
2.4 GHz 11.22mW +- 1.41mW
IN THE BOX
1. Camera
2. Waterproof case 30m
3. Handlebar mount
4. Li-Ion battery pack 1050mAh
5. Quick release mount (x2)
6. Tripod mount
7. 90° mount (x2)
8. Standard photo mount
9. 180° mount
10. Flat mount (x2)
11. USB cable
12. Bandages
13. Tethers
14. Metal tether
15. Lens cloth
1
2
5
4
6
8
3
9
7
14
15
10
11
12 13

12 13
HDMI/OUT
Charging/data port
Shutter/Menu/Selection
button
WIFI LED
WI-FI/MENU UP
Screen
Power/Mode button
Lens
Microphone
Micro SD slot
Speaker
Status indicator led
Charging status led
CONTROL DESCRIPTION GETTING STARTED
To power on: Press the Power/Mode button.
To power o: Keep pressed the Power/Mode button.
Microphone activation: keep pressed the DOWN button.
Microphone deactivation: keep pressed the DOWN button.
OVERVIEW
Turn on the camera and repeatedly press the the Power/Mode button
to browse through the camera functions and settings.
It will be displayed:
Keep pressed the Shutter/Menu/Selection button to enter the menu.
MAIN MENU SCREENSHOT
1. Adjust: to customize Photo/Video mode.
2. Play: play photos/videos.
Seleziona modalità
Video Slow Ciclica Lapse
Foto Lapse
Sequenza
Timer
1
3
2
4
MIC MUTE/
MENU DOWN

14 15
3. Settings: to adjust the camera settings.
4. Go back: to exit the menu.
MODE SELECTION
Video Records videos
Slow Slow motion
Loop Overwrites when the memory is full
Lapse Records videos in Time Lapse mode
Photo Captures a single photo
Lapse Shoots a series of photos at set time
intervals
Burst Captures photo bursts
Timer Self-timer
Mode selection
Video Slow Loop Lapse
Foto Lapse
Burst
Timer
UP/DOWN CONTROLS
[Long press: enables Wi-Fi
]Long press: enables/disables the microphone
SETTINGS
Scroll through the main menu
Long press on the Shutter key to scroll through the settings, then use
UP/DOWN till select
Seleziona modalità
Video Slow Ciclica Lapse
Foto Lapse
Sequenza
Timer
.
Scroll through the settings in this section of menu with the UP/DOWN
buttons.
Press the Power/Mode to scroll through the options.
Then, press the Shutter button again to select the desired option.
Video
Resolution 4K30FPS
White
Balance Auto
EIS Turn Off
Image
Rotation
Wi-Fi
Information
Wi-Fi Turn Off
Turn Off

16 17
Video settings
H5 PRO must be set in Video mode.
• Video resolution
4K@30fps, 2.7K@30fps, 1080p@60fps, 720p@60/120fps
Micro SD 4K 30 2.7K 30 1080p 60 720p 60
32GB 80 min 120 min 60 min 120 min
60 GB 160 min 240 min 120 min 240 min
• Image stabilizer (EIS): on/o
• White balance (to adjust the brightness according to the concrete
lighting conditions): auto/sunny/cloudy/Incandescent/fluorescent
• Exposure (to adjust the video brightness): -3……+3 (negative
numbers mean a darker video, while positive numbers mean a
lighter video)
• Metering (focusing selection):
Average metering
Central metering
Spot metering: focus on the central spot
Matrix metering: focusing on the whole screen
• Sharpness: high/middle/low
• ISO (light sensitivity adjustment): the higher the value, the higher
the sensitivity)
• Date stamp (date on the video)
• Record audio (activates/deactivates the microphone)
Camera settings
• Image rotation (when it is enabled, it flips the video which is being
recorded)
• Wi-Fi (to connect the camera to a smartphone through the APP)
• Wi-Fi information (the Wi-Fi net and the password are shown)
• Do you want to reset Wi-Fi? (to reset Wi-Fi to factory settings)
• Led indicator (activates/deactivates the status led)
• Auto screensaver (sets or deactivates the time after that the
screen automatically turns o)
• Auto power o (sets or deactivates the time after that the camera
automatically turns o if not in use)
• Buttons beep (activates/deactivates the beep at the pressure of
any keys)
• Language (selects the menu language)
• Time format (to change the data format)
• Time set (to adjust the time)
• Date set (to adjust the date)
• Format (to erase all data on the memory card)
• Device info (to display the info about model, software and date of
the latest software upgrading)
• Factory reset (to reset the camera to factory settings)
Photo settings
H5 PRO must be set in Photo mode.
• Photo resolution: 16M – 13M
• White balance
• Exposure
• Metering
• Sharpness
• ISO
• Date stamp
USING H5 PRO WITH A PC
Connect H5 PRO to a PC and select the desired mode.
• Recharge
• Mass storage (the camera is recognized as an external memory and
it is possible to access the files contained on the memory card)
• Camera mode (it allows to use H5 PRO as webcam. It does not
require the driver installation)

18 19
CAMERA APP
Connecting to the APP “DV KING 4K”
The “DV KING 4K” APP allows to control the camera remotly using a
smartphone or a tablet.
The features include the camera control, the live preview, the playback
and sharing of photos and videos.
1. Download the “DV KING 4K” APP on your smartphone or tablet
from Apple Store or Google Play, or in alternative, from
www.midlandeurope.com in the Product Support section.
2. Turn on the camera by pressing the Power/Mode button.
3. To enable the Wi-Fi keep pressed the UP* key
4. In the Wi-Fi settings of your smartphone or tablet, connect to the
network “Midland H5 PRO” followed by a series of numbers. Edit
the password shown on the display of the camera.
5. Open the APP “DV KING 4K” from your smartphone or tablet.
* Briefly push it to turn o the Wi-Fi.
COMPATIBILITY
Compatibility may vary by device.
Playback, sharing and access to the camera’s memory card might not be
available on some devices.
WARRANTY
For information about the warranty please visit www.midlandeurope.com
TECHNICAL SPECIFICATIONS
• Video: 4K@30fps, 2.7K@30fps, 1080p@60fps,
720@60/120fps MOV format
• Photo: 16-13 MP jpg format
• Wide angle lens 120°
• Wi-Fi connection
• Frequency: 2.4GHz
• Power: 11.22mW ± 1.41mW
• Waterproof up to 30m of depth with the supplied waterproof case
• Colour LCD display 2”
• Built-in speaker and microphone
• Operating modes: Video/Photo/Time Lapse/Playback/Webcam
• Multi-language menu : EN/IT/ES/PT/DE/DU/FR/RU/PL/TR/CZ/
JP/FIN/DK/SW/NW/HU/SL/GR
• Connections: USB 2.0 & micro HDMI
• Battery life: up to 120min in 1080P with Wi-Fi o
• Memory: supports Micro SD class 10 U3 up to 128GB
• Battery: Li-Ion 1050mAh
• Dimensions: 41x59x23mm
• Weight: 58gr (w/out battery)
Specifications are subject to change without notice.

20 21
1
2
5
4
6
8
3
9
7
14
15
10
11
12 13
DEUTSCH
FREQUENZ POWER
2.4 GHz 11.22mW +- 1.41mW
LIEFERUMFANG
1. Kamera
2. Wasserdichtes Gehäuse 30m
3. Lenkerhalterung
4. Akku 1050mAh
5. Schnellhalterung (x2)
6. Stativhalterung
7. 90° Halterung (x2)
8. Standard Fotohalterung
9. 180° Halterung
10. Flache Halterung (x2)
11. USB Kabel
12. Kabelbinder
13. Kletthalterung
14. Metallkabel
15. Linsentuch

22 23
HDMI/OUT
Laden/Daten Buchse
Auslöser/Menü/Auswahl
WLAN LED
WLAN
Bildschirm
Mikro
stumm
Power/Modus Taste
Linse
Mikrofon
Micro SD
Lautsprecher
Status LED
Ladestatus LED
BEDIENELEMENTE ERSTE SCHRITTE
Zum Einschalten: Drücken Sie die Power/Mode-Taste.
Ausschalten: Halten Sie die Power-/Modus-Taste gedrückt.
Aktivierung des Mikrofons: Halten Sie die DOWN-Taste gedrückt.
Deaktivierung des Mikrofons: Halten Sie die DOWN-Taste gedrückt.
ÜBERSICHT
Schalten Sie die Kamera ein und drücken Sie wiederholt die Power-/
Modus-Taste, um durch die Funktionen und Einstellungen der Kamera
zu blättern. Es wird folgendes angezeigt:
Halten Sie die Auswahltaste gedrückt, um ein Untermenü aufzurufen.
HAUPTMENÜ
1. Anpassen: zum Anpassen des Foto-/Videomodus.
2. Wiedergabe: zur Wiedergabe von Fotos/Videos.
Seleziona modalità
Video Slow Ciclica Lapse
Foto Lapse
Sequenza
Timer
1
3
2
4

24 25
3. Einstellungen: zum Anpassen der Kameraeinstellungen.
4. Zurück: zum Verlassen des Menüs.
MODUS AUSWAHL
Video Videos aufnehmen
Slow Slow Motion Videos
Schleife Überschreiben, wenn Speicher voll
Lapse Zeitraer-Videos
Photo Aufnahme eines einzelnen Fotos
Lapse Nimmt mehrere Fotos in einem
bestimmten Zeitinterval auf
Serienbild Serienfotos
Timer Selbstauslöser
Mode selection
Video Slow Loop Lapse
Foto Lapse
Burst
Timer
AUF/AB TASTEN SEITLICH
[Lange drücken: aktiviert WLAN
]Lange drücken: stummschalten des Mikrofons
EINSTELLUNGEN
Halten Sie den AUSLÖSER gedrückt, um in das Hauptmenü zu gelangen
und scrollen Sie dann mit UP/DOWN zu den Einstellungen
Seleziona modalità
Video Slow Ciclica Lapse
Foto Lapse
Sequenza
Timer
.
Drücken Sie die Power/Mode Taste, um eine Option auszuwählen.
Drücken Sie dann erneut den AUSLÖSER, um die Wahl zu bestätigen.
Video
Resolution 4K30FPS
White
Balance Auto
EIS Turn Off
Image
Rotation
Wi-Fi
Information
Wi-Fi Turn Off
Turn Off

26 27
Video Einstellungen
Die H5 PRO muss sich zur Änderung im Video Modus befinden.
• Video Auflösung
4K@30fps, 2.7K@30fps, 1080p@60fps, 720p@60/120fps
Micro SD 4K 30 2.7K 30 1080p 60 720p 60
32GB 80 min 120 min 60 min 120 min
60 GB 160 min 240 min 120 min 240 min
• Bild Stabilisierung (EIS): ein/aus
• Weißabgleich (zum Anpassen der Helligkeit an die konkreten
Lichtverhältnisse): Auto/Sonnig/Bewölkt / Natürliches Licht /
Künstliches Licht
• Belichtung (zum Einstellen der Videohelligkeit): -3......+3 (negative
Zahlen bedeuten ein dunkleres Video, während positive Zahlen ein
helleres Video bedeuten)
• Messmodus (Auswahl der Fokussierung):
Mittlere Belichtungsmessung
Zentrale Belichtungsmessung
Spotmessung: Fokussierung auf den zentralen Punkt
Matrixmessung: Fokussierung auf den gesamten Bildschirm
• Schärfe: hoch/mittel/niedrig
• ISO (Lichtempfindlichkeitseinstellung): je höher der Wert, desto
höher die Empfindlichkeit)
• Datumsstempel (Datum auf dem Video)
• Rec Audio (aktiviert/deaktiviert das Mikrofon)
Kamera Einstellungen
• Bilddrehung (wenn diese Funktion aktiviert ist, wird das auf-
gezeichnete Video gespiegelt)
• WLAN (zum Verbinden der Kamera mit einem Smartphone über
die APP)
• WLAN-Informationen (das WLAN-Netz und das Passwort
werden angezeigt)
• Möchten Sie WLAN zurücksetzen? (um WLAN auf die Werksein-
stellungen zurückzusetzen)
• Led-Anzeige (zum Aktivieren/Deaktivieren der Status-LED)
• Automatischer Bildschirmschoner (zum Einstellen oder
Deaktivieren der Zeit, nach der sich der Bildschirm automatisch
ausschaltet)
• Automatisches Ausschalten (legt die Zeit fest, nach der sich die
Kamera automatisch ausschaltet, wenn sie nicht benutzt wird, oder
deaktiviert sie)
• Tastenton (aktiviert/deaktiviert das Tonsignal beim Drücken einer
beliebigen Taste)
• Sprache (wählt die Menüsprache aus)
• Zeitformat (zum Ändern des Datenformats)
• Zeit einstellen (zum Einstellen der Uhrzeit)
• Datum einstellen (zum Einstellen des Datums)
• Formatieren (um alle Daten auf der Speicherkarte zu löschen)
• Geräteinfo (zum Anzeigen der Informationen über Modell, Soft-
ware und Datum der letzten Softwareaktualisierung)
• Werksreset (zum Zurücksetzen der Kamera auf die Werkseinstel-
lungen)
Foto Einstellungen
Die H5 PRO muss sich für Änderungen im Foto Modus befinden.
• Fotoauflösung: 16M - 13M
• Weißabgleich
• Belichtung
• Belichtungsmessung
• Schärfe
• ISO
• Datumsstempel

28 29
VERWENDUNG DER H5 PRO MIT EINEM PC
Schließen Sie den H5 PRO an einen PC an und wählen Sie den
gewünschten Modus.
• Aufladen
• Massenspeicher (die Kamera wird als externer Speicher erkannt
und es ist möglich, auf die auf der Speicherkarte enthaltenen
Dateien zuzugreifen)
• Kameramodus (ermöglicht die Verwendung des H5 PRO als
Webcam. Es ist keine Treiberinstallation erforderlich)
KAMERA APP
Verbinden mit der APP “DV KING 4K”
Die “DV KING 4K” APP ermöglicht die Fernsteuerung der Kamera über
ein Smartphone oder ein Tablet.
Zu den Funktionen gehören die Kamerasteuerung, die Live-Vorschau, die
Wiedergabe und das Teilen von Fotos und Videos.
1. Laden Sie die “DV KING 4K” APP auf Ihr Smartphone oder Tab-
let aus dem Apple Store oder Google Play herunter, oder alterna-
tiv von www.midlandeurope.com im Bereich Produktsupport.
2. Schalten Sie die Kamera ein, indem Sie die Power/Modus-Taste
drücken.
3. Um das WLAN zu aktivieren, halten Sie die UP*-Taste gedrückt
4. Verbinden Sie sich in den WLAN-Einstellungen Ihres Smart-
phones oder Tablets mit dem Netzwerk “Midland H5 PRO”,
gefolgt von einer Reihe von Zahlen. Bearbeiten Sie das Passwort,
das auf dem Display der Kamera angezeigt wird.
5. Önen Sie die APP “DV KING 4K” auf Ihrem Smartphone
oder Tablet.
* Drücken Sie kurz darauf, um das Wi-Fi auszuschalten.
KOMPATIBILITÄT
Die Kompatibilität kann je nach Gerät variieren.
Die Wiedergabe, die gemeinsame Nutzung und der Zugri auf die
Speicherkarte der Kamera sind auf einigen Geräten möglicherweise nicht
möglich.
GARANTIE
Informationen über die Garantie finden Sie unter www.midlandeurope.com.
TECHNISCHE DATEN
• Video: 4K@30fps, 2.7K@30fps, 1080p@60fps,
720@60/120fps MOV-Format
• Foto: 16-13 Mega Pixel, jpg-Format
• Weitwinkelobjektiv 120°
• WLAN-Verbindung
• Frequenz: 2.4GHz
• Leistung: 11,22mW ± 1,41mW
• Wasserdicht bis zu 30 m Tiefe mit dem mitgelieferten wasserdi-
chten Gehäuse
• Farb-LCD-Anzeige 2”
• Eingebauter Lautsprecher und Mikrofon
• Betriebsmodi: Video/Foto/Zeitraer/Wiedergabe/Webcam
• Mehrsprachiges Menü: EN/IT/ES/PT/DE/DU/FR/RU/PL/TR/
CZ/JP/FIN/DK/SW/NW/HU/SL/GR
• Anschlüsse: USB 2.0 und Mikro-HDMI
• Akkulaufzeit: bis zu 120 Minuten bei 1080P und ausgeschalte-
tem Wi-Fi
• Speicher: unterstützt Micro SD Klasse 10 U3 bis zu 128GB
• Akku: Li-Ion 1050mAh
• Abmessungen: 41x59x23mm
• Gewicht: 58 g (ohne Akku)
Die technischen Daten können ohne vorherige Ankündigung geändert
werden.

30 31
1
2
5
4
6
8
3
9
7
14
15
10
11
12 13
ESPAÑOL
FRECUENCIA POTENCIA
2.4 GHz 11.22mW +- 1.41mW
1. Cámara
2. Funda waterproof 30m
3. Soporte de manillar
4. Batería Li-Ion 1050mAh
5. Soporte rápido (x2)
6. Soporte para trípode
7. Soporte 90° (x2)
8. Soporte estándar
9. Soporte 180°
10. Base plana (x2)
11. Cable USB
12. Cintas
13. Bridas
14. Brida metálica
15. Paño limpiador
LA CAJA INCLUYE

32 33
HDMI/SALIDA
Puerto de
carga/datos
Obturador/Menú/
Selección
LED WIFI
WI-FI/MENÚ
ARRIBA
Pantalla
MIC MUTE
MENU ABAJO
Encendido/Modo
Lens
Micrófono
Ranura
Micro SD
Altavoz
Led indicador
Led de carga
DESCRIPCIÓN DE LOS CONTROLES
Seleziona modalità
Video Slow Ciclica Lapse
Foto Lapse
Sequenza
Timer
1
3
2
4
PRIMEROS PASOS
Para encender: pulse Encendido/Modo .
Para apagar: mantenga pulsado Encendido/Modo.
Activación micrófono: mantenga pulsado ABAJO.
Desactivación micrófono: mantenga pulsado ABAJO.
INFORMACIÓN GENERAL
Encienda la cámara y pulse repetidamente el botón Encendido/Modo
para navegar por las funciones y configuraciones de la cámara.
Se mostrará:
Mantenga pulsado Obturador/Menú/Selección para entrar al menú.
MENÚ PRINCIPAL
1. Modo de uso: personaliza el modo Foto/Vídeo
2. Reproducir: reproduce fotos o vídeos.

34 35
Mode selection
Video Slow Loop Lapse
Foto Lapse
Burst
Timer
3. Ajustes: ajusta la configuración de la cámara.
4. Atrás: salir del menú.
SELECCIÓN DE MODO
Video Grabar vídeos
Slow Cámara lenta
Loop Sobrescribir cuando la memoria
está llena
Lapse Grabar vídeos en modo Time Lapse
Photo Tomar una foto
Auto Tomar una serie de fotos en intervalos
de tiempo ajustables
Burst Tomar una ráfaga de fotos
Timer Autodisparador
CONTROLES ARRIBA/ABAJO
[Pulsación larga: activa el Wi-Fi
]Pulsación larga: activa/desactiva el micrófono
AJUSTES
Navegar por el menú principal
Mantenga pulsado el botón Obturador para acceder a los ajustes, y
desplácese con ARRIBA/ABAJO hasta seleccionar
Seleziona modalità
Video Slow Ciclica Lapse
Foto Lapse
Sequenza
Timer
.
Desplácese por los ajustes de esta sección del menú con las teclas
ARRIBA/ABAJO.
Pulse Encendido/Modo para navegar por las opciones.
Después pulse Obturador de nuevo para seleccionar la opción deseada.
Video
Resolution 4K30FPS
White
Balance Auto
EIS Turn Off
Image
Rotation
Wi-Fi
Information
Wi-Fi Turn Off
Turn Off

36 37
Ajustes de vídeo
H5 PRO debe configurarse en modo Video.
• Resolución de vídeo
4K@30fps, 2.7K@30fps, 1080p@60fps, 720p@60/120fps
Micro SD 4K 30 2.7K 30 1080p 60 720p 60
32GB 80 min 120 min 60 min 120 min
60 GB 160 min 240 min 120 min 240 min
• Estabilizador de imagen (EIS): on/o
• Balance de blancos para ajustar el brillo según las condiciones de
iluminación): auto/soleado/nublado/incandescente/fluorescente
• Exposición (para ajustar el brillo): -3……+3 (los números negativos
significan un vídeo más oscuro y los positivos un vídeo más claro)
• Modo de medición (seleccionar el enfoque):
Medición promedio: enfoque equilibrado
Medición central: enfoque en la parte central
Medición puntual: enfoque en el punto central
Medición matricial: enfoque extendido a toda la pantalla
• Nitidez: alta/media/baja
• ISO (ajuste de sensibilidad de la luz): cuanto mayor sea el valor,
mayor será la sensibilidad
• Sobreimpresión fecha (sobreimprime la fecha en el vídeo)
• Grabar audio enciende / apaga el micrófono)
Ajustes de cámara
• Rotación de imagen (cuando está habilitado, rota el vídeo que se
está grabando)
• Wi-Fi (para conectar la cámara a un smpartphone vía la APP)
• Información Wi-Fi (se muestran la red Wi-Fi y el password)
• Reiniciar Wi-Fi? (restaura el Wi-Fi a los ajustes de fábrica)
• Indicador Led (activa/desactiva el led indicador)
• Salvapantallas automático (establecer o deshabilitar el tiempo tras
el cual la pantalla se apaga automáticamente)
• Apagado automático (establece o deshabilita el tiempo tras el cual
la pantalla se apaga automáticamente si no se usa)
• Sonido de las teclas (activa / desactiva el pitido al presionar
cualquier tecla)
• Idioma (selecciona el idioma del menú)
• Formato horario (cambiar el formato de la fecha)
• Ajustar hora (ajusta la hora en la cámara)
• Ajustar fecha (ajusta la fecha en la cámara)
• Formatear (borrar todos los datos en la tarjeta de memoria)
• Información del dispositivo (muestra información sobre el modelo,
el software y la fecha de la última actualización de software)
Ajustes de foto
H5 PRO debe ajustarse en modo Foto.
• Resolución de foto: 16M – 13M
• Balance de blancos
• Exposición
• Metering
• Nitidez
• ISO
• Sobreimpresión fecha
USO DE H5 PRO CON UN PC
Conecte H5 PRO al PC y seleccione el modo deseado.
• Recarga
• Almacenamiento masivo (la cámara se reconoce como una
memoria externa y se puede acceder a los archivos contenidos en
la tarjeta de memoria)
• Modo cámara (permite utilizar H5 PRO como webcam. No
requiere la instalación de ningún driver)
Other manuals for H5 PRO
2
Table of contents
Languages:
Other Midland Action Camera manuals

Midland
Midland H7 User manual

Midland
Midland H3 User manual

Midland
Midland XTC400 HD User manual

Midland
Midland XTC-200 User manual

Midland
Midland XTC-200 User manual

Midland
Midland H3+ User manual

Midland
Midland H5 User manual

Midland
Midland XTC 400 User manual

Midland
Midland XTC300 User manual

Midland
Midland XTC300 User manual

Midland
Midland XTC-100 User manual

Midland
Midland XTC 270 Manual

Midland
Midland H7+ User manual

Midland
Midland XTC-200 User manual

Midland
Midland XTC300 User manual

Midland
Midland XTC-200 User manual

Midland
Midland H9 User manual

Midland
Midland H180 FULL HD User manual

Midland
Midland XTC-200 User manual

Midland
Midland XTC200VP3 User manual