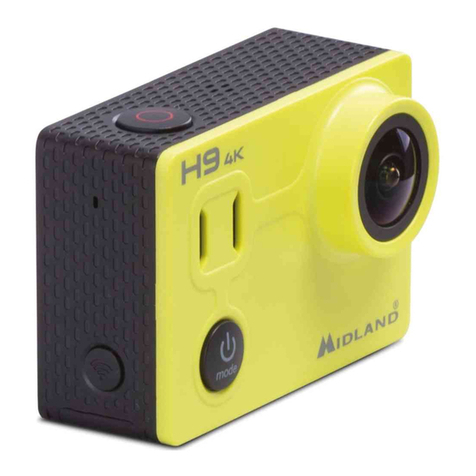
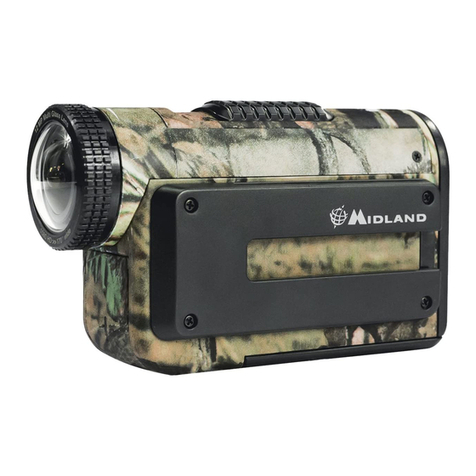
Midland XTC 270 Manual

MANUALE D’USO
INSTRUCTION GUIDE
BEDIENUNGSANLEITUNG
MANUAL DE INSTRUCCIONES
GUIDE D’UTILISATION
MANUAL DE INSTRUÇÕES
ΟΔΗΓΊΕΣ ΧΡΗΣΗΣ
GEBRUIKERS HANDLEIDING
РУКОВОДСТВО ПОЛЬЗОВАТЕЛЯ
HD ACTION VIDEO CAMERA
270

INFORMAZIONE AGLI UTENTI Ai sen-
si dell’art. 13 del decreto legislativo 25 lu-
glio 2005, n.151 “Attuazione delle Direttive
2002/95/CE, 2002/96/CE e 2003/108/CE, relative alla
riduzione dell’uso di sostanze pericolose nelle appa-
recchiature elettriche ed elettroniche, nonché allo
smaltimento dei rifiuti”. Il simbolo del cassonetto barra-
to riportato sull’apparecchiatura indica che il prodotto
alla ne della propria vita utile deve essere raccolto se-
paratamente dagli altri riuti. L’utente dovrà, pertanto,
conferire l’apparecchiatura giunta a ne vita agli idonei
centri di raccolta differenziata dei riuti elettronici ed
elettrotecnici, oppure riconsegnarla al rivenditore al
momento dell’acquisto di una nuova apparecchiatura
di tipo equivalente, in ragione di uno a uno. L’adeguata
raccolta differenziata per l’avvio successivo dell’appa-
recchiatura dismessa al riciclaggio, al trattamento e
allo smaltimento ambientalmente compatibile contri-
buisce ad evitare possibili effetti negativi sull’ambiente
e sulla salute e favorisce il riciclo dei materiali di cui
è composta l’apparecchiatura. Lo smaltimento abusi-
vo del prodotto da parte dell’utente comporta l’appli-
cazione delle sanzioni amministrative di cui al dlgs.
n.22/1997 (articolo 50 e seguenti del dlgs. n.22/1997).
All articles displaying this symbol on the body,
packaging or instruction manual of same, must not
be thrown away into normal disposal bins but brought
to specialised waste disposal centres. Here, the
various materials will be divided by characteristics
and recycles, thus making an important contribution to
environmental protection.
Alle Artikel, die auf der Verpackung oder der
Gebrauchanweisung dieses Symbol tragen, dürfen
nicht in den normalen Mülltonnen entsorgt werden,
sondern müssen an gesonderten Sammelstellen
abgegeben werden. Dort werden die Materialien
entsprechend ihrer Eigenschaften getrennt und,
um einen Beitrag zum Umweltschutz zu liefern,
wiederverwertet.
Todos los artículos que exhiban este símbolo en el
cuerpo del producto, en el embalaje o en el manual
de instrucciones del mismo, no deben ser desechados
junto a los residuos urbanos normales sino que
deben ser depositados en los centros de recogida
especializados. En estos centros, los materiales
se dividirán en base a sus características y serán
reciclados, para así poder contribuir de manera
importante a la protección y conservación del medio
ambiente.
Tous les articles présentant ce symbole sur le corps,
l'emballage ou le manuel d'utilisation de celui-ci ne
doivent pas être jetés dans des poubelles normales
mais être amenés dans des centres de traitement
spécialisés. Là, les différents matériaux seront
séparés par caractéristiques et recyclés, permettant
ainsi de contribuer à la protection de l'environnement.
Todos os artigos que apresentem este símbolo no
seu corpo, embalagem ou manual de instruções,
não devem ser eliminados juntamente com o lixo
normal mas sim conduzidos para contentores de
eliminação de resíduos especializados. Aqui, os
diversos materiais serão divididos por características
e reciclados, realizando assim uma importante
contribuição para a protecção ambiental.
Όλα τα προϊόντα στα οποία εμφανίζεται το ακόλουθο
σύμβολο στο σώμα, τη συσκευασία ή το εγχειρίδιο
χρήσης τους, δεν πρέπει να εναποθέτονται στους
κοινούς κάδους απορριμάτων αλλά να προσκομίζονται
στα ειδικά κέντρα αποκομιδής. Εκεί, τα διάφορα
υλικά θα πρέπει να διαχωρίζονται ανάλογα με τα
χαρακτηριστικά και τα ανακυκλούμενα υκλικά,
συμμετέχοντας έτσι ουσιαστικά στην προστασία του
περιβάλλοντος.
Alle artikels die dit symbool weergeven op de behuizing,
verpakking of instructiehandleiding ervan, mogen
niet weggegooid worden in normale vuilnisemmers
maar moeten naar speciale afvalverwerkingscentra
gebracht worden. Hier worden de verschillende
materialen verdeeld volgens eigenschappen en
recyclage waardoor een belangrijke bijdrage aan de
milieubescherming wordt geleverd.
I
1
Sommario
XTC-270 Action Camera .....................................................................................................................2
Contenuto della confezione............................................................................................................................................... 2
Caratteristiche e pulsanti del XTC-270 ...............................................................................................................................2
Guida rapida all’uso ..........................................................................................................................4
Imparando a conoscere XTC-270 ........................................................................................................4
Batteria.............................................................................................................................................................................. 4
Micro SD Card.....................................................................................................................................................................5
Registrazione..................................................................................................................................................................... 5
Supporti di montaggio......................................................................................................................6
Supporti a slitta.................................................................................................................................................................6
Supporti a vite...................................................................................................................................................................6
Sistemi compatibili ...........................................................................................................................7
Download dei video ..........................................................................................................................7
Come riformattare la Micro SD card....................................................................................................7
Problemi & Soluzioni.........................................................................................................................8
Garanzia ...........................................................................................................................................9

I
2
XTC-270 Action Camera
Grazie per aver acquistato Action camera XTC-270. XTC-270 è la nuovissima videocamera grandangolo in grado di registrare ed im-
mortalare i vostri momenti più importanti e divertenti in FULL HD! Facile da utilizzare con il suo unico comando (on-off/record),
grandangolo con una visuale di 130° e due modalità di registrazione: Standard HD Ready (SD:1280x720) e alta definizione FULL HD
(HD: 1920x1080). Grazie al pacco batteria al litio in dotazione è possibile registrare fino a 2 ore.Terminata la registrazione, collegate
semplicemente la videocamera al vostro computer e scaricate i video registrati. Più facile di così! Buon divertimento!
Contenuto della confezione
›Midland XTC-270 Action camera
›Pacco batteria al litio da 900mAh
›Cavo USB
›Custodia impermeabile 60mt
›1 sistema di montaggio per casco
Caratteristiche e pulsanti del XTC-270
Caratteristiche:
Caratteristiche in HD Caratteristiche in SD
30 frames per secondo 60 frames per secondo
Grandangolo di 130° Grandangolo di 90°
Aspect ratio 16:9 Aspect ratio 16:9
Risoluzione 1920x1080 Risoluzione 1280x720
Filmati in H264 (.mp4) Filmati in H264 (.mp4)

I
3
Grandangolo 130°
Microfono
Scanalature per montaggio del supporto a slitta
Selettore Record
In avanti: on/registrazione
Led di registrazione
lampeggia rosso mentre registra
Led batteria
Selettore Record
Indietro: Off/Stop registrazione
Led SD Card
Pulsante selezione SD/HD
Pulsante per riformattazione SD Card
Connettore Mini USB
Vano inserimento Mini SD Card

I
4
Guida rapida all’uso
N.B. Al primo utilizzo di una nuova Memory card si consiglia di formattarla seguendo la procedura descritta nel relativo
paragrafo
1. Aprite il coperchio del vano batteria ed inserite il pacco batteria. Riposizionate il coperchio del vano batterie.
2. Aprite la cover di gomma della parte posteriore del dispositivo. Inserite la Micro SD card nell’opportuna direzione
3. Selezionate la qualità desiderata (SD: HD Ready - HD: Full HD). Chiudete la piccola cover gommosa.
4. Spostate il selettore RECORD in avanti. La registrazione inizierà dopo 4 secondi circa.
5. Per fermare la registrazione slittate il selettore verso il basso in posizione“off”.
6. Collegate la videocamera al computer e scaricate il video.
Imparando a conoscere XTC-270
Batteria
1. Per inserire il pacco batteria, premete il pulsante posto sul lato destro della vide-
ocamera e rimuovete il coperchio del vano batteria facendolo slittare in avanti.
2. Inserite il pacco batteria al litio.
3. Riposizionate il coperchio del vano batterie
Indicatore stato batteria Significato
Verde fisso Batteria carica
Rosso fisso Batteria parzialmente carica
Rosso lampeggiante Batteria quasi scarica
Led spento Batteria scarica
Nota: quando l’indicatore di batteria inizia a lampeggiare rosso, sarebbe opportuno ricaricare il dispositivo in quanto la teleca-
mera si spegnerà a breve.

I
5
Micro SD Card
1. Aprite la cover di gomma posta sulla parte posteriore della videocamera
2. Inserite la Micro SD nell’apposita fessura come mostrato nell’immagine a lato.
3. Chiudete la cover di gomma.
NOTA: XTC-270 supporta fino ad un massimo di 32 GB di memoria.
Registrazione
1. Slittate il selettore di registrazione in avanti per accendere la videocamera.
2. Si illuminerà prima l’indicatore della batteria, poi l’indicatore della Micro SD card (i colori dipendono dallo status della batteria e
della memoria). Dopo circa 4 secondi l’indicatore di registrazione inizierà a lampeggiare rosso, indicando che la registrazio-
ne è iniziata. (Sonoro: 1 singolo Beep)
3. Per fermare la registrazione, spostate il selettore “record” in posizione “off”. (3 Beep per lo spegnimento 2 Beep per il corretto
salvataggio del filmato)
Nota: non rimuovere la batteria durante la registrazione per spegnere la telecamera in quanto il file potrebbe non essere finaliz-
zato e risultare pertanto illeggibile.
Indicatore stato SD card Significato
Verde Più di 1GB di spazio disponibile
Arancione Da 512 MB a1 GB di spazio disponibile
Rosso Meno di 512 MB di spazio disponibile o Micro SD card non inserita.
Rosso lampeggiante Micro SD card non letta correttamente
Verde lampeggiante Indica che la Micro SD card è stata riformattata
Spazio di memoria Tempo di registrazione HD Tempo di registrazione SD
1 GB 11 minuti 13 minuti
2 GB 22 minuti 26 minuti.
4 GB 45 minuti 52 minuti
8 GB 90 minuti 105 minuti
16 GB 175 minuti 210 minuti
32 GB 350 minuti 410 minuti
Nota: La videocamera dividerà automaticamente i video in documenti da 10 minuti (circa 900mb)

I
6
Supporti di montaggio
Supporti a slitta
XTC-270, con il suo innovativo design a scanalature
può essere facilmente montata su uno speciale sup-
porto a slitta. Tale supporto permette una più facile
ed efficace installazione del dispositivo.
Per montare la telecamera al supporto, posizionate-
la nell’apposita scanalatura e fatela slittare.
Per staccare la telecamera dal supporto a slitta,
tenete la telecamera con la lente distante da voi e
premendo il pulsante di rilascio tirate il supporto
verso di voi.
Questo supporto a slitta può essere abbinato sia ai
supporti bi-adesivi da casco che a tutti i supporti
opzionali che adottano questo tipo di slitta.
Una volta montata la telecamera al supporto a slitta occorre:
1. Montare la telecamera al supporto intercambiabile più adatto in base a ciò che si desidera filmare.
2. Aggiustare l’inquadratura della videocamera in modo che non filmi il cielo o il terreno.
Supporti a vite
XTC-270 può essere montata anche utilizzando sup-
porti opzionali muniti di vite standard per macchine
fotografiche.Nella parte inferiore di XTC-270 vi è
infatti un foro di fissaggio che permette di montare
la telecamera su tali supporti, inserendo semplice-
mente la vite di fissaggio nell’apposito foro e ruo-
tando la telecamera in senso orario.
Se volete fissare la telecamera al manubrio della vo-
stra bicicletta o montarla sul casco tramite supporto
a cinghia, dovete:
1. Montare la telecamera sul supporto a vite più
adatto a ciò che si desidera filmare.
2. Assicurarsi che la telecamera sia posizionata nel modo corretto e che non inquadri cielo o terra.
Supporto a slitta con regolazione
dell’inclinazione
Pulsante di rilascio
Supporto adesivo per casco Supporto per maschera da sci
Foro di fissaggio Vite di fissaggio
Supporto a cinghia per casco da bici Supporto al manubrio

I
7
Sistemi compatibili
XTC-270 è compatibile sia con sistemi operativi Windows che con MAC.
Il formato video è H264, il formato dei file è MP4
Download dei video
Non c’è bisogno di installare ulteriori software per il collegamento con XTC-270.
1. Prima di scaricare i video, assicuratevi che il pacco batteria sia completamente carico.
2. Connettete la telecamera alla porta USB usando il cavo in dotazione e accenderla portando il selettore“record”in posizione On.
3. La telecamera viene vista dal PC come una normalissima memoria esterna (chiavetta USB), ma con solo la possibilità di scaricare
i filmati sul vostro PC; non è possibile caricare alcun dato sulla memoria SD (secondo le vigenti norme EU).
4. Troverete i vostri video salvati nella cartella“DC IM”>“100Media”
Come riformattare la Micro SD card
N.B.Si consigliadi formattare le nuove microSD al loroprimo utilizzo.La formattazione della Micro SD cardpermette di cancellare
tutti i file video in un unico istante.
Per far ciò occorre che la micro SD card sia all’interno della stessa telecamera.
1. Spegnere la telecamera portando il selettore“record”in posizione Off.
2. Tenere premuto il pulsante di riformattazione presente nel retro della camera aiutandosi con un oggetto sottile.
3. Tenendo premuto il tasto al punto 2, accendere la telecamera portando il selettore“record”in posizione di registrazione.
4. Tenere premuto il tasto di riformattazione fino a quando il led della memoria lampeggia verde.
5. Spostate il selettore“record”in posizione off.
6. La formattazione è avvenuta correttamente se si avvertono 2 Beep
7. Estrarre la Micro SD Card e formattare utilizzando un PC prima di utilizzarla nuovamente all’interno della telecamera. (Nota:
XTC270 non è in grado di cancellare autonomamente il file di upgrade)
Nota:la Micro SD cardnon può essereriformattata se l’indicatoredi batteria quasi scaricasiaccende(rossolampeggiante).Assicu-
ratevi che le batterie siano completamente cariche o nuove prima di iniziare il processo di riformattazione.
Nota: XTC-270 è progettata per massimizzare la durata della batteria per essere la compagnia ideale delle vostre avventure, la
CPU viene quindi spenta e non alimentata quando il selettore di registrazione è in posizione “OFF”. A causa di ciò NON É POSSIBILE
impostare la data.

I
8
Problemi & Soluzioni
Problemi Soluzioni
Batteria
La telecamera non si accende Assicuratevi che il pacco batteria sia installato correttamente e che sia carico.
Registrazione
La telecamera non registra Assicuratevi di aver spostato correttamente il selettore “record” (totalmente in avanti). Se
l’indicatore di registrazione non si accende spegnete il dispositivo e re-installate il pacco
batteria.
Verificate che ci sia abbastanza memoria nella Micro SD card.
Micro SD card
La Micro SD card non viene letta Assicuratevi che la Micro SD card sia stata inserita correttamente.
Connettete la telecamera al computer per verificare che ci sia abbastanza spazio di memoria
Attendete che si concluda il processo di formattazione
Visualizzazione Video
Il video è lento e si inceppa Verificate che il cavo USB sia stato inserito correttamente nella presa della telecamera
Rimuovete dispositivi USB al momento non utilizzati
Trasferite i file video sul computer prima di vederli
Accertarsi che il proprio media player sia aggiornato e che il proprio computer rispetti i requi-
siti minimi richiesti (vedere sopra)
Download del Video
Trasferimento dati lento Verificate che il cavo USB sia stato inserito correttamente nella presa della telecamera. Scol-
legate e ricollegate il cavo USB
Rimuovete dispositivi USB al momento non utilizzati
Il computer non riconosce la teleca-
mera
Assicuratevi che la telecamera collegata al computer abbia il selettore “record” posizionato
su ON
Assicuratevi che la Micro SD card sia stata inserita correttamente
La Micro SD card potrebbe essere corrotta. Attendete che si concluda il processo di format-
tazione
Audio
Disturbi causati dal vento Applicate un filtro, ad esempio del nastro adesivo, sul foro del microfono.

I
9
Garanzia
La durata della garanzia è di 24 mesi per l’apparato e di 6 mesi per gli accessori (batterie, caricatori, microfoni, antenne, auricolari).
Per maggiori informazioni visitate il sito www.midlandeurope.com

UK
10
XTC-270 Action Camera ................................................................................................................... 11
What’s in the box.............................................................................................................................................................11
XTC-270 Features and Controls ........................................................................................................................................ 11
Quick Start Guide ............................................................................................................................ 13
Getting to Know the XTC-270........................................................................................................... 13
Battery ............................................................................................................................................................................ 13
Micro SD Card...................................................................................................................................................................14
Recording ........................................................................................................................................................................ 14
Camera Mounting ........................................................................................................................... 15
Mount on DualTrack System ........................................................................................................................................... 15
Mount using theThread Mount ......................................................................................................................................15
Compatible Systems........................................................................................................................ 16
Downloading Videos ....................................................................................................................... 16
Reformatting the Micro SD card....................................................................................................... 16
Tips and Tricks................................................................................................................................. 17
Limited Warranty ........................................................................................................................... 18

UK
11
XTC-270 Action Camera
Thank you for your purchase of the XTC-270 Action Camera. As someone who seeks adventure, we are proud to offer you the ultimate
tool in capturing and recording your adventures.With easy to use one switch operation, 130 degree angle lens and 2 recording modes:
Standard HD Ready (SD: 1280x720) and Full HD (HD: 1920x1080).Thanks to the equipped Lithium battery pack it is possible to record
up to 2 hours. Once captured, simply connect to your computer and upload the videos to share with friends. It is that simple! Enjoy!
What’s in the box
›Midland XTC-270 Action camera
›900mAh Lithium battery pack
›USB cable
›Submersible case up to 60 meters
›One mounting kit for helmet
XTC-270 Features and Controls
Features:
HD features SD features
30 frames per second 60 frames per second
130 degree angle lens 90 degree angle lens
16:9 aspect ratio 16:9 aspect ratio
1920 x 1080 resolution 1280x720 resolution
Codec H.264 (.mp4 files) Codec H.264 (.mp4 files)

UK
12
130° degree
glass lens
Microphone
Dual track mounting system
Record switch
forward: on/record
Record led
flashes red whencamera is recording
Battery led
Record switch
backward: Off/Stop recording
SD Card led
SD/HD Mode switch SD Card
Reformat button
Mini USB connector
Mini SD Card slot

UK
13
Quick Start Guide
N.B. Format the micro SD memory card before the first usage directly from the camera following the indication in related
paragraph.
1. Open battery door and install the battery pack. Replace battery cover.
2. Open and fold down back rubber cover. Insert micro SD card observing proper direction.
3. Choose the desired quality definition (SD: HD Ready; HD: FULL HD). Close the cover.
4. Move RECORD switch forward, recording will start in 4 seconds.
5. To stop recording, slide switch back to the off position.
6. Plug in camera to computer and download video.
Getting to Know the XTC-270
Battery
1. To insert the battery pack, push down the battery door latch on the right side of
the camera. Door will release. Push forward to remove.
2. Install the Lithium battery pack.
3. Return battery door and click into place.
Battery Status Indicator Meaning
Solid Green Indicates full battery life
Solid Red Indicates half battery life
Blinking Red* Indicates low battery life
No Light Batteries are dead
Note: When the red battery LED begins blinking, be prepared to charge the battery because the camera will stop recording at this
point.

UK
14
Micro SD Card
1. Open and fold down the back rubber cover.
2. Insert Micro SD card into slot observing proper direction (shown sideways).
3. Return rubber flap into place.
NOTE: XTC-270 supports up to 32GB memory card size.
Recording
1. Move the RECORD switch forward.This turns the camera on.
2. The battery and the memory card indicator will turn on showing the status of the camera. The record indicator will begin
flashing red after 4 seconds. This indicates the camera is capturing video. (1 single Beep)
3. To stop recording, move the RECORD switch back to the off position. (3 Beeps indicate“stop recording”, 2 Beeps to indicate“correct
video saving”)
Note: Don’t remove the battery while recording because the file can be damaged
SD card LED Status Meaning
Green 1 GB or more available
Orange 512 MB to1 GB available
Red Below 512 MB available or no MicroSD card installed.
Flashing Red Cannot read the card
Flashing Green Indicates card has been reformatted.
Memory Size HD Record Time SD Record Time
1 GB 11 minutes 13 minutes
2 GB 22 minutes 26 minutes
4 GB 45 minutes 52 minutes
8 GB 90 minutes 105 minutes
16 GB 175 minutes 210 minutes
32 GB 350 minutes 410 minutes
Note: The camera will divide the video in files of 10 minutes each (approximately 900Mb)

UK
15
Camera Mounting
Mount on Dual Track System
The XTC-270 was innovatively designed with an
identical dual track mount system on either side of
the camera. This allows an ease of installation. To
mount the camera on the dual track mount, slide
the camera onto the dual track system with the
two notches on the mount facing towards the back
of the camera.
To detach the camera from the dual track mount,
hold the camera with the lens facing away from
you. Press down the mount release switch and pull
the mount towards yourself.
The dual track mount allows the camera to be ea-
sily mounted on the helmet mount and on all other optional accessories with same type of slides.When mounting the camera on the
dual track mount, you must do the following:
1. Consider what you would like to shoot and use the helmet mount or goggle mount accordingly.
2. Ensure, once attached, that the camera is aimed straight and not towards the ground or at the sky.
Mount using the Thread Mount
On the bottom of the XTC-270 there is a stan-
dard thread mount that allows the camera to be
mounted on optional accessories that has standard
camera screw.
To fix the camera, insert the screw on the mount
into the camera thread and rotate the camera
clockwise to tighten down onto the screw.
When mounting the camera on the handlebars of a
bike or with the vented helmet strap mount follow
these steps:
1. Consider what you would like to shoot and
mount accordingly.
2. Ensure, once attached, that the camera is aimed straight and not towards the ground or at the sky.
dual track system mount
Release button
Helmet adhesive mount Goggle mount
Camera thread Mounting screw
Helmet strap mount Bicycle handle bar mount

UK
16
Compatible Systems
The XTC-270 can be used on bothWindows operating system and MAC.
The video codec is H.264, the file format is .MP4.
Downloading Videos
There is no need to install any software with the XTC-270. It is a plug and play device.
1. Before downloading videos, ensure batteries are fully charged.
2. Connect the camera to the USB port using the included cable.
3. Turn on the camera by sliding the“Record”switch in ON position.
4. The camera will be automatically recognized as an external hard drive (USB key) but videos could only be download; it is not
possible upload any data on your SD card based on current EU law.
5. All your videos will be saved into the“DC IM”>“100Media”.
Reformatting the Micro SD card
Note: Format the micro SD card from the camera before the first usage.
The Micro SD card can be reformatted while in the camera.This allows you to delete all the videos at one time. Follow these steps:
1. Turn OFF the camera, sliding the RECORD switch to the OFF position.
2. Press and HOLD the Micro SD card reformat button.
3. Move the RECORD switch to the record position holding the reformatting button.
4. Release the reformatting button when the memory card LED is blinking green.
5. Turn OFF the camera, sliding the RECORD switch to the OFF position.
6. You will hear two beeps if the formatting process is successful.
7. Take out the Micro SD Card and use other device to format the card before using it again in the camera (Note: XTC270 cannot
delete the upgrade software)
Note: The camera cannot reformat the Micro SD card if the low battery light is on. Ensure new batteries are installed in the camera
before attempting the reformat process.
Note: XTC-270 is designed to be your ideal partner during all your adventures, so the CPU is totally turned OFF when the record
button is in OFF position to maximize the battery last. Due to this IT IS NOT POSSIBLE to set time and data.

UK
17
Tips and Tricks
Problem Solution
Battery
Camera not turning on Ensure the battery pack is installed properly and fully charged.
Recording
Camera not recording Make sure the switch is pushed all the way forward. If the record LED does not come on, turn
off the device and reinstall the battery.
Verify available memory.
Micro SD card
Micro SD card not reading Ensure the Micro SD card is inserted properly.
Plug camera into the computer to verify it has available storage.
Attempt formatting process.
Video Playback
Slow or choppy video Verify the camera is plugged into a USB 2.0 device.
Remove other unused USB devices.
Transfer video to computer before viewing.
Make sure the media player you are using is updated and your computer respects the mi-
nimum requirements.
Video Downloading
Slow data transfer Verify the camera is plugged into a USB 2.0 device. If registering as 1.1, unplug and the
re-plug the device.
Remove other unused USB devices.
Computer does not recognize camera Ensure record switch is in the record position while connected to computer.
Ensure the Micro SD card is inserted properly.
Micro SD card may be corrupted. Attempt formatting process.
Sound
ExcessiveWind Noise Place piece of tape over microphone hole.

UK
18
Limited Warranty
The warranty lasts 24 months for the main device and 6 months for the accessories (batteries, chargers, antennas, microphones,
headsets).
For further information about the warranty, please visit www.midlandeurope.com
Table of contents
Languages:
Other Midland Action Camera manuals

Midland
Midland H7+ User manual

Midland
Midland XTC 450 Manual

Midland
Midland H7 User manual

Midland
Midland H5 User manual

Midland
Midland XTC-200 User manual

Midland
Midland H3+ User manual

Midland
Midland H3 User manual

Midland
Midland XTC-200 User manual

Midland
Midland H5+ User manual

Midland
Midland XTC-200 User manual

Midland
Midland XTC300 User manual

Midland
Midland H5 PRO User manual

Midland
Midland H7 User manual

Midland
Midland XTC 400 Manual

Midland
Midland XTC 400 User manual

Midland
Midland XTC280 User manual

Midland
Midland H5 User manual

Midland
Midland XTC400 HD User manual

Midland
Midland H9 User manual

Midland
Midland H360 FULL HD User manual