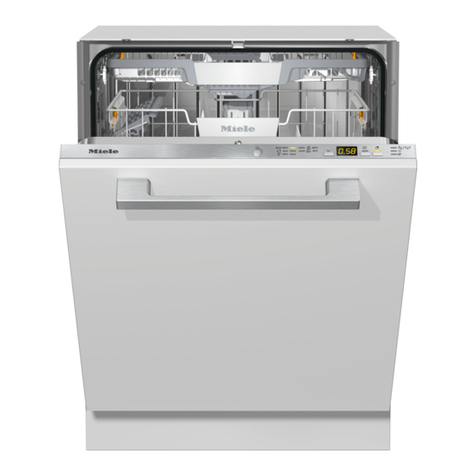
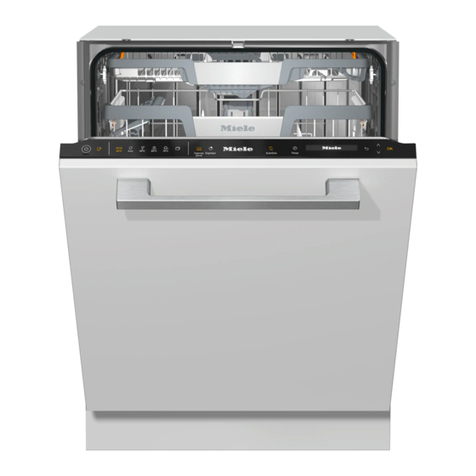
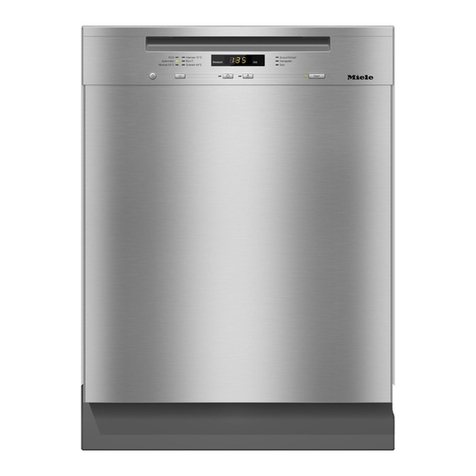
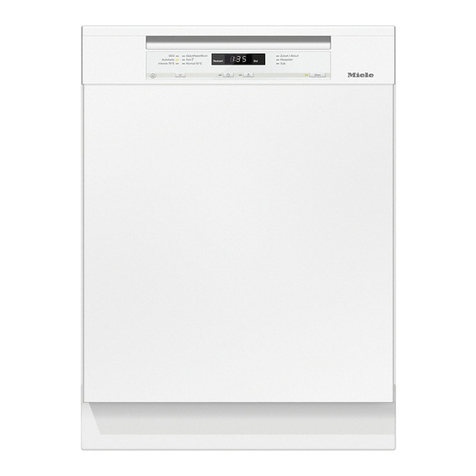
Miele G 8050 User manual

Operating instructions
Commercial dishwasher
G 8050 / G 8051
To avoid the risk of accidents or
damage to the machine it is
essential to read these instructions
before it is installed, commissioned and used
for the first time.
G
M.-Nr. 06 749 290

Guide to the machine. . . . . . . . . . . . . . . . . . . . . . . . . . . . . . . . . . . . . . . . . . . . . . . 4
Overview . . . . . . . . . . . . . . . . . . . . . . . . . . . . . . . . . . . . . . . . . . . . . . . . . . . . . . . . . 4
Control panel . . . . . . . . . . . . . . . . . . . . . . . . . . . . . . . . . . . . . . . . . . . . . . . . . . . . . . 5
Warning and Safety instructions . . . . . . . . . . . . . . . . . . . . . . . . . . . . . . . . . . . . . 6
Caring for the environment . . . . . . . . . . . . . . . . . . . . . . . . . . . . . . . . . . . . . . . . . 10
Disposal of the packing
material . . . . . . . . . . . . . . . . . . . . . . . . . . . . . . . . . . . . . . . . . . . . . . . . . . . . . . . . . 10
Disposal of your old machine . . . . . . . . . . . . . . . . . . . . . . . . . . . . . . . . . . . . . . . . 10
Energy-saving washing . . . . . . . . . . . . . . . . . . . . . . . . . . . . . . . . . . . . . . . . . . . . . 10
Before using for the first time. . . . . . . . . . . . . . . . . . . . . . . . . . . . . . . . . . . . . . . 11
Before using the machine for the first time you require: . . . . . . . . . . . . . . . . . . . . 11
To open the door . . . . . . . . . . . . . . . . . . . . . . . . . . . . . . . . . . . . . . . . . . . . . . . . . . 12
To close the door . . . . . . . . . . . . . . . . . . . . . . . . . . . . . . . . . . . . . . . . . . . . . . . . . . 12
Child safety lock . . . . . . . . . . . . . . . . . . . . . . . . . . . . . . . . . . . . . . . . . . . . . . . . . . 12
Water softener . . . . . . . . . . . . . . . . . . . . . . . . . . . . . . . . . . . . . . . . . . . . . . . . . . . . 13
Programming the water hardness level . . . . . . . . . . . . . . . . . . . . . . . . . . . . . . 14
Checking the programmed water hardness level. . . . . . . . . . . . . . . . . . . . . . . 15
Filling the salt reservoir . . . . . . . . . . . . . . . . . . . . . . . . . . . . . . . . . . . . . . . . . . . . . 16
Salt indicator . . . . . . . . . . . . . . . . . . . . . . . . . . . . . . . . . . . . . . . . . . . . . . . . . . . . . 17
Rinse aid . . . . . . . . . . . . . . . . . . . . . . . . . . . . . . . . . . . . . . . . . . . . . . . . . . . . . . . . 18
Adding rinse aid . . . . . . . . . . . . . . . . . . . . . . . . . . . . . . . . . . . . . . . . . . . . . . . . . . 18
Rinse aid indicator . . . . . . . . . . . . . . . . . . . . . . . . . . . . . . . . . . . . . . . . . . . . . . . . . 19
Setting the rinse aid dosage . . . . . . . . . . . . . . . . . . . . . . . . . . . . . . . . . . . . . . . . . 20
Loading the machine . . . . . . . . . . . . . . . . . . . . . . . . . . . . . . . . . . . . . . . . . . . . . . 21
Items not suitable for dishwashers: . . . . . . . . . . . . . . . . . . . . . . . . . . . . . . . . . . . . 22
Upper basket . . . . . . . . . . . . . . . . . . . . . . . . . . . . . . . . . . . . . . . . . . . . . . . . . . . . . 23
Adjusting the upper basket . . . . . . . . . . . . . . . . . . . . . . . . . . . . . . . . . . . . . . . . . . 24
Lower basket . . . . . . . . . . . . . . . . . . . . . . . . . . . . . . . . . . . . . . . . . . . . . . . . . . . . . 25
Lower basket inserts . . . . . . . . . . . . . . . . . . . . . . . . . . . . . . . . . . . . . . . . . . . . . . . 26
Operation . . . . . . . . . . . . . . . . . . . . . . . . . . . . . . . . . . . . . . . . . . . . . . . . . . . . . . . 27
Detergent . . . . . . . . . . . . . . . . . . . . . . . . . . . . . . . . . . . . . . . . . . . . . . . . . . . . . . . . 27
Adding detergent. . . . . . . . . . . . . . . . . . . . . . . . . . . . . . . . . . . . . . . . . . . . . . . . . . 28
Switching on . . . . . . . . . . . . . . . . . . . . . . . . . . . . . . . . . . . . . . . . . . . . . . . . . . . . . 29
Selecting a programme . . . . . . . . . . . . . . . . . . . . . . . . . . . . . . . . . . . . . . . . . . . . . 29
Starting a programme . . . . . . . . . . . . . . . . . . . . . . . . . . . . . . . . . . . . . . . . . . . . . . 29
Programme sequence indicators. . . . . . . . . . . . . . . . . . . . . . . . . . . . . . . . . . . . . . 30
Display . . . . . . . . . . . . . . . . . . . . . . . . . . . . . . . . . . . . . . . . . . . . . . . . . . . . . . . . . . 30
Contents
2

At the end of a programme . . . . . . . . . . . . . . . . . . . . . . . . . . . . . . . . . . . . . . . . . . 31
Switching off. . . . . . . . . . . . . . . . . . . . . . . . . . . . . . . . . . . . . . . . . . . . . . . . . . . . . . 31
Unloading the dishwasher . . . . . . . . . . . . . . . . . . . . . . . . . . . . . . . . . . . . . . . . . . . 31
Interrupting a programme . . . . . . . . . . . . . . . . . . . . . . . . . . . . . . . . . . . . . . . . . . . 32
Changing a programme. . . . . . . . . . . . . . . . . . . . . . . . . . . . . . . . . . . . . . . . . . . . . 32
Additional functions . . . . . . . . . . . . . . . . . . . . . . . . . . . . . . . . . . . . . . . . . . . . . . . . 33
Delay start. . . . . . . . . . . . . . . . . . . . . . . . . . . . . . . . . . . . . . . . . . . . . . . . . . . . . 33
Drying . . . . . . . . . . . . . . . . . . . . . . . . . . . . . . . . . . . . . . . . . . . . . . . . . . . . . . . . 34
Programming special functions . . . . . . . . . . . . . . . . . . . . . . . . . . . . . . . . . . . . . 35
Dispensing system settings for DOS Module G 60 or C 60 (optional extras) . . . . 35
Setting the dosage:. . . . . . . . . . . . . . . . . . . . . . . . . . . . . . . . . . . . . . . . . . . . . . 35
Venting the dispensing system: . . . . . . . . . . . . . . . . . . . . . . . . . . . . . . . . . . . . 36
Special function 1
Increasing the final rinse temperature . . . . . . . . . . . . . . . . . . . . . . . . . . . . . . . . . . 37
Special function 2
Increasing the water level . . . . . . . . . . . . . . . . . . . . . . . . . . . . . . . . . . . . . . . . . . . 39
Cleaning and care . . . . . . . . . . . . . . . . . . . . . . . . . . . . . . . . . . . . . . . . . . . . . . . . 41
Cleaning the filters in the wash cabinet. . . . . . . . . . . . . . . . . . . . . . . . . . . . . . . . . 41
Cleaning the spray arms . . . . . . . . . . . . . . . . . . . . . . . . . . . . . . . . . . . . . . . . . . . . 43
Cleaning the wash cabinet . . . . . . . . . . . . . . . . . . . . . . . . . . . . . . . . . . . . . . . . . . 44
Cleaning the door and the door seal . . . . . . . . . . . . . . . . . . . . . . . . . . . . . . . . . . . 44
Cleaning the control panel. . . . . . . . . . . . . . . . . . . . . . . . . . . . . . . . . . . . . . . . . . . 44
Cleaning the door front . . . . . . . . . . . . . . . . . . . . . . . . . . . . . . . . . . . . . . . . . . . . . 45
Problem solving guide. . . . . . . . . . . . . . . . . . . . . . . . . . . . . . . . . . . . . . . . . . . . . 46
Problem solving . . . . . . . . . . . . . . . . . . . . . . . . . . . . . . . . . . . . . . . . . . . . . . . . . . 54
Cleaning the water inlet filter . . . . . . . . . . . . . . . . . . . . . . . . . . . . . . . . . . . . . . . . . 54
Cleaning the drain pump and non-return valve. . . . . . . . . . . . . . . . . . . . . . . . . . . 55
After sales service . . . . . . . . . . . . . . . . . . . . . . . . . . . . . . . . . . . . . . . . . . . . . . . . 57
Installation . . . . . . . . . . . . . . . . . . . . . . . . . . . . . . . . . . . . . . . . . . . . . . . . . . . . . . 58
Free-standing (G 8050) . . . . . . . . . . . . . . . . . . . . . . . . . . . . . . . . . . . . . . . . . . 58
Integrated ("i") dishwashers (G 8051). . . . . . . . . . . . . . . . . . . . . . . . . . . . . . . . 58
Built-under ("U") (without a lid or rear panel) (G 8050 U) . . . . . . . . . . . . . . . . . 59
Electrical connection. . . . . . . . . . . . . . . . . . . . . . . . . . . . . . . . . . . . . . . . . . . . . . 61
Plumbing. . . . . . . . . . . . . . . . . . . . . . . . . . . . . . . . . . . . . . . . . . . . . . . . . . . . . . . . 62
Programme chart . . . . . . . . . . . . . . . . . . . . . . . . . . . . . . . . . . . . . . . . . . . . . . . . . 64
Technical data . . . . . . . . . . . . . . . . . . . . . . . . . . . . . . . . . . . . . . . . . . . . . . . . . . . 66
Contents
3

Overview
aUpper spray arm (not visible)
bUpper basket
cWater feed for middle spray arm
dMiddle spray arm
eLower spray arm
fConnection for DOS module
gFour height adjustable screw feet
hFilter combination
iSalt reservoir
jDual compartment detergent
dispenser
kRinse aid reservoir (with dosage
selector)
lData plate
Guide to the machine
4

Control panel
aOn/Off button
bMAXI programme
indicator light
cMIDI programme
indicator light
dMINI programme
indicator light
eAdd liquid cleaning agent indicator
light (only applies to machine fitted
with an optional external DOS
module)
fCheck water inlet/Drain indicator
light
gProgramme sequence indicators
hDisplay
iStart/Stop button
jDelay start button
kCheck spray arm indicator light
lDrying button
mAdd rinse aid indicator light
nAdd salt indicator light
oProgramme selector buttons
pCOLD programme
indicator light
qBEER GLASSES programme
indicator light
rGLASSWARE programme
indicator light
sChild safety lock
tDoor release
uVentilation outlet for drying fan
Guide to the machine
5

This machine complies with all
relevant local and national safety
requirements. Incorrect use can lead
to personal injury and damage to
property.
To avoid the risk of accidents and
damage to the machine please read
these instructions carefully before
starting to use this machine.
Keep these instructions in a safe
place for reference, and pass them
on to any future user.
Correct use
This machine is designed for
cleaning crockery and glassware
only, as described in these instructions.
Alterations to the machine, or using it
for purposes other than those for which
it was designed, are unauthorised and
could cause harm.
The manufacturer cannot be held liable
for damage caused by improper or
incorrect use of the machine.
This equipment may only be used
in mobile installations such as
ships, caravans, aircraft etc. if a risk
assessment of the installation has been
carried out by a suitably qualified
engineer.
Please pay attention to the following
notes to avoid injury and damage.
This machine should be
commissioned and then maintained
by a Miele authorised service technician
or other suitably qualified and
competent approved person. Repairs
and other work by unqualified persons
could be dangerous.
Do not install the machine in an
area where there is any danger of
explosion or of freezing conditions.
The electrical safety of this
machine can only be guaranteed if
connected to a correctly installed
earthing system on-site. It is most
important that this basic safety
requirement is tested regularly and,
where there is any doubt, the on-site
wiring should be checked by an
electrician.
The manufacturer cannot be held liable
for damage or injury caused by the lack
of or inadequacy of an effective
earthing system (e.g. electric shock).
A damaged machine is dangerous.
Switch off at the mains immediately
and call the Miele Service Department
or an authorised Miele Service Dealer.
Warning and Safety instructions
6

Personnel operating the machine
should be trained regularly.
Untrained personnel should not be
allowed access to the machine or its
controls.
This machine is not a toy. Do not
allow children to play in or around it
or to operate it. There is a danger that
they could injure themselves or get into
the machine and lock themselves in.
Take great care when handling
liquid agents and additives. These
may contain irritant or corrosive
ingredients. Do not use organic
solvents as these could cause an
explosion.
Follow all relevant safety procedures
carefully. Wear protective gloves and
goggles. With all chemical agents, the
manufacturer's safety conditions must
be observed.
Avoid inhalation of powder
cleaning agents. They can cause
burning in the mouth and throat if
swallowed, and can inhibit breathing.
The water in the machine must not
be used as drinking water.
Do not sit or lean on an open door.
This could cause the machine to
tip up and be damaged or cause an
injury.
Be careful when sorting items with
sharp pointed ends and
positioning them in the machine that
you do not hurt yourself or create a
danger for others. Sharp knives etc.
should be placed in baskets with the
pointed ends facing downwards.
When using this machine in the
higher temperature ranges be
especially careful not to scald or burn
yourself when opening the door.
Baskets and inserts must be allowed to
cool down before they are unloaded.
Any water remaining in containers
could still be very hot. Empty them into
the wash cabinet before taking them
out.
Do not touch the heating elements
or the heated surfaces on the wash
cabinet floor during or directly after the
end of a programme. You could burn
yourself. They remain hot for some time
after the end of the programme.
Never clean the machine or near
vicinity with a water hose or a high
pressure hose.
Before any maintenance or repair
work is carried out, the machine
must be disconnected from the mains
supply by switching off at the mains
and withdrawing the plug from the
socket or by withdrawing the mains
fuse.
Warning and Safety instructions
7

The following points should be
observed to assist in maintaining
quality standards, to protect users,
and to avoid damage to the machine
and items being cleaned.
Only use cleaning agents
designed for use in this type of
machine. Using unsuitable cleaning
agents could adversely affect the
machine, as well as items being
cleaned.
Only use low-foaming cleaning
agents. Incorrect cleaning agents,
as well as some types of soiling, can
cause a build-up of foam in the drum.
Foam can have an adverse effect on
the cleaning process.
Where a chemical additive is
recommended on technical
application grounds (e.g. a cleaning
agent), this does not imply that the
manufacturer of the machine accepts
liability for the effect of the chemical on
the items being cleaned.
Please be aware that changes in
formulation, storage conditions etc,
which may not be publicised by the
chemical manufacturer, can have a
negative effect on the cleaning result.
When using cleaning agents and
special application chemicals, it is
essential that the manufacturer's
instructions are followed. Only use such
chemicals for the purpose and in the
situation specifed, to the exclusion of
other chemicals, to avoid such dangers
as chemical reactions and material
damage.
The machine is designed for
operation with water and additive
cleaning agents only. Organic solvents
must not be used in this machine, as
there is the danger under certain
circumstances of fire or explosion.
(Although this is not the case with all
organic solvents, other problems could
arise with their use, for example
damage to rubber and synthetic
materials).
In critical applications where very
stringent requirements have to be
met, it is strongly recommended that all
the relevant factors for the process,
such as cleaning agents, water quality
etc., are discussed with the Miele
Application Technology specialists.
If cleaning and rinsing results are
subject to particularly stringent
requirements (e.g. chemical analysis,
specialised industrial processes etc.), a
regular quality control test must be
carried out by the user to ensure that
required standards of cleanliness are
being achieved.
The special inserts should only be
used for their specific application.
Empty any containers or utensils
before arranging them in the
machine.
Warning and Safety instructions
8
Do not allow any remains of acids
or solvents, and in particular
hydrochloric acid or chloride solutions,
to get into the wash cabinet. Similarly
avoid any materials with a corrosive
effect.
The presence in compounds of any
solvents should be minimal (especially
those in hazard class A1).
To avoid any corrosion damage,
ensure that solutions or steam
containing hydrochloric acid do not
come into contact with the steel outer
casing of the machine.
Please follow the advice on
installation in these instructions
and the separate Installation
Instructions.
Accessories
Only use genuine Miele
accessories with this machine.
Consult Miele on the type and
application of such equipment.
Disposal of your old machine
Before disposing of your old
machine, first make it unusable.
Disconnect it from the mains, cut off the
cable near the machine and cut off and
render any plug unusable.
For environmental and safety reasons
ensure the machine is completely
drained of any residual water and
cleaning agent. (Observe safety
regulations and wear safety goggles
and gloves).
Make the door lock inoperative, so that
children cannot accidentally shut
themselves in. Then make appropriate
arrangements for the safe disposal of
the machine.
For tank system machines ensure that
any water is emptied out of the tank.
The manufacturer cannot be held
liable for damage caused by
non-compliance with these Warning
and Safety instructions.
Warning and Safety instructions
9

Disposal of the packing
material
The transport and protective packing
has been selected from materials which
are environmentally friendly for disposal
and can normally be recycled.
Ensure that any plastic wrappings,
bags etc. are disposed of safely and
kept out of the reach of babies and
young children. Danger of suffocation!
Rather than just throwing these
materials away, please ensure that they
are offered for recycling.
Disposal of your old machine
Electrical and electronic machines
often contain materials which, if
handled or disposed of incorrectly,
could be potentially hazardous to
human health and to the environment.
They are, however, essential for the
correct functioning of your machine.
Please do not therefore dispose of it
with your household waste.
Please dispose of it at your local
community waste collection/recycling
centre, and ensure that it presents no
danger to children while being stored
for disposal.
It should be unplugged or
disconnected from the mains electricity
supply by a competent person. The
plug must be rendered useless, and the
cable cut off directly behind it to
prevent misuse. See the "Warning and
Safety" section of this booklet for further
details.
Energy-saving washing
This dishwasher is exceptionally
economical in its use of water and
electricity. You can make the most of
your machine by following these tips:
^If your household water system is
suitable, this dishwasher can be
connected to a hot water supply, for
further economies. *)
Although all stages of the wash
then take place with hot water,
savings are made in:
- the use of primary energy,
- costs,
- programme running time.
If, however, your water is heated by
electricity we would recommend
connection to cold water.
^For most economical dishwashing
make full use of the baskets without
overloading the dishwasher.
^Choose the programme to suit the
type of crockery being washed and
the degree of soiling.
^Follow the detergent manufacturer's
recommendations on detergent
dosage.
^Use only 2/3 of the given dosage if
baskets are only half full.
*) Connect the dishwasher to cold wa-
ter if it is mainly used for washing
glassware and beer glasses.
Caring for the environment
10

Before using the machine for
the first time you require:
–approx. 2 litres of water,
–approx. 2 kg dishwasher reactivation
salt,
–dishwasher detergent,
–rinse aid.
Every dishwasher is tested at the
factory.
There will be residual water in the
machine from this test. It is not an
indication that it has been used
previously.
Before using for the first time
11

To open the door
^Press the release catch inside the
door grip and pull forward.
If the door is opened during operation
all functions are automatically
interrupted.
To close the door
^Push the baskets right in, lift the door
and push until it clicks into position.
Child safety lock
The yellow key for the child safety
lock is on one of the spikes at the
front of the upper basket.
Remove the key before switching on
the dishwasher and keep it in a safe
place away from the dishwasher.
To prevent children opening the
dishwasher door during operation, use
the key to lock the door.
Horizontal setting:
The door is locked.
Vertical setting:
The door can be opened.
Before using for the first time
12

Water softener
In order to achieve good cleaning
results, the dishwasher needs to
operate with soft water. Hard water
results in the build-up of calcium
deposits on crockery and in the
dishwasher.
Mains water with a hardness level
higher than 0.7 mmol/l (4° d – German
scale) needs to be softened. This takes
place automatically in the integrated
water softener.
–The water softener requires
dishwasher reactivation salt.
– The dishwasher must be
programmed for the water hardness
in your area.
– Your local water authority will be able
to advise you of the water hardness
level in your area.
Where the water hardness fluctuates
e.g. between 1.4 - 3.1 mmol/l (8 - 17 °d
German scale) always programme the
dishwasher to the higher value
(3.1 mmol/l in this example).
In the case of a fault, it will help the
service technician if you know the
hardness of your local water supply.
^Enter the water hardness below:
mmol/l or °d
The dishwasher is programmed at
the factory for a water hardness level
of 3.4 mmol/l (19 °d).
If this setting corresponds to the
hardness of your water you do not need
to do anything more.
If your water is harder or softer, you will
need to programme the water hardness
level using the buttons on the control
panel. Each time a button is pressed
one of the other indicator lights will
flash and light up in the control panel.
However, only the indicator lights
mentioned in the following
programming process stages are
significant.
The programming procedure can be
cancelled at any time by pressing
the On/Off button. The procedure
can then be re-started from the
beginning again.
Before using for the first time
13

Programming the water hardness
level
^Switch the dishwasher off with the
On/Off button I-0.
^Press the +cand h/fbuttons in
and whilst holding them in switch
the dishwasher on with the On/Off
button I-0.
Then release these buttons.
The "Main wash/Rinses" lindicator
light will come on and the "Salt" k
indicator light will flash.
If this does not happen, start the
procedure from the beginning again.
If the following flashes in the timer
display: a 19
The water hardness level has been set
to 2.5 mmol/l (19 °d).
^Use the programme selector buttons
%$ to select the value that
corresponds to your water hardness
level (see chart on the right).
Use the %button to scroll down and
select a lower value.
Use the $button to scroll up and
increase the value.
The value selected will appear in the
display.
A two digit value flashes in the display
with one figure alternating with the
other.
^Press the Start/Stop button h/f
twice.
The indicator light beside the h/f
button will flash.
The programmed water hardness level
is now stored in memory.
^Switch the dishwasher off with the
On/Off button I-0.
Before using for the first time
14

°d
German
scale
mmol/l °f
Value displayed
1
2
3
4
5
6
7
8
9
10
11
12
13
14
15
16
17
18
19
20
21
22
23
24
25
26
27
28
29
30
31
32
33
34
35
36-70
0.2
0.4
0.5
0.7
0.9
1.1
1.3
1.4
1.6
1.8
2.0
2.2
2.3
2.5
2.7
2.9
3.1
3.2
3.4
3.6
3.8
4.0
4.1
4.3
4.5
4.7
4.9
5.0
5.2
5.4
5.6
5.8
5.9
6.1
6.3
6.5-12.6
2
4
5
7
9
11
13
14
16
18
20
22
23
25
27
29
31
32
34
36
38
40
41
43
45
47
49
50
52
54
56
58
59
61
63
65-126
1
2
3
4
5
6
7
8
9
10
11
12
13
14
15
16
17
18
19
20
21
22
23
24
25
26
27
28
29
30
31
32
33
34
35
36
Checking the programmed water
hardness level
^Switch the dishwasher off with the
On/Off button I-0.
^Press the +cand h/fbuttons in
and whilst holding them in switch
the dishwasher on with the On/Off
button I-0.
Then release these buttons.
The hardness level set will flash in the
display.
The digit sequence after the a
indicates the hardness level set in °d.
^Switch the dishwasher off with the
On/Off button I-0.
Before using for the first time
15

Filling the salt reservoir
In order to achieve good cleaning
results, the dishwasher needs to
operate with soft water. Hard water
results in the build-up of calcium
deposits on crockery and in the
dishwasher.
Mains water with a hardness level
higher than 0.7 mmol/l (4° d – German
scale) needs to be softened. This takes
place automatically in the integrated
softener unit.
The softener unit requires dishwasher
salt.
^Your local water authority will be able
to advise you of the water hardness
level in your area.
If the water in your area is very soft
and constantly lower than
0.7 mmol/l (4 °d) you do not need
to add dishwasher salt.
Important: Before filling the salt
reservoir with dishwasher salt for the
first time, you must fill it with
approx. 2 litres of water to enable
the salt to dissolve. Once the
dishwasher has been used, there is
always sufficient water in the
reservoir.
,Inadvertently filling the salt
reservoir with powder or liquid
dishwasher detergent always leads
to serious damage to the water
softener. Make sure you have picked
up the correct packet of dishwasher
salt before filling the salt reservoir!
,Only use special coarse grained
dishwasher salt for reactivation. Do
not use other salts such as cooking
salt, agricultural grade or gritting
salt. These may contain insoluble
additives which can impair the
functioning of the water softener.
^Remove the lower basket and
unscrew the salt reservoir cap.
^Fill the reservoir with approx. 2 litres
of water (first use only).
^Place the funnel provided over the
salt reservoir and carefully fill with salt
until the reservoir is full. The salt
reservoir holds approx. 2 kg of salt
depending on the brand used.
Before using for the first time
16

As the salt reservoir is filled, displaced
water will overflow.
^Clean any excess salt from around
the reservoir opening and then screw
the cap on again firmly.
^Run the COLD Iprogramme imme-
diately to remove any traces of salt
water from the cabinet.
Salt indicator
The salt indicator light comes on to
notify you that the reservoir is empty.
^The reservoir should then be refilled
with dishwasher salt.
(See: Filling the salt reservoir).
After the reservoir has been filled, the
water softener is automatically
reactivated the next time the
dishwasher is run. The salt indicator
light may still be illuminated during this
process. It will go out once the salt
concentration has reached the correct
level.
Note
If the water in your area is very soft and
constantly lower than 0.7 mmol (4 °d)
you do not need to add salt to the
reservoir. The salt indicator light,
however, will still come on, but should
be ignored.
The salt refill indicator light is also used
as a programming interface point by
service technicians. See "After sales
service" for details of this.
Before using for the first time
17

Rinse aid
Rinse aid is necessary to ensure water
does not cling and leave marks on
crockery during the drying phase and
helps crockery dry faster after it has
been washed.
Rinse aid is poured into the storage
reservoir and the amount set is
dispensed automatically.
,Inadvertently filling the rinse aid
reservoir with powder or liquid
detergent always causes serious
damage to the reservoir. Only pour
rinse aid formulated for dishwashers
into the reservoir.
Alternatively, it is possible to use
– Household vinegar with a max. 5%
acid content
or
– Liquid citric acid up to 50% acid
content.
The resulting rinsing and drying quality
will not, however, be as good as when
rinse aid is used.
,Do not use vinegar with a higher
acid content (e.g. vinegar essence
25% acid). This would damage the
dishwasher.
Adding rinse aid
^Press the button on the lid of the
rinse aid reservoir in the direction of
the arrow until the flap springs open.
Before using for the first time
18

^Add rinse aid only until it is visible on
the surface of the filter in the
opening.
The rinse aid reservoir holds approx.
130 ml.
^Close the flap firmly so that it clicks
into place. Otherwise water would
enter the rinse aid reservoir during a
programme.
^Wipe up any spilled rinse aid. This
prevents over-foaming occurring
during the next programme.
Rinse aid indicator
When the light comes on the reservoir
contains sufficient rinse aid for 2 - 3
programmes only.
^Add rinse aid in plenty of time.
Before using for the first time
19

Setting the rinse aid dosage
The dosage selector has settings from
1-6. It is set to "3" (3 ml) at the factory.
Approx. 3 ml of rinse aid are then used
per programme. This is a
recommended setting.
If spots appear on crockery and
glassware:
^Use a higher setting.
If clouding or smearing appears on
crockery and glassware:
^Use a lower setting.
Before using for the first time
20
This manual suits for next models
1
Table of contents
Other Miele Dishwasher manuals

Miele
Miele G 8066 User manual

Miele
Miele Diamante II G2183SCSF Manual

Miele
Miele G 4263 VI Active User manual

Miele
Miele Optima II G2432SC User manual

Miele
Miele PLW 6111 User manual

Miele
Miele Inspira G2141 User manual

Miele
Miele G 7859 User manual

Miele
Miele PG 8059 User manual

Miele
Miele G 646 SC User manual

Miele
Miele HG05 User manual

Miele
Miele for dishwashers User manual

Miele
Miele HG01 User manual

Miele
Miele G 975 SC User manual

Miele
Miele G 7804 User manual

Miele
Miele PTD 701 User manual

Miele
Miele TX2349 User manual

Miele
Miele G 5430 SC SL Active User manual

Miele
Miele built-in dishwashers User manual

Miele
Miele PG 8080 U User manual

Miele
Miele G 686 Plus User manual