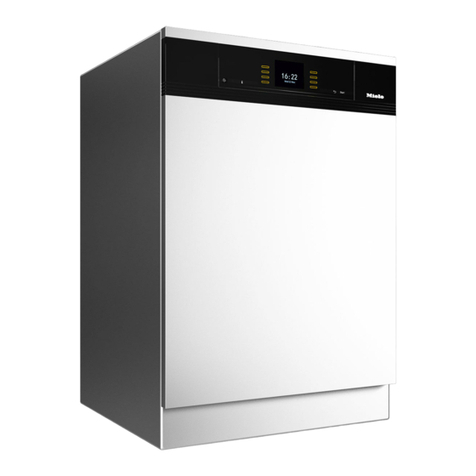
Miele G 595 SC User manual

i
Miele
Operating
instructions
for
the
dishwasher
G
595
SC
USA
(m)
Nr
2881302/04

Contents
Description
of
Appliance.
Important
Safety
Instructions
Economy
Wash
Opening
and
Closing
the
Door
Water
Softener
Adding
Rinse
Aid
Loading
Dishwasher
Loading
Examples
(G
595
SC)
Adjusting
Upper
Basket
Not
suitable
for
Dishwasher
Adding
Detergent
Selecting
Program
Types
of
Programs
Switching
ON
and
OFF.
Changing
Program
Selecting
Additional
Program:
“Ni
Pr
'eated
drying
lection
1-9
hrs
Tointorrupta
program
Unloading
Dishwasher
Additional
Functions
Water
Inlet
-
time-controlled/level-controlled
Drying
-
vented
or
non-vented
Cycle-time
display
Cleaning
and
Care.
Dealing
with
Minor
Faults
Installation
Electrical
Connection
Plumbing
Technical
Data
Page
oco
14
15
18
19
20
21
22
24
24
24
25
26
27
28
28
28
29
33
35
36
37
38

Description
of
Appliance
f
Hu
SS
tul
E
|
|
IM
|
Ql
[IIIJ
MENTI

Description
of
Appliance
1.
Indicator
Lights
2.
Program
Sequence
Indicator
3.
Door
Release
4.
On-Off
Button
5.
Program
Selection
Buttons.
6.
Upper
Spray
Arm
(not
visible)
7.
Cutlery
Tray
8.
Upper
Basket
9.
Water
Hardness
Selector
10.
Center
Spray
Arm
11,
Lower
Spray
Arm
12,
Filter
Combination
13,
Storage
Reservoir
for
Salt
14.
Detergent
Dispenser
15.
Rinse
Aid
Indicator.
16.
Storage
Container
for
Rinse
Aid
with
Dosage
Selector
17.
Data
Plate
18.
Four
Leveling
Screw
Feet
Make
your
contribution
to
protect
our
environment
Disposal
of
the
packing
material
The
transport
and
protective
packing
is
mostly
manufactured
from
the
following
re-useable
materials
®
corrugated
paper/cards
board
polystyrene
-
CFC-free
polyethylene
foil
(transparent)
particle
board
-
solvent-free
©
Untreated
wood
Don't
throw
these
materials
away
with
your
ordinary
rubbish.
Take
them
to
the
nearest
collection
point.
Your
local
authority
will
tell
you
where
it
is.
Disposal
of
your
old
machine
There
are
materials
in
old
machines
which
can
be
re-used,
so
please
don't
simply
dispose
of
your
old
machine.
Ask
your
local
authority
or
scrap
merchant
whether
those
parts
are
re-useable
or
recyclable.
4

Important
Safety
Instructions
WARNING
—
When
using
your
dishwasher,
follow
basic
precautions,
including
the
fol-
lowing:
8
Always
read
instructions
before
using
the
appliance.
This
prevents
damage
to
the
appliance
and
en-
sures
your
safely.
€
Use
the
appliance
only
for
its
in-
tended
purpose.
e
The
appliance
conforms
with
the
uniform
Safety
Regulations.
Re-
pairs
should
only
be
carried
out
by
qualified
experts.
Disconnect
the
appliance
from
the
power
supply
when
servicing
(pull
out
plug
or
remove
fuse).
®
Install
built-in
and
integrated
units
only
under
a
continuous
worktop
which
is
secured
to
adjacent
ca-
binetry.
e
The
dishwasher
must
be
electri-
cally
grounded.
Read
installation
instructions
for
details
e
Use
only
recommended
deter-
gents
and
rinsing
aids.
€
Do
not
use
your
dishwasher
un-
less
all
enclosure
panels
are
pro-
perly
in
place.
e
To
reduce
the
risk
of
injury,
do
not
allow
children
to
play
in
or
on
a
dishwasher
e
Dishwasher
detergent
contains
Sodium
Silicate
and
Sodium
Car-
bonate.
In
case
of
eye
contact,
immediately
flush
well
with
water.
I
swallowed,
give
large
quantities
of
milk
or
water.
Call
a
physician.
Keep
out
of
reach
of
children.
©
Do
not
tamper
with
controls.
6
Do
not
drink
the
water
from
the
wash
cabinet!
€
When
loading
washed:
a.
Locate
sharp
items
so
that
they
are
not
likely
to
damage
the
door
seal,
and
b.
Load
sharp
knives
with
the
handle
up
to
reduce
a
risk
of
cut-type
injuries,
€
Do
not
wash
plastic
items
unless
marked
“dishwasher
safe”
or
the
equivalent.
6
For
items
not
marked,
check
man-
ufacturer's
recommendations.
€
Do
not
abuse,
sit
on,
or
stand
on
the
door
or
dish rack
of
the
dish-
washer.
€
Do
not
touch
the
heating
elements
during
or
immediately
aftor
the
rinse
cycle.
Risk
of
burns!
€
Remove
the
door
to
the
washing
compartment
when
removing
an
old
dishwasher
from
service
or
discarding
it.
e
Hydrogen
gas
may
build
in
the
water
heater
and
hot
water
pipes
when
the
hot
water
system
has
not
been used
for
two
weeks
or
more.
CAUTION
—
hydrogen
gas
is
ex:
Bose:
ihe
hot
water
system
has
not
been
used
for
such
a
period,
before
using
the
dishwasher
turn
on
all
hot
water
faucets
and
let
the.
water
flow
from
each
for
several
minutes.
Do
not
use
the
dish-
washer
before
doing
so.
As
run-
ning
hot
water
will
release
any
accumulated
hydrogen
gas,
do
not
smoke
or
use
an
open
flame
while
the
faucets
are
open.
items
to
be
SAVE
THESE
INSTRUCTIONS

Economy
Wash
These
dishwashers
are
extremely
water
and
energy
saving.
Note
the
following
hints:
©
Connect
dishwasher
to
hot
water.
This
saves
time
and
energy
and
protects
the
dishes.
Energy
costs
are
further
reduced
it
the
water
is
pre-heated.
@
Fill
the
baskets
to
full
capacity,
but
do
not
overload.
®
Select
a
program
according
to
type
of
load
and
amount
of
soils.
€
For
half-loaded
baskets,
select
"Economy"
Program,
€
Pay
attention
to
dosage
instruc-
tions
for
the
detergent.

Opening
and
Closing
the
Door
To
Open
@
Hold
handgrip
and
push
up.
If
door
is
opened
during
operation,
all
functions
are
automatically
interrupted.
To
Close
©
Insert
baskets.
©
Pul
door
up
and
close
unti
it
catches.

Water
Softener
To
prevent
mineral
deposits
on
dishes
and
inside
the
dishwasher,
the
water
must
first
be
softened,
if
it
is
harder
than
8
grains
per
gallon.
The
built-in
water
softener
works
efficiently
only
it
1.
itis
set
correctly
2.
the
salt
container
is
kept
full.
Exception:
If
the
degree
of
hardness
in
local
water
is
permanently
under
8
grains
per
gallon
(140
mglliter)
with
low
carbonate
hardness,
there
is
no
need
to
reactivate.
Your
local
water
autho-
rity
will
advise
you
on
water
hardness
in
your
area.
Water
Hardness
Selector
After
consulting
your
local
water
au-
thority
to
establish
water
hardness
in
your
area,
adjust
the
selector
accord-
ing
to
the
table
below,
using
a
screw-
driver
or
coin.
Water
Hardness
Selector
Adjustments
6
positions
are
possible:
IF
your
dishwasher
is
set
with
fill
time
option,
(see
p.
28),
the
water
hard-
ness
selector
must
be
set
one
setting
higher
than
for
the
normal
water
hard-
ness
setting
(except
with
1170-1250
mg/l).

Water
Softener
/
Filling
Salt
Reservoir
Please
use
only
special
coarse-
grained
reactivation
salt,
as
other
Salts
may
contain
insoluble
additives
which
can
impair
the
functioning
of
the
softener.
Inadvertently
filing
the
tainer
with
dishwasher
detergent
will
always
lead
to
damage
to
the
water
softener.
Make
sure
that
you
have
pioked
up
the
right
packet
of
reactivating
salt
before
filing
the
salt
container.
e
Remove
lower
basket
©
Unscrew
cap
of
salt
reservoir
Before
filling
the
salt
reservoir
for
the
first
time:
Fill
salt
reservoir
with
approx.
2
quarts
of
water,
€
Using
the
funnel
provided,
add
salt
(approx,
4.4
Ibs.)
up
to
the
rim
of
the
reservoir
@
Remove
any
grains
of
salt
from
the
threaded
union
of
the
salt
reser-
voir,
replace
plastic
cap
and
tighten.
Immediately
thereafter
run
the
“Rinse
&
Hold
Program'
to
remove
any
traces
of
salt
from
the
cabinet.
This
is
not
necessary
if
a
normal
program
is
run
immediately.

Water
Softener
/
Filling
Salt
Reservoir
Water
intake
©
Drain-
o
Sat
o
Rinse
aid
Inside
the
screw
cap
of
the
salt
reser-
voir
is
a
green
area
indicating
salt
level
If
the
green
area
in
the
screw
cap.
drops
below
the
appropriate
level,
the
salt
reservoir
should
be
refilled.
10

Water
Softener
/
Filling
Salt
Reservoir
Should
the
salt
indicator
light
stay
constantly
on,
the
floater
inside
the
cap
of
the
salt
reservoir
may
be
blocked.
Remove
the
cap
of
the
salt
reservoir
and
rinse
under
hot
water
until
green
indicator
is
free
to
move.
Replace
cap.
If
reactivation
is
not
necessary
due
to
low
water
hardness
level,
the
salt
indicator
light
on
the
control
panel
can
be
disengaged
as
fol-
lows:
®
Break
out
the
bottom
of
the
floater
guide.
@
Push
the
enclosed
foam
rubber
piece
through
the
bottom
of
the
floater
guide.
The
floater
then
remains
in
the
upper
part
and
the
indicator
light
is
thus shut
off

Adding
Rinse
Aid
Rinse
Aid
is
necessary
for
spotless
dishes.
Itis
poured
into
the
storage
container
and
the
required
amount
is
automati-
When
to
add
Rinse
Aid
(Liquid
Jet
Dry
(Blue
Liquid),
commonly
avail-
able
in
the
USA).
cally
dispensed
during
the
final
rinse.
€
Add
Rinse
Aid
when
the
indicator
Inadvertently
filing
the
rinse
aid
Storage
container
with
powder
or
liquid
detergent
always
leads
to
damage
to
the
storage
container.
Only
pour
rinse
aid
formulated
for
domestic
dishwashers
into
the
rinse
aid
storage
container.
Al-
though
itis
possible
to
use
house-
hold
vinegar
with
at
least
5%
acid
content,
or
liquid
citric
acid
(up
to
50%
acid)
as
an
alternative,
the
resulting
rinsing
and
drying
quality
will
not
be
as
good
as
when
rinse
aid
is
used.
Do
not
use
vinegar
with
a
high
Bad
Sent
lea
oe
(e.g.
vinegar
ess-
ence
25%
acid).
This
could
damage
the
dishwasher.
12
light
Rinse
Aid
on
the
control
panel
comes
on
E
UEM
©,
IL]
y
IB
©
Depress
button
until
id
opens
©.

Adding
Rinse
Aid
Setting
the
dosage.
@
Add
Rinse
Aid
until
top
of
level
indicator
gets
dark
@.
©
Close
lid
tightly,
wipe
off
any
ex-
cess
Rinse
Aid.
The
lid
is
always
closed
at
the
end
of
the
program!
use
the
selector
on
selling
5.
€
Set
dosage
selector
D
to
higher
setting
when
dishes
show
spots.
©
Turn
lower,
if
dishes
are
cloudy.

Loading
Dishwasher
Please
Note:
e
Place
dishes
in
such
order
that
they
can
be
rinsed
from
all
sides.
e
Dishes
and
cutlery
should
not
cover
each
other.
0
Hollow
objects,
such
as
cups,
glasses
and
pots
should
be
in-
verled.
€
Dishes
with
recessed
bottoms,
such
as
cups,
bowls,
etc.,
should
be
placed
in
such
a
way
that
the
water
runs
off,
@
Place
tall,
narrow
objects
in
the
center
basket
©
Do
not
cover
small
objects
in
top
basket
with
larger
ones,
for
example:
place
dessert
cups
on
top
of
regular
cups,
not the
other
way
around,
0
Make
sure
not
to
cover
up
the
inlet
funnel
to
the
spray
arm
in
the
center
of
upper
basket.
©
Do
not
block spray
arms
with
tall
objects.
If
necessary,
manually
rotate
the
arms
to
test
them.
Upper
Basket
The
upper
basket
mainly
accommo-
dates
small,
delicate
objects,
such
as:
O
Cups
€
Saucers
©
Dessert
Plates
O
Glasses
©
Small
Bowls
©
Heat
Resistant
Plastic
Ware
Lower
Basket
The
lower
basket
accommodates
large
objects,
such
as
O
Plates
e
Saucepans
©
Bowis
Glasses
may
only
be
cleaned
in
the
lower
basket
fitted
with
special
glass-
ware
insert

Loading
Dishwasher
Cutlery
—
for
Dishwasher
with
Cut-
lery
Tray
(G
595
SC)
The
cutlery
tray
ensures
excellent
cleaning
and
drying
results,
is
easily
loaded
and
prevents
objects
from
getting
scratched.
The
loading
and
Unloading
is
especially
hygienic
as
only
the
handles
are
touched.
Sharp
knifes
and
forks
donot
then
presenta
danger
©
itis
recommended
that
the
cutlery
be
arranged
in
zones,
ie.
one
zone
for
knives,
forks,
spoons
and
teaspoons,
etc.
This
also
makes
unloading
much
easier
e
Place
spoons
sideways
into
the
grids
so
that
water
can
easily
drain
off.
A
variety
of
cullery
may
be
arranged
in
the
cutlery
tray.
For
instance
Spoons
with
round
or
oval
handles
‘can
be
placed
the
other
way
around,
but
make
sure
the
water
can
easily
drain
oft.
For
your
information:
The
cutlery
tray
is
removable,
thus
making
the
re-
moval
of
your
cutlery
easier

Loading
Dishwasher
Loading
Examples:
G
595
SC
Cutlery
Tray

Loading
Dishwasher
To
arrange
larger
objects,
the
rack
can
be
raised
or
left
in
down
position
to
stack
cups.
The
bottle
accessory
can
be
atta-
ched
at
different
places
within
the
bottom
basket.
Please
note:
The
accessory
can
only
be
attached
within
the
white
areas
—
not
on
the
"X"
locations.
7

Loading
Dishwasher
Y
LET
T
oe
BREE!
mme
LH
T
IH
[
]
Upper
|
€
(ns
Center
7
"t
In
order
to
make
room
tor
larger
ob-
|
|
nr
r
10"
jects
in
the
upper
and
lower
baskets,
the
position
of
the
upper
basket
can
be
changed.
©
Pull
out
upper
basket
and
loosen
screws
on
both
sides.
©
Lift
basket
up
or
down,
tighten
the
screws
again.
In
this
position
of
the
upper
basket,
plates
of
following
diameters
can
be
fitted
(see
table.)
18

Not
suitable
for
Dishwasher
e
Utensils
with
wood
or
plastic
handles.
€
Wood
or
plastic
objects
and
cut-
ling
boards
may
warp
or
split.
€
Old
knives,
blades
and
handles
of
old
knives
may
be
glued
together
and
therefore
should
not
be
cleaned
in
the
dishwasher
as
the
glue
may
not
be
heat-resistant.
8
Handmade
or
craft
items.
©
Copper
or
tin
items.
©
Plastic
articles
may
distort
if
they
are
not
heat-resistant.
Only
wash
plastic
articles
known
to
be
heat-
resistant
in
a
dishwasher,
in
which
case,
use
the
top
basket
only.
When
in
doubt,
wash
by
hand
Please
note:
Silver
and
aluminum
articles
when
used
with
foods
containing
sulphur,
may
suffer
some
discoloration.
Dis-
colorations
on
silver
cutlery
can
be
removed
with
silver
polish.
ted
dishes
-
over
the
glaze
Colors
painted
on
over
the
glaze
are
generally
produced
in
a
quality
Which,
bearing
in
mind
the
normal
lifespan
of
the
article,
can
be
re-
garded
as
permanent.
With
frequent
use,
fading
of
some
delicate
colors
cannot
always
be
en-
tirely
avoided.
Ifyou
are
not
sure
whether
the
colors
of
a
particular
set
of
dishes
are
per-
manent,
test
wash
one
or
two
items
which
are
already
damaged
for
about
four
weeks.
MIELE
recommends
the
followin
€
Glasses
should
only
be
washed
using
the
130°
F
(55°C)
programs.
The
risk
of
damage
to
the
surface
of
the
glass,
in
the
form
of
white
clouding,
increases
with
higher
temperatures.
8
Delicate
glasses
should
only
be
washed
using
the
‘China
&
Crystal"
program
€
Because
very
high
temperatures
can
cause
damage
to
your
deli-
Cate
crystal
glasses,
we
recom-
mend
you
wash
these
by
hand,
if
your
incoming
water
is
above
115°
F
(45°
C).
e
When
purchasing
new
dishes,
make
sure
they
are
dishwasher.
sate,
19

Adding
Detergent
Detergent
is
poured
into
the
dis-
penser
before
each
program,
except
for
“Rinse
and
Hold
Use
the
correct
dosage.
Only
use
detergents
formulated
for
domestic
dishwashers,
@
Press
the
opening
catch
on
the
container
flap
forwards
(see
ar-
row).
The
flap
will
spring
open.
The
flap
is
always
open
at
the
end
of
a
program
20
@
Pour
in
the
required
amount
of
detergent.
See
p.
22.
|
prewash
in
small
compartment
()
Main
wash
in
large
compartment
(11)
6
Shut
the
flap.
Note
Dishwasher
detergent
contains
Sodium
Silicate
and
Sodium
Carbonate.
In
case
of
eye
contact,
immediately
flush
well with
water.
If
swallowed,
give
large
quantities
‘of
milk
or
water.
Call
a
physician.
Keep
out
of
reach
of
children.
©
The
effectiveness
of
different
de-
tergents
can
vary.
Therefore
it
may
be
necessary
to
add
more
deter-
gent
than
is
advised
on
page
22.
@
(f
you
buy
detergent
in
bulk,
check
that
the
package
is
always
pro-
perly
sealed
after
use.
Otherwise
the
detergent
can
lose
its
effec-
tiveness.
Other manuals for G 595 SC
2
Table of contents
Other Miele Dishwasher manuals

Miele
Miele G 1000 User manual

Miele
Miele G 646 SC User manual

Miele
Miele PTD 901 User manual

Miele
Miele G6620SC User manual

Miele
Miele G 1672 User manual

Miele
Miele Diamante Plus G2183SCVI User manual

Miele
Miele PG 8083 SCVi User manual

Miele
Miele G 595 SC User manual

Miele
Miele PTD 701 User manual

Miele
Miele G 832 SC User manual